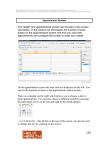
Download Adding Basic Medical Information 7 0
Transcript
Health One Version 7.1 User Manual. Copyright 2011Helix Health Ltd Adding Basic Medical Information The Basic Medical Information is a transaction that records data such as allergies, past medical and surgical history, etc. It effectively acts like a summary chart in your manual notes. This is usually the first page in the Medical Chapter and has a unique icon to represent it. Illustrated on the left, Starting the Program 1) Start HEALTHone™ and Login. Patient selector window is now open. Opening a Health Care Record To open an existing patients HCR: 2) Type: Te in the surname filter 3) Select Sarah Tennant in the patient list. 4) Click on the Select button. The Health Care Record for Sarah Tennant opens. Creating a new Basic Information Transaction We are now going to record the Basic Medical Information in Sarah Tennant’s HCR. Use the icon to quickly create a basic medical transaction 85 Health One Version 7.1 User Manual. Copyright 2011Helix Health Ltd As you can see from above the basic medical information sequence is added, next we select the sequence items we require. Managing Items In this instance we are going to skip over the first item because we wish to leave it in the file merely as a descriptive title. 1) Ensure the basic medical information Item is selected. Press the Down Cursor key once. ‘medical history:’ item is now highlighted 2) Press the Return key to edit the medical history: item. In the associated list Find box type: h only terms beginning with ‘h’ remain in the list. Quick Clicks 3) Select the term 86 hypertension in the list by clicking on it twice Health One Version 7.1 User Manual. Copyright 2011Helix Health Ltd quickly (keep the mouse perfectly still between clicks). ‘hypertension’ added to the medical history item. 4) Click OK to close the medical history: item. Repeating an Item We wish to record more medical history information for Sarah and to do this another medical history item is required. There is a quick way to do this if an item of the same type already exists in the transaction you are editing. Simply select (not edit) the item which is the same type and press the (=) equals key. 5) The highlight is now on the surgical history: item. Press the Up Cursor key once to re-select the medical history: item ( or simply click on it once with your mouse) ‘medical history:’ item now highlighted once more. 6) Press the equals key = once A new ‘medical history:’ item is inserted and opens for editing. 7) Double Click on pneumonia in the associated term list. ‘pneumonia’ added as a response for this item. 8) Do not close this item yet 87 Health One Version 7.1 User Manual. Copyright 2011Helix Health Ltd Setting Item Attributes Each item has a series of settings called attributes, which are in addition to any contents that may have been entered. These perform various functions including how the item and its contents appear on screen, how severe the condition being recorded is – via a gravity index, moment of occurrence, person responsible and various other information. These are displayed by clicking on the button illustrated when the item is open for editing. 1) The medical history item that contains the term pneumonia should still be open. If not, open it now for editing and close the associated list box when it appears by clicking on its Close button. ‘pneumonia’ text displayed. 2) Click once on the button to display the items attributes. 3) Set the attributes the same way as illustrated in Fig.3: Medical History Item Attributes 4) When completed click on the OK button. 88 Health One Version 7.1 User Manual. Copyright 2011Helix Health Ltd Item closes and appears in red. Setting Item Display Mode You may have noticed above the Display Mode box – which we left on its default setting of Normal. Normal display mode shows the Item Name followed by its contents. There are several other ways to display item information – you can select these by either right clicking with your mouse on the item and selecting Display Mode, then select the mode required from the menu, or, click once on the item to select it and then use the short cut keys. 1) Right Click with the mouse on the medical history: item for pneumonia just created. Menu appears Select the Display Mode option – then select the Right option from the next menu. The item contents ‘pneumonia’ stays in view but the item name ‘medical history’ has disappeared. 3) Experiment with other display settings for the same item. 4) Ensure that the item is still selected and press Ctrl + 3 Item display returns to ‘Right’ mode. 89 Health One Version 7.1 User Manual. Copyright 2011Helix Health Ltd Viewing Item Attributes You do not need to open an item for editing to view its attributes. This is only necessary if you wish to change their settings. To view, simply select the item by clicking on it once with the mouse and then click on the Attributes button on the Item Panel Toolbar – illustrated on the left. 1) Click once on the pneumonia medical history: item to select it. Click once on the Item Panel Toolbar Attributes button. 90 Attributes for the selected item appear. Health One Version 7.1 User Manual. Copyright 2011Helix Health Ltd 2) Close the Attributes window by clicking once on the button. Windows closes Completing the Basic Medical Information Surgical History: 3) Open the Surgical history: item for editing. Select appendicectomy from the associated list. Do not close the item yet. 4) Set the Date of Event attribute to: 01/07/1992 5) Click on OK to close the item. Family History: 6) There is a history of Heart Disease in the family. Open the family history: item and record this by selecting the appropriate term from the associated list and close the item. Completing the Basic Medical Information Tobacco: 91 Health One Version 7.1 User Manual. Copyright 2011Helix Health Ltd 7) Open the tobacco: item for editing. Select cigarettes from the associated list. Then type: 20 p/day. 8) Click on OK to close the item. Alcohol Consumption: 9) Open the alcohol consumption: item for editing. Select social from the associated list. Then type: 8 units/week. 10) Click on OK to close the item. Blood Group: 11) Open the blood group: item for editing. Select A neg from the associated list. 12) Click on OK to close the item. Recording & Displaying a Problem Sarah has hypertension and it would be nice to see this instantly when the patient file is opened – to facilitate this we use the Problem Panel. HEALTHone™ copies the contents of the item(s) problem: and places it into the Active window of the Problem Panel. Each problem is assigned a START date and - when inactive - an END date. Items that have been given an end date are moved from the Active to Inactive window of the Problem Panel. 92 Health One Version 7.1 User Manual. Copyright 2011Helix Health Ltd 1) Ensure the Item problem: is highlighted. Press Return to open. 2) Close the associated list and click once on the Term Dictionary (Blue Book) Term Dictionary window appears. 3) Type: Hypert and then select the term Hypertension in the list. Click OK The term ‘Hypertension’ is now in the Problem dialogue box. 4) If the Item attributes are not on view click once on the button to reveal them. 5) Click on the START date to activate it and type: 28091978. Now click on OK to close the problem item window. The problem item closes but the contents ‘Hypertension’ does not appear in the Problem Panel – it must first be validated. 6) Click once on the Save button on the Standard Tool Bar and select 93 Health One Version 7.1 User Manual. Copyright 2011Helix Health Ltd Yes when prompted to validate the transaction. ‘Hypertension Now Appears in the active Problem Panel. Recording Non Medication Related Allergies To record allergies which are not related to medication, such as Gluten, Cat Hair etc. we use the item allergies: Allergic reactions to medication are recorded by using the Drug Module. The technique is fully described in the Prescription Manager chapter. Inserting a new Item 1) Ensure that the item problem: is still selected. Now click once on the Item Selector button on the Item Panel Toolbar. Item selector window opens 2) In the Find box type: all All items names beginning with ‘all’ are listed. 3) Select the Item allergies: in the list. Click OK Item ‘allergies:’ is inserted and automatically opens the associated list’ 4) Select cat hair from the associated list 5) Click on OK to close the item. 6) Ensure the allergies: item is still highlighted and press the equals key = once New ‘allergies:’ item created. 7) Select dog hair from the associated list. 8) Set the Display mode attribute to: Content Right 9) Click on OK to close the item. 10) Ensure the new allergies: item is still highlighted and press the equals key = once more. A third ‘allergies:’ item created. Using the Term Dictionary The Term Dictionary was mentioned in session three. We use it 94 Health One Version 7.1 User Manual. Copyright 2011Helix Health Ltd whenever the associated list does not have the term we require. Sarah has a gluten allergy. Gluten is not included in the allergy associated list. 11) Close the associated list box. 12) Click once on the Term Dictionary Button (blue book) Term Dictionary windows opens. 13) Type: glut in the Find box. Select the term gluten in the list and then click on the OK button. ‘Gluten’ term is inserted as a response. 14) Set the Display mode attribute to: Content Right That completes the Sarah’s medical information. Saving a Patient File Select Save on the File Menu and select Yes when prompted to validate the transaction. Select Close HCR from the File Menu. Sarah’s file closes and the patient selector window reappears. Quitting HEALTHone™ Select Exit on the File Menu. Answer Yes when prompted. HEALTHone™ closes and the desktop reappears. 95 Health One Version 7.1 User Manual. Copyright 2011Helix Health Ltd Summary Guide To repeat an item - Select the item to be repeated and press the equals = key. To set item attributes - First ensure that the item is open for editing by selecting it and pressing the RETURN key. Now click on the attributes panel button to display these. Click once again on the same button to hide these. To change the item display mode - Right click on the item to be changed and select the option Display Mode from the menu. Now select the display mode required from the sub-menu’ To view the attributes on an item - Select the item required and click once on the attributes button on the HCR Toolbar. To use a term from the Term Dictionary as a response to an item. - Click once on the blue book on the item dialogue box toolbar or type Ctrl + T. Now select the term required in the list. Own Notes 96


