1
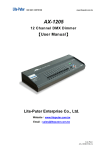
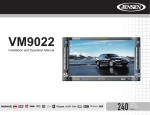
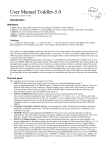
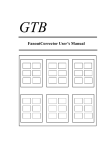
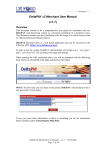
Modular Merchant
Quick Set-Up Guide
Version 1.51
7/19/2004
A Quick Introduction to the Quick-Start Guide
The purpose of this Quick-Start Guide is to assist new Modular Merchant clients get their store open and ready to sell
products. This guide covers just the absolute basics to get started. This is not an exhaustive user’s manual. For a
complete guide to using the Modular Merchant software, refer to the Modular Merchant Administrator’s Guide, available
online at: http://www.modularmerchant.com/docs/Admin_Guide.pdf
This quick start guide will walk you through the basic steps of setting up a brand new Modular Merchant online store. We
will cover logging in, creating administration accounts, adding products, and changing our account settings.
Step One: Log to your Account’s Administration Area
To log in to your Administrator Control panel, you will need three things:
1.
Your Modular Merchant Account Name
2.
Administrator Login
3.
Administrator Password
What is my Modular Merchant Account Name?
Your Account Name is used to identify your online store. It is present in the website address (URL) of your store. For
example: www.modularmerchant.com/clients/myAccountName/
Your Account name was created when you purchased the Modular Merchant software. Your account name is also included in
the Welcome email you receive when your account is ready. Clients with multiple Modular Merchant stores will have a
different account name for each store.
What is my Administrator Login and Password?
Your Administrator Login and Password are a unique login and password you create and use to access your store’s
Administration area. Brand new accounts start with a default Administrator Login and Password which you will use to
access your account for the very first time.
Where do I access my Administration Area?
Access your Administration area by entering through your Admin Login
page. Your Admin Login page is located at:
http://www.modularmerchant.com/clients/myAccountName/admin/,
where “myAccountName” is replaced with your Account Name.
An example of an Admin Login page is shown at right. To log in to your
account you will enter your Administrator Login and Password.
Logging in for the first time
To log in for the first time, use the default Admin Login and Password:
Default Admin Login: admin
Default Admin Password: password
Modular Merchant Quick Set-Up Guide
7/19/2004
Page 2 of 10
Once logged in, you will be able to replace the default Administrator Login and Password with a new one you create.
Change them to something unique that you will be able to remember. Instructions on how to change your Admin login
information can be found in the Administrator’s Guide on page 8.
There are several different types of accounts you can create: Super Admin, Admin, and Fulfillment. See the Admin Accounts
section of the Administrator’s Guide for more information on creating accounts and account types.
Logging in to your account with a Super Admin or Admin account will take you to your default account Home page.
Fulfillment accounts will be taken to a different, fulfillment-only, Home page.
Step Two: Replace the Default Login with One You Create
Administration Account Types
There are three Administration Account types available in Modular Merchant: Super Admins, Admins and Fulfillment. Each
account type has its own abilities & restrictions.
Super Admin Accounts
Super Admins can view and change all settings,
system data, financial data, customer data, and
can create, modify & delete new Admin accounts.
Admin Accounts
Admins can view and edit customer and order
data. Admins cannot change system settings and
cannot view credit card numbers or your store’s
financial data.
Fulfillment Accounts
Fulfillment can view orders to be shipped, mark
order items as shipped, and modify product
information. Fulfillment accounts cannot change
system settings and cannot view credit card
numbers or your store’s financial data.
Creating a New Administration Account
To create a new Admin account, click on the text link “Create a new Administration Account” located at the top of the “My
Admin Accounts” table. This will load the Admin Account creation page. On the “Create a New Admin Account” screen, enter
a custom Login, Password, Custom ID Number, Contact Information, Email address, etc., in the appropriate fields. Also, be
sure to select the account type: Super Admin, Admin, or Fulfillment.
You can have any number of Super Admin, Admin and Fulfillment accounts, but you must always have at least one
Super Admin account!
Modular Merchant Quick Set-Up Guide
7/19/2004
Page 3 of 10
Modifying an Administration Account
To modify an existing administration account, click the blue Edit button for the appropriate account. (This icon is located on
the right-side of the table listing your Administration accounts.) You will be taken to the details page for this account, where
you can edit the details.
Deleting an Administration Account
When logged in to your account as a Super Admin, you will have the option to delete administration accounts. To delete an
existing administration account, click the Trash Can button for the appropriate account. (This icon is located on the rightside of the table listing your Administration accounts.) A popup window will appear, confirming your decision to delete the
selected account. Deleted accounts can not be recovered!
Example: Replacing the Default Super Admin Account
In this example, I will replace the default Super Admin account my store comes with. It is a very good idea to replace the
default Super Admin account information because it will make your account more secure.
Before I can make the change, I will need to log in to my account’s Administration area. The first time I log in to my
account I use the default Login “admin” and the default password “password”. Once logged in, I click the yellow “Admin
Accounts” button on the left-side of the page, which will load a page containing a list of all my Administrator accounts.
There is currently only one Super Admin account listed, “admin”. I’ll click the blue “E” (edit) icon, shown below, which will
the edit screen for this Administration account.
I’ll replace the default admin login name “admin” with “Whiskers”, and the default password of “password” with my own
custom password “catfood_28”. I will keep “Super Administrator” as the Admin type. I’ll then click the “Modify This Admin
Account” button to save my changes.
Clicking the button returns us to the Admin Accounts page, where we find the list of Administrator accounts now lists
“Whiskers” as the Super Admin.
Since I have replaced the default Administration account, I will no longer be able to log in to my Administration area using
the “admin”/”password” login info. In the future, whenever I log in to my Modular Merchant Administration area, I will now
use the Login “Whiskers”.
Modular Merchant Quick Set-Up Guide
7/19/2004
Page 4 of 10
Step Three: Customize Your Account’s System Settings
Next, you’ll need to customize your Account’s settings. Click the "General Settings" button in the navigation menu on the
left side of the page. The General Settings page has links to many different tools for adjusting the look and feel of your
Modular Merchant store. We’re going to look at the “System Settings” area, which we’ll need to configure before we
can start selling items in our store.
Click the "System settings" text link on the General Settings page. In order for your store to function correctly, these
settings will need to be completed. The System Settings page is where you set the major preferences for your account.
Following is a list of the major options you have available.
Account Name
This is your Modular Merchant account name. The account name is displayed in the web address of your online store. You
will need your account name when obtaining technical support.
Are you running in test mode?
Test mode will enter special test credit card information during the checkout process for Authorize.net and PayFlow Pro
users. In test mode any Payment Gateway account you have set up in the Credit Card section of the System Settings will
still be contacted when a credit card order is placed, but transactions will not be charged or credited to any account. Test
Mode does not affect accounts set to manual processing, since those orders need to be manually processed anyway. Test
Mode does not affect PayPal accounts. Any order processed through PayPal while in test mode will still be
charged.
Charge sales tax based on:
You may select to charge sales tax to your customers. You may charge sales tax based on the location of their billing
address, shipping address or both. If you select to charge sales tax for both billing and shipping locations, then the
customer will be billed the sales tax for both locations, even if they are the same. For information on setting up Sales Tax,
see the Tax & Ship Settings section of this guide.
Storefront URL:
Your Modular Merchant store includes a default “storefront” page. The storefront page is the “home page” of your store,
where the customer enters your online store. If you prefer to use a page on another website as your store’s storefront page,
enter the web address of that webpage here and it will be used instead of the default storefront page built-in to your
Modular Merchant account. If this field is left blank, the default store home page included in your Modular Merchant account
will be used as your Storefront.
Check here if you accept Credit Card payments:
Checking this box will add credit card fields to your store’s checkout page. You will need a merchant account in order to
accept credit card payments.
Modular Merchant Quick Set-Up Guide
7/19/2004
Page 5 of 10
Credit Card Payment Processing Method:
With Modular Merchant, you can either accept credit card orders and process them later offline using your business
terminal, or accept and process credit card orders in real-time using your Payment Gateway account. Modular Merchant
supports the following Payment Gateways: Authorize.net, PayFlow Pro, and PaySystems merchant accounts.
Select “manual” from this menu if you will be processing credit card orders offline, or select the Payment Gateway service
you will be using for your orders. NOTE: Payment Gateways may require a merchant account by a third-party service.
When is money collected from credit cards?
You can choose to either collect money from customers automatically at the time of purchase, or to bill orders manually.
Automatically at checkout: If “automatically” is selected, credit card funds will be authorized and queued for collection at
the time of purchase. Your payment gateway will automatically collect the funds. Collection time depends on the settings of
your payment gateway. PayPal orders are always billed automatically at checkout.
Manually in control panel: With this option, credit card funds will be authorized, but not collected until you do so through
either your business or online terminal.
Payment gateway Login:
This is the login for your merchant account payment gateway. This information is encrypted when recorded.
Payment gateway Password:
This is the password for your merchant account payment gateway. This information is encrypted when recorded.
Require CVV2 credit card authorization?
A CVV2 number is an added security number printed on the back of credit cards. Selecting “Yes” for this option will add a
field and explanation for CVV2 numbers on your store’s checkout page.
Check here if you accept PayPal payments:
Checking this box will add a “Buy now with PayPal” button to your store’s checkout page. You will need a PayPal account in
order to accept PayPal payments.
PayPal account Login:
This is the login for your PayPal. This information is encrypted when recorded.
Floodcheck:
The Floodcheck prevents customers from accidentally or maliciously resubmitting their order. Customers must wait the
number of minutes you specify before another order from their account will be accepted. If no value is entered in the
Floodcheck field, it will default to ten minutes.
Company Website:
If you enter the address of your website here, a link to it will appear throughout your Modular Merchant store.
Modular Merchant Quick Set-Up Guide
7/19/2004
Page 6 of 10
Default Email Address:
This email address will be used for all “contact us” type links throughout your Modular Merchant store.
Notification of new orders:
Enter an email address you would like to receive notification of new orders. If a second address is entered in the “CC” field,
a notification will be carbon copied to that address as well.
Notification of declined orders:
Enter an email address you would like to receive notification of declined orders. If a second address is entered in the “CC”
field, a notification will be carbon copied to that address as well.
Store Contact Address:
If you would like to use a contact address other than the “default email address”, enter it here. You may also enter a
webpage address. If so, all contact links will point to that webpage.
Your Color Settings
The color settings manage the default page, table, text and link colors in your store. These settings can also be edited by
customizing the System Skins. See the System Skins section of this guide for more information.
Is your store open or closed?
Closed stores will display a customizable closed message on the storefront page. Closed stores are not browsable by the
public.
After entering the information for your general settings, click the “Modify my Settings” button. Your settings will be
recorded, and you will be returned to the General Settings page.
A complete listing of descriptions of the options available on the System Settings is available in the System
Settings section of the Administrator’s Guide. The Administrator’s Guide can be downloaded from:
http://www.modularmerchant.com/docs/Admin_Guide.pdf
Modular Merchant Quick Set-Up Guide
7/19/2004
Page 7 of 10
Step Four: Configure your Tax and Shipping Settings
The next step is to establish any taxes, additional charges and shipping
methods will be included in the checkout process of your store. Click the
"Tax & Ship Settings" button in the navigation menu. This page has
several options for setting tax, shipping and custom charge rates.
First, click the “Set Your State and Country tax rates…” text link on the
page. On this page (shown at right) you can set State and Country
specific taxes. For example, if I add a 5.12% State/Province tax rate for
Oregon, all customers with an Oregon address will be charged a 5.12%
sales tax on their purchases. Customers in other states would not be
charged this tax. You can also set country-specific taxes this same way.
At the bottom of the State & Country Tax page, there is an option to
“Create a new CUSTOM Tax or Charge”. Custom taxes and charges can
allow you to add additional fees to your customer's orders. For example, you could create a Custom Charge titled "Shipping
Materials" at the rate of $.50. The customer would then have a fifty cent "Shipping Materials" charge added to their orders.
After setting all State, Country and Custom charges, click the “Tax & Ship Settings” button in the left-side navigation to
return to the Tax & Ship Settings page.
If you ship your products by UPS, FedEx or USPS, you can instruct the Modular Merchant software to automatically retrieve
shipping fees, based on total order weight, from these companies at checkout. Click the "Set which standard shipping
services you support." text link on the Taxes & Charges page to configure which, if any, UPS, FedEx or USPS shipping fees
you would like Modular Merchant to retrieve. Click the "Yes" radio button next to all shipping methods you will use. Click
"Modify Shipping Settings" when done. You will then be taken back to the Tax & Ship Settings page.
Additionally, you can create your own custom quantity-based shipping options. Click the “Create/Edit Quantity-Based
Shipping Rates” text link on the Tax & Ship Settings page. Any quantity-based shipping methods you create on this page
will also be listed in the menu of shipping options at checkout.
Modular Merchant Quick Set-Up Guide
7/19/2004
Page 8 of 10
Step Five: Adding Categories and Products
Now that the general settings are entered for your store, you can
start adding products. Click the "Products & Categories” button in
the navigation menu on the left side of the page.
All products have three components: A category, a manufacturer
and the product itself. Before you can create a product, you must
create at least one category and manufacturer it is associated with.
Categories
On the Products & Categories page, click the “Categories” text link
to enter the categories section. Click the white "Add a new product
category" text link, found in the light blue horizontal bar in the table
labeled "Categories". This will take you to the page for adding a new
product category. Enter information about this product category,
then click the "Create This Category" button.
For my example, I’m creating a category named “Hats” with a
Custom ID of “001”.
Manufacturers
Next, On the Products & Categories page, click the “Manufacturers” text link to enter the manufacturers section. In that
section, click the "Add a new manufacturer" link, found in the light blue horizontal bar in the table labeled "Manufacturers".
For my example, I am creating a publisher named “Headgear Express”, with a custom ID of “PUB001”. After entering all
information about this product publisher, then click the "Create This Manufacturer" button; you will then be returned to the
Products & Categories page.
Products
Next, On the Products & Categories page, click the “Manage Products” text link to enter the add/edit products section. In
that section, cick the "Add a Product" button, found in the light blue horizontal bar in the table labeled "Products". Enter
information about this product.
For my example, I am creating a product listing for my product, custom-made hats for cats. I select the category of “Hats”
from the Category dropdown menu, and select “Headgear Express” in the publisher dropdown menu. I’ll create a Custom ID
code of “CH001”, which is also my product’s SKU number. My product’s name is “Cat Bonnet”.
After entering all the product’s information, click the "Create This Product" button. The product will be added to your store
catalog, and you will be returned to the Products & Categories page.
All products added to your inventory will be included in your Modular Merchant store. To add a specific product to the list of
“Featured Products” on your store’s homepage, or “Storefront” page, click the "Select which products are listed on your
Storefront page” text link on the Products & Categories page. Check which items you would like to appear on your
Storefront page, and then click the "Update Storefront" button. Checked items will be listed on your store's home page.
Modular Merchant Quick Set-Up Guide
7/19/2004
Page 9 of 10
Step Six: Open Your Store and Start Selling!
If you have not yet opened your store, click the "General Settings" button in the navigation menu. Click the “System
Settings” text link on the General Settings page. Select the "Open" radio button, then click the "Modify My Settings" button.
Your store is now open and ready for business! To visit your store, click the “My Storefront” button in the upper-right corner
of any page in your Admin Control Panel. This will open your store in a new browser window. All items you added to your
Storefront will appear on this page, your store home page!
There are, of course, many more options you can customize in your Modular Merchant store. There are also add-on
“modules” you can add to your store, which add new features. For more information on additional customization and
modules, refer to the additional documentation in the “Support Center”, found in your Admin Control Panel, or visit the
Modular Merchant user’s forum at: http://www.modularmerchant.com/forum.
Thank you for using Modular Merchant. If you have any additional questions, please email us at:
[email protected].
Modular Merchant Quick Set-Up Guide
7/19/2004
Page 10 of 10