1
|
User Manual
Nord Sample Editor
Version 2.x
Copyright Clavia DMI AB 2010
2 | Nord Sample Editor User Manual
Nord Sample Editor User Manual
Table of Contents
What is the Nord Sample Editor?
What is the Nord Sample Editor? . . . . . . . . . . . . . . . . . . . . . . . . 2
Non-destructive editing . . . . . . . . . . . . . . . . . . . . . . . . . . . . . . . . . . . 2
System Requirements . . . . . . . . . . . . . . . . . . . . . . . . . . . . . . . . . . . . 2
Getting Started . . . . . . . . . . . . . . . . . . . . . . . . . . . . . . . . . . . . . . . . 2
Project, sample memory . . . . . . . . . . . . . . . . . . . . . . . . . . . . . . . . .
WYDIWYH . . . . . . . . . . . . . . . . . . . . . . . . . . . . . . . . . . . . . . . . . . . . .
Working offline . . . . . . . . . . . . . . . . . . . . . . . . . . . . . . . . . . . . . . . . . .
Sample, Zone . . . . . . . . . . . . . . . . . . . . . . . . . . . . . . . . . . . . . . . . . .
Sample Instrument . . . . . . . . . . . . . . . . . . . . . . . . . . . . . . . . . . . . . .
Sample editing, loop markers, crossfade . . . . . . . . . . . . . . . . . . . . .
Generate, upload, download . . . . . . . . . . . . . . . . . . . . . . . . . . . . . . .
2
2
2
2
2
3
3
Installation . . . . . . . . . . . . . . . . . . . . . . . . . . . . . . . . . . . . . . . . . . . . 3
Installation of the USB driver . . . . . . . . . . . . . . . . . . . . . . . . . . . . . . . 3
Installation Windows PC . . . . . . . . . . . . . . . . . . . . . . . . . . . . . . . . . . 3
Installation Mac OSX . . . . . . . . . . . . . . . . . . . . . . . . . . . . . . . . . . . . . 3
The Quick Tour . . . . . . . . . . . . . . . . . . . . . . . . . . . . . . . . . . . . . . . . 3
First Light . . . . . . . . . . . . . . . . . . . . . . . . . . . . . . . . . . . . . . . . . . . . . .
Download Sample Instruments . . . . . . . . . . . . . . . . . . . . . . . . . . . . .
Upload Sample Instruments . . . . . . . . . . . . . . . . . . . . . . . . . . . . . . .
Create a new Sample Instrument . . . . . . . . . . . . . . . . . . . . . . . . . . .
Adding Audio files with individual samples . . . . . . . . . . . . . . . . . . . .
Single Sample Per File Assign . . . . . . . . . . . . . . . . . . . . . . . . . . . . . .
Editing . . . . . . . . . . . . . . . . . . . . . . . . . . . . . . . . . . . . . . . . . . . . . . . .
Looping . . . . . . . . . . . . . . . . . . . . . . . . . . . . . . . . . . . . . . . . . . . . . . .
Generate a Sample Instrument . . . . . . . . . . . . . . . . . . . . . . . . . . . .
3
4
4
4
5
5
6
6
7
Menu Reference . . . . . . . . . . . . . . . . . . . . . . . . . . . . . . . . . . . . . . . . 8
File Menu . . . . . . . . . . . . . . . . . . . . . . . . . . . . . . . . . . . . . . . . . . . . . .
Edit Menu . . . . . . . . . . . . . . . . . . . . . . . . . . . . . . . . . . . . . . . . . . . . .
Instrument Menu . . . . . . . . . . . . . . . . . . . . . . . . . . . . . . . . . . . . . . . .
Settings Menu . . . . . . . . . . . . . . . . . . . . . . . . . . . . . . . . . . . . . . . . . .
Manager Menu . . . . . . . . . . . . . . . . . . . . . . . . . . . . . . . . . . . . . . . . .
Help Menu . . . . . . . . . . . . . . . . . . . . . . . . . . . . . . . . . . . . . . . . . . . . .
8
8
8
8
8
9
Tab Reference . . . . . . . . . . . . . . . . . . . . . . . . . . . . . . . . . . . . . . . . . . 9
Common area . . . . . . . . . . . . . . . . . . . . . . . . . . . . . . . . . . . . . . . . . . 9
Audio File/Assign Tab . . . . . . . . . . . . . . . . . . . . . . . . . . . . . . . . . . 10
Single Sample Per File Assign . . . . . . . . . . . . . . . . . . . . . . . . . . . . 10
Multi Sample Per File Assign . . . . . . . . . . . . . . . . . . . . . . . . . . . . . 11
Manual Sample Assign . . . . . . . . . . . . . . . . . . . . . . . . . . . . . . . . . . 11
Sample Loop/Stop Tab . . . . . . . . . . . . . . . . . . . . . . . . . . . . . . . . . 11
Long Loop . . . . . . . . . . . . . . . . . . . . . . . . . . . . . . . . . . . . . . . . . . . .
Short Loop . . . . . . . . . . . . . . . . . . . . . . . . . . . . . . . . . . . . . . . . . . .
No Loop . . . . . . . . . . . . . . . . . . . . . . . . . . . . . . . . . . . . . . . . . . . . .
Apply on All . . . . . . . . . . . . . . . . . . . . . . . . . . . . . . . . . . . . . . . . . . .
12
13
13
13
Sample Start Tab . . . . . . . . . . . . . . . . . . . . . . . . . . . . . . . . . . . . . . 13
Sample Alt Start Tab . . . . . . . . . . . . . . . . . . . . . . . . . . . . . . . . . . 13
Instrument Tab . . . . . . . . . . . . . . . . . . . . . . . . . . . . . . . . . . . . . . . . 14
Sample Gain grid . . . . . . . . . . . . . . . . . . . . . . . . . . . . . . . . . . . . . . .
Keyboard Gain graph . . . . . . . . . . . . . . . . . . . . . . . . . . . . . . . . . . .
Detune . . . . . . . . . . . . . . . . . . . . . . . . . . . . . . . . . . . . . . . . . . . . . . .
Sample Zone . . . . . . . . . . . . . . . . . . . . . . . . . . . . . . . . . . . . . . . . . .
Transpose . . . . . . . . . . . . . . . . . . . . . . . . . . . . . . . . . . . . . . . . . . . .
Auto Map . . . . . . . . . . . . . . . . . . . . . . . . . . . . . . . . . . . . . . . . . . . . .
Play Mode . . . . . . . . . . . . . . . . . . . . . . . . . . . . . . . . . . . . . . . . . . . .
14
14
14
15
15
15
15
Samp Preset Tab . . . . . . . . . . . . . . . . . . . . . . . . . . . . . . . . . . . . . . 15
Velocity Controlled Dynamics . . . . . . . . . . . . . . . . . . . . . . . . . . . . . 15
Keyboard Controlled Amplifier Envelope . . . . . . . . . . . . . . . . . . . . . 16
Octave Shift . . . . . . . . . . . . . . . . . . . . . . . . . . . . . . . . . . . . . . . . . . . 16
Manager Tab . . . . . . . . . . . . . . . . . . . . . . . . . . . . . . . . . . . . . . . . . 16
Manager Toolbar . . . . . . . . . . . . . . . . . . . . . . . . . . . . . . . . . . . . . . .
Right-click . . . . . . . . . . . . . . . . . . . . . . . . . . . . . . . . . . . . . . . . . . . .
List headlines . . . . . . . . . . . . . . . . . . . . . . . . . . . . . . . . . . . . . . . . .
Footer Memory Indicator . . . . . . . . . . . . . . . . . . . . . . . . . . . . . . . . .
File Types and Names . . . . . . . . . . . . . . . . . . . . . . . . . . . . . . . . . . .
16
16
16
17
17
The Nord Sample Editor is the application that allows you to edit, create and load collections of samples to and from the sample memory
area of a Sample Library compatible Nord instrument.
The Nord Sample Editor will assist you in your editing efforts; it contains
powerful tools for various actions that can be applied to a sample.
These tools will for instance help you in setting a start point of a
sample, creating a loop and other tasks that are essential in making the
samples ready for use in the Nord Sample Editor. The Editor also has
functions for automatic mapping of samples across the keyboard and
much more.
Non-destructive editing
Any editing that takes place in the Nord Sample Editor software is
completely non-destructive. The audio files on your hard disk will not
be altered in any way even though the Nord Sample Editor will e.g.
truncate samples before they are downloaded to the Nord instrument.
If you edit any audio file that is used by the Nord Sample Editor with
some other application, that edit will also affect that particular file in the
Nord Sample Editor.
System Requirements
Windows PC
The Nord Sample Editor requires a computer with Windows XP or
Vista. Additionally you need one free USB port plus a DVD ROM drive if
you want to install the software from the DVD.
Mac
The Nord Sample Editor requires a Mac with one USB-port, a DVD
ROM unit to install the software and OSX 10.4 or later.
Nord
You will also need a Sample Library compatible Nord instrument to be
able to download the samples. The Nord units that are compatible with
the Sample Editor and the Nord Sample Library are: Nord Wave with
OS v2.x and later and the Nord Electro 3 with OS 1.x or later.
|
Getting Started
Let’s begin with a brief description of the terminology used in this chapter, followed by a typical workflow scenario to give you an overview of the
functions of the Nord Sample Editor.
Project, sample memory
Sample editing, loop markers, crossfade
All the parts that are needed to assemble a sample waveform in the
Nord Sample Editor – references to audio files, samples, mappings,
start-, stop- and loop markers etc. - are organized in Projects.
Setting a starting point for a sample to e.g. eliminate any unwanted audio at the beginning, is a one-click function in the Nord Sample Editor.
All Project related settings is done on your computer, and you can
preview edits via the computer audio card. A Project links to the actual
audio files on the hard drive, if you e.g. delete or edit an audio file that
is included in a Project, that Project will be affected.
You can save Project files on the hard drive, just like any other computer file. When you are satisfied with a Project, you can generate a
Sample Instrument, which can be downloaded to the Flash memory in
the Nord Sample Editor.
WYDIWYH
What You Do Is What You Hear. Every function in the Nord Sample
Editor can be applied to a sample in real time. If the sample is playing
back through the computer audio card, you can e.g. listen to how the
loop changes if you move the loop markers or if you adjust the crossfade settings or the start point of the sample.
Working offline
Project or sample editing does not require a connected Nord unit; you
can create and edit Projects using only the computer and then connect
to the unit at some other time in order to download the result of the
Project to the Nord Sample Editor.
The Editor has some very powerful loop functions that make creating
perfect, seamless loops a breeze. The loop makes it possible to use
shorter samples that still can be played for a duration that is longer
than the sample itself. The loop functions also includes a crossfade
option that can be monitored in real time, with various options for the
length, crossfade curves etc.
Generate, upload, download
When a Project is completed, you can generate a Sample Instrument
and automatically download the wave data to the Flash memory in the
Nord unit. The real estate of the Flash memory has a fixed capacity and
to keep track on how much room you have left, there is an indicator
in the Nord Sample Editor that will help you to manage the available
space.
Installation
Installation of the USB driver
Before the Nord Sample Editor can communicate with a Windows
PC, you need to install a Clavia USB driver for the Windows operating
system. Mac users may skip this paragraph. To install the USB driver,
follow these instructions:
1 Insert the ‘Nord DVD’ installation DVD into the DVD-ROM drive or
Sample, Zone
When an audio file is added to a Project, it can be used as the source
for one or several samples. A sample can be assigned to a range on
the keyboard; this range is called a Zone. The sample parameters that
determine the range of its zone is the Root Key and the Upper Key.
get the driver from the Nord Wave download area at
www.nordkeyboards.com.
2 Connect the USB cable between the Nord Sample Editor and
the computer and power up the unit. The ‘Found New Hardware’
wizard should appear, accompanied by its reassuring alert sound.
3 Let the wizard search the installation DVD for the USB driver and
Sample Instrument
A set of samples with zone settings is a Sample Instrument; the maximum number of zones in a Sample Instrument is 91. The Sample Instrument can be selected in the Nord Wave oscillator 2 as a waveform
and by choosing the SampLib type and model in the Electro 3.
Any kind of sample may be assigned to any zone, which means that
a Sample Instrument can consist of several different sounds, mapped
across the keyboard. You can e.g. create a drum type Sample Instrument with one sound for each key, or create multiple splits by assigning
different samples to different keyboard ranges – e.g. bass samples
in the lower register, followed by piano samples higher up on the
keyboard.
install it, or point the wizard to the folder where the driver is.
Installation Windows PC
1 Insert the ‘Nord DVD’ into the DVD-ROM drive.
2 Run the Install Nord Sample Editor v2.xx.exe and follow the
instructions in the setup program.
3 The Nord Sample Editor will be installed in the Program Files folder
on the hard disk.
During the installation you will have the option to select an alternative
location for the application.
4 Confirm every window in the installation procedure by clicking on
the Next button. The installation may be aborted at any time by
clicking on Cancel. When the installation is complete, click the
Close button to return to the Windows desktop.
4 | Nord Sample Editor User Manual
Installation Mac OSX
1 Insert the ‘Nord DVD’ into the DVD-ROM drive.
2 Open the image file (.dmg) that is located in the Nord Sample Editor folder on the DVD and drag the Nord Sample Editor v2.xx.app
to the Applications folder.
When new versions of the Nord Sample Editor are released, they
will be available as a free download at www.nordkeyboards.com.
The Quick Tour
Let us go through a few things we know you are curious about and get
acquainted with the Nord Sample Editor at the same time.
In order for the Nord Sample Editor to be able to playback
samples, you need to select a driver for your audio card. This is
done in the Settings/Audio menu.
MM
On a XP or Vista system, select an available Direct X driver. In
order to be compatible with as many XP and Vista computer systems as possible, the Nord Sample Editor uses Direct X drivers.
Download Sample Instruments
You can find new Sample Instruments at the www.nordkeyboards.com
website. These can be downloaded from the website free of charge.
Here’s how to download a Sample Instrument from the computer hard
drive to the Nord unit:
1 Browse to www.nordkeyboards.com and go to the Nord Sample
Library area.
2 Select the Sample Instrument archives that you wish to get and
save the file (or folder) to a location on your hard drive and unzip it.
The file extension of the file will be .nsmp for Sample Instruments. Read
more about the file types the Editor uses on page 17.
3 In the Nord Sample Editor, open the Manager tab.
4 Select the Organize option in the Manager menu and you will see
a grid with all the available memory locations.
To add new Sample Instruments to the Nord unit just drag the files from
the hard drive to an empty location in the list of Sample Instruments in
the Manager tab.
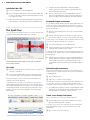
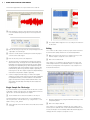
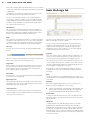
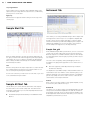
Nord Sample Editor Audio File/Assign tab with an audio file,
with assigned samples
First Light
1 Make sure that the Nord unit is powered up, and connected to the
computer, to a USB port.
2 Launch the Nord Sample Editor from the Program Files folder or
the Start Menu (PC) or from the Applications folder (Mac OSX).
During the start-up procedure, the Editor will automatically try and
establish contact with the Nord unit.
If a Nord unit is not connected, you can still work on a Project with
sample editing, mapping and other functions. When the Editor finds a
unit this will be indicated at the lower, right corner of the Editor window
and the Manager tab will open automatically. A list with all the current
Samples in the unit’s Flash memory will appear in the Nord Sample
Editor window.
EE Audio files have to be added to a Project in the Audio File/Assign
tab and “generated” to become a Sample Instrument before they
can be used in the Nord unit. Only Sample Instruments in the
.nsmp format can be downloaded using the method described
above.
Upload Sample Instruments
Using the Nord Sample Editor, it is very easy to upload samples from
the Nord unit to the computer hard drive. These actions also take place
in the Manager tab.
1 Open the Manager tab.
2 Right-click on a sample and select Upload.
The data will be saved in the same folder as the Editor application lives
in or in a folder chosen by you. Sample Instruments will be saved as
.nsmp files. Read more about the file types the Editor uses on page 17.
By combining the techniques for down- and uploading the Sample
Instruments, you are now able to share Sample Instruments with
other Nord Wave or Nord Electro 3 users if you wish.
Create a new Sample Instrument
Time to get creative; let’s create a new Sample Instrument.
1 Copy the NW_demo1.wav file from the Nord DVD to the folder
where the Nord Sample Editor is installed.
You may of course use any other audio file in the .wav format but this
particular file will demonstrate a very powerful feature of the Nord
Sample Editor.
2 Open a new Project from the File menu.
|
Only one Project can be open in the Editor, you will be prompted to
save any changes before any Project that has been edited is closed.
A quick way to open a new Project is to hit Ctrl+N on the computer keyboard. Ctrl+S will save the current Project. The name you
give to a Project will also be the name of the Sample Instrument
that is downloaded to the Nord unit.s
3 Select the Audio File/Assign tab.
6 Locate the section labeled Multi Sample Per File Assign at the
lower part of the Editor window. Set the Start Note to C2, the
interval to 1 semi, the Threshold to -45 dB and then click on
Assign.
When the Nord Sample Editor
has completed the analysis of
the file, samples with Root Key
and Upper Key settings are
created and these settings are
translated into zones. These
zones will be indicated in the
Keyboard Grid at the top of
the Editor window.
7 The sample that is highlighted in yellow is the focused sample.
This means that this sample is active for further editing and ready for
playback.
4 Click on the Add button below the Audio Files area or type Ctrl+F.
Browse to the location of the NW_demo1.wav file and click Open.
Pressing the space bar on the computer keyboard, or clicking on
the u symbol in the Player at the upper right corner will start the
playback of the file.
8 The dot-marker on a key (
) in the keyboard display indicates
that this is the Root Key of a sample. The sample is also assigned
to the corresponding range that surrounds the dot-marked key,
indicated in grey or blue.
The two progress bars at the lower left corner of the Project window
will indicate that the file(s) are added to the Project. The amount of time
it takes to add one or several files will vary, depending on the file size(s)
and your computer.
You can select and add several samples at once, as long as they
are in the same location on your hard drive. To add all the audio
files from an entire folder, use the Add Folder (Ctrl+D) command
from the File menu.
5 When a file has been added, you will see a representation of its
content as a waveform graph in the Editor window.
Please note that the NW_demo1.wav is one file, which consists of
several recorded notes from a Nord C1 organ. Nothing fancy, just some
simple sounds to show you a cool feature. Let’s do some magic now
and have the Editor create several samples, mapped in Zones across
the keyboard from this audio file.
If you right-click on a dotted key, you can disable a sample temporarily
from the Project which will be indicated with a circle ( ). You can also
de-assign the sample – this means that it will be removed from the
Project.
Disabling a sample from a zone is a great way to determine how
many samples you need in order to cover a particular range of a
multi sampled instrument or sound. Any settings that have been
made to a sample will be kept even if it is disabled. When you reenable a sample, these settings will be restored.
You can use the arrow keys on the computer keyboard to quickly
move the focus from one sample to another.
9 Save the Project by selecting Save in the File menu or type Ctrl+S
on the computer keyboard.
Adding Audio files with individual samples
You may want to add audio files that only contain one sample each.
Here is how you assign individual samples to Zones:
1 Open a new Project, select the Audio Files/Assign tab and click
the Add button.
The Nord Sample Editor can use stereo or mono audio files as
sample sources, with up to 44.1 kHz sample rate, 24 bits resolution.
2 Navigate to a folder that contain the audio files you wish to use,
select the files and click Open to add them to the Project.
3 The files will be listed, one by one in the Audio Files area. Select
the first file that you wish to assign to a zone.
6 | Nord Sample Editor User Manual
The waveform graph will show a representation of the audio file.
4 Click and drag to select the entire waveform in the graph, and
look at the Manual Sample Assign area in the lower part of the
window.
3 The samples will be mapped to zones according to the markers in
the file names.
5 Enter the Root Key; the key where the sample will play back at its
original pitch, and click Assign.
6 Select the next file and click and drag in the waveform graph to
select the entire audio snippet.
7 Enter the Root Key for the next sample/zone.
The first zone that you create will span a range of two octaves
above the Root Key. The range of a zone is determined by two
parameters, the Root Key and the Upper Key for each sample.
The range is also depending on any other sample that may be
assigned further down on the keyboard. A zone’s lower key will
reach all the way down to any previous sample’s Upper Key or
the F0 key if it is the “first” sample assigned. A sample will always
reach down to the previous sample’s Upper Key.
Editing
Let’s continue to edit a sample; in order to prepare it a bit more before
we download the Sample Instrument to the Nord Sample Editor:
1 Make sure that you have at least one sample in the Project and
that this sample is assigned to a zone and in focus.
2 Click on the Instrument tab.
This is where you can adjust the gain, and fine-tune the pitch of the
entire Sample Instrument or any individual samples. You adjust these
functions by entering values in the input boxes or by using the increment/decrement buttons.
A zone in a range cannot be empty, i.e. without an assigned
sample. If you want to have some keys that are silent somewhere
in a Sample Instrument, just make a selection in the waveform
graph of an area that is silent (or Add an audio file that is short,
and contains no audio data). Then map this silent sample to a
range of keys.
Single Sample Per File Assign
If you have audio files on your hard drive where the file name contains
an identifier or marker of the file’s pitch, the Single Sample Per File Assign function can automatically map these samples.
1 Use the Add function to add some audio files to the Project.
The Single Sample Per File Assign function can use identifiers that
refer to a pitch name – if the file name is e.g. cello_C#4.wav – or note
number – like e.g. cello_39.wav.
Move the sample focus by using the horizontal arrow keys on the
computer keyboard.
2 Select all the files in the File List that has these indicators and click
3 Click on the Sample Start tab.
on Assign.
This is where you can adjust the starting point of the sample. This is
useful if you have audio files that contain unwanted material before the
actual sound begins. The Nord Sample Editor will automatically place a
starting point when a sample is assigned to a zone.
|
This marker can easily be changed if you prefer to have manual control
of this function. You can manually set the start point by entering a
value in the Start input box, using the slider or by simply clicking in the
waveform graph.
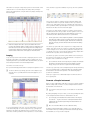
There are three loop options available, Long Loop, Short Loop and No
Loop.
The Long Loop option is useful for various instrument samples and
sounds which contain non-periodic variations. When you select this
option, a loop start marker and a loop end marker are created. These
two loop markers will be separated by the actual loop section which is
indicated as the blue area in the waveform graph.
The long Loop option will also include a crossfade to ensure that the
loop will sound as smooth as possible. The two segments of the crossfade are indicated as the light grey area immediately before the loop
start marker, and the darker area before the loop end marker.
When the Sample Start tab is opened, the Editor will zoom in
closer in the waveform graph to make it easier to distinguish noise
from the actual sound. You can change the zoom settings by using the buttons below the waveform graph for the horizontal axis,
and the slider or the buttons to the right, for the vertical axis.
Looping
Loops are very useful in order to make a sample play back or sound
beyond its own length. Loops will also reduce a sample’s size, since
everything after the loop end marker will be discarded when you download a Sample Instrument to the Nord Sample Editor.
Let’s take a closer look at a loop.
A loop is automatically generated when a sample is assigned to a zone.
1 To view or edit the loop settings, just click on the Sample Loop/
Stop tab. The loop is indicated in the waveform graph as a colored area.
Hit the space bar on the computer keyboard to start the playback
and adjust the settings for the crossfade or move the loop markers by clicking in the waveform graph. What You Do Is What You
Hear, any change you make will be monitored in real time during
playback.
The Short Loop option will create a loop from one single period in the
sample. This option can be successful on sounds where the harmonic
content changes a lot. It can also be very efficient in reducing the size
of a sample. If you have concerns about making as many samples fit in
the Nord unit as possible, this should be explored.
The Short Loop option uses either a pitch estimate or the Root Key as
the reference for its length, since the length will have consequences on
the pitch of the sound when it is looping.
If you can find a smooth short loop early in a sample, the envelope
generators in the Nord unit can be used to emulate a natural
decay, and you can save lots of space in the Flash memory.
The No Loop option may seem self explanatory, but the important thing
here is to remember that no sample data after the end marker will be
downloaded to the Flash memory. Click on the waveform graph to
position the end marker.
Please go to page 12 for a detailed description of all the functions in
the Loop/Stop tab.
Generate a Sample Instrument
When you have added all the audio files to the Project and are satisfied
with the sample edits, it is time to create a Sample Instrument and to
download this to the Nord unit
1 If you haven’t saved your Project, now would be an excellent time
to do so.
By saving and giving a Project a name, you are also providing the name
for the Sample Instrument when it is downloaded to the unit.
If you change your mind about the current name on the Project,
use Save As… to give it a new one. A Sample Instrument that is
created from an unsaved Project will get the default name “Untitled” in the unit
2 Go to the Instrument Menu and select Generate Only.
To set a new beginning of the loop - the loop Start marker - just click
on the waveform graph. To set the length of the loop, just right-click
anywhere to the right of the indication of the loop start. You can also
enter values for these parameters in the input boxes or use the sliders.
A Sample Instrument with all the samples, zones and edits that you
have made in this Project will be generated and automatically saved to
the hard drive as a “Project name”.nsmp file.
8 | Nord Sample Editor User Manual
3 If you select Generate and Download, the Sample Instrument will
also be downloaded to the Flash memory in the Nord unit
Sample Instruments are added incrementally to the Flash memory, to
the first available free location.
Menu Reference
File Menu
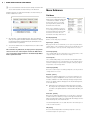
In the Nord Sample Editor, the usual
Windows XP and Mac OSX keyboard
commands are available. The dropdown menus can be accessed by
pressing the Alt key and the underlined letter in the menu bar.
Most of the commands can also be
accessed by pressing the Ctrl (Command on the Mac) key together with
the letter shown next to the command name in the drop-down menus.
All of the tabs – except the Manager tab – have an Instrument
area, up to the right in the Editor window. If Download is checked,
the Sample Instrument will automatically be downloaded to the
Nord unit when it is generated.
You can also double-click on a sample in the list, in order to select
it in the Nord unit
This concludes our guided tour; we hope you have enjoyed the
show so far. The rest of this chapter contains the Editor Reference section where all the functions in the Nord Sample Editor
will be explained in detail.
New Project [Ctrl+N]
Creates a new, empty Project window.
Open Project... [Ctrl+O]
Brings up the file selector and allows you to open a Project file from a
storage device on the computer. If another Project is already open you
will be prompted to save any unsaved changes before it is closed.
Save Project [Ctrl+S]
This command will save the current Project to a storage device on the
computer. A Project file has the extension .nwiproj.
Save Project As...
This command will prompt you for a file name and destination folder
before saving the Project to a storage device on the computer. This is
useful for renaming a Project file before saving it, leaving any original
Project intact on the storage device.
Close Project [Ctrl+W]
Closes the current Project. You will be prompted to save any unsaved
changes before it is closed.
Add Files... [Ctrl+F]
Brings up the Add Files dialog where you select the audio files to be
added to your project. Multiple files can be selected. The same functionality is available in the Audio File/Assign tab by pressing the Add
button. The added audio files will appear in the Audio File/Assign tab,
in the Audio Files list.
EE Audio data is not copied to the actual Project when you add a
file; a Project has only references to the audio files. Any changes
you make to an original audio file on the hard drive will affect your
project.
Add Folder... [Ctrl+D]
Brings up the Add Folder dialog where you can browse to and select
an entire folder to be added to your project. All supported audio files
within that folder will be added. The added audio files will appear in the
Audio File/Assign tab, in the Audio Files list.
The Nord Sample Editor can use audio files in the .wav format, up to a
24 bit, 44.1 kHz resolution.
Exit [Ctrl+Q]
Closes the Nord Sample Editor. You will be prompted to save any
unsaved changes to an open Project.
|
Edit Menu
Select All [Ctrl+A]
This command will select all available items,
e.g. all the audio files or all the Sample Instruments.
Instrument Menu
Generate And Download
[Ctrl+G]
Creates a Sample Instrument
from the current Project and
stores it on the hard drive as
an .nsmp file. The Sample
Instrument will also be downloaded to the first available location in a
connected Nord unit.
This process automatically encodes the samples with Clavia’s proprietary lossless compression algorithm, in order to reduce the sizes of
the samples. Samples will also be cropped before the sample start
points and after the loop end marker.
The duration of this process may take several minutes depending on
the amount of samples being used. You can use this file to share your
Sample Instrument with other Nord Wave or Nord Electro 3 users.
Generate Only [Ctrl+Y]
Creates a Sample Instrument from the current Project and stores it on
the hard drive as an .nsmp-file. This process automatically encodes the
samples with Clavia’s proprietary lossless compression algorithm, in
order to reduce the sizes of the samples.
The audio will also be cropped before the start points and after the
loop end marker. The duration of this process may last several minutes
depending on the amount of samples being used. The file is saved in
the same folder as your Project.
Settings Menu
Audio...
Brings up the Audio Settings dialog box where you
select the driver for any audio card that is connected to or installed in your computer. The output
level can also be set in this dialog. The selected audio card will be used
to play back samples by the Nord Sample Editor.
The Nord Sample Editor is compatible with Direct X drivers on a Windows XP or Vista system, and with the native Mac OSX drivers.
Organize
When this option is checked, the list will show all the available locations
in the memory and not only the occupied ones. This will for instance
make it easier to drag a file to a specific free location in the middle of
the list. If this is unchecked, only the occupied locations will be shown.
Refresh F5
This function refreshes the content of the current window in the Nord
Sample Editor.
Clean Deleted Space
This function will clean up the space where any deleted Sample
Instruments have been before they were removed. If nothing has been
deleted, this button will be blanked out.
Format
This is a radical function; it will format the entire Sample memory in
the Nord unit and prepare it for some brand new content. You will be
asked to confirm this action.
Help Menu
About...
Brings up the About box with information regarding the version of the Nord Sample Editor. You will
also see a list of compatible instruments and OS
versions.
Tab Reference
Each of the tabs opens up a set of functions that will assist you in mapping the samples, setting the start point of samples, loop the samples
and to manage the Sample Instruments in the Flash memory in the
Nord unit.
You can select the different tabs one after each other, by typing
Ctrl+Tab on the computer keyboard.
Common area
The common area will be present at the top of all the tabs except
for the Manager tab. It contains functions that are used to view the
mapping, to change the focus of the samples, to generate a Sample
Instrument and to start and stop playback.
Manager Menu
Sound Upload
Use this function to upload one or
several sounds from the Nord unit to
the computer hard drive.
Sound Download
Use this function to download one or
several Sample Instruments from the
computer hard drive to the Nord unit.
Delete
Allows you to delete a selected Sample Instrument from the Nord unit’s
memory.
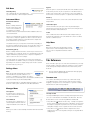
The Keyboard Grid
The Keyboard Grid represents the total keyboard range that the Zones
can cover - from F0 to C8. The middle C in the Nord unit - when the
Octave Shift is set to 0 - is the C4 key, MIDI Note Number 60.
•A key with a dot ( ) indicates the Root Key - a sample is assigned to
this key and the sample plays back at its original pitch. The Zone that
this sample is assigned to is presented in a color scheme, with alternating blue and gray colors to separate the Zones from each other.
•A key with a circle ( ) indicates that the sample that has been
mapped to this zone is de-assigned, but may be re-assigned with its
settings intact.
10 | Nord Sample Editor User Manual
•A key that is yellow indicates that this sample is in focus - this sample
is the active sample that you edit with the other functions in the Nord
Sample Editor.
Audio File/Assign Tab
If a Nord unit is connected to the computer, any keys you play on the
unit, will be indicated in the keyboard area of the Editor.
You can use the horizontal arrow keys on the computer keyboard
to move the focus. When a sample is in focus, the audio file that the
sample originated from will be automatically selected in the Audio File
list and the corresponding part of the waveform in the graph will be
also is presented in the yellow color.
Instrument area
This is a shortcut to the Generate functions that also is available in
the Instrument Menu. If the Download box is checked, clicking on the
Generate button will generate a Sample Instrument from the current
Project, and automatically download this to the Nord unit.
Player
This contains two standard transport buttons, for starting and stopping
the playback of the sample in focus. You can also set the output level
of the audio card in your computer with the slider. Pressing the space
bar on the computer keyboard will also start and stop the playback.
The Footer
The footer area is located at the bottom of the Nord Sample Editor
window.
This area is used to add audio files to your project, and assign sections
within the audio file to be used as samples.
Several scenarios to automatically analyze and assign samples are
available in the Nord Sample Editor. You can either add a group of
audio files, where each file contains a single note and has a name
identifying the note by name or number, or you can add a single file
containing several notes one after the other.
Audio Files
The footer contains mostly informational stuff, and a Cancel button that
can be used to abort some of the ongoing processes.
Progress bars
When you start a task in the Nord Sample Editor, the execution may
take a few moments, depending on what it is you want to do. One
major task may consist of several smaller tasks, and the progress of
these is displayed with the Progress bars.
Cancel button
Use this button to cancel any ongoing task that the Nord Sample Editor is in the process of performing.
Upper Progress bar
This section contains the list of audio files that are included in the current Project. The list will be empty when you create a new Project, if
you open a previously saved Project there may be files in the list.
It is in this list that you select the referenced audio file you wish to use
to create samples and assign these samples to Zones. When a file is
selected, a graphical representation of its waveform will appear in the
waveform graph if the Enabled box is checked.
Only audio files or parts of the audio files that have been assigned
as samples in the Project are included when a Sample Instrument is
generated.
Name
The files in the list may be sorted alphabetically in an ascending or descending manner by selecting Name and changing direction by clicking
on the arrow.
The upper Progress bar will show the progress of the current task being performed, the name of which is displayed in the message area, to
the immediate right of the Progress bar.
Add Button
Lower Progress bar
MM
The lower Progress bar will show the progress of an ongoing task.
In the lower right corner is an indication that tells you if a Nord unit is
connected to the computer, or not.
Brings up the Add Files dialog where you choose audio files, to be
added to your project. Multiple files can be selected.
A Project uses references to the audio files on the hard drive, and
does not copy or load any actual audio data. Any changes that
you do to the original audio files will also affect the Project.
Remove Button
To remove an audio file from the Project, click on the Remove button.
This will also remove any samples from the Project that are associated
with this audio file.
Enabled box
To temporarily remove an audio file from the Project, un-check the
Enabled box. All samples from the audio file in the Project will be
disabled. All the Zones that have these samples assigned to them will
be removed. The neighboring zones will cover the ranges, which the
disabled samples used to occupy. The settings of the disabled samples
and zones will be retained, when the box is checked, the samples and
zones will be restored.
|
Waveform graph
Number
This is a visual representation of the audio file that is selected in the file
list. This graph will appear in other tabs as well, with minor alterations
in order to assist you in the editing process. If the audio file is in mono,
a single graph is drawn, if the audio file is in stereo, the left and right
channel will be presented in two parallel graphs. You can select a part
of, or an entire audio file by a standard click-and-drag procedure with
the mouse.
Uses a number in the file name and interprets this as a Root Key number. The middle C, C4 on the Nord unit keyboard - when the Octave
Shift is set to 0 - is key number 60.
Select one or several audio files in the Audio File list and click on Assign
to assign the samples to Zones. You can use the Ctrl key (or right-click)
to select nonconsecutive files in the list.
Multi Sample Per File Assign
This function can create several samples and assign these to
zones from a single audio file with
recordings of several individual
notes, one after the other.
If the entire duration of the audio file will not fit in the waveform graph,
you can scroll the content of the graph by using the scroll bar below
the graph display.
Waveform Graph Colors
Colors are used to define areas and elements in the graph. The actual
waveform data is drawn in red. An undefined area is illustrated by a
gray background; a selected (but unassigned) area will have a dark
blue background.
If you right-click on a selected area, you can assign this selection as a
sample, with the Root Key setting from the Manual Sample Assign area.
When one or several parts of a audio file has been assigned as one or
several samples, this will be indicated in the waveform with alternating lighter and darker colors, in the same fashion as the zones are
indicated in the Keyboard Grid. If the sample is in focus, this will be
illustrated with a yellow color.
Start Note
Set this to the match the pitch of the first recorded note in the audio file.
Range: F0 - C8
Interval
Set this to match the intervals between the recorded notes in the audio file.
Range -48 - 48 semitones
Threshold
The threshold setting is used to distinguish or separate the individual
notes from one and another in the audio file.
Range: -80 - 0 dB
Remap button
Select this to map the audio file again.
Assign button
Zoom buttons and slider
Zoom in on the waveform using the zoom buttons and the zoom slider.
This activates the assignment of the selected audio file, using the settings you have entered for the parameters for the Multi Sample Assign
function.
Manual Sample Assign
The buttons below the graph labeled All, 50, 20 etc are the zoom
buttons for the X-axis - the duration of the audio expressed in seconds.
If you select All, the entire duration will fit in the graph, if you e.g. select
2, 2 seconds of the audio will fit in the graph. Clicking on the 50m, 20m
or 10m buttons will show 50, 20, and 10 milliseconds sections of the
audio file.
The zoom factor for the Y-axis - the amplitude - is done
with the selectors and/or the slider at the lower, right
corner. The level of 1.0 represents the full amplitude - 0
dBFS- relative to the bit depth of the audio file.
Single Sample Per File Assign
This function allows you to easily map
samples to a Zone, where the Root
Key of the sample is based on a certain string of characters in the audio
file’s filename.
This function can
create and assign a
sample from a selection in the current
audio file. Click and
drag in the waveform
graph to select a part of, or the entire current audio file.
Root Key
This is the note where the sample will play back at its original pitch (or
speed if the sample is non-pitched or a performance loop). If you make
consecutive selections, the setting will increase in steps of one semi
tone for each time you have assigned a sample.
You can also use this setting to adjust the Root Key of a mapped
sample. Put the sample in focus and adjust the value to the next available key.
Range: F0 - C8
It is not possible to assign two samples to the same key.
Name
This function use a naming convention where the pitch or note name is
indicated in the actual file name. A file that has the name celloC#4.wav
will be mapped with the Root Key on C sharp, in the middle octave when the Octave Shift on the Nord unit is set to 0. The function can
interpret the Root Key, a sharp sign (#) and the octave.
Range Begin
This will indicate where the selection you have made in the graph
begins. Use the increment/decrement buttons to adjust the beginning
of the selection.
12 | Nord Sample Editor User Manual
Range End
This will indicate where the selection you have made in the graph ends.
Use the increment/decrement buttons to adjust the end of the selection.
Enabled box
This enables or disables the assignment of the sample in focus. It will
default to the checked state when you click the Assign button. Uncheck it to temporarily disable an assignment to the sample in focus.
The sample and the settings will be kept in the Project, just check the
box again to put it right back in business.
Assign button
This activates the assignment of the selected audio file, using the
settings you have entered for the parameters for the Manual Sample
Assign function.
Deassign
This deactivates the assignment of the sample that is in focus.
Somewhere along the line you will pass the loop start marker, making
a mental note of its location. You continue to travel towards the end of
the audio file but when you reach the loop end marker, you immediately
go back to the loop start marker and resume the path towards the end.
And then you hit the loop end marker again, go back to the loop start,
and so on.
Creating a perfect, seamless loop can sometimes be a bit difficult.
Sometimes the audio at the loop start is very different compared to the
audio at the loop end marker, which will produce audible and perhaps
unwanted artifacts in the sound.
In order to minimize certain loop artifacts, a crossfade function can be
used. This uses audio that is before the loop start marker, and mixes
this with audio that is before the loop end marker when the loop is
playing back.
A crossfade has usually several parameters to set the length of the
crossfade, and to adjust the taper of how these two sound bites will
blend into each other during playback. This can help to smooth things
out and create a better sounding loop.
Deassign All
Clicking on this button will permanently de-assign the mapping of the
focused sample, and also all the other samples that originates from the
same audio file. Use this function with care, to quickly start with a clean
slate with a previously mapped audio file.
Sample Loop/Stop Tab
This tab contain the functions that will assist you in finding a loop for
the sample that is currently in focus, as indicated by the yellow color
in the Keyboard Grid. As soon as an audio file or a selection from an
audio file is assigned as a sample, loop markers will automatically be
created by the Nord Sample Editor.
A loop in a sample consists of two positional markers in the audio,
the loop start and the loop end markers. Visualize the playback of a
sample as a horizontal journey from the start of the waveform at the
extreme left, towards the end at the right.
EE Any audio data after the loop end point will be automatically
discarded by the Nord Sample Editor when you create the Sample
Instrument from the Project.
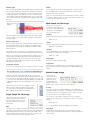
Waveform graph colors
The waveform graph presents the loop by showing certain areas in
different colors. The position of the loop start marker is at the left edge
of the blue area. The position of the loop end marker is at the right end
of the darker blue area.
|
A crossfade’s first section is indicated with the light blue area that is
before the loop start, to the left of the blue area. The crossfade’s end
section is the darkest area immediately to the left of the loop end
marker. As these settings are changed by you, the indication in the
graph will change as well.
You can set the position of the loop start marker by clicking anywhere
in the graph. If you right-click to the right of the loop start marker, you
can set a new loop end marker – and change the actual loop length.
View Trim
The graph in the Sample Loop/Stop tab can be augmented with a
more detailed display of the waveform at the loop start and the loop
end markers. This is activated by checking the View Trim box at the
lower, left corner of the Editor window.
Right-clicking in the graph will position the loop end marker, which
together with the position of the loop start marker sets the loop length.
Make sure that you right-click to the right of the loop start, it is not possible to position the loop end before the loop start marker.
Xfade
You can enter a crossfade length expressed in seconds in the value
box, confirming this by pressing enter or by using the slider. Any
changes you do will be immediately heard if you are playing back the
sample and also presented in the waveform graph. To disable the
crossfade, set the crossfade length to 0.
Xfade Curve
There are three available curves for the crossfade: Log1, Log2, and
Linear. These are used to compensate for any amplitude changes that
might occur in a crossfade as a result of cancellations when harmonics
are out of phase with each other.
Short Loop
When using the Short Loop option, the loop length is set to a single
waveform period. As the length of a single period is relative to the pitch
of the sample, you can use an algorithm that analyzes the pitch of the
sample, or use a length correlating to the pitch of the sample’s Root Key.
Loop Length based on
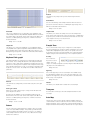
The red waveform shows the audio immediately before and at the loop
end marker. The green waveform is the audio at, and immediately after
the loop start marker. If these two waveforms meet at the same level,
chances are good that this will indicate a loop without any clicks in it.
These are the two alternatives on how to determine what constitutes as a single period in the
sample. If a short loop produces a different pitch
than the actual sample, you may need to try the
Root Key option.
If a crossfade is used, the two waveforms will be superimposed on
top of each other, like the illustration above. This provides a nice visual
confirmation of what happens if you fine-tune the length.
The Pitch Estimate is the default, but there may be occasions when
this is unsuitable. If a sample has strong harmonics (that are stronger
than the fundamental), the Root Key option may be better suited.
Start with the crossfade set to a small value and see how these
two waveforms are presented. When the two colored peaks and
valleys are in phase with each other, chances are good that you
have a pretty good loop. Any changes you do can always be
monitored in real time if you activate the playback.
Xfade
Loop Options
No Loop
There are three available loop options: Long Loop which is the default
loop that is applied to a sample when it is assigned to a zone, Short
Loop which creates a loop with a single waveform period and finally the
No Loop, which gives you an opportunity to set an end marker to the
sample.
Loop Start
You can enter a loop start position expressed in seconds in the value
box, confirming this by pressing enter, using the slider or fine-tune the
position with the increment/decrement buttons. Clicking in the graph
will also position the loop start marker.
The short loop also has provisions for using a crossfade, with a selection of fixed lengths: 25% or 10% of the loop length. Set this to Off if no
crossfade should be used.
This provides you with the option to set a marker where the sample will
end. You can also set a fade out time.
Stop
You can enter the position of where the sample
will end expressed in seconds in the value box,
confirming this by pressing enter or by using
the slider. You can also click in the graph to set
the sample end marker when this loop option is
selected.
Fade Out
Long Loop
This section contains the settings for the Long Loop parameters.
Length
You can enter a loop length expressed in seconds in the value
box, confirming this by pressing
enter, using the slider or set the
length with the increment/decrement buttons, in a coarse- or a
fine-tune fashion.
Enter the Fade Out time expressed in seconds in the value box, confirming this by pressing enter or by using the slider. This is the time in
seconds leading up to the sample end during which the amplitude will
gradually fade out.
Apply on All
The loop settings that you have made can be applied to all other
samples in the project. In order to compensate for any artifacts that
might occur when you e.g. play a chord, as a result of several loops
with identical settings, you have the option to apply a variation to the
loop length.
14 | Nord Sample Editor User Manual
Loop Length Variation
Set the variation to the loop length to all the individual samples loops,
expressed as a percentage. Enter the value in the box, confirm this by
pressing enter or use the slider.
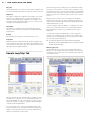
Instrument Tab
Apply Loop
Click this button to apply the variation setting to all of the loops in the
current project.
Sample Start Tab
This is where you can change individual settings to all the samples that
are mapped in the current Project. You can adjust the amplitude with
the gain controls, tune the samples and apply a couple of powerful
functions that will assist you with the final mapping of the samples. The
familiar Keyboard Grid is here to assist you with a clear overview of
how the samples are mapped across the keyboard range.
Sample Gain grid
When the Sample Start tab is opened, the waveform graph will zoom
in to give you a better view of what is happening at the very beginning
of the sample. As soon as a sample is assigned by the Nord Sample
Editor, a Start point will be automatically set. This will be indicated in
the Start tab by the marker.
Start
Enter the start position in the sample expressed in seconds in the value
box, confirming this by pressing enter or by using the slider. You can
also set a start point by clicking in the waveform.
Use the zoom controls if you need to back out of the view, or get closer
to the actual waveform representation.
All the individual samples will be presented here, as zones or slices that
correspond to the map settings that are presented in the Keyboard
Grid. The sample in focus will be indicated in yellow, the other samples
in a alternating pattern of blue and gray to provide you with an easy-touse overview.
The zones can be changed by clicking and dragging on the zone
boundaries in the grid, grab the upper limit of a zone and move it to a
new key.
MM
One zone’s Upper Key cannot be pushed on top of or above
another zone’s Root Key.
The amplitude of any individual sample is indicated with the black horizontal marker in each slice. With the controls below this grid, you can
adjust the global gain of the entire Sample Instrument or an individual
gain for every sample. This can be used to increase or attenuate the
overall loudness of the Sample Instrument.
Reset All
Sample Alt Start Tab
This tab allows you to set the alternate start marker of the sample in
the same fashion as the “normal” sample start. This alternate start
point will be activated when you select the Skip Samp Attack function
on the Nord Wave panel.
MM
The alternate sample start functionality is not available in a Nord
Electro 3
Click on this to reset all the samples to their original amplitude, as they
were when they were added to the Project.
Normalize All
This allows you to set all the samples to the 0 dB amplitude in the grid.
This represents the maximum amplitude in the audio file, in relation to
the bit depth of the audio. There is however headroom available in the
Nord Sample Editor and the Nord units that allows you to increase the
amplitude beyond this level if you need.
|
Reset All
This will reset any changes that you have made using the Detune
controls.
Global Detune
Sets the overall tuning of the Sample Instrument. Enter the value expressed in cents in the value box, confirming this by pressing enter, or
with the increment/decrement buttons.
Range: -50 to +50 cents
Global Gain
Sample Detune
This can set a global increase or attenuation of the amplitude of the
entire Sample Instrument. Any individual amplitude differences between
the samples will not be altered. Set the value expressed in dB:s in the
value box, confirming this by pressing enter, or with the increment/
decrement buttons.
This allows you to detune the sample in focus in the Sample Instrument. Set the value expressed in cents in the value box, confirming this
by pressing enter, or with the increment/decrement buttons. Each and
every sample in the Project can be de-tuned.
Range: -9.0 to + 9.0 dB
Range: -50 to +50 cents
Sample Gain
Sample Zone
This allows you to change the amplitude on each individual sample.
The amplitude after a gain change will be indicated with the horizontal
line in the Grid. Set the value expressed in dB:s in the value box, confirming this by pressing enter, or with the increment/decrement buttons.
These controls makes it very easy to change the focused sample’s
Root Key and Upper Key, in order to edit the assignment. The focused
sample will be highlighted in yellow, and you can quickly select focus
by clicking on the keys in the Keyboard grid or by scrolling through the
samples using the horizontal arrow keys on the computer keyboard.
Range: -9.0 to + 9.0 dB
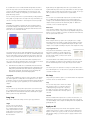
Keyboard Gain graph
This graph will reflect any changes that you make with the Keyboard
Gain controls. These settings will affect the entire Sample Instrument,
and can be used to apply various adjustments that will change the amplitude across the range of the keyboard. If for example the lower range
in the Sample Instrument is too loud, you can apply an attenuation that
begins at a chosen octave. The sample in focus will be indicated as a
yellow slice.
Root Key
Sets a new Root
Key for the focused
sample. There can
only be one sample assigned to each Root Key, the value will automatically skip to the next available note.
Range: F0 to C8
Upper Key
Sets a new Upper Key for the focused sample. The available range
may be limited by samples that occupy a Root Key higher up on the
keyboard. The Upper Key can not be a key that is located lower than
the Root Key on the keyboard.
Range: F0 to C8
Reset All
This will reset any settings that you have made using the octave gain
controls.
Octave gain controls
Allows you to apply a gain change to a range, which will start at the
preset keys C1, C2, C3 etc.
C4 represents the middle C on the Nord Sample Editor, when the
Octave Shift control is set to 0. Set the value expressed in dB:s in the
value box, confirming this by pressing enter, or with the increment/
decrement buttons.
Ranges: -9.0 to + 9.0 dB
Detune
You can change the overall tuning of the samples, either on a global
scale or for any individual samples. This provides you with the means
to fix any problems with samples that are out of tune, or to adjust an
entire Sample Instrument. The unit is in cents, 100 cent is the range
between two semitones.
Enabled
This allows you to disable and re-enable the focused sample.
Transpose
Use the buttons to transpose the entire Sample Instrument in semi
tone steps.
Auto Map
This function can be used to quickly enable and disable samples at
certain intervals in order to reduce the amount of memory used by the
Sample Instrument. This is a great way to quickly experiment with the
Sample Instrument without having to delete and/or re-assign samples.
16 | Nord Sample Editor User Manual
Interval
Set the interval or range between the
samples that will be kept enabled.
The end result will depend on how the
original ranges are mapped. Samples will not be moved from one key
to another, any gaps across the keyboard range will be filled by any
adjacent samples. A setting of 0 will disable all the samples.
Range: 0 to 48 semi tones
Map
Map the samples according to the Interval setting.
Play Mode
This allows you to choose if a sample should be pitched according to
the standard 12 tone interval when you play the keys it has been
assigned to, or to play back at its original pitch, regardless of what key
you play.
If you e.g. have some drum samples that span
several keys, they could be set to Unpitched if you
want them to play at the same, original pitch.
Samp Preset Tab
Vel Dyn Enabled
Check this box if you wish to have the velocity sensitivity turned on in
the Nord Electro 3 as the default setting when the Sample Instrument is
selected. This function is not available in a Nord Wave.
Keyboard Controlled Amplifier Envelope
Decay Time
This can apply an amplitude decay to a sound, in order to e.g. have a
amplitude decay on a looped sound.
Range: None, Short, Long
Release Time
This sets the release time that will be set when the sample is selected.
Range: Short, Medium 1. Medium 2, Long
Octave Shift
This sets the octave shift that will be set when the sample is selected.
Manager Tab
This is where you find the function of the Nord Sample Editor to manage the content of the Sample Instrument memory. If no Nord unit is
connected to the computer, the memory locations will be grayed out.
This tab allows you to set some functions to be applied to the Sample
Instrument. Some of these functions will also determine the automatically activated settings of the Samp Env functions, for the Sample
Instrument.
Velocity Controlled Dynamics
The functions in this area determines how a Sample Instrument should
respond to velocity. This functionality is achieved by using the Morph.
Amplitude
This allows you to determine if the amplitude of the Sample Instrument
should respond to keyboard velocity.
Range: None, Low, High
Filter
This allows you to determine if a keyboard velocity controlled low pass
filter should be applied to the Sample Instrument. This allows you to
make the sound brighter, when you play with a higher velocity.
Range: None, 600Hz, 150Hz
Attack Time
This controls if a velocity controlled attack time should be applied to
the Sample Instrument. Higher velocities will shorten the attack time.
Range: None, Short, Long
EE The actions that take place in the Manager tab will affect the
memories in the unit. The Nord Sample Editor is online with the
Nord unit at all times, so any changes that you perform in the
Editor will immediately be echoed in the Nord Wave or Electro 3.
If you e.g. delete a Sample Instrument from the list in the Nord
Sample Editor, that same Sample Instrument will also be deleted
from the Nord unit’s memory, without any warnings or confirmation dialogs.
Manager Toolbar
The icons on the Tool bar gives you instant access to three functions.
Organize
When this option is active, the list will show all the available locations
in the memory and not only the occupied ones. This will for instance
make it easier to drag a file to a specific free location in the middle of
the list. If this is unchecked, only the occupied locations will be shown.
Sound Up
This will upload a selected Sample Instrument to the computer hard
drive. It will be saved as a .nsmp file.
Sound Down
This allows you to choose a file on the hard drive, to be downloaded to
the next available free location in the Nord unit.
|
Delete
This will delete the selected Sample Instrument from the Nord unit’s
memory.
Sample list
The Flash memory’s size depends on the Nord unit, and it is allocated
dynamically. You can have one Sample Instrument, that contains one
sample that is using up all the memory capacity, or you can have 50
Sample Instruments with several samples each, as long as the combined sizes of these are kept within the memory’s limit.
When you generate a Sample Instrument from a Project in the Nord
Sample Editor, and download this to the Nord unit this Sample Instrument will be saved at the first available location in the Flash memory.
If the locations are occupied one after the other in a consecutive manner, it will then appear at the end of the list in the Manager tab. If there
is an empty location in the middle of the list, it will be saved to this
location.
The Sample Instrument list may be ordered by location, alphanumerical
by name, according to sizes, or versions by clicking on the appropriate
heading.
Right-click
name, and the SI name is also changed when that file is downloaded
to the Nord unit.
EE Two Sample Instruments in the Nord unit cannot have the exact
same name. If you happen to generate two Sample Instruments
without e.g. having saved the Projects, then the second Sample
Instrument called Untitled will overwrite the first one that had that
same name. If you try to drag an .nsmp file from the hard drive to
the list and it has the same name as a SI in the list, that operation
will not be allowed.
Size
Indicates the size of the Sample Instrument. This may be useful if you
are short on memory and wants to know if a particular SI occupies a
certain amount of space in the Flash memory.
Ver
This indicates a version number of the .nsmp file format.
Footer Memory Indicator
This will give you a numerical and a visual indication of how the Flash
memory space is being used. Red indicates the spaced used by the
samples, green is the space that is free to use for new Sample Instruments.
If you right-click on a Sample Instrument in the list, you will get the following options:
Upload – This will upload the Sample Instrument to the computer hard
drive. It will be saved as a .nsmp file.
Just as any other computer file on your hard drive, this .nsmp file may be
renamed, emailed, copied, moved, lost or even stored in a safe location
if an evil computer crash suddenly decides to take your hard drive for
ride.
EE If you want to rearrange the order of the Sample Instruments,
there are a few things to consider. A Program in the Nord unit that
uses a Sample Instrument does not know what the sound of the
sample is. The Program is only referring to a Sample Instrument
location number.
File Types and Names
Files associated with the Nord Sample Editor and the Nord units use
the following extensions:
.nwiproj – Nord Sample Editor Project file
This is a file containing the Project settings. Audio files are not included
in this file - any changes to the original audio files will affect you project.
This file type will be created when you save a Project.
Download – This is only available if you right-click on an empty location
that does not contain a sound. This allows you to choose a file on the
hard drive, to be downloaded to the location in the Nord unit.
These files will be needed if you want to change any settings in a
particular Sample Instrument at a later stage, so save often and keep
copies in a safe location.
Delete – This will delete the Sample Instrument from the Nord unit’s
memory. Any Program in the unit that used that particular Sample
Instrument will probably sound very different, since it will be missing an
important component.
.nsmp - Nord Sample Instrument file
EE A flashing number in the display on the panel indicates that the
Sample Instrument location that the current Program tried to use
is not available in the Flash memory.
List headlines
Loc - location
The Sample Instruments in the list are numbered; these numbers correspond to what you select with the Type selector in the Nord unit.
Name
The Sample Instrument gets its name from the name of the Project that
gave birth to it. If a Project has not been saved – being nameless that
is - and you generate a Sample Instrument, it will get the default name:
Untitled.
If a Sample Instrument is uploaded to the computer hard drive, the
resulting .nsmp file name will be same as the SI name. Change the file
This is a file containing the cropped and encoded audio and the Project
settings for one Sample Instrument. This file type will be created and
saved to the hard drive when you generate a Sample Instrument
from the Instrument menu (or with the Generate button in the Editor
window). You can also create .nsmp files when you upload Sample
Instruments from the Nord unit in the Manager tab in the Editor.
Use this file type to share Sampled Instruments with other Nord users.
The .nsmp file can not be opened or edited; it can only be down- or
uploaded to and from a Nord Sample compatible unit. To edit any content or setting in a Sample Instrument you must go back to the original
Nord Sample Editor Project file (.nwiproj), do the edits there and then
re-generate the Sample Instrument.
18 | Nord Sample Editor User Manual
M
Index
A
Add Button 10
Add Files 8
Add Folder 8
Apply Loop 14
Assign button 11, 12
Audio Files 10
Audio Settings 9
Auto Map 15
C
Manual Sample Assign 11
Map 16
Memory Indicator 17
Middle C 9
Multiple files 8
N
Name 11, 17
New Project 8
No Loop 13
Normalize All 14
Number 11
nwiproj 17
O
Cancel button 10
Cent 15
Circle 10
Close Project 8
Common area 9
Ctrl
+D 8
+F 8
+G 9
+N 8
+O 8
+Q 8
+S 8, 9
+W 8
+Y 9
D
Deassign 12
Deassign All 12
Delete 17
Detune 15
Dot 9
E
Enabled box 10
Exit 8
F
Fade Out 13
File format 8
File Menu 8
Footer area 10
G
Generate 9
Global Detune 15
Global Gain 15
Octave gain 15
Open Project 8
P
Pitch Estimate 13
Play Mode 16
Progress bars 10
R
Range Begin 11
Range End 12
Reference 8
Remap button 11
Remove Button 10
Reset All 14, 15
Right-click 17
Root Key 11
S
Sample
Detune 15
Gain 15
Gain grid 14
Zone 15
Save Project 8, 9
Settings 9
Short Loop 13
Start 14
Start Note 11
Stop 13
T
Tab Reference 9
Threshold 11
U
I
Upper Progress bar 10
Instrument Menu 9
Interval 11, 15
W
K
Keyboard Gain graph 15
Keyboard Grid 9
L
Length 13
Loop Length based on 13
Loop Length Variation 14
Loop Options 13
Loop Start 13
Loop/Stop Tab 12
Lower Progress bar 10
Waveform 11
X
Xfade 13
Xfade Curve 13
Y
Yellow key 10