1
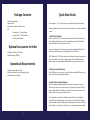
GENEE TECHNOLOGIES
INDIA PRIVATE LIMITED
enee scope
An ISO 9001:2008 certified company
TM
enee scope
TM
Tel: 0124-4934500
@ Email: [email protected]
WWW Website: www.genee-india.com, www.geneeworld.com
Plot No. 698, Udyog Vihar, Phase V, Gurgaon, Haryana-122016, India
Fax: 0124-4934521
G E N E E S C O P E ™ D I G I TA L M I C R O S C O P E
User manual & Set up guide
Table of Contents
Introduction / Package Contents
Introduction / Package Contents................................................................ 3
Thank you for purchasing the finest educational tool for your classroom viewing.
Diagram.......................................................................................................... 3
The Genee Scope digital microscope is a durable product with over 60 years of expe-
Package Contents............................................................................................ 4
rience incorporated into every product shipped. Please review the diagram and the
Optional Accessories to Order........................................................................... 4
list of items contained in this package.
Operational Requirements................................................................................ 4
Diagram
Quick Start Guide......................................................................................... 5
1. Install the Software...................................................................................... 5
2. Plug in your Genee Scope............................................................................. 5
3. Launch Genee Scope Program....................................................................... 5
Set-up of the Genee Scope Digital Microscope........................................... 6
Using the Camera......................................................................................... 8
Using Genee Scope as a Stereo Microscope........................................................ 8
Using Genee Scope “off” the Base..................................................................... 9
Using Genee Scope as a Light Microscope.......................................................... 9
Making Small Things Big................................................................................... 10
Servicing your Genee Scope.............................................................................. 10
Storing your Genee Scope................................................................................. 11
2
1. Capture Button
5. Battery Door
9. Lower LED Light Button
2. Camera Head
6. Center Lower Light
10. Upper LED Light Button
3. Base Unit
7. Silicone Stage Pad
11. Red Handle & Cable Wrap
4. Turret (2x, 4x, 10x)
8. Focus Knob
12. USB Cable
3
Package Contents
Quick Start Guide
• This Instruction Manual
It’s as simple as 1, 2, 3 to begin using your new Genee Scope digital microscope!
• Warranty Card
• Hardware: Base Unit and Camera Head
• CD
o Genee Scope™ Viewer Software
o Applied Vision™ 4 (AV4) Software
o AV4 Instruction Manual
Optional Accessories to Order
• USB Extender Cable (VV C16USB)
• Slide Micrometer (SCSMVE)
Operational Requirements
Although this will get you up and running, it is recommended you read the complete
manual.
1. Install the Software
Place the included CD into your computer’s disc drive (with Windows, Macintosh, or
Linux Operating Systems) to begin the auto installation program. The installation
process will take you through a series of screens.
You may also download it from the www.genee-india.com/downloads Web site. The
most recent installation package is always available on the Web site.
NOTE: Because the T-1050 Genee Scope does not require any drivers to operate, the
Genee Scope will work with other viewing programs. The included software is for
viewing, capturing and manipulating digital stills and videos, and for ease of use.
2. Plug in your Genee Scope
• Computer with a USB connection
• Windows, Macintosh or Linux Operating Systems
• 4 AA batteries (not included)
Find the USB port on your computer. Connect the factory-installed USB cable of your
Genee Scope into the corresponding USB port.
3. Launch Genee Scope Program
The Genee Scope camera automatically turns on when a program calls upon the
Genee Scope. Simply turn the upper light on by pressing the silver upper LED light
button located below the USB cable near the top of the camera head. Focus on the
subject matter to begin using your Genee Scope.
If you would like to view slides, 4 AA batteries (not included in the package) are
required for lower light illumination. Open the door on the left side of the base unit
and insert batteries. Once the batteries are installed, press the silver lower LED light
button located on the right side of the base. You can now view transparent subjects.
4
5
Set-up of the Genee Scope Digital
Microscope
The Genee Scope can be set up in a matter of minutes. Follow the step-by-step
directions on how to get the most out of your new teaching tool.
1. After unpacking the Genee Scope from the box, unwrap the unit from the protective plastic bag.
2. Before beginning, let’s review the parts of the Genee Scope microscope:
a.The Camera Head has 4 main features:
i. The gray Camera Head has a capture button on the top of the unit
next to the molded Genee World logo. Use this button to capture still
images. NOTE: another way to capture still images is through the
software.
ii. The turret objectives of 2x, 4x and 10x result in standard magnifications of 20x, 40x and 100x (respectively) under normal screen use.
iii. The silver upper LED light button is located below the factoryinstalled USB cable. Press this button to turn on/off the upper LED
lights located in the turret.
iv. The black 6 foot USB cable is factory-installed and plugs directly into
a USB port. It is through this cable that the camera is powered.
b. The Base Unit has 5 main features:
i. Use the 2 focus knobs on both sides of the base to move the camera
head up and down or to load and eject it. When the camera head is
used off the base, it is an ideal “touch scope”.
ii. The red handle is for carrying the unit and also functions as a cable
wrap for the USB cable when storing the product.
iii. The base has a battery door for installation of four (4) standard “AA”
batteries. These batteries power the center lower illumination for
viewing slides and transparent specimens.
iv. Use the silver lower LED light button located on the base next to the
silicone pad to turn on/off the center lower light.
v. The stage is designed with a revolutionary factory-installed silicone
pad, which does not require standard stage clips and is impervious to
most natural stains.
6
3. Place the Genee Scope within 6 feet from the computer’s USB port on an even surface, allowing the product to sit securely without rocking or tilting. If you need more
distance, a USB extender will allow you to be farther away from your computers’ USB
ports.
4. On the upper back of the camera is the factory-installed USB cable, which has a USB
plug at the end of it. The USB plug fits in only one way and should easily fit into the
USB port. For most computer USB ports, the USB image on the plug should be facing
up or toward you.
5. Close all windows or other programs before running the set up program. Insert the
enclosed CD into your computer’s CD/DVD drive. There are 2 software programs found
on the CD.
a. Genee Scope Viewer Software: The Genee Scope viewer is designed for
everyday use of the Genee Scope microscope. The program will allow you
to capture stills and movies. This software is ideal for use with Netbooks.
b. Applied Vision™ 4 (AV4) Software: If you require a more robust scienceviewing program, AV4 is also available on the CD and may be installed. AV4 is
designed to work on Windows, Macintosh, and Linux operating systems. With
normal configured operating systems, your software installation should begin
without interruption. If you have questions, call the Genee World technical
support hotline at 0870 386 1900 (Option 4).
NOTE: The T-1050 Genee Scope does not require any driver for the installation of the
Software.
6. Launch the appropriate software (Genee Viewer Software or Applied Vision Software) by double clicking on the software icon on your Windows desktop.
a. On Linux, it will be found in the Genee World/Applied Vision folder.
b. On Macintosh, drag it down to your Docking Tray for easier access and launch.
7. The software begins to launch and the “splash screen” appears. You will now be able
to turn on/off the upper LED light button on top of the camera head to illuminate the
turret. The camera is turned on and ready for viewing.
NOTE: The camera is not on unless you have accessed it by opening the software
program that you installed.
7
8. Immediately, the software may ask you to look for an update. Answer “yes” and the
software will automatically go to the Genee World Web site and download the latest
release.
NOTE: Windows requires you have administrative rights to install or update any software. Please see your IT professional if you do not have these rights.
9. When the update is complete, you may be required to re-launch the software.
10. Once Genee Scope is running, you will need to focus the image in view. When the
camera head is mounted in the base, adjust the focus knobs on either side of the unit
until the specimen comes into focus.
Set the camera to 2x, position the coin in the center of the clear disc, and then
double click the Genee Scope program on your desktop. Press the upper LED light
button on the camera to turn on the upper lights. Check to see if you have a focused
magnified image of your coin. If you do not have the image focused, turn the focus
knobs counter clockwise until the camera head almost touches the stage area of the
base. Slowly move the focus knobs clockwise until the coin on your screen comes
into focus. Once you have achieved a focused image of the coin, now try it with
other “opaque” specimens.
If you have an Interactive Whiteboard (IWB) or Tablet, take a look using your Genee
Scope with an IWB. The product is compatible with IWB software in addition to the
included Genee Scope Viewer Software and Applied Vision 4 Software.
11. To use the camera in the “Hands-On” mode or “off” of the base, simply turn the
focus knobs clockwise while the head moves farther away from the base surface. When
the camera head no longer moves up, lift the camera head off the base.
Using Genee Scope “off” the Base
You are now up and running. To turn off the Genee Scope, simply close the program and
the camera will shut off. You do not need to unplug your camera when not in use.
The unique design of the T-1050 Genee Scope allows you to use it as a hand-held
microscope or a touch scope. Take the Genee Scope into the field with a laptop.
Move around a classroom to view items not available to be placed on your stage. To
accomplish this, you will need to:
Using the Camera
1. Turn the focus knobs clockwise until the camera head is at the highest and
Now that your Genee Scope is set up, let’s explore how easy it is to use.
If you can use a mouse, then you can use this camera. The camera can be used as:
• A Stereo Microscope
• A Touch Scope (Off the Base)
• A Light Microscope
• A Distance Learning Tool
farthest point away from the silicone stage.
The applications for using the Genee Scope are endless. If you can imagine something
and you can’t do it, let us know. Perhaps, we can incorporate your imagination into
future software upgrades.
5. Approach the object with the camera. Press the capture button to take a still shot.
Using Genee Scope as a Stereo Microscope
After installation, the best way to begin using your Genee Scope is to choose a familiar
specimen, such as a coin.
Place the coin on top of the center lower light of the silicone stage pad. This is the
centre of the camera’s view.
Next, turn the turret so that the 2x is aligned with the indented indicator on the camera
housing. You will hear a click. Practice turning this turret to the predefined settings of
2x, 4x, and 10x before using for the first time.
8
2. The camera head should be grasped in one hand and pulled out of the base.
Continue turning the focus knobs to facilitate the removal of the head.
3. With the camera in the hand, position the camera so that a finger is available to
push the capture button on the top of the head.
4. Make sure the turret is adjusted to 2x to begin your exploration.
6. Review the image of your object, is it in focus? You may need to adjust the
distance from the camera to the object.
7. After you have confirmed you can see an image through the 2x, adjust the turret
to the other magnifications, 4x and 10x.
8. Now snap a picture with your finger. The image is now on your screen, captured
for further study, exploration, saving, etc.
Using Genee Scope as a Light Microscope
The Genee Scope is a first class light microscope.
1. With the software engaged and the camera functioning, prepare to “holster” the
camera head into the base.
9
2. Position the camera head in the top hole of the base, making sure that the dove
tails are aligned. The unit will slide into the dove tails and stop. Continue to gently
push the head into the base, or use the focus knobs to return the unit to the base.
3. Once the unit is in the base, move the knobs or push on the top of the unit so the
camera head rests against the stage of the base. This is the ideal storage for the
unit, as no debris can enter into the objectives found in the turret.
4. When ready to use, simply rotate the focus knobs clockwise to create a distance
between the stage and the turret. The camera is designed to have a working
distance of 25mm from the stage.
5. Move the camera head and turret far enough away so you can place your specimen under the turret.
6. Place the slide so the center of the specimen is over the center lower light of the
base.
7. With the batteries already installed, press the lower light button on the base so
that the lower light under the clear portion of the stage illuminates.
8. Make sure the upper light of the camera is now turned off at this time.
9. Begin by turning the focus knobs counter clockwise so the turret is nearly touching the slide. Now slowly begin turning clockwise raising the turret away from the
slide while watching the image on your computer screen.
10. As the image comes into focus, fine adjusting may be required.
Storing your Genee Scope
The Genee Scope is self contained and does not require a special dust cover or box.
Simply:
1. After use, wipe down the Genee Scope with a water dampened cloth.
2. Turn the focus knobs to move the camera head to its lowest position resting
against the silicone stage pad.
3. Wrap the USB cable around the red handle and secure it with the cord clip.
Thank you for your purchase and for choosing Genee Scope from Genee World.
Making Small Things Big
One of the greatest tasks in teaching is to share a small item in a big class. With the
magnification capacity of 20x, 40x and 100x, Genee Scope together with a projection
system’s further enlargement, can create an enormous image.
Servicing your Genee Scope
Your Genee Scope has 2 moving parts, with no lubricated or sealed areas.
The base unit has a moving rubber wheel with a rubber focus tread turned by the
focus knobs. It is important that you DO NOTHING to the rubber wheel. Simply keep
grit and dirt out of it by brushing it off prior to using it.
The turret housing the objective lenses (2x, 4x and 10x) is also a moving part, and
requires that you DO NOTHING to it.
10
11