1
Table of Contents
End User License Agreement
Warranty
I
V
Introduction
1
Why Choose Click ‘N Stitch Xtra with
Applique
2
Icons Used in This Manual
3
Terms Used in This Manual
4
Installation
Computer Requirements
Software Installation
Registration
Start Program
5
6
7
9
13
File Formats
Embroidery Formats
Graphic Formats
15
16
19
General Operations
Drop-Down Menus
File Menu
View Menu
Options Menu
Preferences
Digitizing Parameters
Help Menu
23
25
25
31
33
34
37
38
Table of Contents
General Operations (cont)
Tool Bars
Main Tool Bar
Color Bar
Status Bar
39
40
42
44
Auto Digitizing
Quick Start Lesson
Features
Auto Digitizer Wizard
Select Image
Image Transformations
Set Image Size
Crop Image
Transform Image
Color Reduction
Vectorize
Judgment
45
46
54
63
63
67
68
69
70
71
76
78
Cross Stitch
Quick Start Lesson
Cross Stitch Wizard
Select Image
Image Transformations
Set Image Size
Color Reduction
Edit Image
Outlines
Preview
85
86
96
96
100
101
104
108
111
112
Table of Contents
Applique
Introduction
Applique Wizard
Applique methods
Quick Start Lessons
Add to Existing Design
Magic Wand
Manual Method
Outer Path
MS Paint®
Resequence
Wizard Tools
Wizard Settings
115
116
117
118
MS Paint
Graphic Editing
Drop-Down Menus
File Menu
Edit Menu
View Menu
Image Menu
Colors Menu
Help Menu
Tool Box
147
148
150
151
151
153
154
155
155
156
120
123
125
129
131
141
144
146
Table of Contents
Warranty
○ ○ ○ ○ ○ ○ ○ ○ ○ ○ ○ ○ ○ ○ ○ ○ ○ ○ ○ ○ ○ ○ ○ ○ ○ ○ ○ ○ ○
Items found in this Section:
1.
2.
Your Warranty
End User Agreement
II
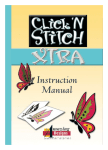
Click ‘N Stitch Xtra with Applique
End User License Agreement
IMPORTANT-READ CAREFULLY:
LICENSE AGREEMENT
ATTENTION: THIS IS A LICENSE, NOTA SALE. THIS PRODUCT IS PROVIDED UNDER THE
FOLLOWING LICENSE AGREEMENTAND ALLAPPLICABLE ADDENDA ("LICENSE") WHICH
DEFINES WHAT YOU MAY DO WITH THE PRODUCTAND CONTAINS LIMITATIONS ON
WARRANTIES AND/OR REMEDIES. THIS LICENSE IS GRANTED BYACTION TAPES, INC., A
TEXAS CORPORATION DOING BUSINESSAS GREAT NOTIONS, FOR PRODUCTS
PURCHASED IN NORTHAMERICA.
THIS LICENSE INCLUDES THE FOLLOWING:
1. GENERAL LICENSE AGREEMENT
2. ACTION TAPES, INC. GUIDELINES FOR THE USE OF IMAGES
3. OEM VERSION ADDENDUM TO THE GENERAL LICENSE
AGREEMENT
GENERAL LICENSE AGREEMENT
IMPORTANT: CAREFULLY READ THIS LICENSE BEFORE USING THIS PRODUCT.
INSTALLING, COPYING, OR OTHERWISE USING THIS PRODUCT INDICATES YOUR
ACKNOWLEDGMENT THAT YOU HAVE READ THIS LICENSE AND AGREE TO BE BOUND
BY AND COMPLY WITH ITS TERMS. IF YOU DO NOTAGREE, RETURN THE COMPLETE
PRODUCTAND ALL PACKAGING MATERIALS TO ACTION TAPES, INC., ATTN: CUSTOMER
SERVICE, 2751 ELECTRONIC LANE, DALLAS, TX 75220, WITHIN TEN (10) DAYS OF THE
DATE YOU ACQUIRED IT FOR A FULL REFUND. THIS LICENSE AGREEMENT IS YOUR
PROOF OF LICENSE. PLEASE TREAT IT AS VALUABLE PROPERTY.
A. LICENSE:
ACTION TAPES, INC. ("we" or "us") provides you with digital media containing a
computer program, computer software,
including its code, objects (including any images, photographs, templates,
script, and/or "applets" incorporated into the software), the accompanying
printed materials, a License, and "online" or electronic documentation (together
called the "Product") and we grant you a license to use the Product in
accordance with the terms of this License. Any supplemental software code
and supporting materials provided to you as part of Action Tapes, Inc.'s support
shall be considered part of the Product and subject to the terms and conditions
of this License.
Warranty
III
The copyright and all other rights to the Product shall remain with us and/
or our licensors. You must reproduce any copyright or other notice marked
on the Product on all copies you make.
B. YOU MAY:
1. Install and use one (1) copy of the Product on a single computer. You
may also make and use a second copy of the Product on a home or
portable computer provided that copy is never loaded in the RAM of the
home or portable computer at the same time it is loaded in the RAM of the
primary computer.
2. Also store or install a copy of the Product on a storage device, such as
a network server, used only to install or run the Product on your other
computers over an internal network; however, you must acquire and
dedicate a license for each separate computer on which the Product is
installed or run from the storage device. A license for the Product may not
be shared or used concurrently on different computers.
3. Make one (1) copy of the Product for archive or backup purposes.
4. If this Product includes Clipart and/or Photo images, use the Clipart
and/or Photo images only if you comply with the terms set out in the
ACTION TAPES, INC. Guidelines for the Use of Clipart and Professional
Images, included hereinbelow.
5. Except in the case of OEM edition Products which are non-transferable
(see OEM Version Addendum), transfer the Product to someone else only if
you assign all of your rights under this License, cease all use of the
Product, erase or destroy any copy (including the hard disk copy) made in
support of your use of the Product, and ensure that the person to whom
you wish to transfer the Product agrees to the terms of this License.
6. If you have purchased this Product as an upgrade of either an ACTION
TAPES, INC. product or another vendor's product, you may continue to use
your upgraded product with this Product. If you transfer this Product, you
must either transfer this upgraded product at the same time you transfer
the Product, or destroy the upgraded product at the same time you transfer
the Product. If the Product you have purchased is an upgrade of an
ACTION TAPES, INC.
IV
Click ‘N Stitch Xtra with Applique
product, you now may use that upgraded product only in accordance with this
License.
7. Use only one (1) of the language versions, if the Product provides you with
a selection of Multiple Language Versions.
8. Use this Product in conjunction with the copyrighted material of some third
party, so long as you (a) do not use the logo, name, or trademarks of ACTION
TAPES, INC. or its licensors (b) include a valid copyright notice on the Image
and/or design used, and (c) indemnify ACTION TAPES, INC. and its licensors
against any claims or lawsuits arising from your use or distribution of the
Image and/or design in any product that you create and/or distribute. ACTION
TAPES, INC. assumes no responsibility or liability for the distribution of such
material, as you (and not ACTION TAPES, INC.) assume all responsibility and
liability for the content of such materials and for suitability of the Product for the
receipt of such materials.
C. YOU MAY NOT:
1. Use the Product or make copies of it, except as permitted in this License.
2. Translate, reverse engineer, decompile, and/or disassemble the Product,
except to the extent the foregoing restriction is expressly prohibited by
applicable law.
3. Rent, lease, assign, and/or transfer the Product, except as specifically set
out in Paragraph B above.
4. Modify the Product or merge all or any part of the Product with another
program.
5. Redistribute the fonts or image files included with the Product.
6. Separate the component parts of the Product for use on more than one (1)
computer.
If this Product is OEM:
7. You may not use or copy the Product if you received the Product as a standalone. The Product must be purchased in conjunction with the ACTION TAPES,
INC. approved partner products or services described in the Warning located
on the Product storage media.
Warranty
D. TERM:
This License shall remain in effect only for so long as you are in full and
complete compliance with the terms and conditions of this Agreement. This
License will terminate if you fail to comply with any of its terms or conditions.
You agree, upon termination, to destroy all copies of the Product. The
Limitations of Warranties and Liability set out below shall continue in full
force and effect, even after any termination.
E. WARRANTY:
WE WARRANT THAT THE MEDIA IN THIS PRODUCT WILL BE FREE FROM
DEFECT IN MATERIALS AND WORKMANSHIP FOR NINETY (90) DAYS
FROM THE DATE YOU ACQUIRE IT. IF SUCH A DEFECT OCCURS, RETURN THE MEDIA TO US AT: ACTION TAPES, INC., ATTN: CUSTOMER
SERVICE, 2751 ELECTRONIC LANE, DALLAS, TX 75220, AND WE WILL
REPLACE IT FREE OF CHARGE. THIS REMEDY IS YOUR EXCLUSIVE
REMEDY FOR BREACH OF THIS WARRANTY. IT GIVES YOU CERTAIN
RIGHTS AND YOU MAY HAVE OTHER LEGISLATED RIGHTS WHICH MAY
VARY FROM JURISDICTION TO JURISDICTION.
F. LIMITATION OF WARRANTIES AND LIABILITY:
EXCEPT FOR THE EXPRESS WARRANTY SET FORTH HEREINABOVE, THE
PRODUCT IS PROVIDED ON AN "AS IS" BASIS, WITHOUT ANY OTHER
WARRANTIES OR CONDITIONS, EXPRESS OR IMPLIED, INCLUDING, BUT
NOT LIMITED TO, WARRANTIES OF MERCHANTABLE QUALITY, SATISFACTORY QUALITY, MERCHANTABILITY OR FITNESS FOR A PARTICULAR
PURPOSE, OR THOSE ARISING BY LAW, STATUTE, USAGE OF TRADE,
COURSE OF DEALING OR OTHERWISE. THE ENTIRE RISK AS TO THE
RESULTS AND PERFORMANCE OF THE PRODUCT IS ASSUMED BY YOU.
NEITHER WE NOR OUR DIRECTORS, OFFICERS, AGENTS, LICENSORS,
CONTRACTORS, DEALERS AND/OR SUPPLIERS SHALL HAVE ANY LIABILITY TO YOU OR ANY OTHER PERSON OR ENTITY FOR ANY INDIRECT,
INCIDENTAL, SPECIAL, OR CONSEQUENTIAL DAMAGES WHATSOEVER,
INCLUDING, BUT NOT LIMITED TO, LOSS OF REVENUE OR PROFIT, LOST
OR DAMAGED DATA OR OTHER COMMERCIAL OR ECONOMIC LOSS, EVEN
IF WE HAVE BEEN ADVISED OF THE POSSIBILITY OF SUCH DAMAGES, OR
THEY ARE FORESEEABLE. WE ARE ALSO NOT RESPONSIBLE FOR
CLAIMS BY A THIRD PARTY. OUR MAXIMUM AGGREGATE LIABILITY TO YOU
AND THAT OF OUR DIRECTORS, OFFICERS, AGENTS,
V
VI
Click ‘N Stitch Xtra with Applique
LICENSORS, CONTRACTORS, DEALERS AND SUPPLIERS SHALL NOT
EXCEED THE AMOUNT PAID BY YOU FOR THE PRODUCT. THE LIMITATIONS IN THIS SECTION SHALL APPLY WHETHER OR NOT THE ALLEGED BREACH OR DEFAULT IS A BREACH OF A FUNDAMENTAL
CONDITION OR TERM OR A FUNDAMENTAL BREACH. SOME STATES/
COUNTRIES DO NOT ALLOW THE EXCLUSION OR LIMITATION OF
LIABILITY FOR CONSEQUENTIAL OR INCIDENTAL DAMAGES, SO THE
ABOVE LIMITATION MAY NOT APPLY TO YOU.
G. U.S. GOVERNMENT RIGHTS:
With respect to any acquisition of the Product by or for any unit or agency of
the United States Government (the "Government"), the Product shall be
classified as "commercial computer software", as that term is defined in
the applicable provisions of the Federal Acquisition Regulation (the "FAR")
and supplements thereto, including the Department of Defense (DoD) FAR
Supplement (the "DFARS"). The Product was developed entirely at private
expense, and no part of the Product was first produced in the performance
of a Government contract. If the Product is supplied for use by DoD, the
Product is delivered subject to the terms of this Agreement and either (i) in
accordance with DFARS 227.7202-1 (a) and 227.7202-3 (a), or (ii) with
restricted rights in accordance with DFARS 252-227-7013 (c) (1) (ii) (OCT
1988), as applicable. If the Product is supplied for use by a Federal
agency other than DoD, the Product is restricted computer software
delivered subject to the terms of this Agreement and (i) FAR 12.212{a}; (ii)
FAR
52.227-19; or (iii) FAR 52.227-14 (AIT III), as applicable. The
contractor/manufacturer is ACTION TAPES, INC., a Texas corporation doing
business as Great Notions, 2751 Electronic Lane, Dallas, TX 75220.
H. EXPORT CONTROLS:
If the Product is identified as a not-for-export product (for example, on the
box, media or during the installation process), then, unless you have
exemption from the United States Department of Commerce or other
regulatory authority, as may be designated from time to time, the following
applies: EXCEPT FOR EXPORT TO CANADA FOR USE IN CANADA BY
CANADIAN CITIZENS, THE PROGRAM MAY NOT BE EXPORTED OUTSIDE
OF THE UNITED STATES OR TO ANY FOREIGN ENTITY OR "FOREIGN
Warranty
VII
PERSON" AS DEFINED BY THE U.S. GOVERNMENT REGULATIONS,
INCLUDING WITHOUT LIMITATION, ANYONE WHO IS NOT A CITIZEN,
NATIONAL OR LAWFUL PERMANENT RESIDENT OF THE UNITED
STATES. BY AGREEING TO THE TERMS OF THIS LICENSE YOU ARE
WARRANTING TO ACTION TAPES, INC. THAT YOU ARE NOT A "FOREIGN
PERSON" OR UNDER THE CONTROL OF A "FOREIGN PERSON".
I. GENERAL:
This License is the entire agreement between us, superseding any other
agreement, and any discussions, oral or written, and may not be changed
except by a signed written agreement. This License shall be governed by
and construed in accordance with the laws of the State of Texas, excluding
that body of law applicable to choice of law and excluding the United
Nations Convention on Contracts for the International Sale of Goods and
any legislation implementing such Convention, if otherwise applicable. If
any provision of this License is declared by a Court of competent
jurisdiction to be invalid, illegal, or unenforceable, such a provision shall
be severed from the License and the other provisions shall remain in full
force and effect. Venue for any litigation brought relating to the Product or to
this License shall be in Dallas, Texas.
ACTION TAPES, INC. GUIDELINES FOR THE USE OF CLIPART
AND STOCK PHOTO IMAGES
ACTION TAPES, INC.'s Products may contain numerous clipart and
images (collectively referred to as the "Images") which are either owned by
ACTION TAPES, INC. or are licensed from a third-party. As a user of
ACTION TAPES, INC. products, you are free to use, modify and publish the
Images as you wish, subject to the restrictions set out below. If you are
uncertain as to whether your intended use is in compliance with the
Guidelines set out below, we recommend that you seek the advice of your
own attorney or legal counsel. ACTION TAPES, INC. will not provide you
with an opinion as to whether your use is in compliance with these
Guidelines.
VIII
Click ‘N Stitch Xtra with Applique
A. YOU MAY, subject to any restrictions set out below:
1.
Incorporate any Image(s) into your own original work and publish,
display and distribute your work in any media; provided you include a
copyright notice in your work reflecting on the copyright ownership of both
you and ACTION TAPES, INC. as follows:
"Copyright (c) 20___ Action Tapes, Inc., its licensors and (YOUR NAME). All
rights reserved."
You may not, however, resell, sublicense or otherwise make available the
Image(s) for use or distribution separately or detached from the Product.
The Images may not be uploaded and/or downloaded to the Internet in any
format.
2.
Make one (1) copy of the Image(s) for backup or archival
purposes.
B.
YOU MAY NOT:
1.
Create scandalous, obscene, defamatory or immoral works using
the Image(s), nor use the Image(s) for any other purpose which is
prohibited by law;
2.
Use or permit the use of the Image(s) or any part thereof as a
trademark or service mark, or claim any proprietary rights of any sort in the
Image(s) or any part thereof;
3.
Use any of the Image(s) related to identifiable individuals or
entities for any commercial purpose or in a manner which suggests their
association with or endorsement of any product or service;
4.
Use the Image(s} in electronic format, on-line or in multimedia
applications unless the Image(s) are incorporated for viewing purposes
only and no permission is given to upload, download and/or save the
Image(s) for any reason;
5.
Rent, lease, sublicense or lend the Image(s), or a copy thereof, to
another person or legal entity. You may, however, transfer all your license
to use the Image(s) to another person or legal entity, provided that (i) you
transfer the Image(s) and this License, including all copies (except copies
incorporated into your work product as permitted under this License), to
such person or entity, (ii) that you retain no copies, including copies stored
on a computer or other storage device, and (iii) the receiving party agrees
Warranty
IX
to be bound by the terms and conditions of this License;
6.
Use the Product to violate any intellectual or other property right(s),
including copyrights;
7.
Use any Image(s), except as expressly permitted by this License.
Government Crests, Seals and Other Official Insignia
The national, state, local, and municipal insignia which may be contained
in this Product are protected by various laws against misuse. Generally
speaking, all logos, insignia, patches, seals, flags and coats of arms are
for official use only. It is your responsibility to obey all national and
international laws regulating display of the insignia, seals, flags and coats
of arms contained herein.
OEM EDITION ADDENDA TO THE GENERAL
LICENSE AGREEMENT
OEM PRODUCT IS SOLD UNDER LICENSE IN CONJUNCTION WITH
ACTION TAPES, INC.'s APPROVED PARTNER PRODUCTS OR SERVICES
WHICH ARE DESCRIBED IN THE WARNING LOCATED ON THE
STORAGE MEDIA. IF THIS PRODUCT IS IDENTIFIED AS AN OEM EDITION,
YOUR USE OF THIS PRODUCT IS GOVERNED BY THE TERMS OF THE
GENERAL LICENSE AGREEMENT AS MODIFIED BY THE TERMS OF THIS
OEM EDITION ADDENDUM TO THE GENERAL LICENSE AGREEMENT. IN
THE EVENT OF ANY CONFLICT BETWEEN THE TERMS OF THE
GENERAL LICENSE AGREEMENT AND THIS OEM EDITION ADDENDUM,
THE TERMS OF THIS OEM ADDENDA TO THE GENERAL LICENSE
AGREEMENT SHALL GOVERN.
NOTWITHSTANDING ANYTHING TO THE CONTRARY IN THE GENERAL
LICENSE AGREEMENT, YOU MAY NOT TRANSFER OR ASSIGN THE
PRODUCT OR ANY COPY THEREOF, OR YOUR LICENSE TO USE THE
PRODUCT TO A THIRD PARTY.
Revised February 2002
X
Click ‘N Stitch Xtra with Applique
Introduction
○ ○ ○ ○ ○ ○ ○ ○ ○ ○ ○ ○ ○ ○ ○ ○ ○ ○ ○ ○ ○ ○ ○ ○ ○ ○ ○ ○ ○ ○ ○ ○ ○ ○ ○ ○
About This Manual
Click 'N Stitch Xtra with Applique gives you the
unique ability to convert your favorite images, clip
art or scanned art to embroidery, cross stitch or
applique. This manual is filled with information on
how to use the program, and many time-saving
tips that will make you more productive, efficient
and effective with your embroidery, cross stitch
and applique projects.
Items found in this Section:
1. Why Choose Click 'N Stitch Xtra
with Applique?
2. Icons Used in This Manual
3. Terms Used in This Manual
2
Click 'N Stitch Xtra with Applique
Click ‘N Stitch Xtra with Appliqué has flexible and easy-to-use
features, allowing you to embroidery your favorite clip art in HUS,
CSD, SEW, PES, PCS, PCM, PSW (XXX), EXP, JEF, DST, SHV,
and EMD formats.
Smart Sizer Platinum™ provides sizing and manipulation
of designs along with editing features.
•
Lettering Pro Plus™ creates multiple lines of text in 105
different fonts with arcing, sizing, and other editing
capabilities.
•
Embroidery Links™ gives borders and chaining effects
like you’ve never seen before – perfect for scrapbooking
and unique framing for any embroidery design.
•
Magnificent Monograms™ creates beautiful
monogramming and single lines of text with or without
embellishments.
•
Fast Fills™ changes the fill stitches to any of over 800
pre-programmed fill designs included.
•
The Amazing Box II converts to any of the seven home
sew formats and save to your computer’s hard drive faster
than ever before!
MS Paint
Applique
•
Auto
Digitzing
Now that you’re auto-digitizing, why not go ahead and create the
ultimate embroidery software system! You can do much more
with your designs when you combine the features of other
Amazing Designs software programs with Click ‘N Stitch Xtra with
Appliqué. Each program works on its own or with Click ‘N Stitch
Xtra with Appliqué, giving you the choice of features you want:
Cross Stitch
General File Formats Installation Introduction
Operations
Why Choose Click 'N Stitch Xtra with Applique?
This icon provides information that will save you
time in your day-to-day use of the software and in
some cases the use of your computer.
mber
This icon is placed next to sections of this manual
you should not forget. Pay close attention to
anything with this icon. It may come in handy later.
al Stuff
This icon explains technical components in the use
of the program and computer.
Warning
Technic
Reme
Time S
aving
This icon lets you know of potential dangers and
will warn you about possible pitfalls while using
your computer.
General File Formats Installation Introduction
Operations
This icon indicates helpful tips that enable you to
better understand how the software works.
Auto
Digitzing
This icon indicates a story. These stories help to
explain and simplify problems that may be confusing.
Cross Stitch
Tip
Anecd
o te
Applique
Icons Used in This Book
3
MS Paint
Introduction
4
Click 'N Stitch Xtra with Applique
MS Paint
Applique
Cross Stitch
Auto
Digitzing
General File Formats Installation Introduction
Operations
Terms Used in This Manual
In the Click 'N Stitch Xtra with Applique program,
there are several different ways to activate the
same function or feature: clicking your mouse on a
drop-down menu, clicking on an icon, or in some
cases, using a hot key.
Installation
○ ○ ○ ○ ○ ○ ○ ○ ○ ○ ○ ○ ○ ○ ○ ○ ○ ○ ○ ○ ○ ○ ○ ○ ○ ○ ○ ○ ○
Items found in this Section:
1.
2.
3.
4.
5.
License Agreement
Computer Requirements
Installing Click ‘N Stitch Xtra with
Applique
Registering the Program
Starting the Program
MS Paint
Applique
Cross Stitch
Auto
Digitzing
General File Formats Installation Introduction
Operations
6
Click 'N Stitch Xtra with Applique
Computer Requirements
Recommended Requirements:
Pentium II Processor or higher
Windows® 98 or higher
128 MB Ram
30 MB available hard drive space
CD-ROM Drive
800 x 600 display
Mouse
Figure Inst-1
General File Formats Installation Introduction
Operations
Auto
Digitzing
You may also press the Browse button and click on the
CD-ROM drive. In the window, locate and click on the file
named setup.exe. Once the setup.exe file is highlighted,
press Open. This will copy the file name to the command
prompt. Press the Return or Enter key.
Cross Stitch
1. Begin installation on the Windows Desktop. Close all
open programs.
2. Place the Click 'N Stitch Xtra with Applique CD in the
CD-ROM drive.
3. From the Windows desktop, click on the Start button.
4. Click on the Run button.
5. At the Run prompt, type the letter of your CD-ROM Drive
followed by Setup. (Ex: D:\SETUP or E:\SETUP)
Applique
Software Installation
7
MS Paint
Installation
MS Paint
Applique
Cross Stitch
Auto
Digitzing
General File Formats Installation Introduction
Operations
8
Click 'N Stitch Xtra with Applique
6. Read the entire
license agreement. If
you agree to its terms,
click Next.
Figure Inst-2
7. Enter requested
information, including
the serial number found
on your CD case.
Click Next.
Figure Inst-3
8. For normal
installation Click Next.
Figure Inst-4
9. Click Finish.
Figure Inst-5
Installation
Follow the steps below in order to acquire your
activation code and run Click 'N Stitch Xtra with
Applique. Your software will function for only ten
days without an activation code.
To start the program:
1. Go to Start and click on Programs.
2. Click on Great Notions.
3. Click on Click 'N Stitch Xtra with Applique.
5. The registration information box will
appear. Type in all of requested information,
including the 15 digit serial number located on your
CD, including the dashes.
Example: 0000-00000000-000
Applique
6. After all the registration information has been
entered, there are four ways you may register your
software : Web site, E-mail, Fax or Telephone.
MS Paint
Cross Stitch
Auto
Digitzing
Figure Reg-1
9
General File Formats Installation Introduction
Operations
Registration
MS Paint
Applique
Cross Stitch
Auto
Digitzing
General File Formats Installation Introduction
Operations
10
Click 'N Stitch Xtra with Applique
Warning:
Once registration is complete, you cannot
transfer registration to another person. This
means you cannot sell, trade or give away the
software to any other person. Activation
codes will only be given to registered users of
the software.
1. Website Registration
A.
Type in all requested information,
including the 15 digit serial number
found on your CD, including the
dashes.
Example: 0000-00000000-000
Pay special attention to First Name, MI, Last Name and
Serial Number. Make sure there are no spaces before or
after these four fields and that everything is spelled the way
you want it to be displayed in your software.
B.
Connect to the Internet and go to
http://www.amazingdesigns.com
Go to the Technical Support page. At the
bottom of the page, click on the link “Click here to
go to the Activation Code screen”. The registration
box will appear.
C.
Type in your 15 digit serial number
and click on Submit Query.
Click on Register Now.
2. E-mail Registration
E-mail registration information to
[email protected].
3. Fax Registration
Click on the Print Registration button and
fax the completed form to 214-352-7249.
4. Telephone Registration
Call 800-553-1691 and receive an activation
code from an Amazing Designs Technician.
Telephone support personnel are
available Monday through Friday, 8 a.m. to
9 p.m. Central Time. If you reach our voice
mail system, please leave your name,
telephone number and best time to call.
General File Formats Installation Introduction
Operations
H.
Auto
Digitzing
G.
Cross Stitch
E.
F.
Type in all the information exactly
as it appears in your software,
including registration number.
Click Submit Query.
Write Down your activation
code now.
Run software and type the
activation code in the Activation
Code field.
Applique
D.
11
MS Paint
Installation
Click 'N Stitch Xtra with Applique
When you click on the Register Later
button you will see a warning box as
shown in Figure Reg-2. Click 'N Stitch Xtra
with Applique will work for 10 days without
registering. After that time has expired,
Click 'N Stitch Xtra with Applique will no
longer function.
With a registered copy of Click 'N Stitch Xtra
with Applique, you are licensed for two
personal computers. Steps one through
seven must be followed for each computer.
Because each computer will have a separate
registration number, a new activation code
will be required.
MS Paint
Applique
Cross Stitch
Auto
Digitzing
General File Formats Installation Introduction
Operations
12
Figure Reg-2
Software Transfer. Once registration has been completed
and the software registered, you cannot transfer registration
of SOFTWARE to another person (either an individual or a
single entity). This means you cannot sell, trade, or give
the software to any other person. Activation codes will only
be given to registered users of this software.
Follow the steps below in order to run your Click 'N
Stitch Xtra with Applique software.
To start the program:
1. Go to Start.
2. Click on Programs.
3. Click on Great Notions.
4. Click on Click 'N Stitch Xtra with Applique.
Applique
MS Paint
Figure RM-1
Cross Stitch
Auto
Digitzing
After clicking OK on the Registration screen, Click
'N Stitch Xtra with Applique will appear on your
screen as shown in Figure RM-1. Your Click 'N
Stitch Xtra with Applique software is properly
installed and is ready to use.
13
General File Formats Installation Introduction
Operations
Installation
MS Paint
Applique
Cross Stitch
Auto
Digitzing
General File Formats Installation Introduction
Operations
14
Click 'N Stitch Xtra with Applique
File Formats
○ ○ ○ ○ ○ ○ ○ ○ ○ ○ ○ ○ ○ ○ ○ ○ ○ ○ ○ ○ ○ ○ ○ ○ ○ ○ ○ ○ ○ ○ ○ ○ ○ ○ ○ ○
Items found in this Section:
1.
2.
Embroidery Formats
Graphic Formats
16
Click 'N Stitch Xtra with Applique
MS Paint
Applique
Cross Stitch
Auto
Digitzing
General File Formats Installation Introduction
Operations
Embroidery Formats
There are many different embroidery formats that
Click 'N Stitch Xtra with Applique will save to. You will
find them listed below.
DST (*.dst)
A “DST” file is an expanded file format that works with the
Tajima embroidery machine.
CSD (*.csd)
A “CSD” file is an expanded file format that works with
Toyota POEM and Singer Embroidery Unlimited.
EXP (*.exp)
An “EXP” file is one of the expanded file formats that works
with the Melco embroidery machine.
HUS (*.hus)
A “HUS” file is an expanded file format that works with
Viking Customizer software.
JEF (*.jef)
A “JEF” file is an expanded file format that works with the
Janome Digitizer 10000 and Digitizer 10001 software.
PCM (*.pcm)
A “PCM” file is an expanded file format that works with
Pfaff Macintosh software.
SEW (*.sew)
A “SEW” file is an expanded file format that works with
Janome Scan-n-Sew PC and Elna Envision Scan PC.
XXX (*.xxx)
A “XXX” file is an expanded file format that works with
Singer PSW
EMD (*.emd)
An “EMD” is an exanded file format that works with
Singer PSW 2.0 Digitgizing sofware and Elna
Xpressive software.
In the Preferences dialog under Options, if you want
to save as Siner .emd, select box “save EMD as
Singer”. If you want to save as Elna .emd, deselect
this option.
SHV (*.shv)
A “SHV” is an expanded file format that works with the
Viking 3D Professional software.
General File Formats Installation Introduction
Operations
A “PES” file is an expanded file format that works with
Baby Lock Palette, Bernina Wizard and Brother PE-Design
software.
Auto
Digitzing
PES (*.pes)
Cross Stitch
A “PCS” file is an expanded file format that works with
Pfaff PC-Designer V2.0 and V2.1 software.
Applique
PCS (*.pcs)
17
MS Paint
File Formats
MS Paint
Applique
Cross Stitch
Auto
Digitzing
Click 'N Stitch Xtra with Applique
mber
Reme
General File Formats Installation Introduction
Operations
18
An expanded format is any format that will not
regenerate new stitches when resized. This
means that if you reduce an expanded design,
the stitch count will not change. What happens is
that the stitches will get closer together and you
may end up with thread or needle breakage and/
or damage to your garment. One way to avoid
this problem is to use stitch processing software
like Smart Sizer Platinum from Amazing Designs.
While in the AutoDigitizer Wizard, when you click on
“Select Image”, you must choose the type of file that you
wish to open in the “Files of Type” box in order to see the
file names. In other words, if you want to open a BMP
image, you must select “Bitmap” or “Windows Bitmaps
(BMP)” from the drop-down selections in the “Files of
Type” window. If a different type of file is showing in the
“Files of Type” box, the BMP files will not be visible and
available for selection.
General File Formats Installation Introduction
Operations
Auto
Digitzing
The best artwork for making appliques has just a few
colors and no continuous outline. There should also be
areas that are large enough to use a piece of fabric as a
stand-in for stitches. It may be necessary to edit artwork
with a continuous outline before converting it to an applique,
so there won’t be a double border. A simple solution is to
edit the outline in the Paint® program, found in the
Accessories folder on all Windows®-based computers.
(refer to MS Paint section of manual)
Cross Stitch
There are many different graphic formats that Click n
Stitch Xtra with Applique will convert into embroidery,
cross stitch and applique.
Applique
Suitable Artwork
19
MS Paint
File Formats
20
General File Formats Installation Introduction
Operations
Supported Artwork Formats
Bitmap Images - BMP, JPG, TIF
When this choice is selected, all types of bitmap artwork
will be available, including those with the extensions JPG and
TIF. Bitmap images are created using small squares called
pixels. All scanned images are bitmap images unless converted
to a vector art format using special software.
Vector
Auto
Digitzing
Vector images are generally cleaner and more precise
than bitmapped images. These images are created using
special software pakages such as Corel Draw®, Adobe
Illustrator® and Adobe Freehand®. The shapes are
editable using key points and it is simple to make changes to
color, line width and other characteristics.
Vector formats include ai, cdr, cmx, emf, wmf, which
are also shown elsewhere on the “Files of Type” list.
Cross Stitch
Adobe Illustrator
Vector files created in the program Adobe Illustrator
have the extension AI. If you don’t see or can’t open a file
with this extension, try saving it as a format version
compatible with an earlier version of Illustrator.
Warning
Applique
MS Paint
Click 'N Stitch Xtra with Applique
When using a Corel Draw file, it is important to
know that only Corel Draw 5 files can be used.
If you are using Corel Draw 6, or higher, you can
save your Corel files to version 5. For more
information refer to your Corel documentation.
Windows Metafiles - EMF, WMF
These vector files will also be displayed under the “Files of
Type” heading “Vector”. The format extension EMF represents
Enhanced Metafiles which is a newer format than WMF, which
represents Windows Metafiles.
Windows Bitmaps - BMP
Also called “raster” artwork, these images are made up of
small squares of color. Windows-compatible bitmapped art
will be displayed under this heading.
JPEG images - JPG
JPEG stands for Joint Photographic Experts Group format.
When this heading is highlighted, only images with the JPG
extension will be available.
General File Formats Installation Introduction
Operations
EPS stands for Encapsulated PostScript. PostScript is the
universal language used by computer printers as well as
professional printers. EPS files can be opened or inserted
into many software applications, such as Microsoft Word®.
This format will also be displayed under “Files of Type”
heading Vector
Auto
Digitzing
Postscript - EPS
Cross Stitch
Corel Draw images can be used in Click n Stitch Xtra with
Applique, however the files must be created in a format
compatible with version 5 or lower.
Applique
Corel Draw - CDR, CMX
21
MS Paint
File Formats
22
Click 'N Stitch Xtra with Applique
MS Paint
Applique
Cross Stitch
Auto
Digitzing
General File Formats Installation Introduction
Operations
TIF Images - TIF
This extension represents Tagged Image File Format.When
this heading is highlighted, only images with the TIF or TIFF
extension will be available.
PCX Images
This format is associated with ZSoft® IBM PC Paintbrush®.
It is one of the oldest bitmapped formats and was used in
MS-DOS paint programs that first appeared in the early
1980’s. When this heading is highlighted, only images with the
PCX extension will be available.
MAC Images
Macintosh® image file format created in the Macintosh®
program MacPaint®.
Photo CD - PCD
Fomat used to store scanned photos, associated with Kodak®
Photo CD® . When this heading is highlighted, only images
with the PCD extension will be available.
Pict - PCT
This extension stands for Picture format, a popular Macintosh
graphics format. When this heading is highlighted, only images
with the PCT extension will be available.
General Operations
○ ○ ○ ○ ○ ○ ○ ○ ○ ○ ○ ○ ○ ○ ○ ○ ○ ○ ○ ○ ○ ○ ○ ○ ○ ○ ○ ○ ○ ○ ○ ○ ○ ○ ○ ○ ○ ○ ○
Items found in this Section:
1.
General Operations of the
Click ‘N Stitch Xtra with Applique
software that are common to
auto digitizing, cross stitch and
applique operations.
MSPaint
Paint
MS
Applique Cross
CrossStitch
Stitch
Applique
Auto
General File Formats Installation Introduction
Auto
General
File Formats Installation Introduction
Digitzing Operations
Operations
Digitzing
24
Click ‘N Stitch Xtra with Applique
General Operations
This section features functions common to both the
Autodigitizer Wizard, Cross Stitch Wizard and Applique
Wizard. All these functions are accessible through the
main screen below.
Figure GO-1
Main Screen
Drop-Down Menus
You will find four Drop-Down menus in Click ‘N Stitch
Xtra with Applique:
Figure GO-2
Applique
File Open
Click on File Open to open a saved design.
MS Paint
File New
Click File New to start a new page.
Cross Stitch
Auto
Digitzing
File Menu
25
General File Formats Installation Introduction
Operations
General Operations
MS Paint
Applique
Cross Stitch
Auto
Digitzing
General File Formats Installation Introduction
Operations
26
Click ‘N Stitch Xtra with Applique
Save As
Click File, then Save As to name your design and
save it to the desired folder.
Figure GO-3
The “Save As” box in Figure GO-3, displays several
items:
To the right of “Save in” at the top, you will see the name of
the folder or sub-directory that the file will save in.
Click on the arrow to show the list of sub-directories as
shown in Figure GO-4.
Figure GO-4
There are multiple file formats you may select from when
saving a file:
DOS Expanded (*.exp)
Tajima (*.dst)
Babylock/Bernina/Brother (*.pes)
Pfaff (*.pcs)
Pfaff Macintosh (*.pcm)
Viking (*.hus)
Janome (*.sew)
Janome (*.jef)
Poem/Singer EU (*.csd)
Singer (*.xxx)
Elna (*.emd)
Viking D1 (*.shv)
General File Formats Installation Introduction
Operations
Figure GO-6
Auto
Digitzing
To the right of “Save as type” you can choose what type
of embroidery format you wish save to.
Cross Stitch
Figure GO-5
Applique
Type the name of the design in “File name” as shown in
Figure GO-5.
27
MS Paint
General Operations
Click ‘N Stitch Xtra with Applique
After typing the name of the design in “File
name” (Figure GO-6), click the Save button and the design
will be saved to the destination set in Figure GO-4.
Click the Cancel button, to cancel the “Save
As” command.
Print (Ctrl+P)
Click File, then Print to print a copy of your design.
Not only will the design print out, but Page One will show
the file name, the size, number of stitches and the color
sequence. Page Two is a template of the design.
Print Preview
Click File, then Print Preview to display how the printed
pages will appear (Figure GO-7).
MS Paint
Applique
Cross Stitch
Auto
Digitzing
General File Formats Installation Introduction
Operations
28
Figure GO-7
Figure GO-8
Cross Stitch
Click the Next Page button to
display the Template from Page Two. The Prev Page will
take you back to the previous page, if applicable.
Click the Two Page button to show a preview
of both pages as shown in Figure GO-9.
MS Paint
Click the Print button to print the instruction
sheets to your printer.
Applique
On the right side of the screen (Figure GO-8), you will
notice the file name, the size of the design in millimeters and
inches, stitch count, number of colors and the order the
colors are to be sewn out.
General File Formats Installation Introduction
Operations
When viewing the “Print Preview” screen, there are some
things to note (Figure GO-8):
29
Auto
Digitzing
General Operations
MS Paint
Applique
Cross Stitch
Auto
Digitzing
General File Formats Installation Introduction
Operations
30
Click ‘N Stitch Xtra with Applique
Figure GO-9
Click the One Page button to bring the “Print
Preview” screen back to one page.
Click the Zoom In button to zoom in as shown
in Figure GO-8.
Click the Zoom Out button to zoom out as
shown in Figure GO-9.
Click the Close button to close the “Print
Preview” screen.
Print Setup
Click File, then Print Setup to bring up the print dialog
box as shown in Figure GO-10.
Figure GO-10
If you have not saved your work, you will be asked
to do so.
View Menu
Zoom
Click View, then Zoom to choose to zoom in on the design,
zoom out, or return to the actual size of the design.
Realistic View
Click View, then Realistic to enable you to view all the
stitches and their angles. If this function is not checkmarked,
the design will look like a line drawing as opposed to stitches.
A checkmark denotes “Realistic” active.
General File Formats Installation Introduction
Operations
Tip
Click File, then Exit to close Click ‘N Stitch Xtra with
Applique.
Auto
Digitzing
Exit
Cross Stitch
You will be able to change the type of printer,
properties, paper size and orientation within print
setup.
Applique
Technic
al
Stuff
31
MS Paint
General Operations
Auto
Digitzing
General File Formats Installation Introduction
Operations
32
Click ‘N Stitch Xtra with Applique
Toolbar
Figure GO-11
(Top of Screen)
Click View, then Toolbar to add or remove the “Toolbar”
options from the screen. A checkmark denotes the toolbar
is active.
The “Toolbar” is the row of icons found at the top of the
screen. As a default, they are always selected “On.”
Status Bar
Figure GO-12
MS Paint
Applique
Cross Stitch
(Bottom of Screen)
Click View, then Status Bar to add or remove the “Status
Bar” options from the screen. A checkmark denotes the
toolbar is active.
The “Status Bar” is the row found on the bottom of the
active screen. As a default, they are always “On.”
Tip
The workspace grid will increase or decrease in
size to show the work area available for that
particular machine and hoop size.
Each square of the grid equals 10 millimeters by
10 millimeters (10mm x 10mm). The design you
select must fit within the work space.
General File Formats Installation Introduction
Operations
Figure GO-13
Auto
Digitzing
Click Options, then Hoop Size to select the brand of
machine, hoop size and hoop shape as shown in Figure
GO-13).
Cross Stitch
Hoop Size
Applique
Options Menu
33
MS Paint
General Operations
MS Paint
Applique
Cross Stitch
Auto
Digitzing
General File Formats Installation Introduction
Operations
34
Click ‘N Stitch Xtra with Applique
Preferences
Click Options, then Preferences to bring up the dialog
box in Figure GO-14.
Figure GO-14
Several options can be selected depending on the brand of
sewing machine you are using.
Figure GO-15
Figure GO-15 shows the default “Save As” setting. Click
the down arrow and select your machine, and the Save
function will automatically save it to that format every time
you save a design.
Figure GO-16
Figure GO-16 shows the setting for Viking/Husqvarna
machines. This option will split the design at every 12th color
change.
Figure GO-18
Figure GO-18 is the setting for Pfaff PCS. The first option
will make your PCS files 100% Pfaff PCS compatible.
The file will automatically split when necessary making it
easy for you to work with the PCS design.
General File Formats Installation Introduction
Operations
Figure GO-17 shows the setting for Janome/New Home/
Elna software. This option will ensure that when you save
to *.SEW it will be compatible with Scan-n-Sew PC V1.x.
The Dream Vision/Customizer 2000, when selected, will
enable 78 colors for Janome/New Home/Elna in your color
palette.
Auto
Digitzing
Figure GO-17
Cross Stitch
When a design is split, the file will be renamed
with an A, B, C etc. at the end of the file. For
example, if you have a design named
16044.GNC and this design has 13 color
changes, the file will be saved as 16044_A.HUS
and 16044_B.HUS.
Applique
Reme
mber
35
MS Paint
General Operations
MS Paint
Applique
Cross Stitch
Auto
Digitzing
Click ‘N Stitch Xtra with Applique
mber
Reme
General File Formats Installation Introduction
Operations
36
When a design is split, the file will be renamed
with an A, B, C etc. at the end of the file. For
example, if you have a design named
16044.GNC and this design has 18 color
changes, the file will be saved as 16044_A.PCS
and 16044_B.PCS.
Figure GO-19
Figure GO-19 is the Realistic View Control. This feature
will show holes in the “Realistic View” design if stitches
exceed the set length. The default is 10 mm.
Click OK to set your preferences.
Click Cancel to close the dialog box
preferences without making any changes to the software.
This feature is only available with the “Autodigitizer Wizard.”
See the “Auto Digitizing” chapter for more information
regarding all the functions of “Digitizing Parameters”.
General File Formats Installation Introduction
Operations
The “Digitizing Parameters” allows you to fine tune your
embroidery prior to converting the bit-image file to
embroidery. This function is mainly used when you run into
push and pull problems (holes and/or gapping) within your
design.
Auto
Digitzing
Figure GO-20
Cross Stitch
Click Options, then Digitizing Parameters to bring up
the dialog box as shown in Figure GO-20.
Applique
Digitizing Parameters
37
MS Paint
General Operations
MS Paint
Applique
Cross Stitch
Auto
Digitzing
General File Formats Installation Introduction
Operations
38
Click ‘N Stitch Xtra with Applique
HELP
Help Topic
Click Help, then Help Topics to display the user manual in
PDF format.
About Click ‘N Stitch Xtra with Applique
Click Help, then About Click ‘N Stitch Xtra with
Applique to display the Version number as shown in Figure
GO-21.
Figure GO-21
(Top of Screen)
Color Bar
Figure GO-23
(Bottom of Screen)
Figure GO-24
Status Bar
(Bottom of Screen)
General File Formats Installation Introduction
Operations
Figure GO-22
Auto
Digitzing
Main Tool Bar
Cross Stitch
This section describes how to use the three tool
bars in Figure GO-22 through GO-24.
Applique
Tool Bars
39
MS Paint
General Operations
40
General File Formats Installation Introduction
Operations
Main Tool Bar
New Icon
Click the New icon to open new design page. Cleans the
document space to start a new design.
Open Icon
Click the Open icon to open an existing design saved
either on your hard drive, CD-ROM, or floppy disc.
Save Icon
(Ctrl+S)
Auto
Digitzing
Click the Save icon to save changes to an existing file. The
“Save” command saves your document under the same
name, replacing the previous version. When you finish using
Click ‘N Stitch Xtra with Applique, save your work before
closing it.
Print Icon
(Ctrl+P)
Cross Stitch
Click the Print icon to print a copy of your design. See the
“File Menu” section for more information and functions.
Hoop Size Icon
Click the Hoop Size icon to select the brand of machine,
hoop size and hoop shape. See the “Options Menu” section
for more information.
Tip
Applique
MS Paint
Click ‘N Stitch Xtra with Applique
Each square of the grid equals 10 millimeters by
10 millimeters (10mm x 10mm). The design you
select must fit within the work space.
Cross Stitch Icon
Click the Cross Stitch icon to start the Cross Stitch Wizard
and convert clip art to stitches. The features of the Cross
Stitch Wizard are discussed in the “Cross Stitch” chapter of
the manual.
Applique Icon
Click the Applique icon to start the Applique Wizard and
convert clip art to stitches. The features of the Applique
Wizard are discussed in the “Applique” chapter of the
manual.
Sequencer Icon
Click the Sequencer icon to start the Re-Sequence Design
screen to redefine the stitching order of appliques created
in the program. For more information, see the “Applique”
chapter.
Zoom In Icon
Click the Zoom In icon to zoom in on the design.
General File Formats Installation Introduction
Operations
Click the Digitizing Parameters icon to fine tune your
embroidery. See the “Auto Digitizing” chapter for more
information.
Auto
Digitzing
Digitizing Parameters Icon
Cross Stitch
Click Auto Digitze icon to start the Autodigitizer Wizard
and convert clip art to stitches. The features of the
Autodigitizer Wizard are discussed in the “Auto Digitizing”
chapter of the manual.
Applique
Auto Digitize Icon
41
MS Paint
General Operations
42
Zoom Out Icon
Click the Zoom Out icon to zoom out on the design.
About Icon
Click the About icon to display the version number of your
Click ‘N Stitch Xtra with Applique.
Color Bar
Figure GO-25
The “Color Bar” enables you to change the colors of the
design on the screen.
Reme
mber
The “Color Bar” will show the number of color
blocks or color stops within a design.
Cross Stitch
Auto
Digitzing
General File Formats Installation Introduction
Operations
Click ‘N Stitch Xtra with Applique
MS Paint
Applique
Figure GO-26
After clicking on one of the boxes shown in Figure GO-25
the “Select Color” box will appear as shown in Figure GO26.
There are five color palettes available to select
colors as shown in Figure GO-28.
Default
=
64 colors
Baby Lock/Bernina/Brother =
64 colors
Husqvarna/Viking
=
29 colors
Elna/Janome/New Home =
78 colors
Pfaff
=
16 colors
Click on OK to change the selected color
to its new color.
Click on Cancel to close the color select
function without changes.
General File Formats Installation Introduction
Operations
Auto
Digitzing
Figure GO-28
Cross Stitch
By clicking on the color you wish to change, the name of
the color will appear in the “New Color / Change To” box
as shown in Figure GO-27.
Applique
Figure GO-27
43
MS Paint
General Operations
General File Formats Installation Introduction
Operations
44
Click ‘N Stitch Xtra with Applique
Status Bar
Figure GO-29
The “Status Bar” provides information about four important
items.
1. Size
2. Position from center.
3. Stitch Count
4. Number of Colors
Figure GO-29a
Auto
Digitzing
“Size:” displays the size of the design placed on the work
space.
Figure GO-29b
Cross Stitch
“Pos:” displays the position of the designs placed on the
work space relative to the center.
Figure GO-29c
Applique
“St:” displays the stitch count of the designs placed on the
work space.
Figure GO-29d
Tip
MS Paint
“Clrs:” displays the number of colors of the designs placed
on the work space.
The design must be “selected” for the numbers to
display on the Status Bar.
Auto Digitizing
○ ○ ○ ○ ○ ○ ○ ○ ○ ○ ○ ○ ○ ○ ○ ○ ○ ○ ○ ○ ○ ○ ○ ○ ○ ○ ○ ○ ○ ○ ○ ○ ○ ○ ○ ○
Items found in this Section:
1.
2.
3.
A Quick Start Lesson
Features
Autodigitizer Wizard
Click 'N Stitch Xtra with Applique
Quick Start Lesson
Reme
mber
This is a quick lesson to get your started on auto
digitizing images. Detailed descriptions of the
functions and their uses are found in the
“Autodigitizer Wizard” section of this chapter.
1. Click on the Auto Digitize icon as shown in Figure QS1 to activate the Autodigitizer Wizard.
Figure QS-1
MS Paint
Applique
Cross Stitch
Auto
Digitzing
General
File Formats Installation
Operations
Introduction
46
2. Click the Select Image button as shown in Figure
QS-2.
Figure QS-2
4. Click the Open button and you are back to the
Autodigitizer Wizard screen.
5. Click Next.
6. Step 2 in the Autodigitizer Wizard is the Image
Transformations screen as shown in Figure QS-4. Here
you can set the width, height, and select the units of
measurement (i.e. mm, cm, or inches). Click on the
Transform button to flip or rotate the design. You can also
crop the image in the “Select area to crop” by using the
handles around the image.
General File Formats Installation Introduction
Operations
Auto
Digitzing
Notice the preview area in the right bottom corner
of the “Open image” screen. This will allow you to
select your clip art by picture instead of just the
file name as long as the “Show preview” is selected.
Cross Stitch
Tip
Figure QS-3
Applique
3. Select the SmileyApple.jpg file as shown in Figure
QS-3. The image file SmileyApple.jpg can be found at
“C:/GN/Bitmaps”.
47
MS Paint
Auto Digitizing
48
Tip
Figure QS-4
Reme
You can click Back on any step in the process to
return to the previous step but cancels any design
changes made except when sized.
8. The next stage in the Wizard is Color Reduction. Here
you can increase or decrease the number of colors in the
design and also export the design to a graphic editor
(Default is MS Paint).
Tip
Applique
MS Paint
Keep in mind when the “Transform...” feature is used
flipping or rotating the clip art will change the direction
of your stitch angles.
7. Click Next.
mber
Cross Stitch
Auto
Digitzing
General
File Formats Installation
Operations
Introduction
Click 'N Stitch Xtra with Applique
Steps 9 through 12 demonstrate a key feature of
the Fill tool in MS Paint. This tool is particularily
useful when the background is the same color as
part of the design and you do not want to stitch
the background (ex. the white teeth and eyes on
the Smiley Apple).
10. In MS Paint, click on the Fill With Color (A) tool
and then select a color from the color palette (B) that is
not in the design.
By sending your clip art into MS Paint from within
Click ‘N Stitch Xtra with Applique, it will not matter
what the original graphic file format is.
MS Paint
Tip
Applique
Figure QS-6
General File Formats Installation Introduction
Operations
Figure QS-5
Auto
Digitzing
9. Click on the Edit Image button as shown in Figure
QS-5, and the design will load in MS Paint (See the
“MS Paint” chapter for a detailed description of all the
tools and features).
49
Cross Stitch
Auto Digitizing
50
General
File Formats Installation
Operations
Introduction
11. Click anywhere in the white background and the
entire background will fill with the color selected from
the color palette.
Figure QS-7
Auto
Digitzing
12. Click File, then Save, then File and Exit to close MS
Paint. The design with the new background will be in the
preview window of the Autodigitizer Wizard - Color
Reduction screen.
Cross Stitch
13. To change the sewing order of the colors listed,
simply click and hold the mouse button on the color
you want to move and drag it to the position of another
color. In our example, we want black to stitch last, so
click on color 4 (A), drag the mouse and release on
color 9 (B) as shown in Figure QS-8.
Tip
Applique
MS Paint
Click 'N Stitch Xtra with Applique
Step 13 is to ensure that the outline color will
sew last when the artwork is converted to embroidery.
14. Click Next.
MS Paint
Figure QS-9
Applique
Cross Stitch
15. The Vectorize screen appears. Here you can increase
or decrease the details of the design using the Tolerance
value bar and the Update Outlines button. Do not select
“Fill background color area with stitches” if you do not want
stitches assigned to the background.
General File Formats Installation Introduction
Operations
Figure QS-8
51
Auto
Digitzing
Auto Digitizing
16. This is where using MS Paint from Steps 9 - 12 becomes
important. The background is now no longer white like the
eyes and teeth of the Apple.
Remember, any part of the design that is the
same color as the background will not convert to
stitches unless “Fill background color area with
stitches” is selected in the Vectorize screen.
17. Click Next.
18. The Judgment screen is the last stage in autodigitizing. Here you can select the fabric type, which
sets the underlay and density.
MS Paint
Applique
Cross Stitch
Auto
Digitzing
Tip
Introduction
Click 'N Stitch Xtra with Applique
General
File Formats Installation
Operations
52
Figure QS-10
19. Click Finish and the design will auto-digitize (Figure
QS-11).
General File Formats Installation Introduction
Operations
Auto
Digitzing
Converting a bit-image file to embroidery does take time.
How much time depends on the size, color and complexity
of the image as well as the speed and memory of the
computer.
Cross Stitch
Tip
20. Click File, then Save As to save the design to your
machine’s format.
Applique
Figure QS-11
53
MS Paint
Auto Digitizing
54
Click 'N Stitch Xtra with Applique
Introduction
Features
Digitizing Parameters
General
File Formats Installation
Operations
Click Options, then Digitizing Parameters to
bring up the dialog box as shown in Figure F-1.
Figure F-1
Warning
Tip
MS Paint
Applique
Cross Stitch
Auto
Digitzing
The “Digitizing Parameters” allows you to fine tune your
embroidery before converting the bit-image file to
embroidery. This function is mainly used when you run into
push and pull problems (holes and/or gapping) within your
design.
This only works before using the “Autodigitizer
Wizard”. All settings must be set first and then
you can convert your bit-image to embroidery.
Also you must select Normal listed under “Select
the style for the design” within the Autodigitizer
Wizard - Judgment screen.
In the following examples, we will be using a
simple 2-color diamond shaped image. This
image will best demonstrate the results you may
get.
Notice the direction of the fill, left and right. The filled area
comes up to the edge of the satin stitch as shown in Figure
F-2.
Technic
al Stuff
There may be some slight image variations between
computers when compared to illustrations shown.
Example 2: Pull Compensation
In this example , we will make changes to the Pull
compensation from “None” to “Percentage” with a
Value (%) of 120 and Max Range of 100 as shown in Figure
F-3.
General File Formats Installation Introduction
Operations
Figure F-2
Auto
Digitzing
Example 1: No Changes
In this example, there will be no changes made in “Digitizing
Parameters” after running your bit-image file through the
“Autodigitizer Wizard”.
Cross Stitch
This function is not needed for most of the images you might use, but we felt it was important
to give you as much flexibility as possible.
Applique
Reme
mber
55
MS Paint
Auto Digitizing
MS Paint
Applique
Cross Stitch
Auto
Digitzing
General
File Formats Installation
Operations
Introduction
56
Click 'N Stitch Xtra with Applique
Figure F-3
Click OK and run the bit-image file through the “Autodigitizer
Wizard”.
Figure F-4
Notice the direction of the fill, left and right. The filled
area moves past the edge of the satin stitch as shown in
Figure F-4.
This normally is not the desired affect, but it
demonstrates how the “Percentage” function works.
By placing 120 in “Value (%)”, you’re telling the software
to add 20% more width to every embroidery line.
By placing 100 in “Max. Range”, you’re telling the software
to add the “Value (%)” but DO NOT exceed 100 tenths of
a centimeter or (10mm).
Now change the “Max. Range” to 30 as shown in Figure
F-5.
Figure F-5
Click OK and run the bit-image file through the “Autodigitizer
Wizard” again.
This can be very useful if a design has holes or
is missing stitches due to push and pull of the
material.
Applique
MS Paint
Tip
Notice how the fill comes to the outer edge of the satin
stitch, but does not exceed the outer edge as shown in
Figure F-6.
Cross Stitch
Auto
Digitzing
Figure F-6
57
General File Formats Installation Introduction
Operations
Auto Digitizing
MS Paint
Applique
Cross Stitch
Auto
Digitzing
General
File Formats Installation
Operations
Introduction
58
Click 'N Stitch Xtra with Applique
Example 3: Pull Compensation
In this example, we will make changes to the Pull
compensation from “None” to “Absolute” with a Value
(0) of 50 as shown in Figure F-7.
Figure F-7
Click OK and run the bit-image file through the “Autodigitizer
Wizard”.
Figure F-8
Notice the change in the width of the satins and fill as
shown in Figure F-8.
By placing 50 in “Value (0)”, you’re telling the software
to add 50 tenths of a centimeter or (5mm) to all satin
stitches and all fill stitches by “X” (width) and “Y”
(height).
Figure F-10
A
Notice the change in the width of the satins as shown in
Figure F-10.
By placing 100 in “X”, and 0 in “Y”, you’re telling the
software to add 100 tenths of a centimeter or (10mm)
to all satin stitches and all fill stitches that sew on the
“X” axis (Figure F-10 A) and add nothing extra to the
“Y” axis (Figure F-10 B).
General File Formats Installation Introduction
Operations
B
Auto
Digitzing
Click OK and run the bit-image file through the
“Autodigitizer Wizard”.
Cross Stitch
Figure F-9
Applique
Example 4: Pull Compensation
In this example, we will make changes to the Pull
compensation from “None” to “Advanced” with a X:
of 100 and Y: 0 as shown in Figure F-9.
59
MS Paint
Auto Digitizing
MS Paint
Applique
Cross Stitch
Auto
Digitzing
General
File Formats Installation
Operations
Introduction
60
Click 'N Stitch Xtra with Applique
Example 5: Pull Compensation
In this example, we will make changes to the Pull
compensation from “None” to “Advanced” with a X:
of 0 and Y: of 100 as shown in Figure F-11.
Figure F-11
Click OK and run the bit-image file through the
“Autodigitizer Wizard”.
A
Figure F-12
B
Notice the change in the width of satins as shown in
Figure F-12.
By placing 100 in “Y”, and 0 in “X”, you’re telling the
software to add 100 tenths of a centimeter or (10mm)
to all satin stitches and all fill stitches that sew on the
“Y” axis (Figure F-12 A) and add nothing extra to the
“X” axis (Figure F-12 B).
Tatami is the setting to use if you want to change column/
satin stitches throughout the entire design. Making the
number larger (150 or 200), will tighten the density within
the design, whereby increasing the stitch count.
Complex Fill is the setting to use if you want to change the
fill stitches throughout the entire design. Making the number
larger (150 or 200) will tighten the density within the design,
whereby increasing the stitch count.
General File Formats Installation Introduction
Operations
All Clients is the setting to use if you want to change the
Tatami and Complex Fills throughout the entire design.
Making the number larger (150 or 200), will tighten the
density within the design, whereby increasing the stitch
count.
Auto
Digitzing
(100) is the default setting for All Clients, Tatami, and
Complex Fill as shown in Figure F-13.
Cross Stitch
Figure F-13
Applique
Density
“Density” gives you the ability to increase or decrease
stitches within a design.
61
MS Paint
Auto Digitizing
62
decrease stitches within a design.
Figure F-14
Tip
40 tenths of a centimeter or (4mm) is the default setting for
“Stitch Length” as shown in Figure F-14.
If you increase the number to 60, for example, then all
running stitches within your design will be at 6mm,
making them longer and using less stitches.
Scale
“Scale” gives you the ability to set the scale of the
finished embroidery depending on your bit-image file.
Auto
Digitzing
General
File Formats Installation
Operations
Introduction
Stitch Length
“Stitch Length” gives you the ability to increase or
Figure F-15
Cross Stitch
(100) is the default setting for “Scale” as shown in Figure
F-15.
Tip
Applique
MS Paint
Click 'N Stitch Xtra with Applique
Using our diamond shaped bit-image as the example, the
diamond is 91 x 92mm and with the “Scale” set at 100, the
diamond will be converted to 91 x 92mm with 6097 stitches.
But, if the “Scale” is changed to 200, the diamond will be
converted to 181 x 183mm with 20,946 stitches.
Autodigitizer Wizard
This section describes how to use the Autodigitizer
Wizard.
Auto Digitize
Click on the Auto Digitize icon to start the
Autodigitizer Wizard as shown in Figure AD-1.
Figure AD-2
Applique
Selecting your image is the first of 5 steps within the
Autodigitizer Wizard.
MS Paint
1. Select Image
Cross Stitch
Auto
Digitzing
Figure AD-1
63
General File Formats Installation Introduction
Operations
Auto Digitizing
64
General
File Formats Installation
Operations
Introduction
Click on “Select Image” as shown in Figure AD-3 to
select a file from your computer or disk.
Figure AD-3
Auto
Digitzing
After clicking “Select Image” a dialog box will appear
as shown in Figure AD-4.
Cross Stitch
Figure AD-4
There are many diffent features within this dialog box
to be aware of:
Applique
Figure AD-5
Tip
MS Paint
Click 'N Stitch Xtra with Applique
The path to *.jpg images included with this program is C:/GN/Bitmaps.
The Image Information box gives you useful information
on the size of the image in pixels, dimensions in
centimeters, Dots Per Inch, File size and a preview
window to view the image before selecting it, as shown
in Figure AD-7.
Figure AD-7
After selecting a image, click on Open to bring
the image into the Autodigitizer Wizard.
Click on the Cancel button, to cancel the
“Select Image” command.
General File Formats Installation Introduction
Operations
Click on a file and it will preview in the “Image
Information” box.
Auto
Digitzing
Open the folder or directory where the image you want
is stored.
Cross Stitch
Figure AD-6
Applique
Click on the arrow to the right to see the list of subdirectories as shown in Figure AD-6.
65
MS Paint
Auto Digitizing
Click 'N Stitch Xtra with Applique
After selecting your image and clicking Open, the path will
appear to the left of the “Acquire.....” button.
Click ‘N Stitch Xtra with Applique also gives you the ability
to scan your favorite drawing into the Autodigitizer Wizard.
Click the Acquire button as shown in Figure AD-8 and
the Twain window will display (Figure AD-9).
Figure AD-8
MS Paint
Applique
Cross Stitch
Auto
Digitzing
General
File Formats Installation
Operations
Introduction
66
Figure AD-9
Click Select Source to set your scanner options, then
click on Acquire Image and follow your scanner’s
instructions.
original state except for sizing when Back icon is used.
Clicking on the Next button will take
you to the next Autodigitizer Wizard page.
Click on the Cancel button to
cancel and exit the Autodigitizer Wizard.
Once you have selected your image, click Next to
proceed to the next step.
2. Image Transformations
The “Image Transformations” feature allows you to
adjust the width and height of the image, select the
units of measurement, and the ability to Transform
(rotate, flip) and crop the image.
General File Formats Installation Introduction
Operations
Tip
Any changes made to image will revert image back to
Auto
Digitzing
Clicking on the Back button will take you to
the previous Autodigitizer Wizard page.
Cross Stitch
You will find three buttons at the bottom of each
Autodigitizer Wizard page: Back, Next, and
Cancel.
Applique
Reme
mber
67
MS Paint
Auto Digitizing
68
Click 'N Stitch Xtra with Applique
Introduction
There are 3 main parts to Image Transformations.
General
File Formats Installation
Operations
1.
2.
3.
Figure AD-10
Set New Image Size
Reme
mber
The size that is set in this screen will be the
finished size of your digitized file.
Applique
Cross Stitch
Auto
Digitzing
In “Set New Image Size”, the size will be set to the size
of the image as default. You can change the width or
height of the image at this point. By changing the width,
the height will automatically change in proportion.
Figure AD-11
MS Paint
Set New Image Size.
Select Area to Crop.
Transform.
Figure AD-12
Click and hold the left mouse button down on the bottom
corner as shown in Figure AD-12.
Figure AD-13
Tip
Drag the mouse to the top left as shown in Figure AD-13.
Crop your image before setting the size.
General File Formats Installation Introduction
Operations
In “Select area to crop,” the size will be set to the size
of the image as default. You can choose to only stitch a
certain part of the image. Select from any one of the
eight small squares to resize the cropped area.
Auto
Digitzing
Select Area to Crop
Cross Stitch
If you do not like the changes you made to the height or
width, click on Reset Size to return the image to its
original size.
Applique
You can set the measurement of the image by
millimeters, centimeters or inches, by selecting which
measurement you desire in the Units box.
69
MS Paint
Auto Digitizing
Introduction
70
General
File Formats Installation
Operations
Figure AD-14
After dragging to the top left corner, click and hold the left
mouse button down in the middle of the image box and
aline the desired area, as shown in Figure AD-14. Only the
area within the gray box will digitze.
To reset the cropping area, click on Select All as shown in
Figure AD-15.
Figure AD-15
Auto
Digitzing
Transform
Cross Stitch
Click on “Transform” and you can rotate the image 90
degrees clockwise, counterclockwise or 180 degrees as
shown in Figure AD-16.
Figure AD-16
Tip
Applique
MS Paint
Click 'N Stitch Xtra with Applique
The Transform feature is a valuable tool to
change the stitch direction of your digitized
design. If your digitized design is missing stitches
in an area, redigitize the same clip art and flip
horizontally to get a different stitch result.
Edit Image
Click Edit Image to export the design to a graphic
editor. The default setting will launch MS Paint.
Figure AD-18
General File Formats Installation Introduction
Operations
Figure AD-17
Auto
Digitzing
In the third feature, you will find “Color Reduction”.
Here you can increase or decrease the number of colors
in the design, change the sewing order of the colors,
and export the design to a graphic editor (Default is MS
Paint).
Cross Stitch
3. Color Reduction
Applique
Click Next to proceed to the next step.
71
MS Paint
Auto Digitizing
72
Tip
General
File Formats Installation
Operations
Introduction
You have all the capabilities of MS Paint at your disposal.
For a description of tools and functions of MS Paint, see
the “Microsoft Paint” chapter in the manual. Also see the
“Quick Start” section in this chapter for a useful lesson in
using MS Paint.
By using the “Edit Image” function in the
Autodigitizer Wizard, any type of image file can
be exported to MS Paint.
Click File, then Save and close out of MS Paint. The design
with the new background will be in the preview window of
the Autodigitizer Wizard.
If you have another image editing
program that you prefer to use, click on the
button to
the right of the Edit Image button. This will allow you to
assign that button to the location of your image editing
software as shown in Figure AD-19.
Cross Stitch
Auto
Digitzing
Click 'N Stitch Xtra with Applique
MS Paint
Applique
Figure AD-19
Figure AD-20a
To view color changes within the bit-image design, click on
Show / Hide Preview as shown in Figure AD-20b.
Figure AD-20b
General File Formats Installation Introduction
Operations
Click on Delete as shown in Figure AD-20a.
Auto
Digitzing
Figure AD-20
Cross Stitch
To delete a color, click on the color to be deleted as shown
in Figure AD-20.
Applique
Reduce Colors
73
MS Paint
Auto Digitizing
MS Paint
Applique
Cross Stitch
Auto
Digitzing
General
File Formats Installation
Operations
Introduction
74
Click 'N Stitch Xtra with Applique
Increase Colors
To add a color, click on the “up arrow” or type the number
in the box as shown in Figure AD-21.
Figure AD-21
To reset your colors to the bit-image default, click on Reset
as shown in Figure AD-22.
Figure AD-22
Arrange Colors
There are several ways to have the Wizard generate stitches.
(These are explained more in Step 5.) One of the functions
is called “By Color”. You have control over what color will
sew first, second, etc. This function is done by selecting
and holding down the left mouse button on the color you
want moved (A) and dragging it to the spot you want it to
stitch at (B) as shown in Figure AD-23.
Color Reduction Tools
Click the Zoom In icon to make the image larger.
Click the Zoom to Fit icon to make the image fit
the picture window.
Cross Stitch
Click the Hand Tool icon to move the image
when zoomed in.
Applique
Click the Zoom Out icon to make the image
smaller.
General File Formats Installation Introduction
Operations
This function if very useful if you want the outline
color to sew last.
Click the Add new color to palette icon to add a
color back if deleted.
MS Paint
Tip
Figure AD-23
75
Auto
Digitzing
Auto Digitizing
76
Click 'N Stitch Xtra with Applique
Introduction
4. Vectorize
General
File Formats Installation
Operations
In the fourth feature, you will find “Vectorize”. This
feature will convert the bit-image file to a vector file.
Figure AD-24
Tolerance Value
Cross Stitch
Auto
Digitzing
Changing the tolerance of the image is a simple matter of
moving the scroll bar to the left or right or clicking the up or
down arrows next to the number, and clicking on Update
outlines as shown in Figure AD-25.
Tip
MS Paint
Applique
Figure AD-25
Changing the tolerance value will give the image
more or less detail when converted to embroidery. The lower the number, the more detail
there will be within the finished embroidery. The
higher the number, the less detail.
Clicking on one of the colors within the image will set
that color to the background color.
Warning
Warning
The background color will not sew unless you select
Fill background color area with stitches.
If you do not want the background to generate
stitches, make sure the correct color is selected
for the background before proceeding.
Remember, any part of the design that is the
same color as the background will not convert to
stitches.
General File Formats Installation Introduction
Operations
Setting Background Color
Auto
Digitzing
Figure AD-26
Cross Stitch
The result will be seen in the Vectorized Image window,
when using the Tolerance function as shown in Figure AD26.
Applique
Vectorized Image
77
MS Paint
Auto Digitizing
78
Introduction
5. Judgment
General
File Formats Installation
Operations
In the fifth feature, you will find “Judgment”. This feature
allows you to choose options that relate to your embroidery
and how it will digitize.
Figure AD-27
Auto
Digitzing
Sequencing order
Cross Stitch
In “Sequencing order”, you have five options to choose
from (Figure AD-28).
Figure AD-28
Applique
Preserve original will preserve the original bit-image
as close as possible.
Warning
MS Paint
Click 'N Stitch Xtra with Applique
When using “Preserve original”, the wizard will
generate the stitches with many jumps and color
changes.
By Color will preserve the original bit-image with as
few color changes as possible.
Reme
mber
Time S
aving
“By color” works much like “Minimize color
change” and is the Wizard’s default setting when
using the “Judgment” function.
The main difference is that it works in conjunction with “Color Reduction” (see Step3 in this
section) to choose what color sews first, second,
etc. This is very useful. For example: If you
want the color that outlines to sew last, but it’s
the third color in the color chart. By using “Color
Reduction”, you can arrange the colors to the
desired order and then choose “Judgement / By
Color”. This will ensure that the outline color will
stitch last.
General File Formats Installation Introduction
Operations
“Minimize overlap” works much like “Preserve
original”, the wizard will generate the stitches
with as many jumps and color changes as
needed, but will minimize the overlaps.
Auto
Digitzing
Warning
Minimize overlap will preserve the original bit-image
with as few overlaps as possible.
Cross Stitch
Minimize color change will preserve the original bitimage with as few color changes as possible.
Applique
Minimize jump will preserve the original bit-image
with as few jumps as possible.
79
MS Paint
Auto Digitizing
80
Introduction
Trim
General
File Formats Installation
Operations
Sewing machine’s with trimmer’s can take advantage of this
feature as shown in Figure AD-29.
Figure AD-29
Never is the default setting for “Trim”. When this is
selected, the Wizard will not add any commands to do
with trimming.
Always is used when you wish to add trim commands
to all parts of your embroidery file.
Auto
Digitzing
Trim at is used when you want to add trim commands but
only when the stitch length exceeds a set distance in tenths
of centimeters (Figure AD-29). There is a box to the right
of “Trim at” that equals 50. This means add a trim every 50
tenths of a centimeter (or 5 millimeters). You can change the
length as you desire.
Tip
Warning
Cross Stitch
Applique
MS Paint
Click 'N Stitch Xtra with Applique
If your embroidery machine and/or embroidery
format does not support trims, do not select “Trim
at”. Use the default setting of “Never”.
Trim is a feature currently used in the commercial embroidery market. As home embroidery
machines become more advanced, trim may be
a feature that will be added to the machines.
Always is the default setting for “Lock stitch”. When
this is selected, the Wizard will add lock stitches to any
part of the design, before and after a color change.
Warning
Around trim is used when you want to add a lock
down around a trim only.
If your embroidery machine and/or embroidery
format does not support trims, do not select
“Around trim”. Use the default setting of “Always”.
Style
The Select the style for the design option is a very
important feature. You select the type of fabric you
wish to sew your embroidery on and the Wizard will
add the correct stitch length, density and underlay
(Figure AD-31).
General File Formats Installation Introduction
Operations
Never When this is selected, the Wizard will not add
lock stitches to any part of your design.
Auto
Digitzing
Figure AD-30
Cross Stitch
Sewing machine’s with trimmers can take advantage of this
feature as shown in Figure AD-30.
Applique
Lock stitch
81
MS Paint
Auto Digitizing
MS Paint
Applique
Cross Stitch
Auto
Digitzing
General
File Formats Installation
Operations
Introduction
82
Click 'N Stitch Xtra with Applique
Figure AD-31
There are 21 different styles to choose from. Depending on
what kind of bit-image used, the stitch count will change.
But, for this example we used a 4 x 4 inch design and the
chart below shows a breakdown of what happened in each
style.
Settings
Under Sewing Type of Under Sewing
Baby Blanket
Yes
Max-Grid
Canvas
Yes
Max-Grid
Cap
No
Dog Collar
No
Fake Fur
Yes
Max-Grid
Fleece
Yes
Minimal
Jeans
Yes
Normal Diagonal
Leather
No
Lycra
Yes
Normal Diagonal
Normal
No
Pique
Yes
Above Normal - Diagonal
Pullover
Yes
Satin
Yes
Max-Grid
Shirt Cuff
No
Very Light
Silk
Yes
Sweat Shirt
Yes
Very Light
Towel
Yes
Normal Diagonal
T-Shirt
Yes
Normal - Large Diagonal
Velvet
Yes
Max-Grid & Density
Vinyl
No
Woven Fabrics
Yes
Normal Diagonal
General File Formats Installation Introduction
Operations
Auto
Digitzing
Figure AD-32
Cross Stitch
Depending on the bit-image file and the speed of
your computer, the conversion from image to
embroidery may take a few minutes.
Applique
Warning
Click Finish and this will start the
conversion to embroidery. Once finished,
the digitized design will appear on the screen.
83
MS Paint
Auto Digitizing
MS Paint
Applique
Cross Stitch
Auto
Digitzing
General
File Formats Installation
Operations
Introduction
84
Click 'N Stitch Xtra with Applique
Cross Stitch
○ ○ ○ ○ ○ ○ ○ ○ ○ ○ ○ ○ ○ ○ ○ ○ ○ ○ ○ ○ ○ ○ ○ ○ ○ ○ ○ ○ ○ ○ ○ ○ ○ ○ ○
Items found in this Section:
1.
2.
A Quick Start Lesson
Cross Stitch Wizard
Click 'N Stitch Xtra with Applique
Quick Start Lesson
Reme
mber
This is a quick lesson to get your started auto
digitizing images into cross stitch designs. Detailed descriptions of the functions and their use
are found in the “Cross Stitch Wizard” section of
this chapter.
1. Click on the Cross Stitch icon as shown in Figure QSC1 to activate the Cross Stitch Wizard.
Figure QSC-1
MS Paint
Applique
Cross Stitch
Auto
Digitzing
General File Formats Installation Introduction
Operations
86
2. Click the Select Image button as shown in Figure QSC2.
Figure QSC-2
4. Click the Open button and you are back to the Cross
Stitch Wizard screen.
5. Click Next.
6. Step 2 in the Cross Stitch Wizard is the “Image
Transformations” screen as shown in Figure QSC-4. Here
you can adjust the width and height of the image and select
the units of measurement (i.e. mm, cm, inches). Here you
can also change the number of cross stitches per inch, repeats
and overlaps. This screen also gives you the ability to rotate,
flip and crop the design.
General File Formats Installation Introduction
Operations
Auto
Digitzing
Notice the preview area in the right bottom corner
of the “Open image” screen. This will allow you to
select your clip art by picture instead of just the
file name as long as “Show preview” is selected.
Cross Stitch
Tip
Figure QSC-3
Applique
3. Select the SmileyApple.jpg file as shown in Figure QSC3. The image file SmileyApple.jpg can be found at “C:/GN/
Bitmaps”.
87
MS Paint
Cross Stitch
General File Formats Installation Introduction
Operations
88
Figure QSC-4
Auto
Digitzing
7. Click the up arrow next to “Cross Size (stitches/inch)”
and change it to 18 (Figure QSC-5). This will increase the
detail when stitched out.
Figure QSC-5
Cross Stitch
8. Click Next.
Tip
Applique
MS Paint
Click 'N Stitch Xtra with Applique
You can click Back on any step in the process to
return to the previous step.
9. Stage 3 in the Wizard is “Color Reduction.” Here you
can increase or decrease the number of colors in the design
and also change the stitching order (Figure QSC-6).
12. Step 4 in the Wizard is “Image Edit.” This screen allows
you to take the design into any graphic editing software or
with MS Paint as the program default.
General File Formats Installation Introduction
Operations
Auto
Digitzing
11. Click Next.
Cross Stitch
Figure QSC-6
Applique
10. To change the sewing order of the colors listed, simply
click and hold the mouse button on the color you want to
move and drag it to the position of another color. In our
example, we want black to stitch last, so click on color
Black (A), drag the mouse and release on last color (B)
as shown in Figure QSC-6.
89
MS Paint
Cross Stitch
MS Paint
Applique
Tip
Click 'N Stitch Xtra with Applique
Step 13 through 17 is to demonstrate two key
features of the Edit Image option: the Fill tool and
pencil in MS Paint.
13. Click on the Edit Image button as shown in Figure
QSC-7, and the design will load in MS Paint (See the MS
Paint chapter for detailed description of all the tools and
features).
Figure QSC-7
Warning
Cross Stitch
Auto
Digitzing
General File Formats Installation Introduction
Operations
90
DO NOT resize the image in your graphic editor
program, but use the Zoom tool found under the
“View” drop down if you need to make the image
larger. Resizing will resize the image in the Cross
Stitch Wizard.
14. In MS Paint, click on the Pencil tool (A) and the black
color chip in the Color Palette (B). Carefully “touch up”
the black outline, or any details you want with any color
you want (Figure QSC-8).
Tip
16. Click anywhere in the white background and it will fill
with the color selected from the color palette (Figure QSC10). Any areas blocked by outline to prevent the “fill color”
from flowing into background, click that area shile still using
the “Fill with Color” icon to finish filling with background
color.
This is useful as it will allow the eyes and teeth to digitize
since they are white, but not the background.
General File Formats Installation Introduction
Operations
Auto
Digitzing
Figure QSC-9
Cross Stitch
15. Now, click on the Fill With Color tool (A) and then
select a color from the Color Palette (B) that is not in the
design (Figure QSC-9).
Applique
Figure QSC-8
91
MS Paint
Cross Stitch
MS Paint
Applique
Cross Stitch
Auto
Digitzing
General File Formats Installation Introduction
Operations
92
Click 'N Stitch Xtra with Applique
Figure QSC-10
17. Click File, then Save and close out of MS Paint. The
design with the new background and any corrections made
to outline will now appear in the preview window of the
Cross Stitch Wizard - Image Edit screen.
18. Click on the Eye Dropper icon under “Background
Color” and then click anywhere in the background of the
design in the “Preview” window. That color will now no
longer sew in the final stitching. (Figure QSC-11). Unless
“Fill with stitches” is selected.
Figure QSC-11
19. Click Next.
22. The “Preview” screen displays a preview of the final
cross stitch of the design (Figure QSC-13).
Figure QSC-13
General File Formats Installation Introduction
Operations
Auto
Digitzing
21. Click Next.
Cross Stitch
Figure QSC-12
Applique
20. The “Outlines” screen appears. Here you can apply
outlines to any or all the colors by checking the box next to
the color you want to apply an outline to (Figure QSC-12).
Or you can click on the first box to the right of the color bars
to select all the colors. To deselect all the colors click on the
second box to the right of the color bars.
93
MS Paint
Cross Stitch
Click 'N Stitch Xtra with Applique
23. Click Finish and the design will digitize (Figure QSC14).
Technic
al Stuff
Converting a bit-image file to cross stitch does take
time. How much time depends on the size, color and
complexity of the image as well as the speed and
memory of the computer.
Figure QSC-14
MS Paint
Applique
Cross Stitch
Auto
Digitzing
General File Formats Installation Introduction
Operations
94
24. Click File, then Save to save the design to your
machine’s format.
MS Paint
Applique
Cross Stitch
Auto
Digitzing
General File Formats Installation Introduction
Operations
Cross Stitch
95
Click 'N Stitch Xtra with Applique
Cross Stitch Wizard
This section describes how to use the Cross Stitch
Wizard.
Cross Stitch
Click on the Cross Stitch icon to start the Cross Stitch
Wizard as shown in Figure CS-1.
Figure CS-1
MS Paint
Applique
Cross Stitch
Auto
Digitzing
General File Formats Installation Introduction
Operations
96
1. Select Image
Selecting your image is the first of 6 steps within the Cross
Stitch Wizard.
Figure CS-2
Figure CS-4
There are many diffent features within this dialog box to be
aware of:
Figure CS-5
Click on the arrow to the right of the “Look in” box (Figure
CS-5) to see the list of sub-directories as shown in Figure
CS-6.
General File Formats Installation Introduction
Operations
Auto
Digitzing
After clicking “Select Image” a dialog box will appear as
shown in Figure CS-4.
Cross Stitch
Figure CS-3
Applique
Click on “Select Image” as shown in Figure CS-3 to select
a file from your computer or disk.
97
MS Paint
Cross Stitch
MS Paint
Applique
Cross Stitch
Auto
Digitzing
Click 'N Stitch Xtra with Applique
Figure CS-6
Open the folder or directory where the image you want is
stored
Tip
General File Formats Installation Introduction
Operations
98
The path to *.jpg images included with this program is C:/GN/Bitmaps.
Click on a file and it will preview in the “Image Information”
box.
The “Image Information” box gives you useful information
on the size of the image in pixels, dimensions in centimeters,
Dots Per Inch, File size and a preview window to view the
image before selecting it, as shown in Figure CS-7.
Figure CS-7
After selecting a image, click on Open to bring
the image into the Cross Stitch Wizard.
Click on the Cancel button, to cancel the
“Select Image” command.
After selecting your image and clicking Open, the path will
appear to the left of the “Acquire...” button.
Click ‘N Stitch Xtra with Applique also gives you the ability
to scan your favorite drawing into the Cross Stitch Wizard.
Click the Acquire button as shown in Figure CS-8 and the
Twain window will display (Figure CS-9).
Applique
Click Select Source to set your scanner options, then click
on Acquire Image and follow your scanner’s instructions.
MS Paint
Figure CS-9
Cross Stitch
Auto
Digitzing
Figure CS-8
99
General File Formats Installation Introduction
Operations
Cross Stitch
MS Paint
Applique
Cross Stitch
Auto
Digitzing
mber
Reme
General File Formats Installation Introduction
Operations
100 Click 'N Stitch Xtra with Applique
You will find three buttons at the bottom of each
Cross Stitch Wizard page: Back, Next, and
Cancel.
Clicking on the Back button will take you to
the previous Cross Stitch Wizard page. Any changes made
to image will revert image back to original state except for
sizing.
Clicking on the Next button will take you to
the next Cross Stitch Wizard page.
Click on the Cancel button to
cancel and exit the Cross Stitch Wizard.
Once you have selected your image, click Next to proceed
to the next step.
2. Image Transformations
The “Image Transformations” feature allows you to adjust
the width and height of the image, select the units of
measurement, change the cross size, overlap and repeats,
and the ability to Transform (rotate, flip) and crop the image.
Figure CS-10
Set New Image Size.
2.
Select Area to Crop.
3.
Transform.
Figure CS-11
Set New Image Size
In “Set New Image Size”, the size will be set to the size of
the image as default. You can change the width or height of
the image at this point. By changing the width, the height will
automatically change in proportion.
Applique
The size that is set in this screen will be the
finished size of your digitized file.
Figure CS-12
MS Paint
Reme
mber
General File Formats Installation Introduction
Operations
1.
Auto
Digitzing
There are 3 main parts to Image Transformations.
101
Cross Stitch
Cross Stitch
102 Click 'N Stitch Xtra with Applique
General File Formats Installation Introduction
Operations
You can set the measurement of the image by millimeters,
centimeters or inches, by selecting which measurement you
desire in the Units box.
If you do not like the changes you made to the height or
width, click on the Reset Size button to return the image to
its original size.
Cross Size is the number of crosses per inch. A higher
number increases the amount of detail and a lower number
decreases the amount of detail in the design (18 is
recommended, 20 is maximum limit).
Repeats is how many times the program will stitch over
one place.
Auto
Digitzing
Overlap is used if you want the crosses to overlap each
other.
Cross Stitch
Select Area to Crop
Tip
MS Paint
Applique
In “Select area to crop,” the size will be set to the size of the
image as default. You can choose to only stitch a certain
part of the image. Select from any one of the eight small
squares to resize the cropped area.
Crop your image and then set the size you want
your finished design to be.
Figure CS-15
After dragging to the top left corner release mouse button,
click and hold down the left mouse button in the middle of
the image box and aline the desired area, as shown in Figure
CS-15. Only the area within the gray box will digitize.
To reset the cropping area, click on Select All as shown in
Figure CS-16.
Figure CS-16
Auto
Digitzing
Drag the mouse to the top left as shown in Figure CS-14.
Cross Stitch
Figure CS-14
Applique
Click and hold the left mouse button down on the bottom
corner as shown in Figure CS-13.
MS Paint
Figure CS-13
General File Formats Installation Introduction
Operations
Cross Stitch 103
MS Paint
Applique
Cross Stitch
Auto
Digitzing
General File Formats Installation Introduction
Operations
104 Click 'N Stitch Xtra with Applique
Transform
Click on “Transform” and you can flip the image horizontally
or vertically or rotate the image 90 degrees clockwise,
counterclockwise or 180 degrees as shown in Figure CS17.
Figure CS-17
Click Next to proceed to the next step.
3. Color Reduction
In the third feature, you will find “Color Reduction”. Here
you can increase or decrease the number of colors in the
design and change the sewing order of the colors (Figure
CS-18).
Figure CS-18
Figure CS-19a
To view color changes within the bit-image design, click on
Preview as shown in Figure CS-19b.
Figure CS-19b
Auto
Digitzing
Click on Delete as shown in Figure CS-19a.
Cross Stitch
Figure CS-19
Applique
To delete a color, click on the color to be deleted as shown
in Figure CS-19.
MS Paint
Reduce Colors
General File Formats Installation Introduction
Operations
Cross Stitch 105
MS Paint
Applique
Cross Stitch
Auto
Digitzing
General File Formats Installation Introduction
Operations
106 Click 'N Stitch Xtra with Applique
Increase Colors
To add a color, click on the “up arrow” or type the number
in the box as shown in Figure CS-20.
Figure CS-20
To reset your colors to the bit-image default, click on Reset
as shown in Figure CS-21.
Figure CS-21
Arrange Colors
You have control over what color will sew first, second,
etc. This function is done by selecting and holding down
the left mouse button on the color you want moved (A) and
dragging it to the spot you want it to stitch at (B) as shown
in Figure CS-22.
Color Reduction Tools
Click the Zoom In icon to make the image larger.
Click the Zoom to Fit icon to make the image fit
the picture window.
Cross Stitch
Click the Hand Tool icon to move the image when
zoomed in.
Applique
Click the Zoom Out icon to make the image
smaller.
Auto
Digitzing
This function if very useful if you want the outline
color to sew last.
Click the Add new color to palette icon to add a
color back if deleted.
MS Paint
Tip
Figure CS-22
General File Formats Installation Introduction
Operations
Cross Stitch 107
MS Paint
Applique
Cross Stitch
Auto
Digitzing
General File Formats Installation Introduction
Operations
108 Click 'N Stitch Xtra with Applique
4. Edit Image
In the fourth feature, you will be able to export the design
to a graphic editor where you can make changes and /or
corrections. (Default is MS Paint). You can also set your
background color in this step.
Figure CS-23
Edit Image
Click Edit Image, as shown in Figure CD-24, to export
the design to a graphic editor. The default setting will launch
MS Paint.
Figure CS-24
Click File, then Save and close out of MS Paint. The design
with the new background will be in the preview window of
the Cross Stitch Wizard.
If you have another image editing
Figure CS-25
Applique
Cross Stitch
program that you prefer to use, click on the button
to the right of the Edit Image button as shown in Figure
CS-25. This will allow you to assign that button to the
location of your image editing software.
Auto
Digitzing
By using the “Edit Image” function in the Cross
Stitch Wizard, any type of image file can be
exported to MS Paint.
MS Paint
Tip
You have all the capabilities of MS Paint at your disposal.
For a description of tools and functions of MS Paint, see
the “MS Paint” chapter in the manual. Also see the “Quick
Start” section in this chapter for a useful lesson in using MS
Paint.
General File Formats Installation Introduction
Operations
Cross Stitch 109
110
Setting Background Color
General File Formats Installation Introduction
Operations
You can set a background color and choose whether to
have it digitize or not.
Click on the Eye Dropper icon under “Background Color”
as shown in Figure CS-26 and then click anywhere in the
background of the design in the “Preview” window. The
color showing within block to the right of the Eye Dropper
icon will now no longer sew in the final stitching.
The background color will not sew unless you select Fill
background color area with stitches.
Warning
Figure CS-26
If you do not want the background to generate
stitches, make sure the correct color is selected
for the background before proceeding.
Warning
Auto
Digitzing
Cross Stitch
Applique
MS Paint
Click 'N Stitch Xtra with Applique
Remember, any part of the design that is the
same color as the background will not convert to
stitches.
Click Next to proceed to the next step.
Figure CS-27
Click on the boxes to the right of the color bars to select or
deselect the colors to be outlined as shown below in Figure
CS-28 arrows A and B. Click on the boxes to the left of the
color bars to select or deselect that particular color not to
be outlined as show in Figure CS-28 arrow C.
Click Next to proceed to the next step.
MS Paint
Applique
Figure CS-28
General File Formats Installation Introduction
Operations
The fifth feature allows you to have “X’s” outlined when
cross stitched.
Auto
Digitzing
5. Outlines
111
Cross Stitch
Cross Stitch
112
The “Preview” screen displays a realistic view of
the image in cross stitch as shown in Figure CS29.
Figure CS-29
Tip
Auto
Digitzing
General File Formats Installation Introduction
Operations
6. Preview
If the image is not to your satisfaction, click the
Back button to redo previous steps.
Click Finish and this will start the
conversion to cross stitch. Once finished, the
cross stitch design will appear on the main screen
(Figure CS-30).
Warning
Cross Stitch
Applique
MS Paint
Click 'N Stitch Xtra with Applique
Depending on the bit-image file and the speed of
your computer, the conversion from image to
embroidery may take a few minutes.
Applique
Cross Stitch
Auto
Digitzing
General File Formats Installation Introduction
Operations
Figure CS-30
MS Paint
Cross Stitch
113
MS Paint
Applique
Cross Stitch
Auto
Digitzing
General File Formats Installation Introduction
Operations
114
Click 'N Stitch Xtra with Applique
Applique
○ ○ ○ ○ ○ ○ ○ ○ ○ ○ ○ ○ ○ ○ ○ ○ ○ ○ ○ ○ ○ ○ ○ ○ ○ ○ ○ ○ ○ ○ ○ ○ ○ ○ ○ ○
Items found in this Section:
1.
Introduction to Applique
2.
Applique Wizard
• Add Applique to Design - Predigitized Shape
• Using Magic Wand
3. Quick Start Lessons Autodigitize Method
• Autodigitize with Manual Tool
• Autodigitize with Manual Tool - Outer Path
• Auto Applique and Paint®
4. Applique Wizard Tools
116
Click 'N Stitch Xtra with Applique
MS Paint
Applique
Cross Stitch
Auto
Digitzing
General File Formats Installation Introduction
Operations
Introduction to Applique
Creating an Applique
You can create an applique from any suitable clip art or
scanned image. Some images may need to be edited
before you can create a suitable applique, with an
appropriate appearance.
Each applique segment has three parts - a cut line, a
tack-down stitching line and a final stitching layer to securely
hold the fabric in place. The cut line segment is also saved
in a separate file so that it may easily be stitched
independently for the purpose of pre-cutting applique
pieces. This file can be stitched directly onto the fabric that
will be the applique, and then the applique can be cut out in
advance for faster and easier production at the machine. A
temporary spray adhesive is used to hold the pre-cut fabric
applique in position over an identical target line stitched at
the beginning of each applique segment.
Autodigitizer Wizard
In the Autodigitizer Wizard section of the program, you
will convert artwork automatically, just as though you were
creating a fully stitched design. At the final step you may
choose the option “Create Applique”. You may create
appliques for the entire design, or just certain portions,
Depending on the artwork, you may wish to create details,
such as eyes and other features, as standard embroidery.
Click ‘n Stitch Xtra with Applique will create the stitch data
necessary to create beautiful appliques. In order for the
appliques to be long lasting, it is necessary to prepare the fabric
so that it doesn’t fray, wrinkle or bubble after it has been applied
to the garment.
When using fabrics that can withstand heat, apply a heat
fusible product to the back of the fabric that will later allow the
applique fabric to be bonded to the garment. If heat can not be
used, there are pressure-sensitive products available. Applying
such a product to the back of your selected applique fabric adds
body and may make pre-cutting easier.
There are many fabrics that will make impressive, eyecatching appliques. When selecting your applique fabric,
consider the care instructions for your garment or base fabric as
well as your applique fabric. They should have compatible care
methods. In other words, you wouldn’t want a dry clean only
applique fabric on your washable sweatshirt-unless you wanted
to be committed to having the washable sweatshirt continually
dry-cleaned.
Auto
Digitzing
Applique Success
Cross Stitch
In the Applique Wizard, you can use predigitized appliques,
resizing them to fit your needs. You can also open clip art and
use it like a template, trace around it with the “Add Path” or
“Autotrace” tool to create one of a kind appliques. You also have
a choice of various stitch types to use as a border for your
appliques.
General File Formats Installation Introduction
Operations
117
Applique
Applique
MS Paint
Applique Wizard
118
Click 'N Stitch Xtra with Applique
MS Paint
Applique
Cross Stitch
Auto
Digitzing
General File Formats Installation Introduction
Operations
Applique Methods
There are two basic methods of doing applique - pre-cut
and cut-away. Your Click ‘n Stitch Xtra with Applique program
creates applique designs that are suitable for either method.
Pre-Cut Method
In the pre-cut method, the applique fabric is cut to fit the
target stitch before stitching begins. This is a fast and
accurate method when done correctly. It is particularly
desirable when creating more than one of the same item.
Your program creates two or more files for each design
containing an applique. The first files contain a cutting line to
be stitched right on your prepared applique fabric. Stitch the
cutting line once for each applique that you need, and cut out
on the stitching line, or just slightly to the outside of the
stitching line.
When stitching the design on your hooped project, the
first thing to stitch will be the target line, which is the same as
the cutting line. You will then place your cut applique onto the
target line, using a suitable adhesive to hold your cut applique
piece in position until it has been tacked down with stitches.
If you are using a backing product with a pressure
sensitive coating, you can remove the paper covering just
before applying the cut piece to the garment. If you are using
a standard fusible to reduce fraying, press in place with an
iron. You can also use an embroidery spray adhesive to hold
your cut applique pieces in place.
Finishing Your Applique
Regardless of the method used, if the fabric was prepared
with a fusible backing, you may be able to fuse the applique to
the garment. Several products made specifically for applique
allow the finished applique to be permanently bonded to the
garment, so the applique fabric won’t wrinkle when washed or
cleaned.
Auto
Digitzing
In this method, the target line is stitched onto the garment.
The machine will stop after the target line for the placement of a
piece of applique fabric just large enough to cover the target
stitch. Restart the machine to stitch the tacking line. When the
machine stops after the tacking line, use a pair of blunt curved
scissors, applique scissors or any suitable scissors to cut the
fabric close to the tacking stitch. After cutting away the excess
fabric, restart the machine to stitch the final satin stitch layer to
complete the applique. Be careful the hooped project does
not move out of position while trimming away the excess
applique fabric!
Cross Stitch
The cut-away method is commonly used in home
embroidery because it eliminates all risk associated with precutting of fabrics. It can take a bit longer, and care must be
taken to avoid allowing the garment from being disturbed during
the cutting.
Applique
Cut-Away Method
General File Formats Installation Introduction
Operations
119
MS Paint
Applique
After positioning your cut piece onto the target line, restart
the machine to stitch the tacking stitches. The purpose of the
tacking stitches is to hold the applique more securely until the
final layer of satin stitches completes the applique.
MS Paint
Applique
Cross Stitch
Auto
Digitzing
General File Formats Installation Introduction
Operations
120 Click 'N Stitch Xtra with Applique
Quick Start Lesson Add Applique to Existing Design
○ ○ ○ ○ ○ ○ ○ ○ ○ ○ ○ ○ ○ ○ ○ ○ ○ ○ ○ ○ ○ ○ ○ ○ ○ ○ ○ ○ ○ ○ ○ ○ ○ ○ ○ ○
1. Go to File, File Open, and open
any design that is in one of the
supported formats. For this
example, we opened the provided
design 64389 located in the
directory
C:/gn/bitmaps/lesson_art. as
shown in Figure QSA-01.
2. Click on the Applique
Wizard tool
located on the
Command Tool bar at the top of
the screen. The tool launches
the Applique Wizard as shown
in figure QSA-02.
Fig. QSA -01
Fig. QSA -02
To begin click “NEXT”.
3. The chickens appear on the
Compose screen in “Ghost”
mode. Click on the “Ghost”
icon as shown in Figure QSA03 so chickens will appear as
Fig.QSA -03
General File Formats Installation Introduction
Operations
Applique
To utilize the Symbol and
Program Stitch options you
must have Embroidery
Links installed and
registered on this computer.
Fig.QSA -03b
Cross Stitch
The properties of the applique around
your design can easily be changed
through Settings and then click Apply.
The applique stitch can also easily be
changed by selecting a different stitch
type from the Type menu. Select the
applique and then make your changes.
Fig.QSA -03a
Fig.QSA -03d
Fig.QSA -03c
MS Paint
Warning
Tip
shown in Figure QSA-03a. From the
Shape list, Figure QSA-03b, select the
chunky heart shape06 and click on the
Add
button above the Shape list.
The heart shape appears around the
chickens in the View screen. Click on
the Settings button, and type 3 in the
box labeled Applique Width, as shown
in Figure QSA-03c. Click OK to close
the dialog. Click on Apply, as shown in
Figure QSA-03d, to activate the change
to the applique.
121
Auto
Digitzing
Applique
MS Paint
Applique
4. The heart shape appears around
the chickens. You can move, resize,
rotate, and reshape the shape
object by clicking and dragging on
any of the handles on the selection
box as shown in Fig. QSA-04. Click
on Next. The design appears in the
Preview screen. Click Finish.
Design is shown in Click ‘N Stitch
with Applique’s main screen.
5. Click on Re-Sequence Design
icon located on top Command Tool
Bar to the right of the Applique icon.
The combined creation is shown in
the Re-Sequence Design screen as
shown in Fig. QSA-05, and the heart
applique is shown in the first
stitching position. Click OK.
Tip
Cross Stitch
Auto
Digitzing
General File Formats Installation Introduction
Operations
122 Click 'N Stitch Xtra with Applique
Fig. QSA -04
Fig. QSA -05
The cross hatching shown on the
screen represents the applique
fabric.
6. In the final screen as shown in Fig.
QSA-06, click on File, Save As, and
select the destination directory where
you would like to save the design.
Select the desired format, type a new
name in the File Name box, click OK.
Fig. QSA -06
3. When the image appears in the
work area, select the Magic Wand
tool from the tool bar. With the wand,
click just inside the black outline of the
cone. Choose a wide area to be sure
you select the cone outline as shown
in Fig. QSA-09. If you get an area you
don’t want, click on the Erase Object
tool to delete.
Fig. QSA -08
Cross Stitch
2. On the tool bar below the work area,
click on the Backdrop icon
and
load the design Ice_Cream.wmf from
the directory C:/gn/bitmaps/
lesson_art.. On the Backdrop screen
as shown in Fig. QSA-08, type a new
size if desired. Remember, there are
25mm in an inch. Click OK.
Fig. QSA -07
Applique
1. Click on the Appliqué Wizard
icon in the Command Tool bar at the
top of your screen. In the Applique
Wizard Welcome screen as shown in
Fig. QSA-07, click Next.
Auto
Digitzing
○ ○ ○ ○ ○ ○ ○ ○ ○ ○ ○ ○ ○ ○ ○ ○ ○ ○ ○ ○ ○ ○ ○ ○ ○ ○ ○ ○ ○ ○ ○ ○ ○ ○ ○ ○
General File Formats Installation Introduction
Operations
Applique 123
Fig. QSA -09
MS Paint
Quick Start Lesson Magic Wand
4. Notice that a satin stitch outline has
appeared around the perimeter of the
cone as shown in Fig. QSA-10. Under
the satin stitch outline are the target
line and tacking stitch lines as well.
Click Next.
Fig. QSA -10
5. The next screen is the Preview
screen. It shows your outline without the
Backdrop artwork as shown in Fig.
QSA-11. Click Finish. The following
screen is the Re-Sequence Design
screen. There is no need to
resequence because there is only one
color as shown in Fig. QSA-12. Click
OK.
6. The design appears on the final work
area as shown in Fig. QSA-13. To
save, click on File, Save As. Choose
the location where you wish to save the
design, Choose your preferred format
in Save as Type, and type a name for
the design in File Name. Click on
Save button.
Tip
MS Paint
Applique
Cross Stitch
Auto
Digitzing
General File Formats Installation Introduction
Operations
124 Click 'N Stitch Xtra with Applique
Remember the cross hatch
markings in the ice cream applique
as to where the applique goes
within the design.
Fig. QSA -11
Fig. QSA -12
Fig. QSA -13
3. We will use the Color
Reduction function to
reduce the image colors.
The screen shows there
are 11 colors. Click the
downward arrow in the
Number of colors box
until there are only two black and white.
Auto
Digitzing
2. Click Next. In this screen,
change the width to 100mm. If you
prefer to work in inches, click on
the arrow in the “Units” box and
change the measurement unit to
inches and type 4 in the box
labeled “Width”. Click Next.
Cross Stitch
1. Open the Autodigitizer Wizard by clicking on the Auto
Digitize icon on the Command Tool Bar at the top of your
screen. Click on the Select Image button and select the art
image Plane from the directory C:/gn/bitmaps/lesson_art
You will need to change the Files of Type from “Bitmaps” to
“Windows Metafiles (EMF,WMF)”. Click Open.
Applique
○ ○ ○ ○ ○ ○ ○ ○ ○ ○ ○ ○ ○ ○ ○ ○ ○ ○ ○ ○ ○ ○ ○ ○ ○ ○ ○ ○ ○ ○ ○ ○ ○ ○ ○ ○
General File Formats Installation Introduction
Operations
Applique 125
MS Paint
Quick Start Lesson Manual Method
MS Paint
Applique
Cross Stitch
Auto
Digitzing
General File Formats Installation Introduction
Operations
126 Click 'N Stitch Xtra with Applique
4. Click on Show/Hide Preview,
and the plane will be shown in the
two remaining colors. Click Next.
When the image appears in the
Vectorized Image window, click
Next.
5. In the Judgement Screen, click
on Create Applique. When the
image appears in the Select
Applique screen, click on the Fill/
No Fill button. Click on all of the
black filled areas except the small
black semicircles on the body of the
plane.
6. Click on the Manual tool, and
click on the outermost outline of the
plane to select it. When selected,
the outside border will turn purple.
Click Next.
Auto
Digitzing
Cross Stitch
9. After the right click, the cloud
appears on the screen. The cloud has
the target line, tacking stitch and satin
layer for an applique, just like the
airplane. Click Next.
Applique
8. You can also add a cloud behind
the plane by selecting the Add Path
tool. Hold the Control button on
your keyboard as you click a freeform cloud around the airplane. When
complete, click the right mouse
button.
MS Paint
7. In the Compose Screen, click on
the Ghost icon to display the
regular embroidery detail on the
plane body, as well as the applique of
the plane body. In this screen, you can
edit the points in the applique outline
by clicking on the Edit Path
tool.
General File Formats Installation Introduction
Operations
Applique 127
10. The Re-Sequence Design
screen shows the airplane
applique will stitch before the
cloud, which would cover it. Place
your cursor over the second item,
the cloud, and hold down the left
mouse button to drag it to the first
position.
11. After moving the cloud to the
first position, the plane shows on
top of the cloud, and the detail of
the plane stitches last. Click OK.
MS Paint
Applique
Cross Stitch
Auto
Digitzing
General File Formats Installation Introduction
Operations
128 Click 'N Stitch Xtra with Applique
12. The design appears in the final
work area located within Click ‘N
Stitch with Applique’s main screen.
Colors may be changed by clicking
on the desired color chip located
at lower left side of screen. Click
on File, Save As, select directory
where you would like to save your
design. Select your desired format,
name the file in the File name box.
Click Save.
Auto
Digitzing
2. In the Color Reduction screen, click on
the downward arrow in the Number of
Colors window until there are only four
colors remaining, or just type in the number
4. Click Next. In the Vectorized Image
screen., click Next. In the Judgement
screen, click Create Applique. In the
Select Applique screen, click on the Fill/
No Fill button, and click inside the wolf. A
purple outline appears around the wolf.
Click on Outer Path Only and click on the
Auto Applique button. Click inside the
wolf again. A grid appears inside the wolf.
Cross Stitch
1. From the File menu, click on
File, File New. Click on the Auto
Digitizer tool from the
Command Tool Bar at the top of
the screen. Select the design
Wolf from the directory C:/gn/
bitmaps/lesson_art after
selecting “Vector Images” in the
pulldown menu of “Files of Type”.
In the Image Transformations
screen change the design to 4
inches or 100mm. Click Next.
Applique
○ ○ ○ ○ ○ ○ ○ ○ ○ ○ ○ ○ ○ ○ ○ ○ ○ ○ ○ ○ ○ ○ ○ ○ ○ ○ ○ ○ ○ ○ ○ ○ ○ ○ ○ ○
General File Formats Installation Introduction
Operations
Applique 129
MS Paint
Quick Start Lesson Manual Method - Outer Path
This is extra information that can happen if you click
on different functions within the program.
“Select All Paths”
Makes extra applique
at base of tail
Extra Applique
MS Paint
Applique
Cross Stitch
Auto
Digitzing
Tip
General File Formats Installation Introduction
Operations
130 Click 'N Stitch Xtra with Applique
“Outer Path”
best setting for
this design
Preferred Results
2. In the next screen, change
the width to 100mm. If you
prefer to work in
inches, click on the
arrow in the “Units”
box and change
the measurement
unit to inches and
type 4 in the box
labeled “Width”.
Click Next.
General File Formats Installation Introduction
Operations
Auto
Digitzing
1. Open the Autodigitizer
Wizard by clicking on the Auto
Digitizer icon on the
Command Tool Bar at the top
of your screen. Click on the
Select Image button and
select the art image
Heart_Apple from the
directory C:/gn/bitmaps/
lesson_art You will need to
change the Files of Type from
“Bitmaps” to “Windows
Metafiles (EMF,WMF)”. Click
Next.
Cross Stitch
○ ○ ○ ○ ○ ○ ○ ○ ○ ○ ○ ○ ○ ○ ○ ○ ○ ○ ○ ○ ○ ○ ○ ○ ○ ○ ○ ○ ○ ○ ○ ○ ○ ○ ○ ○
131
Applique
Applique
MS Paint
Quick Start Lesson Autodigitizer Wizard with MS
Paint®
MS Paint
Applique
Cross Stitch
Auto
Digitzing
General File Formats Installation Introduction
Operations
132 Click 'N Stitch Xtra with Applique
3. The next screen is labeled “Color
Reduction”. Notice that the apple is
made up of two colors, and the leaf
has two colors. The color separations
are numbered on the left side of the
screen The index of colors shows 7
colors in this design.
4. Click on the button labeled Edit
Image. This will place the image into
an associated artwork editing
program. The default associated
program is Microsoft Paint®, because
it is pre-installed on all Windows®based computers.
The image is opened into the Paint
program where we will make
modifications that will help the image
process better in the program. When
opened, the apple has two colors, and
its leaf has two colors.
5. On the color palette tool at the
bottom of the screen, click on the red
color chip.
Auto
Digitzing
Cross Stitch
8. Scroll to the bottom of the
apple. Choose the Paintbrush
tool and one of the larger
brush sizes. The red color is
still loaded as the foreground
color, so red is the color
“loaded” in your paintbrush.
Brush over the black accents
using the Paintbrush tool, and
the black highlights will be
replaced with red.
Applique
7. Now click with the Paint Can
tool in the right side of the apple.
The apple is now a uniform red
color.
MS Paint
6. After loading red as the
foreground color, choose the
Paint Can tool
and click inside
the left side of the apple. The
Pinkish color is changed to the
red that you loaded as the
foreground color.
General File Formats Installation Introduction
Operations
Applique 133
MS Paint
Applique
Cross Stitch
Auto
Digitzing
General File Formats Installation Introduction
Operations
134 Click 'N Stitch Xtra with Applique
9. Next scroll to the top of the
apple. We need to make the
entire apple red, without a black
outline. We want to keep the
black outline for detail on the
stem and leaf. So, we will use
the Paintbrush tool to paint the
area next to the stem with red,
separating the black outline on
the apple from the outline on the
leaf and stem.
10. Select the Paint Can tool
and click with it inside the
black border of the apple. The apple will become completely
red.
Auto
Digitzing
Cross Stitch
13. We have completed editing the
image to produce the best applique.
Under the File menu, click on Save,
and close the Paint program.
Applique
12, Select the Paint Can
tool and click inside the
light green section of the
leaf, flooding it with dark
green. Finally, click inside
the stem and vein,
replacing the tan with bright
green.
MS Paint
11. Select the
Eyedropper tool ,
and click inside the
dark green section of
the leaf. Now your
foreground color will
be the dark green
instead of the color
red.
General File Formats Installation Introduction
Operations
Applique 135
14. Your edited image appears in
the Autodigitizer Wizard. Notice
that the color legend now shows
only four colors instead of the
seven appearing in step 3. Click
Next.
15. The image appears in the
“Vectorized Image” screen. Click
Next.
MS Paint
Applique
Cross Stitch
Auto
Digitzing
General File Formats Installation Introduction
Operations
136 Click 'N Stitch Xtra with Applique
16. The Judgement screen allows
us to select sequencing order,
fabric type, trim and lock stitch
preferences. Leave all settings as
the defaults and click on the
Create Applique button.
Applique
button and then click inside the
heart shape. It will be filled with a
crosshatched pattern indicating
the area will be covered with
fabric. Click Next.
Auto
Digitzing
Cross Stitch
19. Next, click on the Auto
Applique
18. Click inside the red heart to
indicate that standard embroidery will
not be generated for this section, which
will be an applique’. The red fill
disappears, and only a thin red outline
defines the heart.
MS Paint
17. The image is now in the Select
Applique screen, where we will
define what areas will be applique
and what areas, if any, will be
standard embroidery. To begin,
click on the Fill/No Fill
button.
General File Formats Installation Introduction
Operations
Applique 137
MS Paint
Applique
Cross Stitch
Auto
Digitzing
General File Formats Installation Introduction
Operations
138 Click 'N Stitch Xtra with Applique
20. In the Compose screen, the
applique stitches are shown, and the
standard embroidery stitches appear
in a ghost image. Click on the small
ghost icon below the image in the
Compose screen.
21. The embroidery stitches now
appear on the screen along with the
applique shape in an outline form.
Click Next.
22. The image appears in the
Preview screen. Click Finish.
Auto
Digitzing
25. The finished design will appear
on the workgrid within Click ‘N Stitch
with Applique’s main screen. At the
bottom of the main screen are the
color chips in sewing order.
MS Paint
Cross Stitch
24. After dragging the leaf to
position one, the display will look
like this. Click OK.
Applique
23. The Resequence Design
screen allows you to determine the
stitching order of the design
elements by color. In this instance,
we would have a smoother finish on
the apple if the edges of the apple
stem were tucked under the
applique. To accomplish this, place
your cursor over the leaf , hold down
the left mouse button and drag it to
the first position in the resequence
strip.
Click OK.
General File Formats Installation Introduction
Operations
Applique 139
MS Paint
Applique
Cross Stitch
Auto
Digitzing
General File Formats Installation Introduction
Operations
140 Click 'N Stitch Xtra with Applique
26. The first two colors are the leaf
colors. The third color is the target
placement line, the second color is
the tack down stitch and the third is
the applique’ satin stitch. To colorize
the design for stitching, click on the
third color chip and a palette
appears. Select the correct color
palette for your machine and click on
the red chip in your palette. Select
red for the last three colors.
27. Your design is now ready for
saving and stitching. On the File
menu, select Save As.
In the Save In box, place the
name of the directory where you
want to save your file.
In the Save as Type box, select
your desired format from the
drop-down list.
In the File Name box, type the
name of your new creation.
Click Save.
141
Quick Start Lesson - Re-Sequence
Design - Split Colors
Applique
When the size Backdrop
dialog box appears, click
OK.
MS Paint
From the Let-AARDV
folder in the Bitmap
directory, load the letter D.
Cross Stitch
Auto
Digitzing
In the Re-Sequence screen, we can split the three parts of
each color into parts to group them for better stitching
results. To experiment with this, click on the Applique
Wizard icon
and then Next and then the Backdrop
tool .
General File Formats Installation Introduction
Operations
Applique
Using the Magic Wand
tool
click inside the
black portion of the letter.
Click the Magic
Wand tool
again, and click
inside the open
area inside the D.
MS Paint
Applique
Cross Stitch
Auto
Digitzing
General File Formats Installation Introduction
Operations
142 Click 'N Stitch Xtra with Applique
At the Applique-Preview
screen, click Finish.
At the Re-Sequence
Design screen, right click
on the first icon in the
sequence and select “Split
Colors”.
At the warning message, click Yes.
The single color will be shown in its
three segments.
A = Guide Stitch
B = Tacking Stitch
C = Final Layer
Auto
Digitzing
MS Paint
Applique
Cross Stitch
On the second color, repeat by right clicking on the second
color icon, representing the inside of the “D”. After splitting,
highlight the guide stitch of the second segment and use the
left arrow key on your keyboard to move it next to the guide
stitch of the outer segment. Repeat the process until the
segements are grouped by type. The guide stitch, the tacking
stitch and the final layer will be next to each other for both
colors to achieve the best stitching.
General File Formats Installation Introduction
Operations
Applique 143
MS Paint
Applique
Cross Stitch
Auto
Digitzing
General File Formats Installation Introduction
Operations
144 Click 'N Stitch Xtra with Applique
Applique Wizard Tools
Ghost tool - Use this tool to display standard
embroidery elements when creating appliques in the
Autodigitizer Wizard
Zoom In tool - Use this tool to get a closer view of
design elements in the work area. Does not affect
stitching size.
Zoom Out tool - Use this tool to reduce the viewing
size of design elements in the work area. Does not
affect stitching size.
Zoom To Fit tool - Use this tool to view design
elements in actual size.
Center tool - Use this tool to center the design in the
work area.
Backdrop tool - Use this tool to load artwork into the
work area for use with the Magic Wand or Add Path
tools.
Hand Tool - Use this tool to move viewing area when
using the Zoom tools.
Delete Tool - Use this tool to delete a selected object.
Auto
Digitzing
Edit Path Tool - Use this tool to move points on a
created object’s path.
Cross Stitch
Magic Wand Tool - Use this tool to select paths on
artwork for creation of appliques.
Applique
Add Path Tool - Use this tool to add an applique path
by tracing artwork or doing freehand drawing.
MS Paint
Select Tool - Use this tool to select an object for sizing,
moving or deleting.
General File Formats Installation Introduction
Operations
Applique 145
MS Paint
Applique
Cross Stitch
Auto
Digitzing
General File Formats Installation Introduction
Operations
146 Click 'N Stitch Xtra with Applique
Applique Wizard Settings
Settings Screen- Use this screen to control the stitching
parameters of the appliques created in the program
Applique Width - Defines width of the satin stitch in an
applique. A larger number make a wider stitch. The default
is 2mm.
Stitch Length - Defines the length of running stitches in
target and tack down stitches.
Applique Density - Defines the distance between each
satin stitch in the applique. The default is 4.0. A larger
number makes the stitches farther apart.
Tack Down Inset - Defines the distance from the outside
edge of the satin stitch of the applique to the running stitch
tack down. The default is .5. A larger number
Stop Command - A check mark in this box causes the
machine to stop between the target stitch and the tack
down stitch, to allow placement of the applique.
Preview Screen
3D Threshold - Defines the width of
stitches that are viewable in the 3D mode of
the preview. If stitches appear to be
missing, their length exceeds the maximum
set for this value. The default is 3mm. You
may increase this value.
Microsoft® Paint
○ ○ ○ ○ ○ ○ ○ ○ ○ ○ ○ ○ ○ ○ ○ ○ ○ ○ ○ ○ ○ ○ ○ ○ ○ ○ ○ ○ ○ ○ ○ ○ ○ ○ ○ ○
In this section, we describe the features
of the Microsoft Paint software that may
be useful to you as you work with Click ‘N
Stitch Xtra with Applique. MS Paint is a
graphic editor from Microsoft that is
included in the Windows Operating
System. You may use a graphic editor
like MS Paint to alter artwork to work
more suitably with the program.
Disclaimer
Although Click ‘N Stitch Xtra with Applique is
designed to work with Microsoft Paint, MS Paint is
not an Amazing Designs product. MS Paint is
manufactured by Microsoft and any questions
regarding the use of MS Paint should be sought
through Mircrosoft technical support.
148 Click 'N Stitch Xtra with Applique
Click ‘N Stitch Xtra with Applique allows you to edit
a design using MS Paint or another graphic editor
you may have.
Autodigitizer Wizard
In the Color Reduction screen, click on the Edit
Image button, and MS Paint will load. See Figure
P-1 and Figure P-2.
Figure P-1
MS Paint
Applique
Cross Stitch
Auto
Digitzing
General File Formats Installation Introduction
Operations
Graphic Editing Using MS Paint
Figure P-2
MS Paint 149
In the Image Edit screen, click on the Edit Image
button, and MS Paint will load. See Figure P-3 and
Figure P-4.
Auto
Digitzing
Figure P-3
General File Formats Installation Introduction
Operations
Cross Stitch Wizard
Applique
If the imported design is not large enough for
ease of working in MS Paint, use the zoom tool to
enlarge the viewing size. DO NOT resize it as this
will resize the image in your Click ‘N Stitch with
Applique program.
MS Paint
Warning
Cross Stitch
Figure P-4
MS Paint
Applique
Cross Stitch
Auto
Digitzing
General File Formats Installation Introduction
Operations
150 Click 'N Stitch Xtra with Applique
Drop-Down Menus - MS Paint
Figure P-5
There are six Drop-Down Menus:
File
Edit
View
Image
Colors
Help
Only two commands under the File Menu are
used in conjunction with Click ‘N Stitch Xtra with
Applique.
Save (Ctrl+O)
Click File, then Save to save changes to the
design. The “Save” command will not overwrite the
original file, it just saves the changes back to Click
‘N Stitch Xtra with Applique.
Exit (Alt+F4)
Click File, then Exit to close MS Paint and
return to Click ‘N Stitch Xtra with Applique.
Edit Menu
Applique
Cross Stitch
Figure P-6
General File Formats Installation Introduction
Operations
File Menu
151
Auto
Digitzing
MS Paint
Click Edit, then Undo to remove the last
change you made to the design.
MS Paint
Undo (Ctrl+Z)
152 Click 'N Stitch Xtra with Applique
MS Paint
Applique
Cross Stitch
Auto
Digitzing
General File Formats Installation Introduction
Operations
Repeat (F4)
Click Edit, then Repeat to reapply a change
that you just used Undo on.
Cut (Ctrl+X)
Click Edit, then Cut to remove a selected
area of the design.
Copy (Ctrl+C)
Click Edit, then Copy to duplicate a selected
area of the design.
Paste (Ctrl+V)
Click Edit, then Paste to “paste” an area that
was either cut or copied.
Clear Selection (Del)
Click Edit, then Clear Selection to delete a
selected area of the design.
Select All (Ctrl+A)
Click Edit, then Select All to select the entire
design.
Copy To
Click Edit, then Copy To to copy the selected
area of the design to another file.
Paste From
Click Edit, then Paste From to “paste” the
contents of a separate file into your active design.
MS Paint 153
Figure P-7
Tool Box, Color Box, Status Bar and Text Toolbar
You can toggle whether the Tool Box, Color
Box or Status Bar are displayed on the screen.
Click View, then the appropriate choice to turn it
on or off. The Text Toolbar will only appear if you
add text to the design.
Auto
Digitzing
View Bitmap (Ctrl+F)
MS Paint
Click View, then View Bitmap to display the
design at full size on your desktop. This is simply a
display feature. You can not do any editing in this
view.
Cross Stitch
Click View, then Zoom to enlarge the design.
This function can be very important when editing a
design. If the design appears too small on the
screen for detailed editing, zoom in to enlarge the
design. DO NOT resize the design to make it
bigger. Resizing in Paint will resize the design in
Click ‘N Stitch Xtra with Applique.
Applique
Zoom
General File Formats Installation Introduction
Operations
View Menu
154 Click 'N Stitch Xtra with Applique
MS Paint
Applique
Cross Stitch
Auto
Digitzing
General File Formats Installation Introduction
Operations
Image Menu
Figure P-8
Flip/Rotate (Ctrl+R)
Click Image, then Flip/Rotate to choose to
flip the image vertically or horizontally, or to rotate
the image by 90, 180 or 270 degrees.
Stretch/Skew (Ctrl+W)
Click Image, then Stretch/Skew to change the
proportions of the selection. This will change the size of
the design.
Invert Colors (Ctrl+I)
Click Image, then Invert Colors to achieve
an effect similar to a photographic negative.
Attributes (Ctrl+E)
Click Image, then Attributes to change the
basic image attributes such as height and width,
colors (switch between b&w and color) and
transparency.
Clear Image (Ctrl+Shift+N)
Click Image, then Clear Image to delete the
image.
Click Colors, then Edit Colors to edit your
color palette and to create custom colors.
Help Menu
Help Topics
Click Help, then Help Topics for answers to
questions you may have regarding MS Paint.
Auto
Digitzing
Edit Colors
Cross Stitch
Colors Menu
Applique
Click Image, then Draw Opaque to treat the
background of the selected area as transparent
(the default color is white).
MS Paint
Draw Opaque
General File Formats Installation Introduction
Operations
MS Paint 155
156 Click 'N Stitch Xtra with Applique
MS Paint
Applique
Cross Stitch
Auto
Digitzing
General File Formats Installation Introduction
Operations
Tool Box
Free-Form Select
Click on the Free-Form Select tool, then, on the
design, click and hold the left mouse button while
you drag the mouse to create the desired shape.
Select
Click on the Select tool, then, on the design, click
and hold the left mouse button while you drag the
mouse to create a rectangle shape.
Eraser/Color Eraser
Click on the Eraser tool, then click on the part of the
design you want to erase.
Fill
The Fill tool applies color to an entire area of the
design. (See example on next page).
Pick Color
The Pick Color tool is used to pick up colors already
in the design. This allows you to use the exact shade
of that color in other areas of the design.
Magnifier
The Magnifier allows you to zoom in to work on fine
details on the design.
In MS Paint, click on the Fill With Color (A)
tool and then select a color from the Color Palette
(B) that is not in the design.
Figure P-10
Applique
Click anywhere in the white background and
the entire background will fill with the color
selected from the “color palette.”
Cross Stitch
Auto
Digitzing
Figure P-9
General File Formats Installation Introduction
Operations
Use the Fill tool when the background color is the
same color as areas within the design. Fill the
background with a color not currently in the design
so that these areas will be ignored in Click ‘N Stitch
Xtra with Applique.
MS Paint
Tip
MS Paint 157
MS Paint
Applique
Cross Stitch
Auto
Digitzing
General File Formats Installation Introduction
Operations
158 Click 'N Stitch Xtra with Applique
Pencil
The Pencil tool is the basic drawing tool in Paint.
Brush
The Brush is similar to the pencil except that you
can change the size and shape of the brush.
Airbrush
The airbush tool applies color gradually as if it is
being sprayed on the design.
Text
The Text tool allows you to enter text into the design in various fonts, colors and sizes.
Line
The Line tool lets you draw straight lines of various
widths.
Curve
The Curve tool is used to make curved lines of
various widths. Left click the mouse to draw a line,
then click again to position the curve.
Rectangle
The Rectangle tool draws different types of rectangles. To draw a rectangle, click on the tool, then
click a point where you want one corner to be and
drag the mouse to where you want the other corner
to be.
Rounded Rectangle
The Rounded Rectangle tool creates rectangles with
rounded corners. This tool works the same way as
the Rectangle tool.
Auto
Digitzing
The Ellipse tool allows you to draw ovals on the
design. Click the Ellipse tool then click on the
design where you want the oval to start and drag
the mouse to create the shape.
Cross Stitch
Ellipse
Applique
The create a polygon, activate the Polygon tool
then click on the design where you want the first
corner to be. Draw the edges of the shape, then
connect the last edge to the first corner and the
shape will finish.
MS Paint
Polygon
General File Formats Installation Introduction
Operations
MS Paint 159
MS Paint
Applique
Cross Stitch
Auto
Digitzing
General File Formats Installation Introduction
Operations
160 Click 'N Stitch Xtra with Applique