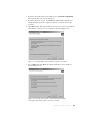
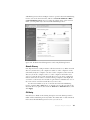
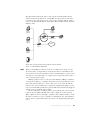
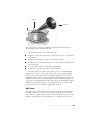
1
NE T WORKING
M A DE PA INLE SS
• Troubleshoot network slowdowns and failures
ABOUT THE AUTHOR
ing for Motorola, AT&T, and other manufacturers. He
(Random House),
• Connect Windows, Macintosh, and Linux computers
(Sybex),
Books), and
(Sunset
(No Starch Press).
• Implement network addressing
• Configure your network adapters, hubs, switches,
• Share music, photos, and documents
COV E RS W INDOW S,
MAC OS X, AND LINUX
N E T W O R K K N O W- H O W
• Automate household appliances and distribute digital
NET WORK
KNOW-H OW
A N
E S S E N T I A L
G U I D E
F O R
ACCIDENTAL A D M I N
JOHN ROSS
ROSS
www.allitebooks.com
T H E
www.allitebooks.com
NETWORK KNOW-HOW
www.allitebooks.com
We are in great haste to construct a magnetic telegraph
from Maine to Texas; but Maine and Texas, it may be, have
nothing important to communicate.
—Henry David Thoreau, Walden
www.allitebooks.com
NETWORK
KNOW-HOW
An Essential Guide for the
A c ci d en t a l A d m i n
by J oh n R os s
San Francisco
www.allitebooks.com
NETWORK KNOW-HOW. Copyright © 2009 by John Ross.
All rights reserved. No part of this work may be reproduced or transmitted in any form or by any means, electronic or
mechanical, including photocopying, recording, or by any information storage or retrieval system, without the prior
written permission of the copyright owner and the publisher.
13 12 11 10 09
123456789
ISBN-10: 1-59327-191-3
ISBN-13: 978-1-59327-191-6
Publisher: William Pollock
Production Editor: Kathleen Mish
Cover and Interior Design: Octopod Studios
Developmental Editor: Tyler Ortman
Technical Reviewer: Mike Kershaw
Copyeditors: Eric Newman and LeeAnn Pickrell
Compositor: Riley Hoffman
Proofreader: Rachel Kai
Indexer: Sarah Schott
For information on book distributors or translations, please contact No Starch Press, Inc. directly:
No Starch Press, Inc.
555 De Haro Street, Suite 250, San Francisco, CA 94107
phone: 415.863.9900; fax: 415.863.9950; [email protected]; www.nostarch.com
Librar y of Congress Cataloging-in-Publication Data:
Ross, John, 1947Network know-how : an essential guide for the accidental admin / John Ross.
p. cm.
Includes index.
ISBN-13: 978-1-59327-191-6
ISBN-10: 1-59327-191-3
1. Home computer networks. 2. Computer networks--Management. I. Title.
TK5105.75.R667 2009
004.6--dc22
2008052768
No Starch Press and the No Starch Press logo are registered trademarks of No Starch Press, Inc. Other product and
company names mentioned herein may be the trademarks of their respective owners. Rather than use a trademark
symbol with every occurrence of a trademarked name, we are using the names only in an editorial fashion and to the
benefit of the trademark owner, with no intention of infringement of the trademark.
The information in this book is distributed on an “As Is” basis, without warranty. While every precaution has been
taken in the preparation of this work, neither the author nor No Starch Press, Inc. shall have any liability to any
person or entity with respect to any loss or damage caused or alleged to be caused directly or indirectly by the
information contained in it.
www.allitebooks.com
BRIEF CONTENTS
Acknowledgments ....................................................................................................... xiii
Introduction ...................................................................................................................xv
Chapter 1: How a Network Will Improve Your Life .............................................................1
Chapter 2: Types of Network Connections .........................................................................9
Chapter 3: Hubs, Switches, and Routers ..........................................................................27
Chapter 4: How Computer Networks Are Organized ........................................................35
Chapter 5: Designing Your Network................................................................................47
Chapter 6: Installing the Network Control Center and Ethernet Cables.................................55
Chapter 7: Ethernet Network Interfaces............................................................................69
Chapter 8: Wi-Fi Networks ............................................................................................77
Chapter 9: File Servers ..................................................................................................93
Chapter 10: Connecting Your Network to the Internet......................................................107
Chapter 11: Connecting Your Computer to a Network ....................................................117
Chapter 12: Sharing Files Through Your Network ...........................................................131
Chapter 13: Network Security ......................................................................................151
Chapter 14: Printers and Other Devices on Your Network................................................191
www.allitebooks.com
Chapter 15: Other Things You Can Connect to Your Network: Audio, Video,
Home Entertainment, and Beyond .................................................................................203
Chapter 16: Other Network Applications.......................................................................225
Chapter 17: Troubleshooting ........................................................................................239
Index .........................................................................................................................253
vi
Br ief C on t en ts
www.allitebooks.com
CONTENTS IN DETAIL
A CK N O W LE D G M E N T S
xiii
I NT R O D UC T I O N
xv
1
HO W A N E T W O R K W I L L I M PR O V E Y O U R L IF E
1
What’s a Network? .................................................................................................. 2
Sneakernet .............................................................................................................. 3
Data Networks and What You Can Do with Them ........................................................ 4
File Sharing ................................................................................................ 5
Sharing an Internet Connection ..................................................................... 6
Instant Messages ......................................................................................... 7
Sharing Printers and Other Hardware ............................................................ 7
Home Entertainment .................................................................................... 7
Video Cameras and Home Security Devices ................................................... 8
Home Automation ....................................................................................... 8
2
T Y P E S O F N E T W O R K C O N N E CT IO NS
9
Packets and Headers .............................................................................................. 11
Error Checking .......................................................................................... 13
Handshaking and Overhead ...................................................................... 13
Ethernet ................................................................................................................ 14
Wi-Fi .................................................................................................................... 16
Powerline Networks ................................................................................................ 16
Other Alternative Wiring Methods ............................................................................ 17
DTE and DCE Equipment ......................................................................................... 18
Point-to-Point Networks ............................................................................................ 19
Ad Hoc Wi-Fi ........................................................................................... 20
Infrared .................................................................................................... 20
FireWire (IEEE 1394) ................................................................................ 21
Connections Through a Telephone Line ..................................................................... 21
Remote Terminals ................................................................................................... 23
Clients and Servers ................................................................................................. 23
3
HU B S , S W IT CH E S , AN D R O UT E R S
27
Hubs and Switches ................................................................................................. 28
Hubs ....................................................................................................... 29
Switches .................................................................................................. 30
www.allitebooks.com
LANs and WANs ................................................................................................... 31
Bridges and Routers ............................................................................................... 32
Combination Boxes ................................................................................................ 33
4
HO W CO M PU T E R N E T W O R K S AR E O R G A N I ZE D
35
TCP/IP Networks .................................................................................................... 36
Names and Addresses ............................................................................... 36
Network Tools ....................................................................................................... 41
IPConfig ................................................................................................... 41
ifconfig .................................................................................................... 43
ping ........................................................................................................ 43
TraceRoute ............................................................................................... 44
5
D E S I G N I NG Y O U R N E T W O R K
47
Identifying Current and Future Nodes ....................................................................... 48
The Control Center ................................................................................................. 50
Home Run Wiring ..................................................................................... 51
Trunks and Branches: Using Secondary Switches .......................................... 53
What About Wi-Fi? ................................................................................................ 54
6
I NS T AL L IN G T H E NE T W O R K C O N T R O L C E N T E R A N D
ETHERNET CABLES
55
Connectors, Wall Plates, and Surface Boxes .............................................................. 55
Ethernet Cable ....................................................................................................... 56
Pushing Cable Through Walls .................................................................................. 57
The Control Center ................................................................................................. 58
AC Power ................................................................................................ 61
Modems, Routers, and Switches .................................................................. 62
Adding a DSL or Cable Connection ............................................................. 64
Terminating the Network Cables ................................................................. 66
Adding a Telephone .................................................................................. 67
Tabletop Control Centers for Small Networks ............................................................. 67
7
E T H E R N E T N E T W O R K I NT E R F A CE S
69
Built into the Motherboard ....................................................................................... 70
Setting the BIOS Utility ............................................................................... 71
Adding a Network Interface to an Old Computer ....................................................... 72
Internal Expansion Cards ........................................................................... 72
USB Adapters ........................................................................................... 73
Network Adapters for Laptops .................................................................... 73
Finding the Driver Software for Your Adapter ............................................... 74
Status Lights on Network Adapters ........................................................................... 75
viii
C on t en t s in D et ai l
www.allitebooks.com
8
W I- FI NE T W O R K S
77
Types of Wi-Fi Networks ......................................................................................... 78
Operating Channels ............................................................................................... 79
Access Points ......................................................................................................... 80
Network Interface Adapters ..................................................................................... 81
Adapters Built into Laptops ......................................................................... 81
PC Cards ................................................................................................. 82
USB Adapters .......................................................................................... 83
PCI Cards ................................................................................................ 84
Antennas .................................................................................................. 84
Wi-Fi Control Programs ........................................................................................... 85
Access Point Configuration Programs ........................................................... 85
Wireless Connection Programs ................................................................... 87
Hybrid (Wired-Wireless) Networks ........................................................................... 89
Wi-Fi Security ........................................................................................................ 89
9
F IL E SE R V E R S
93
Choosing a Computer to Use as a File Server ............................................................ 94
Windows, Mac, Linux, or . . . ? ............................................................................... 94
Using a Server for File Storage ................................................................................ 96
Using Network-Attached Storage ............................................................................. 97
USB Device Servers ................................................................................... 99
Apple’s AirPort Extreme ............................................................................. 99
Backing Up Files to a Server .................................................................................. 100
The Windows Backup Program ................................................................. 101
Macintosh Backup Programs ..................................................................... 103
Linux and Unix Backups ........................................................................... 104
Using a Server at Home ........................................................................................ 105
10
C O NN E C T I N G Y O U R N E T W O R K T O T H E I N T E R N E T
107
The Internet: From the Cloud to You ........................................................................ 108
The Modem ............................................................................................ 108
The Gateway Router ................................................................................ 109
Individual Computers ............................................................................... 110
Configuring the Network Gateway ......................................................................... 115
Summary ............................................................................................................. 115
11
C O NN E C T I N G Y O U R C O M P U T E R T O A N E T W O R K
117
Connecting Your Windows Computer to a Network ................................................. 118
Creating a New Network Profile ............................................................... 118
Changing Your Computer’s Network Settings ............................................. 122
Connecting Your Macintosh Computer to a Network ................................................ 124
Connecting Your Linux or Unix Computer to a Network ............................................ 127
Summary ............................................................................................................. 129
C on t en ts in D et ail
ix
12
S HA R I N G FI L E S T HR O UG H Y O U R N E T W O R K
131
File Sharing in Windows XP .................................................................................. 132
Level 1 ................................................................................................... 133
Level 2 ................................................................................................... 134
Level 3 ................................................................................................... 135
Level 4 ................................................................................................... 135
Level 5 ................................................................................................... 136
File Sharing in Windows Vista ............................................................................... 136
Network Discovery .................................................................................. 137
File Sharing ............................................................................................ 137
Printer Sharing ........................................................................................ 143
Password Protected Sharing ..................................................................... 143
Media Sharing ....................................................................................... 143
File Sharing on a Macintosh .................................................................................. 143
Connecting a Mac to a Windows (SMB) Network ...................................... 143
Connecting from Older Mac Versions ........................................................ 147
File Sharing in Linux and Unix ............................................................................... 147
Sharing from Linux or Unix Computers ....................................................... 147
Creating Shares on Linux and Unix Computers ........................................... 149
Samba ................................................................................................... 150
Using Shares ....................................................................................................... 150
13
N E TW O R K SE CU RI TY
151
Keeping Intruders Out ........................................................................................... 152
User Accounts and Access Levels .............................................................. 152
Passwords .............................................................................................. 152
Firewalls ................................................................................................ 154
Virtual Private Networks ........................................................................................ 159
VPN Methods ......................................................................................... 161
VPN Servers ........................................................................................... 162
VPN Client Software ................................................................................ 165
VPN Clients for Linux/Unix ....................................................................... 172
OpenVPN: A Cross-Platform Alternative ..................................................... 173
Using a VPN Through a Public Network ..................................................... 173
Wireless Security ................................................................................................. 174
Protecting Your Network and Your Data ..................................................... 176
Network Name ....................................................................................... 177
WEP Encryption ...................................................................................... 179
WPA Encryption ..................................................................................... 182
Access Control (MAC Authentication) ........................................................ 184
Physical Security .................................................................................................. 184
Windows Update and Patches ............................................................................... 185
Microsoft Baseline Security Analyzer ...................................................................... 188
Controlling Your Own Users .................................................................................. 189
Denial of Service Attacks ....................................................................................... 189
Conclusion .......................................................................................................... 189
x
C on t en ts in D et ai l
14
P R I N T E R S AN D O T HE R D E V IC E S O N Y O U R N E T W O R K
191
How to Connect a Printer to Your Network .............................................................. 192
External Printer Servers ............................................................................ 192
Wi-Fi Printer Servers ................................................................................ 194
Built-In Printer Servers ............................................................................... 194
Automatic Printer Switches ........................................................................ 194
Using a Computer as a Printer Server ........................................................ 195
CUPS: The Common Unix Printing System ............................................................... 199
All-in-One Devices ................................................................................................ 199
15
O T H E R T H I NG S Y O U C AN CO N N E C T T O YO U R
N E T W O R K : A UD IO , V I D E O , HO M E E N T E R T A IN M E N T ,
A ND B E Y O N D
203
Using a Microphone and Camera with Your Network ............................................... 204
Internal and External Controllers ............................................................... 204
Networked Cameras and Microphones ..................................................... 205
Home Entertainment Networks ............................................................................... 206
Music Through a Home Network ............................................................................ 206
Audio Servers ......................................................................................... 207
Audio Clients .......................................................................................... 211
Video Through a Home Network ............................................................................ 215
Video Servers ......................................................................................... 215
TiVo and Other Digital Video Recorders ..................................................... 216
Playing Video on a Computer ................................................................... 218
Connecting a TV to Your Network ............................................................. 218
Game Consoles ................................................................................................... 220
Connecting a PlayStation ......................................................................... 220
Connecting a Wii ................................................................................... 221
Connecting an Xbox 360 ......................................................................... 222
Connecting Home Appliances to Your Network ....................................................... 222
Home Automation ................................................................................................ 223
Remote Sensors and Controls ................................................................................. 223
Bar Code Readers and Remote Data Entry ............................................................... 224
If You Can Convert It to Digits, You Can Put It on the Network ................................... 224
16
O T H E R N E T W O R K AP P L IC A T I O N S
225
Remote Desktop ................................................................................................... 226
Windows Remote Desktop ........................................................................ 226
Virtual Network Computing (VNC) ............................................................ 229
MaxiVista: Adding a Screen .................................................................................. 229
Multiple Monitors .................................................................................... 230
Remote Control ....................................................................................... 232
Synchronizing Files .............................................................................................. 232
C on t en ts in D et ail
xi
Instant Messaging and Live Communication ............................................................. 233
Servers vs. Peer-to-Peer Messaging ............................................................ 234
Internet-Based IM Services ........................................................................ 234
Messaging Through a LAN ....................................................................... 235
Messaging Through a Virtual Private Network ............................................ 236
Audio and Video Messaging .................................................................... 237
17
T R O U B L E SH O O T IN G
239
General Troubleshooting Techniques ...................................................................... 240
Define the Problem .................................................................................. 240
Look for Simple Solutions First ................................................................... 241
Isolate the Problem .................................................................................. 243
Retrace Your Steps .................................................................................. 243
Keep Notes ............................................................................................ 244
Viruses and Other Nasties ..................................................................................... 245
Other Common Problems ...................................................................................... 245
Configuration Settings .............................................................................. 246
DHCP Settings: DNS and Default Gateway ................................................ 246
Failed Connection to a Specific Site .......................................................... 246
An Alternate Connection to the Internet ................................................................... 247
The Collective Wisdom of the Internet ..................................................................... 247
Software for Troubleshooting ................................................................................ 248
Network Magic ...................................................................................... 248
Protocol Analyzers .................................................................................. 248
ISP Problems ........................................................................................................ 251
Don’t Panic .......................................................................................................... 251
I ND E X
xii
C on te nt s i n De ta il
253
ACKNOWLEDGMENTS
A book like this is always a collaboration, even if only one author’s name
is on the cover. The book in your hands is a huge improvement over the
original manuscript, thanks to the efforts of editors Tyler Ortman and
Kathleen Mish and copyeditors Eric Newman and LeeAnn Pickrell.
Technical editor Michael Kershaw protected me from embarrassing
technical errors. And compositor Riley Hoffman made this the attractive
book you hold in your hands. Thanks to all of you. Of course, any surviving
errors or unclear descriptions are my own responsibility.
Thanks also to Jim Cavin for allowing me to connect his MacBook to my
network and Tommy Tse for his assistance in obtaining evaluation software
from Microsoft.
And thanks as usual to my agent, Carole McClendon, who started the
wheels turning on this project.
INTRODUCTION
This book is for people who never expected
to build or run a computer network. You
were happily using a computer, sending and
receiving email, writing reports, and maybe downloading music through the Internet when one day
you looked around to discover that one computer
had somehow multiplied—now you have two, or three, or more computers.
Maybe each of your children needs his or her own computer to do homework
or all of your employees have computers on their desks. Or maybe you
brought a portable laptop computer home from work and you want to use
it along with the family’s desktop machine.
Whatever the reason, you now have several computers, and you need a
way to connect all of them to the Internet at the same time and to share files,
printers, and other resources among them. You need a network.
A network? Yikes! Isn’t a network some kind of invisible monster that
requires expensive equipment and people to keep it running who speak
a mysterious language and go off to seminars with titles like “The Power
of Virtualization” or “Removing Internet Anonymity Barriers with IP
Intelligence”?
Not necessarily. Networks are not just for geeks any more. Today’s small
networks are relatively easy to install, and you don’t need an advanced
course in computer technology to operate them. Even the smallest of small
businesses will probably benefit from having a network. And home networks
are becoming common household utilities, just like water, electricity, and
cable TV. Like those other utilities, you don’t need a technical background
to use a network. This book will tell you what you need to know to build and
use a small, simple network in your home or business without becoming
mired in obscure technical details.
We thought about calling this book Networks for Nitwits, but that’s not
quite what the book is about—you’re not a nitwit; you’re an intelligent computer user who has been dragged into the world of networks. I suggested
The Bridges and Routers of Madison County, but that would be an entirely
different book: the bittersweet tale of an Iowa housewife who finds romance
with an itinerant network installer. Somebody should probably write that
book, but this isn’t it.
This is a guide to navigating the jungle of servers, routers, modems, and
Ethernet cables and to getting the most out of your small network. I’ll explain
how networks operate (without getting into too much tedious technical
detail), describe each part of a network, and tell you how to use the network with computers running Windows XP and Vista, Macintosh OS X, and
several versions of Linux and Unix. I’ll also tell you about some other ways
you can use your network, including automating household appliances and
distributing digital audio and video to computers, home entertainment
systems, and “Internet radios” throughout your house.
The ideal network is the one that you—and the other people using
your network—never have to think about. You would plug a cable from each
computer into an outlet, and every other computer on the network would
immediately recognize it. And the network would simply be there, ready to
use. Or it would be completely invisible, like the wires that provide electricity
to the lamp next to the chair where you’re reading this. If you think about it,
you don’t really want a network; you want to see and hear files and other
resources that are located beyond your own computer. A network is the
means to that end.
As I wrote this book, I kept several goals in mind: First, I wanted to provide
enough information that readers with some basic computer knowledge and
skills could understand how networks work and how to plan and install their
own small network; second, I wanted readers to think about additional uses
for their networks; and third, I wanted to offer advice and tools for fixing a
network that isn’t working correctly. If I have succeeded, your network will
be up and running shortly after you follow the book’s instructions and
recommendations.
xvi
I n tr odu ct ion
Network Know-How begins with a general overview of networks and the
things you can do with them. In later chapters, you will learn how networks
handle digital data, how different kinds of networks move that data from one
place to another, and how the equipment at the core of most networks—
hubs, routers, modems, and other devices—works. Next, I’ll introduce the
important concepts of clients and servers and tell you how to design and
install simple wired and wireless networks, how to connect the local network
to the Internet, how to build security into your network, and how to use your
network for music and video along with computer data. And finally, the last
chapter of the book offers advice about troubleshooting and describes some
useful tools that might make life a bit easier when it becomes necessary to
find and fix a problem.
When you have a network in your home or small business, all the computers connected to the network will become more flexible and more useful.
Your new network will change the way you use your computer; within a few
weeks or less, you will definitely wonder how you got along without it. When
you and the other people connected to your network find yourself using it
without thinking about “the network,” you and I will both have met our
objectives.
In t ro duc ti on
xvii
www.allitebooks.com
1
HOW A NETWORK WILL
IMPROVE YOUR LIFE
At the beginning, it’s easy. You (or your
employer or your spouse) bring a computer
into your office or your home, and everything is right there: word processing files,
financial records, email, music and video, maybe some
games, and a connection to the Internet. It’s all in one
place. Love it or hate it, that computer has become an important part of the
way you work and play. In fact, it’s so important and so convenient that you
eventually decide to add another computer; it might be a laptop that you can
carry from one place to another, or maybe a second desktop machine that
allows more than one person to use a computer at the same time. And that’s
when the trouble starts.
Shortly after you get that additional computer, you will discover that
something—a text file or a picture you need for a report, or a music file you
want to play, or the modem that connects you to the Internet—is located on
the other computer. You have to copy files to a portable disk or a flash drive
when you have something to print and carry it to the computer connected to
your printer; when you want to scan something you must go to the computer
with the scanner; and when you want to connect to the Internet, you must
either use the computer with the high-speed connection or wait until another
family member has finished using the telephone so you can dial in. Using the
computer has risen to a whole new level of inconvenience.
Any time you (or your family or business) use more than one computer,
something you want—a file, a printer, or some other resource—is likely to
be located on or connected to the computer you’re not currently using; it’s
inevitable that something you need on this computer is stored on or connected
to that computer. The solution to this problem is easy: Simply connect the
computers and allow them to share.
Congratulations. You have just created a computer network.
Two or more computers connected through wires, radio signals, flashing
lights, or any combination of those and other methods form a network that
you can use to send and receive instructions and files from one computer to
another. Whether you’re using your computers at home, at school, in a small
business, or even at a temporary gathering such as a business conference or
a camping trip (if you’re the sort of person who takes computers along on a
camping trip), connecting them through a network makes every one of them
more useful and more powerful. And when you connect your network to
the Internet, every device on your local network also becomes connected to the
Internet.
NOTE
When you connect two or more computers in a network, each computer becomes more
useful. There’s a rule that describes this, called Metcalfe’s Law. Robert Metcalfe was
the original designer of the Ethernet structure used in most modern computer networks;
his law states that the value (or power) of a network increases in proportion to the
square of the number of devices connected to that network. The math is pretty subjective,
but Metcalfe’s Law says that two computers connected together are about 4 times as
useful as a single computer; if you connect 10 computers, the network is 100 times more
powerful, and so forth.
It’s not an exaggeration to say that connecting your computers to a
network will change your life. Within just a few days or weeks, you will begin
to think about everything connected to the network—other computers,
printers, game consoles, the Internet, and anything else—as an extension of
your own keyboard and monitor. And shortly after that, you will discover new
opportunities and services that a network makes possible.
In this chapter, you will learn about the general nature of computer
networks and the things you can do with them. You can find more details
about using a network later in this book.
What’s a Network?
Before we begin to consider the things you can do with a computer network,
it might be helpful to understand a few basic concepts.
First, the idea of networks is not limited to computers. A network can be
any kind of structure that connects individual objects. The highway system is
a network, and so is the worldwide telephone system. You can use either of
2
C h a pt er 1
these networks to interact or communicate with other people connected to
the same system. Broadcasting networks such as CBS and the BBC use wires,
microwave radio links, and other methods to distribute programs from one
or more studios to a large number of local stations.
Every network has the following elements in common:
Two or more objects, or nodes, that use the network to connect them
A set of communication channels that carry something—speech, TV
shows, computer data—between or among nodes
A set of rules that controls network traffic—on a highway, the rules
might specify that vehicles drive on the right and pass on the left, and
every car and truck must display a license plate to identify it; in a telephone network, the rules define the form and use of unique numbers
(called “telephone numbers”) to identify each node and establish connections between them. To assure that a network operates properly,
every node and every channel must follow the rules for that particular
network.
Next, every network has a maximum carrying capacity. For example, a
four-lane Interstate highway can safely carry more cars and trucks at higher
speed than a two-lane country road. In a communications network, the
capacity of a network connection is the amount of information it can carry,
also known as its bandwidth. Both a telephone call and an FM radio station
use audio channels, but the same voice sounds better on the FM station
because the FM channel has a greater bandwidth that allows more of the
original information (in this case, higher audio frequencies) to reach your
ear. In a data network, the speed of a network is usually shown in millions of
bits (or megabits) per second (Mbps).
And finally, every node on a network has a name. This name might be the
same as the name of the person who uses that node, or a description of the
location or the type of device at that node. On some networks, the name is
a number, or a combination of letters, numbers, and other characters that
have no obvious meaning outside of the network (a telephone number is
a good example of this type of name). In order to allow the network to
accurately find each node, it’s essential that every name be unique.
Sneakernet
The simplest kind of computer network is no network at all. If you have been
working with multiple computers without a network, you know the routine:
Every time you need something from a different computer, you have to store
a file on a floppy disk, a portable drive, or a flash drive, physically carry it
from one computer to another, and load the file onto the second computer.
Sometimes you’ll take the file from the computer you were originally using
to the one that is connected to the right printer. If you’ve been writing a
paper on a laptop computer, you might want to add an image that’s stored
on the desktop system’s hard drive. Or maybe you want to give a copy to a
H ow a N et wor k Wil l Im pr ove Yo ur L i fe
3
colleague for review or approval. Whatever the reason, you have to carry a
copy of one or more computer files from one machine to another.
This usually involves some walking, so the process is often known as
sneakernet. The name reflects the informal dress common in most computer
centers, but if you and your family dress for dinner every evening, or if
you’re a slave to fashionable footwear, you can think of it as “Oxfordnet”
or “Slingbacknet” or “Espadrillenet” instead. Whatever you choose to call it,
physically carrying files from one place to another is often a distracting, timeconsuming nuisance.
However, sneakernet does have its uses. When you travel, it can often be
easier and more convenient to carry a few files with you rather than retrieve
them from a distant computer through the Internet. If you plan to use computers in two or more locations, such as one at school and another at home,
you might be better off storing the file on a small portable drive instead of
hauling your laptop around.
When security is an important issue, you might not want to connect your
computer to any network. The very best way to protect your confidential data
from theft through a network is to make sure the computer where the data is
stored has no network access.
Sneakernet is not always the slowest way to move data from one computer
to another. If you want to move a lot of data over a relatively short distance
when you don’t have a high-speed data connection, it can often be faster to
drive a handful of DVDs or a box of tapes across town than to send the same
files through a dial-up connection or any other slow network link. It’s one of
the oldest maxims in the world of computers and networks, but it’s still true:
Never underestimate the bandwidth of a station wagon full of floppy disks.
Data Networks and What You Can Do with Them
The alternative to sneakernet is a network consisting of physical links that
connect two or more computers and related equipment. These links can use
wires, radio signals, or a combination of both to move computer data (and
any other information that can be converted to and from computer data)
between any pair of network nodes.
Every computer connected to a network sends and receives data through
a connector or radio antenna. Depending on the data transfer speed and the
network’s specific requirements, the computer might use a parallel port, a
serial port, an Ethernet port, a USB or FireWire port, or a Wi-Fi antenna.
Because these connectors and antennas move data in both directions, they
are input/output ports or I/O ports, but that term is more often used to describe
the computer’s serial and parallel data connectors.
After you connect your computers together, you will discover that you
can do many things through the network that you may not have expected.
By the time you have lived with the network for a few weeks, you won’t think
much about it, but you’ll use it all the time.
4
C h a pt er 1
File Sharing
When you connect your computer to a network, you can allow other people
to read and write files that are located on your computer’s hard drives and
other storage media, and you can open and store files from other computers.
File sharing is one of the most common and the most convenient uses of a
network.
File sharing has many uses: You can use it to collaborate with other people
on a single document or other file, to play music or watch videos stored on
another computer, and for just about everything else that you can do with
your own files. In effect, every unprotected file stored on any network
computer is as easy to use as a file on your own computer.
For example, Figure 1-1 shows a Windows display of disk drives and
individual directories on a home network (other file-sharing methods also
exist). You can open a file or folder on a remote computer by doubleclicking an icon or a filename, just as you would on your own machine.
Figure 1-1: The files and folders on a remote computer are easy to reach through a
network.
Of course, you probably have some files on your own computer that you
don’t want to share: personal letters, confidential financial records, medical
information, and so forth. A well-designed file-sharing system allows each
user to set every file or folder as either “public” or “private.”
For more about sharing files with other computers on your home or
office network, see Chapter 12.
H ow a N et wor k Wil l Im pr ove Yo ur L i fe
5
Sharing an Internet Connection
Desktop
computer
Ethernet
When you order a connection to the Internet, the telephone company or the
cable TV company installs just one connection point. It doesn’t matter if the
Internet service uses a dial-up telephone line, a high-speed DSL line, a cable
TV service, a fiber optic link, or some kind of radio link; your Internet service
terminates in just one place, most often in a piece of electronic equipment
called a modem (that’s geek-speak for modulator/demodulator, a device that
converts between computer data and some other type of communications
signal). If you have just one computer, you can connect it directly to the
modem; but when you want to connect two or more computers to the
Internet at the same time, you’ll need a network.
For many families, a high-speed Internet connection provides the reason
to start thinking about installing a home network. When you spend that extra
money for a DSL or cable Internet link (or fiber optic link), you want easy
access to the Internet from every computer in the house. When you connect
your network to the modem through a gateway router (shown in Figure 1-2),
you can reach the Internet through any computer on that network. Some
modems require a separate router to distribute the Internet connection to
multiple computers, while others have built-in routers.
Desktop
computer
Internet
Gateway
router
DSL or cable
modem
Laptop
computer
Tower PC
Figure 1-2: A gateway router provides a connection between a
local area network and the Internet.
Connecting your network to the Internet is not difficult, but it’s easier
with detailed instructions. You can find those instructions in Chapter 10.
6
C h a pt er 1
Instant Messages
Instant message programs display text on a distant computer’s screen almost
as fast as you can type them. They’re useful for exchanging notes, asking
questions, and nonspecific chatter within a business or between friends and
family members. When a new message arrives, the messaging program pops
up in a new window on the recipient’s screen. If you attach a microphone
and speaker to each computer, you can use a similar program to speak to the
person at the distant computer rather than using the keyboard and screen.
And if you add a camera at each end, you can use a video messaging system
that allows each of you to see the other party during the conversation.
Within a home or small office network, you can use instant messaging,
with or without sound and pictures, to communicate from one room to
another. It might be a simple message, such as “Dinner’s ready,” or a more
complicated request for information from someone else in the building.
And of course, if there are young people in the house, the instant message
program will quickly become a channel for gossip and idle conversation.
For more about instant messaging programs, see Chapter 16.
Sharing Printers and Other Hardware
In most homes and small businesses, there’s no need for every computer to
have a printer available for its exclusive use, because nobody uses a printer
all the time. It’s often more practical to attach a single printer to a network
(or maybe one for black-and-white pages and another for color) rather than
buying a separate printer for each computer.
When you only need a single printer, you can often buy one that provides
better images and faster performance for considerably less than the price of
two or three cheaper models. The same kind of economy can also apply to a
flatbed scanner and other specialized input or output devices.
A network printer can either connect directly to the network as a
separate node (a printer server) or through one of the network’s computers.
Look for information about both types of printer connections in Chapter 14.
Home Entertainment
The same home network that carries data to computers can also distribute
music, movies, and other audio and video to stereo systems, TVs, and home
entertainment centers throughout the house. Special-purpose computers
called music servers can copy music from CDs or older recordings (such as
cassettes or vinyl records) or download music files, store the music as digital
files, and play them in any room in the house on demand, either through
the speakers attached to a computer, through a traditional stereo system,
or through a dedicated tabletop device similar to a radio. The same players
can also receive and play streaming radio stations from around the world
through the Internet. Video servers can store movies and other videos and
make them available through the network to computers, televisions, and
H ow a N et wor k Wil l Im pr ove Yo ur L i fe
7
home theater systems. Some network music servers also include docking
stations for iPods and other portable music players that can transfer files
between the server and the portable unit and play music and videos directly
from the portable device.
Audio and video programs can move through the network at the same
time as email, web surfing, and instant messages.
For detailed information about setting up and using a home entertainment network, see Chapter 15.
Video Cameras and Home Security Devices
A stand-alone video camera (often with a built-in microphone) connected
to your home network can have several uses. You can place a camera at the
front door to identify visitors, or use one in a nursery or playroom to keep an
eye on your children from computers in other parts of the house. Other
devices can use special sensors to detect smoke and fires, unlocked or open
doors and windows, broken glass, or flooding and other problems and send
alerts to the homeowner on a local computer or to a home protection service
through the Internet.
Combined with a wireless network link, the same kind of security monitoring can extend to a detached garage, shed, or other separate buildings,
even if the house’s wired network does not reach those locations. Chapter 15
explains how to connect and use cameras and other security devices to your
network.
Home Automation
Home automation systems usually use separate wiring from a household data
network, but sometimes they’re closely integrated. Home automation can be
as simple as turning on outside lights after the sun goes down, or as complex as opening and closing drapes, monitoring and adjusting heating and
air conditioning, operating a lawn sprinkler, or filling the dog’s water dish.
You can also expect the next generation of “smart” kitchen and laundry
appliances to include network connections that will allow them to let you
know when the roast is cooked or the clothes dryer has completed its fluff
cycle.
Chapter 15 provides basic information about home automation systems
and devices and explains how to connect them to a computer network.
8
C h a pt er 1
2
TYPES OF NETWORK
CONNECTIONS
Every computer connected to a network
must follow a set of rules and specifications
that define the characteristics of both the
physical connection and the form and structure
of the data that moves from one computer to another.
Without these rules, the people using the network
cannot be sure that their computers will communicate
successfully.
For example, the plugs at the ends of data cables must match the sockets
on each computer and other network hardware. If a cable uses a square plug
with two pins, but the computer has a round socket with four holes, they
won’t fit together. The same thing applies to the electrical voltages, timing,
error checking, and other issues. There are many different kinds of networks,
each with its own rules. This chapter explains a few general principles about
networks and describes the network types that you’re most likely to see in a
home or small office network.
You can use a network without understanding all the internal details of
network communications, but if you’re designing and building a new network,
you should know how to choose the best options for your particular requirements. You can treat individual network components as a series of black boxes,
but you still have to know which black boxes to use. And when something
goes wrong, knowing what’s inside those boxes will make troubleshooting a
lot easier.
Before we talk about specific network types, let’s look at the common
elements of every computer network.
As you probably know, computers reduce all information to only two
information states: Either a signal is present, or there is no signal. These two
conditions are usually described as 1 and 0, or on and off, or mark and space.
Each instance of a 1 or a 0 is a “bit.” Anything described as “digital” can be
reduced to those ones and zeroes.
The form that each 1 or 0 takes is different in different types of communication channels. It could be a light, sound, or electrical charge that is
either on or off; a series of long and short sounds or light flashes; or two
different audio tones, electrical voltages, or radio frequencies. In a very
simple system, the 1 might correspond to “yes” and the 0 to “no,” or any
other pair of options.
Individual bits only offer two options, so they’re not particularly useful,
but when you string eight of them together (into a byte), you can have
256 different combinations (2 × 2 × 2 × 2 × 2 × 2 × 2 × 2). That’s enough
to assign a different sequence to every letter of the alphabet (both upperand lowercase), the ten digits from 0 to 9, spaces between words, and other
symbols such as punctuation marks and many letters used in foreign alphabets.
A byte is the basic building block of computer communication. The most
widely used coding system for converting bytes to characters is called ASCII
(American Standard Code for Information Interchange). Figure 2-1 shows a
typical sequence of two bytes.
0
1
0
0
0
0
0
1
0
1
1
0
1
1
1
0
Figure 2-1: These bits form the ASCII sequence of A (01000001) and n (01101110).
ASCII is fine for text, but a computer can also convert many other forms
of information to digital data. For example, it can divide every second of
sound from a microphone or an analog recording into thousands of very
short segments and use 16 or 24 bits to specify the content of each segment,
or divide a picture into millions of individual points (called pixels, short for
picture elements) and use a series of bits to specify the color of each bit.
A wire or other data link can carry only one bit at a time. Either there’s a
signal on the line or there isn’t. Over short distances, it’s possible to send the
data through a cable that carries eight (or some multiple of eight) signals in
parallel through eight separate wires. Obviously, a parallel connection can be
eight times faster than sending one bit at a time through a single wire, but
those eight wires cost eight times as much as a single wire. That added cost is
insignificant when the wires extend only a foot or two, but the additional cost
10
C ha pt er 2
www.allitebooks.com
of parallel wires can add up quickly when you’re trying to send the data over
a long distance. And when you’re using existing circuits such as telephone
lines, you don’t have any choice; you must find a way to send one bit at a
time, with some additional bits and pauses that identify the beginning of
each new byte. This is a serial data communications channel, because you’re
sending the bits one after another. At this stage, it doesn’t matter what
medium you use to transmit those bits—it could be electrical impulses on a
wire, or two different audio tones, or a series of flashing lights, or even a lot
of notes attached to the legs of carrier pigeons—but you must have a way to
convert the text or other output of the computer to the signals used by the
transmission medium, and to convert the same signals back again at the
other end.
Packets and Headers
Communication over a direct physical connection (such as a wire) between
a single origin and destination doesn’t need any kind of address or routing
information to tell a message where to go. You might have to set up the connection first (by placing a telephone call or plugging cables into a switchboard),
but after you’re connected, the link remains in place until you instruct the
system to disconnect. This kind of connection is great for voice and for simple
data links, but it’s not particularly efficient for digital data on a complex network that serves many origins and destinations, because a single connection
ties up the circuit all the time, even when no data is moving through the
channel.
The alternative is to send your message to a switching center that will
hold it until a link to the destination becomes available. This is known as a
store and forward system. If the network has been properly designed for the
type of data and the amount of traffic in the system, the waiting time will be
insignificant. If the communications network covers a lot of territory, you can
forward the message to one or more intermediate switching centers before it
reaches the ultimate destination.
To make the network even more efficient, you can divide messages that
are longer than some arbitrary limit into separate pieces, called packets or
frames. Packets from more than one message can alternate with packets
containing other messages as they travel between switching centers, and
reassemble themselves into the original messages at the destination.
The great advantage of this approach is that many messages can share
the same circuits on an as-available basis. The packets from a single message
might alternate with packets from one or more other messages as they move
through parts of the network. For example, if you send a message to a recipient in another city, the packets usually move through an inter-city channel
along with many other messages.
Each data packet must also contain yet another set of information: the
address of the packet’s destination, the sequence order of this packet relative
to other packets in the original transmission, and so forth. Some of this information provides additional error checking and instructs the switching centers
T y p es of N etw ork C on ne ct ion s
11
where to forward each packet, while other information tells the destination
device how to reassemble the data in the packet back into the original
message.
The headers (at the beginning of a packet) and trailers (at the end of a
packet) attached to each packet include the address of the packet’s destination, information that allows the recipient to confirm that the packet’s
content is accurate, and information that the recipient uses to reassemble
the packets in the original order. Between the origin and the destination,
network routing equipment sometimes adds more headers or trailers that
contain routing instructions and other administrative information.
Figure 2-2 shows how a network adds and removes headers and trailers at
different stages of a communication session. The specific names of the headers
and trailer don’t matter right now; the point is that they surround the original
data packet.
Ethernet
header
Data
Original
message
TCP/IP
header
Data
Transport
IP
header
TCP/IP
header
Data
Network
IP
header
TCP/IP
header
Data
IP
header
TCP/IP
header
Data
Network
TCP/IP
header
Data
Transport
Data
Message at
destination
Ethernet
trailer
Data link
Figure 2-2: A data packet may be surrounded by several kinds of headers
and footers.
That same pattern repeats every time you add another layer of activity to
a communications system. Each layer may attach additional information to the
original message and strip off that information after it has done whatever the
added information instructed it to do. By the time a message travels from a
laptop computer on a wireless network through an office network and a
gateway to the Internet, and onward to a distant computer connected to
another local network, a dozen or more information attachments might be
added and removed before the recipient reads the original text. A package
of data that includes address and control information ahead of the bits that
12
C ha pt er 2
contain the content of the message, followed by an error-checking sequence,
is called a frame. Both wired and wireless networks divide the data stream into
frames that contain various forms of handshaking information along with
the original data.
NOTE
The network deals with packets and frames at different places during the process of
transmitting data. Fortunately, this all happens automatically, so you (as a network
user) don’t have to worry about adding or removing them by hand.
Error Checking
In a perfect transmission channel, the signal that goes in at one end would
be absolutely identical to the one that comes out at the other end. But in the
real world, there’s almost always some kind of noise along the line that can
interfere with the original signal. Noise is defined as anything that interrupts
or is added to the original signal; it could be caused by a lightning strike,
interference from another communications channel, devices not working
correctly, or dirt on an electrical contact someplace in the circuit (or in
the case of carrier pigeons, an attack by a marauding hawk). Whatever the
source, noise in the channel can interrupt the flow of data. In a modern
communications system, those bits are pouring through the circuit extremely
quickly—millions of them every second—so a noise hit for even a fraction of
a second can obliterate enough bits to turn your data into digital gibberish.
Therefore, your data stream must include a process called error checking.
Error checking is accomplished by adding some kind of standard information
to each byte. In a simple computer data network, the handshaking information is called the parity bit, which tells the device receiving each byte whether
the sum of the ones and zeroes inside the byte is odd or even. This value is
called a checksum. If the receiving device discovers that the parity bit is not
correct, it instructs the transmitter to send the same byte again. More complex
networks, including wireless systems, include additional error-checking handshaking data with each string of data.
Handshaking and Overhead
The computer that originates a message or a stream of data can’t just jump
online and start sending bytes. First it has to warn the device at the other end
that it is ready to send and make sure the intended recipient is ready to accept
data. To accomplish this, a series of “handshaking” requests and answers
must surround the actual data.
The sequence of requests goes something like this:
Origin: “Hey destination! I have some data for you.”
Destination: “Okay, origin, go ahead. I’m ready.”
Origin: “Here comes the data.”
Origin: Data data data data . . . checksum
Origin: “That’s the message. Did you get it?”
T y p es of N etw ork C on ne ct ion s
13
Destination: “I got something, but it appears to be damaged.”
Origin: “Here it is again.”
Origin: Data data data data . . . checksum
Origin: “Did you get it that time?”
Destination: “Yup, I got it. I’m ready for more data.”
We can leave the specific form of handshaking information to the
network designers and engineers, but it’s important to understand that not
every bit that moves through a computer data network is part of the original
block of information that arrived at the input computer. In a complex network such as a wireless data channel, as much as 40 percent or more of the
transmitted data is handshaking and other overhead. It’s all essential, but
every one of those bits increases the amount of time that the message needs
to move through the network.
Ethernet
Ethernet was introduced in the 1970s as a method for connecting multiple
computers and related equipment in the same building. Ethernet offers
several advantages: It’s fast, it’s extremely flexible, it’s relatively easy to install
and use, and it’s inexpensive. It has become an industry standard supported
by dozens of manufacturers, so you can use different brands of equipment in
the same network. Today, more than 85 percent of all local area networks
(LANs), including just about every modern home and office network, use
some form of Ethernet to provide the physical connection between computers
through twisted-pair cables, coaxial cables, or fiber optic cables.
One of Ethernet’s most important features is the method it uses to prevent
conflicts among nodes, called Carrier Sense Multiple Access with Collision Detection
(CSMA/CD). Every time a network node is ready to transmit a frame, it checks
if another frame is already using the network; if the network is clear, the node
sends the frame. But if the node detects that another frame is using the network (a condition called a collision), it waits a random period of time before it
tries again. CSMA/CD is important because it allows a relatively large number
of computers and other devices to operate through the same network without
interference.
There are many Ethernet specifications that cover different data transfer
speeds and different kinds of cables and connectors. The ones you’re most
likely to see in a small LAN include the following:
10Base-T: 10 Mbps through twisted-pair cables
100Base-T or Fast Ethernet: 100 Mbps through twisted-pair cables
1000Base-T or Gigabit Ethernet: 1000 Mbps through twisted-pair or fiber
optic cables
Wireless or Wi-Fi: any of several systems that use radio signals instead of
wires—the latest 802.11n Wi-Fi networks can operate at speeds up to
70 Mbps.
14
C ha pt er 2
A 10Base-T network is adequate for a small home network. It’s faster
than most broadband Internet services, so it’s sufficient for handling the
inbound and outbound data (including audio and video) that you exchange
with the Internet. However, most new network ports, hubs, and switches can
handle both 10Base-T and 100Base-T, so there’s very little point to limiting
the network to the slower speed. 100Base-T will also allow you to move
pictures, music, and videos and play multiplayer games within your own
network much faster than a 10Base-T network, and it will not limit the
speed of an 802.11n link. Considering the insignificant difference in cost,
today’s 100Base-T networks are always a better choice than the older
10Base-T versions.
If a 100Base-T network can’t handle 100 Mbps because of interference or
some other problem, it will automatically drop down to 10Base-T. A 10Base-T
device can work on a 100Base-T network, but it will force the whole network
to drop down to 10 Mbps.
A Gigabit Ethernet network is lightning fast (by today’s standards), but
it’s also more expensive than a network that uses slower equipment. It might
be appropriate for a business that moves very high volumes of data through
its LAN. As the cost of Gigabit Ethernet drops, it will become the preferred
choice for home and small business networks.
You might also see the word Ethernet used to identify the connector on
a computer, printer, or other network device that mates with an Ethernet
cable to connect the device to a network. The instruction manual or the label
on every piece of Ethernet-compatible equipment should tell you which type
of connection it uses.
Twisted-pair cables are bundles of wires in which each pair of wires is
twisted together, as shown in Figure 2-3. Because data normally moves in
only one direction through each pair of wires, a 10Base-T or 100Base-T
network connection uses two pairs—one for each direction. The most
common Ethernet cables include a total of eight wires in four color-coded
wire pairs, so you can use the remaining wires as spares.
Figure 2-3: A typical Ethernet cable contains
four twisted pairs of color-coded wires.
Most of the remaining chapters of this book are dedicated to features
and functions of Ethernet networks.
T y p es of N etw ork C on ne ct ion s
15
D E AL I N G W I T H O T H E R ( M O S T L Y O B S O L ET E )
W I R ED N E T W O RK S
Ethernet is by far the most widely used type of LAN connection, but if you’re using
older equipment you might occasionally find a computer or other device that uses
some other type of network structure. Many of those older networks require special
equipment and experienced network technicians, but the rest of us don’t have to run
away from them.
If you have inherited a working network, the best thing you can do is to leave it
alone. It has probably been working without any problems for many years, and you
can expect it to continue to do so unless you try to expand or otherwise “improve” it.
This is a classic example of “If it ain’t broke, don’t fix it.”
On the other hand, if you have an old desktop computer with some other kind
of network interface, or no network adapter at all, you can probably connect it to
your Ethernet LAN if you don’t mind opening up the computer and swapping circuit
cards. Look for an Ethernet network interface adapter on a plug-in card that fits one
of the empty expansion slots, and download the latest driver software from the card
manufacturer’s website.
Wi-Fi
Wi-Fi (short for wireless fidelity) is a category of networks that use radio signals
instead of wires to connect computers and other devices. Another name for
Wi-Fi is wireless Ethernet, because Wi-Fi uses many of the same data-handling
rules and specifications as a wired Ethernet network. However, every Wi-Fi
packet must include additional handshaking data, so the overall data transfer
speed is often slower than a conventional Ethernet link.
Wi-Fi offers several advantages: It doesn’t need cables to connect every
network node, so it’s often easier to install and use than a wired network
connection. Rather than string cables through walls and provide a network
outlet at every desk, you can distribute access to the network through antennas
in between each computer and a base station (an access point) in a central
location. When you travel with a laptop computer, a handheld PDA (personal
digital assistant), or a mobile Internet device, such as a BlackBerry or an
iPhone, you can often connect it to the Internet via Wi-Fi by simply turning
it on.
Many home and small business networks use a combination of Ethernet
and Wi-Fi; the Wi-Fi base station doubles as a connection point for Ethernet
cables, so the same LAN includes both wired and wireless nodes. Chapter 8
contains information about installing and using Wi-Fi network links.
Powerline Networks
In a powerline network, computer data moves through a building’s existing
electric wiring. Each computer connects through a parallel port, a USB port,
or an Ethernet port to a data adapter that plugs directly into an AC wall
outlet. The same power transformer that feeds your house wiring also
isolates your data network from your neighbors.
16
C ha pt er 2
The most widely used standard for powerline networks is called
HomePlug. The greatest advantage of HomePlug and other powerline
networks is that the wires are already in place. Every AC wall socket in the
house can double as a network connection point. It’s also more secure than
Wi-Fi, and it can reach greater distances than a Wi-Fi network with just one
base station. Wi-Fi signals are often blocked by thick walls and other obstacles
that make no difference to a powerline system.
NOTE
You must plug all your powerline adapters directly into wall outlets. Surge protectors
and powerline conditioners often absorb powerline network data, because they see the
data as “noise” on the AC power voltage. Conversely, if you’re using a powerline network, you will want to connect your stereo or home theater system to power conditioners
to filter out the noise produced by the network.
All equipment that follows the HomePlug specifications should work
together in the same network. Some older types of powerline networking
might also be available, but they’re less reliable than HomePlug because
they can suffer from interference caused by certain electrical appliances
(such as vacuum cleaners and other appliances that use big motors or
power transformers), and they don’t always work well with very old house
wiring. Today, it’s better to stay away from anything that doesn’t carry the
HomePlug certification mark shown in Figure 2-4.
Figure 2-4: The HomePlug certification
mark indicates that a powerline networking product has been approved by the
HomePlug Powerline Alliance.
If installing Ethernet wiring is not practical in your building, a HomePlug
network might be your best choice. When it works, which it does in most
houses, it provides an easy, reliable network. But some would-be users report
slow performance and other problems, so it’s best to buy your HomePlug
adapters from a retailer who will allow you to return them if they don’t work
in your house.
Other Alternative Wiring Methods
Two more home networking methods are possible, but they’re almost always
provided as supplements to other services. These systems use the internal
telephone wiring that connects extension telephones in several rooms or the
coaxial cable (coax) that provides cable TV signals. The industry group that
promotes home networks through telephone wires is called HomePNA (the
Home Phoneline Networking Alliance); MoCA (Multimedia over Coax
Alliance) is the comparable group for coax.
T y p es of N etw ork C on ne ct ion s
17
Don’t confuse internal telephone or coax wiring with the DSL and cable
services that connect high-speed Internet service to your home or business
LAN; HomePNA and MoCA are strictly for distributing network service
within a building.
HomePNA and MoCA are less flexible than HomePlug network wiring
because most homes already have a lot more built-in AC power sockets than
telephone or TV outlets. However, if the phone boxes or cable outlets are
already in convenient locations, it might be practical to consider HomePNA
or MoCA as an alternative to Wi-Fi or separate Ethernet wiring.
DTE and DCE Equipment
There’s one more concept that every network planner should understand:
the difference between data terminal equipment (DTE) and data communications
equipment or data circuit-terminating equipment (DCE). If you’re clear on these
two types of network devices, you will avoid a lot of headaches caused by
communication failures.
Data can move through a wire in only one direction. When a data link
sends and receives signals at the same time, it must use separate wires to send
data from the DTE to the DCE, and from the DCE to the DTE. Therefore,
a network device uses separate inputs and outputs on the same multipin
connector. The specific pin assignment is different in different connection
types, but the inputs and outputs are always different pins or sockets.
The problem arises because every output must connect to an input. As
Figure 2-5 shows, if you connect an output to another output, the two signals
will collide; if you connect an input to an input, there’s never any signal.
output
collision
input
output
input
no signal
Figure 2-5: Connect an output to an output or an
input to an input and nothing useful happens.
Therefore, when you connect two pieces of equipment, the outputs at
each end must go to inputs at the other end. If Pin 2 on one device is an
output, Pin 2 on the other device must be an input. Most standard data cables
connect each connector pin to the same numbered pin at the other end, so
connecting two devices through a cable is exactly the same as plugging one
device directly into another.
That’s why there are two categories of data devices. Data terminal
equipment includes remote terminals, computers, some printers, and other
network endpoints. Data communications equipment includes modems, hubs,
18
C ha pt er 2
switches, and other control devices. When you connect a terminal to a control
device, the output pins on the DTE device connect to the input pins on the
DCE device.
The problem arises when you want to connect two computers without a
control device in between. Direct computer-to-computer communication
requires a special cable because you can’t connect a DTE device directly to
another DTE device. When you connect two DTE devices with serial data
ports, you connect the output on one computer to the output on the other
computer, and the input to the input, so neither computer will actually
receive any data. Therefore, you must flip the connections, so each output
connects to an input. A cable or adapter that connects output pins to input
pins is called a null modem. Figure 2-6 shows a typical null modem adapter.
Figure 2-6: A null modem adapter or cable
connects inputs directly to outputs.
NOTE
The “data moves in only one direction” rule does not apply to data moving through
coaxial cable, which can handle inbound and outbound signals modulated at different
frequencies through the same cable.
Point-to-Point Networks
Most of the time, we think of a computer network as a structure that can link
one computer to any other computer connected to the same network. But
sometimes all you need is a direct connection between two computers. This
kind of connection is called a point-to-point network. Figure 2-7 shows both
network types.
A point-to-point connection is handy when you want to transfer data
from one computer to another when one or both of them are not already
connected to a network. For example, if you’re in a meeting where somebody asks for a copy of a report or drawing, you could use the built-in
infrared network tools built into many laptop computers to shoot the file
across the table from your computer to your colleague’s. Or if you want to
copy a file from a friend’s computer, you could plug a transfer cable into
both machines or set up a point-to-point Wi-Fi link.
T y p es of N etw ork C on ne ct ion s
19
Desktop
computer
MacBook
Network
hub
Tower PC
Desktop
computer
Laptop
computer
Desktop
computer
Laptop
computer
Figure 2-7: A LAN (left) can provide connections between any pair of
nodes; a point-to-point network (right) connects two nodes.
Point-to-point networks can use wires, radio signals, or infrared light to
exchange data between the two endpoints. If you’re using a cable connection,
you must use a special point-to-point Ethernet adapter or cable. For a pointto-point Wi-Fi link, you must configure it as an ad hoc connection.
Ad Hoc Wi-Fi
Most Wi-Fi networks connect wireless nodes to a LAN through a wireless
access point, but Wi-Fi network adapters can also support wireless links
directly from one computer to another. This kind of connection is called an
ad hoc network, because it’s usually set up as a temporary link rather than as
part of a permanent network infrastructure (wireless networks with one or
more central access points are called infrastructure networks).
Infrared
Infrared connections use invisible flashing light (it’s invisible because it uses
frequencies outside the range of human sight) to exchange data between
computers, mobile telephones, digital cameras, and other devices. Most of
the wireless remote control units that you use with your television, DVD
player, and home stereo system also use infrared light signals. Infrared
channels are often called IrDA connections, because the Infrared Data
Association (IrDA) has set the standards for infrared communication.
Many laptop computers have built-in IrDA ports, usually in an inconspicuous location along the edge of the case. The IrDA port is usually an
infrared lens under a transparent plastic cover, like the one shown in
Figure 2-8. The camera captured the flashing infrared light, even though
it’s not normally visible to the human eye.
20
C ha pt er 2
www.allitebooks.com
Figure 2-8: The IrDA port on a laptop computer often
looks like a blank panel on the edge of the case.
As you have probably noticed with your TV’s remote control, infrared
signals can bounce off walls and other objects, so it’s not absolutely necessary
to point a pair of IrDA ports directly at each other, especially when they’re
both indoors. When two computers with active IrDA ports are in the same
room, they will usually detect each other automatically.
NOTE
The infrared port on a laptop computer can detect an IrDA signal from another
computer in the same room and automatically set up a network link between the two
devices. It’s best, then, to disable the infrared port anytime you’re not planning to
use it. To disable or enable infrared communications in Windows, open the Device
Manager (Control Panel System Hardware Device Manager), expand the list
of infrared devices, right-click the name of the infrared port, and choose Disable or
Enable from the pop-up menu.
FireWire (IEEE 1394)
FireWire was developed by Apple as a high-speed serial data transfer
method for connecting computers to external accessories. It was later
adopted by the Institute of Electrical and Electronics Engineers (IEEE)
as their Standard No. 1394. IEEE 1394 is used most often for high-speed
data transfer from audio and video equipment to computers, but it can also
exchange data between two computers through a special cable.
NOTE
Unlike FireWire, it’s not possible to use a simple cable between two computers’ USB
ports as a communications link for direct data transfer. However, special “USB Data
Transfer Devices” are available for this purpose.
Connections Through a Telephone Line
When a high-speed wide area network service such as DSL is not available,
you can connect your computer or LAN to the Internet, or directly to a
remote computer, through the dial telephone system (the Public Telephone
Switched Network or PTSN, also known as POTS, short for Plain Old Telephone
Service). Dial-up network links are considerably slower than DSL, cable, or
T y p es of N etw ork C on ne ct ion s
21
other high-speed services, but they’re convenient because there’s a POTS
telephone line in just about every home and business, and because the PTSN
often continues to work during power failures.
A network connection through a telephone line uses a modem to convert
digital computer data to sounds that can pass through the PTSN. A second
modem at the other end converts those sounds back to digital data. The
communications programs in Windows and other operating systems send
control codes that instruct the modem to transmit telephone numbers and
adjust the data transfer speed and other configuration settings.
Most new laptops have built-in PTSN modems. Separate modems for
desktop computers are available as internal expansion cards or external
devices that connect to the computer through a serial data port or a USB
cable.
Figure 2-9 shows the dial-up modem control panel used in Windows XP
to connect a computer to a distant network or an Internet service provider
(ISP). Figure 2-10 shows the setup screen for the HyperTerminal program.
Other programs have different layouts, but they all do essentially the same
thing: They dial a telephone number and log in to the computer that answers
the call. Advanced properties specify the type of network connection, the
data speed, and other configuration settings.
Figure 2-10: The Connect To dialog in
HyperTerminal includes space for an area
code and telephone number.
Figure 2-9: The Connect dialog in Windows
specifies the telephone number that a modem
will call and the login and password that the
computer will send after the connection goes
through.
22
C ha pt er 2
Remote Terminals
Today, most networks connect two or more computers, but it’s also possible
to use your computer as a remote terminal (a keyboard and screen) to operate
another computer that might be located in the next room or halfway around
the world. Computers using terminal emulator programs send commands
from your computer’s keyboard to a distant system, and they display data from
the distant computer on your computer’s screen. You can connect to another
computer as a remote terminal through a LAN, through a dial-up telephone
line, or through the Internet.
For example, Figure 2-11 shows the login sequence from a remote
terminal program connected to The Well, a text-based online community
that runs on a Unix host computer in Sacramento, California. The Well’s
computer treated my desktop computer in Seattle exactly the same as it
would treat a local terminal connected directly to the host. You might see
similar text-based host computer displays from library catalogs or mainframe
computers.
Figure 2-11: A remote terminal allows a user to operate a remote computer through a
network.
You can connect to a computer as a remote terminal through the Internet,
using a category of programs called telnet that form the core of most terminal
emulators, or you can connect directly to the host computer through a modem
and a conventional dial-out telephone line.
Clients and Servers
As your network grows, you might choose to add some computers and other
devices (such as printers) to the network. Those additional computers will
provide useful resources to all of the network’s users.
In a network, a client is a computer or program that uses resources
supplied by another device; a server is the device that provides those resources.
Organizing a network into clients and servers is one way to make that network
much more flexible and powerful than the individual computers connected
to it. As you plan a new network or expand the one you already have, you
should think about each network activity as either a client program that
runs on local computers or a server that supplies the program from a central
source.
T y p es of N etw ork C on ne ct ion s
23
NOTE
It’s important to understand that a server is not always a dedicated computer; in many
small networks, one or more server programs run on the same computer that is also used
by one of the network’s users for day-to-day activity.
For example, if you store your entire collection of music files on one
computer and play those files from other computers connected to it through
your network, the computer that contains all the files is a “storage server,”
and each of the players is a client. Or if you print documents by sending
them to another computer or a stand-alone printer through the network, the
computer or the special network node device that controls the printer is a
“printer server.”
A server almost always communicates with users (that’s you and me)
through a client. It’s rare for anybody except the system manager or maintenance people to work directly with a server program. The software that
sends instructions to a server and receives data or other services is a client
program. Each server communicates with a client program that sends it the
correct set of requests and receives information in a particular format. For
example, web browsers such as Firefox, Opera, and Internet Explorer are all
clients that use the HTTP (HyperText Transfer Protocol) commands specified
by the World Wide Web Consortium; every web server in the world recognizes
those commands.
A client and server are not always connected to the same LAN; sometimes they connect through the Internet or through a large corporate WAN
(Wide Area Network). For example, when you download a page from a website
or a music file from a service such as iTunes or Zune, you’re using your own
computer as a client to obtain something from a web server.
A network can take advantage of many kinds of clients and servers. Here
are just a few:
Mail server A computer that handles inbound and outbound mail for
all network users
File server A computer that stores data files and makes them available
through any computer connected to the network
Music server A specialized file server that stores music files and makes
them available to computers and home entertainment systems
Firewall server A computer that acts as a security firewall between the
other computers on the network and the rest of the world
Game server
A computer that acts as host for a multiplayer game
A server can be a separate computer that runs only specialized server
software, a general-purpose computer that runs server programs along with
other programs, or an even more specialized device that contains a specialpurpose internal computer processor. For example, as Figure 2-12 shows, a
printer server could be a computer with a printer attached to it, or a printer
with an internal or external network adapter connected directly to the
network.
24
C ha pt er 2
Ethernet
Ethernet
Printer server
Printer
Printer server
Printer
Figure 2-12: A printer server can be either a computer with a printer connected to it or a
dedicated printer server.
In a small network, it’s not unusual for the same computer to double as
a client and a server. For example, in a home network, the family’s printer
might be located in the kitchen, where Mom has a computer on which she
keeps the family’s financial records and looks up recipes on the Internet.
The kitchen computer is the network’s printer server. When others in the
house want to print something, they instruct their own computer to send it
to the printer through the network to the computer in the kitchen. The
computers’ operating systems know how to handle such print requests without
interrupting other programs running on the printer server.
Clients and servers are important because they are essential network
building blocks. A client-and-server structure is often the very best way to add
services to a network because it’s an efficient way to share expensive hardware
and software, and it makes those services equally accessible to everybody.
For more details about adding and using servers, see Chapter 9.
T y p es of N etw ork C on ne ct ion s
25
3
HUBS, SWITCHES, AND
ROUTERS
Any time a network includes more than two
nodes, it must have some way to connect
any pair of nodes. Large networks can have
very complicated structures with many branches
and extensions, but the core of every network can be
reduced to just a few patterns. The simplified layout of
a network is known as its topology.
The most common network topologies are a big loop known as a ring; a
hub system with everything connected to a central core called a star, a common
path (not a loop) that connects nodes using a time-sharing method; and a
mesh, in which there’s a direct connection from every node to every other
node. Figure 3-1 shows simplified diagrams of each network topology.
In a loop network, such as IBM’s old token ring design, data moves
around the loop until it reaches its destination. In the much more common
hub system, each data packet travels to a central location, where a control
device reads the address and sends it back out to the right destination.
Ethernet networks, which include most small LANs, are hub systems.
Desktop
computer
Desktop
computer
Laptop
computer
Laptop
computer
Token
ring
Star
Tower PC
Desktop
computer
Tower PC
Desktop
computer
Server
Desktop
computer
Laptop
computer
Mesh
Desktop
computer
Tower PC
Desktop
computer
Figure 3-1: Every network uses a specific topology.
Mesh topology is not common in small home or office networks, but the
wide area networks that connect your small network to the Internet often use
mesh designs.
This chapter describes the equipment at the center of a star network that
connects the computers and other nodes to one another, and the related
devices that provide connections between networks. Unless you’re connecting
just two nodes, these hubs, switches, and routers are essential network building blocks.
Hubs and Switches
Both hubs and switches are exchange points at the logical center of an
Ethernet network, as shown in Figure 3-2. Each computer or other network
node connects to a hub or switch through a cable plugged into a socket
called a port. In a small network, a hub or switch is almost always a tabletop
28
C ha pt er 3
box with indicator lights on the front and Ethernet ports on the back. In a
larger network, the hub or switch might be a panel that mounts in an equipment rack.
Ethernet
hub
Figure 3-2: A hub or switch is the central connection point in
an Ethernet network.
The maximum data transfer speed of a network is the data-handling
speed of the hub or switch. You might find a 10 Mbps Ethernet hub, but as
faster devices have become less expensive, there’s not much reason to use
one. Today, the most common hubs and switches are designed for both
10 Mbps and 100 Mbps operation. The latest generation of switches and
hubs supports even faster Gigabit Ethernet (1000 Mbps) switches, often at
prices only slightly higher than those of older 100 Mbps versions.
Hubs
When a data packet enters a hub, the hub relays that packet to all of the
hub’s ports (and onward to the nodes connected to those ports). Each node
compares the address on the packet with its own address and either accepts
it if the address is the same or ignores it if the packet is addressed to some
other node. Because the hub sends each packet to every port, only one
packet can travel through the network at a time (we’re talking about many
packets per second, but they still move through the network one at a time). If
two or more computers try to send packets at exactly the same time, Ethernet’s
collision detection feature forces them to stop, wait, and try again a fraction
of a second later.
In order to prevent collisions, each node must examine the network to
be certain that no other node is already using the hub before it transmits a
packet. Therefore, a network with a 10/100 hub is no faster than the slowest
node. If all the computers in your network use 100 Mbps network adapters
but the printer connects through a 10 Mbps port, the whole network will run
at only 10 Mbps or less.
Hub s , Sw it ch es , an d R ou te rs
29
As more nodes try to use a hub at the same time, the data transfer speed
through the entire network drops. This could have a significant effect on a
busy network that uses a hub: The actual data transfer could be only a
fraction of the nominal 10 Mbps or 100 Mbps.
In general, hubs are slow, simple, and cheap. But the difference in cost
between a hub and a switch is often insignificant, so a switch is almost always
the better choice.
Switches
A data switch performs the same function as a hub—it connects the nodes of
a network to one another—but it does the job quite differently. Rather than
sending every packet to every port, a switch reads the address section of each
incoming packet and sets up a direct connection from the source of each
packet to its destination. In the meantime, if some other node tries to send a
data packet to another unused port, the switch can set up the link without
breaking the other connection. As Figure 3-3 shows, a switch can handle more
than one connection at the same time. Because a network node connected to
a switch doesn’t have to monitor the entire network for possible collisions, it
can send and receive data at the same time (this is called full duplex mode).
Both of these features—multiple segments and full duplex operation—mean
that data can move through a switch more quickly than through a hub.
Desktop
computer
Desktop
computer
Laptop
computer
Ethernet
switch
Tower PC
Printer
Internet
Figure 3-3: An Ethernet switch can support two or
more simultaneous connections.
Data switches (and hubs) come in several sizes and shapes. The smallest
switches often have four, five, or eight ports, inside a box that can sit on a
table or shelf, like the one shown in Figure 3-4. When your network expands
30
C ha pt er 3
www.allitebooks.com
to need more ports than your original switch can provide, you can connect
one or more additional switches to one of the ports on the original unit.
Photo courtesy of Linksys, a division of Cisco Systems, Inc.
Figure 3-4: This switch connects five network nodes.
Networks in larger business offices usually run cables from each computer
back to a central space where all the switching equipment is mounted on a
wall plate or an equipment rack. This is often the same room where in-house
telephone equipment connects to the telephone company’s outside lines.
This space is often called a wiring closet.
LANs and WANs
The network in your home or office is known as a local area network (LAN).
All of the computers connected to a LAN can share peripheral devices (such
as a printer or a scanner), they can run programs and read data from other
computers on the same LAN, and they all share a common connection to the
Internet. In a home network, the LAN might also include home entertainment
systems and game controllers.
A LAN also uses the same set of rules and settings to control communication among all the networked computers. These include the name of the
network itself and names (or address numbers, or both) for each computer,
and sometimes firewalls that protect the privacy of the people using the LAN.
When you want to connect several LANs, you can create a “network of
networks” called a wide area network (WAN) that can use communications
channels such as telephone lines or a cable TV service to provide the links.
Figure 3-5 shows a simple LAN connected to a WAN. Your Internet service
provider (ISP) uses a WAN to connect you to the Internet. The Internet itself
is a set of connection points that link a lot of WANs.
It’s also possible to connect a single computer directly to a WAN without
going through a LAN. If you have just one computer, and it’s connected
directly to a modem, your computer is on your ISP’s WAN.
Hub s , Sw it ch es , an d R ou te rs
31
Ethernet
Desktop
computer
Other
LANs
Desktop
computer
WAN
Internet
Router
Laptop
computer
Other
LANs
Tower PC
Figure 3-5: A LAN is usually limited to a single building or some other small
space; a WAN can connect several LANs.
Bridges and Routers
Any time you connect two networks, you must use a tool that translates the
address and control data used by each network into values that the other
network can understand. When the device simply examines the address on
each packet and decides which packets to forward to the other network, it’s
a bridge. When the device examines the address (or routing) information in
each packet and sends the packet along to its ultimate destination (which
might be in yet another LAN far from the original), it’s a router.
NOTE
Bridges and routers operate between two different networks. Don’t confuse them with
switches and hubs that distribute data within a network. However, many routers
combine functions with a switch in a single device.
When you connect your LAN to the Internet, you add a router as a node
on the LAN. This kind of router is sometimes called a gateway router because
packets from your LAN must pass through it on their way to the Internet
(and, of course, packets from the Internet also pass through the router on
their way to your LAN). The most common gateway routers are specifically
designed to supply the right kind of signaling and address conversion
required by DSL or cable TV connections.
32
C ha pt er 3
Combination Boxes
In relatively small networks, the functions of two or more network control
devices are often combined into a single box. For example, a router that connects the network to the Internet could also include a built-in switch that
connects several nodes, or a DSL modem might be matched with a gateway
router. Many other combinations are also widely available.
If you can find one that meets your network’s requirements, a combined
package is almost always a better choice than two or more separate pieces. A
single unit is almost always less costly than separate components because the
case and the power supply account for a major portion of the total price, and
it’s often easier to configure the network when one device handles several
activities.
Using a single device that combines two or more activities offers another
advantage that might not be obvious until you have been using your network
for a while, and you either need to troubleshoot a problem or you want to
add more devices to the network: The connections inside a combined device
don’t require external cables. As Figure 3-6 shows, the area where your network cables plug into your switches, routers, modems, and so forth is almost
always a rat’s nest of confusing wiring; anything you can do to reduce the
number of cables will make things a lot easier.
Figure 3-6: The cables connected to your network
controls can often form a confusing mess.
Hub s , Sw it ch es , an d R ou te rs
33
4
HOW COMPUTER NETWORKS
ARE ORGANIZED
In order to exchange files and messages
through a network, all the computers
connected to that network must use the same
set of rules (known to network designers as a
protocol ). The rules that control the Internet are called
transmission control protocol/Internet protocol (TCP/IP).
Even if you don’t plan to connect your network to the Internet right now,
you should use TCP/IP for at least two reasons: First, TCP/IP is built into the
Windows, Macintosh, and Linux operating systems and most inexpensive
networking equipment; and second, you would waste a lot of time and
money finding equipment that works with one of the other, older network
protocols.
This chapter offers a relatively simple explanation of the TCP/IP
protocols and how your network uses them.
TCP/IP Networks
TCP/IP is really a suite of protocols. The most important are TCP (transmission control protocol), which controls the way commands, messages,
and files are broken into packets and reassembled at the other end, and
IP (Internet protocol), which provides the rules that guide each data packet
through different kinds of networks to the correct destination.
Your computer handles transmission control automatically, so you don’t
have to devote a lot of attention to individual data packets and their contents.
The information in Chapter 2 of this book provides as much detail as most
users ever need. But the Internet protocol is another matter; you should
understand how your network (and just about every other network connected
to the Internet) uses names and addresses for individual computers and other
network nodes and how to use some of the standard software tools that are
included in every network computer.
Fortunately, internal routing through the Internet is automatic; if you
enter a valid address in your web browser, email client, or other program, the
Internet will almost always find a path to the computer with that address. If it
doesn’t, the ping and traceroute commands described in “Network Tools” on
page 41 will help you find the source of the problem.
Names and Addresses
An “addressing convention” sounds like an event where people attend
speeches and workshops about house numbers and receive awards for sending out five million pieces of junk mail without an error. The formal sessions
are often boring, but the after-hours parties are great. In networks, addressing
conventions are actually the rules that everybody uses to identify the computers
and other devices connected to a network and the people who use them.
Every computer connected to a network has a unique name and address
within that network, and every network connected to the Internet has its
own unique numeric Internet address known as an IP address.
Numeric Addresses
The technical committees, international standards organizations, and
government agencies that manage the Internet have all agreed on a 32-bit
numeric address format shown as four numbers between 0 and 255, separated
by periods, like this:
192.168.3.200
When you read an IP address out loud, you pronounce each digit
separately and each period as “dot.” So you would read this sample address
as “one-nine-two dot one-six-eight dot three dot two-zero-zero.”
You can think of an IP address as similar to your telephone number.
Every computer connected to your LAN and every device or network
connected to the Internet has a different address.
36
C ha pt er 4
The agency responsible for assigning numeric IP addresses on the
Internet is the Internet Assigned Names Authority (IANA). Some formal
contracts with the US government are involved, but the real reason IANA
can provide this service to the worldwide Internet community is that everybody agrees to respect their assignments.
As the owner of a small LAN, you will never deal directly with IANA. Your
Internet service provider controls a block of numeric addresses, and it will
assign you one address (or more) when you set up your new connections.
Reserved Addresses
As Chapter 3 explained, your LAN communicates with other networks
through a router. As far as the networks connected to that router are
concerned, the router is just one more network connection with an IP
address. Therefore, as Figure 4-1 shows, a router has two different IP
addresses: one for its connection to the LAN and the other for the WAN
or the Internet. The router presents a single address to the Internet that
represents all the computers and other devices on your LAN; it performs a
function called network address translation (NAT) that converts your public
address to the addresses of individual network devices. One of the benefits
of this system is that you can use the same IP addresses within your LAN as
your neighbor across the street (or a LAN on the other side of the world),
and the addresses won’t interfere with one another.
In order to make this system work properly, IANA has reserved several
blocks of IP address numbers for LANs; when a router receives a packet with
an address in one of these ranges, it does not relay the packet to the Internet.
If you use these addresses for the devices in your LAN, you can be certain
that your packets (and the commands, messages, and files that make up
those packets) won’t end up at the reading room of the National Library of
Ecuador when you wanted to send them to your assistant across the corridor.
The reserved IP addresses are:
10.0.0.0 to 10.255.255.255
169.254.0.0 to 169.254.255.255
172.16.0.0 to 172.31.255.255
192.168.0.0 to 192.168.255.255
Fixed and Dynamic Address Assignments (DHCP)
The computers and other nodes in your LAN can obtain their numeric
IP addresses in one of two ways: The person who sets up the network
connection can assign a permanent address, or a router or other network
control device can automatically assign an address every time the device
connects to the network. A permanent assignment is called a fixed or static
IP address; an automatic assignment is a dynamic address.
How C om put er N et work s Ar e O rg a ni zed
37
Another LAN
Ethernet
Laptop computer
192.168.0.100
103.75.201.47
Desktop computer
192.168.0.101
WAN
103.75.201.0
Internet
Router
LAN side: 192.168.0.1
WAN side: 103.75.201.48
Tower PC
192.168.0.102
Another LAN
103.75.201.50
Printer
192.168.0.105
Figure 4-1: A router presents separate IP addresses to each network.
The method for assigning dynamic IP addresses is called Dynamic Host
Configuration Protocol (DHCP), so the device that makes the assignments is a
DHCP server. In a LAN, the DHCP server uses numbers from the reserved
range; on the Internet, the servers use numbers from a range provided to
your ISP by IANA.
Both fixed and dynamic IP address assignments can work equally well,
but all the devices on the network must use the same system; otherwise, more
than one device might use the same number at the same time.
NOTE
If your LAN includes laptops and other portables that connect and disconnect from the
network, DHCP is the better choice because it allows the network to assign an address
automatically when a user connects and to re-use the same address after the first user
has disconnected.
Some Internet service providers and corporate network managers
assign static IP addresses to each user, whereas others use DHCP to generate
addresses. Chapters 10 and 11 explain how to set up your own computer and
LAN to use either method.
The Domain Name System
Computers have no trouble handling long strings of numbers, but people
often do. Addresses in the form of words rather than numbers are generally
easier to remember and use. That’s why the Internet and just about every
LAN use names for each computer connected to a network. In a LAN, each
38
C ha pt er 4
computer reads the name of every other device on the same network automatically; on the Internet, a computer called a Domain Name System server
(DNS server) converts names to numeric addresses; when you type the name
of a website into a browser, a DNS server finds the number that corresponds
to that name and returns it to your browser, which connects to that numeric
address.
You (or your network manager) will assign a name to each computer
when you set up your network; your Internet service provider should set up a
domain name for your connection to the Internet. Within a LAN, you can
use simple descriptive names for each computer, such as “Sam” or “Kate.”
On the other hand, the system for naming computers and networks
connected to the Internet (rather than to your own LAN) follows some
very specific rules called the Domain Name System (DNS). In the Domain Name
System, every name starts with a top-level domain name at the extreme right
that can be either a generic description (such as com, net, or edu) or a twoletter country code (such as uk for the United Kingdom or ca for Canada).
As you move to the left, the next word (or group of letters and numbers) is
a name (called a subdomain) that has been reserved by a specific owner—an
individual, a business, a government agency, or some other formal or informal
organization. Large organizations might have one or more additional subdomain names to the left of the first one. Each part of the name is divided
from the next one by a period (read as dot ).
For example, the University of Washington’s domain name is
washington.edu. Within the university, the Department of Genome Science’s
address is gs.washington.edu. And within that department, the addresses of the
research group studying evolutionary genetics is evolution.gs.washington.edu.
At the extreme left of a domain name, you will sometimes see a subdomain
that identifies the type of server. This address might be the familiar www or
some other Internet service such as ftp (file transfer protocol).
Many addresses also include the type of Internet service (the protocol) that
the web resource at that address uses as a leading part of the address, followed
by a colon and two forward slashes (//), such as http://host.sample.com/. The
http part stands for HyperText Transfer Protocol—the protocol that defines most
websites. If you want to reach a different service at the same destination such
as a file transfer server, a telnet host, or an Internet Relay Chat server, you
might instead use ftp://host.sample.com/, telnet://host.sample.com/, or irc://host
.sample.com/, respectively. When an address does not include the protocol
type and the two forward slashes, your web browser will assume it’s an http
address. Some top-level domains that use country codes have other structures
that differ from one country to another. Domain names that have a us (for
United States) top-level domain sometimes use subdomains (also called secondlevel domains) that identify the state and city where the owner is located, such
as example.sf.ca.us, which would be in San Francisco, California. In Canada
and other countries, the domain name comes right before the country code
(such as the Canadian Broadcasting Corporation’s cbc.ca), whereas other
countries use generic identifiers along with the geographic domain, such as
bbc.co.uk for the British Broadcasting Corporation; the co stands for commercial
and the uk for the United Kingdom.
How C om put er N et work s Ar e O rg a ni zed
39
NOTE
Just because a domain name address has a country code, the owner of that address is
not necessarily located in that country. For example, many American FM radio stations
have obtained addresses in the .fm domain, which belongs to the Federated States of
Micronesia, and some television stations use the .tv domain assigned to the Pacific
island nation of Tuvalu.
Table 4-1 lists the most common generic top-level domains.
Table 4-1: Generic Top-Level Domains
Top-Level Domain
Used By
.com
Originally commercial, but now a generic domain
.net
Originally reserved for domains related to networks, but now a generic
domain
.edu
Reserved for US colleges and universities
.org
Originally reserved for nonprofit organizations, but now a generic
domain
.gov
Originally reserved for the US government, but now also used by state
and local governments
.mil
Reserved for branches of the US military
.info
A generic domain with no restrictions
.biz
A generic domain restricted to businesses
.name
A generic domain reserved for individuals
Some other top-level domains such as .asia, .coop, .museum, and .travel are
restricted to certain categories of users. Still others, such as
.испытание
.δοκιμή
are for addresses that don’t use the Roman alphabet.
Name Servers
DNS name servers are an essential part of the Internet’s internal plumbing,
but most people don’t know that they exist. If your computer can’t find a
DNS server, your email program, web browser, and other Internet programs
won’t work unless you use a numeric IP address to identify a destination.
DNS servers perform what seems like a simple task, but this task is
more complicated than it first appears because millions of domain names
are out there, and new ones are added all the time. Every DNS server in
the world has to keep up with all the adds, moves, changes, and deletions.
It accomplishes this through a system of root servers that are continuously
40
C ha pt er 4
www.allitebooks.com
updated. If a local DNS server doesn’t recognize a name, it consults the
root server that keeps up with that name’s top-level domain.
NOTE
There’s actually a hierarchy of DNS servers, so a root server might end up consulting
yet another server (and so on up the line) if it can’t handle a name request itself.
When you set up your computer for access to the Internet, you must
specify the DNS servers that the computer will use to convert domain names
to numeric IP addresses. In most cases, your Internet service provider or
network manager will give you the numeric address of one or more nearby
DNS servers. If your primary DNS server is not accessible, your computer will
look for an alternate server if you have provided an alternate address.
It’s generally best to use the DNS server address supplied by your ISP
because the server with this address is probably closer to your own computer
than any other server, and the system works best when total demand for DNS
service is spread among as many servers as possible. But if you can’t obtain
reliable DNS service from your local service provider, a public DNS is often
a useful alternative. You can find addresses for several public DNS servers
though a Google or other web search for Public DNS server.
Some public DNS services can also provide some added features that
your ISP might not offer. For example, OpenDNS (http://www.opendns.com/)
can provide another layer of filtering against spyware, identity theft, adult
sites, and other possible problems. It will also allow you to set up two threeletter shortcuts to frequently used addresses and will automatically correct
common keystroke errors (such as typing example.cmo instead of .com). There’s
some controversy about some of these features, because they could lend
themselves to returning names that are links to advertisements rather than
the sites the original user requested.
Network Tools
You won’t use them often if your LAN and your Internet connection are
working properly, but you should know about a handful of troubleshooting
tools that allow you to examine the innards of your network and its Internet
connection.
All of these tools are simple text commands that you can use with just
about any operating system. When you type a command, the system will
display the results in the same window or screen. In Microsoft Windows,
you can open a Command Prompt window after selecting Start Programs
or by selecting Start Run and then typing cmd. In Mac OS X, select
Applications Utilities and the Terminal program. If you’re using Linux
or Unix, use a command prompt or an XTerminal.
IPConfig
The IPConfig tool displays detailed information about your computer’s
current LAN and Internet connection, as shown in Listing 4-1.
How C om put er N et work s Ar e O rg a ni zed
41
C:\>IPConfig
Windows IP Configuration
Ethernet adapter Local Area
Connection-specific
IP Address. . . . .
Subnet Mask . . . .
Default Gateway . .
Connection:
DNS Suffix
. . . . . .
. . . . . .
. . . . . .
.
.
.
.
:
:
:
:
domain.actdsltmp
192.168.1.100
255.255.255.0
192.168.1.1
Listing 4-1: The IPConfig tool displays the status of a computer’s network configuration.
In this example, Connection-specific DNS Suffix is an address assigned by a
DHCP host. This address is often an arbitrary name used internally within
the network, but if your computer is connected directly to the Internet, it
might be your computer’s DNS address. If you try to connect to a domain
name without a suffix (such as “example” rather than “example.net”), the
network will assign this suffix to the address when it sends it to a DNS server.
The IP Address is the numeric address of this computer within the LAN or
WAN. The Subnet Mask tells the network which parts of the numeric address
identify individual computers, and the Default Gateway is the numeric address
within the LAN of the gateway router that connects your LAN to the Internet.
For more details about your network connection, add /all to the
command, as shown in Listing 4-2.
C:\>IPConfig /all
Windows IP Configuration
Host Name . . . . . . .
Primary Dns Suffix . .
Node Type . . . . . . .
IP Routing Enabled. . .
WINS Proxy Enabled. . .
DNS Suffix Search List.
.
.
.
.
.
.
.
.
.
.
.
.
.
.
.
.
.
.
.
.
.
.
.
.
.
.
.
.
.
.
:
:
:
:
:
:
desktop
Unknown
No
No
domain.actdsltmp
Ethernet adapter Local Area Connection:
Connection-specific DNS Suffix
Description . . . . . . . . . .
Connection
Physical Address. . . . . . . .
Dhcp Enabled. . . . . . . . . .
Autoconfiguration Enabled . . .
IP Address. . . . . . . . . . .
Subnet Mask . . . . . . . . . .
Default Gateway . . . . . . . .
DHCP Server . . . . . . . . . .
DNS Servers . . . . . . . . . .
. : domain.actdsltmp
. : Intel(R) PRO/100 VE Network
.
.
.
.
.
.
.
.
:
:
:
:
:
:
:
:
00-0C-F1-AA-BF-BF
Yes
Yes
192.168.1.100
255.255.255.0
192.168.1.1
192.168.1.1
198.137.231.1
206.63.63.1
Lease Obtained. . . . . . . . . . : Wednesday, April 08, 2009 3:11:22 PM
Lease Expires . . . . . . . . . . : Friday, April 10, 2009 3:11:22 PM
Listing 4-2: The IPConfig /all command displays additional information about your
connection.
42
C ha pt er 4
Obviously, this command produces a lot more information. The Host Name
is the name that this computer uses on the LAN. The Description identifies
the type of network interface adapter that connects this computer to the
network. The Physical Address is the MAC address—the unique hardware
identifier—of the network adapter. The DHCP Server is the address of the
device that assigns IP addresses to other devices on the LAN (in this case,
this device is the same as the Default Gateway), and the DNS Servers are the
computers that this network consults to convert DNS addresses into numeric
IP addresses. The Lease Obtained and Lease Expires lines show the date and
time that this computer obtained its IP address from the DHCP server and
the time the computer will give up that address; the host automatically
renews the lease long before it expires, so you don’t have to worry about
the expiry time.
ifconfig
The ifconfig command is available in Macinstosh OS X and in Unix and
Linux. This command displays information about the current network
interface, including the connection type and the connection’s current
status. The format of the information display, however, varies in different
operating systems. Therefore, the best place to find a detailed explanation
of the ifconfig display produced by your own system is the man page for the
ifconfig command.
ping
The ping command is an echo request. When you type ping target address,
your computer sends a series of “please answer” messages to the target address,
and that computer sends you a reply, as shown in Listing 4-3. Your computer
measures the amount of time for each roundtrip and displays the duration in
milliseconds.
C:\>ping nostarch.com
Pinging nostarch.com [72.32.92.4] with 32 bytes of data:
Reply
Reply
Reply
Reply
from
from
from
from
72.32.92.4:
72.32.92.4:
72.32.92.4:
72.32.92.4:
bytes=32
bytes=32
bytes=32
bytes=32
time=140ms TTL=48
time=99ms TTL=48
time=99ms TTL=48
time=97ms TTL=48
Ping statistics for 72.32.92.4:
Packets: Sent = 4, Received = 4, Lost = 0 (0% loss),
Approximate round trip times in milli-seconds:
Minimum = 97ms, Maximum = 140ms, Average = 108ms
Listing 4-3: The ping command sends a series of echo requests to a designated address.
Many books and people will tell you that ping is an acronym for Packet
InterNet Groper, but Mike Muuss, who wrote the original program, always
insisted that he chose the name to imitate the sound of a sonar system
How C om put er N et work s Ar e O rg a ni zed
43
aboard a submarine; the sonar system makes an audible “ping” when an
echo pulse returns from a target.
ping has several uses. It can confirm that the distant computer is alive,
and that your computer’s connection is working properly. It can also provide
a rough idea of the network’s performance (less time means higher speed).
ping is also useful for finding a DNS problem; if you get a successful ping echo
when you enter the target’s numeric IP address, but not when you enter the
domain name, the glitch is almost certainly someplace in the DNS system.
In Listing 4-3, it took about one-tenth of a second (100 ms) for each test
to go from Seattle to San Francisco and back. That’s a perfectly reasonable
amount of time. But if one or more of the attempts had taken around 500
milliseconds or more, that would indicate some kind of problem.
Ping has also become a verb in computer jargon. You’ll hear a technician
at a help desk ask you to “ping me” at a specific address, meaning that you
should send a ping request to that address. Some people have extended that
usage beyond computer networks: They’ll talk about “pinging” somebody
when they intend to get that person’s attention, either by email, telephone,
or even poking their head into the recipient’s office.
Many large commercial Internet sites, such as yahoo.com and microsoft.com,
have chosen to block ping requests from outside their own network. If you
get a no reply response to a ping request, try another address before you
assume the problem is with your own Internet connection.
TraceRoute
The TraceRoute tool measures and displays the amount of time it takes for
your computer to receive an echo from each network device between your
computer and the target. As a result, a TraceRoute display can show you the
route between your computer and any other computer on the Internet and
pinpoint the segment of that route where a problem is occurring. In Windows,
the command is tracert; in OS X, Linux and Unix, it’s traceroute. TraceRoute
sends three requests to each intermediate node, and shows the timing for
each request.
Listing 4-4 shows a TraceRoute from my office in Seattle to No Starch
Press in San Francisco.
C:\>tracert nostarch.com
Tracing route to nostarch.com [72.32.92.4]
over a maximum of 30 hops:
44
C ha pt er 4
1
2
3
4
5
6
7
4
3
71
57
*
45
42
ms
ms
ms
ms
ms
ms
3
3
63
53
44
43
42
ms
ms
ms
ms
ms
ms
ms
3
3
64
48
42
41
43
ms
ms
ms
ms
ms
ms
ms
192.168.0.1
192.168.0.1
--..blv.nwnexus.net [206.63..]
fe000.cr1.sea.nwnexus.net [206.63.74.1]
fe000.br4.sea.nwnexus.net [206.63.74.20]
204.181.35.197
sl-bb20-sea-4-0-0.sprintlink.net [144.232.6.121]
8
9
10
11
12
13
14
15
86
96
108
110
99
101
101
97
ms
ms
ms
ms
ms
ms
ms
ms
85
97
109
110
98
98
100
100
ms
ms
ms
ms
ms
ms
ms
ms
87
97
107
108
97
97
98
99
ms
ms
ms
ms
ms
ms
ms
ms
sl-bb25-chi-5-0.sprintlink.net [144.232.20.84]
sl-bb20-kc-2-0.sprintlink.net [144.232.20.108]
sl-crs1-fw-0-4-0-1.sprintlink.net [144.232.20.56]
sl-st20-dal-1-0.sprintlink.net [144.232.9.136]
sl-racks-5-0.sprintlink.net [144.223.244.138]
vlan903.core3.dfw1.rackspace.com [72.3.128.53]
aggr115a.dfw1.rackspace.net [72.3.129.109]
squid14.laughingsquid.net [72.32.92.4]
Trace complete.
Listing 4-4: TraceRoute shows the path to a distant computer through the Internet.
In this case, it took 15 hops to complete the connection:
The first two lines show the very fast response from the router sitting
on the same table as the computer through a 6-foot cable. Line 2 repeats
line 1 because of a software problem in the router.
Line 3, whose domain name and IP address I have hidden, is my
Internet service provider’s WAN, a couple of miles away in downtown
Seattle. Completing that echo takes longer, but it’s still pretty fast.
Lines 4 to 7 show the packets moving through various routers in the
same switching center in Seattle.
Starting at line 8, the route apparently jumps through routers in
Chicago, Kansas City, Fort Worth, and Dallas, which increases the
response times.
The path moves around a routing center in Dallas at lines 11
through 15 until it ends up at the Laughing Squid web host that houses
the No Starch web server.
This connection goes from origin to destination with several thousand
miles of detours. However, the whole thing takes only about a tenth of a
second, so those detours don’t really matter.
TraceRoute can help identify several possible problems:
If a TraceRoute report ends with one or more lines of asterisks (***),
that usually isolates the problem to either the router named in the
preceding line or the connection from that router to the next one.
If the report shows a very long path that includes router addresses that
don’t seem to be a on a reasonable route (such as a path from New York
to Philadelphia by way of Singapore), one of the network routers is not
configured correctly.
If the route shows that a pair of routers are passing the signal back and
forth until TraceRoute times out, that usually indicates that one of those
routers has lost a connection and is returning the signal back to the previous router. That router still thinks the best path is through the other
one, so it tries again.
How C om put er N et work s Ar e O rg a ni zed
45
If the report shows a long delay that always begins at the same router, it
could indicate a problem with that router or very high demand for service through that part of the Internet.
Unless you’re a network manager, you probably won’t have to analyze
TraceRoute reports very often. But if you’re having a connection problem,
they can sometimes help you to understand why you’re not getting through
to a website or instant message recipient.
46
C ha pt er 4
5
DESIGNING YOUR NETWORK
It’s quite possible to construct a computer
network “on the fly,” stringing Ethernet
cables from a central hub or switch to individual computers and other devices as you need
them. But it’s almost always better to spend some time
planning your network before you start to install it.
It’s a lot easier to make changes to your design on paper rather than making
adds, moves, and changes in physical space. This chapter offers advice and
instructions for preparing a network plan.
I’m assuming in this chapter that you have chosen not to use either power
line or video cable as your primary network distribution medium. Both of
those methods can be practical in some situations, but a traditional Ethernet
system, possibly with a supplementary Wi-Fi base station, is usually a better
choice for a small business or household network, because the equipment is
widely available, it’s often inexpensive, and it’s easy to install and maintain.
To begin your network plan, start with a floor plan of the house,
apartment, or workspace where you want to install your network. The plan
doesn’t have to be exactly to scale, but it should be big enough to add notes
within each room or cubicle, and it should show the relative positions of
each room. Figure 5-1 shows a typical floor plan for a small one-story house.
If it’s convenient, use a copier or scanner to make several copies of the
floor plan.
BEDROOM/STUDY
LIVING ROOM
BATH
BEDROOM
KITCHEN
LAUNDRY
TO
CELLAR
Figure 5-1: Use a floor plan to identify locations for network
connection points.
Identifying Current and Future Nodes
The next step is to decide where you will want network connections. Use
different colors to note the locations of each of the following items:
Electrical outlets Network wiring and outlets should be at least 12 inches
away from AC wiring, so it will be helpful to identify all of the AC outlets
in each room. In addition, you will want access to AC power for your
computer, router, modem, and other network hardware.
Your home entertainment systems Home theater equipment, stereo
systems, televisions, and game consoles can all exchange data through
your home network, so network outlets should be within close range.
Telephone wall outlets and connection boxes If you plan to use a DSL
or dial-up connection to the Internet, your network will use telephone
outlets to connect.
Cable TV or other video outlets If you get your Internet service from
your cable TV provider, you will connect a modem to a cable outlet.
Even if you don’t use cable Internet service, you might want to use combined wall plates for video and data outlets.
48
C ha pt er 5
Furniture placed next to a wall You won’t want to plan a network outlet
socket in a place that forces you to move a bookcase or a sofa to get to it.
On the other hand, if there’s a table against the wall, you could probably
crawl underneath easily to plug in a cable in a place where it won’t call
attention to itself.
Closets, stairways, and other hiding places If your home or workplace
includes spaces on more than one floor of the building, be sure to note
the locations of closets, stairways, and other places where it will be relatively easy to run hidden cables through ceilings or floors. As with the
other wiring in your home or workplace, your goal will be to hide all
your network cables inside walls, under floors, and in other invisible
locations.
If you’re adding the network in an existing home or office, all of these
elements are probably in place already. Before you start to add new network
wiring and connection points, you must understand how they will relate to
the other things in each room. If you’re planning a network as part of a
major remodeling or new construction, plan to coordinate your efforts
with the contractors or outside installers who will provide electrical wiring,
telephones, cable or satellite TV, and wiring for a home theater or home
entertainment system.
With all this information in one place, it’s easy to decide where you will
want to install network connection points. Use yet another color of pencil to
mark an unobstructed place for the network outlet on the wall nearest to
each computer and every other device you plan to connect to the network.
Each outlet should be at least a foot from the closest electrical outlet,
both because AC wiring can generate interference that affects data signals,
and because it’s often required by the local electric code to prevent shorting
between AC and data cables.
If your telephone or cable TV outlets
are mounted on wall plates (rather than
in small boxes attached to the baseboard),
consider replacing the existing wall plate
with a new one that combines two or three
outlets of different types on a single wall
plate, as shown in Figure 5-2.
When you design your network,
you should also plan for the future. You
probably don’t need them today, but
within a few years, it’s quite possible that
you will want to connect your household
appliances, a bedside radio, and other
devices to your LAN and the Internet.
And if you plan to eventually add one or
Figure 5-2: This wall plate
more online cameras or home automation combines TV and data network
devices (such as lighting or climate controls) outlets.
to the network, it’s a good idea to mark
their tentative locations.
De si gn i ng Y our Ne tw ork
49
Remember, it doesn’t cost anything to mark a location for an outlet on
your floor plan. You don’t have to install every outlet right away, but it’s
helpful to know where they’re likely to be when you plan your cable runs.
You can always change the exact locations before you actually pull cable
through the walls.
NOTE
Planning for a lot of extra network connection points might seem unnecessary right
now, but that will almost certainly change. If you plan for more network connection
points than you think you need today, you might have enough for the next ten years.
Consider this: If you live in an old house with the original electrical wiring, you
probably know that one or two AC outlets in each room was considered more than
enough back in 1925; more would have been extravagant. Today, you should have
several electrical outlet plates on every wall. In the future, household data networks will
be as common as electricity and telephones.
In your home, consider placing at least one network outlet in each major
room—don’t worry about hallways and other odd spaces. In the kitchen,
place one outlet close to a counter, and plan to place another on the wall
next to the refrigerator and range. You might also want an outlet in the
laundry room, not far from the washer and dryer—you probably won’t want
to connect your appliances to the network right now, but remote control and
monitoring through your home network is a real possibility in the future. In
each bedroom, plan for an outlet near a desk or table where the room’s
occupant uses a computer or video game console, and (if it’s not close to the
first outlet) another outlet for a bedside Internet radio or a laptop computer.
In an office, plan for at least one network connection point next to every
desk and every other location where you expect to place a computer or other
network device, such as a printer.
If you expect to use both Ethernet and Wi-Fi connections to your network,
note the locations for one or more Wi-Fi access point on your floor plan.
All of your network wiring should use CAT5e or CAT6 data cable; less
expensive CAT5 (no “e”) cable can’t handle the higher-speed network data
that you’re likely to need in the future.
The Control Center
The network control center is the location of the switch, router, modem, and
other equipment at the core of the network. All of the wiring that connects
each outlet to the network converges at the control center. Common locations
for a network control center (sometimes known as a wiring closet ) include
closets, utility rooms, and garages or basements. For a very small network
(no more than five nodes), you could also consider placing the modem and
router on a table next to one of your computers, but that might limit your
opportunities for easy expansion of the network in the future.
50
C ha pt er 5
www.allitebooks.com
If you plan to distribute audio, video, telephone, or home automation
wiring around the house along with computer network data, your control
center should have enough space for all of the necessary equipment required
by all those services. It will be easier to pull two or more types of cables at the
same time than to install each type separately.
A network control center can have several possible forms: It could be a
simple plywood panel attached to the wall, or it might be a pre-wired modular
cabinet mounted on a wall or between the wall studs. Or if you have the floor
space, it might be in one or more freestanding equipment racks.
The control center’s location should have the following characteristics:
It should be easily accessible. Don’t choose a location that forces you to
climb over bicycles and storage boxes or push clothes on hangers aside
to reach it.
It should have enough light to allow you to see what you’re doing at any
time of day or night.
It should be in a place that remains dry and has a stable temperature.
It should be close to at least one electrical outlet.
It should be relatively central, in order to reduce the length of connecting cables.
It should be at or slightly below eye level, so you can work comfortably.
It should have enough space to allow for additional wiring and equipment in the future.
It should not be adjacent to the fuse box, circuit breaker box, or other
electrical panel. AC power wiring must be kept separate from network,
telephone, and video cables to prevent interference and to comply with
the National Electric Code.
After you choose a place for the control center, note its location on your
floor plan.
Home Run Wiring
When you have identified the locations of your network connection points
and found a place for the control center, you can plan the routes for your
network cables. The preferred method for network wiring is called home run
wiring because each cable runs “home” to a central hub or switch. The alternative, which is more practical for telephone and video wiring than for data
networks, is point-to-point wiring that uses long cable runs that connect to
each outlet through a splitter, as shown in Figure 5-3.
De si gn i ng Y our Ne tw ork
51
Telephone
service entry
Telephone
Telephone
Telephone
Telephone
Telephone
Telephone
Desktop
computer
Desktop
computer
Hub
Desktop
computer
Laptop
computer
Tower PC
Tower PC
Figure 5-3: Home run wiring (left) is best for data networks; telephones and video can use either home run
wiring or point-to-point networks (right).
If you haven’t already done so, this is a good time to look around the
rooms where you plan to install network outlets, and the spaces directly
above and below each room. If you have access to an unfinished basement
or attic, you can run cables through the rafters and joists; but if you have to
run cables through finished walls and ceilings, you will probably have to hide
cables inside walls and behind baseboards and patch some holes after the
wires are in place. Either way, look for the best routes for cables from each
network outlet to the control center. Use a pencil to mark the routes on your
floor plan.
There are two ways to attach a network outlet to a wall. For a finished
appearance, use a wall plate similar to the ones used for electrical outlets,
like the one shown in Figure 5-2. If the outlet will be hidden behind furniture
or in some other place where it won’t be visible, you can use a small terminal
block mounted on a baseboard like the one in Figure 5-4.
Figure 5-4: A data terminal block can mount
directly to a baseboard.
52
C ha pt er 5
Trunks and Branches: Using Secondary Switches
There’s an alternative to a pure home run wiring design for small networks
that can make it possible to expand the network without having to run new
cables all the way back to the control center. This approach, which vaguely
resembles the trunks and branches of a tree or the tributaries of a river,
uses data switches to connect additional computers and other devices to
the network through a single outlet, as shown in Figure 5-5. Connecting
through a switch can be particularly handy when you want to use two or
more devices (such as a computer and a game console or a printer server, or
two or more computers) in the same room.
Desktop
computer
Switch
Tower PC
Printer server
Switch/Router
Desktop
computer
Tower PC
Switch
Laptop
computer
Figure 5-5: An Ethernet switch can extend a network to connect two or
more devices to the network hub through a single cable.
A secondary switch can also be useful when you want to place network
connection points in adjacent rooms that are difficult to reach from the
control center. For example, if you have two second-floor bedrooms that
share a wall, you could run a single cable to a switch and connect the switch
to computers in both rooms.
Many Wi-Fi access points are combined with switches that allow you to
connect one or more devices to the network through wired Ethernet outlets.
If you locate your access point in a room where you also use a desktop computer or other network device, a combination unit is often an excellent
choice: Place the access point next to the computer and use an Ethernet
cable to connect it to the switch.
De si gn i ng Y our Ne tw ork
53
What About Wi-Fi?
Connecting computers and other network devices through a Wi-Fi network
is often an easy alternative to a wired Ethernet system. A single access point is
often enough for sending and receiving data to and from computers in many
rooms.
A Wi-Fi network can provide Internet access and LAN services, but it has
several disadvantages when compared with a wired network:
Wi-Fi networks are usually slower than wired Ethernet unless all the
nodes in the network are compatible with the latest 802.11n standards.
Wi-Fi networks are less secure than wired networks. Unless you protect
your network with a secure encryption method such as WPA, a dedicated
intruder can connect to the Internet through your network without your
permission and can also steal information from the other computers on
the same network.
Interference between your Wi-Fi network and your neighbors’ networks
and other wireless devices can reduce your network’s data transfer
speed.
In spite of those limitations, a Wi-Fi network is often an acceptable
choice if you don’t want to cut holes through your walls or spend time
crawling through your attic or basement. And even if you install a wired
network through part of your building, Wi-Fi could be the best way to reach
one or two isolated locations such as a top-floor bedroom or a detached
garage.
For many families and small businesses, the best approach is to install
both wired and wireless in the same network. This will allow you and your
users to connect your desktop computers, printer, music server, and other
devices that never physically move through wired Ethernet, and use Wi-Fi for
laptop computers, Voice over Internet Protocol (VoIP) telephones, smartphones, and other portable devices.
If you decide to include one or more Wi-Fi access points in your network,
mark their tentative locations on your floor plan. In most cases, a single
access point can exchange data with computers and other devices within
about 300 feet (100 meters), so the exact location is not critical. The best
location is often either in the network control center, or on the floor or a
table next to a computer in a fixed location. For detailed information about
installing Wi-Fi access points and connecting Wi-Fi devices to your home or
office network, see Chapter 8.
With your network floor plan more or less complete, you’re ready to
install the control center and string Ethernet cables to each room. The next
chapter will tell you how to do that job.
54
C ha pt er 5
6
INSTALLING THE NETWORK
CONTROL CENTER AND
ETHERNET CABLES
Whether you connect your computers
and other devices to the network through
cables or wireless links, your network must
have some kind of control center that includes
one or more hubs or switches for your wired Ethernet
connections, an access point for Wi-Fi, or both. If you
plan to connect your LAN to the Internet, the control center must also include
a gateway router and a modem. This chapter explains how to assemble a
control center and run cables between the control center and the computers,
game consoles, printers, and other devices that make up your network.
Connectors, Wall Plates, and Surface Boxes
As part of your floor plan, you chose a location in each room for a network
outlet. In places where you decide to use surface boxes, you can attach the
outlet block to the baseboard with double-sided adhesive or wood screws. For
wall plates, you must cut a hole in the wall and use a mounting bracket like
the one shown in Figure 6-1 to attach the plate to the wall. If there’s an
electrical outlet on the same wall, measure the distance from the bottom of
the plate to the floor and mount the data plate at exactly the same height.
Remember to keep data outlets at least a foot away from the nearest electrical
outlet. When you tighten the screws on the front of the mounting bracket,
the wings inside the wall will turn and hold the bracket in place.
Figure 6-1: Use a mounting bracket to
attach data outlet wall plates to a wall.
If you want to install a single combined wall outlet plate for data,
telephone wiring, and video, use a modular plate with snap-in connectors.
For a single-purpose outlet, use either a snap-in connector or a plate with
the data outlet permanently attached.
Ethernet Cable
All Ethernet cables have four color-coded pairs of wires twisted together:
green with green and white, brown with brown and white, and so forth.
Ethernet cables and connectors are identified as Category 5 (CAT5),
enhanced Category 5 (CAT5e), or Category 6 (CAT6), depending on the
amount of data that can pass through a cable and the cable’s sensitivity to
interference. Unless you plan to install a super-fast Gigabit Ethernet network,
CAT5e is usually the best compromise between cost and performance in a
home or small office network.
NOTE
Don’t use CAT5 cable for new installations. It might be okay for today’s networks, but
it won’t reliably support the next generation of high-speed data services.
Ethernet cables come in two forms: bulk cable on spools or in boxes,
and pre-assembled cables with connectors already attached. Pre-assembled
data cables are often called patch cords, patch cables, or jumper cables. They’re
56
C ha pt er 6
available in many colors and in lengths ranging from 1 foot to 100 feet. Use
different-colored patch cords with a switch or any other device that has lots
of connections; multiple colors will allow you to find the right one quickly.
Bulk cable is the right choice for runs inside walls between your control
center and the data outlets in other rooms. On the other hand, pre-built
cables are better for shorter distances, such as between terminal blocks or
wall outlets and computers, control devices, and other equipment, because
they’re often made with more durable jackets and plugs that have permanent
collars. It’s possible to build your own patch cords out of bulk cable and loose
plugs, but attaching plugs to cables is tedious work that’s generally more
trouble than it’s worth. As a rule of thumb, use bulk cable for permanent
installations with a terminal block to each end, and pre-built cables for patch
cords and for connections between wall outlets and network devices.
Patch cords are widely available in office supply and electronics stores,
but they’re often four or five times more expensive than the identical cables
sold through industrial electronics suppliers and online sources such as
Jameco (http://www.jameco.com/), Cyberguys (http://www.cyberguys.com/), and
Newegg.com (http://www.newegg.com/). A 3-foot cable should not cost $8 or
$10. There’s no reason to pay more for “premium” patch cables; any cable
that meets the CAT5e specification will do the job. (This piece of advice will
probably save you more money than you paid for this book.)
NOTE
In buildings with raised floors or dropped ceilings, it’s often convenient to run your
data cables through the plenum space above the ceiling or under the floor. However,
fire regulations often require special plenum cable that won’t burn easily and won’t
produce toxic fumes. Plenum cable is more expensive than regular bulk Ethernet cable,
and it’s more difficult to use because the jacket is heavier and less flexible, but there’s
no difference in its data-handling performance. When you’re shopping for cable, you
might find boxes or spools of plenum cable next to regular CAT5e cable. Sometimes the
only difference is a single line on a label. Unless you have a specific need for plenum
cable, don’t waste your money on the more expensive stuff.
Pushing Cable Through Walls
This is a book about computer networks rather than home improvement or
new home construction, so it’s not the place to describe all the special tools
and techniques that electricians and telephone installers have been using for
more than a hundred years to push wires through walls, under moldings, and
inside closets. If you plan to install your own internal wiring, consult some of
the do-it-yourself websites or look for a book about home wiring at your local
home center before you start.
NOTE
I can specifically recommend Wiring Home Networks (Sunset Books, 2004) as a
guide to installing network wiring, because I wrote it. However, several other illustrated
books about home wiring also include the information you need.
I n s ta ll in g t he Ne tw ork C on tr ol C en ter a nd Et h ern et C a bl es
57
In order to feed wires from wall plates or surface boxes through your
walls to the control center, you will have to drill some holes through base
plates, studs, and other structural elements of your house or workplace. If
you’re working in rooms on the ground floor, you might be able to reach the
spaces between the walls from below, drilling upward from an unfinished
ceiling in the basement or crawl space. On the top floor, you can work downward from the attic. But if you can’t get to the inside of the walls from above
or below, your best option will be to cut holes in the wall and drill through
the vertical studs, or to hide cables and holes behind mop boards and other
moldings. After the wires are in place, you’ll have to patch the holes and
repaint the walls.
Use an electrician’s snake to pull or push cables through places that you
can’t reach with your hands. When the end of the snake reaches the target
location, attach the end of the bulk cable to the snake with electrical tape
and pull the snake and cable back from the other end. It’s a lot easier to
route wires with a rigid snake (a long, thin piece of metal) than to deal with
loose cable flopping around inside a wall.
Remember to add a length of heavy twine as a pull line along with each
cable or cable bundle that you pull through the walls. In the future, when
you want to add another cable along the same route, you can attach the cable
to the pull line and pull it through without the need to create new holes in
your walls.
You’re going to connect a lot of cables to and through the control center,
so you will want to keep them out of sight in order to maintain a neat and
clean appearance. A 2-inch PVC pipe at the back of a closet or in some other
hidden location can provide an inconspicuous route for cables between an
upper floor or the attic and the basement or crawl space. If the pipe runs
through the space where the control center is located, assemble a channel
from two shorter pipes and a tee fitting about four or five feet above the
floor. Pipes, fittings, and glue are all available at your local hardware store
or home center.
NOTE
Follow the instructions on the package for gluing PVC pipes to fittings, but don’t worry
about creating watertight seals. Your network data won’t leak through a bad pipe joint.
The Control Center
A network control center always performs these tasks:
It connects the local network to the Internet through a modem and a
telephone line, cable TV service, or some other medium.
It uses a router to translate addresses between the LAN and the Internet.
It uses a hub or a switch to exchange data within the network.
It acts as the central distribution point for data cables.
58
C ha pt er 6
In addition, it might also include these services:
A base station for Wi-Fi
A distribution center for audio, video, and telephone connections
If you’re working from the floor plan you created after reading Chapter 5,
you have already chosen a location for your control center. If not, find a
place that is easy to reach but away from day-to-day traffic: the inside wall of
a walk-in closet, a utility room, or a basement wall are all common choices.
A garage that’s built into the house might be another good spot. The control
center should be close to at least one dual AC power outlet.
A network control center can take several forms:
A modular “structured wiring center” Several manufacturers offer
structured wiring cabinets and most of the switches, routers, and other
control devices necessary to assemble a network control center. The
panel mounts on a wall (or between the studs in an unfinished basement
or garage) and can include a cover to keep the contents clean and out of
sight. These panels and components are considerably more expensive
than separate parts from different sources, but they present a finished
appearance that might be important if the control center is in a conspicuous location. If you’re using one of these systems, follow the installation
instructions supplied with each component.
A sheet of plywood attached to the wall A half-sheet (4 feet by 4 feet) of
plywood securely bolted to wall studs is entirely adequate to support your
network’s mounting blocks, control devices, and other equipment. It
might not be as attractive as a structured wiring center, but you’re not
going to see it very often. If you do a neat, workmanlike job, it will work
just as well as a fancy sheet-metal cabinet full of matched components.
A freestanding mounting frame or cabinet If you have enough floor
space in your utility room, you can assemble the control center from
equipment and shelves that mount in a 19-inch-wide relay rack. This
approach is usually limited to larger networks that include a lot of locations and equipment.
Several wall-mounted outlets and a small number of control devices
(modem, router, and/or switch) on a table or shelf If your network is
limited to computers in just two or three rooms, it might be easiest to
choose one of those rooms as your control center and place the modem,
router, and switch near the computer (but remember to allow for additional network nodes in the future). A single wall plate can hold up to six
data outlets, so it’s possible to run cables to several other rooms without
installing an industrial-looking row of mounting blocks.
A data outlet block is the transition between internal data wiring inside a
wall and a socket for a cable with Ethernet plugs at each end. Terminating
each cable from another room with an outlet will make it easier to make
additions and changes to your network wiring.
I n s ta ll in g t he Ne tw ork C on tr ol C en ter a nd Et h ern et C a bl es
59
One side of an outlet block
has a set of slotted pins that
each holds one of the wires
inside a data cable, and the
other side has a socket for an
Ethernet plug. A data outlet
can be located on the side of a
small box attached to a baseboard (or to the plywood base
of your control center) or on a
flush-mounted wall plate.
Figure 6-2 shows an outlet
block, with cables connected
to both sides. The cover has
been removed to make the
individual wire connections
visible.
A completed control
center on a plywood panel will
look something like Figure 6-3.
Figure 6-2: An outlet block provides a transition
from loose wires to an Ethernet connector.
Network
terminal
blocks
Telephone
line
To other
rooms
Phone line
terminal
block
Power
strip
Modem
Shelf
Figure 6-3: A homebrew control panel should include connections for AC power,
DSL or video, and several data outlets, along with your modem, router, and switch.
60
C ha pt er 6
AC Power
Your modem, router, and switches will all need some kind of electric power.
If you’re using a plywood panel as your control center, attach an AC power
strip with enough outlets for all your devices and at least one spare to the
side of the panel closest to the nearest AC outlet, near the bottom. The
control panel should be close enough to an outlet that the cable attached
to the power strip can reach it without an extension cord. In order to protect
your equipment from damage caused by lightning strikes or other power
surges, use a power strip with a built-in surge protector.
Many network devices use plug-in transformers or power converters
(sometimes called “wall warts”) that are bigger than a simple AC power plug,
so you will want a power strip that provides extra space between outlets, like
the one shown in Figure 6-4. This particular model also includes surge
protection for a DSL telephone line.
Photo courtesy of APC
Figure 6-4: This power strip is designed for oversize plug-in power supplies.
As an alternative to a power strip, consider using an uninterruptible
power supply (UPS) that will provide backup power from a battery when
your AC power fails. A UPS is not a replacement for a generator, but it will
keep your network alive during short power disruptions. Network control
devices don’t use as much power as a computer and monitor, so a small UPS
should be enough to keep your network alive for up to an hour. Of course,
during a power failure you will be able to use the network only with laptops
and other battery-powered portables.
The battery in a UPS is relatively heavy, so you will probably want to place
the UPS on the floor rather than on a shelf on the control panel. If the UPS
does not have enough battery backup outlets for all of the equipment in your
control center, plug a power strip directly into an outlet on the UPS.
I n s ta ll in g t he Ne tw ork C on tr ol C en ter a nd Et h ern et C a bl es
61
Modems, Routers, and Switches
If you already have broadband Internet service, take a close look at the
modem that connects your computer to the telephone line or TV cable
and the instruction sheet that was provided with the modem. Some Internet
service providers supply modems (such as the one shown in Figure 6-5) that
double as gateway routers, switches, and/or Wi-Fi access points. If you have a
combined unit, there’s no need to duplicate those functions with one or
more separate boxes.
Photo courtesy of 2Wire, Inc.
Figure 6-5: This DSL modem includes a four-port
switch and a Wi-Fi base station.
Your floor plan should contain enough information to tell you the
number of nodes in your network. You will need one port on a switch or
combined switch/router for each node, plus additional ports to connect the
control devices. For example, if you have a total of seven nodes in your
network, you might use these control devices:
A DSL or cable modem
A gateway router combined with a four-port switch
A four-port Ethernet switch
Figure 6-6 shows how these devices connect to one another.
62
C ha pt er 6
Desktop
computer
Desktop
computer
Server
Laptop
computer
Internet
Switch
Router
Modem
Desktop
computer
Desktop
computer
Laptop
computer
Figure 6-6: A network with seven nodes might use this setup in the control center.
You can find switches and routers at many office supply and electronics
stores and through online retailers. It seems as if one brand or another is
almost always on sale, so it’s worth looking at the advertisements in the
Sunday newspaper for this week’s hot deals.
If possible, your router or switch should have at least one spare port that
you can use with a laptop computer. When you’re trying to troubleshoot the
network, it’s often convenient to send commands from the computer while
you watch the responses to those commands on the control devices’ status
lights.
When you add more nodes to the network in the future, you can expand
the network by connecting an additional switch to the control center. If there
are no spare ports on the existing switch, disconnect one cable from the active
switch, connect the new switch to that port, and plug the original cable into
the new switch.
Some switches and routers have keyhole slots on the bottom of their
cases that allow you to mount them directly on a wall, like the ones shown in
Figure 6-7. When you mount a device on a wall panel, place it below eye level,
with the front panel at the top of the box, so the status lights are easy to see.
If there is no allowance for mounting holes on your modem, switch, or
router, and you’re using a wall-mounted control center, attach a 6-inch shelf
to the plywood panel and place the devices on that shelf. If you’re using a
modular structured wiring center, there’s usually space at the bottom of the
cabinet that you can use as a shelf. For a rack-mounted control center, use a
rack shelf for any devices that don’t mount directly into the rack.
I n s ta ll in g t he Ne tw ork C on tr ol C en ter a nd Et h ern et C a bl es
63
Figure 6-7: This D-Link switch has keyhole slots on the bottom of its case.
Use big wire staples from the hardware store to route the power cables
neatly along one side of your control panel between each control device and
the power strip. Don’t mash the staples all the way into the plywood; allow
some space to be sure you haven’t crushed any of the wires. Be sure to leave
enough slack wire at the back of each device to allow yourself to unplug the
power connector easily.
Adding a DSL or Cable Connection
Broadband Internet service comes into your building through either a telephone line or a TV cable. Therefore, you will need either a telephone or
cable TV outlet in your control center. This is the same kind of outlet that
you are already using to connect a telephone or TV set. If you’re getting
Internet service from your cable TV company, you can sometimes convince
the installer to run a cable to your control center. But if you have DSL or
some other type of Internet service from the telephone company, you might
have to install your own wiring.
Connecting a Telephone Line
If you have DSL or some other kind of Internet service from the telephone
company, you will need a telephone outlet with a four-pin socket called an
RJ-11 jack. This is the same kind of socket that you use to plug in a telephone set.
Mount the outlet block on your panel, about a foot above the power
strip. You can use either conventional telephone cable, with two pairs of
wires inside, or the same four-pair data cable that you use for your computer
network to connect the outlet block on the control panel back to the distribution block that connects your telephones to the service entry. If you use
telephone cable, be sure to match the colors of the wires to the letters on
the outlet blocks at both ends (R = red, Y = yellow, G = green, and B = black).
If you use data cable, use the color codes in Table 6-1.
64
C ha pt er 6
Table 6-1: Data Cable Color Codes for Telephone Lines
Terminal Color
Data Cable Color
Green
Blue
Red
Blue-White
Black
Orange
Yellow
Orange-White
Use a cable-stripping tool to remove about two inches of the plastic
jacket from the end of the telephone cable. If the outlet block has screw
terminals, strip about half an inch of insulation off the end of each wire
and wrap the bare end around the screw next to the letter that corresponds
to the wire’s color.
If the terminal uses two vertical pins with a slot between them to hold
each wire, don’t strip the wires, but use a punch-down tool to force each wire
between the pins. If your terminal does not come with a small punch-down
tool, look for one at a home center or hardware store; you will need the same
tool to connect data cables to their outlet connectors. If excess wire extends
from the side of the connector, cut it off. When all four wires are connected,
place the dust cover on the plug.
After you have connected the telephone line to the outlet block, plug in
a telephone with a modular RJ-11 cable to test for a dial tone. If there’s no
dial tone, check your connections at both ends; if you have a dial tone, unplug
the telephone set and use one of the cables supplied with the modem to
connect the modem to the telephone line.
Connecting a TV Cable
Most video wiring inside a building uses coaxial cable called RG6/U with
a central copper wire surrounded by insulation and a metal shield. The
connectors that attach to this cable are called F connectors.
Video cables usually require a special tool to attach the F connector to
each end of the cable. If you’re not installing your own video distribution
system along with your data network, and you have to install your own cable
from the service entry to the network control center, it might be easier and
cheaper to buy a pre-assembled cable with the connectors already attached
(look for a cable close to the length you need—don’t use a 100-foot cable for
a 20-foot run). Use electrical tape or a cable tie to hold excess lengths of
cable in a neat loop at one end.
If you have to install the video cable yourself, find the service entry where
the cable comes into your house or office. String the cable along the ceiling
or through the rafters under the floor to the control center, then attach the
cable to the F connector inside the outlet plate. If there’s a splitter with a
spare connector at the service entry, screw the plug at the end of the cable
onto the unused socket. If you can’t find a splitter, you’ll have to install a
new one, or distribute your video from the control panel.
I n s ta ll in g t he Ne tw ork C on tr ol C en ter a nd Et h ern et C a bl es
65
If you’re not connecting other outlets through the control center, plug
the cable from the service entry directly into your cable modem. If you want
to use the control panel to distribute cable TV signals to outlets throughout
the house, connect the cable from the service entrance to the input of a
splitter and connect the outputs to your cable modem and the cables from
each room.
Terminating the Network Cables
If you’re using a plywood panel as your control center, mount one or two
rows of outlet blocks along the top of the panel, or along the side opposite
the power strip. Keep the outlets evenly spaced and allow enough space to
add more outlets in the future.
Terminate the wires in each network cable on a terminal block with an
eight-pin RJ-45 socket (be sure to follow the color codes) and attach a tag to
the cable that identifies the location of the cable’s other end. Use a marking
pen or the label supplied with the terminal block to identify each cable on
the cover of the block. Your goal is to be able to figure out at a glance which
terminal block connects to what destination.
There are two different standard color codes for connecting Ethernet
cables to plugs and sockets. Use one of the standard color codes (T568A or
T568B) to connect each wire in the cable to the socket inside the terminal
block. Table 6-2 shows the correct connections. It doesn’t matter which of
the two standards you use, as long as both ends of each cable follow the same
standard. The best approach is to choose a standard and wire every socket in
your network to that standard.
Table 6-2: Wiring for Ethernet Cables and Sockets
Color
T568A Pin Number
T568B Pin Number
Blue
4
4
Blue-White
5
5
Orange
6
2
Orange-White
3
1
Green
2
6
Green-White
1
3
Brown
8
8
Brown-White
7
7
Follow these steps to connect a CAT5, CAT5e, or CAT6 cable to an
Ethernet socket:
66
C ha pt er 6
1.
Allow about a foot of slack and cut off the excess cable.
2.
Remove about two inches of the cable’s outer jacket. Be sure you don’t
nick any of the internal wires with your stripping tool.
3.
Separate the four pairs of wires that extend beyond the jacket, but don’t
untwist the individual wires.
4.
Follow the instructions supplied with the connector to direct each
wire to the correct slot. Be sure the jacket extends into the back of the
connector.
5.
Use a punch-down tool to insert the two wires closest to the back of the
connector into their respective slots.
6.
Insert the wires from the other three pairs into the correct slots. Don’t
untwist the pairs any more than is necessary.
7.
Double-check to confirm that each wire is in the correct slot according
to the color code you are using.
8.
If your punch-down tool doesn’t automatically cut off excess wire, use a
wire cutter to trim each wire.
9.
If the RJ-45 socket came with a dust cover, snap it into place over the
wires.
10. Insert the socket into the terminal block or the wall plate from the inside
of the block or case.
Adding a Telephone
When you’re trying to solve a problem with your network connection, it’s
often helpful to have a telephone next to the control panel, so you can talk
to a technical support person while you’re looking at the status lights on the
modem, router, or switch. You won’t need this phone very often, but when
something goes wrong, you will be happy to have it. Use a cell phone or a
cordless handset if you have one, or install an inexpensive wall phone on or
near the control panel. If possible, look for a simple desk or wall phone that
does not require an external power supply.
Tabletop Control Centers for Small Networks
You don’t need a separate control center for a small network that connects
computers in just a few rooms. It’s often easier to place the modem and
router in one room and run data cables directly to each of the other rooms.
You can place the modem and router on your computer table or on a nearby
bookshelf.
Leviton and other manufacturers make wall plates that can hold up to
six or eight data outlets in the same space as a dual AC outlet. That should be
enough for a small network; if you need more, add a second wall plate or
replace the first one with a dual-width plate.
When it’s time to expand your network, you have two options: You can
run new wiring from the original control room to the new location, or you
can add a downstream switch in the room closest to the location and run a
I n s ta ll in g t he Ne tw ork C on tr ol C en ter a nd Et h ern et C a bl es
67
data cable from there. The second approach can be particularly convenient
when the new location shares a wall with a room that already has a data
outlet.
NOTE
It’s particularly important to label the wall outlets in a network without a control
center. Years from now, when other people try to use your network after you’ve moved
away, they’ll need to know where the cable connected to each data outlet goes.
You can also use a small Ethernet switch to use more than one network
device in the same room. For example, if there’s a data outlet in a teenager’s
bedroom, you could connect a four-port switch to the wall outlet and connect
a computer, a game controller, and an Internet radio to the household
network through that switch.
68
C ha pt er 6
7
ETHERNET NETWORK
INTERFACES
Every computer on a network uses some
kind of internal or external connector to
send and receive data to and from other computers. This connector, along with the hardware that
controls it, is called a network adapter or network interface
because it’s the point of contact between the computer and the network. In
a small home or business network, the network interface can be either an
Ethernet port that communicates with the network through a cable or a
wireless transmitter and receiver that exchanges radio signals with a Wi-Fi
base station. This chapter describes the most common wired Ethernet network
interfaces. Chapter 8 provides similar information about connecting your
computer to a network through a wireless interface.
Built into the Motherboard
Every modern wired Ethernet interface has an eight-pin socket (an Ethernet
port or jack) that mates with the plug on an Ethernet cable. Both the plug and
the socket follow a standard called RJ-45 that specifies the size and shape of the
connectors and the signals that move through each of the eight pins (RJ
stands for Registered Jack). RJ-45 connectors are similar to the six-pin RJ-11 plugs
and sockets used on telephones, but the RJ-45 is slightly larger to allow for
the additional pins. Figure 7-1 shows both an RJ-45 Ethernet plug and an
RJ-11 telephone plug.
Figure 7-1: An RJ-45 data plug (left) has eight
wires; an RJ-11 telephone plug (right) has four
or six wires.
In addition to the port itself, an Ethernet interface also includes some
internal hardware that converts the data in both directions between the
format that the computer’s central processor can handle and the format
used by the network. This hardware can take several forms. It can be:
On the computer’s main circuit board (the motherboard)
A printed circuit card that mounts inside the computer
A PC card that plugs into a laptop computer
An external unit connected to the computer through a USB cable
Almost all the computers built within the past few years have built-in
Ethernet ports. On desktop and tower computers, the RJ-45 jack is on the
back of the case, as shown in Figure 7-2. On laptop computers, the Ethernet
port is usually on either the back or the side of the case.
If your computer has a built-in Ethernet port, the driver software that
instructs the central processor how to handle network data is on the software
disc supplied with the computer or the motherboard. If your computer came
with the operating system already installed, the driver is already in place.
However, if you assemble your own computer from parts, you might have to
install the network driver supplied with the motherboard or a third party
after you load the Windows, Linux, or Unix operating system.
70
C ha pt er 7
Figure 7-2: Most new computers come with Ethernet ports as
standard features.
Setting the BIOS Utility
If your computer has a built-in Ethernet interface, it’s sometimes necessary
to turn off that interface and use a network adapter on an expansion card or
some other kind of external network interface. This might happen when you
want to use a faster network than your built-in adapter can handle (such as a
Gigabit Ethernet network) or if the onboard network controller doesn’t
work correctly.
To turn off the internal network interface, you must open the computer’s
BIOS settings utility and find the option that enables or disables the onboard
LAN controller or some other option with a similar name. In most BIOS
utilities, the LAN option is buried under two or three menu levels.
The BIOS settings utility is a set of controls that load configuration settings
when you turn on the computer. These settings are an essential part of the
computer’s startup sequence because they tell the computer where and how
to find the operating system. To run the BIOS settings utility, turn off the
computer, then turn it on again and immediately press the DEL (delete) or
F1 key (depending on the type of BIOS your computer uses).
If you’re not comfortable changing the BIOS settings, just leave them
alone. When you install another network interface, Windows and other
operating systems will recognize both the internal and external adapters. In
most cases, it won’t matter if both of them are active at the same time.
On the other hand, if your network connection doesn’t work when you
turn on the computer but the rest of the network is okay and all the network
cables are plugged into their appropriate sockets, it’s possible that the internal
adapter has been disabled by accident. This should never happen unless somebody goes into the BIOS utility and changes the setting, but it’s possible,
especially if the computer is in a public location where other people can
mess with it.
E th er ne t Net wo rk I n t erf ac es
71
Adding a Network Interface to an Old Computer
If you’re using an older computer, it’s possible that the computer does not
have a built-in network interface. In that case, you must add one before you
can connect it to your network. Fortunately, network interface adapters are
inexpensive and easy to install.
As a minimum, look for an Ethernet adapter that can handle both
10Base-T and 100Base-T networks. If you plan to connect the computer to a
Gigabit Ethernet network, you’ll need a faster and more expensive adapter.
Like other computer components, Ethernet adapters are available both
as inexpensive no-name products and slightly more costly brand-name versions
that come with better documentation and a manufacturer’s warranty. As
always, you get what you pay for; considering that you can generally find a
brand-name adapter for just a few dollars (or euros or pounds) more, it’s
usually the better choice.
Internal Expansion Cards
Internal network adapters are printed circuit cards that fit into one of the
expansion slots on your computer’s motherboard, like the one shown in
Figure 7-3. Unless you’re working with a very old computer, the adapter
should be a PCI card; that’s probably the only kind you will find at your local
computer or office supply store. The PCI sockets on the motherboard are
almost always white.
Photo courtesy of D-Link
Figure 7-3: An internal PCI card mounts in an expansion slot
inside a desktop or tower computer.
If your computer was made before the mid-1990s, you might need an ISA
card instead. ISA sockets on motherboards are usually black. ISA Ethernet
adapters are still available, but you’ll probably have to go to a specialist source.
A Web search for ISA Ethernet card will produce pointers to many choices, but
be sure to order a “10/100” or “fast Ethernet” card rather than an older design
that works at only 10 Mbps.
72
C ha pt er 7
To install an internal Ethernet adapter, follow these steps:
1.
Turn off the computer and unplug the power cable.
2.
Remove the cover from the computer’s case.
3.
Find an empty expansion slot on the motherboard.
4.
Remove the metal bracket attached to the computer’s frame directly
behind the empty slot. Save the screw; you’ll need it to secure the
adapter card.
5.
Line up the bottom of the adapter card with the slots in the expansion
socket and push it into place.
6.
Use the screw you saved from the old bracket to secure the adapter card.
7.
While the computer case is off, clean out the accumulated dust and make
sure none of the connectors attached to the motherboard and the drives
have come loose.
8.
Replace the cover and plug in the power cable.
9.
Plug a network cable into the new Ethernet jack in the back of the
computer.
10. Turn on the computer. If the operating system does not automatically
detect the new network connection, load the driver software.
USB Adapters
A computer that has built-in USB ports but no Ethernet ports can use an
external USB network interface as an alternative to an internal expansion
card, but the data transfer speed might not be as fast. USB adapters are
widely available, but very few computers need them: By the time USB ports
became common features on computers, onboard Ethernet ports were also
standard equipment.
Network Adapters for Laptops
An old laptop without a built-in Ethernet port must use a network adapter
on a plug-in PC card that fits into the PCMCIA socket on the side of the
computer. Figure 7-4 shows a network adapter on a PC card.
NOTE
A new standard for 32-bit PC cards and services called CardBus was adopted in 1995.
CardBus PC cards (with a gold grounding strip next to the 68-hole connector) don’t fit
older 16-bit PC card sockets, but 16-bit cards will fit into 32-bit sockets. If your laptop
was made before 1997, look for a 16-bit 10/100 Mbps PC card adapter.
Very old laptops that don’t have PC card sockets can connect to an
Ethernet network through a serial-to-Ethernet adapter, but it’s probably not
worth the effort. Any laptop without a PC card socket is at least a dozen years
old, and it won’t come close to the performance of today’s least expensive
models. Considering that a serial-to-Ethernet adapter is likely to cost almost
as much as a whole new computer, it’s time to replace your “Old Faithful”
antique instead.
E th er ne t Net wo rk I n t erf ac es
73
Figure 7-4: This 16-bit PC card network adapter
uses a short cable (sometimes called a dongle)
to connect the adapter to an Ethernet socket.
Finding the Driver Software for Your Adapter
Windows XP, Windows Vista, Mac OS X, and most current versions of Linux
and Unix can automatically detect new network adapters. In some cases, you
might have to restart the computer after installing the network adapter, but
in general, the operating system will load the device driver software right
away.
NOTE
In some less user-friendly Unix or Linux distributions, it might be necessary to compile
the kernel to support a specific network driver and load the module at runtime, but this
is not common.
However, if you’re working with an older operating system or a network
interface that the operating system can’t recognize, you’ll have to find and
install the correct device driver. A device driver is a small program that converts
between the generic output signals supplied by the computer’s central processor and the specific instructions that control the features and functions of
a device connected to the computer. It also converts incoming commands
and data from the peripheral device to a format that the central processor
can recognize.
New network adapters usually come with a software disc that contains
the device driver and other related programs and documentation. If yours is
missing, or if the disc doesn’t contain the right driver for your operating system, you can probably find a driver program on the adapter manufacturer’s
website or through an online source of open source device drivers.
Several websites offer direct links to hundreds of sources for device
drivers:
http://www.windrivers.com/
http://www.pcdrivers.com/
74
C ha pt er 7
http://www.driverzone.com/
http://www.driverguide.com/
http://www.helpdrivers.com/
http://www.winguides.com/drivers/
http://www.driversplanet.com/
http://www.totallydrivers.com/
Status Lights on Network Adapters
Most Ethernet adapters have two or three status indicators that light and go
dark as data moves through the network connection. On an expansion card,
the lights are usually on the metal mounting bracket just above or below the
RJ-45 connector; on a PC card, they might be on the card itself, or on the
socket that connects to the network cable. Indicator lights on a built-in
Ethernet socket are usually right next to the socket itself.
The three indicator lights are:
LINK
Lights in green when the adapter is connected to a live network
10/100 Lights in yellow when the adapter is connected to a 100 Mbps
network; goes dark when it’s connected to a 10 Mbps network
ACT Flashes in green as data passes through the network connection
in either direction
These lights are useful for troubleshooting and watching network performance, because they can tell you whether your network connection is
working properly. For example, when the LINK indicator lights, you know
that the computer is connected to a live network; when it’s dark, the network
connection is offline. When the ACT light flashes, it tells you that the computer is sending or receiving data.
Unfortunately, the lights are often located in a place where it’s difficult
or impossible to see them while you’re using the computer. When you’re
testing the system, it’s often helpful to ask someone else to watch the lights
while you operate the computer.
On some computers, the LINK and 10/100 lights might remain on when
the computer is turned off. This happens when the computer’s BIOS has a
“wake on LAN” feature that turns on the computer if the adapter receives an
incoming signal. Even if this feature is disabled, the computer keeps the
network port alive whenever the power supply is turned on. The only way to
disable the network adapter completely is to either unplug the AC power or
turn off the power switch on the back of the power supply.
E th er ne t Net wo rk I n t erf ac es
75
8
WI-FI NETWORKS
Wi-Fi (short for Wireless Fidelity, pronounced “why-fie”) networks use radio
signals instead of Ethernet cables to connect
computers and other devices to a LAN. Wi-Fi is a
convenient alternative to conventional wired networks
because any wireless-enabled computer within range
of the Wi-Fi signal can join the network; there’s no need to find a network
outlet. This can be particularly useful when it’s not practical to pull data cables
through walls, ceilings, and floors, and when a user wants to connect a laptop
computer or a handheld device such as an iPhone or BlackBerry to an existing
network or through a LAN to the Internet. And of course, thousands of Wi-Fi
hotspots in public spaces such as airports, coffee shops, libraries, and schools
offer easy access to the Internet when you’re away from your own home or
office.
However, Wi-Fi connections are far less secure than wired networks,
because the same data that moves between a computer and a base station by
radio can be intercepted by another computer. Even if the data is encrypted,
a dedicated intruder with enough time can steal passwords, credit card numbers, and other personal information. However, the latest security tools,
including WPA encryption and virtual private networks (VPNs), can go a
long way toward making a Wi-Fi network secure.
This chapter describes the types of Wi-Fi networks and explains how to
add a Wi-Fi hotspot to your LAN, how to select and use a Wi-Fi network
interface with your computer, and how to keep your Wi-Fi network as secure
as possible.
Types of Wi-Fi Networks
Wi-Fi networks use the IEEE (Institute of Electrical and Electronics Engineers)
802.11 family of standards to define the radio frequencies, data formats, and
other technical details that are necessary to establish a wireless LAN. Today,
there are four types of 802.11 networks, as shown in Table 8-1.
Table 8-1: Wireless Network Standards
Type
Maximum Speed
Maximum Range (outdoors)
Radio Frequency Band
802.11b
11 Mbps
300 feet (100 meters)
2.4 GHz
802.11a
54 Mbps
75–100 feet (23–30 meters)
5.2 GHz
802.11g
54 Mbps
300 feet (100 meters)
2.4 GHz
802.11n
248 Mbps
750 feet (250 meters)
2.4 GHz/5.2 GHz
The useful distance that an access point can reach is often considerably
less than the promised maximum, especially when the path between the
access point and a computer’s wireless adapter is indoors. Walls, furniture,
and other objects between the two antennas can all reduce the signal
strength. 802.11b networks were the first to appear, and they were the most
common type until the faster 802.11g version became available. 802.11a uses
different radio frequencies, but many network adapters are compatible with
both 2.4 GHz and 5.2 GHz access points. Today, the new 802.11n standard is
beginning to replace all three older versions.
The three systems that use channels in the 2.4 GHz frequency band are
backward compatible. In other words, if your Wi-Fi network interface adapter
uses 802.11b only, it will continue to work with an 802.11g or 802.11n base
station; both 802.11b and 802.11g adapters will work with an 802.11n base
station.
NOTE
The missing letters—802.11c, d, e, and so forth—describe other wireless data characteristics and enhancements that apply to wireless data networks. They’re important to
hardware designers and manufacturers, but as a network manager or user, you don’t
have to worry about them.
You might also see some Wi-Fi access points and network adapters
identified as extreme or enhanced, or with some other word which suggests that
they work at faster speeds than a standard network. Most often these systems
78
C ha pt er 8
use a proprietary method that involves two or more parallel channels to
increase their data-handling capacity. Enhanced systems usually work as
advertised, but only when the adapter and access point were both made by
the same company. When you’re building a wireless network that will use
network adapters made by different manufacturers, or if you plan to allow
users of laptops and other portable devices to connect to your network,
there’s not much benefit to having an enhanced network.
The Wi-Fi Alliance (http://www.wi-fi.org/), the industry group that
promotes these networks, conducts periodic “bake-offs” where many manufacturers demonstrate that their products will work correctly with equipment
made by their competitors. A network adapter or access point that carries
the Wi-Fi logo has been tested and certified for compatibility by the Wi-Fi
Alliance.
Operating Channels
Wi-Fi uses a segment of the radio spectrum (also called a band) near 2.4 GHz
that has been reserved for unlicensed industrial, scientific, and medical (ISM)
services, including wireless data networks. 802.11b, 802.11g, and 802.11n all
use this band of frequencies. 802.11a uses a different frequency band near
5.2 GHz known as the Unlicensed National Information Infrastructure (U-NII).
Both the ISM and U-NII bands are open to many kinds of unlicensed
radio services. This means that the people who make the equipment must
demonstrate that their designs meet various regulations related to maximum
power, interference, and so forth, but actual users (that’s you and me) don’t
need to obtain licenses before they can operate approved radios. One result
of this is that the same radio frequencies used by Wi-Fi networks are also filled
with signals from cordless telephones, medical equipment, radio-controlled
toys, and microwave ovens, among many other things. Wi-Fi and those other
devices use different methods to transmit and receive radio signals, so there’s
not much danger that the Wi-Fi adapter in your laptop computer will cause a
model-train wreck or cause your cordless phone to ring. However, other ISM
or U-NII signals, along with Wi-Fi signals from other nearby users, can add
noise to your Wi-Fi signal that reduces the network’s data transfer speed.
Within the 2.4 GHz band, there are 14 overlapping Wi-Fi radio channels.
Japan is the only major country that uses all of them. Only 11 of those channels
are used in North America and China, while most of Europe uses 13 channels.
In France, only 4 channels are available. Each channel operates on a different
frequency, numbered from Channel 1 to Channel 14.
Each channel overlaps the two channels above it and two below it, as
shown in Figure 8-1, so the channels with adjacent numbers can interfere
with one another. Like the interference from other ISM devices, adjacentchannel interference can create a slower, noisier connection. Therefore,
when you’re setting up a new network or adding an access point to an existing
network, it’s best to choose a channel number as far away from the channels
used by nearby networks as possible.
Wi-F i N et wor ks
79
22 MHz channel
Channel 1
Channel 2
Channel 3
Channel 4
Channel 5
Channel 6
Channel 7
Channel 8
Channel 9
Channel 10
Channel 11
2.400 GHz
2.483 GHz
Figure 8-1: Wi-Fi signals use 11 separate overlapping channels. Notice that
channels 1, 6, and 11 do not interfere with each other.
Access Points
Every Wi-Fi network must have at least one access point. Wi-Fi access points,
or base stations, are radio transmitter/receivers (transceivers) that send and
receive data by radio and exchange that data with a wired Ethernet network.
You can think of an access point as a router between a Wi-Fi network and a
wired LAN.
Most access points have one or two short antennas attached to the back
panel; some also have a connector that can mate with a cable from a separate
antenna. Separate antennas are useful because they can increase the access
point’s signal strength and sensitivity, but they’re usually not necessary in
small indoor home or small business networks. There’s more about antennas
later in this chapter.
Wi-Fi access points are often combined in a single unit with cable or DSL
modems, gateway routers, or Ethernet switches. If your network includes both
wired and wireless connections, you might want to consider a combined
device, which is often less costly than two separate boxes. Figure 8-2 shows a
combined access point, Ethernet switch, and router. Indicator lights on the
front of this device show power, wireless activity, and data moving to or from
each wired network node.
A single 802.11g or 802.11n base station should provide more than
enough signal coverage to reach all parts of a house or small office, but if it
doesn’t (because of obstructions or interference), the best solution is to add
a second (or third) access point at a location where its signal will fill in the
dead spots. Each access point should be connected to the wired portion of
the network through an Ethernet hub or switch or, if that’s not practical,
80
C ha pt er 8
through a wireless bridge that retransmits Wi-Fi signals on a different channel.
In a Wi-Fi network with more than one access point, they should all use the
same network name, but each one should use a different non-overlapping
operating channel.
Photo courtesy of D-Link
Figure 8-2: This Wi-Fi access point doubles as a
network router.
Network Interface Adapters
Wi-Fi network interface adapters are small radio transceivers that convert
from computer data to radio signals that they exchange with a Wi-Fi access
point, and back again. A Wi-Fi adapter can be an expansion card inside a
laptop or desktop computer, a plug-in PC card, or a separate USB device.
NOTE
A Wi-Fi adapter can also exchange data by radio directly to and from another computer
in an ad hoc network, as described in Chapter 2.
Most new Wi-Fi adapters are compatible with all four standards (802.11a,
b, g, and n), so they can exchange data with any Wi-Fi access point. Older
adapters might use only one, two, or three standards, so they’ll only connect
to compatible base stations. When a network adapter detects a radio signal
from a nearby access point, the adapter’s control software will automatically
match the signal type used by that access point.
Adapters Built into Laptops
Built-in Wi-Fi interfaces are a standard feature of most new laptop computers.
The actual interface adapter is on a mini–PCI card that mounts on the computer’s motherboard, like the one shown in Figure 8-3. The antennas for
internal Wi-Fi adapters are usually flexible wires inside the upper half of a
laptop’s folding clamshell, in the space surrounding the monitor screen.
Wi-F i N et wor ks
81
Antenna connectors
Photo courtesy of Intel
Figure 8-3: Mini–PCI card Wi-Fi adapters mount on the
motherboard inside a laptop computer. The “Main” and
“Aux” connectors near the top in the photograph are
antenna connectors.
One advantage of the mini–PCI card approach (as opposed to making
the Wi-Fi adapter a permanent part of the motherboard itself) is that the
adapter is what IBM calls a field-replaceable unit (FRU). Other manufacturers
use different names, but the meaning is the same: If an adapter goes bad, or
if you want to replace an older adapter with a new one that can handle new
standards, it’s relatively easy to remove the old card and install a new one in
its place without changing the motherboard. This feature will be particularly
convenient as and when the 802.11n standard becomes more common.
It’s important to turn off the Wi-Fi adapter when you’re not using a
network, in order to reduce battery drain and to avoid transmitting a signal
that a hacker could use to link to your computer. There are usually several
ways to turn an internal adapter on and off: a physical on/off switch, a set of
keyboard commands, and an option in the Wi-Fi control program. The computer’s user manual is the best source for instructions on operating a Wi-Fi
adapter.
PC Cards
Laptop computers without built-in adapters can use an adapter on a credit
card–size PC card or PC ExpressCard. To install the adapter, simply plug it
into the PCMCIA socket and wait for your operating system to recognize it
and load the appropriate driver software.
Figure 8-4 shows a PC card adapter. The adapters extend about an inch
beyond the edge of the PCMCIA socket, in order to place the antenna outside
the computer’s metal case.
82
C ha pt er 8
Antenna inside this part
Photo courtesy of D-Link
Figure 8-4: PC card Wi-Fi adapters usually have
built-in antennas.
Some PC card adapters also have a connector on the top or on the outside
edge of the card for an external antenna. This can allow you to place the
antenna in a location where there’s a better signal to and from the base
station, but the separate antenna is one more thing to carry along with your
laptop computer. In general, an adapter with a built-in antenna is usually a
better choice for a portable computer.
A few Wi-Fi adapters are also available on the newer PC ExpressCards
that are gradually replacing PC cards in the latest generation of laptop computers. However, built-in Wi-Fi adapters were already standard features in most
laptops by the time PC ExpressCard sockets were introduced in 2004 and 2005,
so there’s generally no reason to search for a separate adapter. On the other
hand, a PC ExpressCard adapter might be the best way to add Wi-Fi to your
desktop if there’s a PC ExpressCard socket on the computer’s case.
USB Adapters
USB Wi-Fi adapters are available in two different forms: small modules that
plug directly into the computer’s USB port and stand-alone devices that
connect to the USB port through a cable. The separate units often provide
better connections because they have more powerful transmitters and more
sensitive receivers, but they’re considerably less convenient than the small
modules, especially with a laptop.
Figure 8-5 shows both a stand-alone USB adapter and a plug-in USB Wi-Fi
module.
NOTE
The smaller (and cheaper) plug-in USB Wi-Fi modules are often entirely adequate to
connect your computer to a Wi-Fi network unless you’re using the computer at the fringe
of the access point’s coverage. If you can detect a strong signal with a plug-in module,
you won’t get better performance with a stand-alone device. However, a separate adapter
with a more powerful transmitter and a more sensitive receiver might allow you to use a
signal that the smaller module won’t detect.
Wi-F i N et wor ks
83
Photos courtesy of Linksys, a division of Cisco Systems, Inc.
Figure 8-5: USB Wi-Fi adapters can be either stand-alone devices (left) or small
plug-in modules (right).
PCI Cards
Wi-Fi adapters on PCI expansion cards that mount inside a desktop computer
are also available, but they’re less convenient than other types of adapters.
To install a PCI card, you must open the computer’s case and insert the
adapter into an unused expansion slot on the computer’s motherboard—a
considerably more complicated process than plugging in a PC card or a USB
device.
The only reason to consider using a Wi-Fi adapter on a PCI expansion
card might be to add an old computer that has no USB ports to a wireless
network. Even then, you could achieve the same result by installing an
expansion card with several USB ports inside the computer and connecting
a USB Wi-Fi adapter to one of those ports. That’s probably the better
approach, because it will also allow you to use other USB devices with the
same computer.
Antennas
Every Wi-Fi adapter comes with either a built-in antenna or an antenna that
plugs into a socket on the adapter’s case. Some adapters include a built-in
antenna and a socket. As mentioned earlier in this chapter, the antennas for
a mini–PCI adapter in a laptop computer are usually built inside the top part
of the computer’s case, alongside the display panel.
Unless you’re trying to send and receive Wi-Fi signals over very long
distances, the antenna supplied with your adapter should be all you need.
Remember that a more powerful antenna might produce stronger incoming
84
C ha pt er 8
and outgoing signals, but those stronger signals often don’t make any difference to network performance—once the signal strength reaches an
adequate level, there’s no advantage to adding more power or sensitivity.
The antenna used with an access point is a different story. If you install
a “high gain” directional antenna or place the antenna as high as possible,
the access point’s coverage area will increase because radio signals at the frequencies that Wi-Fi uses are line of sight, meaning that the signal can reach
anywhere that an observer at the same location could see. However, the offaxis signals to or from a directional antenna are a great deal weaker because
the antenna focuses most of its output (from a transmitter) or sensitivity (to a
receiver) within a limited area. When you install a directional antenna, take
the time to make sure the antenna is oriented for the best possible signal
strength between the access point and the network interfaces.
On the other hand, nondirectional (or omnidirectional ) antennas have
equal signal strength or sensitivity in all directions. The best way to provide
Wi-Fi coverage over a wide area is to use an access point with a nondirectional
antenna and either increase the height of the access point or antenna or use
directional antennas on the network nodes located at the fringes of the
access point’s coverage area.
Many Wi-Fi adapters and access points use antenna connectors that are
not the same as the standard cable connectors on antennas. In order to
match the two, you must use a short cable adapter (not to be confused with a
network interface adapter) called a pigtail. Pigtails are often available directly
from the companies that make Wi-Fi adapters and access points, but these
OEM (original equipment manufacturer) parts are extremely expensive. Cables
that do the same job equally well are available for a fraction of the OEM
prices from specialty cable suppliers. Run a web search on Wi-Fi pigtails to
find a place where you can order inexpensive adapter cables.
Wi-Fi Control Programs
Before you can move data through a Wi-Fi network, you must configure the
network’s base station to specify the operating channel you want to use, the
password for data encryption, and other characteristics of the network. In
addition, each wireless network adapter must also run a control program.
Access Point Configuration Programs
Your access point should have at least one wired connection to a computer in
order to set and change the configuration settings. Depending on the make
and model you’re using, this connection might be through an Ethernet port,
a USB port, or a serial data port. The access point uses this connection to
accept configuration and setup commands and to send status information.
Some access points can also accept commands through a wireless link, but
after you turn off the wireless function, you’ll need a wired connection to
turn it back on again.
Wi-F i N et wor ks
85
The most common method for configuring an access point is through a
web-based configuration utility. In other words, the access point’s configuration options all appear on one or more web pages that appear when you
point your computer’s web browser to the access point’s IP address.
Each make and model of access point uses a somewhat different configuration program, so the manual supplied with each device is your best source
of specific instructions. However, they all include similar options. The most
important settings include:
DHCP Many networks use Dynamic Host Configuration Protocol (DHCP) to
automatically assign IP addresses from a DHCP host or DHCP server. The
alternative is to manually assign a numeric IP address to each computer
and other device connected to the network. The access point’s configuration utility includes an option to use the access point as the network’s
DHCP server.
IP address You must either set the access point to accept an IP address
from another device (a dynamic IP address) or manually enter an address
for the access point.
Wireless network name Each network should have a distinctive name
called a Service Set Identifier (SSID). This is the name that users will select
from a list of networks in their computers’ control programs.
Channel number Each access point operates on a single channel. This
option sets that channel. For best performance, choose a channel that is
different from the ones used by other Wi-Fi networks within your signal
range.
Operating mode Many access points can operate on more than one
operating mode (802.11b, 802.11a, 802.11g, or 802.11n), depending on
the mode used by the computers with which it exchanges data. This
option allows you to set the access mode to detect operating modes
automatically and choose the best one available, or to specify a particular mode.
Other wireless settings are often available, sometimes in a separate
“advanced” menu or web page. Unless you have a good reason to change
something, it’s usually best to keep the default settings.
Many Wi-Fi access points are combined with routers or modems, so
the configuration process also includes some additional setup options. See
Chapter 10 for information about configuring a router or modem. If you’re
using a separate access point, it’s usually best to turn off the DHCP server in
the access point and obtain all of the network’s addresses from the router or
modem.
86
C ha pt er 8
Wireless Connection Programs
A computer with an installed Wi-Fi adapter uses a wireless control program
to select a Wi-Fi network and establish a connection. Windows, Mac OS X,
and various versions of Linux and Unix include wireless control programs,
and alternative control programs are often provided as part of the driver
software supplied with wireless network interface adapters and laptop
computers.
For example, Figure 8-6 shows the Wi-Fi control program included in
Windows XP, and Figure 8-7 shows the Intel program supplied with its
mini–PCI Wi-Fi adapters. Both programs display a list of all nearby Wi-Fi
access points and identify those that are using encrypted data. To use either
program, select the name of the network you want, and click the Connect
button at the bottom of the program window. Other programs use different
onscreen layouts, but they all operate similarly. In some cases, one of the
programs installed on your computer might be more sensitive to weak signals
from access points, but that usually doesn’t matter—all of them detect the
strong nearby access points’ signals that you will use most often.
Figure 8-6: The Wireless Network Connection program supplied with Windows
detects nearby Wi-Fi signals and sets up a new network connection.
Wi-F i N et wor ks
87
Figure 8-7: Intel’s wireless program provides the same information as the Microsoft program, but in a different format.
Both of these programs, and similar programs supplied with other
operating systems, network adapters, and computers, can automatically
remember the login and password information and other details of each
Wi-Fi network you use. For example, Figure 8-8 shows the Properties settings
for a hotel’s Wi-Fi network. The next time you try to connect to the same
network, the control program won’t have to ask for a password again because
this network profile is set to “Automatic.”
Figure 8-8: The Windows Wi-Fi control program automatically saves the characteristics
of past network connections.
88
C ha pt er 8
If your computer remains connected to the same Wi-Fi network all the
time (at home or in your office), or if you frequently connect to the same
Wi-Fi hotspot at your favorite coffee shop or lecture hall, the Wi-Fi control
program should automatically use the password and other configuration
settings for that network every time you turn on the computer within the
network’s range. The exceptions are public networks that require a new
login with every connection.
NOTE
Many Wi-Fi hotspots that require a password display a web-based login screen before
they connect you to the first website you try to view. These hotspots won’t connect to any
other Internet service (such as email or instant messaging) until you log in through a
web browser.
Hybrid (Wired-Wireless) Networks
Most home and business Wi-Fi networks include at least one computer
connected to the network’s router through an Ethernet cable rather than
via a wireless link. The wired connections are often in the same room as the
router and modem, where there’s little or no advantage to using wireless.
In many networks it might be convenient to run a cable to one or more
adjacent rooms but use Wi-Fi for computers in more isolated locations.
Other networks limit Wi-Fi connections to laptops, smartphones, and
other portable or handheld devices. All the permanent systems use Ethernet
cables, because they’re faster and more secure.
Wi-Fi Security
Wireless networks are a trade-off between security and convenience. The
obvious benefits of a wireless network connection—fast and easy access to the
network from a portable computer or an isolated location—come at a cost.
For most users, the convenience of wireless operation outweighs the possible
security threats. But just as you lock the doors of your car when you park it on
the street, you should take similar steps to protect your network and your
data.
The simple truth is that someone who wants to devote enough time and
effort to monitoring Wi-Fi signals can probably find a way to intercept and
read the data they carry. If you send confidential information through a
wireless link, an eavesdropper can copy it unless the website or other host
is using an end-to-end encryption scheme such as SSL. Credit card numbers,
account passwords, and other personal information are all vulnerable.
Encryption and other security methods can make data a little more
difficult to steal, but they don’t provide complete protection against a really
dedicated snoop. An entire catalog of tools for cracking Wi-Fi encryption is
easy to find on the Internet. As any police officer will tell you, locks are great
for keeping out honest people, but serious thieves know how to get past them.
Wi-F i N et wor ks
89
There are two different kinds of security threats to a wireless network.
The first is the danger of an outsider connecting to your network without
your knowledge or permission; the second is the possibility that a dedicated
eavesdropper can steal or modify data as you send and receive it. Each
represents a different potential problem, and each requires a different
approach to prevention and protection. Although none of the encryption
tools currently available can provide complete protection, they can make
life more difficult for most casual intruders. And as long as the tools are out
there, you might as well use them.
A few techniques can discourage intruders and crackers. First, you can
accept the fact that wireless networks are not completely secure and use the
built-in network security features to slow down would-be intruders; second,
you can supplement your wireless router’s built-in tools with a hardware or
software firewall (or both) to isolate the wireless network (but remember that
a cracker who can grab and decode encrypted network passwords can often
grab firewall passwords too); and third, you can use additional encryption
such as a VPN (virtual private network) to make the network more secure.
The security features of the early Wi-Fi protocols (WEP encryption) were
not adequate to protect data. The WEP protocol was flawed in several ways.
WEP should be treated more as a “Do Not Disturb” sign than as a real means
of protection. The WPA (Wi-Fi Protected Access) and WPA2 standards attempt
to fix the shortcomings of WEP, but they work only when all of the users of
your network have modern cards and drivers.
Here are some specific security methods:
Don’t use your access point’s default SSID. Those defaults are well
known to network crackers.
Change the SSID to something that doesn’t identify your business or
your location. An intruder who detects something called BigCorpNet
and looks around to see BigCorp headquarters across the street will target that network. The same thing goes for a home network: Don’t use
your family name or the street address or anything else that makes it
easy to figure out where the signal is coming from.
Don’t use an SSID that makes your network sound as though it contains
some kind of fascinating or valuable content—use a boring name like,
say, network5, or even a string of gibberish, such as W24rnQ. If a would-be
cracker sees a list of nearby networks, yours should appear to be the least
interesting of the lot.
Change your access point’s password. The factory default passwords for
most access point configuration tools are easy to find (and they’re often
the same from one manufacturer to another—hint: don’t use admin),
so they’re not even good enough to keep out your own users, let alone
unknown intruders who want to use your network for their own benefit.
90
C ha pt er 8
An unauthorized person (who could be one of your own children) who
gets into the access point’s software could lock you out of your own network by changing the password and the encryption key.
If possible, place your indoor access point in the middle of the building
rather than close to a window. This will reduce the distance that your
network signals will extend beyond your own walls.
Use WPA encryption rather than WEP. WPA encryption is a lot more
difficult to break, especially if it uses a complex encryption key.
Change your encryption keys often. It takes time to sniff encryption keys
out of a data stream; every time the keys change, the miscreants trying to
steal your data are forced to start again from scratch. Once or twice every
month is not too often to change keys in a home network. An office LAN
should change keys at least once a week.
Don’t store your encryption keys in plain text on the network where they
are used. This seems self-evident, but in a widespread network, it might
be tempting to distribute the keys on a private web page or in a text file.
Don’t do it.
Don’t use email to distribute encryption keys. Even if you’re not sending
emails in plain text, an intruder who has stolen account names and
passwords will receive the messages with your new codes before your
legitimate users get them.
If it’s practical to do so on your network, turn on the access control feature in your access point. Access control restricts network connections to
network clients with specified MAC addresses. The access point will
refuse to associate with any network device whose address is not on the
list. This might not be practical if you want to allow visitors to use your
network, but it’s a useful tool in a home or small business network where
you know all of your potential users. MAC address filtering will not prevent a determined attacker from copying and spoofing the address
of an authenticated user, but it could provide an additional layer of
protection.
Turn on the security features, but treat the network as if it’s completely
open to public access. Make sure everybody using the network understands that they’re using a nonsecure system.
Limit file shares to the files that you really want to share; don’t share
entire drives. Use password protection on every share.
Use the same firewall and other security tools that you would use on a
wired network. At best, the wireless portion of your LAN is no more secure
than the wired part, so you should take all the same precautions.
Consider using a virtual private network (VPN) for added security.
Use a firewall program on every computer connected to the network,
including both wired and wireless nodes.
Wi-F i N et wor ks
91
It’s important to take wireless network security seriously, but don’t let
the security issues discourage you from using Wi-Fi in your home or office
unless you’re moving very sensitive information through your network. If you
protect your network with encryption and other security tools, you will
probably keep all but the most determined hackers and crackers on the
outside.
On the other hand, if your small business handles customer billing
information, credit card data, sensitive client or patient records, personnel
data (such as Social Security numbers), or any similar information that
should remain confidential, adding Wi-Fi to your LAN creates an extremely
attractive target. If you must add Wi-Fi access to your small business network,
use the strongest firewall you can find between the Wi-Fi access point and the
other computers on the network.
92
C ha pt er 8
9
FILE SERVERS
File servers are computers on a network
that hold text, data, and other files that all
the other computers on the same network
can use. A file server can also be used as a workstation, a computer dedicated to file storage, or a
single-purpose network-attached storage (NAS) device.
This chapter describes the advantages of connecting
one or more file servers to your network and explains
how to set them up and use them.
File servers are much more common in business networks than at home,
but they can also be useful as part of a home network. Whether at work or at
home, a server can provide these services:
It can protect files on other computers connected to the network by
automatically making and storing backup copies of those files.
It can store related files in a central location.
It can help control revisions and updates to documents and other files by
assuring that everybody is using the same version.
It can hold “public” files used by more than one person separate from
each user’s personal files.
It can allow coworkers or family members to create and store new files or
use existing ones without needing to turn on somebody else’s computer.
It can host web pages and other services for an intranet, an Internet-like
site that can only be viewed within the local network.
It can manage email distribution across the network.
It can provide remote access to files through the Internet.
A server on a home network can also be a central storage location for
photographs, music, and video files and allow users to view or play them
through any computer in the house, or through a television, stereo, or home
entertainment system. Chapter 15 explains how to use a network as part of a
home entertainment system.
Choosing a Computer to Use as a File Server
You can use just about any computer as a file server. If you have a spare
computer or an older unit that no longer has enough computing power for
day-to-day use, that might be a good candidate, especially if you just want to
share files and add network storage capacity. You will probably get better
performance from an older computer if you add some extra memory and
one or more new hard drives—Linux server software only needs about 10GB
of hard drive space, but an older hard drive could be more likely to fail due
to age and wear. And, of course, you will also need disk space for all the files
that you store on the server.
If you want to use the server for more than just storage and file sharing,
you can buy or build a new purpose-built server with space for several storage
drives and special server software that includes additional features and
functions such as web hosting and automatic backups. All of the major
office computer manufacturers, including IBM, Dell, Compaq, and Apple,
sell server computers with software already installed.
Windows, Mac, Linux, or . . . ?
Every computer needs an operating system, and servers are no exception.
If you’re resuscitating an old computer to use as a file server, you might be
able to salvage the original operating system that ran on that computer, but
connecting anything earlier than Windows 2000 or Mac OS X to your network
could cause more trouble than it’s worth.
If you have some experience with Unix or Linux or if you’re willing to
learn, one of these operating systems might be a better choice because they
have up-to-date features and functions, and they won’t demand as much
processing power or memory as a newer version of Windows (a good introductory book will help get you started).
94
C ha pt er 9
If cost is an issue (is cost ever not an issue?), many Linux and Unix distributions are available online as free (if time-consuming) downloads or on
low-cost CDs and DVDs from distributors such as LinuxCD (http://www
.linuxcd.org/) and The Linux Store (http://www.thelinuxstore.ca/). Several
versions, including CentOS and FreeBSD, include server applications along
with the core operating system and desktop programs. FreeNAS (available
from http://www.freenas.org/) is also worth considering if you want a simple
file server. On the other hand, if you haven’t used Linux or Unix before,
you might not want to deal with the distractions involved in installing and
learning a new operating system at the same time that you’re trying to set up
a new network.
Microsoft’s Windows Server family and similar products from Apple
and Novell include all the features of a simple file server along with many
additional business functions such as web and email hosting, calendar
coordination, remote access, automated backup, and data management,
all with a more-or-less consistent appearance. These server packages are
relatively expensive, but their easy installation and available support might
be worth the added cost, especially in a large enterprise where additional
support staff is an issue. The developers of these commercial server products
argue that the total cost of ownership (TCO) for their products, including
original purchase price and the cost of ongoing maintenance and support,
is about the same as the TCO of “free” Linux and Unix servers. Microsoft
claims that management and maintenance staffing plus downtime account
for roughly 75 percent of a server’s TCO, but the experience of many open
source software users is quite different. In a very small business, the numbers
will probably work out in favor of free or inexpensive server software unless
you have to pay for outside support.
If you’re already committed to other Microsoft products, including
Access, Microsoft SQL, or Windows Media, Windows Server is likely to be
the best choice. On the other hand, many Linux and Unix versions include
comparable programs (such as the Apache web server) that perform at least
as well as or better than the Microsoft products. If you’re a Mac household or
business, Apple Server is the logical choice.
Unless your family operates like a business, your home network probably
needs a different set of features from the ones used by a business: central
storage, backup, and maybe web and email hosting. But you probably won’t
use other common business-server features, such as database services and
project management. Microsoft’s Windows Home Server is optimized for
home rather than business use, so this product might be a better choice for
your household network. Windows Home Server is available already installed
on server computers from HP and other manufacturers, and Microsoft also
offers an “OEM version” that you could install on an existing computer (if
that computer exceeds the minimum requirements, which are considerably
more than those needed for a Linux server). However, that version doesn’t
include any kind of Microsoft support, so you’re on your own when you have
trouble installing or using it. The OEM version can be difficult to find through
local retailers, but plenty of web and mail-order suppliers will be happy to sell
you a copy.
F il e Se rve rs
95
For mixed networks that include computers using more than one
operating system, Samba (http://www.samba.org/) is an excellent choice. It’s a
well-established open source (and therefore free) cross-platform file-sharing
program.
Figure 9-1 shows the control console screen for Windows Home Server.
The minimum requirements for Windows Home Server are listed in the WHS
Getting Started Guide, which is available at http://www.microsoft.com/windows/
products/winfamily/windowshomeserver/support.mspx.
Figure 9-1: The Windows Home Server Console offers many control options on a
single screen.
In order to use shared files stored on a Windows Home Server from
other computers in your network, you must install the Connector program
supplied with WHS onto each client machine. Without this software, the
clients won’t find the shared files. Connector is only available for Windows
XP and Vista, so Home Server is less useful with Macintosh and Linux/Unix
clients.
Using a Server for File Storage
The easiest way to set up a file server is simply to connect a computer to the
network and designate it as a server. Create one or more folders for shared
files, and set the Permissions or Network Sharing characteristics to share files
in the directories or folders with network users. If you’re storing photos,
music, or video files on the server, create one or more separate folders for
those files, and set the permissions to read-only, allowing network users to
open the files but not to change them. Figure 9-2 shows the Sharing tab that
controls these settings in Windows XP. For more information about sharing
files, see Chapter 12.
96
C ha pt er 9
Figure 9-2: Set sharing permissions for the folder
that holds the files you want to store on your server.
When you work on a document or any other type of data file and when
you download a file from the Internet, use the Save As command to store the
file through the network in one of the shared folders on the server. To read,
view, or listen to a file stored on the server, either open the folder that contains
the file you want and select the file, or use the Open command in a program
associated with that file type (such as a word processor, spreadsheet, or media
player) and use the selection window or chooser to find the file. The program
should treat the file exactly the same as a file stored on your own computer.
Using Network-Attached Storage
A network-attached storage (NAS) device is a dedicated computer—without a
keyboard or display screen—used as a network file server. In the small business
or home networks that many readers of this book are likely to have, one or
more NAS disk drives can be an entirely adequate alternative to a more
expensive and complicated network server.
For all practical purposes, a NAS drive is just a disk drive that connects to
the network through an Ethernet port. Several disk drive and network equipment manufacturers offer purpose-built NAS devices, including complete
hard drive assemblies and network storage enclosures for IDE or SATA hard
drives. Some NAS devices have both Ethernet and USB ports, so you can use
them with either a direct connection to your network or an external drive
connected to a computer with or without a network link. Figure 9-3 shows a
network with a stand-alone disk drive operating as a NAS device.
F il e Se rve rs
97
Desktop
computer
Laptop
computer
Internet
Ethernet
switch
Gateway
router
Desktop
computer
Stand-alone
disk drive
Network-attached
storage server
File server
Figure 9-3: A network-attached storage device connects directly to a network.
A NAS server could also be a regular computer, with or without a keyboard and screen. If you already have a spare computer to use as a server,
the FreeNAS version of FreeBSD, shown in Figure 9-4, could provide all the
services you need for a file server operating system. FreeNAS is designed for
remote configuration and operation, and it’s relatively easy to set up and use.
Figure 9-4: FreeNAS is a simple version of Unix designed for use
as a file server.
98
C ha pt er 9
USB Device Servers
To add one or more stand-alone USB disk drives to your network as file
servers, consider using a USB device server, such as the Lantronix UBox 4100
shown in Figure 9-5. The server connects directly to the network through an
Ethernet cable, and each disk drive or other USB device connected to the
server appears as a local device on every computer connected to the network.
Similar devices are also made by Silex Technology, including a wireless USB
device server that connects to the network through a Wi-Fi access point.
Photo courtesy of Lantronix
Figure 9-5: The Lantronix UBox connects external disk
drives and other USB devices directly to your network.
Apple’s AirPort Extreme
Whether or not you’re using Macintosh computers in your network, Apple’s
AirPort Extreme product can be an inexpensive alternative to a full-size file
server. Along with its functions as a DSL or cable gateway router, an Ethernet
switch, and a Wi-Fi base station, the AirPort Extreme also has a USB port that
can connect an external hard drive directly to your network. To use more
than one external hard drive, connect them to the AirPort Extreme through
a USB hub. Figure 9-6 shows the rear panel of an AirPort Extreme.
USB
port
WAN
port
Ethernet
ports
Photo courtesy of Apple
Figure 9-6: AirPort Extreme can connect a USB hard drive directly to
your network.
F il e Se rve rs
99
Backing Up Files to a Server
There’s more than one way to back up files to a server: You can run a backup
program on the client machine and specify a drive and folder on the server
as the backup storage location, or you can originate the backup from the
server and select files on one or more clients (as explained earlier, client
computers are the ones that receive services from a server).
Before you create your backups, you must decide exactly what you want
to accomplish. Several different kinds of backups are possible, each of them
appropriate for certain situations:
A complete image of your hard drive includes copies of all folders, files, and
programs. This backup allows you to restore your computer to its previous state after a disk failure. A complete image of a drive is sometimes
described as a clone.
An incremental backup only includes copies of the files that have been
installed or have changed since the last backup. Incremental backups are
faster than complete backups because they don’t include the unchanged
files that are already part of your backup.
A selective backup only includes the important files and programs on your
computer. This backup is generally faster and takes up less space on the
backup drive than a complete backup because it does not include things
like temporary files, old log files, and downloads that you will never use
again.
A data-file-only backup can be useful when you expect to restore the
backup to another computer that already has the operating system
and application programs installed. You can also re-install the operating
system and programs from their CDs or other media. If you do choose
this option, remember to check each program’s website for the latest
patches and upgrades before you try to use that program.
A limited backup includes only one or more specific types of files, such
as music, photos, or documents. This kind of backup is usually a supplement to a more complete backup that includes all the essential programs
and files on a drive.
The backup programs provided with Windows, Mac OS X, and most
versions of Linux and Unix are entirely adequate for most people, but there
are plenty of other backup programs with additional features and options
(often related to automatic scheduled backups). Backup programs are often
supplied with network-attached storage (NAS) devices and external USB
hard drives. The important thing to remember about using any backup
program is that you must store your backed-up files separately from the
originals: You can store the backup on a second hard drive on the same
computer (not a good idea, however, because it doesn’t protect against fire
or theft); on a set of CDs, DVDs, or data tapes; or on a computer or other
storage device connected to the original computer through a network or
100
C h ap te r 9
the Internet. A network is a great way to move your backup data to another
computer for storage, but you will still want some kind of backup on
removable media stored off-site to protect your data from fire or theft.
NOTE
The backup methods described in this chapter will work equally well on a network without a designated file server; you can use any other computer or network storage device
on the same network as the destination for your backup files.
The Windows Backup Program
Microsoft has supplied a backup program with most versions of Windows,
including XP and Vista. This example uses Windows XP, but the general
principles are the same for any backup program.
To use the Windows Backup program, follow these steps:
1.
From the Windows Start menu, select All Programs (or Programs if you’re
using the Classic Start Menu) Accessories System Tools Backup.
The Backup or Restore Wizard window shown in Figure 9-7 will open.
Figure 9-7: Use the Windows Backup or Restore Wizard to create
backup copies of your files.
2.
Click Next to advance to the next screen. The wizard will ask if you want
to make new backups or restore files that you saved earlier. Select the
Back up file and settings option and click Next.
3.
The wizard will ask what you want to back up. To save all the information
on the computer, select the All information option; this option will allow
you to create a new copy of the original hard disk, but this copy takes up
a lot of storage space. To create a more selective backup, select the Let
me choose option.
4.
Click Next to advance to the next screen. The wizard will ask where you
want to store the backup.
F ile Ser ver s
101
5.
Click the Browse button to open the Save As dialog. Use either the Save
In field or the finder window to navigate through the network to the
folder on the file server where you want to store the backup file. Choose
that folder and click the Save button and then the Next button in the
wizard window.
6.
The wizard will show you the details about the backup you are about to
create. If everything is correct, click Finish. The backup program will
start.
To restore data from your backup files, run the same Windows Backup
program but select the Restore files and settings option in the Backup or
Restore Wizard.
The reason you’re making backups is to protect your data against loss or
damage. The most common problems that will destroy your original files are
caused by either human error—you really didn’t mean to reformat that
hard drive, did you?—or damage to a disk drive. When either of those events
occur, restoring the files from a network server is easy enough, but if you lose
your files because of a fire, a power surge, a lightning strike that damages
the server along with the client computers, or some other major disaster, the
backup files on the dead server won’t do you much good. Therefore, creating
at least one set of backup files on a set of DVDs, tapes, or removable hard
drives and storing them in another location such as a friend’s home or office
or a safe deposit box at your bank is always good practice.
Installing Backup in XP Home Edition
In Windows XP Home Edition, the Backup utility doesn’t automatically load
when you install the operating system. Apparently, somebody at Microsoft
thought that Home Edition users didn’t need to back up their data. Go
figure.
To install Windows Backup from the XP Home Edition CD, follow these
steps:
1.
Place the XP CD in your computer’s drive.
2.
When the Welcome message appears, select Perform additional tasks.
3.
Select the Browse this CD option.
4.
Open the ValueAdd folder and then the Msft folder and finally the
Ntbackup folder.
5.
Run the Ntbackup.msi program. This will start a wizard that installs the
Backup program.
Installing Backup in Windows Vista
Most versions of Windows Vista (except Vista Starter and Home Basic)
include an automatic utility that can store backup files on a network server,
but it doesn’t run until you turn it on.
102
C h ap te r 9
To configure the Vista Backup utility, select Start All Programs (or
Programs in the Classic start menu) Accessories System Tools Backup
Status and Configuration. The Backup Status and Configuration tool shown
in Figure 9-8 will appear.
Figure 9-8: Use the Backup Status and Configuration tool to set up an automatic
file backup.
The Backup Status and Configuration tool will step through a series
of windows that request the specific information needed to run automatic
backups.
Macintosh Backup Programs
The same general principles apply to creating and restoring backups on a
Mac: Make backups on a regular schedule and store the backup files on a file
server, removable media, or both. The Time Machine program included in
OS X can automatically create backups to an external drive or a networked
drive, as shown in Figure 9-9. Several alternative Mac backup programs can
also send backup files to a network, including:
SuperDuper! http://www.shirt-pocket.com/SuperDuper/
SuperDuperDescription.html
Synk Backup
iBackup
http://www.decimus.net/comparison.php
http://www.grapefruit.ch/iBackup/
.Mac Backup
http://www.mac.com/1/solutions/backup.html
F ile Ser ver s
103
Figure 9-9: If you have a new Mac, turn on Time Machine to automatically
create backups.
Before you trust your critical files to any backup program, run some tests
to confirm that the program can accurately restore those files, including the
metadata embedded inside them. Some Mac backup programs designed for
earlier versions have trouble dealing with OS X files.
Linux and Unix Backups
Linux and Unix users have a wide choice of backup programs, including several that can originate the backup process from either the server (pulling
backup data from client computers) or from individual client computers
(pushing the backup files to a server). The Linux Online! website includes
an up-to-date list of backup programs at http://www.linux.org/apps/all/
Administration/Backup.html. Distributions with graphic environments such as
Gnome and KDE usually include at least one graphic backup program. One
possible backup solution on computers running Linux, Unix, or Mac OS X
is to use rsync over SSH to an external system, and schedule it via cron. This
doesn’t have a nice graphical front end, but it gets the job done securely and
efficiently, because rsync does not copy bytes across the network that already
exist on the other side—it only copies the “changed” bytes.
Server-side programs run on the server and collect backups from each
client computer. BackupPC is a good choice as a server-side Linux backup
program because it can back up Windows, Linux, and Mac computers
through a network. BackupPC is available for download from http://
backuppc.sourceforge.net.
Amanda, the Advanced Maryland Automatic Network Disk Archiver
(http://www.amanda.org/), is another server-side backup program that
supports Windows and multiple versions of Linux and Unix.
104
C h ap te r 9
Using a Server at Home
A server on a home network can do all the same things that a server on a
business network can do, but many of those business functions are probably
not particularly important at home. A typical home network server is mainly
useful for storing and sharing files (such as music and videos), making automatic backups, and maybe hosting web pages and email.
However, a local server is not always the best way to manage email or host
web pages. Using the hosting services that are included with your Internet
connection is often easier; a good hosting service will handle all of the security
issues and other maintenance for you. Many Internet service providers will
give you a separate email address for each family member and provide space
on an existing web server for your family’s web pages. Or if you prefer, you
can obtain individual addresses from one or more of the free or low-cost
email services such as Hotmail, Gmail, or any of the others described at http://
www.emailaddresses.com/. Adding one or more file servers to a network to share
resources goes a long way toward increasing the value of your computers.
You can certainly operate your small network without any servers, but like the
network itself, a central storage location for documents, images, and other
files is often a lot more convenient than storing everything on individual
users’ machines, especially if you can use an old computer as a server that
would otherwise continue to collect dust in a storage closet.
F ile Ser ver s
105
10
CONNECTING YOUR NETWORK
TO THE INTERNET
All of the other benefits of a home
network—file sharing, internal web
hosting, and so forth—are handy, but the
main reason that most people want to connect
all of their household computers together is to share
a high-speed Internet connection. In a business, those
other services are more important than they are at home, but Internet access
for everybody is still important. This chapter explains how to connect a network to the Internet and how to set up each computer to connect to the
Internet through the network.
The Internet is often described as a “network of networks.” In other
words, the Internet provides a way to exchange data between your own LAN
and millions of other networks. Before you can exchange data between your
local network and the Internet, however, you (or your network manager) must
configure your network gateway, and before you can connect a computer
to the Internet through that gateway, you must configure that computer’s
Internet settings.
The Internet: From the Cloud to You
Network diagrams traditionally show the Internet as a big cloud. Inside that
cloud are millions of computers, routers, and other equipment located all
over the world, but the internal operation of that equipment is Somebody
Else’s Problem; when you’re hooking up your own network, the Internet is
simply a huge, shapeless thing that performs in a predictable manner.
Figure 10-1 shows the connection from the Internet through your
local network to individual computers. Those computers can be any kind
of network-attached device, such as a printer, a network-attached storage
(NAS) device disk drive, or a pocket-size smartphone, but for the sake of this
discussion, let’s think of all those things as types of computers. In order to
send and receive data between your computer and the Internet, you must
supply certain information to the Internet, and the Internet provides other
information to you.
Another
customer’s LAN
Desktop
computer
Your LAN
Internet
Your ISP’s
WAN host
Your
router
Laptop
computer
Another
customer’s LAN
Server
Figure 10-1: The Internet communicates with your computer through a local network.
The Modem
Your LAN probably connects to the Internet through a high-speed telephone
line or a cable TV system. The device that converts digital data to and from
the LAN to signals that can move through the phone line or cable is a modem
(modulator/demodulator). In most cases, the modem is combined with a gateway router, but some cable TV companies and telephone companies provide
stand-alone modems that can connect either directly to a single computer or
through a router or switch to a LAN.
For the purposes of this chapter, you can think of a modem as a type of
router. The differences between a modem and a router are that a modem
includes the internal hardware that performs modulation and demodulation
activities along with the software that provides the connection settings. The
configuration settings that control the connections between the Internet and
your local network are generally the same in both modems and routers.
108
C h ap te r 1 0
NOTE
A dial-up modem that uses the voice telephone network to connect your computer to the
Internet operates in a similar manner to a high-speed modem, but it uses a much slower
connection.
The Gateway Router
As Chapter 3 explained, the router that connects the Internet to your local
network has a point of presence in two different networks: your Internet
service provider’s wide area network (WAN) and your own local area network
(LAN). The WAN is part of the much larger Internet cloud.
Therefore, the router has two different addresses: one address on the
WAN and a different address on the LAN. The router’s job is to exchange
data in both directions between these two networks. In certain respects, the
Internet treats the router the same way that the router treats the other computers on the network, but the Internet uses different addresses to accomplish
those goals. One of the important activities that occurs inside the router is
network address translation.
Your router’s Setup utility shows two groups of settings: one for the WAN
and one for the LAN. The WAN side identifies the router to the Internet
with a unique numeric address. That address can be either fixed or static,
which means that it is always exactly the same, or dynamic, which means that
a server at the WAN assigns the next available address from a pool every time
the router connects to the WAN. Dynamic address assignment uses a process
called Dynamic Host Configuration Protocol (DHCP), which is described in
“DHCP Servers On or Off” on page 110.
The gateway router typically specifies the numeric address of one or more
Domain Name System (DNS) servers that convert Internet addresses that use
words (such as nostarch.com) into numeric addresses. Without a DNS server to
consult, the WAN won’t know where to direct email messages, requests for
web pages, or any other attempts to communicate with a destination on the
Internet. Your Internet service provider will provide the addresses of one or
more DNS servers.
The router also needs a gateway address and a subnet mask. The gateway is
the next router in line between the WAN and the rest of the Internet; the
subnet mask tells the WAN which numbers in the router’s IP address identify
the router and which generic numbers identify the WAN. For example, the
most common subnet mask is 255.255.255.0, which means that the last of the
four numbers is different for each node. In other words, if your WAN controls
all the addresses in the 123.223.123.XXX group, your address might be
123.223.123.103, and another customer’s address on the same WAN might
be 123.223.123.117.
The specific numbers your router uses are absolutely essential; if you
don’t have them exactly correct, the router won’t connect to the Internet.
But understanding what they mean is less important than getting them right.
Your Internet service provider will supply the numbers to use when you set
up a new account. Write the numbers in the same place where you keep
account numbers and other important computer-related information.
C o nn ec ti n g Y our N et wor k t o t he I nt er n et
109
NOTE
When a separate DSL or cable modem is between the gateway router and the Internet,
the modem often provides the static IP address and other information to the Internet
and the local network. In this situation, the gateway router relays the necessary
addresses between the modem and the rest of the local network.
The LAN settings for your router or modem control the way your
local network operates. The specific settings in each computer connected
to the network must be within the ranges defined by the router or modem.
The next section explains how each of these LAN-side settings works.
Individual Computers
Each computer connected to a LAN must have the same configuration settings in relation to the router that the router has with the WAN: a numeric
IP address, a network mask, and addresses for a gateway to the Internet and
one or more DNS servers. As the person responsible for your network, you
must set up a DHCP server and either provide these values to each of your
users and make sure they enter them correctly or type them into each computer and network device yourself.
The differences between setting up a router to talk to the Internet and
setting up a computer to talk to the local area network are (1) the router has
two groups of settings (the WAN and the LAN), but the computer has only
one; and (2) the router obtains its WAN settings from your Internet service
provider, but the local computer gets many of the same settings from the
router. Therefore, you should almost always set up the gateway router in
your network first—before you add computers to the network.
NOTE
When you connect a single computer directly to the Internet through a high-speed (DSL
or cable) modem, you must use the settings supplied by your ISP or the modem.
The essential settings for connecting a computer to the Internet through
a LAN are similar to the ones that you use to set up the modem and the router.
The next sections explain how to deal with each of them.
DHCP Servers On or Off
A DHCP server automatically assigns IP addresses and other configuration
information to all of the devices in a network. In a LAN, the DHCP server is
most often part of the router or modem that connects that network to the
Internet or built into a network hub. In most small networks, using a DHCP
server is more convenient than assigning a static IP address to each network
device one at a time.
The DHCP setting is a common cause of connection problems. If a computer is configured to obtain its IP address and other settings from a DHCP
server, the DHCP server on the router or modem must be active. Other (less
common) DHCP problems can occur when more than one server is active at
the same time. In some cases, the other network devices will obtain DHCP
settings from the “wrong” server, or the settings will not allow you to connect
110
C h ap te r 1 0
to the Internet. If you can’t successfully connect a computer to the Internet
through your LAN when testing your network, you should always check the
DHCP server settings.
There are several important things to know about using DHCP in a LAN:
A network can have just one active DHCP server.
When a network is using a DHCP server, each computer and other device
(such as a printer or game console) connected to the network must be
configured to accept an address from the DHCP server. In Windows, the
Obtain an IP address automatically option, shown in Figure 10-2, must
be active.
Figure 10-2: When the Obtain an IP address
automatically option is active, Windows uses the
network’s DHCP server to set its IP address.
In Macintosh OS X, the Configure IPv4 option, shown in Figure 10-3,
must be set to Using DHCP.
The IP address number assigned by the DHCP server must be within one
of the reserved ranges. In almost all cases, you don’t have to change the
server’s default values.
Most hubs, routers, modems, and Wi-Fi access points use one or more
web-based pages (such as the one shown in Figure 10-4) to display and
change the DHCP server’s settings. However, the pages supplied with just
about every make and model of network control device are organized slightly
differently. So you must consult the manual supplied with your device or the
manufacturer’s website for specific instructions.
C o nn ec ti n g Y our N et wor k t o t he I nt er n et
111
Figure 10-3: In OS X, choose the Using DHCP option to obtain an IP address
from a server.
In this example, the important settings are DHCP Server and Starting IP
Address. When the DHCP server is enabled, the server provides IP addresses
for the entire network. When the server is disabled, each computer and network node uses a static address that you must set on that computer or node.
Figure 10-4: The DHCP server sets the IP addresses for the entire network.
112
C h ap te r 1 0
The Starting IP Address setting specifies the lowest IP address number that
the server will assign to a client device. The Number of DHCP Users setting
defines the highest number in the address range (in this case, 192.168.1.149).
In some systems, the server asks for a range of numbers instead of the starting
number and the number of users. In either case, allow for more DHCP users
than the number of machines currently connected to the network, so the
server can continue to support your network after you add more devices.
Subnet Masks
The subnet mask setting specifies which part of the IP address changes for
each device connected to the network. Unless you have a reason to use a
different mask, set the subnet mask to 255.255.255.0. If the network uses
DHCP to assign IP addresses, you don’t have to enter a subnet mask on each
client device.
For most of us, the subnet mask is another of those settings that we have
to enter correctly to make the network work properly, but we really don’t
need to know what it means. In a large or complex network, however, you
can use subnet masking to separate the network into smaller subsidiary
networks, or subnets. Computers and other network nodes within the same
subnet can exchange data more quickly because they don’t have to go all
the way out to the larger WAN or the Internet and back again to locate one
another.
As you know, numeric IP addresses are divided into four groups of
numbers, each of them within the range from 0 to 255. One part of the
address identifies the network, and the other identifies a specific computer. For example, your ISP might use a WAN with the network address
203.23.145.XXX; the individual computers and LANs connected to that
WAN would have addresses from 203.23.145.000 to 203.23.145.255. In this
case, the subnet mask would be 255.255.255.0 because the local address is
limited to the last part of the address (the zero). A maximum of 256 devices
(numbered 0 through 255) can be connected to this subnet.
Within your own LAN, you can use subnet masking to divide the network
into two or more subnets. Dividing the network into subnets is useful when
you want to separate your wired connections from the Wi-Fi access point or
when you want to use an internal firewall to isolate computers that contain
sensitive personnel or financial data from the rest of the network. To divide
your LAN into two equal-size subnets, assign the subnet mask XXX.XXX.XXX.0
to one subnet and use local addresses from 1 to 126 (use 0 for the router).
For the other subnet, use the subnet mask XXX.XXX.XXX.128 and assign
addresses between 129 and 255. You will need a separate router for each
subnet.
NOTE
Using subnets to split a LAN into separate groups counts as an advanced networking
practice; you’re not likely to see this setup in a simple home or very small business
network.
C o nn ec ti n g Y our N et wor k t o t he I nt er n et
113
IP Addresses
As Chapter 4 explained, several groups of numeric IP addresses have been
reserved for computers and other devices connected to LANs. Because
these addresses are only visible within each LAN, it’s practical to use the
same addresses in different networks. Every computer and every other
device connected to your network must have a different address within one
of these reserved number ranges.
Each network device, including the LAN side of the router itself, must
have a different IP address from one of the reserved groups. A DHCP server
(usually part of the router or modem) will take care of this automatically
and assign new addresses whenever users connect another computer to the
network. This can be especially convenient if users connect and disconnect
laptops and other portable devices to and from the network.
If you’re not using a DHCP server, you’ll have to set the address for
each device, one machine at a time. The LAN side of your router or modem
usually has a default address that you use to reach its configuration utility
(look in the device’s manual to find the address). You do not have to change
the default address on a router or other control device unless another device
(such as a Wi-Fi access point) has the same default address. To make sure
that you haven’t assigned the same address to more than one device, keep a
master list of IP addresses that includes every device connected to the network,
including laptops and other portable devices that use part-time connections.
You can keep the list in a text file stored on your own computer, but you
should also print a copy of the current list (including the date) and keep it
separately from the computer. When it’s time to add one or more additional
devices, consult the list to find and add a new address that isn’t already
assigned.
DNS Servers
Your LAN needs one or more DNS servers to convert Internet addresses to
numeric IP addresses, but the DNS servers don’t have to be part of the LAN;
you can use a DNS server anywhere on the Internet. Use the same DNS
server addresses for each computer that you used for the WAN side of the
router.
NOTE
If you can’t get a DNS server address from your ISP, run a web search for public
DNS server to find addresses for alternative servers. One widely-used public DNS is
OpenDNS (http://www.openDNS.com/).
Gateways
The gateway address is the address of the router or other control device that
relays data between computers on a LAN and the Internet. This gateway is
sometimes called the default gateway. The gateway address is the same as the
numeric address used for the LAN side of the router. Consult the router
manual to find the correct address for your network.
114
C h ap te r 1 0
Computers connected to the network don’t use the same gateway address
as the router or modem. The router/modem is the gateway between your
network and the ISP’s WAN. Your ISP’s gateway address identifies the path
between their WAN and the rest of the Internet.
Configuring the Network Gateway
The best place to find specific instructions for configuring the WAN side
of a modem, router, or other network control device is in the information
provided by your ISP. Specifically, when you set up a new ISP account, you
should obtain your connection’s static IP address or DHCP setting, the DNS
server addresses, the subnet mask, and the gateway address. The ISP will
probably give you addresses and a password for your email account at the
same time, but you don’t need them to configure the network connection
(although you will need them to send and receive messages).
If your ISP requires a login and password every time you connect, you
will need a router or modem that uses the same set of connection rules (the
protocol) that your ISP’s equipment expects. If your ISP does not provide a
modem, ask them for a list of compatible makes and models.
The LAN side of the router uses addresses and other settings that don’t
extend beyond your own network, so your network can use the same settings
as your neighbor’s network. Therefore, many manufacturers ship their routers
with preset addresses that should work for most networks. The user’s manual
or setup guide supplied with the device usually contains step-by-step instructions for changing the settings. If you can’t find a printed copy of the manual,
look for one on the manufacturer’s website.
NOTE
Chapter 11 contains detailed instructions for connecting routers using Windows, Macintosh OS X, and Linux or Unix to a LAN. To connect a NAS device, printer, or other
device to the network, follow the instructions supplied with each device.
Summary
Your network connects to the Internet through a gateway router that appears
as a node on both your own LAN and your ISP’s WAN. In order to exchange
data between a network computer and the Internet, you must configure the
WAN side of the router with addresses and options supplied by your ISP.
The LAN side of the router controls the way your own network handles
communication with the Internet. Therefore, the router’s LAN-side settings
must be compatible with the settings on each computer and other device
connected to the LAN.
C o nn ec ti n g Y our N et wor k t o t he I nt er n et
115
11
CONNECTING YOUR COMPUTER
TO A NETWORK
Regardless of the operating system that
a computer uses, it requires the same
configuration settings to connect to a LAN
and to the Internet. Each operating system
organizes configuration information differently, but
they all require the settings described in Chapter 10.
This chapter describes the configuration settings for Windows, Macintosh
OS X, and for Linux and Unix, and it offers step-by-step instructions for
connecting computers running those operating systems to your network.
Before you try to configure the computers in your network, set up the
LAN and WAN settings on the network’s modem and router; the configuration of your network’s computers must be compatible with those settings.
If your network includes an active DHCP server, your computer should
automatically obtain the settings needed to connect to the LAN and to the
Internet. When no DHCP server is present or if the DHCP client isn’t working perfectly, you should assign an address manually and enter other settings
for each computer individually.
NOTE
You can use a computer with a fixed IP address in a DHCP network, but using one is
a bad idea because the fixed address can cause collisions with an automatic assignment.
Some routers and other devices that contain DHCP servers may also allow you to
assign a specific IP address to a network node with a particular MAC address.
The user’s manual for your modem or router and the information
supplied by your Internet service provider are the definitive sources for
network configuration information. Make a note of the following settings on
your modem or router since you will need them to configure the individual
computers:
DHCP status: on or off
IP address
Subnet mask
Default gateway
DNS servers
Connecting Your Windows Computer to a Network
In Windows XP and Windows Vista, the Network Setup Wizard creates a
profile that connects your computer to a LAN. To make changes to an
existing profile, use the Properties settings for that profile.
Creating a New Network Profile
Follow these steps to run the Network Setup Wizard:
1.
From the Start Menu, select Connect To Show all connections, as
shown in Figure 11-1. If you’re using the Classic Start Menu, select
Settings Network Connections.
Figure 11-1: Select the Show all connections option to
open the Network Connections window.
118
C h ap te r 1 1
2.
From the Network Connections window, select Network Setup Wizard.
The wizard’s Welcome screen will appear.
3.
From the Welcome screen, click Next. The Wizard will remind you to
install and turn on all the computers and other components in your
network.
4.
Click Next again. The wizard will look for a network connection and ask
what kind of connection you’re making, as shown in Figure 11-2.
Figure 11-2: Select the Other option to add this computer to your LAN.
5.
Select Other and click Next. The Wizard will ask for more details, as
shown in Figure 11-3.
Figure 11-3: Select the This computer connects to the Internet directly
or through a network hub option to connect to your LAN.
C o nn ec ti ng Y our C om put er t o a N etw ork
119
6.
Select the This computer connects to the Internet directly or through a
network hub option and click Next. The Wizard will ask for a brief
description and a name for this computer, as shown in Figure 11-4.
Figure 11-4: Assign a unique name and description to each computer
on your LAN.
NOTE
120
C h ap te r 1 1
7.
Type a brief description of this computer and the name you want to use
to identify this computer on the LAN. Other users will use this name to
connect to this computer through the LAN. Click Next.
8.
The Wizard will ask for a workgroup name. Type the workgroup name
and click Next. You must use the same workgroup name for every computer on the LAN.
9.
The Wizard will ask about file and printer sharing, as shown in Figure 11-5.
If you want to allow other network users to use the printer (or printers)
connected to this computer or if you want to share files stored on this
computer with other network users, select the Turn on file and printer
sharing radio button; if you do not have a printer connected to this
computer (or you don’t want other users to use the printer) and you
don’t want to share files, select the Turn off file and printer sharing
radio button.
If you don’t turn on file sharing, you won’t be able to view or change files on this computer through the network.
Figure 11-5: Select the file and printer sharing option that applies
to your network.
10. The wizard will configure your computer for the settings you have
selected. When configuration is complete, the Wizard will display the
window shown in Figure 11-6, which offers to create a Network Setup
Disk or finish the wizard. Select the option that describes what you want
to do. If you select Create a Network Setup Disk, you can use a floppy
disk, a USB flash drive, or other removable disk as your setup disk.
Figure 11-6: The Network Setup Wizard will offer to create a
Network Setup Disk.
C o nn ec ti ng Y our C om put er t o a N etw ork
121
11. The wizard will follow your instructions and display the Completing the
Network Setup Wizard window. Click Finish.
Repeat the process for each Windows computer connected to your
network. If you created a Network Setup Disk (or flash drive) at the end of
the Network Setup Wizard for the first computer, you can use the program
on that disk instead of running the Wizard each time.
Changing Your Computer’s Network Settings
To change one or more of your computer’s network configuration settings
manually, follow these steps:
1.
From the Start Menu, select Connect To Show all connections, or
from the Classic Start Menu, select Settings Network Connections.
The Network Connections window, shown in Figure 11-7, will open.
Figure 11-7: The Network Connections window shows all of your
computer’s network profiles.
2.
122
C h ap te r 1 1
Your wired connection profile is the one called Local Area Connection and
sometimes includes a number. The number is usually 1, as shown in Figure 11-7, but if you have added or deleted additional profiles, some
other number might be used. If you’re using a Wi-Fi or other wireless
network connection, the network profile will be called Wireless Network
Connection. Open the Local Area Connection and click the Properties
button, or open the Wireless Network Connection profile and click
Change Advanced Settings. A status window similar to the one shown
in Figure 11-8 will open.
Figure 11-8: The Local Area Connection status window
shows information about your network connection.
3.
Scroll down to the end of the list of items, select Internet Protocol
(TCP/IP), and click the Properties button. The Properties window
shown in Figure 11-9 will open.
Figure 11-9: The Internet Protocol Properties window
controls your network and Internet settings.
C o nn ec ti ng Y our C om put er t o a N etw ork
123
4.
To use this computer with a DHCP server, select the Obtain an IP
address automatically radio button. To assign and use a static IP address,
select the Use the following IP address option and type the numbers of
the IP address, subnet mask, and default gateway.
5.
To use the DNS server specified by the DHCP server, select the Obtain
DNS server address automatically radio button. To specify one or
more DNS servers on this computer, select the Use the following DNS
server addresses radio button and type the addresses for the preferred
and alternate DNS server.
Connecting Your Macintosh Computer to a Network
To connect a Macintosh computer running OS X to your network, follow
these steps:
1.
If it’s not already in place, install an Ethernet cable between the
computer and the network’s hub, switch, or router.
2.
From the Macintosh desktop, click the Apple icon at the extreme left
side of the Menu Bar to open the Apple Menu. The System Preferences
window shown in Figure 11-10 will appear.
Figure 11-10: Use the System Preferences window to set up your network
connection.
3.
124
C h ap te r 1 1
Click the Network icon in the Internet & Network group. The Network
window shown in Figure 11-11 will appear, with detailed information
about your network connection. If your network has a DHCP server
providing IP addresses, the settings will automatically appear in the
Network window.
Figure 11-11: The Network window shows the current network connection settings.
4.
If the settings that appear in the Network window are not the ones you
want to use, click the padlock icon in the lower-left corner of the window
to change them. The icon will change to an open padlock.
5.
To change the network configuration settings, click the Advanced button
near the bottom of the window. The Built-in Ethernet window shown in
Figure 11-12 will appear.
Figure 11-12: The Built-in Ethernet window controls the network configuration settings.
C o nn ec ti ng Y our C om put er t o a N etw ork
125
6.
The bar along the top of the window contains seven network options.
Click TCP/IP to enter or change your Internet connection settings.
7.
The Configure IPv4 field is a drop-down menu. Click the arrows at the
right of the field to open the menu shown in Figure 11-13.
Figure 11-13: Use the Configure IPv4 drop-down menu to enable or disable
DHCP on this computer.
8.
Select the option you want to use to assign IP addresses on this computer. Select Using DHCP to obtain an address from the network’s
DHCP server, or select Manually to assign a fixed address.
9.
If you select the Manually option, enter the numeric IP address, the subnet mask, and the gateway router address in the appropriate fields, and
click DNS in the menu bar along the top of the window. The window
shown in Figure 11-14 will appear.
10. Click the plus sign (+) at the bottom of the DNS Servers box, and type
the IP addresses of one or more DNS servers. You should obtain these
addresses from your Internet service provider.
11. Click OK to save your changes and close the Advanced Network window.
The main Network window will appear with your current settings in
place.
12. Click the open padlock icon at the lower-left corner of the window to
lock the settings, and then click Apply to save your settings and close the
Network window.
126
C h ap te r 1 1
Figure 11-14: Enter the addresses of your ISP’s DNS servers in the DNS window.
Connecting Your Linux or Unix Computer to a Network
Different Linux and Unix distributions use different network configuration
programs, but they all require the same information that Windows and
Macintosh computers use to connect to a LAN and through the LAN to the
Internet. Like the network connections for Mac and Windows, most Linux
and Unix systems will automatically set up a connection when a DHCP server
is active.
Figure 11-15 shows the Gnome Network Administration Tool provided
with Ubuntu. To change the settings, select the Wired connection box and
click Properties.
Figure 11-15: Gnome uses a tabbed window to set network
configuration options.
C o nn ec ti ng Y our C om put er t o a N etw ork
127
The DHCP control and the manual IP address and DNS settings are
shown in the Properties window in Figure 11-16. This window includes fields
for the usual numeric IP address, subnet mask, and default gateway address.
Figure 11-16: Use the Gnome network Properties
window to configure a network connection without
a DHCP server.
Figures 11-17 and 11-18 show the KDE Control Module utility included
with PC-BSD. To change the configuration settings, select the adapter
connected to the network and click the Configure button.
Figure 11-17: The KDE Control Module utility includes network settings for each
network adapter.
128
C h ap te r 1 1
Figure 11-18: The KDE configuration window for
each network adapter includes settings for DHCP,
IP address, and the subnet mask (Netmask).
Other desktop environments might use different configuration utility
programs, but the settings are similar. You can generally find the controls
and settings by searching around each version’s desktop.
Remember that some network control settings programs don’t make
permanent changes (especially when you’re loading the operating system
from a CD or DVD or you’re using versions of the ifconfig/route command
to assign IP, netmask, or other addresses). To make a permanent change,
you must load the operating system on the computer’s hard drive and edit
the system configuration. Checking the settings each time you start the
computer is always good practice.
Summary
No matter what kind of computer you’re using, the basic network configuration settings are the same: Either the computer obtains an IP address and
related settings from the network’s DHCP server, or it uses settings from the
network configuration utility. The procedures in this chapter should give
you enough information to set up a working network connection with any
commonly used operating system.
C o nn ec ti ng Y our C om put er t o a N etw ork
129
12
SHARING FILES THROUGH
YOUR NETWORK
File sharing requires a compromise
between convenience and security. You
want to make some of the files stored on your
computer available to other people, but you
probably have other files that contain information you
would prefer to keep private. Therefore, Windows
and other network operating systems allow you to assign different files or
directories to different access levels. Some files are available to every network
user, while others might be limited to specific users, and still others are only
available to the file’s owner.
One of the most common network systems for sharing files, printers,
and other resources is the Server Message Block (SMB) protocol. This
protocol is at the core of Microsoft Windows networking, and it also works
with Macintosh OS X and Linux/Unix systems. Therefore, exchanging files
among computers that run different operating systems is not a problem,
even though the files themselves might not always be compatible (for example,
you probably can’t run a program written for Windows on a Linux system).
Many operating systems support more than one networking protocol,
but when you run a mixed network, or if it’s remotely possible that a visitor
with a different kind of computer (such as a Mac or Linux laptop) might
want to connect to your network, it’s best to use the most common protocols.
Control of file sharing rests with the computer that holds each file, so
other people can’t open and read your files without your permission—even
if they have a login account (or they’re using a guest account) on the same
computer. In order to share files with other users, you must turn on your
operating system’s file-sharing service and then assign an access level
(universal, limited, or none) to each folder or directory. This chapter
explains how to set up file sharing in Windows XP and Vista, Macintosh OS X,
and in the Gnome and KDE environments used by many Linux and Unix
distributions.
File Sharing in Windows XP
Windows XP uses a set of programs called Simple File Sharing to exchange files
among computers on a network. In XP Home Edition, Simple File Sharing is
always on; in XP Professional, file sharing is normally turned on, but you can
turn it on or off.
To turn Simple File Sharing on or off in XP Professional, follow these
steps:
1.
From the Windows Desktop, open My Computer.
2.
Select the Tools menu and choose Folder Options.
3.
In the Folder Options window, click the View tab to open the window
shown in Figure 12-1.
Figure 12-1: Use the Folder Options window to turn
Simple File Sharing on or off.
132
C h ap te r 1 2
4.
In the Advanced Settings box, scroll down to the bottom.
5.
To turn Simple File Sharing on or off, click the Use simple file sharing
(Recommended) checkbox. The file-sharing function is active when you
see a checkmark in the checkbox.
6.
Click OK to save your setting and close the Folder Options window.
In spite of its name, Simple File Sharing offers five access levels, which
you might consider more complicated than simple. However, each of the five
levels is useful in certain situations.
WARNING
Level 1
My Documents
(private)
Files are only accessible to the file
owner.
Level 2
My Documents
(default)
Files are accessible to the file owner
and administrators.
Level 3
Locally shared
documents
Other users on this computer have
read-only access; the file owner and
administrators have full access.
Level 4
Read-only shared
documents
Local and network users have readonly access; the file owner and administrators have full access.
Level 5
Read and write
All users have full read and write
access.
If you want to restrict access to any of your files, be sure to protect your Windows user
account with a password.
Level 1
The owner of Level 1 files and folders is the only person who can read them.
All the files in a Level 1 folder are also private.
Level 1 files and folders are only possible within your user profile (the
My Documents, My Music, My Pictures, and other folders in <drive letter>:
\Documents and Settings\<username>).
To assign a folder or disk drive to Level 1 access, follow these steps:
1.
From the Windows desktop, open My Computer.
2.
Select Documents and Settings and then select the username folder.
3.
If the folder you want to assign to Level 1 is not visible in the My Computer window, open the drive or folder that contains that folder.
4.
Right-click the drive or folder icon.
5.
Select Sharing and Security from the pop-up menu. The Properties window shown in Figure 12-2 will appear.
Sh ar in g Fil es T h rou gh Y our N etw ork
133
Figure 12-2: Check the Make this folder private
checkbox to restrict access to this folder.
6.
Check the Make this folder private checkbox to limit access to the files
in this folder. Click again to remove the checkmark and allow other
users to see this folder.
7.
Click OK to save your choice and close the Properties window.
Level 2
Files stored in Level 2 drives and folders are accessible to the owner of those
drives and folders and to anybody with an administrator-level account on the
computer where the folders and files are stored. Other users on this computer
and all users on other computers connected to this computer through the
network can’t open these files.
To assign a drive or folder to Level 2, follow these steps:
134
C h ap te r 1 2
1.
From My Computer, right-click the drive or folder icon you want to
assign to Level 2. A pop-up menu will appear next to the icon.
2.
Select Sharing and Security. A Properties window will appear with the
Sharing tab visible.
3.
Disable the Make this folder private option and the Share this folder on
the network option. If a checkmark appears in either box, click the box
to remove it.
4.
Click OK to save your choice and close the Properties window.
Level 3
The owner of Level 3 folders and files and any user with an administratorlevel account on the same computer can read, change, or delete Level 3
folders and files; all others using the same computer can read or open these
files, but they can’t change or delete them. In Windows XP, Power Users can
also change and delete Level 3 files. These files are not accessible through
the network.
All Level 3 files and folders are located in the <drive letter>:\Documents and
Settings\All Users\Shared Documents folder. To assign a file or folder to Level 3,
simply copy or drag it to the Shared Documents folder.
If you expect to create many Level 3 files and folders, consider creating a
shortcut to Shared Documents on the Windows Desktop. Dragging an icon
to a shortcut has the same effect as dragging a file or folder directly to the
original folder.
Level 4
Level 4 drives, files, and folders are accessible through the network as readonly documents. Anybody with a network connection can open and read a
Level 4 file, but only the file owner and the administrator of the local computer can change or delete the file.
To assign a drive, folder, or file to Level 4, follow these steps:
1.
From My Computer, right-click the icon of the drive or folder you want
to assign to Level 4. A pop-up menu will appear.
2.
Select Sharing and Security from the pop-up menu. A Properties window
like the one in Figure 12-3 will appear with the Sharing tab visible.
Figure 12-3: Select Share this folder on the
network to assign a drive or folder to Level 4.
Sh ar in g Fil es T h rou gh Y our N etw ork
135
3.
In the Network Sharing and Security section of the Properties window,
check the Share this folder on the network option.
4.
Make sure a checkmark does not appear in the Allow network users to
change my files checkbox. Click the box to remove an existing checkmark.
5.
Click OK to save your changes and close the Properties window.
Level 5
Level 5 drives, files, and folders have no protection against changes or
deletions by any network user. Anybody with access to a Level 5 file, whether
on the same computer or through the network, can add, change, or delete
that file. In a Level 5 folder, any user can also create a new file or folder or
delete an existing one.
Obviously, Level 5 is the lowest level of security (essentially no security at
all), so you should only use Level 5 for files that you want to allow everybody
on the network to change or delete. As added protection, make sure your
network is protected with a firewall; if the network includes one or more
Wi-Fi access points, be sure to use WPA encryption.
On the other hand, don’t let these security concerns scare you away from
using Level 5 access when it’s appropriate. In a business where two or more
people work together on the same project, you will want to allow those
involved to create or make changes to the relevant documents. On a home
network, you may want to provide universal access to music, photos, and
video files, and documents such as school term papers that a parent might
want to review before they’re turned in. And if you share files between your
home or office computer and a laptop, you will want to allow Level 5 access
between the two.
To assign the contents of a drive or folder to Level 5, follow these steps:
1.
From My Computer, right-click the icon of the drive or folder you want
to assign to Level 5. A pop-up menu will appear.
2.
Select Sharing and Security from the pop-up menu. A Properties window
will appear with the Sharing tab visible. This window is the same one you
used to assign files or folders to Level 4 (Figure 12-3).
3.
In the Network Sharing and Security section of the Properties window,
check the Share this folder on the network option.
4.
Check the Allow network users to change my files checkbox.
5.
Click OK to save your changes and close the Properties window.
File Sharing in Windows Vista
Microsoft introduced a completely new file-sharing method in Windows
Vista. It’s still necessary to turn on file sharing, but the whole process is no
longer as complicated as the earlier “Simple File Sharing” method because
many of the network file-sharing functions are consolidated into the Network
136
C h ap te r 1 2
and Sharing Center shown in Figure 12-4. To open the Network and Sharing
Center, start at the Control Panel, and select Network and Internet Network and Sharing Center. If you’re using the Classic View of the Control
Panel, you can go directly to the Network and Sharing Center.
Figure 12-4: The Network and Sharing Center controls many file-sharing functions.
Network Discovery
One important new setting in Vista is called network discovery. When network
discovery is turned on, your computer is visible to other computers on the
same LAN, and your computer can detect other computers; when network
discovery is off, the computer can’t see other computers and other users
can’t see yours. In other words, network discovery is one more setting that
must be turned on in order to view files among computers. You might also
encounter a custom state if a firewall exception has been disabled or one of
the services that controls network discovery is not active.
To turn network discovery on or off from the Network and Sharing
Center, click the On or Off button, or click the arrow at the far right of the
Network discovery option, then click the Turn On or Turn Off button, and
click Apply.
File Sharing
Vista allows two kinds of file sharing through a network: sharing from the
Public folder and sharing from any folder. You must turn on either method
in the Network and Sharing Center before you can use it.
Sh ar in g Fil es T h rou gh Y our N etw ork
137
Public Folder Sharing
When you turn on Public folder sharing from the Network and Sharing
Center, any folder or file within the Public folder is accessible to anyone on
the network. You can set the Public folder to allow read-only access or you
can allow any user to create new files and to read, change, and delete existing
ones, as shown in Figure 12-5, but you can’t set different access levels to the
Public folder for specific users; the Public folder is an all-or-nothing (or, more
accurately, an everybody-or-nobody) deal.
Figure 12-5: The Network and Sharing Center controls the access level for the
Public folder.
Regardless of the network access settings, others using the local computer
can always open and edit files in the Public folder.
Sharing through the Public folder is a good choice when you want to
keep all your shared files in one place, separated from the files and folders
that you want to keep private. The Public folder is also an easy way to share
files with everybody on the network, without needing to set specific permissions for individual users.
To open the Public folder, select the Start menu and choose Documents
Documents. Then select Public from the Favorite Links list in the left panel
of the Documents window. If the left panel is not visible, select Organize
from the taskbar directly under the menu bar, and then select Layout
Navigation Pane. Figure 12-6 shows the Public folder.
138
C h ap te r 1 2
Figure 12-6: Windows Vista’s Public folder contains subfolders for
different categories of shared files.
To add a folder or file to the Public folder, either move or copy the
file or folder into the Public folder or into one of its subfolders. The preset
subfolders are intended for common file types, such as documents, music,
photos, and videos; you can add new categories or remove the existing ones
to meet your own needs and preferences.
You can also place shortcuts to local files and web pages in the Public
folder. If you place a copy of your Favorites folder (<drive letter>:\Users\
<username>\Favorites) in the Public\Favorites folder, you can share your
Internet Explorer Favorites list with other network users.
To open or view a file or folder in a Public folder from another computer on the same network, use that computer’s network browser and open
the <drive letter>:\Users\Public folder for the target computer.
Sharing from Any Folder
The alternative to the Public folder is to treat each shared file or folder
separately. Outside of the Public folder, you can set sharing permissions for
each folder or individual file to allow read-only or read-and-change access for
specific users or groups of users. A shared folder is also known as a network
share or simply a share.
To share folders or files outside the Public folder, follow these steps:
1.
From My Computer, select one or more folders or drives that you want to
share.
2.
Click Share in the toolbar at the top of the window. The Share icon is
only visible when you have selected one or more drives or folders; it’s not
available for individual files. The File Sharing dialog shown in Figure 12-7
will appear.
Sh ar in g Fil es T h rou gh Y our N etw ork
139
Figure 12-7: The File Sharing dialog specifies the people
with whom you can share a folder’s contents.
3.
To add an individual name to the list of people who have access to this
folder, click the arrow next to the empty field near the top of the dialog,
and either select that person’s name from the list or select Create a new
user from the drop-down menu.
4.
If you select Create a new user, the User Accounts dialog will appear.
Select Manage another account, and then select Create a new account in
the Manage Accounts dialog.
5.
Step through the rest of the process to create a new account, and then
return to the File Sharing dialog. You should now see the name of the
new account in the drop-down menu.
6.
Select the person you want to share access to this folder with and click
the Add button. That name will appear in the list of users, as shown in
Figure 12-8.
Figure 12-8: The File Sharing dialog now includes the
new user’s name.
140
C h ap te r 1 2
7.
Click the Permission Level to the right of each user’s name to assign that
person one of these permissions for the shared files in this folder:
Reader A reader can view the contents of files but cannot edit or
delete them.
Contributor A contributor can view files and add new ones to the
folder but cannot edit or delete existing files.
Co-owner The co-owner of a file or folder can open and view files,
create new ones, and edit or delete existing files.
8.
Click the Share button at the bottom of the dialog to save your changes
and close the window.
9.
The File Sharing utility will display a window confirming that the folder in
question is now shared with other computers on the network. The utility
offers to email other users to advise them about the new shared folder,
but you do not need to send such a message; the new share automatically
appears whenever an authorized user opens a link to your computer (as
shown in Figure 12-9).
Figure 12-9: This network link shows a computer with four hard drives
(C:, F:, G:, and H:), along with three shared folders and a Public folder.
10. Click the Done button at the bottom of the dialog to close the window.
To change permissions for an individual file within a shared folder,
follow these steps:
1.
Open the folder that contains the file.
2.
Right-click the name or icon for the file whose permissions you want to
change. A Properties window for that file will appear.
Sh ar in g Fil es T h rou gh Y our N etw ork
141
3.
Click the Security tab to view the dialog shown in Figure 12-10.
4.
In the Group or User Names list, choose the name of each user to see
current permissions. If you can’t see the name you want, use the scroll
bar at the right side of the list.
5.
To change a user’s access to this file, click the Edit button. The Permissions dialog shown in Figure 12-11 will appear.
Figure 12-10: The Security tab controls file-sharing permissions for individual files.
6.
Figure 12-11: Use the Permissions dialog
to change permission settings for one or
more users.
The lower part of the dialog includes Allow and Deny checkboxes for
each of six different options. To change a setting, click to add or remove
a checkmark from the appropriate box. The options are:
Full control A user with full control can read and write data files,
run program files, edit or delete files, and change a file’s permissions.
Modify A user with Modify permissions can run a program file and
read, write, or delete a data file.
Read & execute A user with permissions to Read & execute can
view the contents of a file and run a program file but can’t make
changes or delete the file.
Read A user with Read permissions can view the contents of a data
file but can’t make any changes or delete the file.
Write A user with Write permissions can make changes but can’t
delete the file.
Special permissions Special permissions are administrative controls
that most users don’t need. Click the Advanced button to set these
options.
142
C h ap te r 1 2
7.
Obviously, some of these permissions overlap, so if, for example, you
allow full control, you will also allow permission to modify, read, and
write to the file. To save your choices and close the Properties dialog,
click OK.
Printer Sharing
The Network and Sharing Center also controls printer sharing. Chapter 14
explains how to use this feature.
Password Protected Sharing
Password protection assigns one more level of security to shared files. When
password protected sharing is turned on, you can’t open or edit files without
a user account and password on that computer.
Media Sharing
Media sharing in Windows Vista transmits music, still pictures, or videos
through your network to a digital media receiver (DMR) such as a game console
or a compatible home theater receiver. Chapter 15 explains how to use media
sharing.
File Sharing on a Macintosh
Starting with OS X 10.2, the Macintosh operating system supports Windows
file sharing (SMB), so that’s the best way to exchange files between an up-todate Mac and another computer through a network. I’ll discuss connecting
older Macs to a network later in this section.
If your home or business uses Macintosh computers exclusively, you could
use one of the older Apple sharing services, but you’re on your own for that;
we’re concerned here about connecting your Mac to a non-proprietary
network.
Connecting a Mac to a Windows (SMB) Network
When a Macintosh is connected to an SMB (Windows) network, it appears
the same as any other computer connected to the network: You can find
drives, directories, files, and other resources connected to the Mac directly
from your Windows or Linux/Unix desktop.
In most cases, connecting a Mac to a Windows network is a plug-and-play
process. Simply plug an Ethernet cable into the socket or turn on your Wi-Fi
adapter and the computer will automatically detect the network. However,
your computer won’t accept connections from the network unless the user
logged in on the other computer also has an account on your Mac. Unlike
Windows, Mac OS X won’t accept connections from a guest account.
Sh ar in g Fil es T h rou gh Y our N etw ork
143
Adding a New Account
To establish a new account in Mac OS X, follow these steps:
1.
From the Apple menu, select System Preferences.
2.
Select View
3.
In OS X 10.2, select New User; in later versions, click the + button. The
window shown in Figure 12-12 will appear.
Accounts.
Figure 12-12: Create a new account using this window.
4.
Type the name and a short name for the new account. The short name
should be identical to the user’s Windows or Linux/Unix username.
5.
Type the user’s password in the appropriate field.
6.
In OS X 10.2, check the Allow user to log in from Windows checkbox
and then click OK.
7.
Close the System Preferences window.
When an existing user wants to connect to a Mac, the user’s computer
should automatically set up the link in versions later than OS X 10.3, but
sometimes you have to instruct the Mac to accept the link. This is always
required in OS X 10.2. Follow these steps to allow a user to log in from a
Windows network:
144
C h ap te r 1 2
1.
From the Apple menu, select System Preferences.
2.
Select View
3.
Select the account you want to authorize.
Accounts.
4.
If the computer requests a password, type it in the appropriate field.
5.
Check the Allow user to log in from Windows checkbox. The system will
instruct you to reset your password.
6.
Enter your existing password or a new password and click the Save button.
7.
Confirm that you can now log in to the Mac from another computer
connected to the network. If it works, the process is complete.
8.
If you can’t log in to the Mac from another computer, try changing the
user’s password.
Setting the Workgroup Name
Each computer on the network should use the same SMB workgroup name,
but the default in Mac OS X is WORKGROUP, which is probably not the
name your Windows network uses.
To change the workgroup name on a Mac, follow these steps:
1.
Select Applications
2.
Click the padlock icon to identify yourself as an administrator.
3.
Select SMB/CIFS from the list of services, as shown in Figure 12-13.
Utilities
Directory Access.
Figure 12-13: Select SMB/CIFS from the list of services.
4.
Select Configure. The program will scan the network and display a list of
workgroups. On most small networks, you will see only one workgroup
name.
5.
Select the workgroup name you want to use and click OK.
6.
Click Apply and quit Directory Access.
Sh ar in g Fil es T h rou gh Y our N etw ork
145
Turning on Windows File Sharing
Before you can share files through a Mac, you must turn on Windows file
sharing:
1.
From the Apple menu, select System Preferences.
2.
Select View
3.
Check Windows Sharing in the Service column, as shown in Figure 12-14.
The list of network preferences will now include Windows Sharing On.
Sharing.
Figure 12-14: Select Windows Sharing in the Service column.
Connecting to Windows File Sharing
To view or open a shared file on another computer through the network,
follow these steps:
146
C h ap te r 1 2
1.
Click the Finder icon in the dock, and select Connect to server from the
Go menu.
2.
When the Connect to Server dialog appears, either browse to find the
share you want or type the address, using this format: smb://<ServerName>/
<ShareName>.
3.
Click the Connect button to make the connection.
Connecting from Older Mac Versions
Apple did not include SMB file sharing in Mac OS until OS X 10.2. You can
use one of the Apple sharing services to share Mac files using older software
with another computer through a network, but the process is somewhat
different.
To share files from OS X 10.1 or 10.2 with another computer on the
same network, select Go Connect to Server. A list of other computers will
appear. Select the name of the computer that contains the files you want to
use and click the Connect button.
To connect to another computer from OS 8 or 9, follow these steps:
1.
From the Apple menu, select the Chooser.
2.
Click the AppleShare icon.
3.
If a list of AppleTalk Zones appears, choose the zone that includes the
computer you want to reach.
4.
Select the name of the computer that contains the file or other resource
you want to open from the list, and click the OK button.
File Sharing in Linux and Unix
The latest Linux and Unix distributions all include support for Windows
file-sharing (SMB) protocols, so sharing files with computers using other
operating systems (or other Linux/Unix distributions) should be easy. The
terminology is not always the same, but if you understand the underlying
principles involved in network file sharing, you shouldn’t have any trouble
working with a mixed network.
NOTE
In this section, I’m describing tools for sharing files that are part of the most commonly
used Linux and Unix desktop environments—Gnome and KDE. If you’re a hardcore
user who works from the command line rather than a desktop, I’m assuming you
already know how to create and use network shares or, if not, that you can find
specific instructions from man pages and other documentation.
Sharing from Linux or Unix Computers
Both of the major Linux/Unix desktop environments—Gnome and KDE—
include relatively easy-to-use network file browsers. In Gnome, the program
is called Nautilus, as shown in Figure 12-15. To open the network file browser,
go to the Places menu on the Gnome desktop, and select Network.
Sh ar in g Fil es T h rou gh Y our N etw ork
147
Figure 12-15: Gnome’s Nautilus file browser includes access to network shares.
In KDE, the comparable function is part of the Konqueror file manager,
as shown in Figure 12-16.
Figure 12-16: In Konqueror, network computers are accessible as Samba
Shares under Remote Places. Click an icon to open a drive or folder.
148
C h ap te r 1 2
Both Nautilus and Konqueror are basic graphic browsers that support
the usual set of file management activities: You can click an icon to open a
folder or a file or drag-and-drop to copy a file from one computer to another.
Creating Shares on Linux and Unix Computers
The general procedures for creating a shared directory in Gnome and KDE
are similar: Open a browser window that contains the directory you want to
share, right-click the directory, and change some settings.
Sharing from Gnome
From a Gnome file browser, follow these steps to create a share:
1.
Right-click the folder you want to share. A pop-up menu will appear.
2.
Choose Sharing options from the menu. The dialog shown in Figure 12-17
will open.
3.
Check the Share this folder option. The additional options shown in Figure 12-18 will become available.
Figure 12-17: Use the Folder Sharing
dialog to configure a directory as a
network share.
4.
Figure 12-18: When you turn on the Share
this folder option, the Folder Sharing dialog reveals more options.
Select the options you want to apply to this share, and click the Create
Share button to save your choices.
Sharing from Konqueror
If your desktop uses KDE and Konqueror, follow these steps to create a
share:
1.
Right-click the folder or drive you want to share.
2.
Select the Permissions tab in the pop-up Properties window, as shown in
Figure 12-19.
Sh ar in g Fil es T h rou gh Y our N etw ork
149
Figure 12-19: Konqueror’s Permissions tab controls
network access to a folder’s contents.
3.
To configure a folder as a share, use the drop-down menus next to
Group and Others to change access permissions, and check the Apply
change to all subfolders and their contents option.
Samba
Samba is a suite of programs that uses SMB to allow file and print sharing
from non-Windows operating systems (including Linux, Unix, and several
others). If it’s not included with your Linux or Unix package, you can
download it from http://samba.org/.
Samba itself uses text commands rather than a graphical user interface
(GUI ), but several add-on GUI interfaces are available at Samba’s website.
Unless the people using Linux or Unix on your network are comfortable
using a command-line shell, you will want to install at least one of these
GUIs along with Samba.
Using Shares
Shared folders and directories (which are two names for the same type of
resource) are a basic networking tool. Any time two or more people want
to collaborate on a project, they can share access to the documents and
information files by creating a project share and allowing any member of
the group to work on those files.
Your computer displays shared folders and other network resources just
like files and folders stored on your own computer, so where the file is actually
stored doesn’t matter—you can place a shortcut to a share on your desktop
and open a shared document or other file with a couple of mouse clicks, just
as if the file was stored on your own computer.
150
C h ap te r 1 2
13
NETWORK SECURITY
Any time you operate a network, you
must protect it against intrusions from
outsiders and damage caused by intentional
or accidental misuse or abuse by internal network
users. Computer networks are vulnerable to several
forms of attack, including unauthorized access to files,
theft of service, and denial of service caused by excessive network-connection
requests. Strictly speaking, attacks on individual computers, such as viruses,
worms, and Trojan horses, are a separate issue from network vulnerabilities,
but a good network security plan will include firewalls and other tools that
also protect the computers connected to the network.
This chapter describes the basic steps that every home and small business
network manager must take to keep his or her network secure.
Keeping Intruders Out
Intruders break into networks for several reasons:
They want to open files and read documents, either to steal confidential
information or just to overcome the challenge of “cracking” protected
files.
They want to use the network to obtain a high-speed Internet connection.
They want to use the network to forward unsavory or illegal data (such as
spam or pornography) to the Internet or download similar material.
They want to steal passwords, credit card numbers, bank account information, and other forms of data that they can either sell or use to order
items of value.
They want to interfere with normal network operation by overloading
the network’s ability to handle data, altering or deleting essential software, or causing hardware to break down.
Two important objectives of network security are to limit access to authorized users and to keep those same users away from configuration settings and
confidential data. The most important tools for maintaining a secure network
include different access levels for different users, passwords, and firewalls. If
they’re not adequate, more complex methods are also possible, including
kernel-level mandatory access control systems, authentication and authorization mechanisms, and data encryption.
User Accounts and Access Levels
Almost all computer operating systems have at least two levels of user accounts:
administrators and users. Administrators have access to all of the computer’s
configuration settings, such as installing or removing printers, joining a network, and so forth. Users can read and write programs and data files assigned
to their own accounts and to resources whose owners allow other people to
use them. On a network, a guest account has its own access settings for those
who use a computer’s resources through the network rather than through
the keyboard and other input devices connected directly to each computer.
Each user has exclusive control of his or her files. The owner of every
account can set access controls on files that keep them either private and
confidential or public and accessible to other users. Even if other users have
accounts on the same computer, they can’t read somebody else’s private
files. The exception is a system administrator account that provides access
and control to almost all files.
Passwords
Passwords are the first line of defense against unwanted access to a computer or a network. If a would-be intruder can’t get the computer to start
the operating system, opening data files or using the network is a lot more
152
C h ap te r 1 3
difficult (but not impossible—a determined intruder with enough time and
resources can often get around a password to open and read unencrypted
files).
You may be tempted to set up your computer without a startup password,
but that completely defeats most of the computer’s security features and
those of the network connected to it. Unless you’re absolutely certain that
no strangers will ever get close enough to turn on your computer or gain
access through a wired or wireless network, and you trust everybody else in
the house or office to respect your privacy, it’s worth the extra time needed
to enter a password every time you turn on the computer or connect to it
through a network.
An effective password should be difficult to guess and long enough to
make it hard to find with a brute-force program (a program that applies
massive computing resources to trying one password after another until it
stumbles upon the right one).
Too many people use one of these items as a password:
Your own first name or middle name
The name of your spouse, child, or pet
Your mother’s maiden name or any other family name
Your favorite entertainer, band, team, or song
Your own first initial and last name (such as JSmith)
An obvious string of numbers, letters, or both (such as 123456, abcxyz, or
abc123)
Your birthday or some other significant date
Your home town or country
A string of characters from your keyboard (such as qwerty or !@#$%)
The word password
The phrase letmein (that is, let me in, not the name of a Chinese noodle
dish)
The phrase trustno1 (Fox Mulder’s password on The X-Files TV series)
The word swordfish (originally used in the Marx Brothers’ Horse Feathers
and in many subsequent movies, books, and computer games)
The word sex or any common curse or obscenity
The word God or Jesus (or any other deity of your choice)
Any of these words or phrases spelled backward
When a “computer security expert” in a movie or TV show finds the right
password to break into the bad guy’s computer on the third try, he probably
tried some of the passwords on this list.
Many network routers, modems, and other hardware come with default
passwords preset at the factory. These passwords are well known by crackers
and easy to find in equipment manuals and on the Internet.
N et wor k Sec uri t y
153
The best passwords are random strings of letters, numbers, and other
characters, at least seven or eight characters in length. One expert tested a
brute-force password-cracking program; Table 13-1 shows the amount of
time that one programmer ( Jimmy Ruska) needed to discover passwords of
different lengths by creating and testing every possible combination. (The
specific numbers in this table apply only to his particular program. You
should pay attention to how the amount of time increases as you add more
characters to a password rather than the exact times.) The time to crack is
even greater if your password includes one or more symbols, such as !, @, #,
$, &, and +.
Table 13-1: Time to Test All Possible Passwords*
Password Length
Letters Only
Letters and Numbers
3 characters
1 second
2 seconds
4 characters
3 seconds
10 seconds
5 characters
1 minute, 17 seconds
6 minutes
6 characters
26 minutes
3 hours, 30 minutes
7 characters
14 hours
6 days
8 characters
15 days
205 days
*
Source: http://blog.jimmyr.com/Most_Common_Passwords_20_2008.php
Other cracking methods can be slower or faster, but the general point—
that longer passwords are more difficult to crack—still applies.
Firewalls
A firewall is a server that uses a set of rules established by the network manager
to inspect incoming data and to block data from a source that isn’t on a list
or files that match a particular description (such as a virus). Or the firewall
might pass all data moving from the LAN to the Internet but only allow
certain types of data from the Internet. The most common use of a firewall
in a LAN is at the gateway to the Internet, as shown in Figure 13-1. The firewall monitors all inbound and outbound data between the computers on the
local network on one side and the Internet on the other. This kind of firewall
is intended to protect the computers on the LAN from unauthorized intrusion
from the Internet.
Firewalls in Wireless Networks
In a wireless network, a firewall can also be placed at the gateway between
the wireless access points and the wired network. This firewall isolates the
wireless portion of the network from the wired LAN, so intruders who have
connected their computer to the network without permission can’t use the
wireless connection to reach the Internet or the wired part of the LAN.
Figure 13-2 shows the location of a firewall in a mixed network that includes
both wired and wireless connections.
154
C h ap te r 1 3
Internet
Firewall
Desktop
computer
Desktop
computer
Ethernet
Printer
File server
Figure 13-1: A network firewall isolates a LAN from the Internet.
Internet
Bridge
Desktop
computer
File server
Ethernet
Firewall
Ethernet
Access
point
Laptop
computer
Access
point
Laptop
computer
Laptop
computer
Figure 13-2: A firewall can also protect the wired portion of
a LAN from wireless intruders.
N et wor k Sec uri t y
155
A firewall in a wireless network can perform several functions:
It can act as a gateway router between the wireless network and a
wired LAN.
It can protect a direct connection from a single computer to the Internet.
It can block all traffic moving from the wireless side to the wired network
that doesn’t come from an authenticated user.
It passes commands, messages, and file transfers from trusted users to
the Internet.
Therefore, a legitimate user can connect to network nodes on the wired
part of a mixed LAN or on the Internet, but an intruder would be cut off at
the firewall.
Because authorized wireless users and intruders are both on the
unprotected side of the firewall, it does not isolate the wireless nodes from
one another. An intruder can still gain access to another computer on the
same wireless network and read shared files, so it’s a good idea to turn off file
sharing on any computer connected to a wireless network and to use firewall
software on individual computers.
A firewall for a wireless network should use some kind of authentication
to allow legitimate users through the gateway, but it should reject everybody
else. If access control based on MAC addresses is built into Wi-Fi networks
and the added authentication in 802.1x are not adequate, then an outboard
firewall should require all users to enter a login and password before they
can connect to the Internet.
If your wireless network includes computers running more than one
operating system, your firewall must use a login tool that works on any platform. The easiest way to accomplish this is with a web-based authentication
server, such as the one included with the Apache web server (http://httpd
.apache.org/).
The Apache web server is available as a Linux or Unix application that
can run on an old, slow computer with an early Pentium or even an antique
486 CPU, so you can often recycle an old junker and use it as a firewall.
Both the Apache application and the operating system are available as open
source software, so it ought to be possible to build an extremely low-cost
Apache firewall.
If you prefer to use Windows, or if you don’t want to assemble your
own firewall, you have several options. You can use the Windows version of
Apache, or you can use a commercial utility such as the ones listed at http://
www.thegild.com/firewall/.
Attacks on a wireless LAN don’t all come through the air. A wireless
network also requires the same kind of firewall protection against attacks
from the Internet as an entirely wired network. Many wireless access points
include configurable firewall features, but if yours does not, the network
should include a firewall program on each computer, along with a separate
router or a dedicated computer acting as a network firewall.
156
C h ap te r 1 3
Protecting Individual Computers
Client firewall programs provide another line of defense against attacks
coming from the Internet. Some of these attacks come from miscreants who
are looking for a way to read your files and other resources that you don’t
want the entire world to see. Others might want to use your computer as a
relay point for spam or attempts to break into some other computer halfway
around the world in order to make the real source more difficult to identify.
Still others spread viruses or use really unpleasant programs called rootkits
that take control of a PC or display threatening messages.
An unprotected system with a lot of unused storage space can be an
attractive target for hackers who want to distribute pirated software, music,
or video files (you didn’t think they store that stuff on their own computers,
did you?).
The number of such idiots and creeps on the Internet is surprisingly
large; if you install a firewall that notifies you when an outside computer tries
to connect to your network, your firewall log will probably list several breakin attempts every day.
Wireless Access Points with Firewalls
The easiest firewall to use with a wireless network is one that’s built into
an access point. Many wireless access points combine the functions of a wireless access point with a broadband router and an Ethernet switch, so they
support both wired and wireless network clients.
As you know, a network router translates addresses between the numeric
IP address that identifies the LAN to the Internet and the internal IP addresses
that identify individual computers within the local network. The firewall
normally blocks all incoming requests for data to network hosts, but this
creates problems when you want to use one or more of the computers on the
local network as file servers. So the firewall redirects certain types of requests
to the appropriate computer inside the firewall.
Each request to connect to a server includes a specific port number that
identifies the type of server. For example, web servers operate on port 80,
and FTP servers use port 21, so those port numbers are part of the request
for access. To accept access requests to a server, you must instruct the firewall’s
Network Address Translation (NAT) function to forward those requests to a
specific computer within the LAN. Table 13-2 lists the most common service
port numbers.
Hundreds of other port numbers have been assigned, but you will never
see most of them in actual use. The official list of port assignments is available
online at http://www.iana.org/assignments/port-numbers.
NAT assumes that each internal server’s IP address doesn’t change from
one request to the next. A web server on 192.168.0.23 today won’t migrate to
192.168.0.47 next week. That’s generally not a problem on a wired network,
but in a wireless setting where network clients join and leave the network all
the time, the DHCP server automatically assigns the next available address to
each new client. If one of those clients is the home of one of the network’s
N et wor k Sec uri t y
157
service ports, the NAT probably won’t find it. This problem is not common,
because most networks don’t use portable computers as servers, but it can
happen. The solution is to turn off the DHCP server and assign a permanent
IP address to each client.
Table 13-2: Common TCP/IP Service Port Numbers
Port Number
Internet Service
20
FTP-Data (FTP default data)
21
FTP (File Transfer Protocol)
23
Telnet
25
SMTP (outgoing mail)
37
Time
53
DNS (Domain Name System)
70
Gopher
79
Finger
80
HTTP (web server)
88
Kerberos
110
POP3 (incoming mail)
119
NNTP (network news)
1863
Microsoft MSN Messenger
5190
AOL Instant Messenger
7070
Real Audio and Video
Firewall Software
A wireless gateway firewall at the interface between the access point and the
wired part of your LAN will keep intruders from using your network to reach
the Internet, and a firewall at the Internet connection will turn away attempts
to connect to your network from the Internet, but a wireless network still needs
one more form of protection. If somebody gains access to your wireless LAN
without permission, you want to keep them away from the other legitimate
computers on the same network, so each network node needs a client firewall
program.
Client firewalls perform the same functions at a computer’s network
interface that a LAN or enterprise firewall performs for the entire network;
a client firewall detects attempts to connect to TCP service ports and rejects
them unless they match one or more of the firewall program’s configuration
settings. Several good firewall products are available as shareware, and others
are free to noncommercial users. It’s easy to try them on your own system and
choose the one you like best. ZoneAlarm (http://www.zonealarm.com/) and
LANguard (http://www.languard.com/) are both well-regarded Windows firewall software products. There’s also a firewall built into Windows XP and
Windows Vista that is adequate for most home and small business networks.
158
C h ap te r 1 3
Linux and Unix users also have plenty of firewall options. Most of them
were written for stand-alone firewall computers that are commonly used as
network gateways, but they could be equally appropriate as protection for
individual network clients.
In Linux, the iptables firewall is part of the kernel. It’s well-documented
at http://www.netfilter.org/projects/iptables/index.html. Port Scan Attack Detector
(psad) is another set of tools that identify port scans and other intrusions on
many Linux systems. For more information, see http://www.cipherdyne.org/
psad/.
IP Filter is a software package that provides firewall services to FreeBSD
and NetBSD systems. The official IP Filter website is http://coombs.anu.edu
.au/~avalon, and you can download an excellent HOWTO document at http://
www.obfuscation.org/ipf/ipf-howto.txt. The program can deny or permit any
packet from passing through the firewall, and it can filter by netmask or host
address, establish service port restrictions, and provide NAT services.
OpenBSD, FreeBSD, and NetBSD can all use the Packet Filter, or PF,
facility to perform firewalling. More information is available at http://www
.openbsd.org/faq/pf/.
NetBSD/i386 Firewall is another free Unix firewall. It will operate on any
PC with a 486 or later CPU and as little as 8MB of memory. The NetBSD/i386
Firewall Project home page is http://firewall.dubbele.com/.
Virtual Private Networks
A virtual private network (VPN) can add another effective form of security to
data that moves from a remote client to a host network that can be located
anywhere with a connection to the Internet.
A VPN uses a data tunnel to connect two points on a network through
an encrypted channel. The endpoints can be a single network client and a
network server, a pair of client computers or other devices, or the gateway to
a pair of LANs. Data that passes through a public network such as the Internet
is completely isolated from other network traffic. VPNs use login and password authentication to restrict access to authorized users; they encrypt the
data to make it unintelligible to intruders who intercept the data; and they
use data authentication to maintain the integrity of each data packet and to
assure that all data originates with legitimate network clients.
NOTE
VPN functions occur at the IP or network layer of the ISO model. Therefore, they can
operate on top of the Wi-Fi or other wireless protocols, which operate at the physical
layer. VPNs can also pass data across a network connection that includes more than
one physical medium (for example, a wireless link that passes data onward to a wired
Ethernet network). In other words, a VPN is an end-to-end service; the data can use a
wireless link, an Ethernet cable, an ordinary telephone line, or some combination of
those and other transmission media.
N et wor k Sec uri t y
159
Remote computer
with VPN driver
Public network
(telephone line
or Internet)
Remote access server
Ethernet
In a traditional VPN, a remote user can log in to a distant LAN and
obtain all the same network services that are available to local clients. VPNs
are commonly used to extend corporate networks to branch offices and to
connect users to the LAN from home or from off-site locations such as a
client or customer’s office.
A connection through a VPN server looks to the rest of the network
exactly like a client device connected directly to the LAN. The only difference
is the data from the VPN passes through a VPN driver and a public network
instead of moving directly from the network adapter to the LAN. Figure 13-3
shows a typical VPN connection to a remote network.
Local computer
Local computer
Local computer
Internet
Figure 13-3: A remote network can connect to a LAN through a virtual private network.
All of the same security benefits also apply to short-range VPNs that
tunnel through a wireless link and longer-range VPNs that start on a wireless
network and relay the data to a remote server. These are two different uses
for a VPN: a local VPN that only extends across the wireless portion of a
network between the client devices and the access point, and an extended
network that carries VPN-encoded data beyond the access points to a VPN
server through a public network, such as the Internet or a dial-up telephone
connection. An extended network is a traditional VPN that happens to
originate from a wireless network client. The same VPN can also support
connections that don’t include a wireless segment and logins from public
wireless services, such as the ones at airports or coffee shops. This setup is
conventional for a VPN.
Local, short-range VPNs are interesting to people who operate wireless
networks because they add another layer of security to wireless links. Because
the data moving between wireless clients and the network access point is
encrypted (using an algorithm that is more secure than WPA encryption), it
is unintelligible to any third party who might be monitoring the radio signal.
Because the VPN server won’t accept data links at the access point from
wireless clients that are not using the correct VPN drivers and passwords, an
intruder can’t break into the network by associating a rogue client with the
access point.
160
C h ap te r 1 3
The goal of a wireless VPN is to protect the wireless link between the
clients and the access point and to lock out unauthorized users. Therefore,
the isolated and encrypted data can only move across a single room rather
than over hundreds or thousands of miles. Of course, the access point might
also relay VPN-encoded data onward through the Internet to a network host
in another location.
Figure 13-4 shows a wireless connection to a VPN. The VPN server is
located between the wireless access point and the host LAN, so all of the
packets that move through the wireless portion of the network are encoded.
For clarity, the diagram shows the VPN server as a separate component, but
the most practical way to add VPN security to a wireless LAN is to use a router
or gateway that incorporates VPN support. VPN-enabled routers are available
from several vendors, including Cisco, NETGEAR, and TRENDnet.
Access point
Network
link
VPN
VPN server
Ethernet
Figure 13-4: A VPN provides a secure connection between a wireless network and an
Internet gateway or a local LAN.
VPN Methods
A VPN moves data through one or more intermediate networks to a destination on another network. The VPN’s tunneling client encapsulates the
existing data packets or frames by adding a new header with the routing
information that instructs the packets how to reach the VPN’s endpoint.
The transmission path through the intermediate networks is called a tunnel.
At the other end of the tunnel, the VPN server removes the tunneling header
and forwards the data to the destination specified by the next layer of headers.
The exact form of the tunnel doesn’t make any difference to the data because
the data treats the tunnel as a point-to-point connection.
N et wor k Sec uri t y
161
The tunneling headers can take several forms. The methods used most
widely in VPNs are Point-to-Point Tunneling Protocol (PPTP), Layer Two
Tunneling Protocol (L2TP), and IP Security (IPsec) mode. PPTP and L2TP
can move data through IP, IPX, and NetBEUI networks; IPsec is limited to
IP networks. Both the client and the server must use the same protocol.
In PPTP and L2TP, the client and server must configure the tunnel for
each transmission before they begin to exchange data. The configuration
parameters include the route through the intermediate network and the
encryption and compression specifications. When the transmission is complete, the client and server terminate the connection and close the tunnel.
Unfortunately, several data security analysts have identified significant
flaws in PPTP that allow intruders to break into a PPTP-based VPN and sniff
passwords and then decode encryption, read data, or inflict damage to a
network server. Therefore, PPTP headers are not secure and should not
be used.
In an IPsec network link, the client and server must establish the tunnel
through the intermediate networks in a separate transaction before they
begin to exchange data.
Both L2TP and IPsec offer specific advantages and disadvantages, but
they’re both good enough to create a secure link between a wireless network
client and an access point. The differences among the three are technical
rather than practical. You can find an excellent explanation of the internal
operation of all three protocols in Microsoft’s white paper entitled “Virtual
Private Networking in Windows 2000: An Overview,” which is available online
at http://technet.microsoft.com/en-us/library/bb742566.aspx (but remember that
the flaws in PPTP networks were identified after that whitepaper was written).
VPN Servers
A VPN server (or host) can be part of a Linux/Unix or Windows server, or it
can be built into a stand-alone network router or gateway. If your network
already uses a separate computer as a dedicated server, you can use that
computer as the VPN server. A separate piece of hardware might be a better
choice if your network does not already have a full-blown network server.
Dozens of VPN equipment makers offer routers, gateways, and other
products that support one or more of the VPN protocols. Each of these products has a different feature set, so testing the specific combination of client
and server that you intend to use on your own network before you commit to
them is essential. The Virtual Private Network Consortium (VPNC) is moving
toward a set of interoperability tests and certification standards (much like
the Wi-Fi standards for wireless Ethernet equipment). The VPNC website
(http://www.vpnc.org/) lists the products that have passed the interoperability
tests, and the site also provides links to information sources for a long list of
VPN products.
162
C h ap te r 1 3
Configuring a Windows Server for a VPN
If you’re committed to using a Windows server, you can use either L2TP or
IPsec with Windows Server 2003 or Windows Server 2008; if your server runs
the older Windows NT Server 4.0 or Windows 2000 Server software, you’re
limited to L2TP (or the seriously flawed PPTP). The server also requires two
network interface cards: one connected to the wired LAN or the Internet
gateway and the other connected to the wireless network. The interface
card that is connected to the wireless port normally connects directly to the
wireless access point’s Ethernet port. The exact process of installing an L2TP
host on a Windows server is slightly different in each version of Windows, but
the general steps are the same. For specific information about configuring a
particular operating system, consult the online Help screens and Microsoft’s
Resource Kit and other online documentation for your server’s operating
system. The following sections describe the configuration steps in general
terms.
NOTE
For more information about deploying and using VPNs with Microsoft servers, see the
Microsoft TechNet articles at http://technet.microsoft.com/en-us/network/
bb545442.aspx.
Configure the connection to the LAN.
The link to the LAN or other network is a dedicated connection through
a network adapter. The network connection profile for this connection
must include the IP address and subnet mask assigned to this connection
and the default gateway address assigned to the network gateway.
Configure the VPN connection.
The VPN connection is usually an Ethernet link to one or more access
points. The connection profile on the server for the VPN connection
must include the IP address and subnet mask assigned to this port and
the addresses of the DNS and WINS name servers used by this network.
Configure the remote-access server as a router.
The server must use either static routes or routing protocols that make
each VPN client reachable from the wired network.
Enable and configure the server for L2TP clients.
Windows uses Remote Access Service (RAS) and point-to-point protocol
(PPP) to establish VPN connections. The Routing and Remote Access
service enables RAS. A VPN connection requires the following RAS configuration options:
Authentication method Encrypted PPTP connections use the
MS-CHAP or EAP-TLS authentication methods.
Authentication provider Either Windows 2000 security or an
external RADIUS server can verify network clients.
IP routing IP routing and IP-based remote access must be active.
If the wired network acts as a DHCP server for the wireless clients,
DHCP must be active.
N et wor k Sec uri t y
163
Configure L2TP ports.
Set each L2TP port to accept remote access.
Configure network filters.
Input and output filters keep the remote-access server from sending and
receiving data that does not originate at a VPN client. These filters will
reject data to or from unauthorized users, so those intruders will not be
able to obtain an Internet connection (or a connection to the wired
LAN) through the wireless network.
Configure remote-access policies.
Set the remote-access permission for each VPN client to allow access to
the RAS server. The port type must be set to the correct VPN protocol
(for example, PPTP or L2TP), and the profile for each connection must
include the type of encryption in use. Windows offers three encryption
strength options:
Basic
Strong
Uses a 40-bit encryption key
Uses a 56-bit encryption key
Strongest
Uses a 128-bit encryption key
VPN Servers for Linux/Unix
All of the BSD variations (including FreeBSD, NetBSD, OpenBSD, and Mac
OS X) include an IPsec VPN client and server as part of the release package.
Linux FreeS/WAN is the most popular implementation of IPsec for
Linux. Go to http://www.freeswan.org/ for downloads, documentation, and
access to the community of FreeS/WAN users.
OpenVPN is an SSL-based VPN solution for Linux, BSD, OS X, and
Windows. OpenVPN is easy to configure and offers both routed VPN (traffic
to specific destinations is sent through the VPN) and tunneled virtual interfaces
(emulating a physical layer Ethernet device, which can pass non-IP traffic
through the VPN). OpenVPN can be found at http://openvpn.net/.
If you’re using a Linux firewall, you might want to consider VPN
Masquerade. Linux uses the IP Masquerade function in the Linux kernel
to share a single connection to the Internet among multiple clients. VPN
Masquerade is the section of IP Masquerade that supports IPsec clients.
The HOWTO for Linux VPN Masquerade is at http://tldp.org/HOWTO/
VPNMasquerade-HOWTO.html.
Network Hardware with Built-In VPN Support
A dedicated computer running Linux or one of the BSD versions of Unix
can be an inexpensive VPN server. Or if you’re using a Windows server for
other purposes, a dedicated computer can also provide VPN support at little
or no additional cost. But a full-size network server is often a bigger and
more complicated solution to a relatively simple problem. They’re not always
the best choice. Many switches, routers, gateways, and firewall devices also
include VPN support. Cisco, 3COM, Intel, and many other manufacturers
164
C h ap te r 1 3
make VPN products that are often easier to install and maintain than a
separate computer.
In a wireless network, the VPN server does not need all the same bells
and whistles as a server in a larger corporate network. As Figure 13-5 shows, a
router located between the wireless access point and the wired portion of an
enterprise network can easily double as a VPN server. In a home network, the
VPN server can operate between the access point and a DSL or cable modem.
Router/VPN
server
Ethernet
Internet
Access point
Figure 13-5: A network router can also act as a VPN server for a wireless network.
Stand-alone VPN client hardware that sits between the computer and the
network is also available, but this setup isn’t as practical in a wireless network
because the wireless network adapter is almost always plugged directly into
the computer itself.
VPN Client Software
A wireless client connects to a VPN server through its wireless Ethernet
link to the network access point, which the operating system sees as a LAN
connection. To set up a VPN tunnel through that connection, you must
install the tunneling protocol as a network service.
Configuring Windows for VPN
Windows XP and Vista include support for virtual private networks, but this
support is not part of the default installation, so the first step in setting up a
VPN client is to install the protocol.
In Windows XP and Windows Vista, a wizard makes the whole process
easy. In XP, follow these steps to set up a VPN connection:
1.
From the Control Panel, open Network Connections.
2.
Double-click the New Connection Wizard icon.
3.
When the Network Connection Type window, shown in Figure 13-6,
appears, select the Connect to the network at my workplace option and
click the Next button.
N et wor k Sec uri t y
165
Figure 13-6: The option for creating a VPN link specifies connecting to a workplace
network, but this option also applies to a wireless VPN.
4.
In the Network Connection window (shown in Figure 13-7), select the
Virtual Private Network connection option and click the Next button.
Figure 13-7: Select the Virtual Private Network connection option to create a VPN
connection.
5.
166
C h ap te r 1 3
In the Connection Name window, type a name for the wireless VPN connection. This name will appear on desktop shortcuts to this connection.
Click the Next button.
6.
In the Public Network window (shown in Figure 13-8), select the Do not
dial the initial connection option because you don’t need to connect
through a telephone line. Click the Next button.
Figure 13-8: In a wireless network, the VPN does not require a dial-up connection.
7.
In the VPN Server Selection window, shown in Figure 13-9, type the host
name or IP address of the VPN server.
Figure 13-9: The host name or IP address identifies the VPN server at the other end of
the wireless link.
8.
Click the Next button and then the Finish button to complete the wizard.
N et wor k Sec uri t y
167
In Vista, follow these steps:
1.
Open the Control Panel.
2.
Select the Network and Sharing Center.
3.
In the Tasks list on the left side of the Network and Sharing Center,
shown in Figure 13-10, select the Set up a connection or network option.
A Choose a Connection Option window will open.
Figure 13-10: Use the Set up a connection or network option to create a VPN link.
4.
Select the Connect to a workplace option and click the Next button.
The wizard will ask if you want to use an existing connection.
5.
Select the No, create a new connection option. The wizard will ask if you
want to use a VPN or a dial-up connection.
6.
Select the Internet connection (VPN) option. The wizard will then ask
for details in the screen shown in Figure 13-11.
7.
Type the VPN server’s address provided by the network manager in the
Internet address field. This can be either a numeric address or a name.
8.
Type the name you want to use on your own computer for this VPN connection in the Destination name field.
9.
If you want to test the connection, click the Next button. If you don’t
want to connect, select the Don’t connect now option and then click
Next. The wizard will ask for your name and password.
10. Type the name and password you use for this VPN account. If you want
your computer to automatically send your password, turn on the Remember this password option. Click the Create button to establish the VPN
connection and close the wizard.
168
C h ap te r 1 3
Figure 13-11: Use this screen to configure your VPN.
To create a shortcut to a VPN on your desktop in Windows, follow these
steps:
1.
In XP, open the Control Panel and select Network Connections. In Vista,
open the Control Panel, select the Network and Sharing Center, and
select Manage Network Connections from the Tasks list.
2.
From the Network Connections window, right-click the icon or listing for
the VPN and select Create Shortcut from the pop-up menu.
3.
A pop-up window will ask if you want to place the shortcut on the desktop. Click the Yes button. A shortcut will now appear on the desktop.
The Microsoft L2TP/IPsec VPN Client
Microsoft includes a client for L2TP connections with Internet Protocol
security (IPsec) in Windows 2000, Windows XP, and Windows Vista. A similar
client program for Windows 98, Windows Me, and Windows NT Workstation
4.0 is available for free download from http://download.microsoft.com/download/
win98/Install/1.0/W9XNT4Me/EN-US/msl2tp.exe.
Making the Connection in Windows
When the VPN connection profile is in place, it’s easy to connect a Windows
client to the host LAN or the Internet through the wireless VPN link: Just
double-click the icon for the connection profile. Windows will ask for a login
and password and then make the connection.
If you mostly use your wireless connection to connect to the Internet,
you can make it the default connection, which will open whenever you run a
N et wor k Sec uri t y
169
network application such as a web browser or email client program. To make
the VPN profile the default, follow these steps:
1.
Open the Internet Properties window from the Control Panel.
2.
Select the Connections tab.
3.
In the Dial-Up Settings section, select the VPN connection profile from
the list, and click the Set Default button.
4.
Click the Settings button. In the Dial-Up Settings section, type your login
and password on the VPN server.
5.
Select the Dial whenever a network connection is not present option.
Selecting Windows XP and Vista Options
Windows XP and Windows Vista offer many VPN options that were not
available in earlier versions of Windows. To set these options, follow these
steps:
1.
Choose the Network Connections window from the Control Panel. If you
have a shortcut to your VPN connection on the desktop, you can skip
this step.
2.
Double-click the VPN icon. A Connect VPN to Internet window, like the
one in Figure 13-12, will appear.
Figure 13-12: Use the Connect VPN to Internet window
to configure a VPN in Windows XP.
3.
170
C h ap te r 1 3
Click the Properties button. The Properties window for your VPN client
will appear. Figure 13-13 shows the General tab of the VPN to Internet
Properties window.
Figure 13-13: The General tab controls the destination of
a VPN connection.
4.
The IP address of the VPN server should already be visible in the Host
name or IP address of destination field. The Dial another connection
first option should be disabled. Click the Networking tab to view the dialog shown in Figure 13-14.
Figure 13-14: The Networking tab controls the VPN’s
network configuration options.
N et wor k Sec uri t y
171
5.
Select the type of VPN server your network will use from the Type of
VPN menu. If you don’t know the VPN type, select the Automatic option.
6.
Select Internet Protocol (TCP/IP) or Internet Protocol Version 4 from
the list of connection items, and click the Properties button to change the
network settings, including the use of a DHCP server or manual settings
for IP address and DNS.
7.
Click the Advanced tab to open the dialog shown in Figure 13-15. If your
network is not already protected by a firewall, select the Internet Connection Firewall option. This will protect the wireless client from attacks
coming through the Internet.
Figure 13-15: The Advanced tab controls the use of a firewall
on the VPN.
The Options and Security tabs in the VPN to Internet Properties window
control connection options that normally don’t change from the default
settings. Network managers who want to change the security settings should
instruct their users on how to configure these options to comply with the
network’s specific requirements.
VPN Clients for Linux/Unix
Using a VPN client on a computer running Unix is more complicated than
running a VPN from a Windows machine because the client is not integrated
into the kernel. Therefore, you must find a client program that works with
the version of Unix and the VPN protocol you’re trying to use. No single
program offers a universal VPN client, and some combinations, such as
PPTP on BSD Unix versions, don’t seem to exist at all.
172
C h ap te r 1 3
Linux users, however, can choose from several IPsec implementations:
FreeS/WAN
pipsec
http://www.freeswan.org/
http://perso.enst.fr/~beyssac/pipsec
NIST Cerberus
http://w3.antd.nist.gov/tools/cerberus/
IPsec is included in the OpenBSD distribution. You can find a tutorial
that explains how to use it at http://tutorials.papamike.ca/pub/obsd_ipsec.html.
The IPsec implementation for FreeBSD is at http://www.r4k.net/ipsec/.
For information about NetBSD IPsec, take a look at http://www.netbsd.org/
Documentation/network/ipsec/.
OpenVPN: A Cross-Platform Alternative
OpenVPN (http://openvpn.net/) is an open source VPN that does not use
IPSec. It can operate on Windows, Mac OS X, Linux, and Unix. It’s designed
for ease of use and security, even through noisy or otherwise unreliable
networks.
Using a VPN Through a Public Network
When you connect your laptop to your corporate LAN through a public
network at an airport or in a conference center, or if you’re using a broadband wireless service, you can connect through that network to the Internet
and onward to your corporate VPN server. Because you’ll have to log in to
the public network before you initiate the VPN connection, you should
create a separate VPN via Public Network connection profile in addition to the
one you use from your own office. The profile should point to your corporate
VPN server, but it should not be your default connection.
To connect through a public network on a computer running Windows,
follow these steps:
1.
Turn on the computer with the wireless network adapter in place.
2.
Use your wireless configuration utility to select the public network you
want to use.
3.
Start Internet Explorer, Netscape Navigator, or another web browser.
You will see the public network’s login screen.
4.
If the computer doesn’t do it automatically, type your account name and
password. The public network will acknowledge your login.
5.
Minimize the browser window and open the Network Connections window or find the VPN shortcut on your desktop.
6.
Double-click the icon for your VPN via Public Network profile. The computer will connect through the Internet to your corporate LAN.
7.
Type the login and password for your corporate network.
N et wor k Sec uri t y
173
VPNs are an important part of many networks’ security plans for off-site
users. With just a few keystrokes or mouse clicks, you can establish access to
your network resources from anywhere with an Internet connection. If any
Internet technique can eliminate the apparent distance between you and
your LAN, your office, and your colleagues without sacrificing security, a
virtual private network is that technique.
Wireless Security
Wireless networks are not secure. They are safe enough for many users most
of the time, but it’s just not possible to make a network that uses radio to
exchange data absolutely private.
Wireless networks are a trade-off between security and convenience. The
obvious benefits of a wireless network connection—fast and easy access to the
network from a portable computer or an isolated location—come at a cost.
For most users, the convenience of wireless operation outweighs the possible
security threats. But just as you lock the doors of your car when you park it
on the street, you should take similar steps to protect your network and your
data.
The simple truth is that a wireless network uses radio signals with a welldefined set of characteristics, so somebody who wants to dedicate enough
time and effort to monitoring those signals can probably find a way to
intercept and read the data contained in them. If you send confidential
information through a wireless link, an eavesdropper can copy them. Credit
card numbers, account passwords, and other personal information are all
vulnerable.
An entire catalog of tools for cracking Wi-Fi encryption methods is easy
to find on the Internet. Although 3G broadband and WiMAX networks
might be more secure than Wi-Fi (primarily because capturing data from
them is more difficult), and WPA encryption is better than WEP encryption,
no wireless security is perfect. Encryption and other security methods can
make data a little more difficult to steal, but these methods don’t provide
complete protection against a really dedicated snoop. As any police officer
will tell you, locks are great for keeping out honest people, but serious
thieves know how to get past them.
To make things even more dangerous, many network managers and
home wireless users leave the doors and windows to their networks wide
open to intruders by failing to use encryption and the other security features
that are built into every Wi-Fi access point and network node. “Drive-by logins”
to unprotected private networks are possible in many urban and suburban
business districts and in a surprising number of residential neighborhoods.
Most people have gotten the message about using encryption on their
home and office networks, but too many of them are still using the older
WEP encryption system rather than the much more secure WPA method.
The technical support people at one major telephone company, Qwest, were
still advising their DSL customers to use WEP encryption as late as mid-2007.
174
C h ap te r 1 3
If you’re located in a city center or a suburb, you can probably see this
for yourself. When you use your Wi-Fi control program to scan the networks
in your neighborhood, you will probably see a list of nearby networks in
addition to your own access point. The control program will also tell you
what kind of encryption (if any) each network is using. In the example shown
in Figure 13-16, one network (RedGoldandGreen) is wide open, and four
others are encrypted; two of the encrypted networks use WPA, and the two
that are listed as “security-enabled” without an encryption type use WEP.
Figure 13-16: Four of the networks in this neighborhood require an
encryption key before they will connect.
Do the math: Your access point can reach 150 feet or more in all
directions, so the signal probably extends beyond your own property lines
(or the walls of your apartment or office). A network device in the building
next door or across the street can probably detect your network. If you don’t
take some precautions to prevent it, your neighbor, or somebody using a
laptop or PDA inside a car parked on the street, can log in to your LAN, steal
files from your servers, and tie up your Internet connection with streaming
videos, multiplayer games, or worse.
It’s important to understand that we’re talking about two different kinds
of security threats. The first is the danger of an outsider connecting to your
network without your knowledge or permission; the second is the possibility
that a dedicated eavesdropper can steal or modify data as you send and
receive it. Each represents a different potential problem, and each requires
a different approach to prevention and protection. While it’s certainly true
that none of the encryption tools currently available can provide complete
protection, they can make life more difficult for most casual intruders. And
as long as the tools are out there, you might as well use them.
N et wor k Sec uri t y
175
An unsecured wireless network presents many opportunities to an
attacker. Not only are the network crackers able to monitor any data that
moves through the network, but they might also be able to modify that data.
If, for example, your web browser has a vulnerability, an attacker can replace
images as you view them with an image that exploits that vulnerability and
installs a Trojan horse program on your computer, allowing the attacker to
steal data stored on the computer, even if you never sent that data over the
wireless network. This type of attack might be relatively rare (casual snoopers
are unlikely to take the time to snoop around on the chance you have something interesting), but it still presents a real risk.
Also, many popular websites encrypt the login page with SSL encryption
via HTTPS, but they don’t encrypt subsequent pages to reduce the drain on
processing power—your password might be secure, but any email you read
via the web mail interface might not be, and attackers might be able to steal
the cookie (a unique piece of data passed with web data) that identifies your
login and open your mailbox directly.
Protecting Your Network and Your Data
As the operator of a Wi-Fi network, what can you do to keep outsiders out?
You can employ a few techniques that can discourage them. First, you can
accept the fact that wireless networks are not completely secure and use the
built-in network security features to slow down would-be intruders; second,
you can supplement your wireless router’s built-in tools with a hardware or
software firewall (or both) to isolate the wireless network; and third, you can
use additional encryption such as a VPN to secure traffic to the network.
The security features of the early Wi-Fi protocols (WEP encryption) were
not adequate to protect data. The wireless equivalent privacy (WEP) protocol
had several serious flaws: The basic encryption method (the RC4 algorithm)
was known to have weaknesses in certain applications, all users had to know
the key, and no secure mechanisms for distributing new keys existed. Most of
these shortcomings were acknowledged and dismissed as being outside the
scope of providing the same protection that a user on a standard wired network would receive, but in fact, they meant that wireless equivalent privacy
was little better than no protection at all. Recent attacks (such as those
performed by the aircrack-ptw tool) have further undermined WEP because
these tools have often been able to disclose an encryption key in a matter of
minutes by analyzing a limited amount of traffic. With these developments,
WEP should be treated more as a “do not disturb” sign than as a real means
of protection.
The WPA and WPA2 standards attempt to fix the shortcomings of WEP,
but they only work when all of the users of your network have modern cards
and drivers. Most, if not all, network interfaces made in the last few years
support WPA or WPA2.
176
C h ap te r 1 3
For most of us, the more serious danger is not that people will eavesdrop
on our messages but that they will create their own connection to your
network and either read files stored on computers on the LAN or use your
broadband connection to the Internet without your knowledge.
However, business networks must take extra precautions to protect their
(and their customers’) data. Several high-profile compromises of customer
credit card data in major store chains have been traced to inadequate
network protection.
Maintaining control of your network and keeping it secure is essential.
“Wi-Fi Security” on page 89 includes a list of specific actions you can use to
keep intruders out of your wireless network.
The security tools in the Wi-Fi specifications aren’t perfect, but they’re
better than nothing. Even if you choose not to use them, it’s essential to
understand what they are and how they work, if only to turn them off.
Network Name
Every wireless network has a name. In a network with just one access point,
the name is the basic service set ID (BSSID). When the network has more
than one access point, the name becomes the extended service set ID (ESSID),
but your computer’s control program displays both types in the same list.
The generic designation for all network names is the service set ID (SSID),
which is the term you will see most often in wireless access point and client
configuration utility programs.
When you configure the access points for a network, you must specify the
SSID for that network. Every access point and network client in a network
must use the same SSID. When a network client detects two or more access
points with the same SSID, it assumes that they are all part of the same network (even if the access points are operating on different radio channels),
and the client associates with the access point that provides the strongest or
cleanest signal. If that signal deteriorates due to interference or fading, the
client will try to shift to another access point on what it thinks is the same
network. This transfer is called a handoff.
If two different networks with overlapping signals have the same name, a
client will assume that they’re both part of a single network, and it might try
to perform a handoff from one network to the other. From the user’s point
of view, this misdirected handoff will look like the network has completely
dropped its connection. Therefore, every wireless network that could possibly
overlap with another network must have a unique SSID.
The exceptions to the unique SSID rule are public and community networks that only provide access to the Internet but not to other computers
or other devices on a LAN. Those networks often have a common SSID, so
subscribers can detect and connect to them from more than one location. In
other words, if you have an Internet access account at your local coffee shop,
you might find and use exactly the same SSID when you visit another shop
owned by the same company.
N et wor k Sec uri t y
177
A network’s SSID provides a very limited form of access control because
it’s necessary to specify the SSID when you set up a wireless connection. The
SSID option in an access point is always a text field that will accept any name
you care to assign, but many network configuration programs (including the
wireless network tools in Windows XP and those supplied with several major
brands of network adapters) automatically detect and display the SSIDs of
every active network within their signal range.
It’s not always necessary to know the SSID of a network before you try to
connect; the configuration utility (or a network monitor or sniffer program
like Network Stumbler) will show you the names of every nearby network in
a list or a menu (the exceptions are networks in which the broadcast SSID
feature has been turned off). For example, Figure 13-17 shows the result of
a Network Stumbler scan at Seattle-Tacoma Airport, where Wayport served
the passenger terminal and MobileStar provided coverage in the American
Airlines VIP club.
WARNING
Every access point comes with a default SSID setting and password. These defaults
are well known and documented within the community of network snoops (run a web
search for default SSID to find several lists). Obviously, the defaults should never be
used in any active network. Make sure you change the access point’s administrative
login and password while you’re at it.
Figure 13-17: Network Stumbler and many configuration utilities display the SSIDs of
every nearby wireless network.
Normally, most Wi-Fi access points send out beacon signals that broadcast
the network’s SSID. When a network adapter performs a radio scan, it detects
those beacon signals and displays a list of nearby SSIDs in its control program.
However, you can disable the SSID broadcast so the network doesn’t show up
178
C h ap te r 1 3
on most control program scans. To connect a computer to a network whose
name is not visible, you must instruct your control program to search for
the SSID.
A nonbroadcast SSID is not completely invisible. A sniffer program (such
as Network Stumbler) can still detect it and display the SSID, and every time
a user connects to the network, the network adapter sends the SSID in a packet
that can be easily sniffed. Disabling the SSID broadcast might, in some cases,
make it easier for an attacker to later attack the laptop of one of your users
(this is a more serious issue for businesses or corporate network administrators
than for people running home networks). Because the laptop cannot know
if the hidden network is available, it must constantly probe for the network,
announcing its presence and giving an attacker much of the information
needed to spoof the hidden network. Because a hidden network must be in a
laptop’s Preferred Networks list, the laptop will automatically connect to the
spoofed network.
WEP Encryption
WEP encryption is an option in every Wi-Fi system, so it’s important to
know how it works, even if you choose not to use it. As the name suggests,
the original intent of the wired equivalent privacy (WEP) protocol was to
provide a level of security on wireless networks that was comparable to the
security of a wired network. That was the goal, but a network that depends
on WEP encryption is almost as vulnerable to intrusion as a network with
no protection at all. WEP will keep out the casual snoops (and your freeloading neighbors, if they’re not particularly adept at cracking encryption),
but WEP is not particularly effective against a dedicated intruder. The more
recent WPA encryption is always the better choice.
WEP encryption is intended to serve three functions: It prevents unauthorized access to the network; it performs an integrity check on each packet;
and it protects the data from eavesdroppers. WEP uses a secret encryption
key to encode data packets before a network client or an access point transmits
them, and it uses the same key to decode packets after it receives them. The
original standard used shared authentication, in which the access point sends a
challenge packet that a client must encrypt with the proper WEP key and send
back. However, this opens a significant vulnerability by allowing a snooper to
watch both parts of the exchange and derive the key.
The “open” authentication method, which should be used by any network using WEP (not that any network should use WEP), simply discards
packets that cannot be decrypted by the network’s WEP key. Therefore, the
WEP settings must be exactly the same on every access point and client adapter
in the network. This sounds simple enough, but it can get confusing because
manufacturers use different methods to identify the size and format of a WEP
key. The functions don’t change from one brand to another, but identical
settings don’t always have identical descriptions.
N et wor k Sec uri t y
179
How Many Bits in Your Encryption Key?
A WEP key can have either 64 bits or 128 bits. Although 128-bit keys are
more difficult to crack (but they are still pretty insecure), they also increase
the amount of time needed to transmit each packet. However, confusion
arises because a 40-bit WEP key is the same as a 64-bit WEP key, and a 104-bit
key is the same as a 128-bit key. The standard 64-bit WEP key is a string that
includes an internally generated 24-bit initialization vector and a 40-bit secret
key assigned by the network manager. Some manufacturers’ specifications
and configuration programs call this 64-bit encryption, but others describe it as
40-bit encryption. Either way, the encryption scheme is the same, so an adapter
that uses 40-bit encryption is fully compatible with an access point or another
adapter that uses 64-bit encryption.
Many network adapters and access points also include a strong encryption
option that uses a 128-bit key. Devices that support strong encryption are
downward compatible with 64-bit encryption, but compatibility is not automatic, so all of the devices on a mixed network of 128-bit and 64-bit devices
will operate at 64 bits. If your access point and all of your adapters accept
128-bit encryption, use a 128-bit key. But if you want your network to be compatible with adapters and access points that only recognize 64-bit encryption,
set the entire network to use 64-bit keys.
In practice, the choice of 64- or 128-bit WEP encryption doesn’t make
much difference. Tools are easily available that can crack both types, although
cracking a 128-bit key might take a bit longer.
Is Your Key ASCII or Hex?
The length of the key is not the only confusing thing about setting WEP
encryption. Some programs request the key as a string of ASCII characters,
but many others want the key in hexadecimal (hex) numbers. Still others can
generate the key from an optional passphrase.
Each ASCII character has 8 bits, so a 40-bit (or 64-bit) WEP key contains
5 characters, and a 104-bit (or 128-bit) key has 13 characters. In hex, each
character uses 4 bits, so a 40-bit key has 10 hex characters, and a 128-bit key
has 26 characters. In Figure 13-18, the Wireless Setting screen for a D-Link
access point, the 40-bit Shared Key Security field uses hex characters, so it has
space for 10 characters. The D-Link program runs all 10 characters together in
a single string, but some others split them into 5 sets of 2 digits or 2 sets of 5.
The key looks the same to the computer either way, but copying the string
when it’s broken apart is easier.
A passphrase is a string of text that the adapters and access points
automatically convert to a string of hex characters. Because humans can
generally remember actual words or phrases more easily than hex gibberish,
a passphrase can be easier to distribute than a hex string. However, a passphrase is only useful when all the adapters and access points in a network
come from the same manufacturer.
180
C h ap te r 1 3
Figure 13-18: The configuration utility for a D-Link access point accepts WEP keys in
hex format.
What Are the Options?
Like just about everything else in a Wi-Fi configuration utility, the names of
the encryption options are not consistent from one program to the next.
Some programs use a straightforward set of options such as “enable WEP (or
WPA) encryption,” but others use technical language taken from the formal
802.11 specification.
Some access points also offer a shared key authentication option that
uses encryption when a network client has the key but uses unencrypted data
with other network nodes.
Mixing Hex and ASCII Keys
Setting up a mixed network becomes more complicated when some network
nodes use hex only and others require ASCII keys. If that’s the situation on
your network, you will want to follow these rules for setting the encryption
keys:
Convert all your ASCII keys to hex. If a configuration program demands
an ASCII key, enter the characters 0x (zero followed by lowercase letter
x), followed by the hex string. If you’re using Apple’s AirPort software,
you’ll have to enter a dollar sign ($ ) at the beginning of a hex key.
Make sure all your encryption keys have exactly the right number of
characters.
N et wor k Sec uri t y
181
If all else fails, read the security sections of the manuals for your network
adapters and access points. It’s possible that one or more of the devices
in your network might have some obscure proprietary feature that you
don’t know about.
WPA Encryption
WPA encryption was developed as a partial solution to the security problems
that make WEP encryption less than totally secure. WPA is much safer than
WEP, but cracking WPA is still possible.
WPA is more secure because it uses a method called Temporal Key Integrity
Protocol (TKIP) to automatically change the encryption key after a specified
period of time or after the system exchanges a specific number of packets.
Because WPA changes the key frequently, it’s a lot more difficult for a cracker
to gather enough information to decipher its encryption code.
In large networks, WPA uses an authentication server to verify the identity
of each network user. The server uses Remote Authentication Dial-in User
Service (RADIUS) and Extensible Authentication Protocol (EAP) to exchange
encryption keys with the computers and other devices that are connected to
the wireless network.
In home networks and smaller business networks that don’t have a
server, a method called pre-shared key (PSK) mode uses a passphrase stored in
the access point in place of the authentication server. To connect to the
network, users must enter the same passphrase on their computer or other
network device (or set their device to automatically enter the passphrase).
When you set up WPA encryption, you must specify whether the network
uses a server or PSK mode.
Any access point and network adapter that supports 802.11g or 802.11n
should also recognize WPA encryption. If you’re using an older 802.11b or
802.11a access point, you might be able to add WPA encryption by installing
the latest version of firmware and drivers. Look in the support or downloads
section of the manufacturer’s website for free upgrade instructions and
software.
PSK Passphrases
A WPA-PSK passphrase can be a string of either 8 to 63 ASCII characters or
64 hexadecimal digits. The passphrase that you enter into a network device
must be exactly the same as the one stored in the access point. Obviously,
typing 64 digits correctly is not something that you want to do frequently,
so the ASCII alternative is the better choice for most users. For optimal
security, the ASCII passphrase you assign to your network should be a random
mixture of at least 20 characters including letters (capitals and lowercase),
numbers, and punctuation marks.
A PSK network uses the passphrase to set up the initial connection
between a client (such as a computer or PDA) and the access point. After
the connection is in place, the TKIP assigns new encryption keys to every
182
C h ap te r 1 3
packet or group of packets. The PSK combines with your network SSID to
calculate the final key value. Choosing a unique SSID and a strong passphrase
is important.
Attackers can build large tables of SSID and PSK pairs for common
network names and dictionary words, performing weeks of calculation once
with the payoff of nearly instantly determining the key of any network that
matches that pair of values. Choosing strong passphrases and unique SSIDs
can mitigate this attack.
Using WPA Encryption
When you set up a new network, the security section of the access point’s
configuration software will ask if you want to use encryption, and if so, whether
you want WEP or WPA encryption. Unless you’re planning to run an open
access network, you should choose WPA.
In many cases, the access point will offer two or more types of WPA
encryption. If your network includes a RADIUS server, choose EAP. If the
network has no encryption server, use the WPA-TKIP option.
For a network user, providing a WPA key is just as easy as providing a
WEP key. Most network adapters made in the last couple of years automatically recognize the type of encryption embedded in each Wi-Fi signal
that they detect, so the control program might ask for an encryption key
without specifying whether it’s a WEP key or a WPA key.
Attacking WPA Security
It was probably inevitable that somebody would take the added security
features in WPA encryption as a challenge and develop a WPA cracking tool.
Several such tools are out there, so WPA does not provide the impenetrable protection that some of its proponents might want you to believe. In
particular, programs called coWPAtty and Aircrack-ng both use dictionary
attacks on WPA-TKIP networks to try thousands or millions of possible keys
until they find the correct one. Fortunately, neither of these programs nor
any of the others aimed at cracking WPA encryption are easy to use, and
cracking a network can take a lot of time, so successful attacks on WPA are
not particularly common. This technique takes time because the programs
can only try about 50 different encryption keys per second, but eventually
they will find the right passphrase and connect to the target network. Because
each additional letter, number, or other character in a key increases the
key’s complexity, a long key takes much longer to crack than a short one.
However, a commercial product called Elcomsoft Distributed Password
Recovery uses graphics processors on video cards to “break Wi-Fi encryption
up to 100 times faster than by using CPU only,” so even a relatively long key
is not that secure.
Completely protecting yourself against attacks might not be possible or
practical, but a long passphrase that includes random numbers and punctuation marks is still a better choice than a string of words or numbers alone.
N et wor k Sec uri t y
183
In other words, something like hdt%mzx33wolf$fgilxxq&#smedbxor is a better
passphrase than nostarchpressbooks. But the only truly secure way to use Wi-Fi is
to combine it with VPN encryption.
Access Control (MAC Authentication)
Most access points include an option that permits the network manager to
restrict access to a specific list of client adapters. If a network device with a
MAC address that does not appear on the list of authorized users tries to
connect, the access point will not accept the request to associate with the
network. This option can keep intruders from connecting to a wireless LAN,
but it forces the network administrator to keep a complete list of users’
adapters and their MAC address. Every time a new user wants to join the
network, and every time an established user swaps adapters or gets a new
laptop, PDA, or other device with a built-in adapter, the network manager
must add one more MAC address to the list. This task is probably manageable in a home or small office network, but it could be a major undertaking
for a larger corporate or campus-wide system, if it’s practical at all.
MAC authentication does not provide unbreakable protection against
unauthorized users because a determined cracker could monitor radio signals
from approved users, intercept their adapters’ MAC addresses, and load an
approved address onto a different adapter. But combined with encryption
and other security tools, authentication adds one more impediment in the
path of a network cracker.
Every access point configuration utility uses a different format for its
access lists. The manual and online documentation supplied with your access
point should provide detailed instructions for creating and maintaining an
access control list.
The Wi-Fi standards do not specify a maximum size for an access point’s
access control list, so the numbers are all over the map. Some access points
limit the list to a few dozen entries, but others, such as the Proxim Harmony
AP Controller, will support as many as 10,000 separate addresses. Still others
accept an effectively unlimited number. If you plan to use a list of addresses
to control access to your network, make sure your access point will work with
a large enough list to support all of your users, with enough expansion space
for future growth. As a rule of thumb, the access point should accept at least
twice as many MAC addresses as the number of users on your network today.
Some access points also include a MAC address exclusion feature that
allows the network manager to block one or more MAC addresses from
access to the network.
Physical Security
Intruders don’t always use technology to crack into a network. Sometimes
they use brute-force methods. For example, if a thief steals your laptop
computer, he can often use the “convenience” features of the computer’s
software to connect to the Internet through your network, read your email
and other confidential files, and gain access to other computers connected
to the same network. Other low-tech methods include shoulder surfing, where
184
C h ap te r 1 3
the bad guy watches your screen or your keyboard as you type a login name
and password, and social engineering, in which the intruder convinces you to
reveal your password or other information because she has convinced you
that she has a legitimate use for it.
There are some things you can do to protect your computer and the data
stored in it:
Think like a thief and do whatever might be necessary to make the
computer difficult to steal. Don’t leave your laptop in plain sight in an
unattended car, or walk away from it in a public location such as a
coffee shop, airport, or library. In an office with cubicles or “open plan”
workspaces, use a chain and lock to secure the computer to a desk, file
cabinet, or other large object if you can’t store it in a locked drawer or
cabinet.
Don’t place your computer near a window where passers-by can see
exactly what you have.
When you’re away from home or work, keep track of your laptop computer at all times.
Log off your office computer whenever you are about to leave your desk.
Don’t allow other people to wander in and use your account when
you’re not there.
Keep the login and password active on your laptop, and use encryption
for files that contain confidential data. If somebody does steal the computer, you want it to be as difficult as possible for the thief to open and
read your files.
Install an antitheft alarm device on a PC card in your laptop or an internal card in a desktop system. If somebody tries to move the computer,
disconnect cables, or open the case without entering a security code first,
the alarm device will sound a very loud alarm.
Use a tracking program such as LostPC (http://www.lostpc.com/) on your
laptop computer. The tracking software will automatically send a “here
I am” signal to a security center every time it connects to the Internet
from a new location. Police and Internet service providers can sometimes use this information to locate and recover a stolen computer.
Consider using full-disk encryption tools such as TrueCrypt for Windows
or dm-crypt for Linux, so the data on it is useless if your laptop is stolen.
Windows Update and Patches
Microsoft distributes security updates and patches through the Internet at least
once every month that include fixes for newly discovered security problems.
You can manually check for updates and select the ones that you want to
install, but it’s a lot easier to let Windows automatically check for newly
released update packages and install them for you. As network manager,
you will want to set all the Windows computers on your network to run
Automatic Updates.
N et wor k Sec uri t y
185
To run Automatic Updates, follow these steps:
1.
Right-click My Computer and select Properties from the pop-up menu.
The System Properties window will appear.
2.
Choose the Automatic Updates tab from the System Properties window.
The dialog shown in Figure 13-19 will appear.
Figure 13-19: Use the Automatic Updates tab in System
Properties to turn on Windows Update.
3.
Choose an option to set the way your computer will handle new updates.
In most cases, the Automatic option is the best choice, but if you’re using
this computer for programs that require most of the system’s processing
power, such as sound or video recording, select the Notify me but don’t
automatically download or install them option instead.
4.
Click OK to save your settings and close the System Properties window.
Automatic Updates loads changes that somebody at Microsoft has
flagged as essential to the computer’s performance or security, but it ignores
many others, including new versions of device drivers and updates that add
or improve other features for Windows and some related programs. To find
and select these programs, follow these steps:
1.
2.
3.
186
C h ap te r 1 3
If you aren’t already connected to the Internet, connect your computer
now.
From the Start menu, choose Windows Update. You can also find a link
to this command in Internet Explorer’s Tools menu.
After the Update website confirms that it has installed the software it uses
to scan your computer, the site displays the Welcome screen shown in
Figure 13-20. Click the Custom button.
Figure 13-20: Use the Custom button to search for nonessential updates.
4.
After the program completes its search for new programs, it will display a
list like the one shown in Figure 13-21. Use the list of update types in the
left column to display a list of available updates in each category. Don’t
forget to scroll down the list to see all the categories.
Figure 13-21: The list of update types (left) shows the number of updates available for
each category.
N et wor k Sec uri t y
187
5.
Choose the updates you want to install in each category from the right
panel. The number in parentheses next to Install Updates in the left panel
shows the number of updates you have selected.
6.
Click Install Updates. The Review and Install Updates panel will appear
on the right side of the window.
7.
Click the Install Updates button. The update program will load the
updates you have selected, one at a time. If necessary, the Update routine will restart the computer to complete one or more updates.
Microsoft Baseline Security Analyzer
Microsoft’s Baseline Security Analyzer is a free tool that scans computers
running Windows XP and Windows Vista to identify security threats and
vulnerable features and functions. You can download it from http://technet
.microsoft.com/en-us/security/cc184924.aspx. You can use the Baseline Security
Analyzer to scan your own computer, or as network manager, you can test
other computers connected to yours through your LAN. Baseline Security
Analyzer provides a quick and easy way to find and fix many common
security issues.
Figure 13-22 shows the result of a Baseline Security Analyzer scan. For
each item it identifies, you can click a link to an explanation (What was
scanned) and instructions for correcting the problem.
Figure 13-22: Microsoft Baseline Security Analyzer finds potential security problems and
offers instructions for fixing them.
188
C h ap te r 1 3
Controlling Your Own Users
As manager of your home or business network, remember that you’re
responsible for the security of the whole network and all the computers
connected to it. Whenever it’s practical, do whatever you can to encourage
all your users to pay attention to security. Even if it seems easier to run their
computers “wide open” without proper security measures, you are responsible
for convincing them to keep their computers safe.
Denial of Service Attacks
A denial of service (DoS) attack occurs when your network receives a very
large number of incoming connection attempts that overloads the network’s
capacity to respond. The volume of traffic forces the computers and routers
in the network to operate at or beyond their capacity, which causes them
to either flood the network with useless traffic, disrupt connections among
machines, or completely disrupt network service. For example, a mail bomb
attack might generate tens of thousands of useless email messages.
A DoS attack can make it impossible to do anything else on the network,
or it can block legitimate incoming traffic, such as requests for access to a web
server or exchange of email. Most DoS attacks are aimed at large businesses,
government agencies, and educational institutions, so they’re not a common
problem for home or small business networks. Even so, it’s important to know
how to recognize DoS attacks and how to deal with them.
US-CERT, the United States Computer Emergency Readiness Team,
has identified three basic types of DoS attack: consumption of limited
resources, destruction or alteration of configuration information, and
physical destruction or alteration of network components. If your small
network suffers a DoS attack, you’re likely to see a significant deterioration
of network performance—or even a complete breakdown.
If somebody decides to target your network with a DoS attack, you can’t
do much to discourage them. Therefore, your best protection is to turn on
the built-in filters in your firewall and modem, install all the latest security
patches to your software and network hardware, and work closely with your
Internet service provider at the first sign that your network is under attack.
Most ISPs have more sophisticated monitoring and filtering resources that
can help them identify and interrupt an attack.
In the United States, DoS attacks are a violation of federal law, so it’s
appropriate to ask your local FBI field office for assistance in finding and
prosecuting the source of an attack.
Conclusion
As manager of a home or small business network, maintaining its safety and
security is one of your primary responsibilities. The methods outlined in this
chapter, combined with some commonsense attention, will allow you and
your users to concentrate on the business (and recreational) use of your
computer, your network, and the Internet.
N et wor k Sec uri t y
189
14
PRINTERS AND OTHER DEVICES
ON YOUR NETWORK
One of the benefits that a network brings
to a small business or a household full of
computer users is the convenience of sharing
one or more printers among all the network’s
users. Rather than carrying a copy of each file to the
computer connected to the printer on a disk or a
flash drive, you can simply click the Print command
on your own computer and let the network send it to
the printer automatically.
Even a very small network might include more than one printer. For
example, you might use a black-and-white laser printer for routine documents
and reports, a color inkjet or laser printer for fancy presentations and school
projects, and a special-purpose color printer for digital photos. If you have
more than one printer, you can select the best printer for each job. Each of
these printers might be located in a different room, close to the person who
uses it most often, or in a central room where they’re equally accessible to all
of your network’s users.
How to Connect a Printer to Your Network
You can connect a printer to a network in several ways: You can use an
external printer server, a server built in to your printer, or an automatic
switch connected directly to each printer, or you can connect through a
computer. All of these methods accomplish the same thing: They send a
formatted document or image to a printer that produces a paper copy. The
best method for connecting a printer to your network depends on your
budget, what’s convenient for you, and the layout of your network.
External Printer Servers
An external network printer server is a device that connects to the network as a
separate network node with an Ethernet port and provides either a parallel
port connection or a USB connection to a stand-alone printer. Figure 14-1
shows a printer connected to a network through an external printer server.
Desktop
computer
Printer server
Desktop
computer
Printer
Internet
Router
Laptop
computer
Server
Figure 14-1: An external printer server connects a printer to
a network using a parallel port or a USB port.
NOTE
When you shop for a printer server, look for one that uses the same type of printer port
as your printer. Most modern printers have USB ports, but older units with parallel
ports are still common. If your printer has both USB and parallel ports, use the USB
port.
External printer servers are a good choice when your network includes
computers in more than one room and you have at least one spare port on
the network hub or router. You can run an Ethernet cable to the server unit
192
C h ap te r 1 4
directly from the hub in the same room or from an unused wall outlet in
another room. If you don’t have enough Ethernet ports in the room where
you want to place the printer server, connect the computer and the printer
server to the network through an inexpensive Ethernet data switch, as shown
in Figure 14-2.
Desktop
computer
Desktop
computer
Data switch
Desktop
computer
Printer server
Printer
Internet
Router
Laptop
computer
Server
Figure 14-2: If you don’t have a spare network outlet for a printer
server, use a small Ethernet data switch.
NOTE
When you install Ethernet cables for your home or small business network, consider
the locations where you might want to install a printer. Run an extra Ethernet cable
between that room and your network hub, and use a wall outlet plate (or surface mount
box) with two or more RJ-45 jacks. Use a different color jack for each outlet to make it
easier to identify them at a glance.
Adding a printer server to your network is similar to adding a computer,
except that you’ll have to configure the printer server remotely from a computer. The usual routine is to connect the server to the network and the
printer to the server and then use a web-based configuration utility to set the
server’s network address and other options. Follow the instructions supplied
with the server to load the printer driver.
Another advantage of using a printer connected directly to the network
is that it operates independently of the other computers on the network.
When a printer connects through a computer, that computer must be on all
the time or you have to create a “public” account that the rest of the family or
office can use to print. This setup is a lot less secure than printing through a
server.
P rin t er s an d Ot h er D evic es on Y our N etw ork
193
Wi-Fi Printer Servers
If your network already includes a Wi-Fi access point, you can use a Wi-Fi
printer server to connect your printer to the network. The printer server
should automatically detect the Wi-Fi signal from your access point and
establish a two-way connection (data in and printer status out) between the
printer and the computer that originated the print request. The Wi-Fi link
should use all the same security tools (such as WPA encryption) as your other
Wi-Fi connections.
A Wi-Fi printer shares the same wireless channel with other Wi-Fi
links on your network, so a large document might slow down the network’s
performance, but slow performance is not likely to be an issue unless your
network carries a lot of traffic. You can solve this problem by adding a second
access point that uses a different channel and dedicating that access point to
one or more printers.
WARNING
When you set up the Wi-Fi link, make sure you connect the printer server to your own
access point and not to a network owned by one of your neighbors.
A Wi-Fi printer server offers the following benefits:
The printer may be located anywhere within range of your Wi-Fi
network signal.
You don’t need a dedicated Ethernet port for the printer server.
If you need to move the printer, you don’t have to rewire the network.
Built-In Printer Servers
When you buy a new printer for your network, consider one that has a builtin network printer server along with the usual USB and/or parallel ports.
The built-in printer server will perform like a printer connected through an
external printer server, but it’s easier to install because you don’t have to
connect additional cables.
Printers with built-in network interfaces are designed for small businesses
and other workgroups that often produce a greater number of printed pages
than a typical home network or a single user. They’re often a bit more expensive than the combination of a low-end, stand-alone printer and a separate
printer server device, because they’re generally more durable printers with
more and better features. But if your network’s users print enough pages
to justify a workgroup printer, the added cost will often pay for better
performance.
Automatic Printer Switches
When two or more of your computers are located in the same room or
adjacent rooms, an automatic printer switch might be a less expensive alternative to a network printer server. As the name suggests, an automatic switch
detects print requests from two or more input connectors and automatically
forwards them to the printer, and the switch returns status information from
194
C h ap te r 1 4
the printer back to the computer that originated the request. When it receives
more than one print request at the same time, the printer switch sends the
first one to the printer and holds the other requests in a buffer until the first
one has completed printing. As far as each computer attached to the switch
is concerned, the printer is connected directly to that computer.
A printer switch is less practical when the computers on your network are
in rooms that are far apart, because a cable must run from each computer to
the switch.
Using a Computer as a Printer Server
The alternative to a printer server for a network that extends beyond more
than one or two rooms is to connect the printer directly to one of the network
computers and send print requests from all the other computers through
that one.
This approach has several advantages:
You can use any printer connected to your computer.
You don’t need a separate printer server device or a printer with a builtin network server.
You can locate a printer anywhere, not just where you have a free network port or outlet.
On a network where different users have different types of printers
(such as laser and inkjet, color and black-and-white, or special formats
for photos or large documents), using a computer as a printer server
allows everyone to take advantage of each printer’s features.
You don’t need an additional port on the network hub or router.
On the other hand, this approach also has a few possible drawbacks:
The computer acting as a printer server must be turned on whenever
anybody wants to print; this could be a security issue.
When the printer begins to print without warning, it could distract the
person using the computer connected to the printer.
As other users come into the office or workspace where the printer is
located to collect their print jobs, this can be yet another distraction for
the operator of the computer acting as a printer server.
If your network also uses a dedicated file server, you can eliminate the
security and distraction issues by using the same computer as your network’s
printer server. Or if you have an older computer collecting dust in a closet,
you can use it as a stand-alone printer server (although you might have to
add a network interface and maybe a USB port on plug-in expansion cards).
However, the most common way to use a computer as a printer server is to
connect the printer to an existing computer and direct print commands
from all the other computers in the network to print through the server.
In Windows, setting up a printer server is a three-step process, described
in the following sections.
P rin t er s an d Ot h er D evic es on Y our N etw ork
195
Turning on Printer Sharing on the Network Card
Follow these steps to turn on printer sharing on your network interface:
1.
From the Control Panel, select Network Connections. The Network
Connections window will open.
2.
Right-click Local Area Connection and select Properties from the pop-up
menu. To share through your wireless connection, right-click Wireless
Network Connection.
3.
Confirm that the File and Printer Sharing for Microsoft Networks option
is active, as shown in Figure 14-3. If you don’t see a checkmark next to
this option, check the box to turn it on.
Figure 14-3: File and Printer Sharing for Microsoft
Networks must be active for you to share access to
a printer.
4.
Click OK to save your settings and close the Properties window.
Instructing the Computer Acting as a Printer Server to Share the Printer
Follow these steps to share a printer:
196
C h ap te r 1 4
1.
From the Control Panel, select Printers and Faxes (in Windows XP) or
Printers (in Windows Vista). A window that contains links to all of the
printers and virtual printers connected to this computer will open.
2.
Right-click the printer you want to share with the network. A pop-up
menu will appear.
3.
Select Sharing from the pop-up menu. The Properties dialog for that
printer will open with the Sharing tab visible, as shown in Figure 14-4.
Figure 14-4: Use the Sharing tab of the printer’s Properties dialog
to turn on sharing.
4.
In Windows XP, select the Share this printer option. In Vista, click the
Change sharing options button, click Continue in the User Account
Control window, and then select Share this printer.
5.
In the Share name field, type a name that identifies this printer, such as
Don’s Printer.
In Windows Vista, the Sharing tab includes an option to render print jobs
on client computers. If the other computers on the network use Windows XP
or some other operating system, leave this option turned off. But if other
Vista computers will be sending print jobs to this printer, you can speed up
the printer’s performance by checking this option.
Installing the Printer on Each Computer
After you set up the computer acting as a printer server to accept print jobs
through your network, you must also add the server to each computer’s list
of printers. Follow these steps to add a network printer in Windows XP:
1.
From the Control Panel, select Printers and Faxes. The Printers window
will open.
2.
Double-click Add a Printer to open the Add Printer Wizard. The Welcome
screen will appear.
3.
Click Next. The Local or Network Printer screen will appear.
P rin t er s an d Ot h er D evic es on Y our N etw ork
197
4.
Select the network printer option and click Next. The Browse for Printer
screen shown in Figure 14-5 will appear, along with a list of shared printers
connected to this network.
Figure 14-5: The Browse for Printer screen shows a list of all the
shared printers connected to this network.
5.
Select the name of the printer you want to use and click Next. The wizard
will ask if you want to use this printer as the default.
6.
If you want this computer to send print jobs to this printer as the
default, click Yes. If you want it to appear in a menu as a secondary
choice, click No.
7.
Click Next. The wizard will confirm that you have added the printer to
this computer’s list.
8.
Click Finish to complete the wizard and close the window. The name of
the newly added printer should be visible in the Printers (or Printers and
Faxes) window.
The process is similar in Windows Vista, but the Add a printer command
is in the toolbar directly above the window, as shown in Figure 14-6.
198
C h ap te r 1 4
1.
Click Add a printer.
2.
Click the Add a network, wireless or Bluetooth printer option. The wizard will display a list of all shared printers and printer servers connected
to this network.
3.
Select the printer you want to use from this computer and click Next.
4.
The wizard will add this printer to your list.
Figure 14-6: The Add a printer icon is on the toolbar directly above the Printers window.
CUPS: The Common Unix Printing System
CUPS is a printer control program for Unix and Linux systems that converts
page descriptions from application programs (such as a word processor or a
web browser) to the specific instructions used by individual printers. If printing
from your Unix or Linux distribution requires complicated command-line
instructions, CUPS can provide an easier solution; look for a free download
from http://www.cups.org/. A CUPS driver for Windows is also available as an
extension to the PostScript driver supplied with Windows. It’s available at
http://www.cups.org/windows. CUPS can print to a printer connected directly
to your own computer, or through a network to a printer server.
All-in-One Devices
Most offices perform several different paper-handling activities: copying,
printing, scanning, and faxing. All of these activities use some combination
of the same core functions, so it often makes sense to combine several
activities in a single machine that can send a digital file or scanned image
to either paper or another digital file. The category of device that combines
these functions is called, rather grandly, an all-in-one device, or simply an allin-one. An all-in-one device almost always costs less and occupies less space
than a separate printer, scanner, copier, and fax machine; however, the
large number of features and functions often means that it’s more difficult
to operate than a simple single-function device.
P rin t er s an d Ot h er D evic es on Y our N etw ork
199
Figure 14-7 is a functional flow chart that shows the types of sources and
destinations that an all-in-one device can handle. The device can receive an
image from a computer or through a telephone line, or it can create a digital
copy of a physical image (such as a printed page, a transparency, or a small
object placed on the surface of a scanner). The device can send the digital
image to any of several different destinations: a printer, a computer file, or a
distant fax machine. If your all-in-one device also includes a network interface,
you can use it to accept print jobs or outgoing faxes through an Ethernet
network, and you can send scanned images and incoming faxes to any of the
computers connected to the same network. Some all-in-ones can also send
images through the Internet as email attachments.
Computer
file
Scanned
image
Fax via
telephone line
Computer
file
All-in-one
device
Printed
page
Fax via
telephone line
Figure 14-7: An all-in-one device can obtain images from different sources and send them
to any of several destinations.
Each of the all-in-one’s activities is a specific combination of input and
output:
Scanning
Copying
Printing
Incoming fax
Outgoing fax
200
C h ap te r 1 4
Goes from a scanned image to a computer file
Goes from a scanned image to a printed page
Goes from a computer file to a printed page
Goes from a telephone line to a printed page or
computer file
Goes from a scanned image or a computer file to a
telephone line
Computers connected to the network treat an all-in-one device like each
of the separate devices. The printer shows up in the menu that Windows,
Mac OS, or Linux/Unix displays when you want to print a document; like
any other printer, you must add it to each computer’s printer list and load a
printer driver on that computer. The scanner uses either a TWAIN or WIA
interface to import images directly into application programs, and fax programs detect the all-in-one as a fax machine. The copier function sends the
scanned image directly to the printer, so it doesn’t show up on the network.
An all-in-one that is not intended for full network operation can still
operate as a networked printer. However, it’s possible that the scanner and
fax functions will only work from the computer connected directly to the
all-in-one unit. As a rule of thumb, you can assume that an all-in-one that
connects directly to the network through an Ethernet port will support all
of its functions from any computer on the network. But if the unit connects
to a printer through a USB port, it might not accept commands from remote
computers.
Installing an all-in-one is like installing a printer: Connect the USB
connector to the computer you want to use as a printer server, or connect
the Ethernet port directly to the network hub or router. If the server doesn’t
automatically detect the all-in-one device, load the software supplied with the
device. If all else fails, follow the installation instructions supplied with the
all-in-one device.
P rin t er s an d Ot h er D evic es on Y our N etw ork
201
15
OTHER THINGS YOU CAN
CONNECT TO YOUR NETWORK
AUDIO, VIDEO, HOME ENTERTAINMENT, AND BEYOND
If you can convert information to digital
data, you can transmit that data through
a network and either convert it back to its
original form or use it as input data for a computer. With the right kind of input and output devices,
you can use the same network that shares computer
resources to monitor and control industrial processes, listen to sound from
a microphone or watch images from a camera, distribute audio and video
through your home or business, and operate equipment by remote control.
And if the network is connected to the Internet, you can do all those things
to or from anywhere with an Internet connection.
Many of these network applications are extremely specialized (such as
monitoring the temperature of the water in a stream), but others are often
practical for a home or small business network. For example, you can use
your network to watch or listen to activity in another room or to distribute
audio and video files from an entertainment server to speakers and video
displays in several locations around your home. This chapter explains how to
connect and use additional devices with your network.
Using a Microphone and Camera with Your Network
A microphone connected to a computer or audio server can capture sounds
and convert them into digital audio files. A camera (known as a webcam) can
capture images that a computer or server can convert to still or moving image
files. An audio or video server can be either a computer with an internal or
external microphone or a camera (or both) or a stand-alone device that
connects directly to the network. When another computer receives the same
audio and/or video files through a network, it can display the images on a
display monitor and play the sounds through one or more speakers or through
a pair of headphones.
One widely used remote webcam service is the familiar online traffic
monitor, like the one shown in Figure 15-1.
Figure 15-1: A traffic webcam uses a networked
camera. This one shows cars and pedestrians on
the Brooklyn Bridge.
Internal and External Controllers
A video camera can connect to a network through a controller mounted
inside a computer on a plug-in PCI expansion card or as an external USB
device. The controller scans the light-sensitive portion of the camera from
side to side and from top to bottom at a constant rate; when it reaches the
end of one row, the controller automatically moves on to the next row; when
it reaches the end of the bottom row, the controller returns to the top.
At some point in the signal chain, the analog image from the camera’s
lens converts to a continuous digital data stream; in most cases, this occurs
inside the camera itself, but some equipment might perform the analog-todigital conversion in the controller card. As an alternative, a camera captures
still images one at a time and stores them or transmits them through the
network as a series of image files.
NOTE
204
C h ap te r 1 5
Many camera controller cards include two or more camera inputs. In general, a
multiple-input card costs more than a single-input card with similar image quality
and performance.
The computer can use a sound card or a USB or FireWire port to handle
audio in a similar manner. The sound card accepts analog audio directly
from a microphone or through an external amplifier, mixing desk, or other
source; the USB port receives digital audio from an external analog-to-digital
converter.
After the computer receives one or more video streams, audio streams,
or still pictures, it can do the following:
Store them on a hard drive or other mass storage device
Display the pictures on the computer’s video monitor as “live” images
Play the sound stream through the computer’s speakers or through
headphones plugged into the computer
Incorporate them into another program or document, such as a web
page or a word-processing document
Transmit them through the computer’s network connection
The alternative to a camera connected to a networked computer is a
network webcam—a camera and control unit that connects directly to the network as a separate node. A typical network webcam includes a remote control
program on a web page that a user can operate through the network, or,
with the correct set of passwords and authorization, through the Internet.
Depending on each camera unit’s specific features, the remote control might
allow an operator to zoom the image in and out, rotate or tilt the camera,
or choose a different image through the same control unit. Some network
webcams also include a wireless network interface that can connect to the
network through a Wi-Fi base station.
Networked Cameras and Microphones
Attaching a camera to your network—with or without a microphone at the
same location—can add many useful features and functions. Anyplace where
you want or need a distant set of eyes and ears, you can install a camera, a
microphone, or both. Here are some examples:
Surveillance monitors One or more cameras aimed at unattended
entryways, corridors, and other locations can transmit pictures to a distant computer’s video display monitor.
Baby monitors A networked computer with a camera and microphone
in a nursery or child’s room can replace a conventional baby monitor
transmitter unit. You can keep an eye on the baby while you work—
through a small window on your desktop that contains the image from
the camera in the other room.
Live conversations When both parties have a webcam and microphone
connected to their computer, it’s easy to conduct a “face to face” conversation through the network.
Remote conferencing One or more participants in a meeting or conference can participate from a remote location.
O th er T h in gs Y ou C an C on n ect t o Y our N etw ork
205
Home Entertainment Networks
A home entertainment system can distribute music, TV, movies, and other
audio and video through the same network that connects your household
computers to one another and to the Internet. Over-the-air, cable, or satellite
TV and radio, music from a CD player or stored on a hard drive, and videos
from DVDs can all provide source material for a system that can play music
or display video in any room with a network connection.
There’s a whole industry out there that supports very expensive home
entertainment systems, complete with video-screening rooms (the high-tech
popcorn maker is optional at extra cost), TV screens built into walls or rising
out of hidden cabinets in the kitchen or bedroom, multiple speakers in every
room, and preprogrammed mood lighting. But unless you have a spare
$10,000 or $20,000 (or more—a lot more) to spend on fancy equipment and
custom installation, those systems are not particularly practical. Most of us
will have to settle (!) for something considerably less extravagant. If you’ve
already wired your house or apartment for a data network, you can add an
entertainment server and connect stereos or TVs in several rooms without
spending a small fortune. You can also connect entertainment devices to
your network in stages, rather than spend a lot of money at one time.
A tremendous variety of equipment and services is available that can fit
within the home entertainment systems category, but for this book’s purposes,
I’ll consider the processes of distributing music, video, and games through a
home network and playing them on TVs, stereo systems, surround sound
systems, and table “radios.”
Music Through a Home Network
Any technology that reproduces sound has at least two elements: a source
and a destination. Often one or more additional intermediate elements are
between the source and destination, such as a preamplifier that boosts volume
level or an analog-to-digital or digital-to-analog converter, but you’ll always
have a program source and a destination device that converts the signal back
to sound.
For example, consider an antique gramophone like the one shown in
Figure 15-2. The source of the sound is a needle that follows the vibrations
in a grooved disk, and the destination is a membrane that reproduces those
vibrations through a horn.
In a modern music system, the program source can include the following:
Analog media such as vinyl disks or magnetic tape
Digital media such as compact discs
Broadcast radio stations
Cable and satellite radio stations or music services
The Internet
Digital music files stored on a computer’s hard drive or a portable device
such as an iPod
206
C h ap te r 1 5
Source
Destination
Figure 15-2: The source of the music played on this gramophone is the needle on a
grooved shellac disc; the destination is the horn.
The destination can be any of the following:
Speakers connected to a home stereo system, TV receiver, or surround
sound system
Speakers connected to a computer or built into a laptop
Headphones or a docking unit’s speakers connected to a portable device
such as an iPod
A storage device such as a hard drive or a flash drive
A tabletop or portable boom box or Internet radio
A home network can connect any of these sources to any destination.
It might be necessary to convert the source from analog to digital format
before it moves through the network, and you might have to convert the
digital data back to analog before you play the sound through a speaker or
headphones, but these are relatively minor technical details; the important
point is the same network that handles other data can also distribute digital
audio files. In networking terms, you can think of the devices that handle
program sources as servers and the destinations as clients.
Audio Servers
An audio server in a home network stores music, radio programs, and other
sound files that are accessible to other devices on the same network. The
server can be a computer that you also use as a workstation, a server for other
data files, a dedicated server for audio files, or a component in a stereo or
O th er T h in gs Y ou C an C on n ect t o Y our N etw ork
207
home theater system. Regardless of their physical form, most audio servers
perform these functions:
They convert (or rip) audio tracks from CDs and other sources to one or
more standard file formats.
They store sound files on a hard drive.
They distribute sound files on demand to one or more players.
They distribute audio to the network directly from a CD, DVD, the
Internet, or some other digital source.
Like any other server, a music server should have a relatively large hard
drive with enough space to hold all the individual music files you want to
store on it. General-purpose computers and stereo-component music servers
can both perform similar services; each type has a different combination of
cost, ease of use, and sound quality.
General-Purpose Computers
When you use a standard desktop or tower computer as your music server,
you can use the same computer to serve other types of data. You can use free
or inexpensive software such as Windows Media Player, RealPlayer, Sound
Forge Audio Studio, Exact Audio Copy, or Audacity to create or convert files
to your standard storage format, and you can increase the server’s storage
capacity by installing one or more additional hard drives.
The sound quality of the most common sound cards (and built-in sound
processing on many motherboards) is adequate for casual listening. However,
the quality is not as good as an “audiophile” or “studio quality” sound card or
external interface unit that adds less background noise and distortion to your
files. If you’re creating your own files from CDs or uncompressed digital
program sources, you will probably want to upgrade your sound card from
the “Sound Blaster” interface supplied with your computer. On the other
hand, if you get all your music by downloading MP3 files from iTunes or one
of the other online services, or if you convert your music from CDs, LPs, or
other sources to highly compressed MP3 files, you won’t notice the
difference.
The choice of operating system—Windows, Macintosh, or Linux—is a
matter of personal preference; all three can work as music servers. If you’re
already using Windows Home Server to control your home network and
share other files, the same server can stream audio (and video) to other
network computers.
Microsoft’s Windows Media Center, included in some versions of Windows
Vista and available as a separate add-in product, is primarily a media player,
but when you connect it to a device that has the Media Center Extender
technology in place, you can use the Media Center computer to serve audio
and video files to other computers, game consoles, and televisions.
For mixed networks, XMBC Media Center (http://xmbc.org/) is an
excellent choice for managing and sharing media files.
208
C h ap te r 1 5
Remember to configure the folder or drive that contains the server’s
music files as a shared resource that is accessible to other computers and
devices on the same network.
Special-Purpose Music Servers
Audiophile music servers store music and other audio files on a hard drive,
and they generally perform two kinds of playback: They connect directly to a
stereo or home theater system as a local program source, and they also connect
to an Ethernet or Wi-Fi network to serve music files to computers and audio
devices in other rooms.
Music servers sold as audiophile equipment generally contain high-quality
internal parts and, often, front panel text displays that provide information
about the music track currently playing. Many of them, such as the McIntosh
MS750, are also very expensive. Most include their own CD drives for ripping
copies to the internal hard drive and analog inputs with excellent analog-todigital converters for making digital copies of LPs and other analog source
material.
A music server is an expensive alternative to a computer with a very good
internal or external audio interface card or adapter, but in a serious audiophile sound system, such a server has its place; a $3,500 music server might
make sense as part of a system that includes a $3,000 amplifier and a pair
of $7,500 speakers. But the rest of us can accomplish the same thing for
considerably less money if we’re willing to use a computer instead.
Audio File Formats
Digital music players convert sound and music files in common formats to
analog sounds that you can play through headphones or speakers. Some of
these formats use compressed audio that squeezes the data into smaller files.
Others use larger uncompressed files that maintain all the original details. The
most common format for compressed audio files is MP3. The most widely
used formats for uncompressed files include WAV and AIFF. Table 15-1 lists
the formats that you’re most likely to see.
The choice of format is a trade-off between the size of the file and the
quality of the sound. As a rule of thumb, sound quality increases with file size,
as measured in bits per second. A WAV file of a music track might require
eight to ten times as much storage space as an MP3 file of the same recording,
but the WAV file is almost always a more accurate copy of the original. The
compressed MP3 file occupies less space on a hard drive and can travel across
the network more quickly, but the added bits in the WAV file will mean
that the music has less distortion and better frequency response (the range
between the lowest bass notes and the highest treble tones). In other words,
an MP3 file might sound like the recording played through an AM radio,
whereas the same music played from a WAV file could sound at least as good
as a very good CD player.
O th er T h in gs Y ou C an C on n ect t o Y our N etw ork
209
Table 15-1: Common Audio File Formats
File Extension
Format Name
Description
.wav
WAV or Wave
(Waveform Audio)
This is Microsoft’s format for uncompressed audio,
which has since been adopted by others. It is widely
used in audio archives.
.mp3
MP3 or MPEG
Layer-3
This is a compressed format for consumer audio. It’s not
a high-fidelity format, but it is good enough for casual
listening.
.ogg
Ogg Vorbis
This is an open source compressed format. It is widely
used for free content.
.flac
Free Lossless Audio
Codec (FLAC)
This is a compressed format that does not remove
content from the compressed file, unlike MP3 or Ogg
Vorbis. Because this format is lossless, a FLAC file is a
more accurate copy of the original than other
compressed file formats.
.aiff
Audio Interchange
File Format
This is an uncompressed format introduced and mainly
used on Apple computers.
.wma
Windows Media
Audio
This is a compressed format developed by Microsoft
and mainly used with Windows Media Player (but it’s
also supported by other players).
.ra or .ram
Real Audio
Th is is Real Audio’s family of formats for streaming
Internet audio. It is widely used by radio stations,
including the BBC.
.bwv
Broadcast Wave
This is an uncompressed format established by the
European Broadcasting Union for digital storage of
audio files. It is similar to WAV with additional space
for metadata (information about each file’s content).
MP3 files are entirely adequate for casual listening, especially for speech,
but uncompressed files can sound a lot better. The compromise between file
size and sound quality is particularly important when you are loading files on
an iPod or other portable device with a limited amount of storage space. For
a home system, where you have little or no practical limit to the amount of
storage space (you can almost always add another hard drive to the server),
storing your music files in an uncompressed format, especially if you plan to
listen through a good quality stereo or surround sound system, is best.
NOTE
It’s important to store archival copies of original recordings as uncompressed files, so
future users will have the best possible recordings to work with. Many libraries and
archives keep a high-quality WAV file as a master copy and a separate MP3 listening
copy for distribution. Archiving uncompressed files is less important when you’re dealing with commercially available CDs because hundreds or thousands (if not millions)
of other copies are probably in circulation, but when you have the only copy, archiving
an uncompressed version can make a difference.
Many audio player programs can automatically recognize and load most
common file formats. However, you might want to install more than one
program, just in case your default player can’t handle a file. For example,
210
C h ap te r 1 5
Windows Media Player won’t accept very high bit rate (24-bit/96 kHz per
second) WAV files, so you’ll have to play them in another program, such as
Audacity or Sound Forge.
Converting from Analog Sources
If you want to distribute music and other recordings from LPs and other
analog media (such as cassettes, old 78 rpm discs, and reel-to-reel tape)
through your network, you must convert them to digital audio files first. This
conversion is more time-consuming than ripping CDs, but it can be rewarding
if you have some great old records that are not available in any other format.
If you plan to transfer a lot of analog media to digital files, it’s worth the
extra cost to use a better analog-to-digital converter than the one built into
your computer. Professional studio-quality converters can cost hundreds or
thousands of dollars, but less expensive devices such as the ones made by
E-Mu, M-Audio, and Edirol, among others, will give you considerably better
performance than consumer-grade sound interfaces.
Remember that the sound of your digital copy won’t be any better than
the sound coming from the analog original. Before you make a copy, be sure
to clean the dust and grit from your LP, and make sure the needle on your
record player is in good condition. Use alcohol or some other head cleaner
to remove the gunk from the face of the heads before you try to play cassettes
or reel-to-reel tapes.
Audio Clients
In a home network, the other half of a music distribution system is a music
client or audio client. The client can be a program running on one or more
of the household computers, a stereo component, a surround sound or home
theater system, or a tabletop “boom box” or Internet radio. The client receives
music files from a server or streaming audio program through the Internet
and plays them through a set of headphones or speakers.
The quality of sound played through a network depends on several
factors: the quality of the original recording, the amount of network traffic,
and the quality of the client’s digital-to-analog converter and speakers. For
example, if you’re playing a music track that originated on a noisy cassette
tape through the tiny and tinny speakers in your laptop computer, the music
will sound much worse than a track ripped from a CD and played through a
good stereo amplifier and high-fidelity speakers. And if the network that
connects the server to the client is already running close to its capacity, or if
it’s using a noisy Wi-Fi link, you might hear repeated drop-outs in the music
when the client can’t convert data packets to a continuous audio stream.
Playing Music Through a Computer
A computer used as a music client must have an internal or external audio
interface, such as a sound card, an interface on the computer’s motherboard,
or an interface connected to the computer through a USB or FireWire port.
To play a music file, open the file in an audio player program that supports
the file’s format, just as you would open any other kind of file. The audio
O th er T h in gs Y ou C an C on n ect t o Y our N etw ork
211
output for the computer’s audio interface should connect through an audio
cable to a set of powered computer speakers or a full-scale stereo or home
theater system.
If you’re using the computer exclusively as a music client, you don’t need
the latest and most powerful processor or a large-screen monitor. Anything
that can connect to the network and support a decent audio interface unit
should be entirely adequate. If you have an older laptop that you’re no
longer using for other purposes, try using it as a music client; the laptop is
probably more compact than a desktop unit and it might work just as well if
you plug a decent audio interface into the USB port.
Most computers look like, well . . . like computers. If your stereo system is
located on a bookshelf or behind glass cabinet doors in your living room, you
might prefer to use a music server that matches your other stereo components.
If you don’t mind assembling a computer out of parts, look for computer cases
(such as the Antec case shown in Figure 15-3) that look like stereo equipment.
But remember that you’ll still need some kind of keyboard, mouse, and
monitor. On the other hand, it’s often easy enough to place the computer
case out of sight on the floor or in some other out-of-the-way location or to
run the server through the network from another room.
Photo courtesy of Antec
Figure 15-3: Some computer cases are
designed to look like stereo components.
Connecting Your Network to Your Stereo
If you don’t have a spare computer, you can also run audio cables between
your stereo and a nearby computer that you’re using for other purposes. For
example, if you have both a desktop computer and a stereo system in your
home office or study, you can use that computer to feed the existing speakers
through the stereo’s amplifier. Even if the stereo is in another room, running
audio cables through the wall or under the floor might be more practical.
Figure 15-4 shows a typical system connection.
To play music from your music server, set the input selector on the
stereo to the Auxiliary input (or whichever input you have connected to the
computer), and use the computer’s mouse and monitor to select the song or
other music file you want to hear. If your computer or sound card has digital
outputs (either optical or copper) and the stereo has digital inputs, use a
digital cable to transfer the audio. The computer should automatically open
the music file in a compatible player and feed it to the stereo.
212
C h ap te r 1 5
Ethernet
Music
server
Wi-Fi
router
Speaker
Digital or analog audio
Music
client
Amplifier
Speaker
Speaker
Ethernet
Music
server
Digital or analog audio
Music
client
Amplifier
Speaker
Figure 15-4: A music server can connect to a client through either a Wi-Fi link or an Ethernet cable. The client sends audio to an amplifier’s analog or digital auxiliary input.
Dedicated Music Client Devices
As an alternative to using a computer, consider using a separate device specifically designed as a music client or network music player. The client device
sends an instruction to find and play a specific music file (or other audio track)
to the music server, which streams the requested file back to the player. The
player can either send the digital stream to a converter in the audio system or
convert the file to an analog signal and send the music signal to the audio
system.
For example, Slim Devices makes a family of Squeezebox music clients,
including the Squeezebox Classic, Squeezebox Receiver, and Squeezebox
Transporter. Figure 15-5 shows the connections on a Squeezebox for a network and a stereo system. Similar products are available from Roku, Netgear,
Philips, and other companies. Most of these devices are marketed as audio
components, so the best place to look for a demonstration is probably a
home audio retailer rather than a computer store.
Each music client manufacturer supports a different set of audio file
formats; they all work with the most widely used formats, but if your library
includes more obscure formats, you should confirm that a client can recognize them.
Network music players offer several benefits: They occupy less space than
a computer; they’re often easier to use; and they can provide sound quality
as good as or better than a computer for less money. If you’re buying new
equipment to play music through your network, a dedicated music player can
O th er T h in gs Y ou C an C on n ect t o Y our N etw ork
213
be an excellent choice; but if you already have a spare computer, you can
probably accomplish the same thing without buying any new equipment
(although replacing the computer’s audio interface might improve the
system’s performance).
Headphone
mini jack
Analog
audio
(RCA)
Digital Digital Ethernet
optical coax
output output
Power
Photo courtesy of Slim Devices
Figure 15-5: Slim Devices’ Squeezebox connects a music server
to a home audio system through an Ethernet or Wi-Fi network.
Networked Receivers and Internet Radios
It’s not necessary to use a computer or a full-scale stereo or surround sound
system just to listen to music from a music server or streaming radio stations
and music channels through the Internet. You can find a whole category of
tabletop “Internet radios” that combine the music client and speaker in a
single box (sometimes with satellite speakers for stereo). In spite of the name,
most Internet radios can also play music files stored on your own music server.
Some also include AM and FM radios, so you can use the same device to
listen to local broadcast stations.
An Internet radio works like any other network music client: It connects
to your home network through an Internet port or a built-in Wi-Fi port and
allows you to select files from your own server or streaming programs through
the Internet. Ultimately, these devices will be as easy to use as the tabletop
radio in your bedroom or kitchen; simply turn the device on, select the
station, and listen. The important difference is that you’re not limited to
the programs on local radio stations; you can choose from thousands of
radio stations and streaming music services that offer a huge variety of music,
news, and other programming—many of them without commercials.
Today, Internet radios are still expensive novelties—most cost $200 or
more—but if and when the price comes down, they will probably become a
hugely popular alternative to radios that only receive local stations.
214
C h ap te r 1 5
Video Through a Home Network
Video—in the form of movies, television shows, home videos, or files downloaded through the Internet—is yet another type of program material that
you can distribute through your network. You can view videos on your
computer’s monitor or through an adapter on a television screen.
Video distribution through a network follows a similar structure to audio:
Video files are stored on a server and transmitted to a client on demand.
However, video files contain many more bits per minute of content than
audio files, so the network must have a high enough capacity to handle that
additional demand. In practice, this means that many Wi-Fi links (except the
newest 802.11n equipment) may not be able to keep up with a video stream,
and even a wired 100-BaseT network might overload if you try to push through
more than one video stream at the same time.
When you want to download a movie or some other large video file
through the Internet, it’s often better to save the file to your computer’s hard
drive, rather than trying to view it as the computer receives it because the
download speed is often too slow for the video player program to assemble
the digital packets and display them as a continuous stream. On the other
hand, when all the bits are already on a DVD or hard drive, the video player
can play the stream without the need to wait for more bits to arrive.
You can think of the stream of incoming bits as a garden hose that fills a
watering pail with a slow trickle of water; if you pour out water more quickly
than the hose fills the pail, you must refill the pail before you can pour more
water. The same thing applies to video files through a network: If the data
packets that contain the video stream enter your network more slowly than
the video player assembles and displays them, the player’s buffer will run out
of bits and stop displaying anything until it receives more.
Video Servers
A video server is a network server that stores movies and other video files and
sends them through the network to video player programs on client computers
or video players. Most video servers can also store and distribute music files.
Some computer operating systems, such as Windows Home Server and its
associated client programs, include software that has been optimized for
video distribution, but you can also use a general-purpose Linux, Unix,
Macintosh, or Windows server, as long as the server computer contains one
or more relatively large hard drives with enough available space to hold very
large video files.
Other media servers combine the function of a network server and a
local media player into a single package. You can play music and videos
through a screen and speakers connected directly to the media server or
send requests to the server from other players through your network.
O th er T h in gs Y ou C an C on n ect t o Y our N etw ork
215
TiVo and Other Digital Video Recorders
The primary function of a digital video recorder (DVR) is to record incoming
broadcast or cable television programs for delayed viewing. However, some
DVRs, including TiVo, the most popular DVR in North America and Australia,
can also distribute programs to another DVR through a network. By connecting a TiVo to a network, you can also download program schedules through
the Internet rather than a slower dial-up telephone connection.
Most recent TiVo models, including the Series2 Dual Tuner and Series3
HD DVRs, have an Ethernet port as standard equipment. The older Series2
Single Tuner DVR requires an optional Ethernet network adapter that
connects to the DVR’s USB port. For a wireless connection, you must use a
TiVo Wireless adapter, which is an optional accessory that connects to the
DVR’s USB port, or a compatible adapter made by Belkin, D-Link, Linksys,
or Netgear.
Connecting to a Wired Network
To connect a TiVo to your existing wired network, follow these steps:
1.
Run an Ethernet cable from the DVR to a network hub or router.
2.
Press the TiVo button on the DVR and select Messages and Settings
Settings Phone & Network.
3.
From the Network Connection screen shown in Figure 15-6, select the
Change network settings option.
Figure 15-6: Use TiVo’s Network Connection screen to
configure a wired connection to your home network.
4.
216
C h ap te r 1 5
Follow the instructions that appear on your screen. If your network has
an active DHCP server, the TiVo client will detect it automatically and
display a Network Setup Complete screen. If your network doesn’t have a
DHCP server, select No, let me specify a static IP address, and type an IP
address for this network node, the subnet mask, and numeric addresses
for the node’s gateway router and DNS server.
5.
The DVR will test the connection. If the settings are correct, it will display a Network Setup Complete screen.
Connecting to a Wireless Network
To connect a TiVo DVR to your network through a Wi-Fi link, follow these
steps:
1.
Press the TiVo button on your DVR. The TiVo Central screen will
appear.
2.
Select Messages and Settings
3.
If your TiVo is already connected to a telephone line, select Use network
instead. If it’s connected to a wired network, select Change network settings. Press Select.
4.
If the wireless adapter is not already connected, connect it now. When
the TiVo identifies the wireless adapter, it will display the Network
Adapter Detected screen.
5.
Press Select. The Wireless Network Name screen will appear.
6.
Either select the name of your Wi-Fi network and press Select or, if the
network does not broadcast the network’s name, select Enter network
name and follow the instructions on your screen.
7.
TiVo will ask for your network password. Use the keypad on your screen
to type your WEP or WPA password and then click Done Entering Network Password.
8.
If the password is correct and your network uses a DHCP server, the
Network Setup Complete screen will appear. If the network doesn’t use
DHCP, you will see a series of configuration screens. Type the IP address,
subnet mask, and the addresses for your network’s gateway router and
DNS server.
Settings
Phone & Network.
Importing Programs
To watch a program that has been stored on a TiVo from a second DVR in
another room, follow these steps:
1.
Turn on both TVs and go to the destination player’s Now Playing List.
The other DVR will appear at the bottom of the list of available
programs.
2.
Highlight the name of the distant DVR and press Select. That DVR’s
Now Playing List will appear.
3.
Choose the name of the show you want to transfer to this DVR and press
Select. The Getting Program screen will appear.
4.
To watch the show while you’re transferring it, select Start playing on the
Getting Program screen. When the transfer is complete, the name of the
show will appear in this DVR’s Now Playing List.
O th er T h in gs Y ou C an C on n ect t o Y our N etw ork
217
Playing Video on a Computer
Several of the same programs that play music on a computer can also handle
video files. Windows Media Player, RealPlayer, and QuickTime include both
audio and video decoders. Others such as VideoLAN (http://www.videolan.org/)
and MPlayer are optimized for video. Like other networked files, you can use
a player program on a client computer to view a video file from a server. In
most cases, one or more video player programs automatically take control of
specific file types, so almost all video files will automatically load into an
appropriate player when you select a file from an onscreen directory or file
folder.
Connecting a TV to Your Network
In rooms where you have a television set but no computer, it’s often possible
to use a game console or other adapter to view movies and other digital video
files on the TV screen. In rooms with both a computer and a large-screen TV,
it’s often worth the trouble to connect the TV directly to the computer as a
complement to the smaller computer monitor. The quality of pictures and
text on a TV screen is not always as sharp as the same images on a computer
monitor, an image from a broadcast or cable TV signal, or a DVD player, but
with a bit of tweaking, it can be good enough to watch.
Connecting Directly to a Computer
To connect a TV directly to a computer, you need two things:
An output signal from the computer that’s compatible with an input to
the television
Driver software for the computer’s video controller
Your television has one or more of these input types:
Two or more screw terminals that connect to a flat antenna cable
A threaded socket that mates with a coaxial cable from an antenna, cable
TV service, or other program source—the socket and mating plug at the
end of the cable are called F connectors
A circular connector with either four or seven sockets that mates with a
matching multipin plug called an S Video (for Super Video or Separated
Video) plug
Three color-coded sockets (yellow for video, white for stereo audio left
or mono, and red for stereo audio right) for analog audio-video cables—
these are similar to the RCA phono plugs and sockets used in most home
stereo systems
A 15-pin analog VGA connector like the one used by older computer
display monitors
A rectangular multipin digital input known as a digital visual interface (DVI)
connector
218
C h ap te r 1 5
A 19-pin or 29-pin digital socket known as a High Definition Multimedia
Interface (HDMI) connector
The easiest way to feed a signal to your TV from the computer is to find
a video controller for your computer that has outputs that match your TV’s
inputs, but that’s not always possible. For example, you won’t find a video
controller that can directly feed an old analog TV with nothing but an F
connector as signal input (or an even older set with screw terminals). The
alternative is to use some kind of adapter—a special cable with different
cables on each end—or a converter that changes the output signal from the
computer to a signal compatible with the TV’s input. For best quality with
an HDTV screen, use either a DVI-to-DVI cable or a DVI-to-HDMI cable or
adapter, depending on the TV’s inputs. Look for an adapter or converter at
an electronics retailer.
Video Output Drivers
Driver software for video controllers can come from several possible sources:
bundled with your computer’s operating system or supplied by the maker of
the video controller or the controller’s chipset or with a video converter. The
control program for each driver package is different, so you’ll have to follow
the printed or onscreen instructions when you install the software.
Video Scaling
Putting aside the issues related to converting between analog and digital
video, it would seem that there isn’t a lot of difference between a TV screen
and a computer monitor. But they use different methods to accomplish the
same objective, and these methods create problems when you try to move
from one to the other. The difficulty arises because of the way computer
monitors and TV screens break an image into scan lines and pixels. For the
purpose of this explanation, we can think about a still picture, but the same
problems can also occur in a moving image.
In North America, an analog TV shows images as a sequence of 535 scan
lines from left to right across the face of the screen; when the TV reaches the
end of one scan line, it moves down to the next one. In digital TV, the screen
is divided into a large number of dots called picture elements, or pixels. The
method used by the TV to light up segments of scan lines or pixels is different
on picture tubes and flat panels, but the number of scan lines or pixels is
specified by industry standards. The size of the screen doesn’t matter; the
number of scan lines or pixels on a screen is always the same (there are
several different standards for flat panels, depending on size and cost, but
the number of pixels is constant for each standard).
Computer monitors also use pixels, but the number of pixels in an image
is different, depending on screen resolution. When you change your monitor’s
resolution from, say, 800 × 600 pixels to 1280 × 1024 pixels, the computer
adjusts the number of pixels within a 1-inch (2.5 cm) square space on the
screen or any other image area.
O th er T h in gs Y ou C an C on n ect t o Y our N etw ork
219
To show a computer image on a TV screen, the controller must adjust
the number of scan lines or pixels to fit the area available on the monitor.
If the TV screen expects more scan lines or pixels than the incoming signal,
the controller will duplicate occasional lines or pixels or it will create a new
line that is a blend of the one above and the one below. If the computer
sends too many scan lines or pixels, the screen will skip some of them. This
process is called video scaling.
Video scaling has two effects: It forces the video controller to work hard
to change the size (and sometimes the shape) of the image, which can slow
down performance, and it sends an image to the TV screen that can suffer
from smeared colors, looser focus, jagged edges, and distorted pictures. A
good controller can make adjustments that minimize these problems, but
don’t be surprised if the image your computer displays on a TV screen (even
a very good high-definition TV screen) is not as sharp as the same image on a
computer monitor; a good DVI-to-HDMI image on an HDTV can be sharper
than a VGA display when everything works together correctly, but a mismatched system can be considerably less impressive.
Game Consoles
The most widely used game consoles—Sony PlayStation2 or PlayStation3,
Nintendo Wii, and Xbox 360—can all connect to your home network through
either a wired Ethernet port or a wireless link to support multiplayer games
with one or more additional consoles on the same LAN or through the
Internet (they could also connect to a business network, but your employer
probably would not approve).
Connecting a PlayStation
To connect through a wireless link, use the PlayStation’s built-in Wi-Fi interface. To connect a Sony PlayStation to your network through an Ethernet
cable, run an Ethernet cable from the game console either directly to an
Ethernet hub or to a router.
To configure the network connection, follow these steps:
220
C h ap te r 1 5
1.
Turn off or disconnect power from your network hub, modem, Wi-Fi
base station, and other network equipment, wait two minutes, and then
turn everything back on again.
2.
If the PlayStation console and attached display are not already turned
on, turn them on now.
3.
Confirm the PlayStation’s connection to the Internet is active: From
the XMB home menu, select Settings Network Settings Internet
Connection Enabled.
4.
Select Internet Connection Settings and press the ⊗ button. The
PlayStation will ask “Do you want to continue?”
5.
Select Yes. The PlayStation will ask you to select a connection method.
6.
Select Wired Connection and press the ⊗ button. The Internet Connection Settings screen will appear.
7.
Select Easy and press the ⊗ button. The PlayStation will scan your connection and display the current settings.
8.
Press the ⊗ button again to save the configuration values. The Test Connection screen will appear.
9.
Press the ⊗ button to test the connection. After approximately a minute
or less, the PlayStation will display either a “Succeeded” or “Failed”
message.
10. If the test was successful, the PlayStation is ready to run multiplayer
games; if it fails, the PlayStation will provide instructions for fixing the
problem.
Connecting a Wii
Nintendo’s Wii console requires an optional Wii LAN Adapter (Model
number RVL 015) to connect to a network. Follow these steps to connect
a Nintendo Wii to your LAN:
1.
Turn off the Wii console and plug the LAN Adapter into the console’s
USB port.
2.
Run an Ethernet cable from the LAN Adapter to your network router
or hub.
3.
Turn on the Wii console.
4.
From the main menu, click the Wii button at the bottom left. A screen
showing a Data Management box and a Wii Settings box will appear.
5.
Click the Wii Settings box. The System Settings screen will appear.
6.
Click the blue arrow at the right side of the list of options to move to the
second of three System Settings menus.
7.
Click the Internet button. The Internet screen will appear.
8.
Click Connection Settings. A list of Connection Settings options will
appear.
9.
Select an “empty” connection slot, with None shown as the connection
type.
10. Select either Wireless or Wired Connection, as appropriate for your system. The console will tell you that it’s initiating a test.
11. Click OK. The Wii console will test your connection. If it’s successful,
you’re ready to use your game console on the network. If it fails, try one
of these fixes:
Check your firewall settings.
If the console displays an error code, go to http://www.nintendo.com/
consumer/systems/wii/en/en_na/errors/iindex.jsp to find an explanation
for the code.
O th er T h in gs Y ou C an C on n ect t o Y our N etw ork
221
Connecting an Xbox 360
If you use your Microsoft Xbox 360 game console and a computer in the
same room, but you have only one network jack or outlet in that room, you
can run the network connection to the computer through the game console.
Follow these steps to connect a Microsoft Xbox 360 console to your network:
1.
Turn off or disconnect power to your computer, your network’s router,
hub, modem, and the Xbox 360 console.
2.
If you don’t have a second network outlet in the room, disconnect the
Ethernet cable from the computer and plug it into the Xbox 360 console. The cable should now run from the game console to the network
hub or router.
3.
If you have access to a spare outlet, you don’t have to disconnect the
computer. Just run a new cable from the game console to the free network outlet or directly to an open port on the hub or router.
4.
If necessary, plug one end of a second Ethernet cable into the Xbox 360
console and the other end into your computer.
5.
Turn on your equipment in this order: modem first, router next, and
then the computer. Leave the game console turned off for the moment.
6.
Confirm that the computer can detect the LAN and the Internet, just as
it did before you added the game console.
7.
Turn on the Xbox 360 console and make sure there is not a disc in the
disc tray. The Xbox Dashboard will display the Xbox Live area.
8.
Assuming you have already configured things like time and language, the
Gamer Profile screen will appear. If you already have an Xbox Live
membership in another location, select Migrate your Xbox LIVE account.
If you’re setting up a new account, select Join Xbox LIVE.
9.
Follow the onscreen instructions to supply your contact information and
gamer profile and to create or transfer an account.
Connecting Home Appliances to Your Network
They’re not widely used today (nor in many people’s opinions, useful enough
to justify the added cost), but home appliances with Internet connections are
available, and more will probably come along in the next few years. Networked
connections can allow you to control your household TV, refrigerator, microwave oven, and other appliances through the Internet or from a mobile
telephone—even when you’re away from home. Combined with built-in
diagnostic modules, a network connection will also make it possible to
identify problems and notify a service bureau that can either send back a
software fix or dispatch a repair person before the problem turns into a
catastrophic failure.
Remember the classic science-fiction nightmare in which all your household appliances communicate with one another and conspire to take over
your life? When you connect everything to your home network, that fantasy is
one step closer to reality.
222
C h ap te r 1 5
Several specifications for networked home appliances have been established in order to assure that appliances made by different manufacturers
will communicate with one another through a home network, including the
Living Network Control Protocol (LnCP), developed by LG Electronics and
adopted by several other (mostly Korean) manufacturers, and the Association
for Home Appliance Manufacturers’ (AHAM) standard for Connected
Home Appliances (CHA-1). It’s too early to know whether LnCP, CHA-1, or
some other specification will ultimately emerge as an industry-wide standard,
but it’s likely that some method for exchanging data among appliances and
other devices through a home network will become common within the next
few years.
If you buy a network-compatible “smart” home appliance today, it will
probably use an Ethernet port to connect to your home network. Depending
on the specific applications built into each appliance, it might use a control
panel or remote control unit, dedicated client software, or a web-based
interface to run the appliance’s communications functions.
Home Automation
Other home network applications can control your house’s heating and air
conditioning systems, open and close draperies, adjust the lighting, communicate with a burglar alarm or home security service, operate lawn sprinklers,
and control the filters and temperature of your swimming pool, among other
activities. The interface between the network and the control device can be
either a direct Ethernet link or a controller that follows the low-voltage X.10
standard.
Remote Sensors and Controls
When you connect a remote interface device to your LAN, you can monitor
environmental conditions or the performance of unattended equipment and
operate equipment by remote control through your network. Many possible
applications for this kind of networked remote activity are available, including
the following:
Monitoring the temperature in an equipment room, a freezer, or
“cold box”
Measuring and monitoring air or water temperature, wind speed,
water flow in a stream or other body of water, and other environmental
conditions
Monitoring power levels
Monitoring and responding to alarms
Turning AC or DC power off and back on again in order to restart
“hung” equipment
Monitoring normally open or normally closed intrusion alarms (such as
open doors or windows)
O th er T h in gs Y ou C an C on n ect t o Y our N etw ork
223
Remotely controlling and adjusting isolated equipment
Tracking any other condition that can be measured or monitored with a
digital sensor or operated with a relay
Most of these applications are more practical for relatively large businesses
and government agencies that operate in several locations (such as a countyor statewide system of radio transmitters or a scientific study that allows
researchers in multiple locations to track environmental conditions through
the Web), but some can be adapted for a home or small business network.
For example, a water detector in the cellar might trigger an alarm or send an
email message, or an intrusion alarm, a fire alarm, and a remote temperature
sensor in a barn could all connect to a network on a farm through a Wi-Fi
link to a computer or other monitoring device in the house. Or with the
right kind of equipment connected to your home network, you could send
an instruction through the Internet from your workplace in case of a sudden
snowstorm that would turn on heating coils embedded in your driveway and
melt the ice before you arrive home. For that matter, you could even operate
a model railroad through your network, but you’ll need somebody near the
tracks to take care of derailments and other scale-model disasters!
Remote controls, thermostats, sensors, and monitors are specialized
devices, but they’re widely available through industrial sources and from
retailers and mail/web-order suppliers of home automation equipment.
WARNING
Every remote sensor and control that connects to your network through a wire or cable
increases the network’s sensitivity to lightning strikes. Remember to use appropriate
lightning suppression wherever practical.
Bar Code Readers and Remote Data Entry
One more possible use of a small business network could be remote entry of
information to a central computer. This might include a portable bar code
reader used for inventory control or property management, security devices
for controlled access, and networked cash registers and other point-of-sale
devices.
If You Can Convert It to Digits, You Can Put It on the Network
The most familiar uses of a data network are the ones that involve a computer
or a game console, but the same network can also handle other forms of
digital data. Today’s technology makes it possible to convert almost any kind
of information to digital form; if you can’t find off-the-shelf equipment and
software that can do the job you have in mind, you can probably assemble a
system from standard parts and software.
As you install your home network, think about it as a household utility—
just like electricity, telephone service, and water. Even if you only use your
network to connect computers to the Internet today, it’s entirely possible
that new and unexpected uses will appear in the future.
224
C h ap te r 1 5
16
OTHER NETWORK
APPLICATIONS
Most people use a network for a limited
number of purposes; they share files and
messages, connect to the Internet, and
maybe play multiplayer games or listen to music
and watch videos from a server. But once you have your
home or small business network up and running, you
can use the network to accomplish some things you
might not have expected.
This chapter describes a handful of other useful network applications.
None of these is reason enough to install a network, but if you have come this
far, you’re already using the network for other purposes. Consider the network
programs and services in this chapter as lagniappe, a little extra that might
enhance your networking experience.
Remote Desktop
Remote Desktop programs allow another user, with your permission, to take
control of your computer through a network. When a remote control program
is active, a network manager or service technician can distribute and install
new or updated software, provide help and remote assistance, and view
information on other computers. Remote Desktop programs are a standard
feature in Windows XP, Windows Vista, and Macintosh.
Several open source remote desktop programs for Linux and Unix are
also available, including Virtual Network Computing (VNC), FreeNX, 2X
Terminal Server, and X Display Manager Control Protocol. You can find links
to downloads for all of these programs at http://blog.lxpages.com/2007/03/13/
remote-desktop-for-linux/. For Mac-to-Windows remote access, try Microsoft’s
Remote Desktop Connection Client for Mac (http://www.microsoft.com/mac/
products/remote-desktop/). For Windows-to-Mac, use a Windows-based VNC
client such as RealVNC or TightVNC. You will find more information about
VNC later in this section.
Windows Remote Desktop
Windows Remote Desktop transfers control of a client computer to a host.
The host mirrors the screen display from the client, and the host’s mouse
and keyboard control the programs running on the client. When Remote
Desktop is active, the client computer displays a blank screen and doesn’t
respond to keyboard or mouse input until the host releases control.
Remote Desktop makes the person running the host computer a sort of
superuser who can take control of a client computer, so several controls are
built into the system that limit this kind of access: First, the user of the client
must set the computer to accept Remote Desktop access, and second, the
person running Remote Desktop on the host computer must have an account
(usually with a password) on the client computer. In other words, if you turn
off Remote Desktop on your computer, other people can’t use it without
your permission.
In Windows XP, the remote access tool is called Remote Access ; in Windows
Vista, it’s known as Remote Desktop. Computers running Windows Vista Starter,
Windows Vista Home Basic, Windows Vista Home Basic N, or Windows Vista
Home Premium won’t accept incoming access, but you can use Remote
Desktop to take control of another computer running some other version
of Vista. Windows XP Home Edition won’t accept access from any Windows
Vista machine.
Configuring Windows for Remote Desktop Access
To configure a Windows XP computer to accept Remote Desktop access,
follow these steps:
226
C h ap te r 1 6
1.
Right-click My Computer. A pop-up menu will appear.
2.
Select Properties from the menu. The System Properties window
will open.
3.
Click the Remote tab. The dialog shown in Figure 16-1 will appear.
Figure 16-1: The Remote tab in System Properties controls inbound
and outbound access to the Windows Remote Desktop utility.
4.
To use this computer to control other computers remotely on your network, check the Allow Remote Assistance invitations . . . option in the
Remote Assistance area.
5.
To permit another computer on your network to take control of this
computer, check the Allow users to connect remotely . . . option.
6.
When Allow users to connect remotely to this computer is turned on,
anybody who is logged on to another machine on the same network with
the same username as an Administrator account on this computer—and
who uses a password to log into this computer—can request remote access.
To allow a non-Administrator to use Remote Access, click the Select
Remote Users button, click the Add button in the Remote Desktop Users
window, and then type the account name for the person who you want to
allow to use Remote Access.
7.
Click the OK buttons in each of the open windows to save your data and
close the windows.
To configure Windows Vista for Remote Assistance, follow these steps:
1.
Right-click My Computer. The System window will appear.
2.
Click Remote settings in the Tasks list on the right side of the window.
The System Properties window will appear with the Remote tab visible,
as shown in Figure 16-2.
O t h er Net wo rk A pp li ca ti on s
227
Figure 16-2: Use the Remote tab in System Properties
to turn Remote Assistance on or off.
3.
Check the Allow Remote Assistance connections to this computer
option. Activating this option will allow both inbound and outbound
remote access.
4.
Click OK to save your settings and close the Properties window.
Using Remote Desktop
To take control of another computer using Remote Desktop in Windows XP
or Remote Assistance in Windows Vista, follow these steps:
1.
Select Start All Programs Accessories Remote Desktop Connection.
A dialog similar to the one shown in Figure 16-3 will appear.
Figure 16-3: Use the Remote Desktop Connection
dialog to specify the computer you want to control.
2.
228
C h ap te r 1 6
Type the name of the computer you want to control, and click Connect.
Your screen will go black, except for a control tab near the top of the
screen and a Log On box.
3.
Type a valid account name and password for the target computer in the
Log On box and click OK. The screen on the distant computer will go
dark, and you will see an image of the distant computer’s desktop on
your screen.
You can now control the distant system with your own computer’s
keyboard and mouse. You can open files, run tests, and load programs
though the network. However, a user looking at the distant computer’s
screen will see nothing but a dark screen.
When a new Remote Desktop connection opens, it fills the client
computer’s screen, but you can reduce the size of the Remote Desktop
window and see your own computer’s desktop and Start menu by clicking
the sizing icon on the Remote Desktop tab at the top of the screen. This will
allow you to copy text, data, or files between the two computers.
To return control to the local user, click the X on the control tab near
the top of the screen.
NOTE
If you try to use an account without a password to take over a Remote Desktop connection, you will get this error message: Unable to log you on because of an account
restriction. If you see this message, go to Control Panel User Accounts on the target
computer, select Change an account to assign a password to your account, and then try
connecting again.
Virtual Network Computing (VNC)
Virtual Network Computing (VNC) is a system that allows one computer (the
client ) to gain remote access to a second computer (the server) and to use
the first computer’s mouse and keyboard to control the second computer.
In general, VNC is not as fast as the Windows and Macintosh remote desktop
programs, but it’s more flexible. Unlike the Microsoft tools described in the
previous section, VNC is not limited to any operating system; you can use any
VNC client (or viewer) to control any VNC server—even if the two computers
use different operating systems.
Several VNC-based programs are available that offer clients and
servers for more than one operating system, including RealVNC (http://
www.realvnc.com/ ), UltraVNC (http://www.uvnc.com/), and TightVNC
(http://www.tightvnc.com/). Several others are limited to Linux and Unix
operating systems. For descriptions and links to additional versions, go to
http://www.linux.com/feature/43165.
MaxiVista: Adding a Screen
MaxiVista is a slick set of network tools for Windows that allows you to extend
your computer’s display to one or more additional computers connected to
the first computer through your network or to operate two or more computers
with the same mouse and keyboard. It can also allow you to use the Windows
clipboard across two or more computers through the network. These tools
O t h er Net wo rk A pp li ca ti on s
229
aren’t for everybody, but under certain conditions, an extended keyboard
or shared controls can be hugely convenient. MaxiVista is available in a free
demo version from http://www.maxivista.com/.
MaxiVista comes as two programs: a server program that runs on the
main computer and a client program that runs on each of the secondary
machines. Except for the network connections that are already in place,
MaxiVista doesn’t require any special hardware.
All of MaxiVista’s controls are on the server; the only setting on each
client turns the program on or off. The server automatically detects each
active client and includes controls that you can use to select either an
extended desktop or remote control of client computers.
Multiple Monitors
Extending the size of your screen display by adding an additional monitor
is one of those things that sounds extravagant, but just about everybody
who tries it is convinced that the second screen makes them much more
productive. Because you can keep two or more windows open at the same
time without the need to bring one of them to the top, you can work more
efficiently; just for starters, you can drag text, figures, or data from one
document or program to another, view large documents and graphics
without scrolling from one end of a document to the other, and keep a
web browser or video surveillance window open on one screen while you
work on the other. If you’re writing code or working on a web page, you
can save your work and immediately see what your latest changes look like in
an application window or a browser. And in many Windows programs, you
can drag one or more toolbars away from the main program window to the
second screen in order to make more of your work visible.
Two (or three or more) monitor screens on your desk will change the
way you work with your computer. Figure 16-4 shows a desktop extended
across two laptop computer screens.
Figure 16-4: Windows can show a single large window extended onto
two or more screens.
230
C h ap te r 1 6
If you have an old monitor in the back of a closet, try adding it to a
computer. Even if the monitor isn’t the same size as your main monitor, it
will still work and be an improvement over a single screen.
The easiest way to add another monitor to your system doesn’t require
MaxiVista or any other special software—simply plug the monitor into a
spare VGA or DVI connector on your computer. If your video controller
doesn’t have an extra video output, install another video controller card in
an empty expansion slot. Don’t worry about high performance and memory
unless you’re playing bleeding-edge games; you can use an old PCI video
card with as little as 8 or 16 MB of memory from your junk box or a secondhand computer store.
None of this requires MaxiVista. You can use the Display Properties
controls in Windows to extend your desktop to additional monitor screens.
But if you want to use a laptop computer as your second screen, or if you
already have two or more networked computers on the same table or
countertop, MaxiVista allows you to use the monitors on those additional
computers as extended screens and switch back to normal use when that’s
more convenient.
If you already have both a laptop and a desktop computer, MaxiVista
allows you to try an extended screen without the need to haul out any extra
hardware; just plug your laptop into the network, install the free trial version
of MaxiVista, and reconfigure your Display Properties settings (as shown in
Figure 16-5).
Figure 16-5: The Display Properties dialog includes an
option that can extend the Windows desktop to two or
more monitor screens.
O t h er Net wo rk A pp li ca ti on s
231
Remote Control
When you’re already using two or more computers in the same room, it’s
often a nuisance to move among the keyboards and mice that control them.
MaxiVista includes a Remote Control feature that allows a single keyboard
and mouse to transmit signals through a network to multiple computers.
To use MaxiVista’s Remote Control, turn on Remote Control mode in
the main computer and drag the mouse cursor to the desktop of the computer you want to use. When you select or open a program with the mouse
connected to the main computer, the main keyboard will work with that
program.
The shared clipboard is part of MaxiVista’s Remote Control function.
Simply use the mouse from the main computer to select and copy a file,
folder, block of text, or other object to the clipboard just as you normally
copy objects on a local computer. Then move the mouse cursor to the target
computer, open a program (or select an already open window), and paste
the contents of the clipboard.
Synchronizing Files
Any time you collaborate with somebody else on a project, you run the risk
that each copy of the document (or drawing or spreadsheet or any other
record of your work) will accumulate a different set of changes. It’s essential
to maintain some kind control that synchronizes everything.
File synchronization software compares computer files across a network
and incorporates all the additions, moves, changes, and deletions from each
copy into all the others. When the file synchronizer finds a conflict between
two versions, it can flag the differences and allow a human editor or project
manager to decide which version to accept. Most file synchronizers compare
and update the contents of folders or directories, but they don’t open and
change individual files—you must make an all-or-none decision about
each file.
Some synchronizers are limited to Windows or Macintosh computers, but
others can compare files stored on computers that use different operating
systems. Here are some programs that are either available at no cost or as
try-before-you-buy downloads:
Synchronize It! (http://www.grigsoft.com/winsin.htm)
GoodSync (http://www.goodsync.com/)
Microsoft SyncToy (http://www.microsoft.com/downloads/—search for
SyncToy)
DirSync Pro (http://directorysync.sourceforge.net/index.html )
FreeFileSync (http://sourceforge.net/projects/freefilesync/)
232
C h ap te r 1 6
Instant Messaging and Live Communication
As the name suggests, instant messaging (IM) is the process of sending text
or other data that arrives at its destination almost immediately. The most
common forms are text messaging, in which the participants use their keyboards to conduct a conversation on a display screen, and audio or video
messaging, where a microphone and/or a camera replace or supplement the
keyboard.
Live messaging is more immediate than email because it arrives on the
recipient’s screen as soon as the originator hits the Send button, rather than
waiting for a mail server to forward each message. Assuming the distant computer is turned on and the messaging program is running, the text appears
on the screen or the sender’s voice comes through the computer’s speakers
immediately. Live messaging makes it possible to conduct a text-based
conversation through the network, without the time delay that comes with
sending and receiving email.
The most common uses for instant messages involve brief questions and
answers such as requests for specific items of information (“Hey Sarah, I’m
on the telephone with a customer. How many Size 4 gizmo brackets do we
have in stock?”), invitations to face-to-face meetings (“Can you meet me in
ten minutes in my office?” or “Do you have plans for lunch?”), and purely
social exchanges among friends and family. IM has also become the medium
of choice for online gossip among teens and preteens.
IM has a specific place in the hierarchy of communication methods.
It’s less formal and more immediate than email or facsimile (fax), less
intrusive than telephone calls, and more civilized than shouting from one
room to another. In some businesses and families, IM is an essential part
of the culture; others hardly use it at all. For an extensive study of instant
messaging and the way people in business use it, take a look at “Interaction
and Outeraction: Instant Messaging in Action” (Proceedings of Conference
on Computer Supported Cooperative Work, 79-88 New York: ACM Press,
http://dis.shef.ac.uk/stevewhittaker/outeraction_cscw2000.pdf ). The authors of
this study offer some interesting insights, but they have buried them under
some seriously dense academic language, using highfalutin words like dyadic
and ethnomethodology.
Just about every messaging program has a similar structure: It displays a
list of other users, with an indicator that shows whether each user is currently
available to receive a message. Users might not be available because their
messaging program is not active or because they have set the program to
not accept incoming messages. To start a conversation, click the intended
recipient’s name. When a message arrives, it appears in a pop-up window on
the recipient’s screen (some programs also sound an audible signal when
they receive a new message).
O t h er Net wo rk A pp li ca ti on s
233
NOTE
Instant messaging is not the same as online chat, but the experience is similar. The
difference is that chat takes place among two or more participants who connect to a
common channel (a chatroom). When you join a chat, you instruct the program to
connect to a specific chatroom. Instant messaging appears to connect two participants’
computers directly to each other, so you specify the name of the other participant rather
then the channel. After you make the initial connection, there’s not much difference
between chat and IM.
Servers vs. Peer-to-Peer Messaging
Instant messaging services can use two different structures: through message
servers that receive all messages and forward them to their ultimate destinations and peer-to-peer systems that forward each message directly from its
source to its destination. Figure 16-6 shows both types. Just about every
Internet-based IM service uses a server; messaging services within a LAN
are usually peer-to-peer.
User 2
Ethernet
User 1
User 2
Internet
message
server
User 1
User 3
Internet IM Service
Peer-to-peer
Figure 16-6: Internet instant messaging servers and peer-to-peer chat
use different structures to accomplish similar objectives.
Internet-Based IM Services
Most IM uses one of the services that send and receive messages through the
Internet, such as AOL Instant Messaging (AIM), Windows Live Messenger,
Google Talk, or Yahoo! Messenger, or a service that exchanges messages with
a mobile telephone. Other messaging programs are available that operate
within a LAN.
Unfortunately, many IM services are self-contained networks; for
example, you can’t use Google Talk software to send a message to an AIM
account. However, several third-party programs—such as Pidgin (http://
www.pidgin.im/ ); Trillian (http://www.ceruleanstudios.com/); and meebo
(http://www.meebo.com/)—are available that can exchange messages with
people on different services from a single contact list and message window.
234
C h ap te r 1 6
To set up a new IM account with one or more of the major services, go to
their respective websites:
Google Talk (http://www.google.com/talk/)
Jabber (http://www.jabber.org/)
AIM or AOL Instant Messenger (http://www.aim.com/)
Yahoo! Messenger (http://messenger.yahoo.com)
Windows Live Messenger (http://get.live.com/messenger)
Gadu-Gadu, based in Poland, with Polish-language screens (http://
www.gadu-gadu.pl )
In-house LAN messaging offers several advantages over Internet messaging services for exchanging messages within a business or a household. It’s
more secure and more private because the messages never leave the LAN.
And they aren’t exposed to spam and other unwanted messages from strangers
through the Internet. In addition, they don’t use bandwidth between the
LAN and the Internet, so they don’t interfere with other activities, and they
don’t require a separate account for each user with an IM service (although
the major IM services all offer free accounts). More importantly, a local
messaging system controls all of your messages within the LAN, rather than
sending everything to an outside service.
Messaging Through a LAN
Many LAN messaging programs are available, all with similar feature
sets. Some are limited to a single operating system, whereas others offer
compatible versions for exchanging messages between different computer
types. In most cases, the same program must be running on each computer
connected to the LAN; you can’t assume that two different LAN messenger
programs will automatically recognize
each other.
SoftRos Lan Messenger (http://
messenger.softros.com/) is typical of this
category. As Figure 16-7 shows, the
program displays a list of people
who are currently logged into their
computers, with an icon that shows
each person’s status (Available, Busy,
or Away). To send a message to another
user, simply click that person’s name
and type your message in the pop-up
Figure 16-7: LAN messenger programs
Conversation window.
list the names of available users.
O t h er Net wo rk A pp li ca ti on s
235
When a message arrives, the recipient’s computer sounds a signal and
displays the message in a pop-up window like the one in Figure 16-8. The
same window appears on both the sender’s and the recipient’s computers.
To continue the conversation, type the text in the Message text box and click
Send.
Figure 16-8: Both sides of a message exchange appear in
the conversation window.
The same program also allows users to transfer files through the LAN.
If you don’t like the SoftRos package, there are plenty of others, each
with a slightly different screen layout and features. A web search for “LAN
messenger” will produce dozens of links to descriptions and download
sources.
Messaging Through a Virtual Private Network
When you connect to a LAN through a virtual private network (VPN), the
LAN treats your computer just like every other network node, even through
you might be hundreds or thousands of miles away from the rest of the
network. Chapter 13 explains how to set up and use a VPN.
VPN connections are commonly used for IM, although you can also use a
public IM service to accomplish the same thing. To set up an IM through a
VPN, follow these general steps:
236
C h ap te r 1 6
1.
Establish your VPN connection to the LAN.
2.
Run your LAN messaging program.
3.
Choose a connection through the VPN and select the person with whom
you want to exchange messages.
Audio and Video Messaging
In some situations, there’s value to adding sound and pictures in text
messages. The world’s telephone companies spent many years and huge
amounts of money trying to develop a successful commercial “picturephone”
service as a supplement to traditional voice telephone calls, but it never
happened until they repackaged it as “videoconferencing.” Adding pictures
to telephone service seemed like a good idea but it turned out to be too
expensive and too intrusive to be practical for individual users. As a business
proposition, call-based picturephones were a complete flop.
But less expensive video devices and higher bandwidth have made it
possible to send and receive both still pictures and full-motion video through
computer networks. As a result, many people have added online cameras
(webcams) and microphones to their systems.
Both Microsoft’s Windows Live Messenger (shown in Figure 16-9) and
Apple’s iChat support video conversations in parallel with their text messaging services. They’re both designed to operate through the Internet, but
there’s nothing to stop you from using them to conduct conversations with
other people on your LAN.
Image courtesy of Microsoft
Figure 16-9: Windows Live Messenger can add video images to simple text.
O t h er Net wo rk A pp li ca ti on s
237
17
TROUBLESHOOTING
When your network is working properly,
it’s all but invisible; you can send and
receive files through the network between
any pair of computers or other connected devices.
But when a connection fails, or one of your users can’t
find a network node, or any of a truly amazing number
of other possible problems occurs, as the local network expert, it’s your job is
to fix it. Network problems always have a specific cause (or combination of
causes), even if that cause is not obvious.
Too often, a network error message will say something like “ask your
network manager for assistance.” But when the network manager is you,
that message doesn’t tell you how to solve the problem. This chapter offers
some tools and methods that will help you identify and solve most network
problems.
General Troubleshooting Techniques
The key to successful troubleshooting is to follow a logical problem-solving
process, rather than simply trying things at random until you stumble upon
the correct solution to your problem. Most people who spend a lot of their
time fixing things use a system like this without a formal plan, but if you’re
new to repairing computers and networks, consider using the techniques in
this chapter as a guide.
Many of these suggestions are common-sense answers, rather than
complex technical procedures. Don’t overlook them; otherwise you can
spend hours tracing a circuit or trying to find a bad connection just because
somebody has unplugged a cable.
Remember that a problem that appears in your network might really be
located on one of the computers or other devices connected to the network. In
many cases, you will want to look for problems in the Windows, Macintosh,
or Linux/Unix operating system as well as on the network itself.
Define the Problem
The first step in solving a problem should be to identify the symptoms.
Remember that computers and networks don’t break down completely at
random. Every piece of information you can find about a problem can help
you isolate and solve it. Is the problem a failure to connect to a particular
computer through the network, or an error message, or a file transfer that
takes longer than usual? Is it limited to a single computer, or does it appear
all over the network? Have any of the lights on your network router, switch,
or modem changed color or gone dark? Does the problem occur when you
are using a particular program or only when a certain desk lamp (or vacuum
cleaner or any other electrical device) is turned on? As you identify symptoms,
make a list—either on paper or in your mind.
If you see an error message, copy the exact text onto a piece of paper.
You might have to restart the computer or go to another computer to search
for information, and you will need the specific wording of the message.
Don’t ignore the cryptic code numbers or other apparently unintelligible
information. Even if the message means nothing to you, it could be the key
to finding the help you need.
Sometimes you can identify a pattern in the symptoms. When more
than one user reports the same problem, ask yourself what those users have
in common: Are they all trying to use the printer or connect to the Internet
at the same time? Are they connected to the network by Ethernet cables or
Wi-Fi? Does the problem happen at the same time every day?
If you’re lucky, defining the problem can tell you enough to fix it. For
example, if the Power LED indicator light on your modem is off, that’s a
good indication that the power cable is unplugged, either at the wall outlet
or on the modem itself. If everybody has trouble connecting to the Internet
during a rainstorm, maybe water is leaking into the telephone cable that
carries your Internet connection from the utility pole to your house (that
240
C h ap te r 1 7
happened to me—the repair guy told me that the cable had been there since
about 1927).
More often, your list of symptoms will be a starting point that you can use
to search for more information. As you analyze the problem, ask yourself
these questions:
What caused the problem? Did it occur when you or another user ran a
specific program or tried to connect? Does the problem seem to be related
to some other action? If you try the same action again, does the same
problem occur? Did it first appear when you turned on a computer?
What has changed? Have you installed new hardware on the network
or loaded new software on the server or another computer? Did you
recently update the router’s firmware? Have you made any other change
to the network or another connected computer, even if the change seems
unrelated to the problem?
What else happened? Have you noticed any other problems or unexpected events? Has another network user experienced a similar problem
at about the same time?
Is this a new problem? Have you ever experienced this problem or
something similar before?
Look for Simple Solutions First
Look for easy solutions before you start to tear apart hardware or run
complex software diagnostic routines. Nothing is more aggravating than
spending several hours running detailed troubleshooting procedures, only
to discover that restarting a computer or flipping a switch is all that was
needed to fix the problem.
Restart Everything
The first thing to try when an otherwise unexplainable problem occurs is to
turn off each network component—one at a time—wait a few seconds, and
then turn it back on again. Sometimes that’s all you need to do to clear a
program or a chunk of memory that is stuck on the wrong setting and return
it to the correct value. If possible, use the operating system’s shut-down process
to turn off the computer in an orderly manner; don’t use the power switch
or reset button unless the computer won’t respond to a mouse or keyboard
command.
NOTE
Don’t turn off your computer until you have copied the text of any error messages on the
screen. Sometimes the same problem will produce a different message after you restart (or
none at all), and the text of the original message might be a useful troubleshooting tool.
When you restart a computer, don’t use the Restart option; that can
leave some settings at the same values rather than resetting them to the
default startup configuration. You should turn off the computer completely,
count to ten, and then turn it back on.
T ro ubl es h oot in g
241
If the problem continues after you restart the computer, try restarting
the modem, Wi-Fi access point, or network router. If a device doesn’t have an
on/off switch, disconnect the power cable, wait a few seconds, and plug it
back in. After you restart each device, check to find out if the problem still
exists. If the problem still occurs, move on to the next device.
Check the Plugs and Cables
If a single computer can’t connect to the network, confirm that the physical
cables providing those connections are not unplugged. Be sure to check
both ends of each cable. If the whole network can’t find the Internet, check
the cables connected to the modem. If possible, examine the cable itself to
make sure it hasn’t been cut someplace in the middle.
Almost all routers, switches, modems, and network adapters have LED
indicators that light when they detect a live connection. If one or more of
these LEDs has gone dark, check the connection.
Most data plugs and sockets maintain solid connections, but it’s possible
that a plug might have come loose without separating itself from the socket,
or a wire inside the plug might have a bad contact. If you suspect a loose
connection, try wiggling the cable while you watch the LED indicator that
corresponds to that socket. If the LED lights and goes dark as you shake the
cable, try a different cable.
If you can’t connect through a newly installed wall outlet, make sure the
wires inside the outlet are connected to the correct terminals at both ends of
the cable inside the wall (at the outlet and at the data center).
To quickly confirm that data is passing through the network to and from
each computer, use the tools supplied with the computer’s operating system
to display network activity. In Windows, use the Networking tab in the Task
Manager; in Linux, use the ethtool command (ethtool interfacename | grep
Link). If the computer reports that no link is available, a cable is disconnected
or the network adapter or hub has a problem.
Check the AC Power
Every device connected to the network probably has an LED indicator that
lights when the device is connected to AC power. When a connection fails,
look at the front of each device to confirm the power light is on. If it’s not,
check the device’s power switch (if it has one) and both the plug at the back
of the device and the plug or power supply that plugs into the AC outlet.
If you use a power strip or an uninterruptible power supply, make sure
that the master power switch is turned on and the power unit is plugged into
an AC outlet.
If the network fails but your computer still works, a fuse or circuit breaker
might have blown in the room containing the network switch, router, or other
control device.
242
C h ap te r 1 7
Check the Settings and Options
Look for other switches and settings that might interfere with a device’s
operation. For example, make sure that the network printer is online and
that no Error LED indicators or messages are visible in the control panel. Or
if you’re having trouble with a Wi-Fi connection, make sure your computer
hasn’t associated itself with the “wrong” base station and connected to one of
your neighbors’ networks instead of your own.
Isolate the Problem
If your search for simple solutions to a network problem or failure doesn’t
produce an answer, the next step is to identify the physical location where
the problem is occurring. Although it’s easy (and often appropriate) to think
about a network as an amorphous cloud that exists everywhere at the same
time, when you’re looking for a specific point of failure, you must replace
that cloud with a detailed map that shows every component and connection.
If you don’t already have a network diagram in your files, consider drawing
one now.
Most problems offer some kind of hint about their location: If just one
computer’s connection to the network has failed, but all the others work
properly, the problem is probably in that computer or its network link.
But if nobody on the network can connect to any other computer or to the
Internet, the problem is probably in a server, router, or other central device.
Start searching for the source of a problem in the most logical device.
If you have a hardware problem, it’s often effective to isolate the problem
by replacing individual components and cables one at a time until the problem
goes away. If the problem disappears when you install a replacement, that’s a
good indication that the original part was the source of the problem. If the
replacement is a relatively expensive item like a router or a printer, you might
want to send it back to the manufacturer for replacement or repair, especially
if it’s under warranty. But if you replace a cheap part like a cable or a network
interface card, it’s often easier to just throw it away and buy a new one.
Similar techniques can work with software. If a computer connection
fails, try shutting down each program running on that computer, one at a
time, and then try to reestablish the connection. If you recently installed a
new program, driver, or update, try uninstalling the new software and test
the connection again. If the connection works, the conflict is between the
new software and your network connection or device driver. In Windows, try
restarting the computer in Safe Mode and re-establishing the connection; if
it works in Safe Mode, you know that the Windows operating system is not
the source of the problem.
Retrace Your Steps
Even if a network problem appears without warning, the problem was
probably caused by something that has changed within the hardware or
software. Therefore repeating your steps can often help identify and solve it.
T ro ubl es h oot in g
243
Keep Notes
As you try to identify and solve a problem, keep a record of what you have
done. Describe each problem you encounter and what you did to fix it in a
simple log or notebook. Note configuration settings, websites that provide
useful information, and the exact location of any options or control programs
that caused the problem or helped solve it. Keep this on paper, rather than
in a text file stored on the computer, so you will be able to access it if the
computer breaks down again.
If the same problem appears again, your log will tell you exactly what
you did to fix it the first time; rather than stepping through all the same
unproductive troubleshooting techniques again, you can go directly to the
correct solution.
One excellent approach is to keep a network notebook in a loose-leaf
binder. Among other things, your notebook should include the following:
The configuration settings and passwords for each modem, router, Wi-Fi
access point, and other device connected to the network
The numeric IP addresses for your Internet connection, DNS servers,
default gateway, and subnet mask
The numeric addresses used by your LAN
The make, model, serial number, and MAC address (if you can find
them) of each hub, switch, router, modem, Wi-Fi access point, network
adapter, and other network device
A list of channel numbers, SSIDs, and passwords for your Wi-Fi network
The telephone numbers and other contact information for your ISP
and the telephone company or cable service that supplies your physical
Internet connection
Instruction manuals for each modem, router, access point, or other network device
A list of your network’s users, including names, telephone numbers, and
logins
A diagram that shows how each computer and other device connects to
the network
Passwords for each network server
Account names and passwords for your email service
A list of rooms that have wall-mounted network outlets and the label on
the other end of each cable
A log of adds, moves, changes, and deletions to your network
A log of repairs, including:
The date and time each problem appeared
A description of each problem
What you did to fix the problem
244
C h ap te r 1 7
The time and date of each call to a technical support center
The name and telephone number of each technical support person
you talk to
The trouble ticket number or case number assigned to the problem by
each support center
WARNING
Your network notebook might contain confidential information such as passwords and
information about user accounts. Therefore, you should to keep it in a secure location
such as a locked cabinet or drawer.
Viruses and Other Nasties
If you can’t find an obvious solution to a network problem, it never hurts to
run a complete scan for viruses, worms, Trojan horses, and spyware on each
computer connected to your LAN. Even if you have firewalls, up-to-date
antivirus programs, and other network security software running on all your
computers, it’s possible that something might have slipped through your
defenses.
Several antivirus program vendors offer free online scans that might
identify a virus that your resident program might not catch. As part of your
troubleshooting routine, run a full scan with your usual network security
programs and also use one or more of these online scans:
http://housecall.trendmicro.com
Trend Micro HouseCall
Symantec Security Check
http://security.symantec.com/sscv6/default.asp
BitDefender Online Scanner
Kaspersky Online Scanner
ESET Online Scanner
Panda ActiveScan
activescan/
http://www.bitdefender.com/scan8/ie.html
http://www.kaspersky.com/virusscanner
http://www.eset.com/onlinescan/
http://www.pandasecurity.com/homeusers/solutions/
Use an online scanner made by a different supplier from the one that
came with the antivirus program resident in your computers. Each company
employs a slightly different set of rules for finding and isolating viruses, so
you will want to take advantage of more than one approach.
Other Common Problems
It’s not practical to describe every possible network problem, but there are a
few that occur more frequently than others. If the problem in your network
is not described in this chapter, try the Windows Network Problem Solver
described in “The Collective Wisdom of the Internet” on page 247 (for computers using Windows), or search for information about the problem in the
web pages devoted to your own operating system.
T ro ubl es h oot in g
245
Configuration Settings
When you can’t connect your computer to the Internet, but other computers
on the same network can connect, check the computer’s network configuration settings to confirm that the default gateway and the DNS server are
present and correct. If none of the network’s computers can find the Internet,
check the settings on the network’s router or modem.
To confirm that the gateway and the DNS server are alive and operating
properly, try sending ping requests to their numeric addresses. If you don’t
receive a reply, look for a problem in the gateway or the server, or in the
equipment and cables between your computer and the target.
DHCP Settings: DNS and Default Gateway
When a DHCP server is active on your network, and your own computer
(or the one you’re troubleshooting) is set to accept DHCP settings, the
computer should automatically connect itself to the network. But if there’s
no DHCP server, or if the computer is not configured to accept DHCP data
from a server and the settings on the computer itself are missing or
incorrect, the computer won’t connect.
To confirm that the DHCP settings are correct, follow these steps:
1.
Check the modem, router, Wi-Fi access point, or other device that
normally acts as DHCP server for your network. If the server is active
(and other computers on the network are connecting normally), the
problem is in your computer; if it’s not active, either turn it on or
confirm that this network doesn’t use DHCP.
2.
Open the network configuration settings utility in your computer. If the
DHCP server is active, confirm that the computer is set to accept data
from the server; if the network does not use DHCP, make sure the
addresses for the DNS server and the default gateway (or gateway router)
are correct.
If the DNS server settings in your computer or DHCP server appear to be
correct, it’s possible (but unlikely) that the DNS server itself is not working.
Try adding the address of one of the OpenDNS servers (208.67.222.222 or
208.67.220.220) as an alternative to your usual DNS server’s address.
Failed Connection to a Specific Site
When you try to connect to a specific website or other Internet service, you will
sometimes see an Unable to connect message instead of the web page or other
screen you were expecting. When this happens, immediately try some other
address that takes you to a site in a different geographical location; for
example, if you can’t connect to The New York Times website, try a site based
in Germany or Australia. If you can connect to the second address, you can
246
C h ap te r 1 7
safely assume that the problem is at the first address, and not in your own
computer or network. If you can’t connect to any site, look for a local problem
such as your computer, the LAN, or your Internet service provider.
An Alternate Connection to the Internet
When your Internet connection breaks down, it’s not possible to use that
connection to consult technical support websites or send email to your network provider. Therefore, it’s often helpful to have a backup method for
connecting at least one of your computers to the Internet. It might be a
neighbor’s Wi-Fi network (with their permission, of course), a nearby library
or coffee shop that offers Internet access, or a link through a dial-up telephone line and modem.
Before you have a problem, ask your Internet service provider if they
offer dial-up access along with their high-speed services. If they do, ask them
for a dial-up account as an emergency backup, and make a note of the access
telephone numbers, login name, and password in your network notebook.
The Collective Wisdom of the Internet
Any problem that occurs on your network has happened before to somebody
else. You have an excellent chance of finding a description of the problem
and instructions for fixing it someplace on the Internet.
This is where defining the problem carefully becomes important. If you’re
working with a Windows-based network, the Microsoft Knowledge Base at
http://support.microsoft.com/ can be particularly useful; if Microsoft’s technical
support people have ever had to deal with a particular problem, they have
probably included instructions for fixing it in the Knowledge Base. Similar
resources exist for Macintosh networks and servers at http://www.apple.com/
support, and for Unix and Linux systems in the Support sections of each
distribution’s website.
Other online sources for useful troubleshooting information include
manufacturers’ technical support centers, independent newsgroups and
web forums, and sites such as Wikipedia and HowStuffWorks.com that offer
descriptions and explanations of various types of technology. If those sites
don’t answer your question, try a more general web search. Type a few
keywords that describe the problem (such as “XP can’t find network printer”)
or the exact text of an error message into a web search tool and follow each
of the links to read about other people’s experiences under similar circumstances. Remember that quotation marks around phrases instruct the search
sites to search for the entire phrase rather than individual words.
One particularly helpful tool for troubleshooting networks is the Windows
Network Problem Solver at http://winhlp.com/wxnet.htm, shown in Figure 17-1.
The Problem Solver is an interactive list of symptoms that links to instructions
for solving the most likely cause of the problem. If you take the time to
carefully answer each of the questions in the problem definition form, the
Problem Solver can be a remarkably effective tool.
T ro ubl es h oot in g
247
Figure 17-1: The Windows Network Problem Solver is an excellent interactive troubleshooting tool. This screen image shows only a small portion of the page; scroll down for
additional information and instructions.
Software for Troubleshooting
Several software programs can gather and display useful information when
you’re trying to understand what’s happening inside your network. These
programs are available as free or trial downloads, so you don’t incur a cost
when testing them.
Network Magic
Network Magic (http://www.networkmagic.com/) provides a graphic display
of the devices connected to a LAN, as shown in Figure 17-2, and a central
control point for adding new network devices or changing the existing
network configuration. It can also perform some basic troubleshooting tests
and automatic repairs.
Protocol Analyzers
Microsoft Network Monitor (go to http://www.microsoft.com/downloads/ and
search for Network Monitor) and Wireshark (http://www.wireshark.org/) are
free protocol analyzers that capture and display data as it moves through
your network. In other words, they grab each block of data (a frame) as it
passes in or out of your computer, and they display the contents of the frame
along with detailed information about the form and structure of each frame.
Figure 17-3 shows a data capture in Network Monitor, and Figure 17-4 shows
248
C h ap te r 1 7
a Wireshark screen. The two programs capture the same data stream, but
they handle and display it differently. The programs are available at no cost,
so you might want to install both of them. Protocol analyzers are also known
as network sniffers.
Figure 17-2: Network Magic scans your LAN and displays all the
devices connected to it.
Most of this data display looks like hexadecimal gibberish, but it contains
the actual text of messages, conversations, and other transactions, along with
all the commands and status messages that move through the network. Most
of the time, you can allow your computer and the network plumbing to handle
the data in background. But when something goes wrong, the data captured
by a protocol analyzer can help you identify what’s causing the problem.
For example, if the amount of incoming or outgoing traffic moving
through your network increases, the network may be sending or receiving
many requests every second. This could be a hacker’s denial of service attack,
or a computer that has innocently latched itself into an endless program loop.
Either way, you will want to identify the source and take action to make it
stop. When this happened to me, I used Wireshark to find the numeric IP
address of the computer that was originating the bogus messages and a whois
program to identify that computer’s owner; then I sent an email explaining
the problem and asking them to fix it. The data stream stopped within an
hour.
A network sniffer can also identify a device within your own network
that becomes infected or has some other problem that interferes with proper
operation. By running the sniffer program on more than one computer, or
even inserting a sniffer at a router, a modem connection, or other interface
point, you can often isolate the source of a problem.
You won’t use a protocol analyzer very often, which is probably okay,
because it’s a complex and tedious process. But when you need to know
what’s moving through your network, an analyzer can give you information
that you won’t find anywhere else.
T ro ubl es h oot in g
249
Figure 17-3: Microsoft Network Monitor displays detailed information about network
data.
Figure 17-4: Wireshark uses contrasting colors to show different kinds of data frames.
250
C h ap te r 1 7
ISP Problems
As a formal or informal network manager, you’re often on your own when
you’re trying to find and fix a problem on your LAN, but if you or one of
your users discovers a problem using the Internet, you might need help
from your Internet service provider’s (ISP’s) support center and the people
who run the computer or network at the other end of your connection.
Therefore, you should find and keep the telephone numbers and email
addresses of the ISP’s help desk and the network tech center at the telephone
company, cable TV service, or other company that provides the physical
connection between your own LAN and your ISP. The people who answer
calls in those support centers are there to help you, and they will often have
tools that can test and monitor your network connection. When you talk to a
support representative, ask for the case number or trouble ticket number
that they have assigned to your problem; if you have to call back later, the
case number will lead the person who takes your call to the notes about
earlier calls.
Don’t Panic
Finally, keep calm. Your network does not have a mind of its own. If you take
a logical and organized approach to finding the cause of a network problem,
you will probably solve the problem without developing (or enlarging) an
ulcer. Over time, you will recognize particular symptoms and know how to
home in on the most effective diagnostic tools and techniques.
If you can’t find the problem after searching for an hour, walk away for
a few minutes. Make yourself a sandwich, have a cup of coffee or a glass of
lemonade, or go for a short walk. The network will still be there when you get
back, and you’ll feel better about it. Approaching the problem with a fresh
mind can often be the most effective possible way to solve it.
T ro ubl es h oot in g
251
INDEX
Page numbers in italics refer to figures, tables,
and listings.
Numbers
2X Terminal Server, 226
3COM, 164
3G broadband networks, 174
10/100 indicator lights, 75
10Base-T networks, 14–15
10 Mbps operations, 29
100Base-T networks, 14–15
100 Mbps operations, 29
1000Base-T networks, 14
A
Access, Microsoft, 95
access points, Wi-Fi, 53, 55, 62, 80–81, 81,
85–87, 90, 99, 111, 113, 174
AC power, 17, 48, 49, 50, 51, 60, 61, 67,
75, 242
ACT indicator lights, 75
addresses and names, 36–41, 38, 48. See
also Internet Protocol (IP),
addresses
ad hoc networks, 20
administrators, 152
Advanced Maryland Automatic Network
Disk Archiver (Amanda), 104
AHAM (Association for Home Appliance Manufacturers), 223
AIFF (Audio Interchange File Format)
files, 209, 210
AIM (AOL Instant Messenger), 158,
234–235
AirPort Extreme, 99, 99, 181
all-in-one devices, 199–201, 200
Amanda (Advanced Maryland Automatic
Network Disk Archiver), 104
American Standard Code for Information Interchange (ASCII), 10
encryption keys, 180–181, 182
AM radios, 209, 214
analog-to-digital conversion, 206–207,
209, 211–212
antennas, 4, 80, 82, 84–85
antivirus programs, 245
AOL Instant Messenger (AIM), 158,
234–235
Apache web server, 95, 156
Apple, 21, 95
AirPort Extreme, 99, 99, 181
computers, 94
iChat, 237
ASCII. See American Standard Code for
Information Interchange
(ASCII)
.asia, 40
Association for Home Appliance Manufacturers (AHAM), 223
Audacity, 208, 211
audio
clients, 211, 212, 213
devices, 213–214, 214
controls, 51
converters, 206, 207–209, 211
files, 203–205, 206–214, 210, 212–214
formats, 209–210, 210
messaging, 237
player programs, 210–211
servers, 7–8, 207–209, 212–213, 213
Audio Interchange File Format (AIFF)
files, 209, 210
audiophile music servers, 209
automatic printer switches, 194–195
automatic updates, 185–186, 186
Auxiliary input, 212
B
baby monitors, 205
backup files, 100–104, 101, 103, 104
BackupPC, 104
Backup Status and Configuration, 103
bands, 79
bandwidth, 3, 4
bar code readers, 224
Baseline Security Analyzer, 188, 188
BBC, 3
Belkin, 216
BIOS utilities, 71, 75
BitDefender Online Scanner, 245
bits, 10, 10–11
.biz, 40
BlackBerry devices, 77
bridges, 32
Broadcast Wave files, 210
brute-force programs, 153
BSD systems, 95, 98, 159, 164, 172, 173
BSSID, 177–179
built-in Ethernet window, 125
built-in printer servers, 194
bulk cables, 56
C
cable modems, 110
cables
bulk, 56
CAT5/CAT5e/CAT6 data, 50,
56–57, 66
coaxial, 17, 65
for combination boxes, 33
DVI, 219, 220
Ethernet, 15, 47, 53, 56–60, 60, 66, 66,
77, 192
jumper, 56
overview of, 33, 56
RG6/U, 65
troubleshooting, 242
twisted-pair, 15, 15
video, 65–66
cable TV
connections, 32, 64, 99
outlets, 48, 49
cameras/webcams, 8, 204, 204–205, 237
CardBus, 73
Carrier Sense Multiple Access with Collision Detection (CSMA/CD), 14
CAT5/CAT5e/CAT6 data cables, 50,
56–57, 66
CBS, 3
CDs (music), 208, 209, 211
254
I ND EX
CentOS, 95
CHA-1 (Connected Home Appliances)
standard, 223
chatrooms, 237
checksums, 13
Cisco, 161, 164
client firewall programs, 157, 158–159
clients, audio, 211, 212, 213
clients and servers, 23–25, 25
clones, 100
coaxial cables, 17, 65
collisions, 14, 18
.com, 39, 40
combination boxes, 33
commands. See network commands
communication channels, 3, 11
complete images, 100
compressed audio files, 209
Computer Supported Cooperative
Work, 233
computer-to-network connections. See
network connections
conferencing, remote, 205, 237
Connected Home Appliances (CHA-1)
standard, 223
control centers. See networks, control
centers
controller cards, 204
conversions, audio, 206, 207–209, 211
converters
analog, 206–207, 209, 211–212
audio, 206, 207–209, 211
power, 61
TV/video, 219
.coop, 40
copying devices, 199–201, 200
country codes, domain name, 39, 40
CSMA/CD (Carrier Sense Multiple
Access with Collision
Detection), 14
CUPS printer control program, 199
Cyberguys, 57
D
data
cable color codes, telephone lines, 65
circuit-terminating equipment (DCE),
18–19
communications equipment (DCE),
18–19
entry, remote, 224
networks, 4
outlets, 48, 56, 56–57, 59, 60, 67–68
packets, 11–13, 12
terminal blocks, 52, 52
transfer speeds, 14–15
tunnels, 159, 161
data-file-only backups, 100
data terminal equipment (DTE), 18–19
DCE (data communications equipment
or data circuit-terminating
equipment), 18–19
decoders, audio/video, 218
default gateways, 42, 43, 114, 118, 246
Dell computers, 94
demodulation, 6, 108
denial of service (DoS) attacks, 189
designing networks, 47–54, 48, 49, 52, 53
destinations, 206, 207
device drivers, 74–75
DHCP. See Dynamic Host Configuration
Protocol (DHCP)
dial-up modems, 109
dictionary attacks, 183
digital audio files. See audio, files
digital conversions, 209
digital data streams, 204–205
digital media receiver (DMR), 143
digital-to-analog conversion, 206–207, 211
digital video recorder (DVR), 216–217
digital visual interface (DVI), 218
DirSync Pro, 232
Display Properties setting, 231, 231
D-Link
programs, 180–181, 181, 216
switches, 64
dm-crypt, 185
DMR (digital media receiver), 143
domain names. See also Internet Protocol
(IP), addresses
country codes in, 39, 40
subdomain, 39
top-level, 39–41, 40
Domain Name System (DNS), 39–41, 42,
44, 109, 158
servers, 40–41, 42, 43–44, 109, 115,
118, 124, 127, 246
DoS (denial of service) attacks, 189
dot, 39
downstream switches, 67
“drive-by logins,” 174
drivers, device, 74–75
DSL
connections, 6, 22, 32, 62, 64, 99
modems, 110
DTE (data terminal equipment), 18–19
DVI (digital visual interface),
218–219, 231
DVI-to-DVI cables, 219
DVI-to-HDMI cables, 219, 220
DVR (digital video recorder), 216–217
Dynamic Host Configuration Protocol
(DHCP), 37–38, 42, 43, 86,
109–115, 246
servers, 38, 109–115, 111, 112,
117–118, 124, 126, 126, 129,
157–158, 163
dynamic IP addresses, 37–38, 86, 109
E
EAP (Extensible Authentication
Protocol), 182
Edirol, 211
.edu, 39, 40
Elcomsoft Distributed Password
Recovery, 183
electrical outlets, 48–50, 49, 52, 52,
55–56, 59
electronics suppliers, 57
email services, 105
E-Mu, 211
encryption methods, 54, 89–91, 159
ASCII keys, 180–181
end-to-end, 89, 159
hex keys, 180–181, 181
WEP, 90, 91, 174–175, 176, 179–182,
181, 183, 217
wireless security and, 174–184, 175,
178, 181
WPA, 54, 78, 90, 91, 136, 160,
174–176, 179, 181, 182–183,
194, 217
WPA2, 90, 176
enhanced systems, 78–79
equipment, data communication, 18–19
error checking, 9, 13
error messages, 229, 239–240, 241, 247
ESET Online Scanner, 245
ESSID, 177–179
Ethernet
cables, 15, 47, 53, 56–60, 60, 66, 66,
77, 192
hubs, 29, 29, 80, 220
LANs, 14–16, 71
networks, 14–16, 17, 28, 29, 47, 50, 53,
54, 56, 69–75, 71, 72, 125
outlets, 53
ports, 4, 70–74, 71, 85, 97, 193,
201, 216
switches, 30, 53, 53, 55, 62, 80, 193
I N D EX
255
Exact Audio Copy, 208
Extensible Authentication Protocol
(EAP), 182
external controllers, 204–205
external printer servers, 192, 192–193
extreme systems, 78–79
F
faxing devices, 199–201, 200
F connectors, 218
fiber optic links, 6
field-replaceable unit (FRU), 82
File and Printer Sharing for Microsoft
Networks, 196, 196
file servers
backup files, 100–104, 101, 103, 104
choosing, 94
home usage of, 105
NAS (network-attached storage)
devices, 93, 95, 97–98, 98,
100, 108
overview of, 24, 93–94
sharing permissions, 96–97, 97
software/systems for, 94–96, 96,
97–99, 98, 99
storing files on, 96–97
USB device servers, 99, 99, 100
file sharing
compatibility issues, 131
computer-to-network connections, 120
dialogs, 140, 140
Linux, 131, 147–150, 148–150
Macintosh OS X, 131, 134, 135,
143–147, 144–146
media sharing, 143
overview of, 5, 5, 131–132
passwords and privacy, 133–136,
134, 143
permission levels, 141–143
printer sharing, 7, 143, 196, 196–199,
198, 199
Server Message Block (SMB) protocol,
131, 143, 145–147, 146, 150
Simple File Sharing, 132, 132–133, 136
Unix, 131, 147–150, 148–150
usernames, 140–141, 145
Windows Vista, 131, 136–143, 137–142
Windows XP, 131, 132, 132–136,
134, 135
file storage servers, 96–97
file synchronization, 232
File Transfer Protocol (FTP), 39, 157, 158
Finger, 158
256
I ND EX
Firefox, 24
firewalls, 90, 91, 154–159, 155, 158, 164,
172, 176
firewall servers, 24
FireWire ports, 4, 21, 205, 211
fixed IP addresses, 37–38, 109, 118
FLAC (Free Lossless Audio Codec)
files, 210
flash drives, 1, 3, 120, 217
floor plans, 47–48, 48, 54, 55, 59
floppy disks, 3, 4
FM radios, 214
Folder Options window, 132, 132
frames, 11–13, 248
FreeBSD, 95, 98, 173
FreeFileSync, 232
Free Lossless Audio Codec (FLAC)
files, 210
FreeNAS, 95, 98, 98
FreeNX, 226
FreeS/WAN, 164, 173
FRU (field-replaceable unit), 82
FTP (File Transfer Protocol), 39, 157, 158
full duplex mode, 30
G
Gadu-Gadu, 235
game consoles, 220–222
game servers, 24
gateway addresses, 109, 114–115
gateway routers, 6, 6, 32, 109–110
Gigabit Ethernet networks, 14, 15, 29,
56, 72
Gmail, 105
Gnome, 104, 127, 127–128, 128,
147–149, 148
GoodSync, 232
Google Talk, 234–235
Gopher, 158
.gov, 40
gramophones, 206–207, 207
graphical user interface (GUI), 150
guest accounts, 152
GUI (graphical user interface), 150
H
hackers, 82, 92, 157, 249
handoffs, 177
handshaking, 13–14
HDMI. See High Definition Multimedia
Interface (HDMI)
HDTV screens, 219, 220
headers, 11–13, 12
Hewlett-Packard (HP), 95
hex encryption keys, 180–181, 181
hidden networks, 179
High Definition Multimedia Interface
(HDMI), 217
cables, 219, 220
high-gain directional antennas, 85
high-speed modems, 109
home appliances, 8, 222–223
home automation, 8, 49, 51, 223
home entertainment systems, 7–8, 48, 49,
203, 206
Home Phoneline Networking Alliance, 17
HomePlug, 17, 17
HomePNA, 17
home run wiring, 51–52, 52, 53
home security devices, 8, 205
hosting services, 105
host names, 43
Hotmail, 105
hotspots, 77–78, 89
HOWTO, 159, 164
HP (Hewlett-Packard), 95
HTTP. See HyperText Transfer Protocol
(HTTP)
hubs
data, 30, 55
designing, 47
Ethernet, 29, 29, 80, 220
network, 120
overview of, 28–30, 29, 111
for printers, 193, 201
hybrid wireless networks, 89
HyperTerminal programs, 22
HyperText Transfer Protocol (HTTP),
24, 39
web servers, 158
I
IANA (Internet Assigned Name
Authority), 37, 38, 157
IBM, 82, 94
iChat, 237
IDE hard drives, 97
IEEE (Institute of Electrical and Electronics Engineers), 21, 78
ifconfig, 43
IM (instant messaging), 7, 233–237
incremental backups, 100
indicator lights, 75
individual bits, 10, 10
industrial electronics suppliers, 57
.info, 40
Infrared Data Association (IrDA), 20
ports, 20–21, 21
infrared networks, 20–21, 21
input/output (I/O) ports, 4, 18,
18–19, 19
instant messaging (IM), 7, 233–237
Institute of Electrical and Electronics
Engineers (IEEE), 21, 78
Intel, 88, 164
internal controllers, 204–205
internal expansion cards, 72, 72–73
Internet Assigned Name Authority
(IANA), 37, 38, 157
Internet-based IM services, 234–235
Internet connections, network, 110–115,
111, 112
Internet Explorer, 24, 174
Internet Protocol (IP), 35–36, 54, 123,
123, 126
addresses, 36–41, 38, 42, 45, 86
computer-to-network connections
and, 118, 124, 126–128, 127
domain names and, 38–41, 40
dynamic, 37–38, 86, 109
firewalls and, 157
fixed, 37–38, 109, 118
network-to-Internet connections
and, 110–115, 111, 112
filters, 159
networks, 162
Internet Protocol Properties window, 123
Internet radio, 209, 214
Internet Relay Chat (IRC) servers, 39
Internet service providers (ISPs), 22, 31,
41, 110, 113, 114
problems, 251
Internet-to-network connections, 6,
107–115, 108, 111, 112
I/O (input/output) ports, 4, 18,
18–19, 19
IP. See Internet Protocol (IP)
IPConfig, 41–43, 42
iPhone, 77
IP Masquerade, 164
iPod, 8, 206, 207, 210
IPsec network links, 162, 163, 164,
169, 173
IPX networks, 162
IRC (Internet Relay Chat) servers, 39
IrDA. See Infrared Data Association
(IrDA)
ISA Ethernet adapters, 72
I N D EX
257
ISM bands, 80
ISPs. See Internet service providers (ISPs)
iTunes, 24
J
Jabber, 235
jacks. See ports
Jameco, 57
jumper cables, 56
K
Kaspersky Online Scanner, 245
KDE, 104, 128, 128–129, 129, 148,
148, 149
Kerberos, 158
keyhole slots, 63–64, 64
Konquerer file manager, 148, 148,
149–150, 150
L
L2TP (Layer Two Tunneling Protocol),
162, 163–164, 169
LANguard, 158
LANs. See local area networks (LANs)
Lantronix UBox 4100, 99
laptops
interface adapters, 81–82, 82
network adapters, 73–74, 74
Laughing Squid web hosting, 45
Layer Two Tunneling Protocol (L2TP),
162, 163–164, 169
LED indicator lights, 240, 242–243
Level 1–5 access, 133–136
Leviton, 67
LG Electronics, 223
limited backups, 100
line of sight, 85
LINK indicator lights, 75
Linksys, 216
Linux
backup files, 100, 104
computer-to-network connections,
117, 127, 127–129, 128, 129
CUPS printer control program, 199
file servers, 94–95, 96, 215
file sharing, 131, 147–150, 148–150
firewalls, 154–159, 155, 158, 164
network adapters, 73–74
network-to-Internet connections, 115
OpenVPN for, 173
remote desktop programs, 229
258
I ND EX
text commands for, 43
troubleshooting info, 247
VPN clients for, 172-173
VPN servers for, 164
wireless control programs, 87
LinuxCD, 95
Linux Online!, 104
live conversations, 205, 233–237
Living Network Control Protocol
(LnCP), 223
local area connections, 42, 42,
122–123, 196
local area networks (LANs)
addresses, 37–38
computer-to-network connections,
117–123
connections to, 20, 21, 32, 41, 49, 55
data transfer speeds, 14–15
Ethernet, 14–16, 71
file sharing, 137
firewalls, 154–159, 155, 158
game consoles, 220–222
instant messaging, 234–236, 235
network-to-Internet connections,
107–115, 108, 111, 112
overview of, 31–32, 32
remote terminals, 23, 23
security methods for, 91–92
troubleshooting for, 248–251
VideoLAN, 218
VPNs and, 159–161, 160, 161, 163
Wi-Fi and, 54, 77–78
wireless security, 54, 89–92, 174–184,
175, 178, 181
LostPC, 185
LPs (music), 208, 209, 211
M
MAC
addresses, 43, 91, 184
authentication, 184–185
Macintosh OS X, 35, 43, 44
backup files, 100, 103–104, 104
computer-to-network connections,
117, 124, 124–127, 125, 126, 127
file servers, 94–95, 96, 99, 99, 215
file sharing, 131, 134, 135, 143–147,
144–146
IP addresses, 112, 112, 118
network adapters, 73–74
network security, 184–185
network-to-Internet connections, 115
OpenVPN for, 173
remote desktop programs, 226–229,
227, 228
troubleshooting info, 247
wireless control programs, 87
Mac-to-Windows remote access, 226
mail servers, 24
M-Audio, 211
MaxiVista, 229–232
Mbps (megabits per second), 3
McIntosh MS750, 209
Media Center Extender, 208
media sharing, 143
meebo, 234
megabits per second (Mbps), 3
mesh topologies, 28
messages, sending, 11, 13–14
message servers, 234
messaging, 233–237
microphones, 8, 204, 205
Microsoft
Baseline Security Analyzer, 188, 188
Knowledge Base, 247
MSN Messenger, 158
Protocol Analyzers, 248, 250
Resource Kit, 163
SQL, 95
SyncToy, 232
TechNet articles, 163
Windows. See Windows
Xbox 360, 220, 222
microsoft.com, 44
microwave radio links, 3
mini-PCI cards, 81–82, 82, 84, 87
MoCA (Multimedia over Coax
Alliance), 17
modems, 6
cable, 110
combination boxes, 33
configuring, 86
dial-up, 109
DSL, 62, 110
high-speed, 109
installing, 59, 61, 62–64, 63
location of, 50
network-to-Internet connections,
108–115
null, 19, 19
PTSN, 21–22
telephone line connections and,
21–23
modular structured wiring center, 59, 63
modulation, 6, 108
monitors, multiple, 229–232, 230, 231
motherboards, 70
mounting brackets, 56, 56
mounting frames, 59
MPEG Layer-3 (MP3) files, 208,
209–210, 210
MPlayer, 218
MSN Messenger, 158
Multimedia over Coax Alliance
(MoCA), 17
music clients, 211, 212, 213
devices, 213–214, 214
music servers, 7–8, 24, 207–209,
212–213, 213
Muuss, Mike, 43
N
.name, 40
names and addresses, 36–41
NAS (network-attached storage) devices,
93, 95, 97–98, 98, 100, 108
NAT (Network Address Translation), 37,
67, 157–158, 159
National Electric Code, 51
Nautilus file browser, 147–148, 148
.net, 39, 40
NetBEUI networks, 162
NetBSD, 159, 164, 173
Netgear, 161, 213, 216
Netscape Navigator, 174
network adapters
for laptops, 73–74, 74
USB, 73
Network Address Translation (NAT), 37,
67, 157–158, 159
Network and Sharing Center, 136–138,
137, 138
network applications
MaxiVista, 229–232, 230
messaging, 233–237
multiple monitors, 229–232, 230, 231
overview of, 225
remote controls, 232
remote desktop programs, 226–229,
227, 228
network-attached storage (NAS) devices,
93, 95, 97–98, 98, 100, 108
network commands
ifconfig, 43
IPConfig, 41–43, 42
ping, 36, 43, 43–44
TraceRoute, 36, 44, 44–46, 45
network-compatible home
appliances, 223
I N D EX
259
network configuration settings, 117–129,
118–129
network connections
computer-to-network
Linux, 117, 127, 127–129, 128, 129
local area, 122–123, 123
Macintosh OS X, 117, 124,
124–127, 125, 126, 127
overview of, 117–118
Unix, 117, 127, 127–129, 128, 129
Windows, 117, 118, 118–124, 119,
120, 121, 122, 123
Wireless Network Connections
profile, 122
network-to-Internet, 107–115, 108,
111, 112
other devices
audio/music files, 203–205,
206–214, 210, 212–214
baby monitors, 205
bar code readers, 224
game consoles, 220–222
home appliances, 8, 222–223
home entertainment systems, 7–8,
48, 49, 203, 206
Internet radios, 209, 214
live conversations, 205, 233–237
microphones, 8, 204, 205
remote conferencing, 205, 237
remote data entry, 224
remote sensors and controls,
223–224
stereos, 206, 212
surveillance monitors, 205
traffic monitors, 204
video files, 203–205, 215–220
webcams/cameras, 8, 204,
204–205, 237
types
ad hoc networks, 20
clients and servers, 23–25, 25
common elements of, 9–14
DTE/DCE equipment for, 18–19
error checking, 9, 13
Ethernet, 14–16, 15
FireWire ports, 4, 21, 205, 211
infrared networks, 20–21, 21
Plain Old Telephone Service
(POTS), 21–22
point-to-point, 19–20, 20, 51–52, 52
powerline networks, 16–17
Public Telephone Switched
Network (PTSN), 21–22, 22
260
I ND EX
remote terminals, 23, 23
servers, 23–25, 26
telephone line connections,
21–22, 22
Wi-Fi, 16. See also Wi-Fi (wireless
fidelity)
wired networks, 16
wireless programs, 87, 87–89, 88
Network Connections window, 118,
118–119, 122, 169–170, 173, 190
networked Internet radios, 214
networked receivers, 214
Network Magic, 248–249, 249
Network Monitor, 248, 250
networks
control centers
designing, 50–53
installing, 58–68, 60, 63, 65
for small networks, 25, 67–68
control devices, 33, 37, 61, 111, 115
defined, 1–3
designing, 47–54, 48, 49, 52, 53
discovery, 137
error messages, 229, 239–240, 241, 247
gateway configuration, 115
hubs, 120
installation
cables, 56–57
cable TV connections, 64–66
connectors, 55–56
control centers, 50–53, 58–68, 60,
63, 65
DSL connections, 22, 62, 64, 99
expanding, 67
small networks, 25, 67–68
surface boxes, 55–56
telephone lines, connecting,
64–65, 65
terminating network cables, 66–67
wall plates, 49, 49, 50, 52, 55–56,
56, 67
wiring, 16–17, 57–67, 66
interface adapters, Wi-Fi, 81–85, 82,
83, 84, 85, 87
names. See SSIDs
notebooks, 244–245
planning for, 47–54, 48, 55
problems. See troubleshooting
profiles, 118
security. See also encryption methods
access levels, 152
administrators, 152
Baseline Security Analyzer, 188, 188
controlling users, 189
DoS (denial of service) attacks, 189
firewalls, 90, 91, 154–159, 155, 158,
164, 172, 176
guest accounts, 152
intruders, 152–159, 174
IP filters, 159
MAC authentication, 184–185
naming networks, 177–179, 178
passwords, 90, 133–136, 134, 143,
152–154, 154, 205
physical security, 184–185
port assignments/port numbers,
157–158, 158
sneakernets, 4
updates and patches, 185–188,
186–187
user accounts, 152
wireless security, 54, 89–92,
174–184, 175, 178, 181
sniffers, 178, 179, 249
topologies, 27–28, 28
webcams, 205
wiring methods, 16–18
Network Setup Wizard, 118–122, 119,
120, 121
Network Stumbler, 179
Network window, 125
Newegg.com, 57
Nintendo Wii, 220, 221
NIST Cerberus, 173
NNTP (network news), 158
nodes, 14, 48–50
noise, 13, 17
nondirectional antennas, 85
Novell, 95
null modems, 19, 19
numeric IP addresses, 36–37, 42, 109, 110
O
OEM (original equipment
manufacturer), 85, 95
Ogg Vorbis files, 210
omnidirectional antennas, 85
ones and zeroes, 10, 10. See also Internet
Protocol (IP), addresses
online virus scans, 245
OpenBSD, 159, 164, 173
OpenDNS, 41, 114
open source operating systems, 96
OpenVPN, 164, 173
Opera, 24
operating channels, Wi-Fi, 79–80, 80, 86
.org, 40
original equipment manufacturer
(OEM), 85, 95
outlet blocks, 59–60, 60
outlets
cable TV, 48, 49
data, 48, 56, 56–57, 59, 60, 67–68
electrical, 48–50, 49, 52, 52, 55–56, 59
Ethernet, 53
telephone wall, 48, 49, 51
video, 48, 49, 50, 51
wall-mounted, 59
P
Packet Filter (PF), 159
Packet Internet Gopher, 43
packets, 11–13, 12
Panda ActiveScan, 245
parallel ports, 4, 16, 192, 192, 194
parallel signals, 10
parity bits, 13
passwords, 90, 133–136, 134, 143,
152–154, 154, 205
patch cords, 56–57
patches and updates, 185–188, 186–188
PC card adapters, 82–83, 83
PC Express Cards, 82–83
PCI expansion cards, 72, 72, 84, 204
PCMCIA sockets, 73, 82
peer-to-peer messaging, 234
PF (Packet Filter), 159
Philips, 213
picture elements, 10, 219
picturephones, 237
Pidgin, 234
pigtails, 85
ping command, 36, 43, 43–44
pipsec, 173
pixels, 10, 219
Plain Old Telephone Service (POTS),
21–22
PlayStation, 220–221
plug-in modules, 83–84, 84
plugs, 66–67, 70, 70, 75, 193, 218, 242
plywood sheets, 59, 66
point-to-point networks, 19–20, 20,
51–52, 52
Point-to-Point Tunneling Protocol
(PPTP), 162, 163–164, 172
POP3 (incoming mail protocol), 158
portable drives, 3
port assignments/port numbers,
157–158, 158
I N D EX
261
ports
Ethernet, 4, 70–74, 71, 85, 97, 193,
201, 216
FireWire, 4, 21, 205, 211
infrared, 21
input/output, 4
IrDA, 20–21, 21
overview of, 28
parallel, 4, 16, 192, 192, 194
TCP service, 158
USB, 4, 16, 21, 70, 73, 99, 192, 194,
195, 201, 205, 211, 212, 216
Port Scan Attack Detector, 159
POTS (Plain Old Telephone Service),
21–22
power converters, 61
Power LED indicator lights, 240
powerstrips, 61, 61
PPTP (Point-to-Point Tunneling
Protocol), 162, 163–164, 172
pre-assembled cables, 56
pre-shared key (PSK) mode, 182–183
printers
connecting to network, 191–201,
192–194, 199–200
servers, 7, 25, 25, 193–197
sharing, 7, 143, 196, 196–199, 198, 199
switches, 194–195
private folders, 5
protocols, 35–36, 115
PSK (pre-shared key) mode, 182–183
PTSN (Public Telephone Switched
Network), 21–22
Public DNS servers, 41
public folders, 5, 139, 141
public networks, VPN via, 173–174
Public Telephone Switched Network
(PTSN), 21–22
PVC pipes, 58
RCA phone plugs, 218
Real Audio and Video, 158, 210
RealPlayer, 208, 218
RealVNC, 226, 229
Registered Jack, 70
remote
access, 226
conferencing, 205, 237
data entry, 224
desktop programs, 226–229, 227, 228
sensors and controls, 223–224, 232
terminals, 23, 23
webcams, 204
Remote Authentication Dial-in User
Service (RADIUS), 182, 183
Remote Desktop Connection Client, 226
reserved addresses, 37
restart options, 241–242
RG6/U cables, 65
rips, 208
RJ-11 telephone plugs/cables, 64–65,
70, 70
RJ-45 plugs/jacks, 66–67, 70, 70, 75, 193
Roku, 213
root servers, 40
Ross, John, Wiring Home Networks, 57
routed VPN traffic, 164
routers
combination boxes, 33
configuring, 86
gateway, 6, 6, 32, 109–110
installing, 59, 61, 62–64, 63
IP addresses, 38
location of, 50
network-to-Internet connections,
109–115, 114
overview of, 32, 33
rsync, 104
Ruska, Jimmy, 154
Q
S
QuickTime, 218
Qwest, 174
Samba operating system, 96
Samba Shares folder, 148, 150
SATA hard drives, 97
scanning devices, 199–201, 200
secondary switches, 53
second-level domains, 38
Secure Shell (SSH), 104
Secure Sockets Layer (SSL), 89, 164, 176
security, network. See networks, security
selective backups, 100
serial data communications channels, 11
R
radio, Internet, 209, 214
radio signals, 2, 4, 14, 16, 20, 69, 77, 79,
81, 85, 160, 174, 184
radio transmitter/receiver, 80, 81
RADIUS (Remote Authentication Dial-in
User Service), 182, 183
262
I ND EX
Series2
Dual Tuner DVRs, 216
Single Tuner DVRs, 216
Series3 HD DVRs, 216
Server Message Block (SMB) protocol,
131, 143, 145–147, 146, 150
servers. See also file servers
2X Terminal Server, 226
Apache web server, 95, 156
audio/music, 7–8, 207–209,
212–213, 213
audiophile music, 209
client-and-server structures, 23–25, 25
computer for, 94
DHCP, 38, 109–115, 111, 112,
117–118, 124, 126, 126, 129,
157–158, 163
DNS, 40–41, 42, 43–44, 109, 115, 118,
124, 127, 246
file storage, 24, 96–97
file transfer, 39
firewall, 24
game, 24
HTTP web, 158
internal/external printer, 192,
192–193
mail, 24
message, 234
printer, 7, 25, 25, 193–197
Public DNS, 41
root, 40
stereo-component music, 208
types of, 24–25, 25
USB device, 99, 99, 100
video, 7–8, 215
VPN, 161, 162–165, 165, 167–169, 168
Windows Home Server, 95–96, 96,
208, 215
server-side backup programs, 104
Service Set Identifiers (SSIDs), 86, 90,
177–179, 178, 183, 244, 283
shared directories, 150
shared folders, 5, 139, 141, 150
shared Internet connections, 6
Shared Key Security field, 180
shared printers, 7, 143, 196, 196–199,
198, 199
shares, 139
sharing permissions, 96–97, 97
shoulder surfing, 184
Silex Technology, 99
Simple File Sharing, 132, 132–133, 136
Slim Devices, 213–214, 214
“smart” home appliances, 223
SMB (Server Message Block) protocol,
131, 143, 145–147, 146, 150
SMTP (outgoing mail protocol), 158
sneakernets, 3–4
sniffer programs, 178, 179, 249
social engineering, 185
SoftRos Lan Messenger, 235
Sony PlayStation, 220–221
Sound Blaster, 208
sound cards, 205, 208, 211, 212
Sound Forge Audio, 208
sound quality, 208, 211, 213
sources, 206, 207
SQL, 95
Squeezebox devices, 213–214, 214
SSH (Secure Shell), 104
SSIDs (Service Set Identifiers), 86, 90,
177–179, 178, 183, 244, 283
SSL (Secure Sockets Layer), 89, 164, 176
standards, wireless network, 78, 78–79
stars, 27
static addresses, 37, 109
status indicators, 75
stereo-component music servers, 208
stereo systems, 206, 212
storage servers, 24, 96–97
store-and-forward system, 11
structured wiring center, 59, 63
subdomain names, 39
subnet masks, 42, 109, 113, 118, 128
superusers, 226
surface boxes, 55–56
surveillance monitors, 205
S Video plugs, 218
switches
combination boxes, 33
designing networks with, 47
D-Link, 64
downstream, 67
Ethernet, 30, 53, 53, 55, 62, 80, 193
installing, 59, 61, 62–64, 63
location of, 50
overview of, 28, 29, 30–31, 31, 33
print, 194–195
secondary, 53
switching centers, 11
Symantec Security Check, 245
Synchronize It!, 232
SyncToy, 232
system administrators, 152
System Preferences window, 124
I N D EX
263
T
TCO (total cost of ownership), 95
TCP. See transmission control
protocol (TCP)
TCP/IP, 35–36, 123, 123, 126, 158
telephones
line connections, 17–18, 21–22, 22,
64–65, 65
wall outlets, 48, 49, 51
wiring, 17–18
telnet, 23, 39, 158
Temporal Key Integrity Protocol (TKIP),
182–183
text messaging, 233
TightVNC, 226, 229
Time Machine, 103–104, 104
TiVo, 216, 216–217
TKIP (Temporal Key Integrity Protocol),
182–183
top-level domain names, 39–41, 40
topologies, 27–28, 28
total cost of ownership (TCO), 95
TraceRoute tool, 36, 44, 44–46, 45
tracert, 44
traffic monitors, 204
trailers, 11
transceivers, 80, 81
transmission control protocol (TCP),
35–36, 123, 123, 126, 158
service ports, 158
Trend Micro HouseCall, 245
TRENDnet, 161
Trillian, 234
troubleshooting
AC power, 242
configuration settings, 246
defining problems, 240–241
DHCP settings, 246
error messages, 229, 239–240, 241, 247
failed connections, 246–247
general techniques, 239–245
isolating problems, 243
ISP problems, 251
keeping calm, 251
note keeping, 244–245
operating systems, 240
plugs and cables, 242
restart options, 241–242
retracing steps, 243
settings and options, 243
software for, 248–250, 249, 250
viruses, 245
TrueCrypt, 185
264
I ND EX
tunneled virtual interfaces, 164
tunneling headers, 161–162
TV cable connections, 65–66
TVs, 206, 218–220
TWAIN interface, 201
twisted-pair cables, 15, 15
U
UltraVNC, 229
uncompressed audio files, 209, 210
U-NII (Unlicensed National Information Infrastructure), 79
United States Computer Emergency
Readiness Team (US-CERT), 189
uniterruptible power supply (UPS), 61
Unix
backup files, 100, 104
computer-to-network connections,
117, 127, 127–129, 128, 129
CUPS printer control program, 199
file servers, 94–95, 96, 98, 215
file sharing, 131, 147–150, 148–150
firewalls, 154–159, 155, 158
network adapters, 73–74
network-to-Internet connections, 115
OpenVPN for, 173
remote desktop programs, 229
text commands for, 43, 44
troubleshooting info, 247
VPN clients for, 172-173
VPN servers for, 164
wireless control programs, 87
Unlicensed National Information Infrastructure (U-NII), 79
updates and patches, 185–188, 186–187
UPS (uniterruptible power supply), 61
USB
adapters, 72
device servers, 99, 99, 100
flash drives, 121
ports, 4, 16, 21, 70, 73, 99, 192, 194,
195, 201, 205, 211, 212, 216
Wi-Fi adapters, 83–84, 84, 85
US-CERT (United States Computer
Emergency Readiness
Team), 189
user accounts, 152
V
VGA
connectors, 218
displays, 220, 231
video
cables, 65–66
conferencing, 205, 237
files, 203–205, 215–220
messaging, 237
outlets, 48, 49, 50, 51
output drivers, 219
scaling, 219–220
servers, 7–8, 215
VideoLAN, 218
Virtual Network Computing (VNC),
226, 229
Virtual Private Network Consortium
(VPNC), 162
Virtual Private Networks (VPNs)
built-in support, 164–165, 165
client software for, 165–173, 166–172
configuring servers for, 163–164
configuring Windows for, 165–172,
166–172
data tunnels, 159, 161
functions of, 90, 159–161, 160, 161
messaging through, 236
methods, 161–162
OpenVPN, 164, 173
overview of and examples, 78, 90, 91,
159–174, 160, 161, 165, 166, 167,
168, 169, 170, 171, 172
via public networks, 173–174
servers, 161, 162–165, 165,
167–169, 168
viruses, troubleshooting, 245
VNC (Virtual Network Computing),
226, 229
Voice over Internet Protocol (VoIP), 54
VPNC (Virtual Private Network
Consortium), 162
VPN Masquerade, 164
VPNs. See Virtual Private
Networks (VPNs)
W
wall-mounted outlets, 59
wall plates, 49, 49, 50, 52, 55–56, 56, 67
WANs. See wide area networks (WANs)
WAV files, 209, 210, 210–211
web browsers, 24, 174
webcams/cameras, 8, 204, 204–205, 237
web hosting services, 105
WEP (wired equivalent privacy)
encryption, 90, 91, 174–175,
176, 179–182, 181, 183, 217
WIA interface, 201
wide area networks (WANs)
computer-to-network connections, 117
connections to, 24
network-to-Internet connections, 108,
109–113, 115
overview of, 31–32, 32, 45
Wi-Fi (wireless fidelity)
hotspots, 77–78, 89
links, 19–20, 194, 211, 213, 213, 215,
217, 224
networks
access points, 16, 53, 55, 62,
80–81, 81, 85–86, 87, 90, 99,
111, 113, 174
antennas, 4, 80, 82, 84–85
configuring, 85–86
connection programs, 85, 87–89
control programs, 85–86, 87–88, 88
designing/planning for, 54
enhanced/extreme systems, 78–79
firewalls for, 154–159, 155, 158, 172
hybrid wireless networks, 89
network interface adapters, 81–85,
82, 83, 84, 85, 87
network standards, 78, 78–79
operating channels, 79–80, 80, 86
overview of, 16, 77–78
planning for, 50
security methods, 54, 89–92,
174–184, 175, 178, 181
types of, 16, 78–79
Wireless Network Connection
programs, 87, 87–89, 88
wireless settings, 86
pigtails, 85
printer servers, 194
Wi-Fi Alliance, 79
Wi-Fi Protected Access (WPA)
encryption, 54, 78, 90, 91,
136, 160, 174–176, 179, 181,
182–183, 194, 217
Wii, 220, 221
WiMAX networks, 174
Windows
backup files, 100–103, 101, 103, 104
Backup or Restore Wizard, 101,
101–102
computer connections, 22
computer-to-network connections,
117, 118, 118–124, 119, 120, 121,
122, 123
I N D EX
265
Windows, continued
configuring for VPN, 165–172,
166–172
file servers, 94–96, 96
file sharing in Vista, 131, 136–143,
137–142
file sharing in XP, 131, 132, 132–136,
134, 135
firewalls, 154–159, 155, 158
Home Server, 95–96, 96, 208, 215
infrared ports, 21
IP addresses, 111, 111–112
Live Messenger, 234–235, 237
Media Audio, 210
Media Center, 208
Media Player, 208, 211, 218
network adapters, 73–74
Network Problem Solver, 245, 247,
247–248
network profiles, 118
Network Setup Wizard, 118–122, 119,
120, 121
network-to-Internet connections, 111,
111–112, 112, 115
OpenVPN for, 173
Remote Desktop, 226
remote desktop programs, 226–229,
227, 228
servers, 163–164, 215
TCP/IP, 35–36, 123, 123, 126, 158
text commands for, 43, 44
troubleshooting info, 247
updates and patches, 185–188,
186–187
Vista Home Premium, 226
VPN servers for, 162–165, 165
Wi-Fi control programs, 87, 87–88, 88
Windows-to-Mac remote access, 226
wired equivalent privacy (WEP)
encryption, 90, 91, 174–175,
176, 179–182, 181, 183, 217
wired networks, connecting to, 216–220
266
I ND EX
wireless
Ethernet. See Wi-Fi (wireless fidelity)
gateway firewalls, 158
network names, 86
network standards, 78, 78–79
security, 54, 89–92, 174–184, 175,
178, 181
wireless fidelity. See Wi-Fi (wireless
fidelity)
Wireless Network Connection programs,
87, 87–89, 88, 122
Wireshark, 248, 249, 250
wiring
Ethernet, 17
home run, 51–52, 52, 53
installing, 16–18, 57–58, 66
modular structured wiring center,
59, 63
telephone, 17–18
wiring closets, 31, 50
Wiring Home Networks (Ross), 57
workgroup names, 145
World Wide Web Consortium, 24
WPA (Wi-Fi Protected Access)
encryption, 54, 78, 90, 91,
136, 160, 174–176, 179, 181,
182–183, 194, 217
WPA2 encryption, 90, 176
X
Xbox 360, 220, 222
X Display Manager Control Protocol, 226
XMBC Media Center, 208
Y
yahoo.com, 44
Yahoo! Messenger, 234–235
Z
ZoneAlarm, 158
Zune, 24
The Electronic Frontier Foundation (EFF) is the leading
organization defending civil liberties in the digital world. We defend
free speech on the Internet, fight illegal surveillance, promote the
rights of innovators to develop new digital technologies, and work to
ensure that the rights and freedoms we enjoy are enhanced —
rather than eroded — as our use of technology grows.
PRIVACY
FREE SPEECH
INNOVATION
EFF has sued telecom giant AT&T for giving the NSA unfettered access to the
private communications of millions of their customers. eff.org/nsa
EFF’s Coders’ Rights Project is defending the rights of programmers and security
researchers to publish their findings without fear of legal challenges.
eff.org/freespeech
EFF's Patent Busting Project challenges overbroad patents that threaten
technological innovation. eff.org/patent
FAIR USE
EFF is fighting prohibitive standards that would take away your right to receive and
use over-the-air television broadcasts any way you choose. eff.org/IP/fairuse
TRANSPARENCY
EFF has developed the Switzerland Network Testing Tool to give individuals the tools
to test for covert traffic filtering. eff.org/transparency
INTERNATIONAL
EFF is working to ensure that international treaties do not restrict our free speech,
privacy or digital consumer rights. eff.org/global
EFF is a member-supported organization. Join Now!
www.eff.org/support
More no-nonsense books from
STEAL THIS COMPUTER BOOK 4.0
What They Won’t Tell You About the Internet
by WALLACE WANG
This offbeat, non-technical book examines what hackers do, how they do it,
and how readers can protect themselves. Informative, irreverent, and entertaining, the completely revised fourth edition of Steal This Computer Book
contains new chapters that discuss the hacker mentality, lock picking,
exploiting P2P file-sharing networks, and how people manipulate search
engines and pop-up ads. Includes a CD with hundreds of megabytes of hacking and security-related programs that tie in to each chapter of the book.
MAY 2006, 384 PP. W /CD , $29.95
ISBN 978-1-59327-105-3
UBUNTU FOR NON-GEEKS, 3RD EDITION
A Pain-Free, Project-Based, Get-Things-Done Guidebook
by RICKFORD GRANT
This newbie’s guide to Ubuntu lets readers learn by doing. Using immersionlearning techniques favored by language courses, step-by-step projects build
upon earlier tutorial concepts, stimulating the brain and increasing the
reader’s understanding. This book covers all of the topics likely to be of
interest to an average desktop user, such as installing new software via Synaptic;
Internet connectivity; working with removable storage devices, printers, and
scanners; and handling DVDs, audio files, and even iPods. It also eases readers
into the world of commands, thus allowing them to work with Java, Python,
or other script-based applications; convert RPMs to DEB files; and compile
software from source.
JUNE 2008, 360 PP. W /CD , $34.95
ISBN 978-1-59327-180-0
HACKING, 2ND EDITION
The Art of Exploitation
by JON ERICKSON
While many security books merely show how to run existing exploits,
Hacking: The Art of Exploitation was the first book to explain how exploits
actually work—and how readers can develop and implement their own.
In this all new second edition, author Jon Erickson uses practical examples
to illustrate the fundamentals of serious hacking. You’ll learn about key concepts underlying common exploits, such as programming errors, assembly
language, networking, shellcode, cryptography, and more. And the bundled
Linux LiveCD provides an easy-to-use, hands-on learning environment. This
edition has been extensively updated and expanded, including a new introduction to the complex, low-level workings of computer.
FEBRUARY 2008, 480 PP. W /CD, $49.95
ISBN 978-1-59327-144-2
THE BOOK OF WIRELESS, 2ND EDITION
A Painless Guide to Wi-Fi and Broadband Wireless
by JOHN ROSS
This plain-English guide to popular wireless networking standards shows
readers how to connect to wireless networks anywhere they go. After an
introduction to networking in general and wireless networking in particular,
the book explains all available standards, including all flavors of wireless
Ethernet (Wi-Fi), along with new standards like WiMAX and 3G networks.
Readers will learn how to use wireless software to connect to the Internet
wherever they are, rather than waiting until they’re in range of a public
Wi-Fi hot spot. The Book of Wireless offers information about all of the currently available wireless services for Internet access, with advice on how to
understand the important differences between them such as cost, speed,
and coverage areas. For readers setting up home networks, the book contains
useful advice about choosing and setting up hardware and software, securing
networks using WEP and WPA, and setting up a wireless connection for VoIP.
JANUARY 2008, 352 PP., $29.95
ISBN 978-1-59327-169-5
THE MANGA GUIDE TO ELECTRICITY
by KAZUHIRO FUJITAKI, MATSUDA, and TREND-PRO CO., LTD.
The Manga Guide to Electricity teaches readers the fundamentals of how electricity works through authentic Japanese manga. Readers follow Rereko, a
denizen of Electopia, the Land of Electricity, as she is exiled to Tokyo to
learn more about electricity. In no time, graduate student Hikaru is teaching
her the essentials, such as static electricity and Coloumb’s law; the relationship between voltage, resistance, and current; and the difference between
series and parallel electrical circuits. Using real-world examples like flashlights and home appliances, The Manga Guide to Electricity combines a whimsical
story with real educational content so that readers will quickly master the core
concepts of electricity with a minimum of frustration.
MARCH 2009, 232 PP ., $19.95
ISBN 978-1-59327-197-8
PHONE:
EMAIL:
800.420.7240 OR
415.863.9900
[email protected]
MONDAY THROUGH FRIDAY,
WEB:
WWW.NOSTARCH.COM
9 A.M. TO 5 P.M. (PST)
COLOPHON
The fonts used in Network Know-How are New Baskerville, Futura, and
Dogma.
The book was printed and bound at Malloy Incorporated in Ann Arbor,
Michigan. The paper is Glatfelter Spring Forge 60# Antique Eggshell, which
is certified by the Sustainable Forestry Initiative (SFI). The book uses a
RepKover binding, which allows it to lay flat when open.
UPDATES
Visit http://www.nostarch.com/networks.htm for updates, errata, and other
information.
NE T WORKING
M A DE PA INLE SS
Network Know-How is your guide to connecting your
machines, filled with practical advice that will show you
how to get things done. You’ll learn the nitty-gritty of
network setup, design, and maintenance, from running
cables and placing wireless access points to configuring
file sharing and printing. This practical and comprehensive
guide will teach you how to implement security, create
intranets, and more. You’ll learn how to:
• Connect Windows, Macintosh, and Linux computers
• Automate household appliances and distribute digital
audio and video to your home entertainment center
• Troubleshoot network slowdowns and failures
No matter which operating system you use, and even
if you’ve never installed or run a network before, you’ll
get what you need to know in Network Know-How.
ABOUT THE AUTHOR
John Ross has worked on wired and wireless networking for Motorola, AT&T, and other manufacturers. He
is the author of more than two dozen books, including
Internet Power Tools (Random House), Connecting with
Windows (Sybex), Wiring Home Networks (Sunset
Books), and The Book of Wireless (No Starch Press).
• Implement network addressing
• Configure your network adapters, hubs, switches,
and router
COV E RS W INDOW S,
MAC OS X, AND LINUX
• Share music, photos, and documents
N E T W O R K K N O W- H O W
Are the machines in your office living isolated lives?
Do you have a few computers at home that you want
to connect to each other and the Internet? The best
way to share files on a group of computers is to create
a network. But how do you do that?
T H E F I N E ST I N G E E K E N T E RTA I N M E N T ™
“ I L AY F L AT .”
$29.95 ($29.95 CDN)
SHELVE IN:
COMPUTERS/NETWORKING
This book uses RepKover — a durable binding that won’t snap shut.
ROSS
w w w.nostarch.com
NET WORK
KNOW-H OW
A N
E S S E N T I A L
G U I D E
F O R
ACCIDENTAL A D M I N
JOHN ROSS
T H E