1
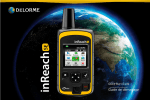
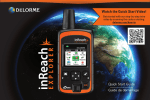
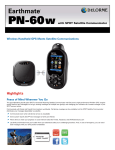
DE LORME
inReach
™
User Manual
for Android
November 2011
for Earthmate® PN-60w
Contents
Getting Started...........................................................................................................................................................3
Welcome...........................................................................................................................................................3
What’s in the Box..............................................................................................................................................3
inReach Interface...............................................................................................................................................3
Set Up Your inReach Account............................................................................................................................4
Satellite Reception.............................................................................................................................................4
Using the inReach as a Standalone Device................................................................................................................5
Power ................................................................................................................................................................5
Tracking .............................................................................................................................................................5
Message ...........................................................................................................................................................5
SOS ...................................................................................................................................................................6
Locate................................................................................................................................................................7
Signal LED.........................................................................................................................................................7
Using the inReach with a PN-60w.............................................................................................................................8
Pair the inReach and PN-60w............................................................................................................................8
Sync Account Info..............................................................................................................................................8
inReach LEDs....................................................................................................................................................9
Messages..........................................................................................................................................................9
Tracking............................................................................................................................................................ 12
SOS.................................................................................................................................................................. 13
History............................................................................................................................................................. 15
Using the inReach with an Android Phone............................................................................................................... 16
Pair the inReach and Phone............................................................................................................................. 16
Sync Account Info............................................................................................................................................ 16
inReach LEDs.................................................................................................................................................. 17
Maps................................................................................................................................................................ 17
Messages........................................................................................................................................................ 18
Tracking............................................................................................................................................................20
SOS.................................................................................................................................................................. 21
History.............................................................................................................................................................22
Safety and Legal Information....................................................................................................................................23
Safety Information...........................................................................................................................................23
Legal Information.............................................................................................................................................24
inReach Service...............................................................................................................................................25
Specifications...........................................................................................................................................................26
Resources.................................................................................................................................................................27
Getting Started
Welcome
The inReach™ two-way satellite communicator with GPS keeps you in reach wherever you go—whether you want to
share your trip, check in with loved ones, or send an SOS in an emergency, you’re always in reach.
•• Use the inReach for Android with the Earthmate® app on your compatible phone tablet to take full advantage of
two-way messaging and DeLorme maps.
•• Use the inReach for Earthmate® PN-60w to experience all the PN-60w has to offer, with the addition of two-way
messaging.
•• Use either inReach alone to send your location to explore.delorme.com; send predefined messages that include
your location to your contacts, Facebook, or Twitter; or send an SOS in an emergency.
What’s in the Box
Your inReach package contains:
•• inReach with pack clip and lanyard
•• Micro USB cable
•• 2 lithium AA batteries
•• Quick Start Guide
inReach Interface
Antenna
Tracking
LEDs
Power
Signal LED
Message
SOS
SOS Button Lock
Battery compartment
DeLorme inReach User Manual | Getting Started
3
Batteries
The battery compartment is on the bottom of the inReach. Inside the battery compartment, you’ll find a label with your
device’s IMEI number and authorization code; you’ll need this when you activate your inReach at explore.delorme.
com.
To insert the batteries
Remove the cover by unscrewing the D-ring screws, insert two lithium AA batteries according to the polarity symbols,
and then replace the cover.
Low battery warning
When the lithium batteries are low (approximately 10% of their power remains), the Power LED will flash red once
every three seconds. When power loss is imminent, the Power LED flashes red every 1.5 seconds.
Two (2) AA batteries are required for use. Lithium batteries provide the best performance and are strongly
recommended. Alkaline and NiMH batteries can be used in an emergency; the low battery warning is not
accurate for these types of batteries.
Micro USB Port
The micro USB port is located in the battery compartment. This is used to update the device (this happens
infrequently). If an update is required, you will be notified and instructions will be provided.
Set Up Your inReach Account
Create an account and activate the inReach
Before you start using the inReach, you must set up an account at explore.delorme.com. During the account setup
process, you will choose your inReach service plan and add information about your emergency contacts. Once you
log in to your account, you should add your contacts to the Address Book and customize the predefined inReach
messages in the Message Book so you can better use the inReach in standalone mode.
Click the Help link at the top of explore.delorme.com for help with using the website.
•• If you will be using the inReach with an Earthmate® PN-60w, see Using the inReach with a PN-60w on page
8 for information about syncing your account info with your device. See the Help page on explore.delorme.
com for detailed information.
•• If you will be using the inReach with an Android phone, you will need to download the free Earthmate® app from
the Android Market (market.android.com) to your phone and sync your account with the Earthmate app. See the
Help page in the app or on explore.delorme.com for more information.
•• Set up your MapShare page on explore.delorme.com and send a link to your friends and family. They can follow
along on your adventures and even send you messages or request your location if you allow them to do so.
Satellite Reception
The inReach requires a clear view of the sky to acquire a GPS fix and transmit your messages over the Iridium® satellite
network. This process should take less than one minute, but it could take more time if the line of sight is obstructed.
For the best reception when wearing the inReach, attach it to a backpack strap on your upper body or place it in a
pocket at the top of a backpack. If you attach the pack clip to your belt, some of the signal may be blocked by your
body and could prevent proper transmission of messages and tracking points.
4
Getting Started | DeLorme inReach User Manual
Using the inReach as a Standalone Device
You can use the inReach as a standalone device when you don’t want to use it with an Android phone or
Earthmate PN-60w GPS.
Power
•• To turn the inReach on, press and hold the Power button until the Power LED flashes green and then release the
button. When powered on, the Power LED will flash green once every three seconds.
•• To turn the inReach off, press and hold the Power button until the Power LED flashes rapidly and then release the
button.
•• When power is low, the Power LED flashes red once every three seconds. See Batteries on page 4 for more
information.
•• When there is not enough power to send any messages or tracking points, the Power LED flashes red every 1.5
seconds. See Batteries on page 4 for more information.
Tracking
The Tracking button allows you to send your location to explore.delorme.com when you are using the inReach in
standalone mode. When you are moving, your location is sent every 10 minutes. When you are stationary, your location
is sent every four hours; if you move more than 100 meters, tracking at 10 minute intervals resumes.
•• To start tracking, press and hold the Tracking button until the Tracking LED flashes and then release the button.
The LED will flash green once every three seconds while tracking until you cancel tracking or turn off the inReach.
•• To stop tracking, press and hold the Tracking button until the Tracking LED flashes rapidly and then release the
button.
You can also use tracking when connected with an Earthmate PN-60w (see page 12) or Android phone (see page
20). In addition, tracking can be initiated from explore.delorme.com by anyone who can log in to your account. See
the Help at explore.delorme.com for more information.
Message
The Message button lets you send predefined inReach messages that you created on explore.delorme.com. You can
create up to three messages—it’s a good idea to make a note of the messages in the proper order and take it with you.
The message is sent to contacts you designated on explore.delorme.com when you created the message.
•• To send predefined message one, press and hold the Message button until the Message LED flashes once and
then release the button. The Message LED will flash once every three seconds until the message is sent.
•• To send predefined message two, press and hold the Message button until the Message LED flashes twice and
then release the button. The Message LED will flash twice every three seconds until the message is sent.
•• To send predefined message three, press and hold the Message button until the Message LED flashes three
times and then release the button. The Message LED will flash three times every three seconds until the message
is sent.
Note The LED flashes for choosing the message will cycle in order until you release the Message button to make a
selection.
DeLorme inReach User Manual | Using the inReach as a Standalone Device
5
SOS
IMPORTANT! Use SOS only in an emergency. Do not test SOS—all SOS activations are real and a false activation
could result in charges to you.
Use the SOS button to send an emergency message to GEOS Search and Rescue when you are using the inReach
in standalone mode. You can also use the SOS button on the inReach when it is paired with an Android phone or
an Earthmate PN-60w. Your location will be relayed to GEOS Search and Rescue and they will dispatch emergency
services and notify the emergency contacts listed in your explore.delorme.com account. Your location will
automatically update until you cancel the SOS.
Your location will be sent to GEOS as follows:
•• First ten minutes, every sixty seconds
•• Ten minutes to one hour, every ten minutes
•• One hour to eight hours, every 15 minutes
•• Eight hours to 24 hours, every 60 minutes
After the first ten minutes, if you are stationary, your location is sent every thirty minutes; the transmission rate is
slowed to preserve battery life.
If your position changes by more than 100 meters, your location will be sent again. If you don’t need to move for safety
reasons, stay where you are to preserve battery life and to make it easier for search and rescue to locate you.
To send an SOS message
1. Press and slide the SOS button lock to the left.
2. Press and hold the SOS button until the SOS LED begins to flash and then release the button. The SOS LED will
flash green once every three seconds.
When the SOS LED begins flashing green more rapidly (every 1.5 seconds), it indicates that your SOS message
was received by a responder at GEOS Search and Rescue and they are acknowledging your message.
3. To confirm that you know GEOS has received your message, press and immediately release the SOS button. The
SOS LED will resume flashing green every three seconds.
If you are unable to confirm that you know your message was received, help will still be sent.
If you do not have a clear view of the sky, the SOS messages will be stored and then sent as soon as you have a good
signal. The Signal LED will flash green when you have a good signal; it will flash red when you do not have a good
signal.
To cancel an SOS message
1. Press and hold the SOS button until the SOS LED flashes rapidly and then release the button.
This sends a message to GEOS Search and Rescue to let them know that the emergency has been resolved and
assistance is no longer needed.
2. Press and slide the SOS button lock to the right.
When you cancel SOS, the SOS LED flashes rapidly and then stops. The Signal and Message LEDs flash until the
cancellation message has finished sending; do not power off the inReach until the Signal and Message LEDs stop
flashing.
IMPORTANT! You must cancel SOS to stop GEOS from sending help. Turning off the inReach device (or a connected
Android phone or PN-60w) or taking out the batteries will NOT tell GEOS to stop the rescue. If you replace the
batteries when an SOS is in progress, press and hold the SOS button again to update your location.
For more information about GEOS, visit geosalliance.com.
6
Using the inReach as a Standalone Device | DeLorme inReach User Manual
Locate
Anyone who has your explore.delorme.com account login information can send a tracking point request from the
website to the inReach to determine the location of the inReach. When the inReach receives the request, it sends
a tracking point (a total of two tracking points are used). If you are using the inReach as a standalone device, your
inReach will automatically respond. If you are using the inReach with your PN-60w or Android phone, you will be
notified of the request. See the Help on explore.delorme.com for more information.
Signal LED
The Signal LED indicates the status of the connection between the inReach and the GPS or Iridium satellites. Green
flashes indicate that messages or tracking points are being sent. Red flashes indicate that you don’t have a good signal
and messages or tracking points aren’t being sent.
•• The Signal LED flashes green once every three seconds when the inReach is sending a message of any type.
The LED will stop flashing when the message is sent, unless the inReach is tracking in standalone mode. When
tracking in standalone mode, the Signal LED flashes continuously to indicate the status of the GPS satellites.
•• The Signal LED flashes red once every three seconds when the inReach is having trouble sending or confirming
a message. The Signal LED will flash red until the message is successfully transmitted or cancelled. If the LED is
flashing red, try moving to a new location to get a better view of the satellites.
DeLorme inReach User Manual | Using the inReach as a Standalone Device
7
Using the inReach with a PN-60w
When you pair your DeLorme inReach with the DeLorme Earthmate PN-60w, you have the best of both worlds—a
powerful, rugged handheld GPS device and the ability to send and receive messages wherever you go—whether you
want to share your trip, check in with loved ones, or send an SOS in an emergency.
Note To use the inReach with a PN-60w, you must update the firmware on the PN-60w to version 3.3. You can
update the firmware through Earthmate Sync in Topo North America or visit support.delorme.com.
Quick Tips
•• To select something—for example, a check box, an on-screen button, or a drop-down list— or to open the onscreen keyboard to enter text, use the arrow keypad to highlight the item and then press ENTER.
•• To exit a list or screen, press QUIT. To exit the on-screen keyboard, highlight OK and press ENTER.
•• For detailed help on using the PN-60w, see the DeLorme Earthmate PN-60 User Manual available at
manuals.delorme.com.
Pair the inReach and PN-60w
Before you can use the inReach and PN-60w together, you must first pair them. Pairing connects the inReach and
PN-60w wirelessly. Once the devices are paired, they automatically connect when they are both powered on and near
each other.
1. Open the inReach Page on the PN-60w.
2. Press MENU, select Pair DeLorme inReach and press ENTER.
3. With the inReach powered off, press and hold its Power button until the Power LED flashes green. Then, press
ENTER on the PN-60w.
To unpair the devices, from the inReach Page on the PN-60w, go to MENU > Unpair DeLorme inReach.
Note The wireless antenna settings for the PN-60w are found under Settings > Wireless.
Sync Account Info
Log in to your account on explore.delorme.com and view your inReach details. Connect the PN-60w to your
computer, and then click the red Sync PN-60w button at the upper right corner of the website to send contacts—
including Facebook and Twitter info—Quick Text messages, and MapShare information to your device. Syncing allows
you to send contacts and messages from explore.delorme.com to your PN-60w—contacts you have added to the
PN-60w are not synced back to explore.delorme.com.
8
Using the inReach with a PN-60w | DeLorme inReach User Manual
Note You will be prompted to install the DeLorme GPS Browser Plugin the first time you sync. During the initial
process, you will need to close your browser.
inReach LEDs
The inReach LEDs reflect what you are doing on the PN-60w inReach Page. See Using the inReach as a Standalone
Device on page 5 for more information.
Messages
The Messages page displays a list of conversations. The number of unread messages is indicated in the page header
and the conversations with unread messages are indicated with a green dot. All sent and received messages are
available at explore.delorme.com and on the History page on the device. See History on page 15 for more
information.
Messages that you send and receive while the inReach and PN-60w are connected are displayed on the PN-60w
Map Page. To view the message details from the map, use the arrow keypad to pan to the message icon and press
ENTER.
Create Messages
Create messages (of up to 160 characters) and send them to the contacts that you synced from explore.delorme.
com or add new addresses directly to the PN-60w.
•• The predefined Quick Text messages you set up at explore.delorme.com and synced to your PN-60w are
available in the drop-down list on the Compose Message page, or you can create a new message.
•• Post to Facebook and Twitter. Link your accounts at explore.delorme.com—Facebook and Twitter will appear in
your address book and each has its own conversation thread. You can post to your own Facebook wall or Twitter
account; you will not receive comments or replies on the PN-60w.
•• Post messages to your MapShare page. You must first set up MapShare on explore.delorme.com and sync your
PN-60w. MapShare will appear in your address book and it has its own conversation thread.
•• Create messages on your PN-60w when you aren’t connected to your inReach. When you are connected, the
message will be sent.
•• On the inReach, the Signal and Message LEDs flash green if the message is sending successfully and red if it is
not.
DeLorme inReach User Manual | Using the inReach with a PN-60w
9
To send a new message
1. From the inReach Page, select Messages, and then select New Message.
2. With the address text box highlighted, press ENTER to open the keyboard.
Start entering a name. Matches from your contact list will appear. Select OK to add the name shown or to see all
possible matches when multiple matches exist, and then select the address to use. Select OK to enter another
address. Select OK twice to exit.
OR
Enter the entire email address or mobile phone number and press ENTER. An address that has not been synced
from explore.delorme.com to the PN-60w is subtracted from the 160-character composed message allotment.
Select OK to enter another address. Select OK twice to confirm the addresses.
OR
Select the address book to the right of the text box and scroll through your contacts. To select a contact, highlight
it and press ENTER. Press QUIT to exit the list.
3. To select a Quick Text message that you synced from explore.delorme.com, select the Compose Text
Message drop-down list and select the message.
OR
To type a new message, select Type message here and press ENTER. Then, type the message. The number of
characters remaining displays in the Compose Message area.
4. Select Send.
To reply to a conversation
1. From the inReach Page, select Messages.
2. Select the conversation that you want to reply to. Select Reply, and then enter your message.
3. Select Send.
Sent Messages
The message sending icon displays until the message is sent. If the failed message icon
appears, the message has
not been sent. Make sure the PN-60w and inReach are connected and that you have a clear view of the sky. Attempts
to send a failed message will continue until you have a good signal. If after 15 minutes the message has not been sent,
you will be prompted to continue sending or cancel the message.
On the inReach, the Signal and Message LEDs flash green if the message is sending successfully and red if it is not.
10
Using the inReach with a PN-60w | DeLorme inReach User Manual
Message Details
The details page displays information about the message. From the Messages page, select a conversation thread to
view the messages, and then select a message to view its details. You can also view message details from History;
see page 15 for more information.
To
Do this
View the message location on
the map
Select View.
Route to the message location
Select Route. See the DeLorme Earthmate PN-60 User Manual (manuals.
delorme.com) for more info about routing.
Mark a waypoint at the message
location
Select Mark. See the DeLorme Earthmate PN-60 User Manual (manuals.
delorme.com) for more info about waypoints.
Delete the message
Go to MENU > Delete message.
Reference Points
A reference point is a location that is somewhere other than your current location. You can use the PN-60w to send a
map location, geocache, or waypoint as a reference point message using the inReach. From the details page for the
point, go to MENU > Send Point/Geocache/Waypoint with inReach. See the Earthmate PN-60 User Manual at
manuals.delorme.com for more information.
Sent Messages
When you send a message, the method used for sending determines how the recipient can respond.
•• Text/SMS message–Recipients receive a text message. They can reply to the message directly. The carrier’s text
messaging rates apply in addition to your inReach account messages. The text message also includes a link to a
map of your location and an option to reply via the website.
•• Email–Recipients receive an email with a link. The recipient can use the link to go to a website where they can
view your location on a map and reply to you via the website. They cannot reply directly to the email.
•• inReach–Other inReach users receive a message on their PN-60w or in the Android Earthmate app. They can see
your message on their map and can also view the map from the message details page.
Incoming Messages
When you have new messages:
•• The inReach icon on the Home Page displays the number of unread messages.
•• A sound plays when you receive a message. To control sound settings, go to
Settings > Sound > Message.
•• In the Messages page list, the header indicates the number of unread
messages and a green dot indicates the conversations with unread messages.
•• You can add someone who sends you a message to your address book or edit
an existing address book entry to add a new source. From the conversation
thread, go to MENU > Add Sender as New Contact/Add Sender to Existing
Contact.
DeLorme inReach User Manual | Using the inReach with a PN-60w
11
Tracking
When you use the inReach’s tracking feature with your PN-60w, you can set the interval for placing tracking points
on the map at explore.delorme.com. The tracking points recorded while the PN-60w and the inReach are paired are
visible on the PN-60w’s Map Page and you can view information about them in the inReach History page. Regular
tracking points are yellow pins and SOS tracking points are red pins.
If you set up a MapShare page on explore.delorme.com, you can send a link to share your travels. The MapShare
page has options you can customize, so you can allow people to send you messages, send a request to view your
current location, or just view the tracking points and messages you send to MapShare.
Anyone who has your explore.delorme.com account login information can send a location or tracking request from
the website to the inReach. When the inReach receives the request, it sends one tracking point for a location request
(a total of two tracking points are used) or turns on tracking for a tracking request. If you are using the inReach with
your PN-60w, you will be notified of the request. See the Help page on explore.delorme.com for more information.
Handing off Tracking
When your PN-60w and inReach are connected, you can start tracking on the PN-60w and then power it off to save
battery life—the inReach will begin tracking in standalone mode. No tracking points will be recorded on your PN-60w
when it is powered off, but tracking points will be visible on explore.delorme.com and on your MapShare page.
Alternatively, if you start tracking on the inReach and then power on your PN-60w, you can monitor tracking on the
PN-60w.
You can also stop tracking on either device when they are connected.
To start tracking from the PN-60w
The tracking interval determines how often tracking points are sent via the inReach to explore.delorme.com and
your MapShare page. To save battery life, select a longer interval so that fewer tracking points are sent while you
are moving. When you are stationary, tracking points are sent every four hours; if you move more than 100 meters,
tracking resumes at the interval you set.
1. Make sure your inReach is powered on and connected before you begin. From the inReach Page, select Tracking.
2. To change the tracking interval, click Edit.
3. From the When moving, send every drop-down list, select a time interval and then press QUIT to exit the interval
setup page.
4. On the Tracking Setup page, if you want to send a link to your MapShare page, select Share. Then enter or add
addresses to your message and click Send. The message thread displays—press QUIT to exit.
5. On the Tracking Setup page, select Start Tracking. The Tracking Details page displays. On the inReach, the Signal
and Tracking LEDs flash. If tracking points fail to send successfully, you will be notified.
6. To stop tracking, select Stop Tracking.
12
Using the inReach with a PN-60w | DeLorme inReach User Manual
SOS
IMPORTANT! Use SOS only in an emergency. Do not test SOS—all SOS activations are real and a false activation
could result in charges to you.
The SOS feature uses the inReach to send a message to GEOS Search and Rescue in a critical or life-threatening
emergency. With the PN-60w, you can type a message giving GEOS details about your situation and they can reply to
you. They will dispatch emergency services and notify the emergency contacts you listed in your explore.delorme.
com account. Your location will automatically update until you cancel the SOS.
Your location will be sent to GEOS as follows:
•• First ten minutes, every sixty seconds
•• Ten minutes to one hour, every ten minutes
•• One hour to eight hours, every 15 minutes
•• Eight hours to 24 hours, every 60 minutes
After the first ten minutes, if you are stationary, your location is sent every thirty minutes; the transmission rate is
slowed to preserve battery life.
If your position changes by more than 100 meters, your location will be sent again. If you don’t need to move for safety
reasons, stay where you are to preserve battery life and to make it easier for search and rescue to locate you.
You can monitor the SOS on the Tracking page. From there you can also cancel the SOS or send a message to GEOS.
The tracking points and messages are also visible on the Map Page.
Note If you do not have a clear view of the sky, the SOS messages will be stored and then sent as soon as you have
a good signal. The Signal LED will flash green when messages are being sent; it will flash red when you do not have a
good signal.
Handing off SOS
When your PN-60w and inReach are connected, you can start the SOS on the PN-60w and then power it off to save
battery life—the inReach will send the SOS in standalone mode. No SOS tracking points or messages will be recorded
on your PN-60w when it is powered off, but both will be visible on explore.delorme.com.
Alternatively, if you start SOS on the inReach and then power on your PN-60w, you can monitor SOS tracking and send
and receive messages from GEOS Search and Rescue.
The SOS LED on the inReach will flash while the SOS is in progress.
To send an SOS message
1. Make sure your inReach is powered on and connected.
2. From the inReach Page, select SOS and then select Emergency.
3. Press ENTER to select Compose SOS. The recipient is GEOS—this cannot be changed.
DeLorme inReach User Manual | Using the inReach with a PN-60w
13
4. A default message is available, but, if possible, type a message providing details about your emergency.
5. Select Send SOS. The countdown timer displays for 10 seconds. To cancel the SOS before it’s sent, press QUIT.
6. The SOS conversation thread will appear. Select Reply to send another message to GEOS or to respond to them.
Note If you do not have a clear view of the sky, the SOS messages will be stored and then sent as you have a good
signal. The Signal LED will flash green when messages are being sent; it will flash red when you do not have a good
signal.
To cancel an SOS message
Select Cancel SOS. This sends a message to GEOS to let them know that the emergency has been resolved and
assistance is no longer needed. The SOS message thread will close once the cancellation has been processed. On the
inReach, the Signal and Message LEDs flash until the cancellation message has finished sending; do not power off the
inReach until the Signal and Message LEDs stop flashing.
You can also cancel the SOS on the inReach; see page 6 for more information.
IMPORTANT! You must cancel SOS to stop GEOS from sending help. Turning off the inReach device (or a connected
Android phone or PN-60w) or taking out the batteries will NOT tell GEOS to stop the rescue. If you replace the
batteries when an SOS is in progress, press and hold the SOS button again to update your location.
For more information about GEOS, visit geosalliance.com.
Addresses
The address book displays a list of contacts you have synced from explore.delorme.com as well as any contacts you
add to the address book on the PN-60w. Note that contacts you add or delete or edits you make on the PN-60w are
not synced back to explore.delorme.com—you should update explore.delorme.com with any changes you make on
your device that you want to keep and then sync again.
You cannot add, edit, or delete Facebook, Twitter, or MapShare contacts on the PN-60w. You must add them to
explore.delorme.com and sync them to the device.
To view a contact’s details
From the inReach Page, select Addresses, and then select the contact.
To add a contact
1. From the inReach Page, select Addresses, and then select New Contact.
2. Complete the contact’s information by selecting each field to open the on-screen keyboard.
3. To add fields, press MENU, select Add additional fields, and select the type of field to add. Then, enter the
information.
4. Press QUIT to exit.
To edit a contact
1. From the inReach Page, select Addresses, and then select the contact to view its details.
2. Select the field to edit OR to add a field, press MENU, select Add additional fields, and select the type of field to
add. Then, enter the information.
3. Press QUIT to exit.
To delete a contact
1. From the inReach Page, select Addresses, and then select the contact.
2. Go to MENU > Delete contact.
14
Using the inReach with a PN-60w | DeLorme inReach User Manual
History
The History page displays a chronological list of activity by day.
•• To view the details for a day, select it. Select View All to view all message and tracking points on the map, or
select an individual point to view its details.
•• To delete all history, from the History page, go to MENU > Delete All History.
•• To delete the history for a specific day, select the day to view its details, and then go to MENU > Delete History
for Day.
DeLorme inReach User Manual | Using the inReach with a PN-60w
15
Using the inReach with an Android Phone
When you pair your DeLorme inReach with your Android phone you can send and receive messages wherever you go.
You can share your trip, check in with friends and family, or send an SOS in an emergency.
Android version 2.1 and above is supported; 2.2 or above is recommended.
To get started, go to the Android Market and download the free Earthmate app to your Android phone.
The main menu in the Earthmate app gives you options to pair the inReach, view Help, sync with your account on explore.delorme.com, update settings, and exit the app. Additional options are available on each page. Go to the menu
within the app to see the options.
Note To close the Earthmate app, go to MENU > Exit.
Pair the inReach and Phone
You must pair your inReach with your Android phone to use them together.
•• Your phone’s Bluetooth must be turned on to pair with the inReach. You will be prompted to turn on Bluetooth in
your phone’s settings if you don’t have it on already.
•• If you see your inReach device appear in the list and the searching message is still active, tap Back to dismiss the
message and then tap the device name.
•• Some Android phones require that you confirm the Bluetooth connection. Check the notifications window on your
phone if it doesn’t appear to be connecting.
•• You will need to pair the devices only once; however, if you unpair them for any reason, you will need to pair them
again.
To pair the devices, tap MENU > Pair and follow the instructions.
Note The wireless antenna settings for the PN-60w are found under Settings > Wireless.
If you turn off your phone to save battery life or close the Earthmate app, the inReach will continue any tracking or SOS
messaging that is in progress.
Once you pair your inReach and your phone, they will stay paired. To connect them, you must either launch the
Earthmate app when the inReach is powered on, or start an activity in the Earthmate app that requires the inReach
(such as tracking or sending a message).
Sync Account Info
Log into explore.delorme.com to make sure your account contacts and Quick Text messages are up to date. If you
want to post messages to Facebook, Twitter, or your MapShare page, you must set that information up before you
sync.
16
Using the inReach with an Android Phone | DeLorme inReach User Manual
To sync account info
Tap MENU > Sync to sync account info from explore.delorme.com with your phone. The first time you sync, you will
be prompted to enter your explore.delorme.com account info. Note that contacts and quick text messages you add to
explore.delorme.com are synced to your phone but contact info you add to your phone is not synced back to explore.
delorme.com.
inReach LEDs
The inReach LEDs reflect what you are doing in the Earthmate app. See Using the inReach as a Standalone Device for
more information.
Maps
Downloading Maps
The first time you use the map, the world base map will be downloaded. It is recommended that you download the
maps when you have a Wi-Fi connection because of the file size. An SD card is required to download maps.
You can download highly-detailed DeLorme topographic maps for North America. Tap the map download icon
select a region for download.
to
Map Controls and Settings
See the app’s Map Help topic for information about map controls and settings. To change map settings, go to MENU >
Settings > Map (MENU > Settings from the Map page).
Reference Points
A reference point is a location that is somewhere other than your current location. To get information about a place on
the map, long press the location on the map. The reference point icon appears. Tap the icon to view details about
the point, send a message that includes the reference point, or delete the reference point. When you send a reference
point as a message, it is saved on the map.
To view another point, long press another place on the map.
DeLorme inReach User Manual | Using the inReach with an Android Phone
17
Messages
Tap Messages to view a list of conversations. The number of unread messages is indicated in the page header and
the conversations with unread messages are indicated by a blue dot.
All sent and received messages are available to view at explore.delorme.com and are saved to History in the app.
See History on page 22 for more information.
Messages that you send and receive while your phone is connected to the inReach are displayed on the map.
Create Messages
Create messages (up to 160 characters) and send them to the contacts that you synced from explore.delorme.com,
contacts on your phone, or add a new address.
•• The predefined Quick Text messages you set up at explore.delorme.com and synced to your phone are available
by tapping the Quick Text icon next to the text box or you can create a new message. Quick Text messages
synced from explore.delorme.com to the Earthmate app use a short code rather than the 160-character limit.
•• Post to Facebook and Twitter. Link your accounts at explore.delorme.com—Facebook and Twitter will appear
under your contact information and each has its own conversation thread. You can post to your own Facebook wall
or Twitter account; you will not receive comments or replies in the Earthmate app.
•• Post messages to update your MapShare page. You must first set up MapShare on explore.delorme.com; see
the Help at explore.delorme.com for more information. MapShare will appear under your contact information
and has its own conversation thread.
•• Create messages on your phone when you aren’t connected to your inReach. When you are connected within
15 minutes, the message will be sent automatically; you can tap the message to send it if you connect after 15
minutes.
To send a new message
1. Tap the message icon
in the notification bar on the Home, Map, Messages, Tracking, or History pages.
2. Start typing a name in the text box and select a contact.
OR
Tap the contact icon
to open the phone’s contact list and then select a contact.
OR
Enter the entire email address or mobile phone number and press ENTER. An address that has not been synced
from explore.delorme.com to your phone is subtracted from the 160-character message allotment. The number
of message characters remaining is displayed in the Type message box.
3. To select a Quick Text message that you synced from explore.delorme.com, tap the Quick Text icon and
select the message. The Quick Text will be added to the message area. To edit the message, tap the text box.
OR
Tap Type message and enter a new message.
18
Using the inReach with an Android Phone | DeLorme inReach User Manual
4. Tap Send.
To reply to a conversation
1. Tap Messages.
2. Tap the conversation that you want to reply to.
Note Facebook, Twitter, and MapShare threads are available if you set them up at explore.delorme.com and
synced the Earthmate app with your account.
3. Tap Send.
Sent Messages
The message sending icon displays until the message is sent. Once the message has been sent, the location icon
is displayed if the phone had a valid GPS fix. If the failed message icon
appears, the message has not been sent.
Make sure the phone and inReach are connected and that you have a clear view of the sky. Attempts to send a failed
message will continue until you have a good signal. If after 15 minutes the message has not been sent, you will be
prompted to continue sending or cancel the message.
On the inReach, the Signal and Message LEDs flash green if the message is sending successfully and red if it is not.
Conversation Threads
The Messages page shows you conversations sent and received using the inReach.
•• A blue dot next to a conversation in the list indicates unread messages in that conversation.
•• Tap a conversation to open the thread.
•• Long press a conversation to view the conversation thread, add a contact, add the current address to the contact,
or delete the conversation thread (also deletes it from History).
•• From an open conversation thread, go to MENU > Delete Conversation to delete a conversation thread. If you
delete the default Facebook, Twitter, or MapShare threads, a new thread will be created when you sync again. If
you disconnect a Facebook or Twitter account on explore.delorme.com, the threads will be deleted.
Message Details
The details page displays information about the message. From the Messages page, tap a conversation thread to view
the messages, tap a message, and then tap View message details. You can also view message details from History;
see page 22 for more information.
To
Do this
View the message location on the map
Tap View on Map.
Forward the location as a reference
point
Go to MENU > Forward and send a message that includes the location.
See Reference Points on page 17 for more information.
Delete the message
Tap Delete.
Reference Point Messages
You can use the Earthmate app to send a map location as a reference point message using the inReach. See
Reference Points on page 17 for more information.
Sent Messages
When you send a message, the method used for sending determines how the recipient can respond.
•• Text/SMS message–Recipients receive a text message. They can reply to the message directly. The carrier’s text
messaging rates apply in addition to your inReach account messages. The text message also includes a link to a
map of your location and an option to reply via the website.
DeLorme inReach User Manual | Using the inReach with an Android Phone
19
•• Email–Recipients receive an email with a link. The recipient can use the link to go to a website where they can
view your location on a map and reply to you via the website. They cannot reply directly to the email.
•• inReach–Other inReach users receive a message on their PN-60w or in the Android Earthmate app. They can see
your message on their map and can also view the map from the message details page.
Tracking
When you use the inReach’s tracking feature with the Earthmate app on your Android phone, you can set the interval
for placing tracking points on the map at explore.delorme.com. The tracking points recorded while the phone and
the inReach are connected are visible on the map in the Earthmate app; you can also view information about them in
History–see page 22 for more information.
If you set up a MapShare page on explore.delorme.com, you can send a link to share your travels. The MapShare
page has options you can customize, so you can allow people to send you messages, send a request to view your
current location, or just view the tracking points and messages you send to MapShare.
You can change the tracking interval setting from the main Tracking page or from MENU > Settings > Tracking.
Anyone who has your explore.delorme.com account login information can send a location or tracking request from
the website to the inReach. When the inReach receives the request, it sends one tracking point for a location request
(a total of two tracking points are used) or turns on tracking for a tracking request. If you are using the inReach with
your Android phone, you will be notified of the request. See the Help page on explore.delorme.com for more information.
Handing off Tracking
When your phone and inReach are connected, you can start tracking on the phone and then power it off to save
battery life—the inReach will begin tracking in standalone mode. No tracking points will be recorded in the Earthmate
app when the phone is not connected, but tracking points will be visible on explore.delorme.com and on your
MapShare page.
Alternatively, if you start tracking on the inReach and then power on your phone and open the Earthmate app, you can
monitor tracking on your phone.
You can also stop tracking on either device when they are connected.
To start tracking from the Earthmate app
The tracking interval determines how often tracking points are sent via the inReach to explore.delorme.com and
your MapShare page. To save battery life, select a longer interval so that fewer tracking points are sent while you
are moving. When you are stationary, tracking points are sent every four hours; if you move more than 100 meters,
tracking resumes at the interval you set.
20
Using the inReach with an Android Phone | DeLorme inReach User Manual
1. Make sure your inReach is powered on and connected before you begin. In the Earthmate app, tap Tracking.
2. To change the tracking interval, tap Interval and select an interval.
3. If you want to send a link to your MapShare page, tap Share. Then enter or add addresses and your message and
tap Send. The message thread displays.
4. On the Tracking page, tap Start Tracking. The Tracking details page displays. On the inReach, the Signal and
Tracking LEDs flash green. If tracking points fail to send, you will be notified.
5. To stop tracking, select Stop Tracking.
SOS
IMPORTANT! Use SOS only in an emergency. Do not test—all SOS activations are real and a false activation could
result in charges to you.
The SOS feature uses the inReach to send a message to GEOS Search and Rescue in a critical or life-threatening
emergency. With the Earthmate app and your Android phone, you can type a message giving GEOS details about your
situation and they can reply to you. They will dispatch emergency services and notify the emergency contacts you
listed in your explore.delorme.com account.
Your location will be sent to GEOS as follows:
•• First ten minutes, every sixty seconds
•• Ten minutes to one hour, every ten minutes
•• One hour to eight hours, every 15 minutes
•• Eight hours to 24 hours, every 60 minutes
After the first ten minutes, if you are stationary, your location is sent every thirty minutes; the transmission rate is
slowed to preserve battery life. If you don’t need to move for safety reasons, stay where you are to preserve battery
life and to make it easier for search and rescue to locate you.
You can monitor the SOS on the Tracking details page. From there you can also cancel the SOS or go back to the
conversation thread. The tracking points and messages are also visible on the map.
Note If you do not have a clear view of the sky, the SOS messages will be stored and then sent as soon as you have
a good signal. The Signal LED will flash green when messages are being sent; it will flash red when you do not have a
good signal.
DeLorme inReach User Manual | Using the inReach with an Android Phone
21
Handing off SOS
When your Android phone and inReach are connected, you can start the SOS using the Earthmate app and then power
off the phone to save battery life—the inReach will send the SOS in standalone mode. No SOS tracking points or
messages will be recorded in the Earthmate app when it is powered off, but both will be visible on explore.delorme.
com.
Alternatively, if you start SOS on the inReach and then open the Earthmate app, you can monitor SOS tracking and
send and receive messages with GEOS Search and Rescue.
The SOS LED on the inReach will flash while the SOS is in progress.
To send an SOS message
1. Make sure your inReach is powered on and connected to the Earthmate app.
2. Tap SOS and then tap This is an emergency.
3. A default emergency message is available, but, if possible, type a message providing details about your emergency.
You can also send a predefined quick text message that you synced from explore.delorme.com.
4. Tap Send. The countdown timer displays for 10 seconds. To cancel the SOS before it’s sent, tap Cancel.
5. The SOS conversation thread will appear. To enter a new message, tap the Type Message box.
Note If you do not have a clear view of the sky, the SOS messages will be stored and then sent as you have a good
signal. The Signal LED will flash green when messages are being sent; it will flash red when you do not have a good
signal.
To cancel an SOS message
Tap Cancel SOS in the header of any page. This sends a message to GEOS Search and Rescue to let them know that
the emergency has been resolved and assistance is no longer needed. The SOS message thread will close once the
cancellation has been processed. On the inReach, the Signal and Message LEDs flash until the cancellation message
has finished sending; do not power off the inReach until the Signal and Message LEDs stop flashing.
You can also cancel the SOS on the inReach; see page 6 for more information.
IMPORTANT! You must cancel SOS to stop GEOS from sending help. Turning off the inReach device (or a connected
Android phone or PN-60w) or taking out the batteries will NOT tell GEOS to stop the rescue. If you replace the
batteries when an SOS is in progress, press and hold the SOS button again to update your location.
For more information about GEOS, visit geosalliance.com.
History
The History page displays a chronological list of activity by day.
•• To view the messages and tracking points for a specific day on the map, select the check box for that day. To hide
the points on map, clear the check box.
•• To view the details for a day, tap it. From the menu, you can rename the day, email the message and tracking
points as an attachment, or delete the day.
•• To view the details for a specific message or tracking point, tap the item in the day details. From the message
details page, you can view the message or tracking point on the map or delete it. From the menu, you can forward
the message or point.
•• To email the history go to MENU > Email Day (from the day details) or MENU > Email All (from the main History
page). Email attachments in both .gpx and .kml formats are provided.
•• To delete the history for a specific day, select the day to view its details, and then go to MENU > Delete Day. To
delete all history, from the main History page, go to MENU > Delete All.
22
Using the inReach with an Android Phone | DeLorme inReach User Manual
Safety and Legal Information
Safety Information
Disposal
Dispose of all electronic devices in compliance with local regulations in your area.
Driving
Always follow safe driving practices and local rules and regulations regarding the use of wireless devices while driving.
Always park safely prior to sending a text message or consulting mapping data.
Pacemakers
Follow the guidelines of the Health Industry Manufacturers Association (www.hira.org) as they may be updated from
time to time regarding maintaining minimum distance between a handheld wireless device and a pacemaker to avoid
potential interference with the pacemaker.
Hearing Aids
Digital wireless devices may interfere with some hearing aids. In the event of such interference, you may want to consult your hearing aid manufacturer to discuss alternatives.
Other Medical Devices
If you use any other personal medical device, consult the manufacturer’s guidelines for that device and consult your
physician to determine compatibility with your medical device.
Turn your InReach device OFF in any health care facility when necessary to comply with posted rules and regulations.
Blasting Areas
To avoid interfering with blasting operations, turn your device OFF when in a “blasting area” or in areas posted: “Turn
off two‐way radio.” Obey all signs and instructions.
Potentially Explosive Atmospheres
Power OFF your device and do not remove your battery when you are in any area with a potentially explosive
atmosphere. Obey all signs and instructions. Sparks from your battery or from discharge of static electricity in areas
such as gasoline filling stations could cause an explosion or fire resulting in serious injury or even death. Areas with
a potentially explosive atmosphere are not always clearly marked, and include fueling areas such as gasoline stations;
below deck on boats; fuel or chemical transfer or storage facilities; areas where fuel odors are present (for example, if
a gas/propane leak occurs in a car or home); areas where the air contains chemicals or particles, such as grain, dust, or
metal powders; and any other area where you normally would be advised to turn off your vehicle.
DeLorme inReach User Manual | Safety and Legal Information
23
Legal Information
Certifications
FCC compliance statement (United States)
FCC Class B Part 15
This device complies with part 15 of the FCC Rules. Operation is subject to the condition that this device does not
cause harmful interference.
CAUTION: Changes or modifications to this unit not expressly approved by the party responsible for compliance could
void the user’s authority to operate this equipment.
This equipment has been tested and found to comply with the limits for a Class B digital device, pursuant to Part 15 of
the FCC Rules. These limits are designed to provide reasonable protection against harmful interference in a residential
installation. This equipment generates, uses and can radiate radio frequency energy and, if not installed and used in
accordance with the manufacturer’s instructions, may cause interference harmful to radio communications. There is
no guarantee, however, that interference will not occur in a particular installation. If this equipment does cause harmful
interference to radio or television reception, which can be determined by turning the equipment off and on, the user is
encouraged to try to correct the interference by one or more of the following measures:
•• Reorient or relocate the receiving antenna.
•• Increase the separation between the equipment and receiver.
•• Consult the dealer or an experienced radio/TV technician for help.
Industry Canada certification
This device complies with RSS-310 of Industry Canada. Operation is subject to the condition that this device does not
cause harmful interference.
Cet appareil est conforme au CNR-310 d’Industrie Canada. Son exploitation est autorisée sous réserve que l’appareil ne
cause pas de brouillage préjudiciable.
EU regulatory conformance
DeLorme hereby declares that this DeLorme inReach device is in compliance with the essential requirements and
other relevant provisions of Directive 1999/5/EC, Directive 2002/95/EC, and Directive 2002/96/EC. The Declaration of
Conformity made under Directive 1999/5/EC (HG nr.88/2003) is available for viewing at the following location in the EU
community: manuals.delorme.com.
24
Safety and Legal Information | DeLorme inReach User Manual
Limited Warranty
INREACH warrants that your INREACH Product will be free from defects in materials and workmanship for one year
from the date of purchase. If your INREACH Product fails in normal use, INREACH will, during the first (90) ninetydays after purchase, at its sole option, either repair or replace the unit. INREACH reserves the right to either repair
or replace the unit with a new or refurbished unit at its sole discretion. Such repairs or replacements will be made at
no charge for labor or materials; however, the customer will be responsible for any shipping charges incurred to send
the device to INREACH. After the first ninety (90) days, INREACH will repair your unit, but will not replace it. The
repaired or replaced product will be warranted for ninety (90) days from the date of return shipment, or for the balance
of the original warranty, whichever is longer. This warranty does not cover failures due to abuse, misuse, accidents, or
unauthorized disassembly or modification. Any repairs not performed by INREACH will void this warranty.
INREACH DISCLAIMS ANY LIABILITY FOR ANY SPECIAL, INDIRECT, INCIDENTAL, OR CONSEQUENTIAL
DAMAGES, INCLUDING, BUT NOT LIMITED TO, LOSS OF REVENUES OR PROFITS, EVEN IF INREACH HAS BEEN
ADVISED OF THE POSSIBILITY OF SUCH DAMAGES. THIS LIMITED WARRANTY CONTAINED HEREIN IS IN
LIEU OF ALL OTHER EXPRESS WARRANTIES. ANY AND ALL IMPLIED WARRANTIES, INCLUDING ANY IMPLIED
WARRANTIES OF MERCHANTABILITY OR OF FITNESS FOR A PARTICULAR PURPOSE, SHALL LAST FOR 1 YEAR.
This warranty gives you specific legal rights and you may also have other rights which vary by jurisdiction. Some
jurisdictions do not allow the exclusion or limitation of relief such as incidental or consequential damages, or limitations
on how long an implied warranty lasts, so the above limitations or exclusions may not apply to you. This warranty
applies to the original purchaser of the product ONLY. REMINDER: Be sure to retain the sales receipt proving the date
of your original purchase. This will be needed if warranty service is ever required. INREACH reserves the right to refuse
warranty if a receipt is not provided or if the receipt is incomplete/illegible.
inReach Service
Before you return a product, you must contact inReach Support at 207-846-8900. For the latest warranty and repair
information, visit support.delorme.com.
DeLorme inReach User Manual | Safety and Legal Information
25
Specifications
Specifications
•• Case: IPX-7 waterproof, impact resistant, and rugged
•• Height (including antenna): 4.77”
•• Height (not including antenna): 3.40”
•• Width: 2.85”
•• Depth: 1.73”
•• Weight (without batteries): 7 oz
•• Weight (with batteries): 8 oz
•• Operating temperature range: -20º C to +70º C (-4º F to +158º F)
•• Storage temperature range: -45º C to +75º C (-49º F to +167º F)
Battery Life and Usage
Two (2) AA batteries are required for use. Lithium batteries provide the best performance and are strongly
recommended. Alkaline and NiMH batteries can be used in an emergency; the low battery warning is not accurate for
these types of batteries.
Lithium batteries tested to send one tracking point every ten minutes for 60 hours.
Iridium Communication
Using the DeLorme inReach’s Iridium® communication services requires a clear view of the sky. A subscription is
required to operate this device. For more information, go to explore.delorme.com.
•• Frequency Spectrum: 1.61GHz–1.63GHz
•• Transmission Power (peak): 1.6W
inReach Wireless Radio
Bluetooth - for Android
•• Radio Technology: Bluetooth® compliant
•• Frequency Spectrum: 2.40GHz - 2.48GHz unlicensed band
•• Transmission Power (peak): 2.5mW
802.15.4 - for Earthmate PN-60w
•• Radio technology: IEEE 802.15.4 compliant
•• Frequency spectrum: 2.40GHz - 2.48GHz unlicensed band
•• Transmission Power (peak): 2.5mW
26
Specifications | DeLorme inReach User Manual
Resources
User Manuals
manuals.delorme.com
Customer Forums
forum.delorme.com
Technical Support Knowledge Base
support.delorme.com
inReach Customer Service and Support
United States
Customer Service
For questions on returns, order status, or shipments.
Email: [email protected]
Phone: 800-511-2459 (outside the U.S. call 207-847-1165)
Tech Support
Email: [email protected]
Phone: 207-846-8900
Call Customer Service or Tech Support Monday-Friday, 9:00 a.m.– 8:00 p.m. Eastern Time (US & Canada).
Canada
Find information on rate plans, activations, general information, and support at inreachcanada.com
Customer Service
[email protected]
Tech Support
[email protected]
Phone
800-337-3155
Call Customer Service or Tech Support Monday-Friday, 9:00 a.m.– 6:00 p.m. Eastern Time (US & Canada).
DeLorme inReach User Manual | Resources
27