1
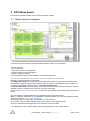
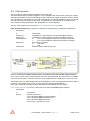
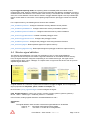
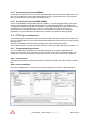
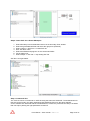
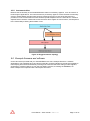
Step3: Create .SVF file in Xilinx ISE Impact
1.
2.
3.
4.
5.
6.
7.
Select Boundary scan and add Xilinx device in the boundary Scan window.
Select the generated MCS file and select the right prom (XCF04S).
Select: output => SVF File => Create SVF file.
Give SVF file a name.
Select the PROM and program. Do not check load FPGA
File is written now.
Select Output => SVF file => stop writing SVF file.
SVF file is now generated.
Step 4: Create ACE File
The .SVF file can be converted to an .ACE file using the Xilinx tool SVF2ACE. The download link for
this tool can be found in the Xilinx Application Note XAPP424 (found on the Xilinx website).
On the software disc delivered with the PA72DIOS6xxx, a batch file (“Generate Ace.bat”) is included
that can help in passing the right parameters to this tool.
PA72 Series – User manual – Rev 1.10
Page 39 of 51