1
i
9. Maintenance
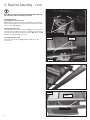
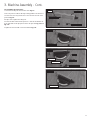
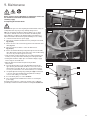
Fig. 9.1
Kg
Hex screw
CAUTION!
Before carrying out any adjustments or maintenance ensure that
the machine is isolated and disconnected from the
electricity supply.
i
i
9.1 Replacing the bandsaw blade
Kg
Keep plate
Kg
HAZARD! Take great care when unpacking the bandsaw blade as they are
usually folded and can spring out very suddenly with great force.
TIP: If the new blade being fitted is a different width to the one being
removed, it is advisable to move back and slacken off all blade guides
before fitting the new bladei as this will make fitting easier. Whenever a
different size blade is fitted the blade guides will always need re-setting.
1. Isolate the machine from the power supply.
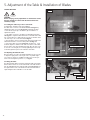
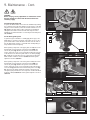
2.Open the top and bottom bandwheel doors by turning the star handle,
Fig. 9.3 (14).
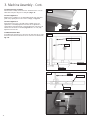
3.Remove the hex socket screw and keep plate from the underside of the
table, Fig 11.1.
4. Move the cam lever clockwise to release the blade tension.
Fig. 9.3 (17).
5.Remove the bandsaw blade by feeding it through the slot in the table,
upper blade guides & guard and slot in the spine of the machine taking
care not to cut yourself, wear gloves if necessary.
• Fit the new blade ensuring the blade teeth are pointing downwards and
towards you at the position where the blade passes through the table.
• Ensuring that the blade is fully in place on bandwheel. Simply re-apply
tension using the cam handle lever. • Adjust the blade tension further if required using the blade
tension wheel.
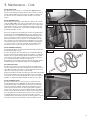
6.Check the blade tracking on the newly fitted blade by turning the
upper wheel by hand. The blade should run as close to the centre of
the bandwheel as possible. On 1/4", 3/8" and 1/2" blades it may be
necessary to run the blade to rear of the bandwheel, see section 5.5.
7.If required adjust the tracking using tracking knob (15) and lock knob
to the rear of the upper bandwheel housing. When the tracking is
correct lock the setting, see section 5.5.
8. Re-set the blade guides, see sections 6.1 & 6.2.
9.Close and lock both the bandwheel doors before reconnecting the
power supply.
The blade tension indicator is a guide only and may need re-calibrating
periodically. For further information on blade tensioning see section 5.4.
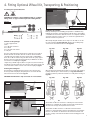
Fig. 9.2
Blade tension indicator
Blade tension wheel
Fig. 9.3
14
16
17
15
14
23