1
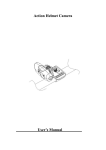
Lumintrek TrailBlazer
LED Bicycle Light User Manual
Model: TB-1000
1. READ BEFORE USE!
Please read this user manual to completely familiarize yourself with this product. Make sure you
understand all functions before hitting the trails.
Cycling in the dark is dangerous inherently. Always make sure the light is firmly secured and the
battery is fully charged before you go for a ride. Like all other electronic devices, the light can
fail at any unexpected time. It is advised to always keep a backup light and battery pack with you
whenever you go on an extended ride. Please note that your Lumintrek light is very bright!
Never aim it directly at any oncoming motorists/cyclists.
Your Lumintrek bicycle light is equipped with a high capacity Lithium-ion battery pack. Please
fully charge the battery before first use of the light. While the battery pack is double protected,
you should always observe the following:
• While charging the batteries, never leave it unattended for a long time.
• Only use the Lumintrek charger to charge the batteries. Using other chargers to charge
Lumintrek batteries may cause battery failure and/or other serious damage.
Your Lumintrek bicycle light uses high power LEDs which, especially in turbo/high mode,
generate a significant amount of heat. The aluminum light-head is designed to draw most of the
excess heat away. The light head may get extremely hot during this process if sufficient air flow
is not provided. Please use with caution.
2. Charging the battery pack
The battery pack is shipped half charged. You need to fully charge it before first use.
•
Connect the battery to the charger- the charger LED will turn Green.
1
•
Plug the charger into the power outlet – the charger LED will turn Red indicating that
the battery is charging. A full charge from empty will take approximately 4 hours.
•
Once fully charged the LED will turn Green. Unplug the charger and disconnect the
battery.
3. Handle Bar Mounting
•
Insert the O-ring into the hook on the front of the light head. You must stretch the
O-ring slightly which makes it thinner and then it slips into place easily.
•
Place the light head on the handlebars and stretch the O-ring around the bottom of
the handle bar. Clip it onto the hook at the rear of the light head. Various O-ring
sizes are provided; Use the one which provides the best fit depending on the size of
your handle bars.
2
•
Find the most suitable place for mounting the battery. If you have a long enough stem, this
is the best place to put it; otherwise you can mount it to your bike frame or handlebars
(Opposite side to where the light is).
•
•
Estimate how much cable length you will require and then fold up the excess cable.
Wrap the Velcro strap around the stem/frame/handle bars, at the same time stuffing the
excess cable into the pouch.
•
Plug the light cable into the battery cable.
4. Helmet mounting
•
•
•
Attach the helmet bracket to your helmet by feeding the Velcro straps through your helmets
air vents. You can cut the straps shorter if needed.
Insert the O –ring into the hook on the front of the light head.
Place the light head on the helmet mount bracket and stretch the O-ring around the
underneath. Clip it onto the clip at the rear of the light head.
3
•
Guide the cable through one of your helmet straps or Velcro it to the back of your helmet in
order to ensure that the cable doesn’t snag on a low hanging branch or dangle down in front
of your face while you are riding.
•
Place the battery in a convenient location. Here are some suggestions:
--in your shirt pocket
--Inside your hydration pack
--Attached to the shoulder strap of your hydration pack
•
Plug the light cable into the battery cable.
5. Operating Lumintrek TB-1000 Trailblazer light
•
The switch is illuminated while plugged in which makes it easy to locate in the dark.
•
•
The light starts in the OFF mode.
Push the switch button for High, Medium, Low
4
•
•
Push and hold the switch button for two seconds (from any setting) to turn the light OFF.
Push and hold the switch button for four seconds to enter into the STROBE mode.
6. Battery Level Indicator
The Lumintrek TB-1000 Trailblazer comes with a 4 stage power meter. As the battery depletes,
the backlit switch button will change color from Green-Blue -Red-Flashing Red.
• Green 100%-75%
• Blue 75%-30%
• Red
30%-5%
• Flashing Red < 5%
7. Battery Storage
Disconnect the battery pack from the light head when not using. Store the battery pack fully
charged and re-charge it before using the lighting system again. If not used for an extended
period of time, please store the battery pack in a cool dry place to avoid excessive discharge.
8. Troubleshooting
Failure
No light
Running time too short
Flicker
Caused
Battery is over discharged
Battery is not plugged in
correctly
Battery is not fully charged
New battery
Very old battery
Cold temperature
Defective charger
Cables not secured
Solution
Charge the battery
Make sure all parts are firmly
connected
Charge the battery
Charge the battery
Replace the battery
Keep the battery warm
Replace the charger
Make sure all parts are firmly
connected
9. Warranty
Lumintrek warrants its products to be free from defects that compromise their functionality. We
will repair or replace, at our option, without charge, any product or part which is found to be
defective under normal use and service within 5 years from the date of purchase with proof of
purchase. Battery pack is warranted for 6 months from the date of purchase. Such repair or
replacement shall be the purchaser's sole and exclusive remedy under this warranty.
This warranty does not cover normal maintenance and service and does not apply to any
products or parts which have been subject to modification, misuse, abuse, negligence, accident,
or improper maintenance or repair by anyone other than Lumintrek.
5
For repair or replacement contact Customer Service at 1-888-787-8168 (toll free), or email at
[email protected], or visit http://www.lumintrek.com/warranty.
10. Technical Data
LED: XML- T6
LED lifespan:above 50,000 hours
Max output: 1000 lumens
Beam angle: 15 degree
Lens: Anti-reflection toughened optical glass lens, scratch resistant
Reflector : High efficiency orange peel reflector, excellent throw and side spill
Modes: 3-level adjustable brightness, flashing and over-heat protection functions
Output levels: Max: 1000 lumens Medium: 580 lumens Low: 260 lumens
Runtime: Max: Nearly 4 hours Medium: 8 hours Low : 14 hours Flash: 10.5 hours.
Power indicator: 3-color/4-modes LED indicator to display battery capacity
Battery capacity/Voltage: 5.2 Ah, 8.4V (4X18650 waterproof designed)
Charge time: 4 hours
Charger: 110 Volt to 240 Volt
Shell material: 6061-T6 Aluminum alloy
Surface treatment: Premium Type III hard-anodized anti-abrasive finish
Waterproof grade: IPVI
Weight : 130G without battery pack, 370G with battery pack
Package Includes: light head, battery pack, charger, helmet mount, extension cable, O-rings
6