1
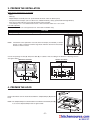
4. PREPARE THE HOOD (CONT’D)
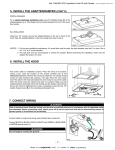
Punch out the appropriate electrical knock-out hole.
Using a long nose pliers, remove the knock-out for the chosen opening (vertical on top or horizontal at the back of the hood).
See figures below.
VERTICAL
HORIZONTAL
DISCHARGE
DISCHARGE
1
2
3
HD0153
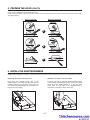
5. INSTALL THE ADAPTER/DAMPER
NOTE: If this hood replaces another one, please note that the location of the air exhaust can vary from one manufacturer to another.
HORIZONTAL
DISCHARGE, NEW INSTALLATION
HORIZONTAL
Fold down the foldable flange (C) of the
adapter/damper. This flange must be at 90° from the
remaining flanges. Use the lower screw holes on
each side of the adapter/damper to assemble it to the
back of hood. See below.
DISCHARGE, HOOD REPLACEMENT
It may be necessary to adjust the adapter/damper location
to the existing wall discharge opening. Leave the foldable
flange (C) of the adapter/damper as is. Use the upper
screw holes on each side of the adapter/damper to
assemble it to the back of hood. See below.
C
C
HJ0007
HJ0006
-6-