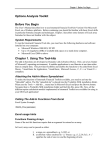
1
Guard Tour Management Software
Page 1 of 39
Guard Tour Management Software
User’s Manual
Preparation (for initial setup)
Before you begin to insert assignments into the software, please read the sequence below:
a. Make a sketch of the sites and name all the points (recording stations) where the cards will be screwed to the wall e.g. front door, back door,
etc. Include on the sketch a list of all persons you want to control and the names repuired for the guard ID cards.
b. The sketch will be useful when you assign these cards in the software, and will be of utmost importance to the person physically screwing
the correct cards at the correct recording station points.
c. Signal cards can be installed on site discretely or on full show, depending on the circumstances can be screwed to the walls, doors,
furniture,fences, trees etc.
d. Referring to "the sketches named points" (proposed recording stations) the signal cards can now be assigned the same name in the software,
it is important to label them as they are being assigned, perhaps dropping each assigned signal card into a sealed named envelope, the person
fixing them to the walls will then be 100% sure the correctly named cards will be installed in the correct places of the proposed tour.
e. If the wrong cards are screwed to the wall on the "wrong tours" in positions different from "the sketch", the resulting tour information will
be useless.
Initial setup Flows
Login-> Initializing-> Guard Setup -> Route Setup-> Checkpoint Setup-> Event Setup-> Tour Plan
Initial Setup Details and Item Fuction Introduction
Software Installation
1. System Requirement
a. Operating system requirement: Windows2000 / XP, Windows Vista
b. Minimum hardware requirement: MMX Pentium 233MHz CPU, 32 MB RAM , CD ROM drive, RS232/USB port, the min screen
resolution 800x600
2. Software Installation
a. Insert CD on appropriate drive
b. Program contains an auto-run(start) function. When the follow icon showed up, double click it and finish installation.
c. After the installation wizard started, follow the instructions on the screen, and install the program in less than 5 minites.
Initial Setup
1. Log in
a. After software installation, click on the icon "Patrol Management System", and the system will launch a user login dialog box as shown
below.
b. By default, the software require a username and password to operate. For first use, you can get password in Tip.
c. For master user, choose the default username "master", and the default password is "999";
For regular user, choose the default username "user", and the default password is "123".
file://C:\Documents and Settings\Administrator\Local Settings\Temp\~hh2784.htm
2010/05/14
Guard Tour Management Software
Page 2 of 39
d. In fact, this is a multi-level operator system, so when access, you can reset
username and password at different level operator system in Operator Management (For details, see below instructions about Operator
Management.)
2. Initializing System
a. Reset and initialize the reader's and the system inernal memory.
b. Press System Tool, and then click on Initialize, there are several options,choose the items you want to have a initialization, and then, all
data stored in the reader and system will be erased.
file://C:\Documents and Settings\Administrator\Local Settings\Temp\~hh2784.htm
2010/05/14
Guard Tour Management Software
Page 3 of 39
c. When the system is operated for the first time, or a reader is used on the system for the first time, it is recommended using it, in order to
eliminate all useless records.
In addition, please contact reader to software and then click read data in order to clear the useless records in the reader.
3. Guards Setup
a. In the item of Patrol Setup, click Guard Setup to add, delete or modify guard ID cards.
b.There are two ways to add guard card’s ID number to software. 1. read ID cards and then connect the reader to computer, then click
button; 2. Please note that click ADD button, you just can add guard name, but can not add card number, which just fit for no ID
card condition.
We recommend you using guard ID card and click batch add button to add card number to software.
Please note: there is "Clear data" option on the right side of batch read button.
Before "BatchRead" card ID from the Reader,
If you choose "Clear Data" option, that means after batchreading card ID from the Reader, all the information will be erased from the Reader.
file://C:\Documents and Settings\Administrator\Local Settings\Temp\~hh2784.htm
2010/05/14
Guard Tour Management Software
Page 4 of 39
If you do not choose that fuction, that means when batchreading card ID from the Reader, all records will still be stored in the Reader, and you
can still use them in other aspects.
In order not to mass all the setup, we recommand to “clear data” when you batch read data from the reader.
4. Route Setup
a. Open up the Setup Routes screen by going into the Patrol Setup.
b. Click on Route Setup to add, delete or modify routes.
c. Click Add to add new route. Enter in a Route number and the Route's Name (for example: Route number: 1, Route's name: warehouse)
d. Please note: you will see there is a button named
, if in this route, no any tour plan in it, you must make a reader bound in this route, otherwise
when you finish patrol, all the patrol records will not be allowed to upload to the software.
But if the route has a tour plan, then this item will become a optional item, you can choose to bound it or not bound it.
file://C:\Documents and Settings\Administrator\Local Settings\Temp\~hh2784.htm
2010/05/14
Guard Tour Management Software
Page 5 of 39
4. Station Setup
a. In the item of Patrol Setup, click Checkpoint to add, delete or modify stations.
b. Before editing station information, choose a route in which you want to add stations first, e.g. warehouse and then set up the informations as
you want.
c. To add each card manual, after selecting the Route's name, then click Add on the left hand side.
d. The screen below will pop up. Enter card's ID number and enter the station name.
e. To do a batch read automatically, use the Reader to read each card in the order that you want. After which, connect the Reader to computer
and click
and then all the cards’ ID number will be shown on the right blank. Please see below.
First choose a route record,
and then add EMID signal
card ID and the station
name.
Two ways to add the EMID
signal card information: 1.
click Add, 2. or click
BatchRead when connecing
the reader to PC after the
reader collecting EMID
signal card ID. then save
them when click on
file://C:\Documents and Settings\Administrator\Local Settings\Temp\~hh2784.htm
2010/05/14
Guard Tour Management Software
Page 6 of 39
f. And then you must assign each card ID with the respective station names and select available ID records and click
to save them. After
adding and modifying, all the information will be saved and displayed on the left hand side as shown on the “Route Setup” screen, which are
shown under a route name.
g. After adding all the stations you need which will be showed on the right side of scren, you can use
to move each station up and down.
Please note:
1. there is "Clear data" option on the right side of the screen.
Before "BatchRead" card ID from the Reader,
If you choose "Clear Data" option, that means after batchreading card ID from the Reader, all the information will be erased from the Reader.
If you do not choose that fuction, that means when batchreading card ID from the Reader, and you select and save the data from right to the
left blank, then the unselected rests, which are on the right side blank, will still be stored in the Reader, and you can still use them..
In order not to mass all the setup, we recommand to “clear data” when you batch read data from the reader.
2. If there are corss points in routes, then before click "BatchRead" button, you must do belowing action.
, then one checkpoint
card ID can be used in more than one routes. You will see in right window, records as a cross point is in red color, and registerd card is in blue
color.
5. Event
a. An events (incident) book can be defined and setup using cards for the patrolling guards to carry during the patrol.
b. For example, the guards can carry 4 cards with the following predefined events:
card 1: Hidden fire danger
card 2: Unlocked door
card 3: Raw materials lost
card 4: Lights still on
When the patrolling guard encounters any of the incidents above mentioned, he can automaticlly read the card with the Reader to record these
events automatically with time stamps.
file://C:\Documents and Settings\Administrator\Local Settings\Temp\~hh2784.htm
2010/05/14
Guard Tour Management Software
Page 7 of 39
c. To use this fuction, these sets of signal card have be pre-defined in the Events Book by clicking on Events Book, and you can find it in the
item of Patrol Setup.
Steps for batch add event card number is same as guard setup.
6. Tour Plan
a. First choose a route which you want to set a tour time plan. Please see below.
b. Then click
, another window will pop up, first choose tour plan start date
holiday, you should also choose holiday item.
c. If the tour plan has a disciplinary, you can click
, if there is a
.
to have a time setup.
file://C:\Documents and Settings\Administrator\Local Settings\Temp\~hh2784.htm
2010/05/14
Guard Tour Management Software
Page 8 of 39
d. If tour time do noes not has a disciplinary, then please click
, then to add tour time. Please see below.
When you finish time setup and click confirm button, you will see time setup information on Plan Setup window.
e. After time setup, please click
to add guard in the route.
file://C:\Documents and Settings\Administrator\Local Settings\Temp\~hh2784.htm
2010/05/14
Guard Tour Management Software
Page 9 of 39
Please not: when you click Setup plan button and have time setup, this tour plan is a main and general tour plan, which just have only one tour
plan. It just have start time, no end time, that means once you set a mail tour plan, this plan will keeps being operated till you modify or delete
it.
If during a period, tour plan need some changes, except this period, the tour plan will still be same as general tour plan, then you can use
to add a provisional plan. When set up a provisional plan, you should set start time and end time.
Data Maintenance
1. Data Backup and Restore
a. It is important to back up your database on a regular basis, even daily, to provide a safety net in case your database gets corrupted, or if you
accidentally purge data that you still need. Data can be backed up to a backup drive, or to diskette.
b. To perform a backup of saved database and all the setup done during the setup as above mentioned, click Backup data as shown below.
c. After clicking the button, you will be prompt to save the backup file. Give a meaningful name and choose the destination folder to save the
file into.
file://C:\Documents and Settings\Administrator\Local Settings\Temp\~hh2784.htm
2010/05/14
Guard Tour Management Software
Page 10 of 39
d. In the event that the data in your database has been corrupted or lost, you can restore the data from your backup drive or from diskette. To
restore a saved backup file, simply click Restore data
Click on the Restore option. This will bring up the Restore Data window. Select the drive and directory from which to restore the data.
2. Clear Data
a. When too many old and unuseful data stored in the database, then speed of the software will be slow. So you need to clear these old and
unuseful data periodically.
b. In the item of Data Maintenance, click Clear Data, Then the screen below will pop up.
file://C:\Documents and Settings\Administrator\Local Settings\Temp\~hh2784.htm
2010/05/14
Guard Tour Management Software
Page 11 of 39
c. Choose the time you want to clear data which is in the database, then click Clear Data.
System Tools
1. Operator Management
a. Our guard tour system is multi-level operator system, and different level operator has different access rights, which can garuantee data's
safty and validity.
b. Press System Tool, and then choose Operator Management, then click on Modify to reset username, password at differnent access level.
Same way to click Add, to increase new username and password.
file://C:\Documents and Settings\Administrator\Local Settings\Temp\~hh2784.htm
2010/05/14
Guard Tour Management Software
Page 12 of 39
c. There are two login operators each with different levels of rights:
Access Level:
"User"
"Master"
Initial Username
user
master
Initial Password
123
999
Allows Data Reading and Query
Yes
Yes
Allows Test Reader
Yes
Yes
Allows Modify User's name and Password
Yes
Yes
Allows Modify Master's name and Password
No
Yes
Allows System Setup
No
Yes
Allows System Maintenance
No
Yes
Allows Reader Initialization
No
Yes
Allows Import of Basic Data
No
Yes
2. Password Modify
a. In the item of Maintenance System, click Modify Password
b. Then the screen below will pop up. Enter current Password and the new Password, then click OK. ( password is not more than 6-bit
number )
3. Communication Test
a. Click on System Tool, you will find the item of Communication Test .
b. This perform the following functions:
i. Checking whether the Reader, or its connection with computer works well.
file://C:\Documents and Settings\Administrator\Local Settings\Temp\~hh2784.htm
2010/05/14
Guard Tour Management Software
Page 13 of 39
ii. Modify Reader ID. Each Reader has one set ID number in it, which can be modified.
c. Click Communication Test, the screen below will pop up. After connect Reader directly to computer, click Read ID, and then this Reader
ID will be shown on the top blank.
d. You also can change Reader ID in itself to 4-bit number you want. Just click Modify ID, or enter a new 4-bit ID number in the bottom
blank manually.
4. Initializing System
a. Reset and initialize the reader's and the system inernal memory.
b. Press System Tool, and then click on Initialization, there are several options,choose the items you want to have a initialization, and then, all
data stored in the reader and system will be erased.
c. When the system is operated for the first time, or a reader is used on the system for the first time, it is recommended using it, in order to
eliminate all useless records.
Data Processing
1. Reading Data
a. Click on
on the main screen
b. Then the screen below will pop up. With the Reader connected to computer, click on Read Data button, and then the data in the Reader
(condition for patrolling, such as guard name, timecost, route, station, time, date and incidentetc.) will be transferred to the computer.
When reading data, the software will automatically process records, and incomplete tour and omissions will be shown here.
file://C:\Documents and Settings\Administrator\Local Settings\Temp\~hh2784.htm
2010/05/14
Guard Tour Management Software
a.
For conditional query, click the button
up.
Page 14 of 39
on the right of each title bar, then choose Custome Filter . A custom filter screen below will pop
d. Choose condition buttons, and then input range for time, data etc., click OK to have a conditional query.
2. Patrol Report
a. By this fuction, you can query all what you want. Click
on the main screen.
b. Then the screen below will pop up. Choose date range (Start Date, End Date) to query the patrolling reports, then all the data you need will
be shown on the following screen. Methods for further query is same as methods in section c,d of Reading Data part.
file://C:\Documents and Settings\Administrator\Local Settings\Temp\~hh2784.htm
2010/05/14
Guard Tour Management Software
c. For conditional query, click the button
up.
Page 15 of 39
on the right of each title bar, then choose Custome Filter . A custom filter screen below will pop
d. Choose condition buttons, and then input range for time, data etc., click OK to have a conditional query.
3. Statistical
Click Statistical button on the main screen.
a. First, choose start date and end date you want to have a statistics, and then choose statistical way. If you want to see guard statistical result,
then please choose Guard and click Stat. Button. Please see below
b. if you want to have route statistical result, then choose Route and click Stat. Button.
file://C:\Documents and Settings\Administrator\Local Settings\Temp\~hh2784.htm
2010/05/14
Guard Tour Management Software
Page 16 of 39
c. For conditional query, click the button
In statistical, besides statistical table, there are also diagrams which show guards patrol conditions visually.
file://C:\Documents and Settings\Administrator\Local Settings\Temp\~hh2784.htm
2010/05/14
Guard Tour Management Software
file://C:\Documents and Settings\Administrator\Local Settings\Temp\~hh2784.htm
Page 17 of 39
2010/05/14
Guard Tour Management Software
Page 18 of 39
Direction for use
a. After software installation and setup, all the checkpoint cards have been labelled names (checkpoint names, personnel names or events),
which are as same as being assigned in the software. Then fixing these checkpoint cards to the proposed positions. Make sure that, the
correctly named cards will be installed in the correct places of the proposed tour.
Besides, for the first usage, make sure the Readers ID have been registered in the software system via connections between Reader and
computer.
b. When patrolling, first the patrolling guard takes the Reader and read his own Guard ID to identify himself with the system, e.g. Guard A.
Make sure that the guard cards are not read in the middle of patrol routes, which can cause the data will be showed by the software that a noname guard have the former part patrolling.
c. Then the guards go to the checkpoints, the Reader will automatically read each card. When reading successfully, a flash of the red indicator
light, sometimes accompanied by a “beep” means that a reading has been made. Then the reader will store card’s hexadecimal ID number in
it.
d. After patrolling are done, connect the reader on computer.
e. Then download all the patrol data to software and have a data prosessing.
Preparation (for initial setup)
Before you begin to insert assignments into the software, please read the sequence below:
file://C:\Documents and Settings\Administrator\Local Settings\Temp\~hh2784.htm
2010/05/14
Guard Tour Management Software
Page 19 of 39
a. Make a sketch of the sites and name all the points (recording stations) where the cards will be screwed to the wall e.g. front door, back door,
etc. Include on the sketch a list of all persons you want to control and the names repuired for the guard ID cards.
b. The sketch will be useful when you assign these cards in the software, and will be of utmost importance to the person physically screwing
the correct cards at the correct recording station points.
c. Signal cards can be installed on site discretely or on full show, depending on the circumstances can be screwed to the walls, doors,
furniture,fences, trees etc.
d. Referring to "the sketches named points" (proposed recording stations) the signal cards can now be assigned the same name in the software,
it is important to label them as they are being assigned, perhaps dropping each assigned signal card into a sealed named envelope, the person
fixing them to the walls will then be 100% sure the correctly named cards will be installed in the correct places of the proposed tour.
e. If the wrong cards are screwed to the wall on the "wrong tours" in positions different from "the sketch", the resulting tour information will
be useless.
Initial setup Flows
Login-> Initializing-> Guard Setup -> Route Setup-> Checkpoint Setup-> Event Setup-> Tour Plan
1. Log in
a. After software installation, click on the icon "Patrol Management System", and the system will launch a user login dialog box as shown
below.
b. By default, the software require a username and password to operate. For first use, you can get password in Tip.
c. For master user, choose the default username "master", and the default password is "999";
For regular user, choose the default username "user", and the default password is "123".
file://C:\Documents and Settings\Administrator\Local Settings\Temp\~hh2784.htm
2010/05/14
Guard Tour Management Software
Page 20 of 39
d. In fact, this is a multi-level operator system, so when access, you can reset
username and password at different level operator system in Operator Management (For details, see below instructions about Operator
Management.)
1. Operator Management
a. Our guard tour system is multi-level operator system, and different level operator has different access rights, which can garuantee data's
safty and validity.
b. Press System Tool, and then choose Operator Management, then click on Modify to reset username, password at differnent access level.
Same way to click Add, to increase new username and password.
c. There are two login operators each with different levels of rights:
Access Level:
"User"
"Master"
Initial Username
user
master
Initial Password
123
999
Allows Data Reading and Query
Yes
Yes
Allows Test Reader
Yes
Yes
Allows Modify User's name and Password
Yes
Yes
Allows Modify Master's name and Password
No
Yes
Allows System Setup
No
Yes
Allows System Maintenance
No
Yes
Allows Reader Initialization
No
Yes
file://C:\Documents and Settings\Administrator\Local Settings\Temp\~hh2784.htm
2010/05/14
Guard Tour Management Software
Allows Import of Basic Data
Page 21 of 39
No
Yes
2. Password Modify
a. In the item of Maintenance System, click Modify Password
b. Then the screen below will pop up. Enter current Password and the new Password, then click OK. ( password is not more than 6-bit
number )
3. Communication Test
a. Click on System Tool, you will find the item of Communication Test .
b. This perform the following functions:
i. Checking whether the Reader, or its connection with computer works well.
ii. Modify Reader ID. Each Reader has one set ID number in it, which can be modified.
c. Click Communication Test, the screen below will pop up. After connect Reader directly to computer, click Read ID, and then this Reader
ID will be shown on the top blank.
d. You also can change Reader ID in itself to 4-bit number you want. Just click Modify ID, or enter a new 4-bit ID number in the bottom
blank manually.
4. Initializing System
a. Reset and initialize the reader's and the system inernal memory.
file://C:\Documents and Settings\Administrator\Local Settings\Temp\~hh2784.htm
2010/05/14
Guard Tour Management Software
Page 22 of 39
b. Press System Tool, and then click on Initialization, there are several options,choose the items you want to have a initialization, and then, all
data stored in the reader and system will be erased.
c. When the system is operated for the first time, or a reader is used on the system for the first time, it is recommended using it, in order to
eliminate all useless records.
5 System diary
Entering the query interface of system diary by Pressing system diary from the pull-down menu of system tools,
chose starting time and ending time first, then press query, there will be a display for all the system operations
within the selected time period. All those data can be exported to Excel by clicking export Excel or printed out by
print and print preview.
file://C:\Documents and Settings\Administrator\Local Settings\Temp\~hh2784.htm
2010/05/14
Guard Tour Management Software
Page 23 of 39
6. Device management
There are two functions in device management, awake device and device dormancy, with which can change device state between low-power
consumption state (sleep state) and normal working condition. the device can’t read any tags in state of “ device dormancy”, and in this state, the
battery life can extended.
Awake device: change the device state from device dormancy (sleeping mode) to its normal working condition.
Device dormancy: make the device from normal working condition into device dormancy (sleeping mode).
system tools then choose
Entered the guard tour system management software, click
device or device dormancy to confirm the status of the equipment.
Device Management , you can click
awake
Please note:
1. We must ensure that the device and computers have been properly connected during the state switching.
2. These functions are only fit for RFID reader.
1. Data Backup and Restore
a. It is important to back up your database on a regular basis, even daily, to provide a safety net in case your database gets corrupted, or if you
accidentally purge data that you still need. Data can be backed up to a backup drive, or to diskette.
b. To perform a backup of saved database and all the setup done during the setup as above mentioned, click Backup data as shown below.
c. After clicking the button, you will be prompt to save the backup file. Give a meaningful name and choose the destination folder to save the
file into.
file://C:\Documents and Settings\Administrator\Local Settings\Temp\~hh2784.htm
2010/05/14
Guard Tour Management Software
Page 24 of 39
d. In the event that the data in your database has been corrupted or lost, you can restore the data from your backup drive or from diskette. To
restore a saved backup file, simply click Restore data
Click on the Restore option. This will bring up the Restore Data window. Select the drive and directory from which to restore the data.
1. Data Backup and Restore
a. It is important to back up your database on a regular basis, even daily, to provide a safety net in case your database gets corrupted, or if you
accidentally purge data that you still need. Data can be backed up to a backup drive, or to diskette.
b. To perform a backup of saved database and all the setup done during the setup as above mentioned, click Backup data as shown below.
file://C:\Documents and Settings\Administrator\Local Settings\Temp\~hh2784.htm
2010/05/14
Guard Tour Management Software
Page 25 of 39
c. After clicking the button, you will be prompt to save the backup file. Give a meaningful name and choose the destination folder to save the
file into.
d. In the event that the data in your database has been corrupted or lost, you can restore the data from your backup drive or from diskette. To
restore a saved backup file, simply click Restore data
Click on the Restore option. This will bring up the Restore Data window. Select the drive and directory from which to restore the data.
file://C:\Documents and Settings\Administrator\Local Settings\Temp\~hh2784.htm
2010/05/14
Guard Tour Management Software
Page 26 of 39
2. Clear Data
a. When too many old and unuseful data stored in the database, then speed of the software will be slow. So you need to clear these old and
unuseful data periodically.
b. In the item of Data Maintenance, click Clear Data, Then the screen below will pop up.
c. Choose the time you want to clear data which is in the database, then click Clear Data.
1. Guards Setup
a. In the item of Patrol Setup, click Guard Setup to add, delete or modify guard ID cards.
b.There are two ways to add guard card’s ID number to software. 1. read ID cards and then connect the reader to computer, then click
button; 2. Please note that click ADD button, you just can add guard name, but can not add card number, which just fit for no ID
card condition.
We recommend you using guard ID card and click batch add button to add card number to software.
file://C:\Documents and Settings\Administrator\Local Settings\Temp\~hh2784.htm
2010/05/14
Guard Tour Management Software
Page 27 of 39
Please note: there is "Clear data" option on the right side of batch read button.
Before "BatchRead" card ID from the Reader,
If you choose "Clear Data" option, that means after batchreading card ID from the Reader, all the information will be erased from the Reader.
If you do not choose that fuction, that means when batchreading card ID from the Reader, all records will still be stored in the Reader, and you
can still use them in other aspects.
In order not to mass all the setup, we recommand to “clear data” when you batch read data from the reader.
2. Route Setup
a. Open up the Setup Routes screen by going into the Patrol Setup.
b. Click on Route Setup to add, delete or modify routes.
c. Click Add to add new route. Enter in a Route number and the Route's Name (for example: Route number: 1, Route's name: warehouse)
d. Please note: you will see there is a button named
, if in this route, no any tour plan in it, you must make a reader bound in this route, otherwise
when you finish patrol, all the patrol records will not be allowed to upload to the software.
file://C:\Documents and Settings\Administrator\Local Settings\Temp\~hh2784.htm
2010/05/14
Guard Tour Management Software
Page 28 of 39
But if the route has a tour plan, then this item will become a optional item, you can choose to bound it or not bound it.
3. Station Setup
a. In the item of Patrol Setup, click Checkpoint to add, delete or modify stations.
b. Before editing station information, choose a route in which you want to add stations first, e.g. warehouse and then set up the informations as
you want.
c. To add each card manual, after selecting the Route's name, then click Add on the left hand side.
d. The screen below will pop up. Enter card's ID number and enter the station name.
e. To do a batch read automatically, use the Reader to read each card in the order that you want. After which, connect the Reader to computer
and click
and then all the cards’ ID number will be shown on the right blank. Please see below.
file://C:\Documents and Settings\Administrator\Local Settings\Temp\~hh2784.htm
2010/05/14
Guard Tour Management Software
Page 29 of 39
First choose a route record,
and then add EMID signal
card ID and the station
name.
Two ways to add the EMID
signal card information: 1.
click Add, 2. or click
BatchRead when connecing
the reader to PC after the
reader collecting EMID
signal card ID. then save
them when click on
f. And then you must assign each card ID with the respective station names and select available ID records and click
to save them. After
adding and modifying, all the information will be saved and displayed on the left hand side as shown on the “Route Setup” screen, which are
shown under a route name.
g. After adding all the stations you need which will be showed on the right side of scren, you can use
to move each station up and down.
Please note:
1. there is "Clear data" option on the right side of the screen.
Before "BatchRead" card ID from the Reader,
If you choose "Clear Data" option, that means after batchreading card ID from the Reader, all the information will be erased from the Reader.
If you do not choose that fuction, that means when batchreading card ID from the Reader, and you select and save the data from right to the
left blank, then the unselected rests, which are on the right side blank, will still be stored in the Reader, and you can still use them..
In order not to mass all the setup, we recommand to “clear data” when you batch read data from the reader.
2. If there are corss points in routes, then before click "BatchRead" button, you must do belowing action.
, then one checkpoint
card ID can be used in more than one routes. You will see in right window, records as a cross point is in red color, and registerd card is in blue
color.
4. Event
a. An events (incident) book can be defined and setup using cards for the patrolling guards to carry during the patrol.
b. For example, the guards can carry 4 cards with the following predefined events:
card 1: Hidden fire danger
card 2: Unlocked door
card 3: Raw materials lost
card 4: Lights still on
When the patrolling guard encounters any of the incidents above mentioned, he can automaticlly read the card with the Reader to record these
file://C:\Documents and Settings\Administrator\Local Settings\Temp\~hh2784.htm
2010/05/14
Guard Tour Management Software
Page 30 of 39
events automatically with time stamps.
c. To use this fuction, these sets of signal card have be pre-defined in the Events Book by clicking on Events Book, and you can find it in the
item of Patrol Setup.
Steps for batch add event card number is same as guard setup.
5. Tour Plan
a. First choose a route which you want to set a tour time plan. Please see below.
b. Then click
, another window will pop up, first choose tour plan start date
holiday, you should also choose holiday item.
c. If the tour plan has a disciplinary, you can click
, if there is a
.
to have a time setup.
file://C:\Documents and Settings\Administrator\Local Settings\Temp\~hh2784.htm
2010/05/14
Guard Tour Management Software
Page 31 of 39
d. If tour time do noes not has a disciplinary, then please click
, then to add tour time. Please see below.
When you finish time setup and click confirm button, you will see time setup information on Plan Setup window.
e. After time setup, please click
to add guard in the route.
file://C:\Documents and Settings\Administrator\Local Settings\Temp\~hh2784.htm
2010/05/14
Guard Tour Management Software
Page 32 of 39
Please not: when you click Setup plan button and have time setup, this tour plan is a main and general tour plan, which just have only one tour
plan. It just have start time, no end time, that means once you set a mail tour plan, this plan will keeps being operated till you modify or delete
it.
If during a period, tour plan need some changes, except this period, the tour plan will still be same as general tour plan, then you can use
to add a provisional plan. When set up a provisional plan, you should set start time and end time.
1. Reading Data
a. Click on
on the main screen
b. Then the screen below will pop up. With the Reader connected to computer, click on Read Data button, and then the data in the Reader
(condition for patrolling, such as guard name, timecost, route, station, time, date and incidentetc.) will be transferred to the computer.
When reading data, the software will automatically process records, and incomplete tour and omissions will be shown here.
file://C:\Documents and Settings\Administrator\Local Settings\Temp\~hh2784.htm
2010/05/14
Guard Tour Management Software
a.
For conditional query, click the button
up.
Page 33 of 39
on the right of each title bar, then choose Custome Filter . A custom filter screen below will pop
d. Choose condition buttons, and then input range for time, data etc., click OK to have a conditional query.
2. Patrol Report
a. By this fuction, you can query all what you want. Click
on the main screen.
b. Then the screen below will pop up. Choose date range (Start Date, End Date) to query the patrolling reports, then all the data you need will
be shown on the following screen. Methods for further query is same as methods in section c,d of Reading Data part.
c. For conditional query, click the button
up.
on the right of each title bar, then choose Custome Filter . A custom filter screen below will pop
d. Choose condition buttons, and then input range for time, data etc., click OK to have a conditional query.
3. Statistical
Click Statistical button on the main screen.
a. First, choose start date and end date you want to have a statistics, and then choose statistical way. If you want to see guard statistical result,
then please choose Guard and click Stat. Button. Please see below
file://C:\Documents and Settings\Administrator\Local Settings\Temp\~hh2784.htm
2010/05/14
Guard Tour Management Software
Page 34 of 39
b. if you want to have route statistical result, then choose Route and click Stat. Button.
c. For conditional query, click the button
In statistical, besides statistical table, there are also diagrams which show guards patrol conditions visually.
file://C:\Documents and Settings\Administrator\Local Settings\Temp\~hh2784.htm
2010/05/14
Guard Tour Management Software
file://C:\Documents and Settings\Administrator\Local Settings\Temp\~hh2784.htm
Page 35 of 39
2010/05/14
Guard Tour Management Software
Page 36 of 39
4 INITIAL DATA
All the data from the reader are kept in the database of the system and are listed according to its reading time, no matter they are valid or unvalid.
Entering initial data interface by clicking initial data from the pull-down menu of the data processing, chose reading start time and reading end time
to make a query data by clicking query. The data showed out can be exported to Excel by clicking export excel or can be printed out by clicking
print and print preview. Clicking the right key of the mouse on the data, chose from the pull-down menu, the selected data can be deleted by
clicking delete, to delete all data, click delete all.
Attention: reading start time means the time PC begin to read record from the reader.
Reading end time means the time that PC finish reading record from the reader.
file://C:\Documents and Settings\Administrator\Local Settings\Temp\~hh2784.htm
2010/05/14
Guard Tour Management Software
Page 37 of 39
Direction for use
a. After software installation and setup, all the checkpoint cards have been labelled names (checkpoint names, personnel names or events),
which are as same as being assigned in the software. Then fixing these checkpoint cards to the proposed positions. Make sure that, the
correctly named cards will be installed in the correct places of the proposed tour.
Besides, for the first usage, make sure the Readers ID have been registered in the software system via connections between Reader and
computer.
b. When patrolling, first the patrolling guard takes the Reader and read his own Guard ID to identify himself with the system, e.g. Guard A.
Make sure that the guard cards are not read in the middle of patrol routes, which can cause the data will be showed by the software that a noname guard have the former part patrolling.
c. Then the guards go to the checkpoints, the Reader will automatically read each card. When reading successfully, a flash of the red indicator
light, sometimes accompanied by a “beep” means that a reading has been made. Then the reader will store card’s hexadecimal ID number in
it.
d. After patrolling are done, connect the reader on computer.
e. Then download all the patrol data to software and have a data prosessing.
V6 guard tour equipment communication instruction
For v6 system, the settings and management of the managing system is the same as those of common guard tour systems, but the equipment
should be started to communicate with the computer.
Operating methods:
Putting v6 equipment besides a station (within 10 meters) or inserting the v6 equipment into the station, then entering the management
software and clicking the data communication button, a signal searching interface will pop out, and the signal searching process can be
stopped by pressing the stop button. Pressing the touching sensor on the v6 equipment for 8s, the light of the equipment will flash once every
1s, which stands for equipment starting; when the equipment is communicated with the computer successfully, the light of the v6 equipment
flashes more fast, and then communication state is started(the communication interface is as picture2); when the communicating process is
finished, the light will be off, and cards can be read normally now. If the light flashes after pressing the key for 8s, and the communication
between the equipment and the computer is failure, the light will go out automatically after 15s, the communication is failure, and above
operation should be done again.(notices: the equipment can be started firstly, and then the communication buttons of the software system can
be clicked.)
Communication buttons of the system: the [batch read] button of guard places setting item, the [batch read] button of guard person
setting item, the [batch read] button of guard events setting item, the [date read] button of data reading item, the [equipment number reading]
button and the [equipment number modifying] button of communication test item, and the [equipment data cleaning] button of data
maintenance item.
file://C:\Documents and Settings\Administrator\Local Settings\Temp\~hh2784.htm
2010/05/14
Guard Tour Management Software
Page 38 of 39
Common Errors and Maintenance Methods
Touch guard tour system
Precautions:
1. absolute prohibition on the use of fire roast, water immersion or maliciously throw or hit;
2.keep the reader head from reading metal sheet and lead to shell short circuit or increase voltage;
3.metal sheet of the reader head against demolition, if the reader head was found round sheet metal loose, tightening it clockwise in time;
4.except replacing battery, prohibit disassembly of any other components
5.reader data collecting, encounter buzz sound continuously which is an indication of reader storage is full ,timely data read
Maintenance of Common Sense
Error
Error diagnosis
Test method
Trouble-shooting
Reader light does
not
shine,buzz
sound small or
silent
Low battery power
Read with a multimeter to acquire voltage
between round metal sheet and metal shell
Voltage is greater than 5 volts under
normal circumstance, less than 5
volts, replace the battery
round metal sheet of reader
head lose result in poor
connection
Observe whether the round metal sheet of the
head reader loose or not
Screw tight with thumb clockwise
Damage of the insulating
sleeve of round metal sheet
reader head or insulation
gasket cause short-circuit
Screw the round metal sheet of the reader head
with thumb counter clockwise to check whether
the insulation sleeve damage or not
Replace the insulaton sleeve
Reader
and
downloader
station got a poor conection
Press the reader in the downloader station with
your hand while receiving the data
Replace the reader correctly
Small copper pillar within the
jack in the downloader station
loose;
Small copper pillar spring fail
to work
Shake the small copper pillar gently to check if it
looe or not
Press downThe small copper pillar gently to verify
if it is elastic or not
Loose or small copper pillar lose
elastic ,
replace the small pillar with the
manufacturers
Downloader station does not
add power
Downloader station lines fail to
work
Serial
port
settings
are
incorrect
Observe whether the light of the downloader
station shine or not, check carefully whether the
downloader station line has problems; check
whether the serial port settings in software is
correct
Add power
Replace another communication
line
Reset or replace the serial port of
the software
Untouch the buttons
Guard tour operation is wrong
Clear data in the reader, imitate guard tour
ibutton,reread the data to see whether it is normal
or not
If opertaion is correct ,other
phenomenon are normal,data loss
sent back to the manufacuturer to
maintenance promptly
Can
data
not
receive
Data totally lost or
partially lost
Method to replace the battery
Supply battery of reader should be the 9-volt DC power ,when battery no electricity or power insufficient replace the battery immediately
Employ the hexagonal screwdriver to open the rear cover of the reader ,pull the battery gently,replace a new one,and then push it inside the reader
gently,screw the rear cover
Touch guard tour system
can not read the ibutton
countinous buzz three times when read
when the reader read a tag, there is a beep sound but the light fail to shine
the light countinously shine even the reader does not make the tag reading work
buzz all time
file://C:\Documents and Settings\Administrator\Local Settings\Temp\~hh2784.htm
2010/05/14
Guard Tour Management Software
Page 39 of 39
can not read
There are 3 causes lead to the phenomenon:
after complete the communication and unplug the USB cable, you need wait 10 more seconds to read ibutton
the reader will be influenced by the metal objects around the inspection point, the inspection point of touch items should not be placed around
the metal object
battery out of power or poor connections, remove the battery, better measured by the multimeter to check whether it got power, if the voltage is
below 2.7V ,it is out of Power. please relace the battery
Note: After replace the battery, connect the reader with computer to communicate at first, then it will operate normally
reader buzz during data read, but light shines continuously
Check: if temperature where the guard tour device placed is too low
countinous buzz three times when read
Check: time in the reader is error. Connect the reader with computer and then click “ communication test” to correct time
the light countinously shine even the reader does not make the tag reading work
Check: check battery power, if the voltage is low, replace the new battery
buzz
Buzzer short-circuit, contact customer service Low battery, please exchange the battery
Battery replace method as below
file://C:\Documents and Settings\Administrator\Local Settings\Temp\~hh2784.htm
2010/05/14