Download Morse Decoder User Manual rev 1
Transcript
JM Precision
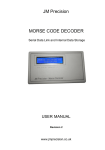
MORSE CODE DECODER
USER MANUAL
Revision 1
www.jmprecision.co.uk
JM Precision
Introduction
The JM Precision Morse Decoder is used to decode Morse code audio
signals and to display the decoded text along with the actual received
code on a continuously scrolling display.
A direct connection to the unit is not required as it has a built in
microphone and simply needs to be positioned in front of a receiver
which is tuned to a station which is transmitting Morse code.
There are also many on-line resources where Morse recordings can
be downloaded and decoded using this device.
Operation
Battery Insertion
1
Move the power switch to the off position
2
Remove the battery compartment cover located on the rear
of the unit.
3
Remove the old battery if fitted.
4
Connect the new battery and slot it into the battery
compartment
5
Refit the battery compartment cover
Calibration
Before the unit will operate it must be calibrated. This operation is
performed automatically after switching the unit on but should be
repeated when required.
To allow the unit to properly calibrate
1
Tune your radio to a station so that the Morse can be clearly
heard.
2
Switch on the decoder and place it in a location where it will
pick up the audio sounds.
3
Immediately after switching on the decoder will display
‘initialising’ for around two seconds.
www.jmprecision.co.uk
JM Precision
4
During this period the unit is preparing to perform a
calibration and you must ensure that the unit is positioned
before the end of this period.
After around two seconds the display will change to
‘searching’
The unit is now searching for Morse data in the audio signals
with which to calibrate itself. It is important that it can clearly
‘hear’ the sound so the unit should not be moved when the
word ‘searching’ is displayed as this can cause the
calibration to fail.
The reason it needs to perform this calibration is due to the
huge range of Morse sending speeds. The calibration
procedure ensures that the unit can properly decode signals
being sent at the currently received speed.
If the unit fails to calibrate successfully then try to reposition it or
adjust the audio volume and reset the unit by switching it off and
then back on again.
During calibration the unit may display an exclamation character
‘!’
at the left of the lower line.
This indicates that the Morse keying is non standard, odd
relationships between dots, dashes and spaces, but it will continue to
attempt to decode the data.
Data Display
Once successfully calibrated the decoded text should start to appear
on the display.
If you change stations and the speed of the code is significantly
different then you should reset the unit and allow it to recalibrate.
Loud noises after calibration may cause errors in the decoding but
the unit will continue decoding normally once the noise has stopped.
www.jmprecision.co.uk
JM Precision
Any characters that are decoded that the unit does not recognise are
displayed as
‘#’
If you are getting many of these in the displayed text then try
adjusting the volume or recalibrating the unit as described above.
Also note that noisy audio signals can cause poor decoding.
At very low Morse rates, typically below 12 words per minute the unit
may be unable to determine the difference between character
spacing and word spacing. This will cause the characters to be
spaced as if they are all individual words. It is however unlikely that
you will find such slow speeds in use by any commercial operators.
Should the display become dim or the unit fail to decode any signals
then the battery should be replaced.
Sample Morse recordings can be downloaded from our website at
www.jmprecision.co.uk
Specification
Length
145mm
Depth
80mm
Height
35mm
Weight (without battery) 175g
Power
9V battery PP3 (6LR61)
Maximum current
30mA
Display
2 line LCD white on blue with backlight
Maximum bit rate
30 bits / second
Maximum Morse rate 60 words per minute (nominal)
Minimum Morse rate
5 words per minute (nominal)
www.jmprecision.co.uk


