1
PRODUCT OVERVIEW
CAMERA AND POWER CONNECTIONS
Installing Cameras
Mounting Cameras and Running Cable
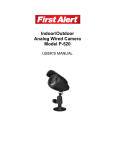
Select the position for the camera and secure the camera stand. Screw the camera onto the stand. Adjust camera to the proper
view angle. Make sure the lens is upright relative to the subject. Tighten the thumb bolt. First Alert cameras can be either ceiling or
wall mounted by simply reversing the camera stand mounting. See “Camera Orientation” Info box. Holes are provided on both the
bottom and back of the camera housing to accommodate most mounting requirements. Run cable from camera to DVR location.
See Information box below on “Longer Cable Runs”.
Camera Orientation
It’s important the camera is mounted correctly
to ensure the image is not upside down as the
camera lens can only be positioned one way.
Longer Cable Runs
Camera - Ceiling Mounted
Longer cable runs may require an upgrade
to RG59 Coax cable. First Alert kits ship with
economical AV cable that is designed to work
well up to the length of cable provided, usually
around 60 feet. If longer distances between
camera and DVR are required, you will need to upgrade to RG59
Coax cable. We provide several lengths up to 300 feet. In addition, if
you need to run cable for in-wall installations, then you may require
fire rated cable, FT-4/CMR UL approved for in-wall installations.
Connecting Cameras
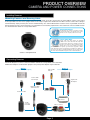
Follow this diagram to connect camera to a DVR or other device using a BNC connection. Note:
DVR Power Adaptor is for illustration purposes only. Your power adaptor may be different.
Option 1
Option 2
Power from DVR (Not Supplied)
Video to DVR
Video In
Power from Supplied Adaptor
Power to DVR
DC 12V Input
Supplied 12V
DC Adaptor
Splitter from DVR
Camera & Power
Power from 120V
Power to Camera
AV Cable: BNC/
DC Power
12V DC
Converter
From DVR
Video to Camera
Power to Camera
Page 5