1
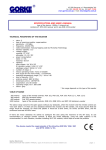
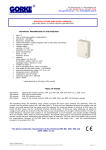
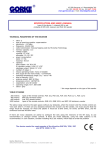
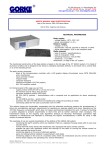
43-200 Pszczyna, ul. Staromiejska 31b
tel. 032 326 30 70, fax 032 447 73 30
www.gorke.com.pl, e-mail: [email protected]
SPECIFICATION AND USER’s MANUAL
type of the device: 2-channel ANT-KO2/1 set
the set contains: a 2-channel RSU-KO2 receiver and a 3-button PUK 303 remote control
TECHNICAL PARAMETERS OF THE RECEIVER
•
•
•
•
•
•
•
•
•
•
•
•
•
•
•
•
•
class: C
type of receiving module: superreaction
sensitivity: -100 dBm
frequency: 433,92 MHz
radio transmission: KeeLoq hopping code by Microchip
Technology
memory capacity: 14
voltage supply:
- nominal: 12 V DC
- allowable: 10-15 V DC
power consumption:
- static: 17 mA
- maximal: 60 mA
capacity:
- relay output: 1A/ 30 V DC
- S transistor output: 0,5A/ 12 V DC
- sabotage output: 50mA/ 12 V DC
number of relays: 2
relay's operating mode: mono or bistable
time scope for the mono mode: ~1s-4min20s
operating temperature range (°C): 0 to +40
dimensions (mm): 48*68*26
cooperation: any GE sender
operating range (m)*: 100-500
colour: white
* the range depends on the type of the sender
TECHNICAL PARAMETERS OF THE REMOTE CONTROL
•
•
•
•
•
•
•
•
•
•
class: C
frequency: 433,92 MHz
transmission: coded (KeeLoq hopping code by Microchip
Technology)
number of buttons: 3
sending power: <5mW
power supply: 1 battery 9V/GF22
dimensions (mm): 123*35*20
colour: black
cooperation: any GE receiver
operating range (m):
with superreactive receiver: 300
with heterodyne receiver: 600
The operating range of the set is 300 metres. It concerns the open space (without any obstacles, when the
receiver and the remote control can “see each other”). If there are any obstacles between the receiver and the
sender, one must assume that the range would be reduced: for wood and plaster it would be 5-20% lower, for
bricks 20-40% lower, and for reinforced concrete 40-80% lower.
If there are many obstacles we advise to configure the sets using the receivers of the SH class, to use
retransmitters or stronger remote controls. If there are metal obstacles, using the radio systems is not
recommended.
The device meets the requirements of the directives EMC 89/ 336/ EEC and
RTTE 1999/ 5/ EC.
Gorke Electronic Sp. z o.o.
SPECIFICATION AND USER’s MANUAL: 2-channel ANT-KO2/1 set
strona: 1
The purpose of the elements.
Diode SUPPLY control (green ZAS) – it indicates connection of the power supply
Diode CHANNEL 1 control (red K1) – it signals that the relay no 1 is opened
Diode CHANNEL 2 control (red K2) – it signals that the relay no 2 is opened
LEARNING button – launches the programming procedures
ANTISABOTAGE – allows for connecting the device to the antisabotage circuit
S output – it is used to connect an acoustic signalling device which informs with short signals whether the relay
is opened or closed, for example while opening the access path to the encryptor or by arming a simple alarm
circuit. On opening the relay on the S output one short signal is emitted, and on closing it – two signals. The
maximal capacity of this output is 0,5A/12V DC, which is enough even for using sirens with a high level of
audibility. The positive terminal should be connected to +12V and the negative terminal – to the S output on the
terminal strip.
SAB
12 V
The receiver installation conditions.
We recommend installing the receiver as high as possible, far from any metal or electric devices because the
superreactive receiver is sensitive to electromagnetic interferences. In conditions of high electromagnetic
interferences, using superheterodyne receivers (for example, OPC type) is recommended. The RSU-KO1 receiver
requires dry and closed places.
The transmission code.
The radio transmission, based on the hopping code (KeeLoq by Microchip Technology Inc. USA) guarantees the
high safety of using. Each transmission is different from the previous one. To make the receiver work, you must
enter a remote control into its memory – it is the basic condition.
The control can be programmed to unlimited number of receivers. „Loosing” 15 successive transmissions (using
the remote control beyond the receiver's range) requires sending the signal twice (press the remote control
button twice).
The principal use.
The receiver can be used as equipment which controls remotely the work of the following devices: gates and
barriers, electromagnetic locks, lights etc. In alarm systems it is used:
–
as a panic button
–
as a unit which controls the work of other devices of the system, for example, sensors
–
to arm or disarm the system, zones, etc.
The device works on the frequency 433,92 MHz. In majority of the European Union countries (including
Poland) this bandwidth does not require any special permissions and concessions for using it.
Gorke Electronic Sp. z o.o.
SPECIFICATION AND USER’s MANUAL: 2-channel ANT-KO2/1 set
strona: 2
1.
REGISTERING A 2-BUTTON REMOTE CONTROL
a) press the LEARNING button for more than 0,5 but less than 4 seconds – the K2 diode will light
b) press the button which is supposed to control the channel 1 – the diode K2 will fade
c) press the button which is supposed to control the channel 2 once more – the diode K2 will light for 3 seconds,
then it will start to pulse and will fade. The process of registering a new remote control is finished
If the registering fails, the diode K2 will blink once and then fade. In this case, you need to start the process
from the beginning. If the receiver's memory is full (14 remote controls have already been programmed),
programming the next remote will delete the one which had been programmed as the first. If the number of
users is larger than 14, you need to use receiver with extended memory – the S version (113 senders) or
configure the receiving module WLC 201 with an adequate number of receivers of the LC version (two for 226
users, 3 for 339 users, etc.).
2.
REGISTERING A 1-BUTTON REMOTE CONTROL ON THE CHANNEL 1
a) press the LEARNING button for more than 0,5 but less than 4 seconds – the K2 diode will light
b) press the remote control’s button – the diode K2 will fade
c) press this button once more – the diode K2 will light for 3 seconds, then it will start to pulse and then it will
fade
3.
REGISTERING A ONE-BUTTON REMOTE CONTROL ON THE CHANNEL 2
a) press the LEARNING button for more than 0,5 but less than 4 seconds – the K2 diode will light
b) press the remote control button – the diode K2 will fade
c) press the same button once more – the K2 diode will light for 3 seconds and during this time you need to
press the LEARNING button
d) the diode will pulse and then it will fade
e) the process of registering a new remote control is finished
If you want to use only one button of a multi-buttoned remote control (2, 4 or 8) to control channel 1 or 2,
proceed according to point 2 or 3.
4.
SETTING THE RECEIVER'S OPERATNG MODE
To set the receiver's operating mode, you need to have a remote control which has previously been entered into
the receiver's memory (point 1.). Manufacturing settings – the bistable mode.
The monostable mode(timer) – after sending the transmission from the remote control, the receiver's relay will
open for the pre-programmed time.
Press the LEARNING button (the diode K2 will light) and keep it pressed until the K2 diode starts to pulse – then
release the button. After releasing the button, the K2 diode will emit continuous light for about 4 seconds and
then, slowly pulse. Each blink corresponds to one second.
For example, in order to set timer on 20 seconds, you need to count 20 blinks of the K2 diode and press the
remote control button, thus confirming the length of time. The maximal time available to set is 260s (4 min 20
s). If no button is pressed during the diode's pulsing (time countdown), after counting to 260s, the K2 diode will
emit continuous light for 1 minute. If during this time (the continuous lighting) the control button is pressed
(confirming), the receiver will set time on the maximum, that is, about 260s. If during this time the button is
NOT pressed, the receiver will quit the programming mode and will save the previous setting.
The bistable mode (flip-flop) – after receiving the transmission from the remote control, the relay flips on the
other state.
Press the LEARNING button (the K2 diode will light) and keep it pressed until the K2 diode starts to pulse – then
release the LEARNING button. After releasing the LEARNING button the K2 diode will emit continuous light for
about 2s and during this period press the control’s button.
5.
DELETING THE REMOTE CONTROLS FROM THE MEMORY
Keep the LEARNING button pressed.
Phase one: the LED K2 will light for about 4s.
Phase two: LED K2 will start to pulse and then it will fade, which means that the deletion is finished. Release the
LEARNING button.
1.
2.
3.
4.
one must remember that deleting concerns the whole capacity of the memory. If you want to remove
only one or several remote controls, you must re-enter the ones which are supposed to be saved.
If there are many users and you want to avoid the toilsome process of programming the remote
controls individually, you can use one of the identifying receivers (their parameters allow for deleting
the controls individually)
deleting the senders does not change the operating mode of the receiver
disconnecting the supply voltage does not cause losing the information about programmed remote
controls or the operating mode of the receiver.
Gorke Electronic Sp. z o.o.
SPECIFICATION AND USER’s MANUAL: 2-channel ANT-KO2/1 set
strona: 3