1
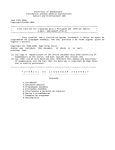
The big announcement is that the debugger works. You will need to log into
flounder instead of dumbo to do the lab. The debugger only works on flounder.
Your disk files will exist on both dumbo and flounder and your account will
have the same name and password on flounder as it would on dumbo. Basically
you can do anything but run the debugger on dumbo - TO RUN THE
DEBUGGER YOU MUST BE LOGGED INTO FLOUNDER!!!
Because it is rather late in the semester we will skip the assignment that was
previously e-mailed to you several weeks ago and proceed directly to the lab
assignment discussed in class last Wednesday. A copy of the lab is given below.
This lab will be due Monday, October 14th. However, this may be delayed if we
detect more problems with the Kern Lab computers and the debugger.
EEAP 282
PROGRAMMING ASSIGNMENT #1
TERMINAL INPUT/OUTPUT
PURPOSE: This lab will introduce you to the use of branch and test instructions
as well as polled input/output (i/o). You will write a program which reads the
keyboard for input and then echoes it TWICE to the terminal screen.
LAB DESCRIPTION:
This lab simulates a terminal connected to a 68000 microprocessor. In reality, a
68000 is usually connected to a terminal or other serial device through special
hardware such as a Motorola 6850 Asynchronous Communications Interface
Adapter (ACIA). The 68000 can send and receive data through special memory
locations called interface registers.
Because data cannot be transferred
instantaneously in the real world, there are also additional interface registers
which are similar to a status register and indicate whether any new data has been
sent to the 68000 or whether the hardware is busy outputting data. More
detailed information about how the 6850 works and the function of the ACAI
registers can be found on pages 474-483 of Ford and Topp.
This lab will use special debugger software to simulate the operation of a 6850
and its associated hardware. The workstation/terminal keyboard will be used
for input and the db68k display will be used for output.
Polling refers to the fact that you must write a program with an infinite loop
which monitors the 6850 registers for input from the keyboard. When input is
detected your software will then output the input (a single character) to the
output using one of the special output routines provided. The function of your
program can be summarized by the following pseudocode:
loop: if terminal_status_register = 1
then
character = keyboard_data_register;
if character = 'X' then exit;
output character;
output character;
else
goto loop;
where character is the data being input and output, terminal_status_register and
keyboard_data_register are the 6850 interface registers described below, and
output is based upon the routines described at the end of this lab description.
Note that the above code shows your software in an infinite loop. Provision must
be made, i.e. testing for the character 'X', to stop your software. Because not all
software works the first time a short appendix to this lab describes how you can
stop a UNIX process, i.e. kill your program, if it cannot be stopped otherwise.
For the purposes of this lab, you will use two interface registers:
(1) terminal status register (TSR) at memory
location $10040 - READ ONLY;
This register shows the status of the keyboard interface. In a real 6850, bit 0 is set
by hardware, thus, you CANNOT write to this register. When bit 0 = 1 a
character is in the keyboard data register. Bit 0 resets to 0 immediately after the
keyboard data register is read. Note that real i/o takes time and bit 0 will not
change immediately in your program.
(2) keyboard data register (KDR) at memory location
$10042 - READ ONLY;
This register contains the ASCII coded character input from the keyboard.
APPENDIX 1
HOW TO STOP A UNIX PROCESS
Suppose you are in the debugger and you cannot get out of your program. In
addition, since your program is reading the keyboard for input and commands
such as CTRL-D which you might type in to stop the debugger do not work. To
safely stop a runaway debugger you can terminate your SLIP or telnet
connection. However, since this does NOT terminate your process you should
kill all old processes when you log back in. You can only kill your own
processes. To kill a debugger session which is still running you must be in Unix
(not the debugger), determine the process number associated with that program,
and issue a UNIX kill command.
To determine the process identification code (PID) of your debugger command,
type:
ps -f
to get something similar to the following display:
> dumbo 3: ps -f
UID
merat
merat
merat
merat
PID
23604
23534
23602
23601
PPID
23602
23533
23601
23534
C
5
0
0
0
STIME
14:05:13
14:04:03
14:05:06
14:04:42
TTY
ttyu0
ttyu0
ttyu0
ttyu0
TIME
0:00
0:02
0:00
0:00
COMMAND
ps -f
-csh [csh]
/bin/csh -i
db68k exam1
The display shows the user, in this case merat, followed by the PID number you
want. However, because UNIX is multi-tasking you can have many processes
running simultaneously. You should examine the right hand column, looking
for a command which begins with db68k. The PID shown in this row is the one
associated with your runaway debugger program. In this example, the correct
number is 23601. To stop the process, type:
dumbo 4: kill 23601
This will typically result in a message like the following:
dumbo 5: Stopped (tty output)
dumbo 7: Reset tty pgrp from 23534 to 23602
Closed.
which indicates that the process has been killed and you can get back to what
you were doing. Note that kill is a priviledged UNIX instruction and you can
only kill your processes; YOU CANNOT ASK ANYONE ELSE TO KILL YOUR
PROCESSES FOR YOU. However, Wes can kill anyone's processes.
APPENDIX 2
Emulation Code User's Manual
Special input/output routines have been written for the debugger to simulate the
operation of the 6850 ACIA as discussed above as well as to perform the
functions of the various input/output routines described in sections 4.3.5 and
4.3.6 of Ford and Topp. The routines described in your book DO NOT WORK in
the db68k debugger; hence, they have been replaced with the routines described
in this appendix.
Before you can use any of these routines you must load them into the debugger
along with your program. This is done in two ways:
1. The FIRST line of your assembly language program MUST be the following:
include io.s
which loads some special assembly language routines into your program.
2. You must invoke the debugger using the command:
db68k -c lab1.com <your_program_name>
The -c lab1.com will cause special routines written in C to be available for use by
the debugger.
The following files should be in your home directory:
iodorm.com
acia.com
extra.com
lab1.com
io.s
The following routines will be available to you if you properly load the debugger
with the lab1 files:
HexIn
HexOut
HexOutLong
PutString
CharOut
inputs a single hex number from the keyboard into D0.W
outputs the D0.W in hex to the debugger screen
outputs the D0.L in hex to the debugger screen
outputs the string of ASCII characters whose starting address is
contained in A0 to the debugger screen
output the character whose ASCII value is in D0.B to the
debugger screen
Note that these names involve upper and lower case characters and they must
appear exactly as given above in your programs. A more detailed explanation of
how to use each routine is given below.
HexIn
When it is called, this routine will input a hex number from the keyboard and
store its word-length value in D0.
Example:
_Main
include
jsr
move.w
io.s
HexIn
D0,num
;stores input word
;at num
HexOut
This routine is the inverse of HexIn. It will output the word in D0 as a hex
number, followed by a line feed.
Example:
_Main
include
move.w
jsr
io.s
#32,D0
HexOut
;will print 20 (hex of
;32)
HexOutLong
This routine is exactly the same as HexOut except that it prints the long word in
D0 instead of only a word like HexOut does.
PutString
This routine requires the value in A0 to point to a string. A string is a sequence
of non-zero bytes (usually ASCII characters) followed by a zero byte that
identifies the end. When it is called, this routine will print to the screen the
string pointed to by A0. This string can have special ASCII values such as $0A
for line feed or $08 for backspace.
Example:
_Main
include
lea
jsr
io.s
str,A0
PutString
DC.B
'This is a string',0
;prints the below
;string
* does not add a line feed after the print
...
str
An example of a string with special characters might be:
str
DC.B
$0A, $0A, 'he', $08,'i',$0A,00
This string would print two blank lines followed by 'he'. The $08 after 'he' is a
backspace so the 'e' would be erased. Then, it would print the 'i' and go to the
next line. The end result would be two blank lines, and 'hi' on the next line.
Anything else printed would go on the line after 'hi'.
CharOut
When this routine is called, it will output to the debugger screen the character
whose ASCII value is in D0. Only one character will be output. This character
can also be a special character such as a line feed or backspace.
Note that these routine require that the "include io.s" statement must be the first
line of your assembly language program and you must invoke the debugger with
the statement:
db68k -c lab1.com <your_file_name>
Several notes about this programming assignment are in order:
1. The input/output routines included in your assembly language program will
be located at $9000 in memory. You should not locate your program or any data
used by your program there. The file io.s contains the following assembly
language commands which will appear in your program listing. Don't worry,
you are not responsible for understanding their function yet and they will not
interfere with your program unless you insist on putting data or instructions at
$9000
ORG
MOVE.W
RTS
HexIn
MOVE.W
RTS
HexOut_Long
RTS
HexIn_Long
RTS
PutString
RTS
CharOut MOVE.B
RTS
HexOut
$9000
D0,$10100
$10102,$10102
MOVE.L
D0,$10104
MOVE.L
$10108,$10108
MOVE.L
A0,$1010c
D0,$10110
2. Many people do not know how to get a listing of the assembler output. You
use the -L option to get the program listing to the terminal screen, i.e.
as68k -L program_name
If you use my aliases for doing the EEAP282 labs, i.e.
asm68k rm !*.lis; as68k -L !*.s > !*.lis
link68k rm !*.llis; ld68k -L -o !*.x !*.o > !*.llis
you will automatically generate a listing file with the name program_name.lis
3. You can modify the file extra.com to initialize the debugger pc or do other neat
things. The file extra.com currently contains the following instructions:
Memory Register @usp=0x3000
Memory Register @ssp=0x4000
Memory Register @sr=0x00
For the 'professional' programmer, you can put any startup debugger
instructions you want in the file extra.com. This can be handy for initializing
registers, memory contents or the like. For example, you can automatically
initialize the debugger pc to $1000 by putting the following command in the
extra.com file:
Memory Register @pc=0x1000
Your lab report should conform to the following format:
1. standard lab cover page with signature. Use the format of the page at the end
of this message. Note that you must write a short (several sentences at the
most) abstratct of what the lab was about.
2. listing of your ASSEMBLED program INCLUDING symbol table
3. separate page with pseudocode explanation of how program worked
4. separate page answering the following questions
Questions
1. Define polling. (See pages 578-579, 589 of Ford & Topp)
2. Is the input/output used in this lab memory mapped or isolated input/output.
(See pages 575 of Ford & Topp)
3. Pages 577 and 578 of Ford & Topp describe the 6850 serial interface.
Compare the status and input registers you used in Lab #3 with the register
descriptions of the 6850 on page 578. Which 6850 registers were not used in
this lab and why.
You will turn in the lab Monday, October 14th. Although the lab title page has
provision for a checkout there will be no checkout of this lab at this time.
EEAP 282 TITLE PAGE
Names:
________________________________
Typed
________________________________
SIgnature
No laboratory will be graded unless it is signed. By signing this page you are
indicating that this lab and that the work described in the lab report is your own.
Any complaints about grading should be directed to Prof. Merat or the lab T.A.'s.
TITLE: ______________________________________________________
Abstract:
[ ] Checked by ___________________________ ______________