1
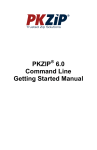
Front End Risk Adjustment System [ FERAS ] User Guide Centers for Medicare & Medicaid Services Table of Contents Table of Contents TRADEMARK INFORMATION............................................................................................................... 1 INTRODUCTION ........................................................................................................................................ 2 FERAS OVERVIEW ................................................................................................................................... 2 WHO TO CALL AND HOURS OF OPERATION................................................................................... 2 FERAS AVAILABILITY ............................................................................................................................ 2 REQUIREMENTS FOR USING THE FERAS......................................................................................... 3 PRODUCTION CYCLE.............................................................................................................................. 3 TESTING REQUIREMENTS..................................................................................................................... 3 CONNECTING TO THE FERAS .............................................................................................................. 4 CONNECTING TO THE MDCN ............................................................................................................... 4 LOCATING THE FERAS........................................................................................................................... 4 SITE LAYOUT............................................................................................................................................. 5 SITE HEADER ............................................................................................................................................... 5 SITE MENU .................................................................................................................................................. 5 LEFT SIDEBAR ............................................................................................................................................. 5 SITE FOOTER................................................................................................................................................ 5 LOGIN PAGE............................................................................................................................................... 6 LOGGING INTO THE FERAS.................................................................................................................. 6 MENU AND HOME PAGE......................................................................................................................... 7 NEWS & UPDATES PAGE ........................................................................................................................ 8 MAILBOX .................................................................................................................................................... 9 FILTERING YOUR MAILBOX LISTING ........................................................................................................... 9 DOWNLOADING FILES FROM YOUR MAILBOX ........................................................................................... 10 DOWNLOADING FILES TO YOUR COMPUTER .............................................................................................. 11 Returning to the Latest Downloads ....................................................................................................... 11 DELETING FILES FROM YOUR MAILBOX ................................................................................................... 12 File Delete Confirmation Box ............................................................................................................... 12 VIEWING FILES IN YOUR FERAS MAILBOX .............................................................................................. 13 Viewing The Selected Files ..................................................................................................................... 13 Viewing a File ....................................................................................................................................... 14 Returning to the Latest List of Files Viewed.......................................................................................... 14 UPLOAD FILE........................................................................................................................................... 14 UPLOAD RESTRICTIONS ............................................................................................................................. 14 UPLOAD TIPS ............................................................................................................................................. 14 UPLOAD FILE STORAGE ON OUR SYSTEM .................................................................................................. 15 Front End Risk Adjustment System User Guide i Centers for Medicare & Medicaid Services Table of Contents CREATING A RAPS FILE (DIRECT DATA ENTRY)......................................................................... 18 WELCOME PAGE ........................................................................................................................................ 18 Suspened Files / File Recovery From Welcome Page ........................................................................... 18 AAA RECORD PAGE .................................................................................................................................. 19 Creating the AAA Record ...................................................................................................................... 19 BBB RECORD PAGE................................................................................................................................... 20 Creating the BBB Record(s).................................................................................................................. 20 CCC RECORD PAGE................................................................................................................................... 21 Creating the CCC Record(s) ................................................................................................................. 22 ADDING ADDITIONAL CCC RECORD(S)..................................................................................................... 22 ADDING ADDITIONAL BBB RECORD(S)..................................................................................................... 22 THE YYY RECORD(S)................................................................................................................................ 22 THE ZZZ RECORD ..................................................................................................................................... 23 BUILDING THE FILE ................................................................................................................................... 23 EDIT / REVIEW PAGE ................................................................................................................................. 24 Editing / Reviewing the AAA Record..................................................................................................... 25 Editing / Reviewing the BBB Record(s)................................................................................................. 26 Editing / Reviewing the CCC Record(s) ................................................................................................ 27 EDITING FILES FROM THE VIEW FILE PAGE ............................................................................................... 28 SUSPENDING \ CANCELING A FILE ............................................................................................................. 29 Suspending a File .................................................................................................................................. 29 Cancelling a File................................................................................................................................... 29 DOWNLOAD / SUBMIT PAGE (DDE)........................................................................................................... 30 Downloading the File............................................................................................................................ 31 Submitting the File ................................................................................................................................ 31 CONTINUING A SUSPENDED FILE AND FILE RECOVERY ............................................................................. 32 Why Would I Need to Continue a File?................................................................................................. 32 At What Point Does the Continuation Process Start in the File?.......................................................... 32 File Status is In Progress ...................................................................................................................... 32 File Status is Complete.......................................................................................................................... 33 Choosing From Your List of Files ......................................................................................................... 34 ERROR CODE LOOKUP PAGE............................................................................................................. 35 PERFORMING A SEARCH ............................................................................................................................ 35 SEARCH RESULTS ...................................................................................................................................... 36 HELP PAGE ............................................................................................................................................... 37 FREQUENTLY ASKED QUESTIONS PAGE ....................................................................................... 38 DOCUMENTATION PAGE ..................................................................................................................... 39 SITE ACCESSIBILITY INFORMATION .............................................................................................. 40 CONTACT INFO PAGE ........................................................................................................................... 41 SITE MAP PAGE....................................................................................................................................... 42 SEARCHING THE FERAS SITE ............................................................................................................ 43 PERFORMING A SEARCH ............................................................................................................................ 43 SEARCH RESULTS ...................................................................................................................................... 43 FILE TRANSFER USING MICROSOFT FTP SOFTWARE............................................................... 44 PASSWORDS ............................................................................................................................................... 44 LOGGING-ON TO THE FTP SERVER ............................................................................................................ 44 Front End Risk Adjustment System User Guide ii Centers for Medicare & Medicaid Services Table of Contents RISK ADJUSTMENT DATA UPLOAD USING MICROSOFT FTP ...................................................................... 45 RISK ADJUSTMENT DATA DOWNLOAD USING MICROSOFT FTP ................................................................ 45 DOWNLOADING A SINGLE FILE .................................................................................................................. 46 DOWNLOADING MULTIPLE FILES .............................................................................................................. 46 LOGGING-OFF THE FTP SERVER................................................................................................................ 46 FILE TRANSFER USING OTHER FTP SOFTWARE ......................................................................... 47 HELPFUL HINTS...................................................................................................................................... 47 APPENDIX A ............................................................................................................................................. 48 Front End Risk Adjustment System User Guide iii Centers for Medicare & Medicaid Services 02/16/10 Trademark Information PK-ZIP® Software version 2.04G is a licensed product of PKWARE, Inc. This user manual references material from the PK-Zip Read Me File. Microsoft Internet Explorer® is a licensed product of Microsoft Corporation. Netscape Communicator / Navigator® is a licensed product of Netscape Communication Corporation. Any other software referenced within this manual or any other publication of Palmetto GBA, LLC is licensed or copyrighted by their respective companies and is for informational purposes only. Front End Risk Adjustment System User Guide 1 Centers for Medicare & Medicaid Services 2/16/2010 Introduction Web services such as file transfers and file building are the main functions of the Front End Risk Adjustment System (FERAS). Using a browser, registered users may browse the FERAS site for Risk Adjustment related documentation and other useful information. The file transfer and building functions allow registered users to transfer and build electronic data using any type of platform (i.e. Windows 95, UNIX, Macintosh, etc.). Using a web browser or FTP Client software, you can connect to the FERAS, upload files, build files and download reports. FERAS Overview The FERAS contains the following menu options: Home Returns you to the FERAS Home Page. Mailbox Allows registered users to download/view/delete Risk Adjustment data files, reports and responses from their outbound mailbox. Upload File Allows registered users to upload Risk Adjustment data files for processing. DDE Allows registered users to create a RAPS formatted file on-line and submit it for processing. Error Codes Allows the user to look up descriptions for Error Codes. Help Lists the help available on-line for the FERAS. News & Updates Displays a list of the latest news and updates for RAPS and the FERAS. Who to Call and Hours of Operation If you have questions regarding the FERAS or the submission of Risk Adjustment data, you may access the Help menu option from the FERAS web site or call the CSSC Help Line at (877) 534-2772 (534-CSSC). This information is also available by accessing the Contact Information from the FERAS web site. FERAS Availability The FERAS is available for use 24 hours a day 7 days a week. The CSSC Help Line is unavailable on the following holidays: New Year's Day Martin Luther King Day Memorial Day Independence Day Labor Day Thanksgiving Day and the day after Christmas Eve Day and Christmas Day Front End Risk Adjustment System User Guide 2 Centers for Medicare & Medicaid Services 2/16/2010 Requirements for Using the FERAS File transfers and file building are two main components of the FERAS. To access the FERAS menu options such as File Submissions or Help, users must have a browser. Netscape Navigator version 3.0 or higher and Internet Explorer version 3.02 or higher are recommended and supported. Other browsers may be used; however, the FERAS technicians do not currently support browsers other than Netscape Navigator and Internet Explorer. File transfers and file building via the FERAS can be performed by use of a browser. You can also use other FTP software to upload your files. Before you can perform file transfers on the FERAS, you must have one of the following components available on your system: Browser Netscape Navigator version 3.0+ or Internet Explorer 3.02+. Other browsers may work, but will not be supported by the FERAS technicians at this time. FTP Client Software Windows 95+ includes Microsoft FTP software. If you are using FTP software other than Microsoft, you must refer to your FTP software documentation for correct FTP procedures. See the section titled “Using Other FTP Software.” NOTE: Although the FERAS is designed to be multi-platform, the FERAS technicians will only be equipped to support Windows 9x and Windows NT environments. In addition, the FERAS technicians will only be able to support Netscape Navigator version 3.0 or higher and Internet Explorer version 3.02 or higher browsers. Production Cycle Production Cycles run at 5:00 p.m. (EST). Claims submitted via the FERAS must be completely transmitted in order to process in the 5:00 p.m. production cycle. CMS Reports will be available the following morning. Testing Requirements Submitter testing is required to ensure the flow of data from the Submitter to the FERAS works properly. Testing also ensures the data submitted is valid and formatted correctly. If you would like to send data in a test format, please contact the CSSC Help Line at (877) 534-2772 (534-CSSC) to notify them of your test submission. Test data will be processed at CMS and reports will be available the next morning. By calling the CSSC Help Line prior to transmission of your first production or test file, a CSSC representative will be able to give you information on how to properly submit a test and/or production file. Front End Risk Adjustment System User Guide 3 Centers for Medicare & Medicaid Services 02/16/10 Connecting to the FERAS To establish an IP connection with the FERAS, you must be connected to the Medicare Data Communications Network (MDCN), which is provided by AT&T Global Network Services. The MDCN is the secure network linking the Risk Adjustment data processing entities. If you are not connected to the MDCN, please contact AT&T at 1-800-905-2069. All submitters with IP network access have been authorized to connect to the FERAS. In order to submit claims to the FERAS via the MDCN, you must be enrolled with the CSSC. If you are not enrolled, please contact the CSSC Help Line at (877) 534-CSSC. Once enrolled with the CSSC to submit and retrieve data electronically, you will receive a Submitter ID and a password. NOTE: This password is case sensitive. You must enter your original password exactly as it was assigned to you by the CSSC. See the Changing Passwords section for information on how to change your password. Connecting to the MDCN 1. 2. Refer to your MDCN instructions for dialing into the MDCN. Once you have dialed in to the MDCN, start your browser. At the Uniform Resource Locator (URL) or address field, type: http://32.77.242.4, as shown in Figure 1, and press ENTER. See the figure below for locating the FERAS site using Netscape Navigator. Locating the FERAS Enter the address of the FERAS into the browsers location or address bar and press the Enter key. Figure 1 Entering the FERAS IP Address Front End Risk Adjustment System User Guide 4 Centers for Medicare & Medicaid Services 02/16/10 Site Layout The FERAS site is constructed so that there is a common Site Header, Site Menu, Left Sidebar and Footer shared by each page of the site. The Login Page shown in Figure 2 shows the entire site with the header, menu, left column and footer, the remaining screen shots will not include these common items, please refer back to this section for information on the shared portions of the FERAS site. Site Header The site Header contains the site logo, search and links to the contact, site map and accessibility sections of the site. Site Menu The site Menu contains links to all of the major sections for the FERAS. Left Sidebar The left Sidebar contains your welcome message along with a link to log in or out of the FERAS. Also contained within this section is the Get Assistance menu where you can find help, documentation, contact information, etc. that will assist you has you use the FERAS. Site Footer The site Footer contains the same links as the Site Header and Site Menu along with logos for CMS and Palmetto GBA. Figure 2 Site Layout Front End Risk Adjustment System User Guide 5 Centers for Medicare & Medicaid Services 2/16/2010 Login Page Once you establish an IP connection, you will see the Login Page for the FERAS, shown in Figure 3. This will server as your Home page if you are not logged into the system. Figure 3 Login Page Logging into the FERAS To access most of the pages on the FERAS you must log in using the user name and password assigned to you. You will be prompted for your User Name and Password as shown in Figure 3. This is the Submitter ID and password assigned to you when you enrolled for electronic claims submission with the CSSC. Front End Risk Adjustment System User Guide 6 Centers for Medicare & Medicaid Services 2/16/2010 Menu and Home Page After you enter a valid username and password, you will see the page in Figure 4. You can choose to go to any of the file actions from this menu. You can go back and forth between these functions by using the menu bar or the links at the bottom of the site. This page also serves as your Home page once you have logged into the FERAS. By selecting the Home menu option, or pressing ALT + H then ENTER, you will be returned to this page Figure 4. Menu and Home Page. Front End Risk Adjustment System User Guide 7 Centers for Medicare & Medicaid Services 02/16/10 News & Updates Page The News & Updates page can be reached by clicking News & Updates menu item or by clicking the read more >> link in the sidebar area under Latest News or by pressing ALT + N then ENTER. The News & Updates page is shown in Figure 5. This page is used to post new information that pertains to the FERAS. Figure 5. News and Updates page. Front End Risk Adjustment System User Guide 8 Centers for Medicare & Medicaid Services 02/16/10 Mailbox Clicking the Mailbox menu button from the main menu will display the page shown in Figure 6. The files available are those contained in your mailbox directory on our system. The Size is the size of the file in bytes; the Date is the date the file was placed in your mailbox. Figure 6. Mailbox Page. The files in your directory list ordered by the date from oldest to newest with the oldest files being on top of the list. Filtering Your Mailbox Listing You can filter your directory list by choosing either the Date, File Type or both using the Filter Directory List function on the Mailbox page. In the example below, shown in Figure 7, a filter was applied to show only the FERAS Response Files dated July 29th. Front End Risk Adjustment System User Guide 9 Centers for Medicare & Medicaid Services 2/16/2010 Figure 7. Applying a Mailbox Filter. In the example below, shown in Figure 8, the mailbox listing was reset to show all of the files by setting both the Date and File Type drop down lists to “All” and clicking the Apply Filter button. Figure 8. Removing the Mailbox Filter. Downloading Files From Your Mailbox To download files from your FERAS mailbox to your computer, follow these instructions: 1. 2. 3. Select up to 5 files from the list of available files. Click the left mouse button once to select the file, use the CTRL and SHIFT keys to select multiple files. Click the Download button. Once your selected files are ready for downloading you will receive the page shown in Figure 9. You can save the file with the same name as the file you are downloading, or, if you wish, you can rename the file to something else when downloading it to your computer; simply type the file name you want in the File name text box. Front End Risk Adjustment System User Guide 10 Centers for Medicare & Medicaid Services 2/16/2010 Figure 9. Downloading Files. Downloading Files to Your Computer The page in Figure 9 lists the files you chose to download. To begin a download, right click on the filename and choose "Save as…" or whatever menu item that allows you to save the file onto your computer. Also note that the size of the file is displayed next to each link and those large files will take a long time to download. You can select to download one file at a time, or you can select each file to download simultaneously. You will notice that the file names you chose have been modified to replace all period separators with underscores and to add a file extension. Compressed (zipped) files will receive a .zip extension; all other files will receive a .txt extension. This is done to eliminate the need to rename zipped files so they are recognized as such by your compression software. NOTE: Left clicking on the file may cause your browser to attempt to display the file. This is why we recommend the right click method. Returning to the Latest Downloads You can return to the latest list of downloads by clicking the Latest Downloads link from the My Mailbox page. This will display the page in Figure 9 just as it appeared when you first chose this set of files to download. Front End Risk Adjustment System User Guide 11 Centers for Medicare & Medicaid Services 2/16/2010 Deleting Files From Your Mailbox To delete files from your FERAS mailbox, follow these instructions 1. Place the mouse pointer over the file you wish to delete (use the down arrow to display the list if your file does not appear in the box). 2. Click the left mouse button once to select the file. 3. Click the Delete button to bring up the confirmation page in Figure 10. 4. Select Delete File(s) to delete the file or Cancel to cancel the delete. NOTE: If you click the Delete File(s) button, the file will be permanently deleted from your FERAS mailbox. File Delete Confirmation Box Click Delete File(s) button to delete the file, or Cancel to cancel the deletion. Figure 10. Mailbox File Delete Confirmation. Front End Risk Adjustment System User Guide 12 Centers for Medicare & Medicaid Services 2/16/2010 Viewing Files in Your FERAS Mailbox To view files in your FERAS mailbox, follow these instructions 1. Select up to 5 files from the list of available files. 2. Click the left mouse button once to select the file, use the CTRL and SHIFT keys to select multiple files. 3. Click the View button. NOTE: Large files will take a short while to display. Viewing The Selected Files The page in Figure 11 lists the files you chose to view. To view a file, click on the View File link next to the filename. Once the file is retrieved for viewing you will receive the page shown in Figure 12. Also note that the size of the file is displayed next to filename and large files will take a long time to display. Figure 11. Mailbox View File List. Front End Risk Adjustment System User Guide 13 Centers for Medicare & Medicaid Services 2/16/2010 Viewing a File This page will display the contents of the file selected. Click the back button to go back to your file list. Figure 12. Viewing a File. Returning to the Latest List of Files Viewed You can return to the latest list of files you chose to view by clicking the Latest Views link from the My Mailbox page. This will display the page in Figure 11 just as it appeared when you first chose this set of files to view. Upload File Clicking the Upload File menu item from the main menu, by clicking ALT + U then ENTER, or from the bottom of any page will display the page shown in Figure 13. Upload Restrictions The file size limit is 75 megabytes via the web site; it is unlimited via command line FTP. This is considered a very large file and all files transmitted via the web site should be zipped. If you have problems transmitting the file try using the command line method. You can only upload one physical file at a time. Upload Tips It is recommended that you compress (zip) all files prior to uploading via the web site. Large files can take a long time to upload and this time is dependent on your connection speed. Although the site can handle files up to 75 megabytes, it is recommended that large files are zipped and uploaded using the command line method. What constitutes a large file? This can be anywhere from 5 to 75 megabytes. If you have trouble uploading a large file or your connection times out, then you should use command line FTP. As stated Front End Risk Adjustment System User Guide 14 Centers for Medicare & Medicaid Services 2/16/2010 before the file upload time is dependent on your connection speed, low connection speed = long upload time with possible time outs. Upload File Storage on Our System Your file is kept on our system for approximately 17 days. How many files are kept depends on how many files are uploaded within a 17-day window, after 17 days an uploaded file will be removed from our system permanently. The file is not stored in your directory when uploaded. The file is kept in the system queue directory for approximately 3 days then it is moved to the archive directory where it is kept for approximately 14 days. Follow the steps on the next few pages to select your file on your system and upload it to the FERAS. 1. Click the Browse button to select a file to transfer. Figure 13 File Upload Page Front End Risk Adjustment System User Guide 15 Centers for Medicare & Medicaid Services 2. 02/16/10 Use the File Upload window, as shown in Figure 14, to navigate to the file you wish to upload. You can click on the file you wish to upload, press the Open button, and close the File Upload window, or double-click the file and the file will be selected and the window will close automatically. Figure 14 File Selection Dialog Box 3. Once you return to the window in Figure 13, the file you selected should appear in the text box next to the Browse button. If the file is correct press the Upload File button to transmit the file. The window shown in Figure 15 will appear after a successful upload. If the upload is not successful, you will receive a window which will display a short reason for the error, and some information on why the error may have occurred. Front End Risk Adjustment System User Guide 16 Centers for Medicare & Medicaid Services 2/16/2010 Figure 15. Successful File Transfer Front End Risk Adjustment System User Guide 17 Centers for Medicare & Medicaid Services 02/16/10 Creating a RAPS File (Direct Data Entry) Clicking the DDE menu item on the main menu or from the bottom of any page where the menu appears will display the page shown in Figure 16. Welcome Page Click the Start button to begin creating your file or click the Cancel button to return to the main menu. Follow the steps below to create your file and upload it to the FERAS. Suspened Files / File Recovery From Welcome Page To display you list of completed/suspended files, click the list of files link under the Suspended Files / File Recovery section of the Welcome page. See the section entitled Continuing a File for more information. Figure 16 DDE Welcome Page Front End Risk Adjustment System User Guide 18 Centers for Medicare & Medicaid Services 02/16/10 AAA Record Page The AAA Record Page, shown in Figure 17, is where you enter the data that will appear in your file's AAA record. Follow the steps below to create your AAA record. Figure 17 AAA Record Page Creating the AAA Record 1. Enter a File ID. This can be up to 11 characters in length. 2. Choose either TEST or PROD. This will determine how your file is processed, as either a test file or a production file. 3. Click one of the following buttons, depending on what you would like to do Store AAA - Submit the AAA record data and proceed to the BBB Record. Suspend/Cancel - Suspend or Cancel the building of this file, you will be asked to confirm this as shown in Figure 25. Reset - Resets the AAA record to blanks (except for the system-generated fields). NOTE: The Submitter Number is your log-in submitter ID, the Record ID and Transfer Date are generated Front End Risk Adjustment System User Guide 19 Centers for Medicare & Medicaid Services 2/16/2010 by the system. You can click the Help button at the top of the page for help at any time. BBB Record Page The BBB Record Page, shown in Figure 18, is where you enter the data that will appear in your file's BBB record. Follow the steps below to create your BBB record. Figure 18 BBB Record Page. Creating the BBB Record(s) 1. Enter a Plan Number. This field is 5 characters in length (example: H9999). 2. Click one of the following buttons, depending on what you would like to do Store BBB - Submit the BBB record data and proceed to the CCC Record. Suspend/Cancel - Suspend or Cancel the building of this file, you will be asked to confirm this as shown in Figure 25. Reset - Resets the BBB record to blanks (except for the system-generated fields). NOTE: The Record ID and Sequence Number are generated by the system. You can click the Help button at the top of the page for help at any time. Front End Risk Adjustment System User Guide 20 Centers for Medicare & Medicaid Services 02/16/10 CCC Record Page The CCC Record Page, shown in Figure 19, is where you enter the data that will appear in your file's CCC record(s). Follow the steps below to create your CCC record(s). Figure 19 CCC Record Page Front End Risk Adjustment System User Guide 21 Centers for Medicare & Medicaid Services 2/16/2010 Creating the CCC Record(s) 1. Enter the following data Patient Control Number, this can be up to 40 characters in length. The PCN is optional. HIC Number, this can be up to 25 characters in length. Patient Date of Birth (DOB) is optional; if submitted must be in the format YYYYMMDD. You can use the calendar to choose the date or enter it using the required date format. 2. Enter the Diagnosis Cluster information Provider Type, the two-character provider type. From Date, must be in the format YYYYMMDD. You can use the calendar to choose the date or enter it using the required date format. Thru Date, must be in the format YYYYMMDD and cannot be prior to the From Date. You can use the calendar to choose the date or enter it using the required date format. Delete Indicator; choose this from the drop down box, either blank or 'D'. Diagnosis Code, this can be up to 5 characters in length. (Omit the decimal) NOTE: The first Diagnosis Cluster is required, if clusters 2 through 10 are used they must contain valid data. 3. Click the one of the following buttons, depending on what you would like to do Store CCC - Submit the CCC record data and proceed to the next CCC Record Suspend/Cancel - Suspend or Cancel the building of this file, you will be asked to confirm this as shown in Figure 25. Reset - Resets the CCC record to blanks (except for the system-generated fields). NOTE: The Build File and Next BBB buttons will be enabled once you have created one CCC record. 4. Once the Build File and Next BBB buttons are enabled you may choose to add another BBB record, build the file, or add additional CCC records. These actions are covered next. Adding Additional CCC Record(s) The Store CCC button allows you to add additional CCC records under the current BBB record. All edits apply to each CCC record. The Sequence Number will be incremented by the system for each new CCC record. Please see the section titled Creating the CCC Record(s) for details. Adding Additional BBB Record(s) The Next BBB button allows you to add additional BBB records under the current AAA record. All edits apply to each BBB record. The Sequence Number will be incremented by the system for each new BBB. Please see the section titled Creating the BBB Record(s) for details. The YYY Record(s) A YYY Record will be created by the system for every BBB record that you create. You do not need to create the YYY Record(s) when building your file via the FERAS web site. Front End Risk Adjustment System User Guide 22 Centers for Medicare & Medicaid Services 2/16/2010 The ZZZ Record A ZZZ Record will be created by the system and added to your file when you have completed the file building process. You do not need to create the ZZZ Record when building your file via the FERAS web site. Building the File The Build File button allows you to build your file with the data that you have entered (see the section titled Edit/Review Page). The Edit/Review Page in Figure 20 will allow you to edit the data you have entered, view your file, as it will be submitted to the FERAS, and review each record you have created. Front End Risk Adjustment System User Guide 23 Centers for Medicare & Medicaid Services 2/16/2010 Edit / Review Page Clicking the Build File button from the CCC Record Page will display the page in Figure 20. This page allows you to edit and review the file you just built before the actual file creation and submission to the FERAS. You can also choose to continue building the file if you have more information to add. The build process will continue at the next CCC record under the last BBB record you entered. You may also choose to suspend or cancel this file. Figure 20 Edit/Review Page. Front End Risk Adjustment System User Guide 24 Centers for Medicare & Medicaid Services 02/16/10 Editing / Reviewing the AAA Record By clicking the Edit/Review button below the Edit/Review AAA record section you will be able to change any piece of information that you previously entered using the page in Figure 21 below. Figure 21 Edit/Review AAA Record Page How to Edit / Review the AAA Record To edit the AAA Record, make any changes to the fields that you entered and press the Update AAA button. If you do not wish to make any changes, or are simply reviewing this record, just click the Back button and you will be returned to the Edit/Review page. NOTE: Changes cannot be undone once they are submitted; you will have to edit the record again to make further changes. Front End Risk Adjustment System User Guide 25 Centers for Medicare & Medicaid Services 02/16/10 Editing / Reviewing the BBB Record(s) To edit the BBB record(s), you must know the sequence number for the record you wish to edit; you can find this out by viewing the file to see which BBB record sequence numbers are available. By clicking the Edit/Review button below the Edit/Review BBB record section you will be able to change any piece of information that you previously entered using the page in Figure 22 below. Figure 22 Edit/Review BBB Record Page How to Edit / Review the BBB Record(s) To edit the BBB Record(s), make any changes to the fields that you entered and press the Update BBB button. If you do not wish to make any changes, or are simply reviewing this record, just click the Back button and you will be returned to the Edit/Review page. NOTE: Changes cannot be undone once they are submitted; you will have to edit the record again to make further changes. Front End Risk Adjustment System User Guide 26 Centers for Medicare & Medicaid Services 02/16/10 Editing / Reviewing the CCC Record(s) To edit the CCC record(s), you must know both the CCC and BBB sequence numbers for the record you wish to edit, you can find this out by viewing the file to see which CCC record sequence numbers are available, and to which BBB record sequence number they belong. By clicking the Edit/Review button below the Edit/Review CCC record section you will be able to change any piece of information that you previously entered using the page in Figure 23 below. Figure 23 Edit/Review CCC Record Page Front End Risk Adjustment System User Guide 27 Centers for Medicare & Medicaid Services 2/16/2010 How to Edit / Review the CCC Record(s) To edit the CCC Record(s), make any changes to the fields that you entered and press the Update CCC button. If you do not wish to make any changes, or are simply reviewing this record, just click the Back button and you will be returned to the Edit/Review page. NOTE: Changes cannot be undone once they are submitted; you will have to edit the record again to make further changes. Editing Files From the View File Page You can edit your records from the View File Page, shown in Figure 24, by clicking the Edit links next to the AAA, BBB and CCC records. You cannot edit the YYY and ZZZ records, these records are generated by the system using the information you entered for the AAA, BBB and CCC records. Once you have edited your records, see sections entitled Edit/Reviewing AAA Records, Edit/Reviewing BBB Records, and Edit/Reviewing CCC Records for more detail. You will be returned to this page to check that your updates were successfully applied. Figure 24 Editing From the View File Page. Front End Risk Adjustment System User Guide 28 Centers for Medicare & Medicaid Services 2/16/2010 Suspending \ Canceling a File Choosing the Suspend/Cancel button when available will return the page shown in Figure 25. You can choose to suspend the building of a file for continuation at a later time or date, or to cancel the building of a file. Canceling a file will permanently delete all records that relate to that file and will make the File ID available for reuse. Use the Back button to return to the previous page. Figure 25 Suspend/Cancel Page. Suspending a File By choosing the Suspend button from the Suspend/Cancel Page shown in Figure 25, you will be returned to the Welcome page and your file will be available for continuation. Please note that when you continue your file it will start at the next record after the last saved record. If you have no BBB records, then you will start at BBB record 1, if you have BBB records, then you will start with the next CCC record under the last BBB record saved. Cancelling a File By choosing the Cancel button from the Suspend/Cancel page shown in Figure 25, you will be returned to the Welcome page and your file will be permanently deleted from the system. You can then reuse that same File ID to create another file. Front End Risk Adjustment System User Guide 29 Centers for Medicare & Medicaid Services 2/16/2010 Download / Submit Page (DDE) By clicking the Create File button on the Edit / Review Page show in Figure 20 you will receive the page shown in Figure 26. This allows you to download the file you created to your computer, and then upload the file to the FERAS. If you wish to cancel the build process at this point, click the Cancel button. You will be prompted to confirm the cancellation process. You can also choose to continue building the file if you have more information to add. The build process will continue at the next CCC record under the last BBB record you entered. Figure 26 Download / Submit File Page. Front End Risk Adjustment System User Guide 30 Centers for Medicare & Medicaid Services 2/16/2010 Downloading the File To download the file you created, click on the Download File button, and then choose a location on your computer to store the file from the Save As… dialog box. You may also choose to return to the previous page using the Back button, continue to build this file using the Continue button, or to suspend and/or cancel this file using the Suspend/Cancel button. NOTE: You must download your file prior to performing the upload. This is done to ensure that you have a copy of the file if an error occurs during the upload process. Submitting the File To submit your file to the FERAS, click on the Upload File button. You will receive a confirmation page with some statistics on your file as shown in Figure 27. Figure 27 File Statistics Page. Front End Risk Adjustment System User Guide 31 Centers for Medicare & Medicaid Services 2/16/2010 Continuing a Suspended File and File Recovery You can choose to continue a file that has not been submitted to the FERAS. You can stop building a file at any point in the build process, by clicking the Suspend/Cancel button when available, and continue that file at a later time or another day. Just make note of the File ID and enter that same File ID on the AAA Record page or choose from the list of files, see Figure 30, you have created from the Welcome or AAA Record pages. Once you have entered a File ID that you wish to continue you will receive the page shown in Figure 28. If the file was already submitted to the FERAS you will receive the page shown in Figure 29, in this case you will have to start a new file. Why Would I Need to Continue a File? There are many reasons why this feature has been implemented, some of which are listed below. Mainly this feature is available for recovery purposes. 1. 2. 3. 4. You do not have time to complete the file at one sitting. You lose connection to the FERAS web site. The web server experiences problems or crashes. You need more information to complete the file. At What Point Does the Continuation Process Start in the File? If you have no BBB records in your file, the continuation process will begin with the first BBB record. If you have BBB records in your file, the continue process will always start at the next CCC record under the last BBB record you entered. File Status is In Progress A status of 'In Progress' indicates that this file has not been submitted and can be continued at the next CCC record under the last BBB record you submitted. Figure 28 Continuing a File. Front End Risk Adjustment System User Guide 32 Centers for Medicare & Medicaid Services 2/16/2010 File Status is Complete A status of 'Complete' indicates that the file was already submitted to the FERAS. In this case you will have to start a new file with a different File ID. Figure 29 shows the page you will receive in this situation. Figure 29 File Status Complete. Front End Risk Adjustment System User Guide 33 Centers for Medicare & Medicaid Services 2/16/2010 Choosing From Your List of Files By clicking the list of files link from either the Welcome or AAA Record Page you will receive the page shown in Figure 30. This page lists all of the files you have created since January 21, 2003. Figure 30 File Listing Page. Completed Files Completed files can be viewed, downloaded and deleted from this page. When deleting a file, you will be asked for a confirmation, as this will permanently delete all records associated to the file from our database on the web site. Since these files have already been completed and submitted to the FERAS they are not available for continuation. Incomplete Files Incomplete files are marked as "In Progress". These files can be continued for completion and submission to the FERAS and deleted. These files are not available for viewing or downloading from this page, however these features are available from the Edit/Review Page when you reach that point in the building process for that file. When deleting a file, you will be asked for a confirmation, as this will permanently delete all records associated to the file from our database on the web site. Front End Risk Adjustment System User Guide 34 Centers for Medicare & Medicaid Services 2/16/2010 Error Code Lookup Page The Error Codes menu option will take you to the window shown in Figure 31. Here, searches can be performed to look up a description for a particular Error Code for Risk Adjustment. Performing a Search To perform an Error Code search enter the Error Code into the text box then click the search button. Figure 31 Error Code Search Page Front End Risk Adjustment System User Guide 35 Centers for Medicare & Medicaid Services 02/16/10 Search Results When a successful search is performed, the window shown in Figure 32 will appear, showing a table with the code you searched on and the description that was found. Figure 32 Successful Error Code Search Front End Risk Adjustment System User Guide 36 Centers for Medicare & Medicaid Services 2/16/2010 Help Page The Help menu option will take you to the window shown in Figure 33. From here you can access various help topics for the FERAS. Figure 33 Help Page Front End Risk Adjustment System User Guide 37 Centers for Medicare & Medicaid Services 02/16/10 Frequently Asked Questions Page The FAQs menu option will take you to the window in the Figure 34. From this page you can access the frequently asked questions pertaining to the FERAS. Figure 34 Frequently Asked Questions Page Front End Risk Adjustment System User Guide 38 Centers for Medicare & Medicaid Services 02/16/10 Documentation Page The Documentation menu option will take you to the window shown in Figure 35. This page is for documents pertaining to the FERAS such as an user guide. There will be updates to this page from time to time and will be documented on the News & Updates page. Figure 35 Documents Page. Front End Risk Adjustment System User Guide 39 Centers for Medicare & Medicaid Services 2/16/2010 Site Accessibility Information The Accessibility Statement menu option will take you to the window shown in Figure 36. From here you can access information on how this site conforms to Section 508 Accessibility Guidelines. Figure 36. Accessibility Statement. Front End Risk Adjustment System User Guide 40 Centers for Medicare & Medicaid Services 2/16/2010 Contact Info Page The Contact Information menu option will take you to the window shown in Figure 37. From here you can access the contact information for the CSSC Help Desk. Figure 37 Contact Info Page Front End Risk Adjustment System User Guide 41 Centers for Medicare & Medicaid Services 02/16/10 Site Map Page The Site Map menu option will take you to the page shown in Figure 38. This page contains a list of links to all of the pages available on the FERAS web site. You can use the menu at the top of the page to jump to the sections of the FERAS, or simply scroll down to browse through all the pages of the FERAS. Figure 38 Site Map Page Front End Risk Adjustment System User Guide 42 Centers for Medicare & Medicaid Services 02/16/10 Searching The FERAS Site The Search page allows you to search the FERAS using keywords. Performing a Search To search the FERAS, type a keyword(s) in the search box, as shown in Figure 39, and press the Search button. If the search is successful, a page will be returned with links to the pages that contain the keyword(s) you typed in, as shown in Figure 40. Otherwise a page will be returned informing you that no pages were found matching your search criteria. Figure 39 Searching the Site Search Results This is the window that will appear for a successful search, click on the link to go to any of the pages that match your search criteria. Figure 40 Search Found Page Front End Risk Adjustment System User Guide 43 Centers for Medicare & Medicaid Services 02/16/10 File Transfer Using Microsoft FTP Software The following instructions apply to the FTP client software available in Windows 95 and Windows NT. Refer to Appendix A for a sample script to automate file transfers using Microsoft FTP software. Passwords The CSSC assigns you a Submitter ID and an original password. If you forget your original, CSSC assigned, password or if your password becomes compromised, you must call the CSSC Help Line at (877) 534-CSSC. NOTE: If you change your password and then forget your new password, there will be a delay while the CSSC resets or reassigns your password. Logging-On to the FTP Server To connect to the FERAS using Microsoft FTP, follow these instructions, see Figure 41: 1. Refer to your MDCN dial in instructions. 2. At the DOS prompt, you need to launch the FTP software. Type <FTP> at the DOS prompt and press <ENTER>. If you want to turn off Interactive Logging so you will not be asked for individual file confirmation when transferring multiple files, use the ‘-i’ option. Example: ftp –i 3. At this point, you must open the server connection. Type the following at the ftp> prompt and press <ENTER>: ftp> open 32.77.242.3 2021 4. A connection message will display, along with a prompt to enter your User Name and Password. Type your User Name and press <ENTER>. Type your password and press <ENTER>. This is the Submitter Id and password assigned to you when you enrolled for electronic claims submission with the CSSC. You may change your password. NOTE: This user name and password are both case sensitive. You must enter the user name and password exactly as they were assigned to you by the CSSC. After you enter the password at least once, you may change the password. If you do change the password, be sure to remember it because the CSSC will not have a record of it. Figure 41 Login Command Sequence. Front End Risk Adjustment System User Guide 44 Centers for Medicare & Medicaid Services 5. 6. 02/16/10 Once you have successfully entered the required user name and password, a welcome message will display. You now need to set your mode to “binary” to allow for zipped files. Type the following command at the ftp> prompt: ftp> binary A “Type Set to I” message will appear, indicating that you may receive and send binary files. You are now logged on to the FERAS FTP server and ready to perform data transfers. Risk Adjustment data Upload Using Microsoft FTP Perform the following sample steps to place claim files in your upload directory: 1. See the above section titled “Logging-On to the FTP Server” to establish an FTP session. 2. At the ftp> prompt, type the “put” command to upload the file and press <ENTER>. ftp> put YOURFILENAME CUSTOMER_UPLD!FTP <enter> 3. Once you press <ENTER>, the FTP software will transfer the file(s). A “File transfer is complete” message will appear indicating successful transfer of each file. You will return to the ftp> prompt when the transfer operation is complete. The return to the ftp> prompt does not mean that all files were successfully transferred. Please verify the “File transfer complete” message for each file uploaded. Risk Adjustment data Download Using Microsoft FTP To download remittances, reports and other files, follow these sample steps: 1. See the above section titled “Logging-On to the FTP Server” to establish an FTP session. 2. Type the following commands and press <ENTER> to change to the download directory on the server: ftp> cd .. <enter> ftp> cd outbound <enter> 3. You will see a “CWD command successful” message, which indicates that your current directory has changed. 4. To display all files available for download, type the following command press <ENTER>. ftp> ls Front End Risk Adjustment System User Guide 45 Centers for Medicare & Medicaid Services 02/16/10 Downloading a Single File 1. 2. Type the following command and press <ENTER>. ftp> get FILENAME The FILENAME you wish to receive must match the file name in the outbound directory exactly (wild cards "*" will be accepted only if "glob" is on). If you do not delete the files after successfully downloading them, they will remain in the outbound directory for 14 days, at which time they will be automatically purged. Downloading Multiple Files 1. To download all of your remote files type mget * at the ftp> prompt and pres <ENTER>, see Figure 42. Figure 42 Downloading Multiple Files. 2. 3. Once you press <ENTER> the FTP software will transfer the file(s). A"transfer is complete” message will appear indicating successful transfer of each file. You will be asked to confirm each file by pressing <ENTER>. You will return to the ftp> prompt when the transfer operation is complete. The return to the ftp> prompt does not mean that all files were successfully transferred. Please verify the “226 File transfer complete” message for each file downloaded. Logging-Off the FTP Server To log-off and exit the FTP software, type the following command at the ftp> prompt and press <ENTER>. ftp> bye Front End Risk Adjustment System User Guide 46 Centers for Medicare & Medicaid Services 02/16/10 File Transfer Using Other FTP Software If you will be using FTP software other than Microsoft FTP for Windows 95, you will need to follow these basic steps. Consult your FTP software documentation for detailed instructions for completing each step. 1. Refer to your MDCN dial in instructions. 2. Log-On to the FTP server (32.77.242.3) on port 2021 using your FERAS Submitter Id (User Id) and password as assigned to you by the CSSC. 3. Upload your claims. 4. Download your claims from the 32.77.242.3\outbound\ directory. 5. Log-Off the FTP server. NOTE: The upload and download directories are specific to your FERAS Submitter Id (User Id). Each Submitter has a specific upload and download location on the server. Helpful Hints Zip your upload files in a PK-ZIP 2.0 compatible format. This can diminish your upload time by as much as 90%. With Risk Adjustment data files, do not use the same filename. This may cause problems with uploading as you may potentially overwrite files that may be waiting for processing. Try using sequential names (i.e., FILE1, FILE2, etc.). Visit our News & Updates page periodically to check for new features, changes or updates. Front End Risk Adjustment System User Guide 47 Centers for Medicare & Medicaid Services 2/16/2010 Appendix A To automate the FTP transfer, create a batch file to launch the FTP software with the following command line options. Example: Sample batch file (c:\ftp\ftpbatch.bat): ftp -n -i -s:c:\ftp\ftpscript.txt Command line reference: -n Suppress auto login -i Suppress interactive prompting -s <<Filename>> Specify what file contains commands to execute in ftp session This file calls ftpscript.txt which contains the commands to be executed when the FTP program starts. The file ftpscript.txt should contain the following commands: Sample FTP Command Script (c:\ftp\ftpscript.txt): open 32.77.242.3 2021 user <<username>> <<password>> binary cd upload mput c:\mco\upload\* lcd c:\mco\download cd \download mget * bye Front End Risk Adjustment System User Guide 48