1
TrackRecord
User’s Guide
®
Advanced Change Request
Management
Release 6.1
®
Windows 95
®
Windows 98
Windows 2000
®
Windows NT
Part Number 11504
Copyright © 1996-2001 Compuware Corporation.
All Rights Reserved
Information in this document is subject to change without notice and
does not represent a commitment on the part of Compuware
Corporation. The software described in this document is furnished
under the software license agreement distributed with the product. The
software may be used or copied only in accordance with the terms of
the license. The purchaser may make one copy of the software for a
backup, but no part of this user manual may be reproduced, stored in a
retrieval system, or transmitted in any form or by any means electronic
or mechanical, including photocopying and recording for any purpose
other than the purchaser’s personal use, without prior written
permission from Compuware Corporation.
Compuware, the Compuware logo, NuMega, the NuMega logo,
DevPartner Studio, Abend-AID Fault Manager, QACenter, the QACenter
logo, TrackRecord, and the TrackRecord logo are either trademarks or
registered trademarks of Compuware Corporation. Microsoft, Windows
and Windows NT are either trademarks or registered trademarks of
Microsoft Corporation. Netscape and Netscape Navigator are registered
trademarks of Netscape Communications Corporation. Other brand
and product names are either trademarks or registered trademarks of
their respective holders.
Software License Agreement
This Software License Agreement is not applicable if Licensee has a valid Compuware License Agreement and has licensed
this Software under a Compuware Product Schedule.
Please Read This License Carefully
You, either an individual or entity (“Licensee”), are purchasing a license (“Agreement”) to use this Compuware Corporation
software (“Software”) and related user manuals (“Documentation”). The Software is the property of Compuware
Corporation (“Compuware”) and/or its licensors, is protected by intellectual property laws, and is provided to Licensee
only under the license terms set forth below. This Agreement does not transfer title to the intellectual property contained
in the Software. Compuware reserves all rights not expressly granted herein. Opening the package and/or using the
Software indicates your acceptance of these terms. If you do not agree to all of the terms and conditions, or if after using
the Software you are dissatisfied, you may return the Software, Documentation and any copies within thirty (30) days of
purchase to the party from whom you received it for a refund, subject in certain cases to a restocking fee.
Title and Proprietary Rights: Licensee acknowledges and agrees that the Software is proprietary to Compuware and/or its
licensors, and is protected under the laws of the United States and other countries. Licensee further acknowledges and
agrees that all rights, title and interest in and to the Software, including intellectual property rights, are and shall remain
with Compuware and/or its licensors. Unauthorized reproduction or distribution is subject to civil and criminal penalties.
Use Of The Software: Compuware grants Licensee the limited right to use the Software and Documentation included in
the package with this license, subject to the terms and conditions of this Agreement. Licensee agrees that the Software will
be used solely for internal purposes. Only one copy of the Software may be installed on a single computer at any one time
unless:
(i) The Software is designed and intended by Compuware for use in a shared network client server environment, as set
forth in the Documentation; and
(ii) Licensee agrees to provide technical or procedural methods to prevent use of the Software, even at different times, by
anyone other than Licensee; and
(iii) Licensee has purchased a license for each individual user of the Software and/or for each computer that will have access
to the Software. Any unauthorized use of this Software may cause termination of this Agreement.
Licensee may make one machine-readable copy of the Software for BACK UP PURPOSES ONLY. This copy shall display all
proprietary notices, be labeled externally to show that it is the property of Compuware, and that its use is subject to this
Agreement. Documentation may not be copied in whole or part. Licensee agrees to provide technical or procedural
methods to prevent use of the Software by anyone other than Licensee, even at different times.
Licensee may not use, transfer, assign, export or in any way permit the Software to be used outside the country of purchase,
unless authorized in writing by Compuware. Except as expressly provided in this Agreement, Licensee may not modify,
reverse engineer, decompile, disassemble, distribute, sub-license, sell, rent, lease, give or in any way transfer the Software,
by any means or in any medium, including telecommunications. Licensee will use its best efforts and take all reasonable
steps to protect the Software from unauthorized use, copying or dissemination, and will retain all proprietary notices
intact.
Redistribution Rights of Device Driver Development Software: This section shall only apply if the Software is device
driver development software, used by Licensee to develop application or device driver programs (“User Software”), as
specified in the Documentation. The User Software may include run-time components (“RTCs”) that have been extracted
by the Software from the library files of the Software, programs to remotely test the User Software, and compiled code
examples. These RTCs, examples, and programs are specifically designated as redistributable in the Documentation.
Licensee has a non-exclusive, royalty-free, restricted license to:
(i) modify, compile, and distribute the driver code examples;
(ii) distribute the remote testing program for testing purposes only;
(iii) embed the RTCs and driver code examples in its User Software, in object code form only; and
(iv) reproduce and distribute the RTCs and driver code examples embedded in its User Software, in object code form only,
provided that:
(a) Licensee distributes the RTCs and driver code examples only in conjunction with and as a part of its User Software;
(b) Licensee will be solely responsible to anyone receiving its User Software for any updates, technical and other
support obligations, and any other liability which may arise from the distribution of its User Software;
(c) Licensee does not use Compuware's or its licensors' names, logos, or trademarks to market or distribute its User
Software;
(d) Licensee includes Compuware's and its licensors' copyright and/or proprietary notices and legends within the
executable images of its User Software and on Licensee's software media and documentation; and
(e) Licensee agrees to indemnify, hold harmless and defend Compuware and its licensors from and against any claims
or lawsuits, including attorney's fees, that arise or result from the use or distribution of its User Software.
Government Users: With respect to any acquisition of the Software by or for any unit or agency of the United States
Government, the Software shall be classified as “commercial computer software,” as that term is defined in the applicable
provisions of the Federal Acquisition Regulation (the “FAR”) and supplements thereto, including the Department of
Defense (DoD) FAR Supplement (the “DFARS”). If the Software is supplied for use by DoD, the Software is delivered subject
to the terms of this Agreement and either (i) in accordance with DFARS 227.7202-1(a) and 227.7202-3(a), or (ii) with
restricted rights in accordance with DFARS 252.227-7013(c)(1)(ii) (OCT 1988), as applicable. If the Software is supplied for
use by a Federal agency other than DoD, the Software is restricted computer software delivered subject to the terms of this
Agreement and (i) FAR 12.212(a); (ii) FAR 52.227-19; or (iii) FAR 52.227-14(ALT III), as applicable. Licensor: Compuware
Corporation, 31440 Northwestern Highway, Farmington Hills, Michigan 48334.
Limited Warranty and Remedy: Compuware warrants the Software media to be free of defects in workmanship for a
period of ninety (90) days from purchase. During this period, Compuware will replace at no cost any such media returned
to Compuware, postage prepaid. This service is Compuware's sole liability under this warranty. COMPUWARE DISCLAIMS
ALL EXPRESS AND IMPLIED WARRANTIES, INCLUDING THE IMPLIED WARRANTIES OF MERCHANTABILITY AND
FITNESS FOR A PARTICULAR PURPOSE. SOME STATES DO NOT ALLOW THE EXCLUSION OF IMPLIED WARRANTIES, SO
THE ABOVE EXCLUSION MAY NOT APPLY TO LICENSEE. IN THAT EVENT, ANY IMPLIED WARRANTIES ARE LIMITED IN
DURATION TO THIRTY (30) DAYS FROM THE DELIVERY OF THE SOFTWARE. LICENSEE MAY HAVE OTHER RIGHTS,
WHICH VARY FROM STATE TO STATE.
Infringement of Intellectual Property Rights: In the event of an intellectual property right claim, Compuware agrees to
indemnify and hold Licensee harmless, provided Licensee gives Compuware prompt written notice of such claim, permits
Compuware to defend or settle the claim, and provides all reasonable assistance to Compuware in defending or settling the
claim. In the defense or settlement of such claim, Compuware may obtain for Licensee the right to continue using the
Software or replace or modify the Software so that it avoids such claim, or if such remedies are not reasonably available,
accept the return of the infringing Software and provide Licensee with a pro-rata refund of the license fees paid for such
Software based on a three (3) year use period.
Limitation of Liability: LICENSEE ASSUMES THE ENTIRE RISK AS TO THE RESULTS AND PERFORMANCE OF THE
SOFTWARE. IN NO EVENT WILL COMPUWARE BE LIABLE TO LICENSEE OR TO ANY THIRD PARTY FOR ANY SPECIAL,
INDIRECT, INCIDENTAL, OR CONSEQUENTIAL DAMAGES, INCLUDING BUT NOT LIMITED TO, LOSS OF USE, DATA,
REVENUES OR PROFITS, ARISING OUT OF OR IN CONNECTION WITH THIS AGREEMENT OR THE USE, OPERATION OR
PERFORMANCE OF THE SOFTWARE, WHETHER SUCH LIABILITY ARISES FROM ANY CLAIM BASED UPON CONTRACT,
WARRANTY, TORT (INCLUDING NEGLIGENCE), PRODUCT LIABILITY OR OTHERWISE, AND WHETHER OR NOT
COMPUWARE OR ITS LICENSORS HAVE BEEN ADVISED OF THE POSSIBILITY OF SUCH LOSS OR DAMAGE. SOME STATES
DO NOT ALLOW THE LIMITATION OR EXCLUSION OF LIABILITY FOR INCIDENTAL OR CONSEQUENTIAL DAMAGES,
SO THE ABOVE LIMITATION OR EXCLUSION MAY NOT APPLY TO LICENSEE. IN NO EVENT SHALL COMPUWARE BE
LIABLE TO LICENSEE FOR AMOUNTS IN EXCESS OF PURCHASE PRICE PAID FOR THE SOFTWARE.
Term and Termination: This License Agreement shall be effective upon Licensee’s acceptance of this Agreement and shall
continue until terminated by mutual consent, or by election of either Licensee or Compuware in case of the other’s
unremediated material breach. In case of any termination of this Agreement, Licensee will immediately return to
Compuware the Software that Licensee has obtained under this Agreement and will certify in writing that all copies of the
Software have been returned or erased from the memory of its computer or made non-readable.
General: This Agreement is the complete and exclusive statement of the parties' agreement. Should any provision of this
Agreement be held to be invalid by any court of competent jurisdiction, that provision will be enforced to the maximum
extent permissible and the remainder of the Agreement shall nonetheless remain in full force and effect. This Agreement
shall be governed by the laws of the State of Michigan and the United States of America.
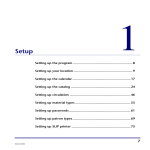
Table of Contents
Preface
Who Should Read This Guide . . . . . . . . . . . . . . . . . . . . . . . . . . . . . . . xi
About This Guide . . . . . . . . . . . . . . . . . . . . . . . . . . . . . . . . . . . . . . . . . xii
Product Enhancements. . . . . . . . . . . . . . . . . . . . . . . . . . . . . . . . . . . . . xii
Reference Material for Programmers . . . . . . . . . . . . . . . . . . . . . . . . . . xii
Related Publications . . . . . . . . . . . . . . . . . . . . . . . . . . . . . . . . . . . . . . . xii
World Wide Web Information . . . . . . . . . . . . . . . . . . . . . . . . . . . . . . xiii
Getting Help . . . . . . . . . . . . . . . . . . . . . . . . . . . . . . . . . . . . . . . . . . . . xiii
Part 1: Using TrackRecord
1 Introducing TrackRecord
Overview of TrackRecord . . . . . . . . . . . . . . . . . . . . . . . . . . . . . . . . . . . . 1
Process at a Glance . . . . . . . . . . . . . . . . . . . . . . . . . . . . . . . . . . . . . . 3
About the TrackRecord Database . . . . . . . . . . . . . . . . . . . . . . . . . . . 5
Understanding Data Type Inheritance . . . . . . . . . . . . . . . . . . . . . . 7
Getting Started . . . . . . . . . . . . . . . . . . . . . . . . . . . . . . . . . . . . . . . . . . . . 8
Starting TrackRecord . . . . . . . . . . . . . . . . . . . . . . . . . . . . . . . . . . . . 8
Changing Your Login Password . . . . . . . . . . . . . . . . . . . . . . . . . . . . 9
Exploring TrackRecord’s User Interface . . . . . . . . . . . . . . . . . . . . . 10
Using TrackRecord Forms. . . . . . . . . . . . . . . . . . . . . . . . . . . . . . . . 13
Working With the Item Browser . . . . . . . . . . . . . . . . . . . . . . . . . . 18
Accessing TrackRecord Online Help . . . . . . . . . . . . . . . . . . . . . . . 19
Searching the TrackRecord Database . . . . . . . . . . . . . . . . . . . . . . . 20
2 Entering Data
Entering TrackRecord Data . . . . . . . . . . . . . . . . . . . . . . . . . . . . . . . . . . 23
Changing Item Status . . . . . . . . . . . . . . . . . . . . . . . . . . . . . . . . . . . . . . 25
Merging Items . . . . . . . . . . . . . . . . . . . . . . . . . . . . . . . . . . . . . . . . . . . . 26
TrackRecord User’s Guide
v
3 Retrieving Data
Understanding Queries . . . . . . . . . . . . . . . . . . . . . . . . . . . . . . . . . . . . 29
Composing Queries- Guidelines to Follow . . . . . . . . . . . . . . . . . . . . . 30
Query Execution Order . . . . . . . . . . . . . . . . . . . . . . . . . . . . . . . . . 31
Creating a Query . . . . . . . . . . . . . . . . . . . . . . . . . . . . . . . . . . . . . . . . . 33
Opening, Modifying, and Deleting Queries. . . . . . . . . . . . . . . . . . . . . 35
4 Viewing Data
Understanding Views . . . . . . . . . . . . . . . . . . . . . . . . . . . . . . . . . . . . . . 37
Opening, Modifying, and Deleting Views . . . . . . . . . . . . . . . . . . . . . . 38
Using Outline Reports . . . . . . . . . . . . . . . . . . . . . . . . . . . . . . . . . . . . . 39
Creating a New Outline Report . . . . . . . . . . . . . . . . . . . . . . . . . . . 40
Using Headers in Outline Reports . . . . . . . . . . . . . . . . . . . . . . . . . 45
Opening Items in an Outline Report . . . . . . . . . . . . . . . . . . . . . . . 51
Creating New Items from an Outline Report . . . . . . . . . . . . . . . . 51
Utilizing the Shortcut (Right-Click) Menu . . . . . . . . . . . . . . . . . . 51
Printing from Outline Reports . . . . . . . . . . . . . . . . . . . . . . . . . . . . 52
Working with Graphs . . . . . . . . . . . . . . . . . . . . . . . . . . . . . . . . . . . . . . 53
Types of Graphs . . . . . . . . . . . . . . . . . . . . . . . . . . . . . . . . . . . . . . . 53
Creating Graphs From Outline Reports . . . . . . . . . . . . . . . . . . . . . 56
Formatting Graphs . . . . . . . . . . . . . . . . . . . . . . . . . . . . . . . . . . . . . 57
Using the Milestone Status View . . . . . . . . . . . . . . . . . . . . . . . . . . . . . 57
Creating a New Milestone Status . . . . . . . . . . . . . . . . . . . . . . . . . . 59
Filtering Milestone Status Data . . . . . . . . . . . . . . . . . . . . . . . . . . . 60
Using Volatility Statistics Dialog Boxes . . . . . . . . . . . . . . . . . . . . . 62
Interpreting the Volatility Graph . . . . . . . . . . . . . . . . . . . . . . . . . 63
Utilizing the Calendar View . . . . . . . . . . . . . . . . . . . . . . . . . . . . . . . . . 64
Creating Your Default Calendar . . . . . . . . . . . . . . . . . . . . . . . . . . 66
Adding Tasks to the Calendar . . . . . . . . . . . . . . . . . . . . . . . . . . . . 66
5 Using TrackRecord’s WebServer
Understanding WebServer . . . . . . . . . . . . . . . . . . . . . . . . . . . . . . . . . . 69
Notes about the WebServer . . . . . . . . . . . . . . . . . . . . . . . . . . . . . . 70
Entering and Exiting the WebServer . . . . . . . . . . . . . . . . . . . . . . . 71
Exploring the WebServer Interface. . . . . . . . . . . . . . . . . . . . . . . . . . . . 73
Creating a New Item. . . . . . . . . . . . . . . . . . . . . . . . . . . . . . . . . . . . . . . 74
Working with File Attachments . . . . . . . . . . . . . . . . . . . . . . . . . . . . . . 75
Attaching a File to a TrackRecord Form. . . . . . . . . . . . . . . . . . . . . 76
Opening Attachments . . . . . . . . . . . . . . . . . . . . . . . . . . . . . . . . . . 76
Deleting Attachments . . . . . . . . . . . . . . . . . . . . . . . . . . . . . . . . . . 77
Opening an Outline Report . . . . . . . . . . . . . . . . . . . . . . . . . . . . . . . . . 77
vi
TrackRecord User’s Guide
6 Working With Templates
Understanding Templates. . . . . . . . . . . . . . . . . . . . . . . . . . . . . . . . . . . 79
When Are Templates Applied?. . . . . . . . . . . . . . . . . . . . . . . . . . . . 81
Creating Templates . . . . . . . . . . . . . . . . . . . . . . . . . . . . . . . . . . . . . . . . 83
Setting the Default State . . . . . . . . . . . . . . . . . . . . . . . . . . . . . . . . . . . . 85
Associating Templates with a Header . . . . . . . . . . . . . . . . . . . . . . . . . . 86
7 Customizing User Options
Configuring General Options. . . . . . . . . . . . . . . . . . . . . . . . . . . . . . . . 89
Identifying Favorite Reports and Home Pages . . . . . . . . . . . . . . . . . . . 91
Specifying Favorite Data Types. . . . . . . . . . . . . . . . . . . . . . . . . . . . . . . 91
Customizing Outline Reports . . . . . . . . . . . . . . . . . . . . . . . . . . . . . . . . 92
8 Integrating TrackRecord with Other Applications
Using TrackRecord with Text Editors . . . . . . . . . . . . . . . . . . . . . . . . . . 95
Integrating TrackRecord with Graphics Applications . . . . . . . . . . . . . 96
Synchronizing TrackRecord with Microsoft Outlook. . . . . . . . . . . . . . 97
Connecting TrackRecord to Microsoft Project . . . . . . . . . . . . . . . . . . 100
Integration Overview . . . . . . . . . . . . . . . . . . . . . . . . . . . . . . . . . . 100
Installing the Microsoft Project Macros . . . . . . . . . . . . . . . . . . . . 101
Performing Initial Project Setup. . . . . . . . . . . . . . . . . . . . . . . . . . 102
Mapping TrackRecord Priorities to Project Priorities . . . . . . . . . . 104
Synchronizing a Project in TrackRecord with Microsoft Project . 105
Utilizing TrackRecord with Version Control Systems . . . . . . . . . . . . 108
Checking Files In and Out . . . . . . . . . . . . . . . . . . . . . . . . . . . . . . 111
Synchronizing TrackRecord and VCS Projects. . . . . . . . . . . . . . . 112
Troubleshooting . . . . . . . . . . . . . . . . . . . . . . . . . . . . . . . . . . . . . . 112
Integrating TrackRecord With Compuware Products . . . . . . . . . . . . 113
Using TrackRecord With QACenter . . . . . . . . . . . . . . . . . . . . . . . 113
Using TrackRecord With DevPartner Studio . . . . . . . . . . . . . . . . 114
Using TrackRecord With Interval Pro . . . . . . . . . . . . . . . . . . . . . 120
Using TrackRecord With Abend-AID Fault Manager . . . . . . . . . . 120
Part 2: Administering TrackRecord
9 Configuring TrackRecord
Administration Overview . . . . . . . . . . . . . . . . . . . . . . . . . . . . . . . . . . 124
Privileges. . . . . . . . . . . . . . . . . . . . . . . . . . . . . . . . . . . . . . . . . . . . 124
Tasks . . . . . . . . . . . . . . . . . . . . . . . . . . . . . . . . . . . . . . . . . . . . . . . 125
Starting TrackRecord as an Administrator . . . . . . . . . . . . . . . . . . 125
TrackRecord User’s Guide
vii
Group Administration . . . . . . . . . . . . . . . . . . . . . . . . . . . . . . . . . . . . 126
Planning Group Membership and Access Rights. . . . . . . . . . . . . 126
Implementing Group Access Rights. . . . . . . . . . . . . . . . . . . . . . . 127
Creating or Modifying a Group . . . . . . . . . . . . . . . . . . . . . . . . . . 128
Share Group Administration . . . . . . . . . . . . . . . . . . . . . . . . . . . . . . . 129
Creating a Share Group . . . . . . . . . . . . . . . . . . . . . . . . . . . . . . . . 129
Sharing Information with Share Groups . . . . . . . . . . . . . . . . . . . 130
Team Member Administration . . . . . . . . . . . . . . . . . . . . . . . . . . . . . . 131
Project Administration . . . . . . . . . . . . . . . . . . . . . . . . . . . . . . . . . . . . 134
Global Preferences Administration . . . . . . . . . . . . . . . . . . . . . . . . . . 137
Creating Global Queries and Outline Reports . . . . . . . . . . . . . . . 137
Creating Global Favorite Types, Reports, and Home Pages. . . . . 139
Creating Global Templates . . . . . . . . . . . . . . . . . . . . . . . . . . . . . 140
Workflow Administration . . . . . . . . . . . . . . . . . . . . . . . . . . . . . . . . . 140
Displaying the Workflow Editor . . . . . . . . . . . . . . . . . . . . . . . . . 142
Working with States . . . . . . . . . . . . . . . . . . . . . . . . . . . . . . . . . . . 144
Working with Transitions . . . . . . . . . . . . . . . . . . . . . . . . . . . . . . 145
Designing a Workflow Based on Type . . . . . . . . . . . . . . . . . . . . . 147
Adding a Status Field to a Type . . . . . . . . . . . . . . . . . . . . . . . . . . 147
Default Status for New Items . . . . . . . . . . . . . . . . . . . . . . . . . . . . 149
Type Administration . . . . . . . . . . . . . . . . . . . . . . . . . . . . . . . . . . . . . 150
Abbreviations . . . . . . . . . . . . . . . . . . . . . . . . . . . . . . . . . . . . . . . . 151
ActiveLink Tags . . . . . . . . . . . . . . . . . . . . . . . . . . . . . . . . . . . . . . 151
Database Lock-out . . . . . . . . . . . . . . . . . . . . . . . . . . . . . . . . . . . . 152
Type Administration Tasks . . . . . . . . . . . . . . . . . . . . . . . . . . . . . 153
Creating and Modifying Types . . . . . . . . . . . . . . . . . . . . . . . . . . 153
Using the Type Editor . . . . . . . . . . . . . . . . . . . . . . . . . . . . . . . . . 157
Restrictions . . . . . . . . . . . . . . . . . . . . . . . . . . . . . . . . . . . . . . . . . . 163
Custom Items . . . . . . . . . . . . . . . . . . . . . . . . . . . . . . . . . . . . . . . . 164
Rules Administration . . . . . . . . . . . . . . . . . . . . . . . . . . . . . . . . . . . . . 165
Notes About Rules . . . . . . . . . . . . . . . . . . . . . . . . . . . . . . . . . . . . 165
Adding a Rule . . . . . . . . . . . . . . . . . . . . . . . . . . . . . . . . . . . . . . . . 166
10 Creating and Maintaining TrackRecord Databases
Database Overview . . . . . . . . . . . . . . . . . . . . . . . . . . . . . . . . . . . . . . . 169
Best Practices for Maintaining TrackRecord Data . . . . . . . . . . . . . . . 170
Backing Up Information . . . . . . . . . . . . . . . . . . . . . . . . . . . . . . . 170
Maintaining Data Integrity . . . . . . . . . . . . . . . . . . . . . . . . . . . . . 170
Defining Data . . . . . . . . . . . . . . . . . . . . . . . . . . . . . . . . . . . . . . . . 171
Optimizing Performance . . . . . . . . . . . . . . . . . . . . . . . . . . . . . . . 172
Frequently Asked Questions . . . . . . . . . . . . . . . . . . . . . . . . . . . . 172
Using the Database Administration Utility . . . . . . . . . . . . . . . . . . . . 173
Starting the Database Administration Utility . . . . . . . . . . . . . . . 173
viii
TrackRecord User’s Guide
Navigating the Database Administration Utility Interface . . . . . 173
Creating a New Database . . . . . . . . . . . . . . . . . . . . . . . . . . . . . . . 174
Scheduling Check Database . . . . . . . . . . . . . . . . . . . . . . . . . . . . . 175
Rebuilding Databases . . . . . . . . . . . . . . . . . . . . . . . . . . . . . . . . . . 179
Scheduling Back Ups and Restoring Databases . . . . . . . . . . . . . . 180
Copying Databases . . . . . . . . . . . . . . . . . . . . . . . . . . . . . . . . . . . . 182
Importing and Exporting Data . . . . . . . . . . . . . . . . . . . . . . . . . . . . . . 182
Using the Import-Export Wizard . . . . . . . . . . . . . . . . . . . . . . . . . 183
Setting Import and Export Menu Options . . . . . . . . . . . . . . . . . . 187
Exporting Data With Copy and Paste . . . . . . . . . . . . . . . . . . . . . 188
Exporting Using the Command Line Interface . . . . . . . . . . . . . . 188
Manually Creating Template Files and Importing. . . . . . . . . . . . 188
11 Administering AutoAlert and WebServer
AutoAlert Administration. . . . . . . . . . . . . . . . . . . . . . . . . . . . . . . . . . 193
Using the AutoAlert Administrator . . . . . . . . . . . . . . . . . . . . . . . 194
Configuring AutoAlert Users . . . . . . . . . . . . . . . . . . . . . . . . . . . . 199
Setting Up Mail Queries . . . . . . . . . . . . . . . . . . . . . . . . . . . . . . . . 199
Changing the Contents of Mail Messages . . . . . . . . . . . . . . . . . . 201
WebServer Administration . . . . . . . . . . . . . . . . . . . . . . . . . . . . . . . . . 202
WebServer Processes . . . . . . . . . . . . . . . . . . . . . . . . . . . . . . . . . . . 203
Permanent and Transient Sessions. . . . . . . . . . . . . . . . . . . . . . . . 203
WebServer Log Files . . . . . . . . . . . . . . . . . . . . . . . . . . . . . . . . . . . 204
Ending a Session. . . . . . . . . . . . . . . . . . . . . . . . . . . . . . . . . . . . . . 204
WebServer Administration Menu . . . . . . . . . . . . . . . . . . . . . . . . 205
WebMonitor . . . . . . . . . . . . . . . . . . . . . . . . . . . . . . . . . . . . . . . . . 208
Troubleshooting Common WebServer Issues . . . . . . . . . . . . . . . 208
Part 3: TrackRecord Reference Material
A Utilizing ActiveX
ActiveX Interfaces . . . . . . . . . . . . . . . . . . . . . . . . . . . . . . . . . . . . . . . . 213
Basic Design . . . . . . . . . . . . . . . . . . . . . . . . . . . . . . . . . . . . . . . . . . . . 214
Simple Examples. . . . . . . . . . . . . . . . . . . . . . . . . . . . . . . . . . . . . . 214
Object Reference . . . . . . . . . . . . . . . . . . . . . . . . . . . . . . . . . . . . . . . . . 217
Application Object . . . . . . . . . . . . . . . . . . . . . . . . . . . . . . . . . . . . 217
Abbreviation Object . . . . . . . . . . . . . . . . . . . . . . . . . . . . . . . . . . . 220
Abbreviations Object (Collection) . . . . . . . . . . . . . . . . . . . . . . . . 221
Database Object . . . . . . . . . . . . . . . . . . . . . . . . . . . . . . . . . . . . . . 221
Field Object . . . . . . . . . . . . . . . . . . . . . . . . . . . . . . . . . . . . . . . . . 222
FieldLayout Object . . . . . . . . . . . . . . . . . . . . . . . . . . . . . . . . . . . . 223
TrackRecord User’s Guide
ix
Fields Object (Collection) . . . . . . . . . . . . . . . . . . . . . . . . . . . . . . 224
History Object . . . . . . . . . . . . . . . . . . . . . . . . . . . . . . . . . . . . . . . 224
Histories Object (Collection) . . . . . . . . . . . . . . . . . . . . . . . . . . . . 226
Item Object. . . . . . . . . . . . . . . . . . . . . . . . . . . . . . . . . . . . . . . . . . 227
Items Object (Collection). . . . . . . . . . . . . . . . . . . . . . . . . . . . . . . 229
Query Object . . . . . . . . . . . . . . . . . . . . . . . . . . . . . . . . . . . . . . . . 230
Queries Object (Collection) . . . . . . . . . . . . . . . . . . . . . . . . . . . . . 231
Type Object . . . . . . . . . . . . . . . . . . . . . . . . . . . . . . . . . . . . . . . . . 232
Types Object (Collection) . . . . . . . . . . . . . . . . . . . . . . . . . . . . . . 233
User Object . . . . . . . . . . . . . . . . . . . . . . . . . . . . . . . . . . . . . . . . . . 233
Users Object (Collection) . . . . . . . . . . . . . . . . . . . . . . . . . . . . . . . 235
B Using Tags
Overview of Tags . . . . . . . . . . . . . . . . . . . . . . . . . . . . . . . . . . . . . . . . 237
Cautions When Using Tags . . . . . . . . . . . . . . . . . . . . . . . . . . . . . . . . 238
Categories of Tags . . . . . . . . . . . . . . . . . . . . . . . . . . . . . . . . . . . . . . . . 238
Tag Naming Conventions . . . . . . . . . . . . . . . . . . . . . . . . . . . . . . . . . 239
Type Tags . . . . . . . . . . . . . . . . . . . . . . . . . . . . . . . . . . . . . . . . . . . . . . 239
Type Tags for TrackRecord . . . . . . . . . . . . . . . . . . . . . . . . . . . . . . 239
Type Tags for QACenter . . . . . . . . . . . . . . . . . . . . . . . . . . . . . . . . 240
Type Tags for DevPartner . . . . . . . . . . . . . . . . . . . . . . . . . . . . . . . 240
Type Tags for Fault Manager . . . . . . . . . . . . . . . . . . . . . . . . . . . . 241
Field Tags . . . . . . . . . . . . . . . . . . . . . . . . . . . . . . . . . . . . . . . . . . . . . . 241
TrackRecord Field Tags. . . . . . . . . . . . . . . . . . . . . . . . . . . . . . . . . 241
QACenter Field Tags . . . . . . . . . . . . . . . . . . . . . . . . . . . . . . . . . . . 242
DevPartner Field Tags. . . . . . . . . . . . . . . . . . . . . . . . . . . . . . . . . . 243
Glossary
Index
x
TrackRecord User’s Guide
Preface
The TrackRecord User’s Guide is intended for all TrackRecord users,
administrators, and programmers writing modules to access a
TrackRecord database. It includes the following parts:
⽧
Part 1 (Chapter 1 through Chapter 8)— Information designed to
aid users by providing information about TrackRecord’s concepts
and user interface, instruction on entering information into
TrackRecord, using predefined reports to display the contents of the
TrackRecord database, and formatting custom TrackRecord reports.
⽧
Part 2 (Chapter 9 through Chapter 11)— Description of various
administrative tasks that must be performed before TrackRecord
can be used and the actions required to create and maintain the
TrackRecord database and AutoAlert.
⽧
Appendix (Appendix A through Appendix B)— Reference material
for programmers writing modules to access the TrackRecord
databases.
Who Should Read This Guide
The TrackRecord User’s Guide is intended for users of TrackRecord and
those responsible for configuration and administration of the product.
You can find additional information in the online help facility and
documentation set.
Compuware assumes that you are familiar with basic Microsoft
Windows navigation. If this is not the case, familiarize yourself with
the documentation for Microsoft Windows before reading this guide.
TrackRecord User’s Guide
xi
About This Guide
The following conventions are used to draw your attention to special
information:
Boldface
Information that you type, choices you select from a dialog or
menu, and keys that you press. Boldface is also used to
emphasize important information.
italic
Placeholders for items you must supply. For instance, when
the guide says x:\, x is the letter of the drive that exists on your
computer.
Product Enhancements
For a detailed listing of product enhancements made in TrackRecord
Release 6.1, refer to the “Summary of Changes” in the TrackRecord
online help. In addition to the most recent release, the online help also
lists enhancements included in several previous releases of TrackRecord
for your reference.
Reference Material for Programmers
For detailed reference material for programmers writing modules to
access the TrackRecord database, refer to the “Object Reference” and
“Using Tags” in the TrackRecord online help or “Utilizing ActiveX” on
page 213 and “Using Tags” on page 237.
Related Publications
The TrackRecord installation documentation set contains:
xii
⽧
TrackRecord and Reconcile Installation and Configuration Guide— PDF
file containing system requirements and instructions for installing
and configuring TrackRecord and Reconcile.
⽧
Licensing Guide— PDF file containing Client/Server licensing
procedures and overview.
⽧
The TrackRecord online help— Field descriptions, operating
procedures, and reference information relating to TrackRecord. On
the browser’s reports screen, click Help and then Contents to see
an outline of available topics.
⽧
TrackRecord Release Notes— HTML file that contains technical
information that may affect how you use the product and known
issues related to the current release of TrackRecord. You can find
TrackRecord User’s Guide
the Release Notes by navigating to
Start>Programs>Compuware>TrackRecord>Release Notes.
You can access the online versions of the PDF files from the installation
bookshelf on the TrackRecord CD browser or from Compuware’s
FrontLine technical support Web site at: http://
frontline.compuware.com.
Viewing and Printing Online Books
TrackRecord’s online books are provided in PDF format, so you need
Adobe Acrobat Reader to view them. It is recommended that you install
Acrobat Reader 4.0 or above to get the best results when viewing the
online books. To install the Adobe Acrobat Reader, go to Adobe’s Web
site at www.adobe.com.
Because PDF is based on PostScript, a PostScript printer is the most
reliable way to print the online books. In most cases, you can also print
PDF files to PCL printers. If you cannot print the PDF files to your
printer, refer to Adobe’s Web site for trouble-shooting information.
World Wide Web Information
To access Compuware Corporation’s site on the World Wide Web, point
your browser at http://www.compuware.com. The Compuware site
provides a variety of product and support information.
FrontLine Support Web Site
You can access online technical support for Compuware products via
our FrontLine support Web site at http://frontline.compuware.com.
FrontLine provides fast access to critical information about your
TrackRecord product. You can read or download documentation,
frequently asked questions, and products fixes, or email your questions
or comments. The first time you access FrontLine, you are required to
register and obtain a password.
Getting Help
At Compuware, we strive to make our products and documentation the
best in the industry. Feedback from our customers helps us maintain
our quality standards. If you need support services, please obtain the
TrackRecord User’s Guide
xiii
following information before calling Compuware’s 24-hour product
support hotline:
Tip To display the
TrackRecord About
window, from the Help
menu choose About
Compuware
TrackRecord. Click OK
when you are finished.
⽧
The name and release (version) number of the TrackRecord
product. This information is found on the covers of the product
documentation or the About Compuware TrackRecord window.
⽧
Installation information including:
〫
Installed options
〫
Whether the product uses local or network databases
〫
Whether it is installed in the default directories
〫
Whether it is a standalone or network installation
〫
Whether it is a client or server installation
⽧
Environment information, such as the operating system and
release on which the product is installed, memory, hardware/
network specifications, and the names and releases of other
applications that were running.
⽧
The location of the problem in the TrackRecord product software,
and the actions taken before the problem occurred.
⽧
The exact product error message, if any.
⽧
The exact application, licensing, or operating system error
messages, if any.
⽧
Your Compuware client, office or site number if available.
TrackRecord Technical Support
Compuware Corporation
31440 Northwestern Highway
Farmington Hills, MI 48334-2564
1-800-538-7822
xiv
TrackRecord User’s Guide
Part 1: Using TrackRecord
⽧
“Introducing TrackRecord” on page 1
⽧
“Entering Data” on page 23
⽧
“Retrieving Data” on page 29
⽧
“Viewing Data” on page 37
⽧
“Using TrackRecord’s WebServer” on page 69
⽧
“Working With Templates” on page 79
⽧
“Customizing User Options” on page 89
⽧
“Integrating TrackRecord with Other
Applications” on page 95
Chapter 1
Introducing TrackRecord
This chapter provides a summary of Compuware TrackRecord®, a
software development tool that helps you organize information about
products you are developing or supporting. Because it provides an
overview of TrackRecord functions and concepts, you should read this
chapter carefully before you use TrackRecord for the first time. This
chapter includes the following sections:
⽧
Overview of TrackRecord — This section contains a high-level
summary of TrackRecord’s concepts, functions and features.
⽧
Getting Started — Procedures to get you up and running with
TrackRecord.
Overview of TrackRecord
Compuware TrackRecord is a software development tool designed to
record and report information about products being developed or
supported. TrackRecord records all the information relating to a
project—project Team Members and testers, schedules and milestones,
bug reports and feature requests—in an object database. You can then
use TrackRecord’s query and reporting features to retrieve and format
the information you need to keep your project on track.
Product Integration
TrackRecord is part of the Compuware NuMega DevPartner Studio suite
of software debugging tools and the Compuware QACenter family of
automated testing tools. Interaction with these families of products is
described in Chapter 8, “Integrating TrackRecord with Other
Applications”.
TrackRecord User’s Guide
1
Types of Users
TrackRecord supports three types of users:
⽧
TrackRecord Administrator — TrackRecord includes
administrative functions that can only be performed by authorized
users, such as setting up user groups, importing and exporting
information to and from other applications, and editing the data
types used by TrackRecord. When a TrackRecord administrator logs
in, he or she sees an additional menu (the Administrator menu) on
the TrackRecord menu bar. For additional information, see
“Administration Overview” on page 124.
⽧
TrackRecord User — A user running the TrackRecord client
software accesses the TrackRecord database by logging in from
client machines anywhere on your network. Whether a user can
add or modify database information, including items and reports,
depends on the groups to which the user belongs. The
administrator determines the access and editing privileges of each
user.
⽧
WebServer User — WebServer users access the database by logging
in using standard Web browsers, such as Microsoft Internet
Explorer or Netscape Navigator. Refer to Chapter 5, “Using
TrackRecord’s WebServer” for information on the WebServer
interface.
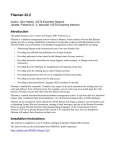
Figure 1-1 illustrates how TrackRecord users, administrators, and
WebServer users interact with the TrackRecord server and database.
2
Introducing TrackRecord
TrackRecord User’s Guide
Figure 1-1 TrackRecord Users
Process at a Glance
TrackRecord can be used to enter information about projects and to
retrieve and view that information. This section provides an overview
of those fundamental tasks.
The example shown in Figure 1-2 depicts a visual overview of task to
create a report of all defects in the database that are assigned to Your
Project and have a priority of 1 (Critical) or 2 (High).
TrackRecord User’s Guide
Introducing TrackRecord
3
1. Enter data by opening a
Defect Item View (a form on
which you enter or modify
information about a item
such as a defect or a person).
This defect is for Your Project
and is a priority 1. For more
information, refer to Chapter
2, “Entering Data”.
2. Retrieve data by
creating a query.
This query is set to
retrieve data for Your
Project that is a
priority of 1 or 2. See
Chapter 3,
“Retrieving Data” for
more information.
3. View data that has been retrieved by
a query. Four formats are available:
Outline Report, Graph, Milestone
Status, or a Calendar. In this example,
an Outline Report has been used to
display the information. Refer to
Chapter 4, “Viewing Data” for
complete information.
Figure 1-2 Process at a Glance. Note that your screens may be different than shown.
4
Introducing TrackRecord
TrackRecord User’s Guide
About the TrackRecord Database
Understanding how the TrackRecord database records, links, and
displays information is an important step toward using the product
more effectively.
When you enter information using TrackRecord, the information is
stored in a database. TrackRecord automatically opens its database
when you start the program, and automatically closes your connection
to the database when you exit. You interact with this database through
item views, queries, and report views, as described in “Process at a
Glance” on page 3.
Types, Items, Links, and Fields
The TrackRecord database organizes information into types, such as
Person, Company, Defect, or Project. Each data type functions like a
database table, establishing the properties (fields) TrackRecord expects
for an item of that type. Visually, a data type is a form, with fields and
controls to enter or display information.
A data item is one record of a specific type. For example, Abraham
Lincoln and Harry Truman would be two items of the type Person in a
TrackRecord database.
Each data item consists of fields and links. Fields hold specific facts
about an item, such as a person’s address or the name of a project; links
connect one item in the TrackRecord database to another to capture
the relationships between items. For example, a Team Member item
(John Doe) might be connected to Project items (as a Team Member),
Defect items (as the person reporting them or responsible for fixing
them), and Company items (as an employee).
Figure 1-3 illustrates how a Team Member item links to a Company
item and to several Project items. These links make it easy to retrieve
information, such as all Team Members assigned to a Project or all
Projects with open defects.
TrackRecord User’s Guide
Introducing TrackRecord
5
Figure 1-3 Links Between Database Items
When an object is entered in a field, that field is automatically linked
to the original item. When you change the item, no matter where it
appears, all references to that item change automatically. For example, if
you change the spelling of the Person’s name, that change is reflected
in all other items that contain a link to that Person.
In addition to the obvious information types, such as Projects or
People, the TrackRecord database can store special types of
information, such as executable commands and database queries.
Change History
As database items are created and modified, TrackRecord captures the
time and date of each change, the person adding or changing the item,
and the information that was added or changed. For more information
regarding change history, refer to “Change History Tab” on page 15.
Client-Server Technology
The TrackRecord database resides on a central server on your network.
The TrackRecord server software accepts simultaneous input from
multiple users on client machines; the TrackRecord server periodically
checks the database for new information during a session and forwards
updated information to clients when necessary.
6
Introducing TrackRecord
TrackRecord User’s Guide
Understanding Data Type Inheritance
TrackRecord information types, such as the Person type, Defect type,
and so on, provide the framework on which the TrackRecord database
is built and is organized into a data hierarchy.
When one type inherits from another, the inheriting type (the child)
receives all the attributes of the original type (the parent). In the
example (Figure 1-4), Bugs is the parent of Open Bugs, and Open Bugs
is the parent for Priority 1 and Priority 2; Open Bugs and Closed Bugs
are the child of Bugs, and Priority 1 and Priority 2 are the child of Open
Bugs.
“Open Bugs” inherits
attributes of “Bugs”
Children of “Open Bugs” and
inheritors of its attributes
“Closed Bugs”, the child type,
inherits attributes of “Bugs”,
the parent type
Figure 1-4 Data Type Inheritance
After the child inherits fields from the parent, it can add fields of its
own. Figure 1-5 illustrates how the Person data type is the parent to the
Developer and Beta Tester data types; each child type starts with the
fields it inherits from the Person type, and adds its own fields below the
inherited fields.
The Developer and Tester types
inherit from the Person type,
taking all of the fields from
Person before adding others.
Figure 1-5 Child Items Inherit Fields from Parent
TrackRecord User’s Guide
Introducing TrackRecord
7
This type of inheritance allows items of any child type to be used
anywhere in TrackRecord where an item of its parent type is expected.
For example, Figure 1-5 illustrates that the Team Member type inherits
from the Person type, so all Team Member items are also Person items.
Therefore, Team Members and Testers can be used to fill fields where
Person items are expected. Note, however, that the reverse is not
generally true: Person items that are not Team Members cannot be used
in fields where Team Members are required.
One of the benefits that type inheritance provides is the ability to add
another identity to an item of one type. For example, a person in a
database changes roles on a project and must be changed to a Team
Member. If Team Member is a child type of the Person type, an
administrator does not need to remove and reenter information about
that individual.
Type inheritance also permits querying on a parent type to retrieve
information about all items of that type, including its child types. For
example, a query that looks for Defects will retrieve items of the parent
as well as the child.
Getting Started
Before you begin using TrackRecord, you will need to obtain the
following information from your TrackRecord administrator:
⽧
What user name and password should you use?
Before you can log in to TrackRecord, you must have a valid user
name and password.
⽧
What database should you use?
If your site has several development projects running concurrently,
your TrackRecord administrator might create separate databases.
You will need the name of your database.
⽧
What project should you use?
A database can include multiple projects. Your TrackRecord
administrator can tell you what project name you should use to
display and enter project information.
Starting TrackRecord
Follow the instructions below for quickly getting started with
TrackRecord.
8
Introducing TrackRecord
TrackRecord User’s Guide
1
Open TrackRecord by clicking the Start button on your
Windows desktop and selecting Programs>Compuware.
Select the TrackRecord icon. The TrackRecord Login Dialog Box
(Figure 1-1) opens. If your TrackRecord user information has been
set to automatically log in to TrackRecord, the login Dialog Box will
not be displayed.
Figure 1-1 TrackRecord Login Dialog Box
2
On the TrackRecord Login dialog box,
〫
Enter your TrackRecord login name and password. Note that
they may be different from your Windows login name and
password. Passwords are case-sensitive.
〫
Identify the database you want TrackRecord to use in the
Database field by selecting a name from the drop-down list or
by entering a new name.
If you have used TrackRecord before, the names of the
databases you have used previously appear in the Databases list.
You do not need to enter the path to the database, just the
database name.
Click OK.
The main TrackRecord window (Figure 1-3) opens and displays any
subwindows left open from your previous session. If your TrackRecord
Administrator has created a Home page, the Home page opens.
Changing Your Login Password
To ensure the security of the information in a TrackRecord database,
the first task you should perform with TrackRecord is to change your
login password. (Note that if you or your Administrator has created
your user profile to allow you to automatically log in when you start
TrackRecord, this task is not necessary.)
You can change your TrackRecord login password at any time. To
change your password:
TrackRecord User’s Guide
Introducing TrackRecord
9
1
Choose Change Password from the Tools menu.
The Change Password Dialog Box (Figure 1-2) opens.
Figure 1-2 Change Password Dialog Box
2
Tip If you do not wish to
use a password, leave the
New Password and
Confirm Password fields
blank.
In the Change Password dialog box, enter your new password
in the New Password field and the Confirm New Password field.
To prevent anyone from observing what you type, TrackRecord
displays an asterisk for each character you enter. Passwords are casesensitive.
Click OK. Your new password takes effect immediately.
Exploring TrackRecord’s User Interface
Before you begin using TrackRecord, you should take a few minutes to
explore its windows, toolbar, and status bar.
Menu bar
Toolbar
Display area
User name
Status Bar
Figure 1-3 TrackRecord Main Window. Since various aspects of this window can be
customized, yours may vary from the example.
10
Introducing TrackRecord
TrackRecord User’s Guide
Menu Bar
The main TrackRecord window (Figure 1-3) displays a menu bar below
the window title.
Menu Item
Functionality
File
Create new items and reports, open and manage predefined
reports, queries, and templates, and lists items you have
recently worked with. Also includes standard File menu
entries, such as Print Setup, Print, and Exit.
Edit
Copy and paste text and graphics from one place to another.
Contents change according to which window is active within
TrackRecord.
Administrator
(Displayed only if you log in with Administrator access). Create users and user groups, edit data types and user defaults,
and import and export data and type descriptions.
Favorites
Specify frequently used reports. After adding a report to the
Favorites menu, run it by choosing its name from the menu.
Also specify one report as your Home Page to open automatically when you log in.
Tools
Search the database for items that meet specified criteria, log
in as another user, browse items, and modify options.
Window
Position windows and switch from one window to another.
Help
Access online documentation and the About TrackRecord
window, which displays registration and software release
information.
Toolbar
The toolbar (Figure 1-4) contains shortcuts to your most commonly
performed tasks. It lets you create a new item or view, open an existing
item, display the Item Browser, open your Home Page, or search for
items.
TrackRecord User’s Guide
Introducing TrackRecord
11
Search
Open Home Page
Item Browser
Open Item
New Item
Figure 1-4 Toolbar.
Toolbar Item
Functionality
New Item
• Create a new item or view. The item types listed on the
drop-down list are determined by your Favorite Types list
(as described in “Creating Global Favorite Types, Reports,
and Home Pages” on page 139).
• Control the new item type shown on the Toolbar with
your Favorite Types list. For example, if you most often
create new Tasks, you would move Task to the top of your
Favorite Types list and the Toolbar would show New Task
rather than New Defect, which is the default.
Open Item
Open an existing item or view. The Open dialog is described
in “Opening, Modifying, and Deleting Views” on page 38.
Item Browser
Displays the Item Browser. The Item Browser is described in
“Working With the Item Browser” on page 18.
Open Home
Page
Opens your Home Page report. Setting a Home Page is
described in “Identifying Favorite Reports and Home Pages”
on page 91.
Search
Search items in the TrackRecord database for a specified
string. Control whether TrackRecord displays the Search tool
by right-clicking anywhere in the Toolbar area and toggling
Search off. To display the Search tool, right-click in the Toolbar area and toggle Search on. Refer to “Searching the TrackRecord Database” on page 20 for additional information on
searching.
Status Bar
The left side of the Status bar (Figure 1-3) provides suggestions for the
actions you can perform with a tool or on a selected object. If you are
working in an Outline Report, the status bar identifies the sequence
12
Introducing TrackRecord
TrackRecord User’s Guide
number of the item you have selected and the number of items in the
sequence.
The right side of the status bar displays the login name of the current
user.
Using TrackRecord Forms
For each type of information stored in the TrackRecord database —
Defects, Tasks, Team Members, and so on — you will want to store
different pieces of information. For example, you might want to store a
name and phone number for a Team Member and a summary and
description for a Defect. Each item type has its own data entry form,
which is composed of fields appropriate to that item type.
Item Tab
Links Tab
Change History Tab
Figure 1-1 Tab Location on Defect Form
To make data entry even easier, you can create item templates that
store default values for fields. Information about how to construct and
use templates is provided in Chapter 6, “Working With Templates”.
Although the Team Member form contains additional tabs, most
TrackRecord forms include three tabs: Items, Links, and Change
History.
Item Tab
To enter or change information, you open an item view, a form on
which you can enter or modify information about one item, such as
one Defect or one Person. Each type of item uses a different form, since
each type requires different information.
Tip For additional
information on opening
an Item tab, see
“Entering TrackRecord
Data” on page 23.
Item views use standard Windows controls, such as text fields, dropdown lists, scrolling lists, checkboxes, and radio buttons, to display and
update information about specific items. They also use some unique
controls, such as the Calendar and Add Item buttons. For more
information on these buttons, refer to “Controlling TrackRecord
Forms” on page 15.
The Item tab on a TrackRecord form (Figure 1-2) lets you enter
information about the item you are adding or updating. The fields
TrackRecord User’s Guide
Introducing TrackRecord
13
displayed on the item tab depend on the type of item with which you
are working.
Drop-down
lists let you link
one database
item to
another.
Enter
descriptions
and other text
in fields.
Retrieve items
in the
database by
date or other
fields.
To clear a drop-down list, click the
Delete key or choose <None>.
Scroll to display
more fields.
Figure 1-2 Item Tab for Task Item
Links Tab
As you add information to the database, TrackRecord creates a network
of links between items. The Links tab (Figure 1-3) displays a list of all
the items in the TrackRecord database that refer to the item with which
you are currently working.
Opens item in new window
Follows link to determine what
other database items are linked to
that item
Returns to previous item
Figure 1-3 Links Tab. It allows you to navigate through your network of linked items
by selecting a link.
14
Introducing TrackRecord
TrackRecord User’s Guide
Change History Tab
The Change History tab (Figure 1-4) provides an audit trail of the
changes made to an item over time. When an item is created, modified,
or deleted, an entry is added to the change history list for that item. If a
person made several changes to an item during a single session, each
change will be noted separately.
Date and time of change
Login name of user
Modified item
Figure 1-4 Change History Tab
Controlling TrackRecord Forms
In addition to standard Windows controls, such as text boxes, lists,
buttons, and checkboxes, TrackRecord uses a number of special
controls to help you create, display, and maintain database
information. This section describes how to use each of these special
controls.
Expand Item Button
As you learned earlier, fields in one type of item can be links to other
items in the database. For example, in a Defect item the Project field
might be a link to an item of the Project type. The Project field’s dropdown list would display a list of all Project items in the database,
allowing you to select an existing Project. The selected Project would
then be “linked” to this defect.
The Expand Item button lets you expand a link to another item. You
can display and update the fields belonging to that linked item. For
example, clicking the Expand Item button beside the Priority list in
Figure 1-5 causes the window to display more fields for the selected
Priority. If you have appropriate privileges, you can add new items or
modify the items displayed. If you make changes, these changes will be
reflected in all other items that are linked to the changed item.
TrackRecord User’s Guide
Introducing TrackRecord
15
Clicking the
Expand Item
button beside
an item...
...lets you see the
fields associated with
that linked item.
Figure 1-5 Using Expand Item Button
Calendar Button
The Calendar button (Figure 1-6) lets you specify dates from a graphical
calendar instead of entering a date with the keyboard. Click the
Calendar button to open the calendar and double-click a date to select
the day you want to enter.
To choose a date on a past or future month, click the left (past) or right
(future) arrows at the top of the calendar. The single triangles move one
month at a time. The double triangles move one year at a time.
Clicking the Calendar
button beside a date
field...
...lets you choose a
date from a graphical
calendar.
Figure 1-6 Using Calendar Button
Add and Delete Item Buttons
The Add and Delete Item buttons (Figure 1-7) let you add and delete
items in the TrackRecord database in the course of maintaining other
types of items. For example, if you want to enter a new telephone
number while adding or editing a Person item, you would click the
Add Item button beside the Phone Number field, create the item you
want, and click Save and Close. (Note that the behavior of the Add
Item button is configurable. Some fields display a list of existing items,
allowing you to pick one or to click New Item to create a new item of
that type.)
16
Introducing TrackRecord
TrackRecord User’s Guide
Clicking the Add
Item (+) button...
...lets you link a
new item with
the one you
were updating.
Figure 1-7 Using Add Item Button
To delete an item from one of these lists, select the item and click the X
button. Depending on how this field was defined when the type was
created, deleting an item from a list may remove it from the database.
You will be prompted to confirm the deletion. If the field was not
defined to allow deletion from the database with the X button, you can
delete it from the database by right-clicking on the item and choosing
Delete itemname from the shortcut menu.
Expand Text Field Button
The Expand Text Field button (Figure 1-8) identifies resizable text
fields. When you click the Expand Text Field button, the text field area
expands to the bottom of the window to let you display the complete
text of an extended description or note about an item. You can click
the Collapse Text Field button to collapse the text field to its original
size.
Clicking the
Expand Text
button above
a text field...
...expands the text field
to fill the available
window space.
Clicking the Collapse Text button collapses the expanded field.
Figure 1-8 Using Expand Text Button
TrackRecord User’s Guide
Introducing TrackRecord
17
Working With the Item Browser
The Item Browser window (Figure 1-9) provides access to information
in your TrackRecord database. With the Item Browser, you can access
existing database items of any type or create new items.
Items
List
Types
List
Figure 1-9 Item Browser Window
The Item Browser window includes two lists:
⽧
The Types list identifies the basic types of information in the
TrackRecord database. If one type of information is a subtype of
another, it appears indented below that type. For example, Team
Member is a subtype of the Person data type in Figure 1-9.
⽧
The Items list identifies all of the items of the selected type. When
you select a type that has subtypes, the names of all the members
in the subtypes appear. For example, if you choose Person, the
Items list will include the names of all Team Member items
(subtype of Person) as well as all Person items.
Note The list of types that you see might be a subset of the types
available. The administrators control your access to types.
Working with the Item Browser
To use the Item Browser, perform the following steps:
1
18
Introducing TrackRecord
Click the Item Browser button (Figure 1-10) on the TrackRecord
toolbar to open the Item Browser window.
TrackRecord User’s Guide
Figure 1-10 Locating Item Browser Button on Toolbar
Tip TrackRecord often
presents several ways to
accomplish a task. For
example, you can open
the Item Browser with the
Toolbar button, from the
Tools>Item Browser
option, or from the
File>Open>Other
option.
2
Select the type of item about which you want information.
For example, select Person to see the list of all Person items in the
TrackRecord database. Note that the list will include all items
linked to the type you selected; therefore, selecting Person will
show a list of Persons, Customers, and Team Members in the Item
list.
3
Double-click an entry in the Items list to display the item’s
contents.
For example, double-clicking the name of a Person in the Items list
opens the appropriate item view, letting you view and modify the
information recorded for that Person.
Note that if you select an item that belongs to a child type of the
data type you chose, TrackRecord opens the item view for the child.
For example, if you choose Person and then double-click the name
of someone who is a Team Member (child of Person), TrackRecord
opens the Team Member item view instead of the Person item view.
Accessing TrackRecord Online Help
TrackRecord’s online help facility is a convenient way to find
information about a task you are performing, a feature you would like
to know more about, or a command you want to use. It also contains
complex information for an administrator that is not contained in the
TrackRecord User’s Guide.
⽧
While performing certain tasks, you may press the F1 key to open
the online help system and display a help topic appropriate for the
task you are performing.
⽧
Selecting the TrackRecord Help option on the Help menu displays
a window containing TrackRecord’s help system. You can located
information quickly through the Contents, Index, or Search tabs.
Topics may contain links to other topics or links to popup frames. To
close a popup frame, click anywhere inside the popup.
TrackRecord User’s Guide
Introducing TrackRecord
19
Searching the TrackRecord Database
To find database information quickly, you can perform a search rather
than create a query and view. Simple searches find text strings that
occur in an item; advanced searches find text strings in specific fields.
Performing a Simple Search
A simple search lets you find items of a specified type that contain a
specified text string. For example, you can search for all defect items
that contain a specific name in any field.
1
Select Search from the Tools menu. The Search window (Figure
1-11) opens.
You can use the Search tool on the main TrackRecord window to
perform the same function as the Search menu option.
Figure 1-11 Search Window
2
Select the type of item you want to find.
To search for a specific type of item, pull down the Search for
Items of Type list and choose the type you want.
〫
To search through the entire database, choose All Items from
the Search for Items of Type list.
Enter the text string you want to find in the That Contain field.
〫
3
Any item that contains the specified text string in any field will be
displayed. You can enter partial words to find wording variations.
For example, you can enter veri to find all items that include the
words verification, verify, verified, or unverified.
4
Click Search.
A counter displays in the left corner of the status bar, indicating the
progress of the search.
The Search window lists all items that meet your search criteria. To
display the contents of one of the items, double-click the
appropriate entry.
5
20
Introducing TrackRecord
When you are finished, click Close.
TrackRecord User’s Guide
Performing an Advanced Search
Advanced searches let you refine the criteria you want TrackRecord to
use to search in the database. Unlike a standard search, an advanced
search lets you specify the fields to check for text strings and lets you
construct multiple search criteria. For example, you can perform an
advanced search to find all defects where the project name is
YourProject, the severity level is 3, and the description includes the
phrase “only happens.”
Complete the following procedure to perform an advanced search:
1
Select Advanced Search from the Tools menu.
The Choose a Type window (Figure 1-12) displays your list of
standard database types.
Figure 1-12 Choose Type Window
2
Select the type of information you want to find and click
Search.
TrackRecord opens the form associated with the type of
information you selected. For example, if you selected Defect,
TrackRecord would open the Defect form.
3
Use the fields and controls on the item form to specify your
search criteria.
For example, you can use the Project list to select the project for
which you want to find Defect items. Similarly, you can enter a text
string in the Description field to find all defects whose description
starts with those words. If you specify more than one search
criterion, TrackRecord finds all items that meet all of the search
criteria.
TrackRecord User’s Guide
Introducing TrackRecord
21
4
Click Search.
TrackRecord displays the Search Results window (Figure 1-13),
which lists the items that meet your search criteria.
Figure 1-13 Search Results Window
5
Display the contents of a selected item.
Double-click an entry in the Search Results window or select an
entry and click Open. TrackRecord displays the contents of the
specified item.
6
When you are finished, click Close.
Where to Go Next
You use TrackRecord to enter information about projects and to retrieve
and view that information. Although there are many tasks performed
with TrackRecord, the three primary tasks – entering, retrieving and
viewing data -– provide the framework for all other tasks. For a
description of each of these tasks, consult the following chapters:
22
Introducing TrackRecord
⽧
Chapter 2, “Entering Data”
⽧
Chapter 3, “Retrieving Data”
⽧
Chapter 4, “Viewing Data”
TrackRecord User’s Guide
Chapter 2
Entering Data
This chapter describes how to enter different types of information into
the TrackRecord database by opening an item view. It contains the
following sections:
⽧
Entering TrackRecord Data — Instructions for entering a item
using the TrackRecord’s forms and item browser.
⽧
Changing Item Status — Guidance regarding changing an item’s
status.
⽧
Merging Items — Information on how to remove redundant
information by merging items.
Entering TrackRecord Data
1
From the File menu, open a new form using one of the
following methods:
〫
Click the drop-down arrow next to the New Defect button on
the Toolbar.
If you or your Administrator has changed your Favorite Types
list, the New Defect button may not be displayed. In this case,
use the Toolbar’s New Item drop-down list to select the
appropriate form.
〫
TrackRecord User’s Guide
Open the Item Browser, (see “Working with the Item Browser”
on page 18 for more information), right-click on a applicable
item, and select the New optionname from the shortcut menu
(Figure 2-14).
23
Figure 2-14 Opening New Project Using the Item Browser
〫
Select the appropriate form from the File>New menu.
〫
Choose New>Other from the File menu. When the Choose a
Type Dialog Box (Figure 2-15) opens, select the appropriate
form and click the New button.
Figure 2-15 Choose Type Dialog Box
2
Tip If you are unfamiliar
with the controls on this
screen, refer to
“Controlling TrackRecord
Forms” on page 15.
When the form appears, enter information in the appropriate
fields.
Note If you are, or will be, using the WebServer, be sure to review
“Notes about the WebServer” on page 70 to avoid errors when opening
your web page. The TrackRecord limit on file attachment size per item is 12
MB. All attachments are compressed before storage, so their physical size in
the database can be notably smaller (similar to .zip compression ratios).
If your site has implemented templates, TrackRecord may fill in
some of the fields for you. Refer to Chapter 6, “Working With
24
Entering Data
TrackRecord User’s Guide
Templates” for information on how to establish and use
TrackRecord templates.
3
If you are finished entering data, click Save and Close on the
toolbar.
The drop-down menu next to the Save and Close button offers two
additional save options:
〫
If you want to add an unrelated item, choose Save and New
from the Save menu on the toolbar.
〫
If you want to duplicate the current information as part of a
new item, select Save and Duplicate from the Save menu on
the toolbar.
Changing Item Status
From the time an item is opened to the time it is officially closed, it
typically undergoes a series of status changes; these changes are
collectively known as a workflow. For example, a new Defect typically
starts with a status of Unassigned. A project manager assigns the Defect
to a developer, updating its status to Assigned. If the developer
confirms that the problem exists and fixes the appropriate software, he
or she would move the Defect into a Pending Validation status,
flagging it for testing and verification.
A workflow defines the states an item goes through and the privileges
each user has to move an item from one state to another. Your
TrackRecord administrator defines the workflow for items. For
example, an administrator might specify that a someone in Quality
Assurance can move a Defect with a status of Unresolved to a status of
Needs More Information or to Resolved.
Not all items follow a workflow. The Person type, for example, might
undergo a series of changes over time, but these changes do not
constitute a change in the status of the item. Your TrackRecord
administrator establishes which types of items will follow a workflow
by placing a Status field on the type form. The Person type does not
follow a workflow and does not contain a status field.
To change the status of an item, perform the following procedure:
1
Open the appropriate item and enter any changes in the fields
on the form.
2
Use the Action button on the toolbar to select an action.
You can only select actions that your group is authorized to
perform.
3
TrackRecord User’s Guide
When you are finished, click Save and Close.
Entering Data
25
Merging Items
If you discover that your TrackRecord database includes duplicate
items, you can merge them to remove the redundant information.
When you merge one item, the source, into another, the target,
TrackRecord replaces all references to the source item with references to
the target item throughout the TrackRecord database, ensuring that
database links are preserved. When the merger is complete and the
appropriate information from the source item is moved to the target
item, TrackRecord deletes the source item.
If the two items you merge contain lists of information, such as
telephone numbers, the contents of the source item’s lists are added to
the corresponding list for the target.
Perform the following procedure to merge items:
1
Open the target item and the source item.
You can open items from the File menu, from the Item Browser, or
from an Outline Report.
2
Click inside the dialog of the target item to make it active.
3
Choose Merge with Another Item from the Edit menu.
The Target Dialog Box (Figure 2-16) opens. The Target Dialog Box
displays the type and name of the item to which information will
be transferred.
Figure 2-16 Target Dialog Box
4
Click inside the dialog of the source item to make it active.
5
Click the Merge into Target button in the Target Dialog Box.
If the source item has information in lists that can be transferred to
the target item, the Merge Items Dialog Box (Figure 2-17) opens.
Click Yes to transfer the item’s list contents.
Figure 2-17 Merge Items Dialog Box
26
Entering Data
TrackRecord User’s Guide
6
When the Merge Complete dialog is displayed, click OK.
TrackRecord merges the two items, closes the dialog for the source
item, and deletes the source item from the database.
7
TrackRecord User’s Guide
Close the target item and the dialog box.
Entering Data
27
28
Entering Data
TrackRecord User’s Guide
Chapter 3
Retrieving Data
This chapter describes how to define what information is displayed
from the TrackRecord database through the creation of queries. It
contains the following sections:
⽧
Understanding Queries — Overview of queries and their
functionality.
⽧
Composing Queries- Guidelines to Follow — Simple rules to
ensure that your queries perform satisfactorily.
⽧
Creating a Query — Procedural information on how to create a
query.
⽧
Opening, Modifying, and Deleting Queries — Instructions
regarding opening, modifying, and deleting queries.
Understanding Queries
To use information that has been entered into the TrackRecord
database, you must first identify the information in which you are
interested and create a query to retrieve that data. A query defines what
is displayed. It lets you formulate requests for specific data from the
database.
Tip If you are new to
TrackRecord and want to
create simple reports
quickly, you can use the
Header Wizard to display
data without creating a
query. See “Using the
Header Wizard” on
page 47.
TrackRecord User’s Guide
Queries let you specify criteria for retrieving information in the
TrackRecord database and are building blocks for Outline Reports. An
Outline Report consists of one or more queries that are formatted to
display information that is returned by queries. You select the type of
item you want to find and add parameters to make your query as
specific (or general) as necessary.
When you create a query, you select:
⽧
Type of item you want to find (Defect in the example)
29
⽧
Fields you want the query to search on (Project and Build Number
in the example)
⽧
Parameters to make your query as specific as necessary
You can create your own queries or use queries that have been
constructed for you by your TrackRecord Administrator.
The query shown in Figure 3-1 returns all Defect items in which the
Current Build field is equal to 42.
List of types
List of searchable
fields within the
selected type
Drag a field from the
list to use it in the query
Search criteria to set
specific search parameters
Figure 3-1 Simple Query
Tip For date fields, you
can use relative dates
(Today, 1 week from
today) to make reuse of
queries easier.
Each selection criterion is represented graphically as an arrow.
Including more than one arrow in a query allows you to filter database
information using several fields as selection criteria. The output from
one arrow becomes the input set for the next arrow, until the end of
the query chain is reached.
Composing Queries- Guidelines to Follow
While TrackRecord provides great flexibility in the creation of queries,
you should follow a few simple rules to ensure that your queries
perform satisfactorily.
⽧
30
Retrieving Data
Begin your query with the type of item you want to find. For
example, if you want to find all the Defects for a particular Project,
start by selecting the Defects data type, then add a query element
for the Project field. If you start your query by asking for all Project
items, the query would check all Projects, rather than Defects that
relate to a given Project.
TrackRecord User’s Guide
⽧
To create an AND specification (Figure 3-2), place related queries
side-by-side; to create an OR specification (Figure 3-3), place queries
top-to-bottom.
Query will search for defects relating
to Fault Manager AND were entered
by the current user. Items that meet
both criteria will be selected.
Figure 3-2 An AND Specification for Search Criterion
Query will search for defects relating to Fault
Manager OR defects entered by the current user.
Items that meet either condition (as well as other
elements in the query) will be selected.
Figure 3-3 An OR Specification for Search Criterion
⽧
Create many simple queries. You can later combine these queries
into more complex data extraction operations by creating Outline
Reports and attaching simple queries. (Refer to “Using Outline
Reports” on page 39 for more information.)
⽧
Avoid complex queries and queries that return very large data sets.
⽧
In a sequence of Query elements (arrows), start with the query
elements you expect to return the fewest items.
⽧
The fastest queries are often the ones that run on the entire
database.
⽧
To create a query based on a specific date, do not use the GUI date
selector. Simply type in the date in the date field.
Query Execution Order
TrackRecord executes queries from left to right, then top to bottom
following the arrows in the queries.
Example One
In the example shown in Figure 3-4, the query would be executed in
the following manner:
TrackRecord User’s Guide
1
The database will search for defects related to Your Project.
2
The database will search for Critical defects relating to Your Project.
3
The database will search for High priority defects relating to Your
Project.
Retrieving Data
31
4
The results of steps 1 - 3 are combined and can be displayed with
the Run Query Now button.
Arrow B
Arrows (A and B) or
(A and C)
Arrow C
Arrow A
Figure 3-4 Example One
Example Two
In the example shown in Figure 3-5, the query will retrieve data in the
following order:
1
The database will search for items assigned to <CurrentUser> AND
are assigned a priority of Critical.
2
The database will search for items assigned to Matt Johnson AND
are assigned a High priority.
3
The results of steps 1 - 2 are combined and can be displayed with
the Run Query Now button.
Arrow A
Arrows (A and B) or
(C and D)
Arrow B
Arrow D
Arrow C
Figure 3-5 Example Two
Example Three
In the example shown in Figure 3-6, the query will execute in the
following order:
32
Retrieving Data
1
The database will search for items with a Critical OR High priority.
2
The database will search for items assigned to <Current User> AND
a Critical OR High priority.
3
The database will search for items assigned to Matt Johnson AND a
Critical OR High priority.
TrackRecord User’s Guide
4
The results of steps 1 - 3 are combined and can be displayed with
the Run Query Now button.
Arrow AB
Arrow C
Arrows ((A or B) and C)
or ((A or B) and D
Arrow D
Figure 3-6 Example Three
Creating a Query
To create a query, perform the following procedure:
1
Choose Query from the New Item drop-down list on the
Toolbar.
Alternatively, you can open a new Query by choosing New>Query
from the File menu (Figure 3-7).
Run Query
Now button
Create Outline Options
Report button button
Query name
Type list
Query area
Field list
Search criteria fields
Sort options
Find list
Figure 3-7 Query Form
2
Enter a name for this query in the Query Name field.
Query names can contain up to 39 characters.
TrackRecord User’s Guide
Retrieving Data
33
3
From the Type list, select the type of item you would like to
find.
For example, if you want to find all Defects in the TrackRecord
database relating to a specific development project, you would
choose Defect.
4
In the Field list, select a primary search criterion and drag it to
the Query area (Figure 3-7).
For example, to find the Defects relating to a specific project, drag
Project to the Query area. An arrow identifying the search field (the
query element) will appear in the Query area.
5
Use the Find list to specify whether child types should be
retrieved.
Normally, if you query a parent type such as Defect, the results
include child types, such as Unassigned Defect. If you want to
exclude child types from the query results, choose Excluding child
types. Refer to “Understanding Data Type Inheritance” on page 7
for additional information on parent-child relationships.
6
Tip When using multiple
query elements, the
search criteria fields will
reflect the currently
selected element. See
“Composing QueriesGuidelines to Follow” on
page 30 for information
on structuring queries.
Specify search criteria.
〫
Use the Where fields to specify the search criteria you want the
query to use. For example, to find Defects associated with the
Colossus project you would select Is Equal To from the option
list and then enter Colossus in the field below. As you specify
selection criteria, TrackRecord updates the text in the query
element (the arrow).
〫
In the Return drop-down list, specify what you want
TrackRecord to do when it finds an item that matches the
search criteria. Typically, you want the query to return all items
that meet the search criteria you have entered. Alternatively,
you can retrieve all items that link to anything meeting your
search criteria.
〫
Optionally, use the Sort list to specify how the query should
sort the items it retrieves.
i
If you choose Ascending, TrackRecord sorts the selected
items by the selection field you specified in alphabetical
order (1, 2, 3,…x, y, z).
ii
If you choose Descending, TrackRecord sorts the selected
items by the selection field you specified in reverse
alphabetical order (z, y, x,…3, 2, 1).
iii If you choose None, TrackRecord does not sort the selected
items.
Repeat steps 3 through 6 to add additional query elements.
34
Retrieving Data
TrackRecord User’s Guide
7
If you want to share this query with other users or be notified
when new items meet the selection criteria, click the Options
button to display the Query Options Dialog Box (Figure 3-8).
Figure 3-8 Query Options Dialog Box
〫
〫
To share the query with other users, click the Sharing button.
When the Sharing Dialog Box opens, click Share To and select
the share groups with whom you want to share the query. If
you choose Not Shared, no one other than you can use the
query.
To receive notification through electronic mail when a new
item meets the selection criteria for this query, click the Email
Me check box. Note that your TrackRecord administrator must
configure AutoAlert and record your electronic mail address as
part of your user profile for this feature to take effect.
If you choose to share a query and also click the Email Me
checkbox, the e-mail will only be sent to you, not to members
of Share Groups.
Click OK to close the Sharing dialog.
8
Optionally, click the Run Query Now button on the toolbar.
Running the query from within the Query dialog allows you to test
your query. A search results dialog will display all items from the
database that match your query. If the results do not match your
expectations, modify the query.
9
Optionally, click the Create Outline Report button in the
toolbar.
Since queries are most often used to create Outline Reports, this
button provides a shortcut to that feature.
Tip Outline Reports are
described in “Using
Outline Reports” on
page 39.
The new query is automatically saved and entered as a header in a
new Outline Report. (This option is not available on Queries
created from within Outline Reports.)
10 Save the new query by clicking Save and Close or by choosing
Save from the File menu.
Opening, Modifying, and Deleting Queries
TrackRecord makes it simple to open, modify, and delete queries.
TrackRecord User’s Guide
Retrieving Data
35
Opening and Modifying Queries
There are several ways to open an existing query: the Open button on
the Toolbar, File>Manage, or File>Open, which is the method used in
the following steps.
To open and/or modify an existing query, perform the following steps:
1
From the TrackRecord File menu, select the Open option.
2
From the displayed list, select Query.
3
After making modifications, click the Save and Close button.
Deleting Queries
To delete a query, perform the following steps:
1
From the TrackRecord File menu, select the Manage option.
2
From the displayed list, select the type of query to be managed.
The Manage dialog appears.
3
36
Retrieving Data
Select the query to be deleted and click Delete.
TrackRecord User’s Guide
Chapter 4
Viewing Data
This chapter describes how to display the information that you want to
retrieve via a query from the TrackRecord database. It contains the
following sections:
⽧
Understanding Views — Overview of the four types of views
available with TrackRecord.
⽧
Opening, Modifying, and Deleting Views — Guidance regarding
opening, modifying, and deleting a view.
⽧
Using Outline Reports — Instructions on creating outline reports,
adding multiple headers, dragging headers, opening new items,
creating new items, using the remainder header, shortcut menu,
and Header Wizard.
⽧
Working with Graphs — Information on creating graphs from
outline reports and formatting graphs.
⽧
Using the Milestone Status View — Explanation regarding
creating a new milestone status view, filtering data, using volatility
status windows, and interpreting the volatility graph.
⽧
Utilizing the Calendar View — Description of how to establish
and add tasks to the calendar.
Understanding Views
After you identify the information in which you are interested by
creating a query, you must determine what format in which you want
the information displayed. A view defines how data is displayed.
TrackRecord allows you to choose from four types of views:
⽧
TrackRecord User’s Guide
Outline Reports— Dynamic reports that allow you to view
summaries of the TrackRecord data returned by a query or set of
queries, select what fields appear in columns in the report, and
37
change the order in which the columns and headers are displayed.
For more information, refer to “Using Outline Reports” on page 39.
⽧
Graphs— Displays a graphical summary of the information in an
outline report. Depending upon the type of information, you can
generate pie charts, bar graphs, trend graphs, and more. For more
information, refer to “Working with Graphs” on page 53.
⽧
Milestone Status— Provides a provides a concise summary of
project status that captures a broad range of project status
indicators, from code base volatility to how much automated error
detection has been performed. See “Using the Milestone Status
View” on page 57 for additional information.
⽧
Calendars— TrackRecord automatically categorizes and displays a
simple list of your appointments and tasks or a tick-marked
schedule of each day. You can maintain and display multiple
calendars simultaneously. Refer to “Utilizing the Calendar View”
on page 64 for more information.
Opening, Modifying, and Deleting Views
TrackRecord makes it simple to open, modify, and delete views.
Opening and Modifying Views
There are several ways to open an existing views: the Open button on
the Toolbar, File>Manage, or File>Open, which is the method used in
the following steps.
To open and/or modify an existing view, perform the following steps:
1
From the TrackRecord File menu, select the Open option.
2
From the displayed list, select the type of view to be opened.
3
After making modifications, click the Save and Close button.
Deleting Views
To delete a view, perform the following steps:
1
From the TrackRecord File menu, select the Manage option.
2
From the displayed list, select the type of view to be managed.
The Manage dialog appears. Figure 4-9 illustrates the Manage
Outline Reports dialog.
38
Viewing Data
TrackRecord User’s Guide
Figure 4-9 Manage Outline Reports Dialog
3
Select the view to be deleted and click Delete.
Using Outline Reports
Outline Reports (Figure 4-10) let you selectively retrieve information
from the TrackRecord database through dynamic reports that select,
sort, and format summaries. When you create an Outline Report, you
insert headers into the report and associate a query with each header.
When you run the report, the queries are run and the matching
information is displayed in columns in the report.
Tip If you are new to
TrackRecord and want to
create simple reports
quickly, you can use the
Header Wizard to display
data without creating a
query. See “Using the
Header Wizard” on
page 47.
While you are viewing an Outline Report, TrackRecord periodically
runs the queries associated with the report to ensure the contents of
the report reflect the most current information in the database.
Parent headers with
queries attached
Columns (fields from
the items found by
the query attached to
this header)
Sibling of Your Project
Priorities 1; Child of Your
Project Priorities 1 or 2
Figure 4-10 Sample Outline Report
TrackRecord User’s Guide
Viewing Data
39
Outline Reports are not outlines in the tradition sense; you cannot use
an Outline Report to enter data in a hierarchical format. Rather,
Outline Reports are a mechanism for generating a dynamic report by
querying the database. The queries associated with the Outline Report
act like smart filters, letting through only the applicable data, and
presenting that data in an outline-like format.
The headers on an Outline Report are hierarchical. A child header can
display only data that meets the Query conditions of all of its parent
headers. Refer to “Using Headers in Outline Reports” on page 45 for
more information.
To collapse or expand a header, click the bullet to the left of the
header’s title. When a header is expanded to show its child headers and
data items, its bullet appears as a white circle with a minus (-) sign
inside it. When a header is collapsed, concealing its child headers and
contents, its bullet appears as a black circle with a plus (+) sign inside
and the number of items it contains appears to the right of the header
text. You can use this feature to create numeric summary reports that
identify data categories and item counts within each category.
You can specify what data is to be displayed in the columns of the
report, rearrange the columns, and rearrange the headers in the report.
Tip Chapter 7,
“Customizing User
Options” provides
additional information on
customizing Outline
Reports.
When you view a list of existing Outline Reports, the list shows both
your privately owned reports plus all other Outline Reports you are
permitted to share.
The TrackRecord sample database provides several Outline Reports that
demonstrate the use of headers and queries.
Creating a New Outline Report
There are five steps to creating an outline report.
Defining Queries
If the queries you want to use in your Outline Report do not already
exist, you should create them before you establish the Outline Report.
Alternatively, you can create them as you add report headers. Refer to
Chapter 3, “Retrieving Data” for information on setting up queries.
Adding Report Headers
1
From the File menu, choose New>Outline Report.
An untitled Outline Report (Figure 4-11) opens.
40
Viewing Data
TrackRecord User’s Guide
Figure 4-11 Blank Outline Report Form
2
Click the Insert Header button and select the As a Sibling
Header option.
The Header Properties Dialog Box (Figure 4-12) opens.
Tip If you are new to
TrackRecord or have not
created queries to be
used in this report, you
may prefer to use the
Header Wizard. This
option is described in
“Using the Header
Wizard” on page 47.
Figure 4-12 Header Properties Dialog Box
3
On the General tab, select the query you want for your top-level
header or click the New button to create a new query.
To review the contents of an existing query, click the Open button.
If you create a new query and use the Run Query Now button,
note that the query results will not reflect the filters of the parent
headers.
TrackRecord User’s Guide
4
Click a Header Text option to use the query name or to enter
more descriptive text for the header.
5
Click OK or click another tab to continue setting up the header.
Viewing Data
41
Configuring New Items Options
The options on the New Items tab are used to define custom behavior
when a user right-clicks on a displayed header. It adds a New Item
option to a header’s right-click menu and allows you to specify a
template to be used for new items. If you are new to creating Outline
Reports, you do not have to enter anything on this tab.
1
Right-click in the Outline Report and select Set Template.
2
On the New Items tab, select the type of item to be added.
3
Select a template to be used when items are added.
To learn about templates, refer to “Working With Templates” on
page 79. Click OK or click another tab to continue setting up the
header.
Setting Report Columns
Use the Column tab to specify what columns are to be displayed for
this header.
1
Right-click in the Outline Report and select Set Columns to
display the Columns tab (Figure 4-13) on the Header Properties
dialog box.
Add button
Types list
Columns to be
Displayed list
Column name
field
Remove
button
Show As list
Column width setting
Figure 4-13 Columns Tab in Header Properties Dialog Box
2
Select one of the following options for column display:
Show the Same Columns as the Parent Header—Displays the
same columns as are displayed under the parent header.
〫
Show These Columns— Allows you to customize the column
display for the selected header.
Select the type of data in the header from the Type list.
〫
3
42
Viewing Data
TrackRecord User’s Guide
4
Select a field you want to display in the Outline Report and
click the Add> button to move the field name into the Columns
To Be Displayed list.
The Default Abbreviation is always displayed. It is established by
your Administrator and cannot be eliminated from the report. To
display multiple lines in the description field, select Descriptions
and then Full Notepad from the Show As drop-down list. Repeat
this step for all columns to be displayed.
5
Specify the order in which you want columns displayed by
dragging field names up and down within the Columns To Be
Displayed list.
For example, if you want Project to be displayed in the first
column, drag it to the top of the list.
〫
Use the Column Name field to change the label the Outline
Report displays at the top of the column.
〫
Use the Show As list to specify how you want the column
displayed.
〫
The available options vary depending on the field type. For a
Name field, for example, you could choose to display the full
name, initials, name and address, and so on.
〫
Specify how wide you want the selected column to be within
the Outline Report.
i
If you want TrackRecord to determine how much space to
use, click the As wide as possible option.
ii
6
If you want the column to be a specific width within the
report, click the Exactly option and enter the number of
inches for the column width in the Inches text box.
When you have finished adding and formatting columns for
the header, click OK or click another tab.
Specifying Print Options
Tip When you print an
Outline Report,
TrackRecord prints items
within open headers. If
you collapse a header,
the items under that
header will not be
printed.
TrackRecord User’s Guide
You can specify print options for an Outline Report to override your
default print option settings, and you can specify print options for
specific headers within the report.
⽧
To set print options for the whole report, click the Options button
on the Outline Report toolbar and select the Print Options tab
(Figure 4-14).
Viewing Data
43
⽧
To set print options for individual headers, right-click on the
header, choose Properties, and select the Print Options tab (Figure
4-14).
The following steps are common to both report and individual header
print options.
Change Font buttons
Print list
Header
styles list
Item styles list
Sets
vertical
space
Figure 4-14 Print Options for Individual Header
1
Select the typeface and size you want to use to print report
headers and data items.
Note Headers and items must use the same type size, even if they use
different typefaces.
Click the Change Font button beside the Header font or the Item
font field. When the Font Dialog Box opens, select the typeface,
style, and size you want to use. When you are finished, click OK.
2
From the Print list, selecting Headers and Items or Headers
Only will print the items belonging to report headers.
3
If you are printing data items, use the Item Style list to select
the lead-in character for item entries.
〫
〫
〫
Choose Leading Bullet if you want each item to be preceded
with a bullet (•).
Select Leading Number if you want each item to be preceded
with a sequence number. Sequence numbers restart within each
header.
Choose Leading Checkbox if you want each item to be
preceded with an empty checkbox. Checkboxes simplify
tracking which items within a list have been discussed or
completed.
Select whether to print with or without a line following each item.
44
Viewing Data
TrackRecord User’s Guide
4
Tip For additional
information on printing
Outline Reports, see
“Printing from Outline
Reports” on page 52.
Use the Header Style list to specify how you want headers on
the report printed.
〫
Select Header Text Only or Header Text and Item Count.
Select whether to print with or without a line following each
header.
Use the Space After Each Item and Space After Each Header
fields to specify how much vertical space you want between
lines.
〫
5
6
If you are setting print options for an individual header, choose
whether to start this header on a new page and, if this is a child
header, whether to use the parent headers print options.
7
When you are finished, click OK.
The changes will not be reflected on your screen display; they are
used only when reports are printed.
Using Headers in Outline Reports
Tip If you are new to
TrackRecord or have not
created queries to be
used in this report, you
may prefer to use the
Header Wizard. This
option is described in
“Using the Header
Wizard” on page 47.
Headers are the building blocks of Outline Reports. They are used to
isolate and filter project data by associating database queries with
Outline Reports. Headers have properties that you can modify such as
data view options, use of templates, column content and format, and
print and displaying fonts.
Creating a Report Header
For information on adding a report header to an Outline Report, refer
to “Adding Report Headers” on page 40.
Adding Multiple Headers
To add more headers to your reports, select a header in the report and
click the Insert Header button.
Tip For information on
Parent, Child, and Sibling
relationships, refer to
“Understanding Data
Type Inheritance” on
page 7.
⽧
⽧
To add headers at the same level as the one you selected, choose As
a Sibling Header from the Insert Header menu.
To add child headers, choose As a Child Header from the Insert
Header menu. Child headers act to further segment the data
selected by the parent header. The selection criterion of the parent
header limits the data available for selection by the child header.
Dragging Headers in an Outline Report
You can easily rearrange your Outline Report by dragging headers from
one location to another within the report. When the cursor is over an
TrackRecord User’s Guide
Viewing Data
45
area where the header can be dropped, the dragged image will snap in,
showing you where the dropped header will appear. You can drag one
header above or below another as a sibling, which puts them at the
same level within the report. You can also drag one header below
another to position it as a child or drag one header above another to
make the dropped header a parent header.
If it is not possible to drop a header at a given location, the header will
not snap in at that location, or will snap to the closest alternative.
Employing the Remainder Header
TrackRecord includes a special header called Remainder, which acts as a
None of the Above summary item. When you include a Remainder
header as a child header, it gathers and summarizes all the items
belonging to the parent header that have not been listed in the child
headers above it. The Remainder header is typically used to identify
items belonging to a parent header that fail to match all criteria
pertaining to sections under that parent header.
By moving the Remainder header within a parent header, you can
summarize the none of the above items quickly and easily. Figure 4-15
illustrates how you can move the Remainder header from one location
to another within an Outline Report to obtain different summaries.
Figure 4-15 Using Remainder Header
The first screen summarizes all defects, sorted by status, with the
number of defects of each status shown in parentheses beside the
sibling header. The Remainder header indicates that the product has 19
defects whose status is not Open or Fixed.
When the Remainder header is moved above the Fixed Defects header
in the second screen, the item count for Remainder changes from 19 to
28. The Remainder header is now counting the Open Defects it was
46
Viewing Data
TrackRecord User’s Guide
counting before (19), plus the Fixed Defects (9). Similarly, when the
Remainder header is moved above the Open Defects header, the item
count for Remainder changes to 30, representing the number of items
of Open Defects (2) in addition to the number of items of Fixed Defects
(9), and the number of items it represented in the first screen (19).
Using the Header Wizard
The Header Wizard is a TrackRecord utility that simplifies the creation
of Outline Reports. The Header Wizard is most useful in two situations:
⽧
When you are a new TrackRecord user unfamiliar with creating
queries and inserting headers
⽧
When you want to create Outline Reports that would require
multiple, repetitious queries
For example, to create a report listing tasks assigned to certain
Team Members, you would have to create a query element for each
person (AssignedTo=Bob, AssignedTo=Mary, AssignedTo=Joe, etc.).
To group the tasks under separate headers would be even more
tedious, since you would have to create separate queries. With the
Header Wizard, you could identify all Team Members at one time
by selecting them from a list and specifying how you want the
tasks grouped.
To use the Header Wizard, perform the following procedure:
1
From the File menu, choose New>Outline Report.
2
Click the Insert Header button on the toolbar and choose Using
Header Wizard.
The Introduction Dialog Box (Figure 4-16) opens.
Tip Click Back to back up
one step. Click Next to
move to the next step.
Figure 4-16 Header Wizard Introduction Dialog Box
Read the instructions on the Introduction Dialog Box. If you want
to skip the Introduction Dialog Box when you run the Header
TrackRecord User’s Guide
Viewing Data
47
Wizard in the future, click the Don’t Show This Introductory
Screen check box. When you are finished, click the Next button.
3
In the Select Item Types Dialog Box (Figure 4-17), click the
check box beside each type of item you want to retrieve from
the TrackRecord Database.
Figure 4-17 Select Item Types Dialog Box
The Header Preview pane displays the name of each type you select.
When you are finished, click Next.
4
In the Choose Field to Query On Dialog Box (Figure 4-18),
specify the field you want to use as your query criterion.
Figure 4-18 Choose Field to Query On Dialog Box
Click on one of the following options:
〫
〫
48
Viewing Data
Find All Items— Searches for all items. Click Next and skip to
step 5.
Query On Field Named— Finds items that have a specified
value in a field. Select the field you want to use. For example, if
you want to look for Defects associated with a specific project,
you would choose Project as the query field. If you choose more
than one type in Step 3, the Query on Field Named option may
not be available. Click Next and continue to step 4.
TrackRecord User’s Guide
5
If you selected a query field in step 4, use the Choose Specific
Values To Find Dialog Box (Figure 4-19) to specify the values
you want the query to find.
Figure 4-19 Choose Specific Values to Find Dialog Box
If you want the query to search for more than one value, click each
value you want. For example, if you want to look for Defects
associated with three specific projects, you would click each project
name. To deselect an entry, click it again. When you are finished,
click Next.
6
In the Grouping Dialog Box (Figure 4-20), specify how you
want the query results to be grouped.
Figure 4-20 Grouping Dialog Box
To group selected items under separate headers, click the Group
Them Under Multiple Headers option. Click Next and
continue to step 5.
〫
To group selected items under one header, click the Put Them
All Under a Single Header option. Click Next and skip to step
5.
If you specified in step 6 that you wanted selected items
grouped under multiple headers, use the Grouping Options
〫
7
TrackRecord User’s Guide
Viewing Data
49
Dialog Box (Figure 4-21) to specify how TrackRecord should
group items.
Figure 4-21 Grouping Options Dialog Box
The following options are available:
〫
〫
〫
〫
Group by Type— Places all items of the same type together, but
do not sort them.
Group by Value—Places all items with the same value together,
but do not sort them.
Group by Type, Then By Value— Places all items of the same
type together and sort them by value.
Group by Value, Then By Type— Places all items with the
same value together and sort them by type.
When you are finished, click Next.
8
In the Placement Options Dialog Box (Figure 4-22), specify
where the new headers should appear on the Outline Report.
Figure 4-22 Placement Options Dialog Box
〫
50
Viewing Data
If new headers should appear at the same level as the current
header, or if these are the only headers in the report, click the
Insert as a Sibling option.
TrackRecord User’s Guide
〫
If new headers should appear as subheaders within the current
header, click the Insert as a Child option.
When you are finished, click Finish. TrackRecord formats the
Outline Report with the new headers, retrieves the items that meet
the header search criteria, and displays the selected items under the
appropriate headers.
You can use the Header Wizard to insert as many headers as desired in
your report.
Opening Items in an Outline Report
Each item entry in an Outline Report represents an item in the
TrackRecord database. To open an item, double-click its entry in an
Outline Report. If you want to update the information displayed for
the item, make the appropriate changes and close the form; click Yes to
save your changes.
Creating New Items from an Outline Report
You can create new items from within an Outline Report. Refer to
“Configuring New Items Options” on page 42 for information about
establishing the type of items that will be created and the template to
be used. To create a new item from within an Outline Report, perform
the following steps:
1
Select the header under which the item will be created.
2
Right-click and select the New itemtype option.
The itemtype is the default type of item included in this header. An
item form opens, allowing you to create a new item.
Utilizing the Shortcut (Right-Click) Menu
When you are working in an Outline Report, you can use the shortcut
menu to perform a variety of functions. To open the shortcut menu,
right-click an outline header or item.
As Figure 4-23 illustrates, the contents of the shortcut menu change
according to the type of header or item you right-click.
TrackRecord User’s Guide
Viewing Data
51
Shortcut menu
for a header in
an Outline
Report view
Shortcut menu for an item in an
Outline Report
Figure 4-23 Shortcut Menus for Headers and Items
Printing from Outline Reports
There are three methods available to print multiple defects in an
outline view:
For information on specifying print options for an Outline Report to
override your default print option settings, and you can specify print
options for specific headers within the report.
Tip When you print an
Outline Report,
TrackRecord prints items
within open headers. If
you collapse a header,
the items under that
header will not be
printed.
⽧
Hold the Shift key while right-clicking a defect. An option will
appear on the menu allowing you to print the defect and the rest of
the set.
⽧
Hold the Control key (Ctrl) while right-clicking a defect. This
allows you to print that defect as well as the next 15. Please note
that this command will create a separate print job for each defect
and will create 15 print jobs with one defect each.
⽧
Hold the Control key (Ctrl) + C to copy the result of the header.
Open an application you will be displaying the report in (e.g.
Microsoft Word) and hit Ctrl + V. Multiple header results can be
displayed on a single document using this method.
To create printed copy that looks like the screen format of Outline
Reports:
⽧
Hold down the Shift key, right click on the first item under a
header in your Outline Report.
⽧
Select Print from the menu.
This command will print out all of the items in the list until the next
parent header is reached. Repeat the process if desired.
52
Viewing Data
TrackRecord User’s Guide
Working with Graphs
The Graph view displays a visual summary of the information in an
Outline Report. Graphs can be used to effectively:
⽧
⽧
⽧
Convey information quickly
Identify trends which may not be apparent
Display relationships that may exist between groups or series of
numbers
Note Graph availability is governed by the number of parameters in the
query that resides in the header.
Tip Reports with
symmetric, hierarchical
headers produce the most
meaningful graphs.
After a graph is generated, TrackRecord updates it automatically when
its underlying data changes. However, the graph does not change if you
modify the Outline Report view from which the graph was generated.
You can print and save Graph views just as you do any other view. You
can copy graphs generated by TrackRecord into graphics applications,
such as Microsoft Paint, or into text editors, spreadsheet programs, and
electronic mail applications that can accept bitmap images, such as
Microsoft Word, Microsoft Excel, or Microsoft Outlook. For more
information, refer to “Integrating TrackRecord with Other
Applications” on page 95.
Types of Graphs
Depending on the information in the Outline Report, you can generate
the following graphs: pie, bar, stacked bar, and trend (line and area).
Pie Graphs
Tip The graph style
toolbar buttons become
active when the style is
appropriate for the data
being graphed. Pie
graphs require two or
more parameters.
TrackRecord User’s Guide
A pie graph (Figure 4-24) is a pictorial summary that display the
number of items matching a particular set of queries in an Outline
Report. The results of each query represent a single pie slice
(percentage) on the graph. They are useful in seeing the percentage
relationship between components. It can also be used to show the
change in component proportion at different times, using two pie
graphs.
Viewing Data
53
Figure 4-24 Pie Graph— Defects by Team Member and Priority
Bar Graphs
Tip The graph style
toolbar buttons become
active when the style is
appropriate for the data
being graphed. Bar
graphs require two or
more parameters.
A bar graph (Figure 4-25) is a pictorial summary that display the
number of items matching a particular set of queries in an Outline
Report. The results of each query represent a single bar on the graph. A
bar graph is useful when comparing the magnitude of, or differences
between items.
Figure 4-25 Bar Graph— Defects by Status and Priority
Stacked Bar Graphs
Tip The graph style
toolbar buttons become
active when the style is
appropriate for the data
being graphed. Stacked
bar graphs require three
or more parameters.
54
Viewing Data
A stacked bar graph (Figure 4-25) displays the results of queries, which
are used to calculate all the bars on the graph. Each point is the
number of items matching a particular value for a field in that query. A
stacked bar graph shows bars on top of one another to convey relative
proportions of parts to the whole, and to each other. Data is presented
in segments and bars.
TrackRecord User’s Guide
Figure 4-26 Stacked Bar Graph— Defects by Team Member and Priority for the
Bolts ‘N Things Application
Trend Graphs
Tip The graph style
toolbar buttons become
active when the style is
appropriate for the data
being graphed. Trend
graphs require two or
more parameters, one of
which must be timerelated.
A trend graph is used to show rates of change over time, especially if
data quantities differ greatly. It is useful for comparing two series of
data if large quantities are involved, or when quantities differ greatly
between two series. There are two types of trend graphs in TrackRecord
(Figure 4-27):
⽧
Line graphs — Used to show trends in data over equally spaced
intervals of time. It is useful for a long series of data, or comparison
of two or more series of data.
⽧
Area graphs — Used to show trends in data over time. It is useful
for emphasizing the magnitude of changes of time. An area graph is
the equivalent of a stacked bar graph, for continuous data.
Trend graphs uses the results of a single query to calculate all the
points/bars/slices on the graph, and each point is the number of items
matching a particular value for a field in that query.
TrackRecord User’s Guide
Viewing Data
55
Line Graph
Area Graph
Figure 4-27 Example of a Line and Area Graph
Creating Graphs From Outline Reports
To create a graph from an Outline Report, select the appropriate header
in the report and click the Graph button on the toolbar (Figure 4-28).
Alternatively, right-click the appropriate header and choose Graph
from the shortcut menu.
If the information in the header is not appropriate for graphing, the
Graph button and option will not be active.
Select a
header in
an Outline
Report ...
...then click
the Graph
button...
... or choose
Graph from
the shortcut
menu.
Figure 4-28 Creating Graph from Outline Report
56
Viewing Data
TrackRecord User’s Guide
Formatting Graphs
TrackRecord automatically selects a graph style based on the structure
of the Outline Report and the contents of the queries in the outline.
You can override the default graph style by choosing a different graph
icon from the Graph toolbar. The graph style toolbar buttons (pie
chart, bar graph, stacked bar graph, line graph, area graph, and trend
graph) become active when the style is appropriate for the data being
graphed.
⽧
⽧
⽧
To select a different graph style, click a graph style button on the
Graph toolbar or choose a graph style entry from the View menu.
For line graphs, you can add a line identifying the overall trend by
choosing View>Best Line Fit. Similarly, you can insert vertical bars
connecting graph points to the baseline by choosing Draw Bars to
Points from the View menu.
To choose whether to display a legend for your graph, choose View
>Legend.
Using the Milestone Status View
When project plans are developed, typically the project is broken into
manageable segments or development cycles, target dates are
identified, and criterion for each milestone is defined. Once
development is underway, milestones become the focus of the team
efforts; Team Members work to perform the tasks associated with
upcoming milestones.
Tip Some parts of the
Milestone Status view are
product-specific. If you
are not using the tool
that populates a
particular section of the
view, that section will not
contain data.
The Milestone Status view (Figure 4-29) identifies where a development
project stands with respect to a predefined milestone, such as an Alpha
or Beta release date. Individual developers can use the Milestone Status
view to identify the specific assignments they have to complete to meet
an upcoming deadline. By adding database queries identifying which
tasks and bugs have been assigned, individual developers can use a
personalized Milestone Status view as a To Do list that highlights tasks
remaining to be performed.
Similarly, project managers can use the Milestone Status view to get a
summary of the overall project status. They can leverage code volatility
statistics to identify how much of the code is changing from one build
to the next and coverage statistics to identify how much of the project
source code has been tested. By adding queries to the standard report, a
project manager can determine critical information, such as the status
of the project’s requirements and software defects.
A Milestone Status view consists of five types of information:
TrackRecord User’s Guide
Viewing Data
57
Header
Information
Volatility
Session
Information
CodeReview
Queries
Figure 4-29 Sample Milestone Status View
Tip Milestone Status
views depend on certain
internal tags. If these
tags have been removed
or altered, the Milestone
Status option might not
be available.
Administrators should
refer to “Configuring
TrackRecord” on
page 123 for more
information on ActiveLink
Tags.
58
Viewing Data
Section
Description
Header Information
Identifies the project, milestone and date due. When
used with the DevPartner tools, it also summarizes:
• Volatility— Number of functions that were added,
removed, or changed between builds over the total
number of functions in both builds.
• Line Coverage— Number of lines that have been
tested over the total number of lines of code in the
components that have been run under TrueCoverage.
• Function Coverage— Number of functions that have
been tested over the total number of functions in
the components that have been run under TrueCoverage.
Volatility
Graph depicts how much of the project has changed
from one build to another. Click the triangle on the left
side of the Volatility header to display the volatility
graph for the selected milestone. This section is populated when TrackRecord is used with the DevPartner
tools.
Session Information
Displays testing data generated from applications that
submit session information, such as BoundsChecker or
TrueCoverage. Click the triangle on the left side to display statistics for each component; click the triangle to
the left of a component name to display the items
belonging to that component.
CodeReview
Lists of tasks and defects identified by NuMega CodeReview.
Queries
Results of queries included in the Milestone Status.
TrackRecord User’s Guide
Creating a New Milestone Status
To create a new milestone status view, perform the following
procedure:
1
From the File menu, choose New>Milestone Status to create a
blank Milestone Status view.
〫
Use the Project list to select the project you want to profile.
Optionally, click the Open button beside the Project list to
display the project details.
Use the Milestone list to select the project milestone you want
to profile. Optionally, click the Open button beside the
Milestone list to display the milestone details.
Click the Options button on the Milestone Status toolbar to
open the Milestone Status Options Dialog Box (Figure 4-30).
〫
2
Sharing button
Project list
Description field
Displays report
description on report
Displays code
volatility information
graphically
Displays information
passed from other
applications
Displays CodeReview
information
Displays queries
Changes query
sequence
Adds new query
Removes query
Figure 4-30 Milestone Status Options Dialog Box
3
To share your Milestone Status view with other users, click the
Sharing button.
Click Share To button on the dialog that appears and click the
checkbox beside each share group with whom you want to share
the report. Click OK when you are finished.
4
Use the Project list to select the project you want to summarize
in the Milestone Status view.
To prohibit other users from changing the project being displayed,
choose Lock Project field from the list to the right of the Project
list.
TrackRecord User’s Guide
Viewing Data
59
5
Enter a brief description of the report in the Description field.
To display the report description on the report, click the
Description checkbox.
6
To display code volatility information graphically, click the
Code Volatility checkbox and select whether the graph should
depict volatility over time or across builds.
If you choose By Build, you can use the Show Every control to
specify how many builds back you want to compare to the
previous build. For example, if you choose 1, TrackRecord
compares the volatility of the current build against the previous
build. If you choose 3, TrackRecord compares the volatility of
the current build against the software three builds ago.
〫
If you choose By Date, you can specify whether you want a
graph of changes in code volatility for each day, for each week,
for each two-week period, or for each month.
To display information passed to TrackRecord from other
applications, click the Session Information checkbox, click
Change and click the checkbox beside each component whose
session information is to be displayed.
〫
7
Click OK to close the Products dialog.
8
To include CodeReview information in the Milestone Status
view, click the CodeReview checkbox.
To see CodeReview tasks, click the Tasks checkbox. To see
CodeReview defects, click the Defects checkbox.
9
To include queries in the Milestone Status view, click the
Queries checkbox.
To add a query to a Milestone Status view, click the Add button.
When the Open Query Dialog Box opens, choose the query you
want to include in the Milestone Status view and click Open.
To change the sequence in which queries are displayed in the
Milestone Status view, select a query and click the Move Up or
Move Down buttons.
To delete a query from the Milestone Status view, select it and click
the Remove button.
10 When you are finished, click OK.
Filtering Milestone Status Data
The data that accumulates over the course of a development project
provides a rich source of information about the project. Answering
specific questions may require the filtering of session information.
60
Viewing Data
TrackRecord User’s Guide
You can create a filter to isolate specific information for display. For
example, you might want to see only those sessions entered by Dan
Developer.
You can filter session information by one or more of the following
criteria:
⽧
⽧
⽧
⽧
⽧
⽧
Developer
Build
Specific application component
Date
Operating system
Amount of memory
For example, you could filter the session information to discover how
much debugging had been done on machines configured with more
than 32 MB of memory by setting the filter to Memory is greater than
32. TrackRecord searches the Hardware Configuration items in its
database, retrieves a list of machine names whose configurations have
more than 32 MB of memory, and then shows only those sessions run
on the retrieved list of machines.
To filter sessions in a milestone status view, perform the following
procedure:
1
Open the appropriate Milestone Status view.
2
Click the Filter button on the Session Information header.
The Filter Sessions Dialog Box (Figure 4-31) opens.
Figure 4-31 Filter DevPartner Studio Sessions Dialog Box
3
TrackRecord User’s Guide
Specify the types of sessions you want to retrieve and click
Next.
Viewing Data
61
4
On the second Filter Sessions Dialog Box, select the sessions you
want to include in the Milestone Status view.
Click the Select All button to select all projects.
5
When you are finished, click the Set Filter button.
The Milestone Status view displays information for the sessions you
selected.
Using Volatility Statistics Dialog Boxes
The Volatility field in the header section of the Milestone Status view
displays a percentage value that represents the number of functions
that were added, removed, or changed between the current build and
the previous one. This data is available when TrackRecord is used with
the NuMega DevPartner tools.
If you click the Volatility percentage, TrackRecord displays the
Volatility Information Dialog Box, which contains three tabs (Figure 432):
62
Viewing Data
TrackRecord User’s Guide
Summary Tab — Displays a count of the
number of functions in a project that have
been added, removed, and changed
between the current build and the
previous one.
Details by Component Tab — Identifies
components, source files, and functions
that have changed between one build
and another. Volatility statistics reported
here may differ from volatility statistics
reported by TrueCoverage, because the
volatility calculations in DevPartner
Studio include new or deleted functions
in the count of changed functions.
Details by Function Tab — Displays
the list of functions that have been
added, modified, or removed
within a project’s source tree
between one build and another.
Figure 4-32 Volatility Information Dialog Box Tabs
Interpreting the Volatility Graph
You can display a graphical summary of the volatility between builds
by opening the Volatility section of the Milestone Status view. To open
TrackRecord User’s Guide
Viewing Data
63
the Volatility section, click the triangle to the left of the Volatility
header.
The point plotted above each build label represents the percent change
between that build and the previous one. If you specified that you
wanted to display volatility across more than one build at a time, the
plot pointed above the label represents the percent change between
that build and the appropriate earlier build.
Utilizing the Calendar View
To view project information in the context of some span of time, use
TrackRecord’s Calendar view. The Calendar view (Figure 4-33 and
Figure 4-34) functions as an appointment book and To Do list, where
TrackRecord automatically categorizes and displays the appropriate
data by date and time.
By default, TrackRecord displays all uncompleted items for a given day
or week. Timed Tasks are displayed according to their scheduled start
date/time, and Tasks (including Defects and Feature Requests) are
displayed according to their due date. Timed Tasks take place at specific
times and for specific periods. Regular Tasks may have deadlines, but
are otherwise open-ended.
The data displayed in a calendar is determined by the query run by the
calendar view. You can customize the information displayed by your
calendar by changing the query. Refer to Chapter 3, “Retrieving Data”
for more information on queries.
Depending on your preferences, the daily or weekly Calendar view
displays a simple list of your appointments and tasks or a tick-marked
schedule of each day. By changing the Calendar view’s query, you can
display different data or dates. You can also maintain and display
multiple calendars simultaneously.
64
Viewing Data
TrackRecord User’s Guide
Drag open a
new time bar
to create a new
item for a
selected day;
also works in
Week view
Displays list of
appointments
and items or
daily calendar
Displays
appointments
(Timed Tasks)
and To Do
items (Tasks)
Figure 4-33 Sample Calendar by Day Views
Change
appointment
times dynamically
by dragging
handles or entire
time bar
Display list of
appointments
and items or
weekly calendar
Double-click
titlebar to
display Day
view
Double-click an item
to see its Item view;
right-click to inspect
Figure 4-34 Sample Calendar by Week Views
TrackRecord User’s Guide
Viewing Data
65
Creating Your Default Calendar
The items displayed in a calendar are determined by the query run by
the Calendar view. Before setting up your default calendar, create a
query for the items that you want displayed. Refer to “Understanding
Queries” on page 29 for information about creating queries.
To configure your default calendar, perform the following procedure:
1
From the File menu, choose the New>Calendar option.
2
Click the Options button.
The Calendar Preferences Dialog Box (Figure 4-35) opens.
3
Tip Refer to Chapter 3,
“Retrieving Data” for
additional information on
queries.
Specify your calendar preferences:
Specifies calendar
display.
Turns time bar at
top of calendar on
or off.
Sets time slots
intervals and tick
marks on time bar.
Sets default type for
other time-dated
queries
Description of
calendar.
Specifies if empty
calendar slots are
shown.
Sets time range
displayed. Allows tasks
to be entered outside
established range.
Sets default type for
appointments.
Sets query to retrieve
information. Choose any
that scans for time or date
fields (default query
displays all incomplete
tasks and timed tasks due
each day).
Figure 4-35 Calendar Preferences Dialog Box
4
Click OK to display the Calendar view.
TrackRecord stores your Calendar view settings and uses them any
time you display a new calendar.
Adding Tasks to the Calendar
Note If the query specified in your Calendar Preference dialog does not
search for date and time fields, you will not be able to enter an
appointment in this way. The default calendar query uses appropriate
fields.
Perform the following procedure to add a task to a calendar:
66
Viewing Data
TrackRecord User’s Guide
1
Open your TrackRecord calendar by choosing Calendar from
the File>New menu. TrackRecord uses your default calendar
settings to display your current calendar.
2
From the File menu, choose the New>Calendar option to open
your Calendar view.
3
Click the point on the time bar representing the starting time of
the task or appointment, and drag across to the ending time.
Release your mouse button.
For example, if you are entering an appointment scheduled to start
at 9 AM and end at 10 AM, you would drag from the 9 to the 10 on
the time bar. The Timed Task form (Figure 4-36) opens.
Figure 4-36 Timed Task Form
4
Enter information about the appointment, such as a one-line
summary (which will appear in your calendar), in the form
fields.
TrackRecord fills in the starting and ending date and time fields for
your appointment automatically.
5
When you are finished, click the Save and Close button.
The new appointment appears on your calendar.
TrackRecord User’s Guide
Viewing Data
67
68
Viewing Data
TrackRecord User’s Guide
Chapter 5
Using TrackRecord’s WebServer
This chapter describes how to use the WebServer browser interface to
add, maintain, and display data items and reports in the TrackRecord
database. It includes the following sections:
⽧
Understanding WebServer — Overview of the TrackRecord
WebServer and instructions on logging in to and out of the
WebServer.
⽧
Exploring the WebServer Interface — Description of the
WebServer window.
⽧
Creating a New Item — Information on creating a new item.
⽧
Working with File Attachments — Instructions on attaching files
to a TrackRecord form, opening attached files, and deleting
attachments.
⽧
Opening an Outline Report — Explanation of how to open an
Outline Report in WebServer.
Understanding WebServer
TrackRecord’s WebServer allows you to access the TrackRecord database
through a Web browser, such as Microsoft Internet Explorer or
Netscape Navigator/Communicator.
Tip Refer to “WebServer
Administration” on
page 202 for
administrative
information.
TrackRecord User’s Guide
When you log in to TrackRecord through the WebServer, TrackRecord
accesses your user information in the database just as though you had
logged in through the TrackRecord Windows client. If you have set
preferences such as a Home Page or favorite reports through your
Windows client, those items will be maintained in the WebServer client
as well. The WebServer also recognizes your membership in Groups and
Share Groups and allows you to run the same reports you run through
the Windows client.
69
While using the WebServer, you can create new items, view and modify
existing items, and view existing Outline Reports. You cannot create
new queries, Outline Reports, or other reports.
Notes about the WebServer
The WebServer uses the same item form as the TrackRecord Windows
client, but has a few important differences.
Entering Information
You enter information just as you would in the Windows client with
these exceptions:
⽧
For any date fields in the web client, always enter date information
using the same date format as that used by the computer running
the WebServer. This information is displayed next to the Date field
label. For example, if the WebServer machine is configured to use
dates in the format dd/mm/yyyy, you should enter a date as 28/09/
2001, not 09/28/2001. To ensure that the correct format is used
when selecting dates, click the calendar button to specify dates
from a graphical calendar instead of entering a date with the
keyboard. Click the Calendar button to open the calendar and
double-click a date to select the day you want to enter. Note that
alphabetic characters are not supported in dates.
Note
The Calendar button only works with Microsoft Internet Explorer.
⽧
To update an existing TrackRecord item from the WebServer
interface, you must open an Outline Report that includes that item
and then click the item’s link.
⽧
Make sure that you do not have an ampersand (&), a quote sign, a
greater than sign (>), or a less than sign (<) in any of your
TrackRecord fields that are going to be displayed on the Web. If you
do, you will not be able to open up the Web page.
⽧
Do not use field names greater than 31 characters in length.
Outline Reports
When accessing an Outline Report through the WebServer, note the
following differences from Outline Reports in the Windows client.
70
Using TrackRecord’s WebServer
TrackRecord User’s Guide
⽧
You can open and close all headers at once with the Expand All
and Collapse All buttons in the Status Bar (Figure 5-3). Note that
Expand All may take a some time to complete, depending on the
contents of the headers.
⽧
If a report contains more than ten items in a header, when the
header is expanded the first ten items are displayed. Figure 5-1
illustrates how the arrows are used to display the returned items.
Number of Results
Shows Previous Shows All
Returned Items
10 Items
Shows Next 10
Items
Displays Previous Item Shows Next Item
Figure 5-1 Navigation Arrows for Viewing Returned Items
⽧
When you open a header, the report scrolls to position the open
header at the top of the Work Area.
⽧
If you click on a drop-down list that causes TrackRecord to run
rules, TrackRecord must access the database to run those rules. The
item will be partially saved when the database is accessed. Once the
item has been partially saved, clicking the Cancel button will
display a message that a version of the item has been saved and you
cannot cancel your changes. You must manually restore the values
that you want saved.
Entering and Exiting the WebServer
Note A non-admin user is prevented from a login to the WebServer if
they have not previously performed a login to the full TrackRecord client.
Logging In to WebServer
To log in to TrackRecord WebServer, perform the following procedure:
1
Run a Web browser such as Microsoft Internet Explorer or
Netscape Navigator.
2
Enter http://servername/trackrecord/welcome.html in the
Destination field of your Web browser and press Enter.
Your TrackRecord administrator can tell you what value to enter for
servername. The TrackRecord WebServer Login page (Figure 5-2)
opens.
TrackRecord User’s Guide
Using TrackRecord’s WebServer
71
Figure 5-2 TrackRecord WebServer Login Page
3
Enter your user name, password, and the name of your
TrackRecord database.
4
Click OK.
The TrackRecord WebServer main window (Figure 5-3) opens.
Logging Out of WebServer
To log out of TrackRecord, click the Logout link in the Control Area of
the WebServer window.
You are automatically logged off if you close the browser or access a
different URL. You should use this browser window exclusively for
TrackRecord tasks. Use another browser window to access other URLs.
Changing the Database Name Appearing on Login Screen
To change the database that appears on the login screen:
1
Select Run from the Start menu.
2
Type Regedit in the Open field. Click OK.
3
Navigate to the following path:
H_KEY_LOCALMACHINE>SOFTWARE>Compuware>TrackRecord.
72
4
Right-click on databaseDir.
5
Select Modify from the menu.
6
In the Edit String dialog box, change the value data from
Default to the name of your database.
Using TrackRecord’s WebServer
TrackRecord User’s Guide
Exploring the WebServer Interface
The WebServer window (Figure 5-3) is your Web interface to the
TrackRecord database. You use this window to create and modify items
and view reports. The WebServer window consists of three areas that
are explained in the following sections:
⽧
⽧
⽧
“Control Area” on page 73
“Status Bar” on page 74
“Work Area” on page 74
Control Area
Status Bar
Work Area
Figure 5-3 TrackRecord WebServer Main Window. The links are shortcuts to your
most common tasks. The links on your screen may differ from the illustration, since
they depend on your user settings.
Control Area
The two drop-down menus at the top right of this area allow you to
choose to create a new item or to open a report. The available links
include:
TrackRecord User’s Guide
⽧
The first link (New Defect by default) allows you to create a new
item of your favorite type. If your favorite type is set to Task, for
example, this link will be New Task.
⽧
Shortcut to your Home Page report if you or your administrator has
specified a Home Page in TrackRecord. If a Home Page has not been
specified, this link is not displayed.
⽧
For administrators, the Manage option is available. This link is not
displayed if you are not logged on as an Administrator.
⽧
The Logout link allows you to log out of the WebServer.
⽧
The About link displays the TrackRecord WebServer version
number, the name of your database and your username.
Using TrackRecord’s WebServer
73
⽧
The Help link displays information about using the WebServer.
Status Bar
The Status bar may contain a status message, such as an error or a
message indicating communication with the server, or a series of dots
that are displayed to indicate that the WebServer is performing an
action. It may also contain information about the item or report you
are currently viewing, including the title of the page and buttons that
operate on the current item or report.
The contents of this area vary. For example, when you are working on a
Defect, the status bar contains a Cancel button and a Save button.
Work Area
The Work Area displays the selected item or report. When you first
access the WebServer, your TrackRecord Home Page is displayed in the
work area by default. If you have not set a Home Page, the work area
will be empty.
WebServer Window Notes
Note the following when using the WebServer window.
⽧
TrackRecord spawns a separate browser window in which to run the
Web application. This window should be used exclusively for
running TrackRecord. If you use this window to access another URL
or if you close the window, your TrackRecord session will be
terminated.
⽧
The context menu (right-click menu) Open Item in New Window
option is not supported. Although a window will be opened, it will
not be functional. To display two items simultaneously, open
another browser window, enter the URL for the welcome.html page,
and log in to TrackRecord from this window.
Creating a New Item
You can use the WebServer interface to create new TrackRecord items.
Caution: Compuware recommends that you review the “Notes about
the WebServer” on page 70 before beginning this procedure.
To create a new TrackRecord item, execute the following procedure:
74
Using TrackRecord’s WebServer
TrackRecord User’s Guide
1
Open the TrackRecord WebServer main window as described in
“Entering and Exiting the WebServer” on page 71.
2
From the New drop-down menu, select the type of item you
want to create.
Alternatively, click the first link (New Defect by default) to create
an item of that type.
The Work Area displays a form allowing you to enter the new item.
The Status Bar displays buttons appropriate for this item, such as
Cancel and Save.
Figure 5-4 New Defect Form in WebServer Window
3
Complete the fields in the form.
Required fields are identified with red field labels.
4
When you are finished, click the Save or Cancel button on the
Status Bar.
Working with File Attachments
Note This function will not work unless you are running Microsoft
Internet Explorer and your web server is Microsoft Internet Information
Server (IIS) 4.0 or higher.
TrackRecord’s WebServer client allows you to attach files, open
attached files, and delete attachments.
TrackRecord User’s Guide
Using TrackRecord’s WebServer
75
The TrackRecord limit on file attachment size per item is 12 MB,
chosen for reasonability and optimization sake. Note that all
attachments are compressed before storage, so their physical size in the
database can be notably smaller (similar to .zip compression ratios).
Furthermore, attachments are only read into memory when viewing or
extracting them, so the fact that the attachment table can become
rather large on disk has no affect on performance or memory usage.
Attaching a File to a TrackRecord Form
To attach a file, repeat steps 1- 3 of the procedure for “Creating a New
Item” on page 74. Add the following steps:
1
Click New next to the Attachment field.
Attachment field
Figure 5-5 Attaching File To Form
2
Enter the path to the file you wish to attach or click the Browse
button to locate the file.
3
Optionally, enter a description of the attached file.
4
Click the Save button to return to the browser.
5
When you are finished, click the Save button on the Status Bar.
Opening Attachments
To open an existing attached file, select the desired item and click the
Open link next to the Attachment field (Figure 5-5). Click on the
Attachment link to view the attached file in a new window. If you
make any changes to the description field, be sure to click the Save
76
Using TrackRecord’s WebServer
TrackRecord User’s Guide
button. If you have not made any changes to the attachment, click
Cancel to return to the browser.
Deleting Attachments
To delete an attached file from a TrackRecord form, select the item and
click the Delete link next to the Attachment field (Figure 5-5). Click the
Save button when you are finished.
Opening an Outline Report
Any Outline Report that is available to you through the Windows
client is also available through the WebServer.
Caution: Compuware recommends that you review the “Notes about
the WebServer” on page 70 before beginning this procedure.
Complete the following procedure to open an Outline Report:
1
Open the TrackRecord WebServer main window as described in
“Entering and Exiting the WebServer” on page 71.
2
Select the Outline Report you want to display from the Open
list.
If you have identified a Home Page report, you can open your
Home Page by clicking on the link in the Control Area.
3
Click a report header to show the items within that header.
You can click the Expand All button to display all items in the
report, or click Collapse All to hide items. You cannot collapse
individual headers.
TrackRecord User’s Guide
4
To update an item in the TrackRecord database, click its
reference in the Outline Report.
5
To close the report, open another item or report.
Using TrackRecord’s WebServer
77
78
Using TrackRecord’s WebServer
TrackRecord User’s Guide
Chapter 6
Working With Templates
This chapter explains TrackRecord templates and how to use them to
accelerate entering project data. It contains the following sections:
⽧
Understanding Templates — Overview of TrackRecord templates.
⽧
Creating Templates — Instructions on creating templates and
associating them with a header.
⽧
Setting the Default State — Instructions to set the default state
through the use of a template.
⽧
Associating Templates with a Header — Information on using
templates with Outline Reports.
Understanding Templates
Templates simplify data entry in TrackRecord by automatically entering
information in specified fields when you create a new item. This preset
format is used as a starting point for a particular application so that
format does not have to be recreated each time it is used. For example,
you can create a template for new Defect items that enters your name,
your computer configuration, and other information in the
appropriate fields in the Defect form. You can create templates for any
TrackRecord data type, such as Team Members, Tasks, or Defects.
Figure 6-6 illustrates how TrackRecord enters information in a Defect
form when it is first opened.
TrackRecord User’s Guide
79
Personal template
in)
supplies Reported By name
dm
yA d
b
re
Up
e
t
t
r)
n
e
(S
eE
Us e
bal
by
/Tim
e
o
l
t
p
a
G
tU
red
y D
te (Se
Ente
pla orted B
nal
me
i
m
o
T
s
e
/
p
r
T
e
Re
Dat
- Pe
ect
Def tifier
late rted By
p
n
m
o
e
Ide
Rep oe
ct T
tem ted By
D
efe ier
ct I
.
or
D
e
J
f
is
if
e
t
Rep oe
ops
wD r
Iden
e
Syn
N
J. D
ie
entif
d
is
I
s
op
ect
Syn
Proj tigo
is
r
ops
e
V
Syn
t
c
s
e
m
j
u
d
u
Pro enni
Stat viewe
e
ect
m
Mill
Unr ier
Proj enniu
s
u
t
f
i
a
ill
t
t
n
S
M
e
Id
us
Stat viewed
r
e
tifie
r
n
n
e
d
U
I
r
tifie
Iden
Project name supplied by
global template (Vertigo)...
red
Ente
me
i
T
/
e
Dat
...is overridden by Project
supplied by personal
template (Millennium)
Figure 6-6 Templates Prefill Information in Forms
⽧
The user’s personal Defect template specifies that “J. Doe” should
be automatically entered in the Reported By field on the Defect
form.
⽧
The global template specifies that the default status for new Defects
is “Unreviewed”. Note that the user’s personal template does not
specify a value for that field. TrackRecord automatically enters
“Unreviewed” in the Status field on the Defect form.
⽧
The global template specifies that the default project name for new
Defects is “Vertigo”. However, the user’s template, which overrides
the global template, specifies that new Defects should default to
“Millennium” for the project name, so TrackRecord enters
“Millennium” in the Project field on the Defect form.
Templates can be global, shared to selected work groups, or private.
Private templates are applied after global and shared templates and can
therefore be used to override global and shared templates.
Caution: When creating a template, be careful to leave blank any autoincrementing or auto-initialized fields. Otherwise, the contents of the
template will override the automatic value inserted by TrackRecord.
80
Working With Templates
TrackRecord User’s Guide
When Are Templates Applied?
TrackRecord applies templates in two circumstances: when you create
new items directly and when you create new items from within an
Outline Report.
When Creating Items Directly
When you create an item, TrackRecord automatically inserts values
from templates for that type of item. Templates use the principles of
data type inheritance determining how to populate fields (Refer to
“Understanding Data Type Inheritance” on page 7 for more
information). The values that will be inserted are determined by a
nested set of sources, which are applied in the following order:
1
Global template for a parent of the new item
2
Template for a parent of the new item shared with the user’s
workgroup(s)
3
User’s personal template for a parent of the new item
4
Global template for that type of item
5
Template for that type of item shared with the user’s workgroup(s)
6
User’s personal template for that type of item
When a value for a field is found at one level, TrackRecord ignores
values specified at lower levels. For example, if a user’s personal
template specifies “Colossus” as a project name and the global Defect
template specifies “Millennium,” TrackRecord uses “Colossus” because
it is a higher priority.
Templates and Items Created from an Outline Report
Templates provide a context-sensitive formula for items created in an
Outline Report section. When you use templates to create items from
within an Outline Report, you can specify as many templates as you
require to prefill the item’s fields.
For example, Figure 6-7 illustrates an Outline Report that lists Defects
by status (Unfixed bugs, Fixed bugs), with separate child headers for
each Defect priority (1, 2, 3) under each status header. If you add a
Defect template to the Unfixed bugs status header, the phrase Unfixed
bugs will automatically be inserted into the Status field when a new
Defect is created from within that header. You could then add a Defect
template to each child header under Unfixed bugs to insert the
appropriate value in the Defect Priority field.
TrackRecord User’s Guide
Working With Templates
81
A template attached to
the Unfixed bugs header
would insert a status of
Unfixed bugs into new
Defects
A template attached to
each Priority header
would insert a different
priority into new Defects
Figure 6-7 Adding Templates to Headers Simplifies Data Entry
When someone using this Outline Report wants to add a new Defect,
he or she would right-click the appropriate child header and choose
New Defect from the shortcut menu. TrackRecord would automatically
fill the Status field with the information supplied by the parent
header’s template and the Priority field with the information from the
child header’s template.
Templates associated with child headers override templates associated
with parent headers. For example, if the template linked to the parent
header inserts “Millennium” in the Project field of a new Defect and
the child header inserts “Vertigo,” TrackRecord would insert “Vertigo”
whenever a new Defect is created from within the child header.
Figure 6-8 illustrates how TrackRecord fills fields in a new item with
information supplied by templates attached to headers within an
Outline Report.
82
Working With Templates
TrackRecord User’s Guide
)
bal
Glo
)
(
d
r
e
re d
ter de
l)
e tEnHea Entered er (Sha
t
l
u
on a
im
T ren
e ea d
efa DateP/a
d r ( P e rs
e
im
D
r
T
l
e
/
H
al)
t
na
En de
nt
ate
By to
lob
d
)
erso ortedigned
y Do Pare te/Timent Hea Entereer (G
P
B
re d
d
e
s
d
t
rte ned t
Rteep As
Da Pare
ered r (Sha
ime Hea
t
o
pla
T
n
p
y
/
E
e
m
e
B
ig
R
la
to
e
at ild
on a
de
r
d
Te
Ass portedgned
tifieemp
tere r (Pers
y Dto Ch ate/Timld Hea
n
B
E
d
Re Assi
Iden T entifier plate
e
i
m eade ered
y D Ch
orte ned
Id
e/Ti
Tem ifier plate
RepAssig orted B ed to
Dat hild H me Ent
t em
n
sis
e
n
e
p
y
p
t
e
g
d
o
B
C
r
T
R As s i
is I
ie pla
d
o
e/Ti
Syn
ops
orte ned t y Dat
entifTem fier
te
d
p
I
e En
Syn
e
a
l
R
g
i
s
B
i
ssi
/Tim
ent Temp r
ed
e
ops
t
A
t
Id
t
r
n
a
o
c
y
e
e
e
S
D
is
lat
tifi
Rep tem
Proj
ops
By
ect
Iden T em p r
Syn
Proj
rted
ct I
e
psis
o
i
e
o
f
if
t
p
t
n
c
e
e
R
Sy
s Iden ew D
us
Proje
opsi
Stat
N
ect
ifier
Syn
t
n Status
e
Proj
n
t
e
s
p
c
O er
psi Id
s
Proje
yno
tatu
tifi
s
ect S
er S
j
i
u
f
o
t
i
Iden
sis
r
t
a
St
nop
iew s P
Iden
fier Unrev Statu
ect Sy
i
j
t
o
n
r
r
s P
Ide
tifie
tatu
t
Iden
ojec
er S
i
if
t
us Pr
t
a
t
Iden
rS
tifie
Iden
tus
ierSta n
if
t
n
Ide
Ope er
tifi
Iden
Unreviewed Status
Figure 6-8 Precedence of Templates From Within an Outline Report
Creating Templates
To create a new template, perform the following procedure:
1
From the File menu, choose the Manage>Templates option.
The Manage Templates Dialog Box (Figure 6-9) opens.
Figure 6-9 Manage Templates Dialog Box
TrackRecord User’s Guide
Working With Templates
83
2
Click the New button to display the Choose a Type Dialog Box.
3
Select the type of item for which you want to create a template
and click the New button.
An Item form (Figure 6-10) for the selected type opens. The
Identifier and Summary fields display a blue key icon beside the
label to signify that these fields are not part of the template.
Blue key
indicates field
identifies or
describes the
template instead
of establishing
default
information for a
field in a new
item
Figure 6-10 Template Form for Build Item
4
Enter the following information:
〫
Description for this template in the Summary field. The
Summary field is used to identify the template in the Manage
Templates screen (that is, the Summary becomes the template
name).
Information in the fields you want the template to prefill.
Click the Options button to open the Template Options Dialog
Box (Figure 6-11).
〫
5
Figure 6-11 Template Options Dialog Box
6
Optionally, specify whether you want to share this template
with other users.
〫
84
Working With Templates
Click the Sharing button to open the Sharing Dialog Box
(Figure 6-12). Click the Share To button and then click the
checkbox next to each group with which you want to share the
template.
TrackRecord User’s Guide
Template is shared with
Team Members in the
Colossus and Millennium
workgroups but not Team
Members in the Accounting workgroup.
Figure 6-12 Sharing Dialog Box
〫
If you have opened the Sharing Dialog Box, click OK to return
to the Template Options Dialog Box.
〫
If you want to use this template whenever you open a new item
of this type, click the Apply This Template to New Items
checkbox.
When you are finished, click OK to return to the template
form.
If you are finished, click Save and Close.
〫
7
Setting the Default State
To set the default state through the use of a template, perform the
following steps:
1
Select File>Manage>Templates.
The Manage Templates dialog opens. If necessary, use the Show
drop down menu to view a subset of templates.
2
If an appropriate template already exists, select it and click Edit
to modify.
If an appropriate template does not exists, click New and click the
type.
3
In the Summary field, enter a descriptive name for this
template.
This name will identify this template in the Manage Templates
dialog.
4
TrackRecord User’s Guide
In the Status field, choose a default value for Status, such as
Unreviewed or Open.
Working With Templates
85
5
Click Options to open the Template Options dialog.
6
Make sure the Apply This Template to All New Items box is
checked.
7
Click the Sharing button and check the Share to All option.
Click OK.
8
When all template items have been set, click Save and Close.
When a user creates a new item of this type, the initial status will be
set.
Associating Templates with a Header
To associate a template with an Outline Report header, complete the
following procedure:
1
Open the Outline Report to which you want to link a template.
2
Right-click the header to which you want to add a template
and choose Set Templates.
The New Items tab on the Header Properties Dialog Box (Figure 613) opens.
Figure 6-13 Header Properties Dialog Box – New Items Tab
3
Use the New Item Type controls to specify the item types that
you want to be able to add by right-clicking the header.
〫
86
Working With Templates
Click the Of type option and choose the data type from the list
on the right.
TrackRecord User’s Guide
To open the same types from this header as you can from the
parent header, click the Of type <type>, as specified in the
parent header button.
Identify the templates you want to use when creating new
items from within the selected header.
〫
4
Use the Type list to select the type of item for which you want to
create templates. When TrackRecord displays the list of templates
applicable to the type you select in the Available templates list,
select the one you want to use and click the Add> button.
You can use more than one template when you create items from
within an Outline Report header. For example, construct one
template to insert your name and a second template to insert a
project name. This lets you reuse the first template when you set up
templates for other headers in the Outline Report.
When you create more than one template for an Outline Report
header, information from the templates at the top of the list is used
before information from lower templates. For example, if the first
template in the list specified a project name of “Colossus” and a
lower template specified a project name of “Millennium,”
TrackRecord would use “Colossus” when creating a new item.
5
TrackRecord User’s Guide
When you are finished, click OK.
Working With Templates
87
88
Working With Templates
TrackRecord User’s Guide
Chapter 7
Customizing User Options
After you become familiar with TrackRecord, you will probably want to
customize your user options to suit your style of work. TrackRecord
user preferences fall into three categories:
⽧
Configuring General Options — Configure your system to control
how TrackRecord behaves at startup, database-polling frequency,
and how it interacts with DevPartner tools.
⽧
Identifying Favorite Reports and Home Pages — Information on
adding reports to a favorites menu and changing a home page.
⽧
Specifying Favorite Data Types — Simplify data entry by setting
up a list of your favorite data types.
⽧
Customizing Outline Reports — Customize Outline Report’s
default typeface and size and what header functionality.
Configuring General Options
The General tab on the TrackRecord Options Dialog Box controls how
TrackRecord behaves at startup, how frequently it polls its database,
and how it interacts with DevPartner tools. To configure general
options, execute the following procedure:
1
From the Tools menu, choose TrackRecord Options.
The TrackRecord Options Dialog Box (Figure 7-1) opens.
TrackRecord User’s Guide
89
Figure 7-1 TrackRecord Options Dialog Box – General Tab
2
On the General tab, specify what TrackRecord should do when
you open a new session.
〫
To preserve your window layout from one session to the next,
click Open the windows that were open at the end of the
last session.
To display your Home Page at the start of a session, click Open
the current Home Page.
If you want to log in to TrackRecord without entering your user
name and password, click Automatically log in at startup.
〫
3
If you activate this option, whenever you start TrackRecord you will
be automatically logged in and, since you will not be prompted for
a database name, you will always access the same database. Anyone
running TrackRecord on your computer will automatically be
logged in to the last TrackRecord account and database that you
used from TrackRecord or from one of the integrated tools.
4
Use the Check the Database for Changes slider to specify how
frequently TrackRecord should poll its database for changes.
Polling the database frequently ensures that TrackRecord is working
with current information but may slow other operations on your
computer. If your network link is slow or if you are using Outline
Reports that are not likely to change frequently, you may want to
check the database less often.
90
5
If you are using the DevPartner tools and want TrackRecord to
record information from DevPartner tools automatically, click
Automatically Submit Sessions from DevPartner Tools.
6
Click OK.
Customizing User Options
TrackRecord User’s Guide
Identifying Favorite Reports and Home Pages
Favorite Reports are reports or views that you use frequently.
Identifying a view or report as a Favorite Report lets you open it from
the Favorites menu instead of through the File>Open menu.
A Home Page is a report that opens automatically when you start
TrackRecord, and can be accessed quickly through the Home Page
button on the Toolbar. If you are using the WebServer browser
interface, your Home Page is accessible through a button in the control
area.
Project administrators can create one or more favorite views for new
users during TrackRecord setup and can set default Home Pages. You
can modify these settings.
Adding a Report To Your Favorites Menu
1
Open the report or view you want to identify as a favorite.
2
With the Report dialog active, choose Add to Favorites from the
Favorites menu.
The title of your report appears on the Favorites menu.
Changing Your Home Page
1
Open the report or view you want to identify as your Home
Page.
2
With the Report dialog active, from the Favorites menu select
the Set as Home Page option.
Specifying Favorite Data Types
TrackRecord lets you create a list of your favorite data types to simplify
data entry. It controls which data types appear in the File>New
submenu, in the New list on the Toolbar, and in the Search Types list.
The list of your favorite types appears in three places in TrackRecord:
⽧
⽧
TrackRecord User’s Guide
When you choose New from the File menu, your list of favorite
types appears at the top of the resulting submenu.
When you use the New Item list on the Toolbar, your list of
favorite types appears at the top of the resulting list.
Customizing User Options
91
⽧
Tip Do not confuse
Favorite Data Types with
the Favorites menu,
which lets you save
shortcuts to frequently
used views and reports.
For information on the
Favorites menu, refer to
“Identifying Favorite
Reports and Home
Pages” on page 91.
When you use the Search Types list, your list of favorite types lets
you select a specific type to search.
Perform the following procedure to identify a data type as a favorite:
1
From the Tools menu, choose TrackRecord Options.
2
When the TrackRecord Options Dialog Box opens, click the
Favorite Types tab.
The Favorite Types panel (Figure 7-2) appears.
Figure 7-2 TrackRecord Options Dialog Box – Favorite Types Tab
3
Identify the data types you want to appear in your Favorite
Types list.
To use the default list of favorite data types, click Use the types
defined by the TrackRecord administrator.
〫
To customize your favorite types list, click Use these types,
select each data type you want in your list from the list on the
left, and click Add >. To remove an entry from your list of
favorite types, select its name in the list on the right and click
<Remove.
Specify the order for favorite types by dragging entries in the
list on the right up and down.
〫
4
The first entry in the Favorite Types list appears as the label for
New Item on the Toolbar.
5
When you are finished, click OK.
Customizing Outline Reports
The Outline Reports tab on the TrackRecord Options Dialog Box
controls the default typeface and size for new Outline Reports and
what headers in a report do when you double-click them. You can
92
Customizing User Options
TrackRecord User’s Guide
override these default settings for specific reports or for specific headers
within a report. If you are new to TrackRecord, read “Using Outline
Reports” on page 39 before customizing the Reports.
1
From the Tools menu, choose TrackRecord Options.
When the TrackRecord Options Dialog Box opens, click the
Outline Reports tab. The Outline Reports panel (Figure 7-3)
appears.
Figure 7-3 TrackRecord Options Dialog Box – Outline Reports Tab
2
Tip You can use different
typefaces and styles for
headers and items, but
the header font and the
item font must use the
same type size. Resetting
the size for one
automatically changes
the size for the other.
〫
Click the Change Font button to the right of the font sample.
When the Font Dialog Box opens, select the typeface, type
style, and size you want TrackRecord items to use.
Specify what you want TrackRecord to do when you doubleclick an Outline Report header.
〫
3
Select Expand and collapse section if you want TrackRecord to
display and hide the entries under a header when you doubleclick it.
〫
Select Open Header Properties if you want TrackRecord to
display the property form for a header when you double-click
it.
〫
Select Open Query if you want TrackRecord to display the
query associated with a header when you double-click it.
Click OK.
〫
4
TrackRecord User’s Guide
To change the font used to display report headers or items in an
Outline Report:
Customizing User Options
93
94
Customizing User Options
TrackRecord User’s Guide
Chapter 8
Integrating TrackRecord with
Other Applications
This chapter describes how to integrate TrackRecord with other
applications. It includes the following sections:
⽧
Using TrackRecord with Text Editors — Instructions on
embedding an Outline Report in a text document.
⽧
Integrating TrackRecord with Graphics Applications —
Description of the procedure for placing a TrackRecord graph into
another application.
⽧
Synchronizing TrackRecord with Microsoft Outlook —
Information for importing TrackRecord task items into Outlook
and synchronizing TrackRecord and Outlook to keep your items
up-to-date in both applications.
⽧
Connecting TrackRecord to Microsoft Project — Overview of
using TrackRecord with Microsoft Project and procedures for
installing Project macros.
⽧
Utilizing TrackRecord with Version Control Systems —
Information on associating TrackRecord with VCS, checking files in
and out, synchronizing projects, and troubleshooting.
⽧
Integrating TrackRecord With Compuware Products —
Overview of integration between TrackRecord and QACenter,
DevPartner Studio, EcoSYSTEMS, and Abend-AID.
Using TrackRecord with Text Editors
TrackRecord makes it easy to copy data from Outline Reports into other
applications, including text editors, spreadsheet programs, and
electronic mail applications. When you paste data from an Outline
Report into an application that supports Rich Text Format (RTF), such
TrackRecord User’s Guide
95
as Microsoft Word or Microsoft Outlook, the report’s columns, fonts,
and format are preserved in the new document.
Tip Information copied
from TrackRecord to
other applications is
embedded statically. It
will not change when the
data in TrackRecord
changes.
Embedding an Outline Report in a Text Document
Perform the following procedure to embed an Outline Report in a text
document:
1
Select the headers or items you want to copy and choose Copy
from the Edit menu to copy the Outline Report data to the
Windows Clipboard.
2
Switch to the document window for your target application
and choose Paste from the Edit menu.
If you copied an Outline Report header, the header you selected, its
child headers, and any sibling headers below the one you copied
appear in the target document window. If you selected an Outline
Report item, that item is pasted to the target document.
3
Optionally, update the style information for pasted data to
make it conform to your document standards.
TrackRecord information pasted into other applications uses two
styles: TR Header and TR Item. After you have pasted information
from TrackRecord into a text editor, you can quickly adjust the
typefaces, type sizes, and other properties of the embedded
information by changing settings for these styles.
Integrating TrackRecord with Graphics Applications
You can copy graphs generated by TrackRecord into graphics
applications, such as Microsoft Paint. After you paste a TrackRecord
graph, you can modify the graph using the application’s tools.
Additionally, you can paste graphs generated by TrackRecord into text
editors, spreadsheet programs, and electronic mail applications that
can accept bitmap images. For example, you can paste a bar graph from
TrackRecord into Microsoft Word, Microsoft Excel, or Microsoft
Outlook.
Tip Graphs copied from
TrackRecord to other
applications will not
change when the data in
TrackRecord changes.
Pasting a TrackRecord Graph into Another Application
To paste a TrackRecord graph into another application, perform the
following procedure:
1
Generate the graph from the appropriate Outline Report.
Use the TrackRecord graph controls to format the graph. Refer to
“Working with Graphs” on page 53 for information on formatting
TrackRecord graphs.
96
Integrating TrackRecord with Other Applications
TrackRecord User’s Guide
2
Choose Copy from the Edit menu to copy the TrackRecord
graph to the Windows Clipboard.
3
Switch to the window for your target application and choose
Paste from the Edit menu.
4
Optionally, if the target application lets you edit bitmap
images, change the colors or layout of the TrackRecord graph.
Synchronizing TrackRecord with Microsoft Outlook
Those who use Microsoft Outlook can import TrackRecord task items
into Outlook. It then displays TrackRecord task items as Outlook tasks.
You can check off a task when you complete it and mark them as
completed in TrackRecord. You can synchronize the applications
periodically to keep your items up-to-date in both applications. Tasks
marked as completed in either application get removed from Outlook
during the next synchronization (if you selected that option).
The following details how TrackRecord tasks appear in Outlook tasks:
Outlook Field
Contents
Subject
Default value of item (Identifier and Summary by default)
Due Date
Date Due field
Priority
Mapped from Priority field
Body
Text of the format:
“Project: <Project> <Description>” where Project and Description are taken from the corresponding TrackRecord fields
Category
Set to the text TrackRecord
Note Three additional user-defined fields are added to the Outlook task
item, TRIdentifier, Project, and Database, to maintain the link with
TrackRecord. These should not be edited.
Outlook 2000 users will find a TrackRecord menu on the Outlook
menu bar after a TrackRecord installation. Outlook 97/98 users must
run a separate program called TROutlookSync.Exe to set
synchronization options and to synchronize tasks.
TrackRecord User’s Guide
Integrating TrackRecord with Other Applications
97
TrackRecord and Outlook 97/98
1
Double-click TROutlookSync.Exe in your TrackRecord directory.
If the TrackRecord login screen appears, enter your user name and
password. Click OK.
2
Click Options on the TrackRecord Task Synchronization Dialog
Box.
Note You can also use the “/sync” command line parameter to
automatically begin a synchronization upon launching the application. If
this is coupled with a “/silent” parameter, no user interface will be shown
and the synchronization will simply occur. For example: C:\Program
Files\Compuware\TrackRecord\TROutlookSync.exe/sync.
Tip If you want
synchronization to occur
automatically, you can
use a feature like the
Microsoft Scheduler to
automatically launch the
TrackRecord Task
Synchronization program
periodically, with the “/
synch /silent” arguments
to prevent dialog boxes
from displaying.
3
On the Synchronization Options dialog box (Figure 8-1), set or
change options as necessary:
Note If the selected query returns non-task items such as Defects or
Projects, they will not be imported into Outlook; only tasks (or items that
inherit from tasks) can be imported.
Figure 8-1 Synchronization Options with Microsoft Outlook
〫
98
Select a TrackRecord query for retrieving task items by clicking
the drop-down list arrow and choosing a query from the
supplied list. By default, TrackRecord will search for a query
named My Outlook Tasks in the current database and use that to
determine which items should be synchronized. If that query is
not found, it will scan all task items and synchronize any tasks
that are assigned to the current user and not marked as
Integrating TrackRecord with Other Applications
TrackRecord User’s Guide
complete. Changing the query only affects what new items will
be imported/synchronized with Outlook. Any items that have
already been imported into Outlook will remain, and will
continue to be synchronized with TrackRecord.
〫
Choose whether to remove completed tasks from Outlook by
checking or unchecking the box. By default, once an item is
marked as complete, it is removed. When this option is
unchecked, completed items will not be removed and will
continue to be synchronized.
Note You cannot mark tasks as incomplete from within Outlook. If you
mark a completed task as incomplete in Outlook, it will be remarked as
complete next time you synchronize.
〫
Choose whether to exclude TrackRecord tasks already marked
as complete by checking or unchecking the box. By default,
completed TrackRecord tasks in the query are not added to
Outlook. When this option is unchecked, even the completed
tasks will be added.
Note If the Remove Completed Items option is checked with the Exclude
Completed tasks is unchecked, all the completed tasks will be added to the
Outlook Tasks folder and then moved to the Deleted Items folder.
〫
Select how to map TrackRecord Priorities to Outlook by doubleclicking an entry in the Outlook Importance column and
selecting High, Normal, or Low. This control allows you to map
each TrackRecord priority to an Outlook priority. If a priority
has not been mapped in TrackRecord, or has no priority, it will
be set to Normal in Outlook.
Click OK when you are finished.
4
Click the Synchronize button.
5
Click Exit when finished.
TrackRecord and Outlook 2000
If you have Outlook 2000, the TrackRecord client installation process
will install an add-in that allows you to access TrackRecord Task
Synchronization. From the Outlook Tools>TrackRecord menu, there
will be three menu options: Synchronize, Edit Options, and Change
TrackRecord User’s Guide
Integrating TrackRecord with Other Applications
99
Login. To synchronize using Outlook 2000, perform the following
procedure:
1
In Outlook, select Tools>TrackRecord>Options.
The Synchronization Options dialog box (Figure 8-1) appears.
2
Set or change options as necessary.
See Step 3 on page 98 for more information regarding setting
options.
3
Synchronize tasks by selecting Tools>TrackRecord>Synchronize
Tasks.
The TrackRecord Task Synchronization Status dialog appears.
4
Close the dialog when the synchronization is complete.
Connecting TrackRecord to Microsoft Project
Integrate TrackRecord with Microsoft Project to let managers and
development Team Member exchange up-to-date project status
information quickly and easily and link development schedules to
items in the TrackRecord database. Periodically synchronizing Project
information and TrackRecord information lets you update information
about project dates and milestones, status and priorities of tasks, and
the availability of project Team Member.
Managers can track actual schedules against baseline schedules easily;
each time a Team Member marks a task as complete in TrackRecord, its
status and dates are adjusted in the project plan in Project. Similarly, a
project Team Member can use TrackRecord to obtain a list of current
tasks (which may include tasks defined in TrackRecord or Project).
When a Team Member completes an assignment, TrackRecord
automatically updates the project database and passes the new
assignment information to Project.
Integration Overview
The following provides an overview of the process of integrating
TrackRecord and Microsoft Project information. Each item is described
fully in the following sections. These tasks are generally performed by a
project manager and should be done in the following order.
100
Integrating TrackRecord with Other Applications
TrackRecord User’s Guide
Install the Microsoft Project and
TrackRecord integration macros. See
“Installing the Microsoft Project Macros”
on page 101.
Perform initial project setup to connect a
Microsoft Project-based schedule with a
TrackRecord project. See “Performing
Initial Project Setup” on page 102.
Map Project and TrackRecord priorities.
See “Mapping TrackRecord Priorities to
Project Priorities” on page 104.
Synchronize applications. TrackRecord
creates a new Project Task item for each
task and synchronizes status. See
“Synchronizing a Project in TrackRecord
with Microsoft Project” on page 105.
Synchronize the applications periodically, whenever you want to
update project information. Refer to “What Happens During
Synchronization?” on page 106 for an explanation of how fields are
synchronized.
Installing the Microsoft Project Macros
To integrate TrackRecord and Microsoft Project information, begin by
installing the TrackRecord macros in Microsoft Project. A new
TrackRecord menu will be added to the Microsoft Project toolbar.
Tip You can enable two
TrackRecord toolbar
buttons, one for
synchronization and the
other for opening a task
item, by right-clicking on
the Microsoft Project
toolbar and clicking on
TrackRecord.
TrackRecord User’s Guide
1
Double-click the TrackRecord Integration.mpt file to open
Microsoft Project.
By default, the TrackRecord Integration.mpt file is installed in the
x:\Program Files\Compuware\TrackRecord folder where x is the
drive where Windows resides on your computer.
2
If the Microsoft Project Macro warning dialog (Figure 8-2)
opens, click Enable Macros.
This dialog will not display if you have cleared the Always ask
before opening projects with macros checkbox.
Integrating TrackRecord with Other Applications 101
Figure 8-2 Microsoft Project Dialog Box
3
Click OK.
If the Office Assistant is open, TrackRecord displays status and error
messages through the Office Assistant.
TrackRecord Menu
The integration macros create an additional TrackRecord menu in
Microsoft Project that contains three options:
⽧
⽧
⽧
Synchronize Project Now – Causes TrackRecord and Microsoft
Project to exchange project information. Refer to Table 8-1 for
information on what types of information are transferred during
synchronization.
Open Current Item in TrackRecord – Selecting an item, such as a
task, milestone, or resource, in Microsoft Project and choosing this
option causes TrackRecord to run and open the selected item.
Options – Opens a new dialog that lets you change the user ID,
database, project, or priority map.
Performing Initial Project Setup
Before TrackRecord and Microsoft Project can exchange project
information, you must log in to TrackRecord from within Project and
identify the database and TrackRecord project associated with the
current schedule.
1
Open the Microsoft Project project file you want to use.
2
From the TrackRecord menu, choose Options.
The TrackRecord Options dialog box (Figure 8-3) opens.
102
Integrating TrackRecord with Other Applications
TrackRecord User’s Guide
Figure 8-3 TrackRecord Options Dialog Box
3
Enter your TrackRecord login name in the User field and the
database you want TrackRecord to use in the Database field.
4
To specify a project, do one of the following:
〫
To use an existing project, click the drop-down list in the
Project field.
To create a new TrackRecord project, click the Create New
Project button.
On the TrackRecord Login Dialog Box (Figure 8-4), enter your
login password in the Password field and click OK.
〫
5
Note that TrackRecord passwords are case-sensitive.
Figure 8-4 TrackRecord Login Dialog Box
6
TrackRecord User’s Guide
Perform one of the following:
〫
If you are using an existing project, select it from the Project list
on the Options Dialog Box (Figure 8-3).
〫
If you are creating a new project, click the checkbox beside the
Team Members you wish to assign to the new TrackRecord
project (Figure 8-5). Click OK when you are finished.
Integrating TrackRecord with Other Applications 103
Figure 8-5 TrackRecord Team Member Selection Dialog Box
7
Click OK.
Mapping TrackRecord Priorities to Project Priorities
The priority assigned to a task indicates the task’s importance within a
project. When schedules grow tight, tasks with low priorities are
typically deferred or eliminated. TrackRecord and Project have different
default priority settings. Before you can use resource leveling in Project,
you must map the priority levels in TrackRecord to the corresponding
priority levels in Project. To map priorities, perform the following
procedure:
1
Run Microsoft Project.
2
Open a project you have previously configured for TrackRecord
and Microsoft Project integration.
3
Open the Priorities tab by selecting Options from the
TrackRecord menu in Project.
When the TrackRecord Options Dialog Box opens, click the
Priorities tab.
104
Integrating TrackRecord with Other Applications
TrackRecord User’s Guide
MS Project
priority settings
TrackRecord
priority settings
Figure 8-6 TrackRecord Options Dialog Box – Priorities Tab. If your TrackRecord
administrator has modified the default priorities in TrackRecord, your Priorities tab
may differ from the one shown.
4
Click Edit to change any mapping assignments (Figure 8-6).
The Priority Mapping dialog appears (Figure 8-7)
Figure 8-7 Priority Mapping Dialog Box
In this example, the TrackRecord priority “1 – Critical” is mapped
to the Project priority “1000 - 1000”. Select an item from the dropdown list to change the mappings. Click OK when your changes
are complete.
5
Click OK to close the dialog.
Synchronizing a Project in TrackRecord with Microsoft Project
Note Tasks are not synchronized if a Team Member has not been
assigned to the task. If you have not assigned a TrackRecord Team Member
for each task in Microsoft Project, do so now. Refer to “Performing Initial
Project Setup” on page 102 for complete instructions.
TrackRecord User’s Guide
Integrating TrackRecord with Other Applications 105
What Happens During Synchronization?
When you choose Synchronize Project Now, TrackRecord and
Microsoft Project exchange information about Team Members,
Projects, Tasks, and Milestones in the project.
TrackRecord adds a Microsoft Project section to the bottom of the Task
item form. Checking the Auto Update Summary field in the Microsoft
Project section of a Task item form will cause the Summary field to be
read-only in TrackRecord, allowing it to be changed through Project
only. Unchecking this option allows you to change the Summary in
TrackRecord, but your changes will not be reflected in Microsoft
Project.
Table 8-1 identifies what fields in TrackRecord are overwritten by
information from Microsoft Project and what fields in Microsoft
Project are overwritten by information from TrackRecord.
106
Integrating TrackRecord with Other Applications
TrackRecord User’s Guide
Table 8-1 TrackRecord-Microsoft Project Synchronization
TR Item
TrackRecord
Field
Synch
MS Project Project
Direction Item
Field
Comment
Team
Member
Name
-->
Project members
are defined in
TrackRecord and
sent to MS
Project.
Project
Task
Milestone
Name
Initials (abbre- -->
viation)
Initials
Email Address -->
Email
Name
Project
<-(new items
only)
Name
Description
<-(new items
only)
Notes
Team Members
-->
(new or
changed)
Resources
Team Members
are defined in
TrackRecord.
Summary
<--
Name
Description
<--
Notes
Assigned To
<--
Resource
Priority
<--
Priority
(mapped)
Tasks are created
in MS Project.
Completion status
is captured in
TrackRecord.
Date Due
<--
Finish
(baseline)
Date Completed
-->
Finish
(actual)
Completed
-->
% Complete
Identifier
(autogenerated)
-->
WBS field
Name
<--
Description
<--
Project
<--
Projected End <-Date
TrackRecord User’s Guide
Resource
Task
Task
Project name and
description can
be defined in
Project and sent
to TrackRecord on
first synchronization.
Name
Milestones and
planned dates are
Notes
defined in MS
Associated Project. Actual
dates are capProject
tured in TrackFinish
Record.
(baseline)
Start Date
-->
Project
Start date
Actual End
Date
-->
Finish
(actual)
Integrating TrackRecord with Other Applications 107
Performing Project Synchronization
1
Open the Microsoft Project file for the project you want to
synchronize.
2
From the TrackRecord menu in Project, choose Synchronize
Project Now.
If you have not already done so, you will be prompted to login into
the TrackRecord database.
The TrackRecord Synchronization Dialog Box indicates the progress
as TrackRecord and Project exchange information.
3
When the TrackRecord Synchronization Complete Dialog Box
appears, click OK.
Utilizing TrackRecord with Version Control Systems
Version control system (VCS) applications help you manage projects by
controlling and tracking source and other project files. You can
integrate TrackRecord with VCS applications, such as Microsoft Visual
SourceSafe, Merant PVCS, and MKS Source Integrity. Integrating
TrackRecord with a version control system allows you to check files in
and out from within TrackRecord, open read-only versions of source
files, and synchronize releases with VCS labels.
When you integrate TrackRecord with a VCS application, each tool
tracks parallel sets of changes to your software projects: TrackRecord
tracks change requests and their resolution, such as defects that have
been fixed or features that have been added, and your VCS application
tracks changes to files. By integrating the tools, you can identify which
source file changes were associated with specific change requests.
For example, a developer fixing a defect checks out source files, makes
changes to them, and checks them in again. If a problem with the
defect fix is subsequently identified, you can use the VCS files to
identify and roll back the files that were modified, making it easier to
resolve the problem.
For each file, release, and project in a VCS application, TrackRecord
maintains a corresponding item in the database. This item references
the source file. In most situations, the program creates items
automatically when you check files in or out. However, you must
update information for milestones, projects, and for file items that
already exist in TrackRecord.
108
Integrating TrackRecord with Other Applications
TrackRecord User’s Guide
Associating a TrackRecord Project with a VCS Project
To associate a TrackRecord project with a VCS project, perform the
following procedure:
1
Open a new or existing project in TrackRecord.
To open a new project, from the File menu choose New>Other.
From the Choose a Type Dialog Box, select Project and click
New.
〫
To open an existing project, from the File menu choose
Open>Other. From the Item Browser, select Project and
double-click the appropriate project name in the Items list.
When the Project form opens, click the button beside the VCS
Project Name field (Figure 8-8).
〫
2
Click the VCS
button to log in
to your version
control system.
Figure 8-8 Browse Project Button on Project Form. Depending on the version
control system you are using, your dialog may differ from those shown.
3
On the login Dialog Box (Figure 8-9):
Figure 8-9 Version Control System Login Dialog Box
〫
Enter your user name and password in the Username and
Password fields.
〫
Use the Database field to specify the version control database
you want to use.
If you know the name of the database you want to use, enter it
in the Database field. If you are not sure what name to enter,
TrackRecord User’s Guide
Integrating TrackRecord with Other Applications 109
click the Browse button, select the appropriate database from
the Open Database Dialog Box (Figure 8-10), and click Open.
Figure 8-10 Open Database Dialog Box
Click OK.
On the Create Local Project from SourceSafe dialog, specify the
VCS project to use, or enter the name of a new project.
〫
4
Figure 8-11 Choose Local Project From SourceSafe Dialog Box
5
Specify where you want to store the new project.
Enter the name of the folder where you want to store the VCS
project or click the Browse button (Figure 8-12) to select the folder
you want to use.
110
Integrating TrackRecord with Other Applications
TrackRecord User’s Guide
Figure 8-12 Browse Folder Dialog Box
6
Click OK.
The name of the project you select appears in the VCS Project
Name field in the Project form.
If you do not already have Source File and Data File items that you
want to connect with your VCS files, TrackRecord will automatically
create these items the first time you check the file in or out from within
TrackRecord. When the items are created, you will see a status message,
and have the opportunity to enter a description of the new file.
Checking Files In and Out
You typically check source files in and out of a VCS system in the
course of working on a specific TrackRecord Defect or Feature. When
you check files in and out of a VCS system from within TrackRecord,
TrackRecord automatically records the file name and current VCS
version number in the item’s change history. To check a file in or out
from TrackRecord, execute the following steps:
1
Open the appropriate Defect or Feature item.
2
Verify that the project identified in the Project field is
associated with a project in your VCS application.
3
Choose Check Out or Check In from TrackRecord’s Edit>Source
Control menu.
You will be presented with a list of files from your VCS project,
which can be checked in or out as appropriate.
When the file(s) are checked in, TrackRecord copies the descriptive
comments from the Resolution Details field to the VCS Comment
field. This comment may then be further modified as desired.
TrackRecord User’s Guide
Integrating TrackRecord with Other Applications 111
Synchronizing TrackRecord and VCS Projects
Labels are user-defined identifiers used by VCS applications to
represent a specific version of a project or file. When you label a
project, all the files in that project inherit the label. For example, if you
assign a label of “Beta 1” to a project, you can retrieve the appropriate
version of files within that project by using the project label.
Connecting your TrackRecord releases with your VCS releases works
the same way as connections to projects and file names, with one
exception: you can create a new VCS label from within TrackRecord, at
the same time you create a TrackRecord release.
Tip If TrackRecord cannot
find the VCS project,
verify that the Milestone
item is contained in a
Project item that contains
a valid VCS Project field.
To add the release to the
Project, open the Project
item, scroll to the
Milestones field, and click
Add Item. After the
Milestone item links to
the Project item, you
should be able to display
the list of your VCS labels.
Associating a TrackRecord Release with a VCS Label
Perform the following procedure to associate a TrackRecord release with
a VCS label:
1
Open the Milestone item in TrackRecord.
2
Click the button beside the VCS Release>Label field.
TrackRecord displays a list of your VCS labels.
3
To use an existing label, select the appropriate entry in the list.
To create a new label from within TrackRecord, click the New
button.
To create a new VCS label from within TrackRecord, press the
checkbox next to the VCS Release field, and click New. TrackRecord
will use the name of the release as the default value for the label;
you can change this value when prompted for the release name.
When TrackRecord creates the release, it applies the label to the
entire project associated with the Release item.
4
Click OK.
Troubleshooting
For a detailed listing of troubleshooting and configuration information
for one of the supported version control systems, refer to
“Troubleshooting VCS” in the TrackRecord online help.
For the most current TrackRecord support information, please visit the
Compuware Web site at: http://www.compuware.com . From this
location, you will have access to our online Knowledgebase and the
most current patches and updates for the product.
112
Integrating TrackRecord with Other Applications
TrackRecord User’s Guide
Integrating TrackRecord With Compuware Products
TrackRecord integrates with four of Compuware’s product families:
QACenter, DevPartner Studio, EcoSYSTEMS, and Abend-AID.
Using TrackRecord With QACenter
The Compuware QACenter product family offers sophisticated
automated testing tools for mainframe, client/server and Web
development projects.
TrackRecord can capture and track defects identified with these tools
and manage the resolution process. TrackRecord currently integrates
with QACenter’s Reconcile, TestPartner, and QADirector. This
integration does not require configuration because when run in the
same development environment, TrackRecord and QACenter can share
a single project database. Defects entered through QADirector,
TestPartner or Reconcile can become a part of TrackRecord Milestone
Status reports or Outline Reports.
Note Refer to the Reconcile, TestPartner, or QADirector documentation
for general information on using these products.
Reconcile
QACenter’s Reconcile allows you to associate Reconcile requirements
with TrackRecord change request and defect information. Reconcile
can track the status of a requirement’s associated defects, and can keep
TrackRecord updated on the status of requirements. This exchange of
information permits cross-product reporting and analysis.
QADirector
QACenter’s QADirector provides a menu for submitting defects directly
to TrackRecord and for viewing submitted defects from within
QADirector. For example, if a failed QADirector test reveals a defect in
the application, you can submit the defect to TrackRecord from
QADirector, and QADirector will automatically enter relevant
information about the failed test in the new Defect item.
TrackRecord includes a QACenter Reported Defect item that is
specifically designed for logging defects reported by its testing tools.
The QACenter Reported Defect item contains all the fields found in its
parent type, Defect, plus additional QACenter-specific fields such as
TrackRecord User’s Guide
Integrating TrackRecord with Other Applications 113
Test Tool, Script Name, and Failure Reason. If your testing reveals a
defect in the test application, you can use the QACenter Reported
Defect item to record the test, tool, and diagnostic information so that
the problem can be re-created and fixed.
TestPartner
Use TestPartner in conjunction with TrackRecord to track bugs in your
test application. For example, if a failed TestPartner test reveals a defect
in the application, you can submit the defect right from TrackRecord.
TestPartner automatically enters relevant test information in the
TrackRecord defect item, reducing the amount of required data entry.
The failed test is linked to the TrackRecord defect by means of a defect
ID.
Using TrackRecord With DevPartner Studio
TrackRecord is part of the NuMega DevPartner Studio Enterprise
Edition suite of software debugging tools for building components and
applications using Microsoft Visual Studio and Java. These applications
automatically generate information about the detection, diagnosis, and
resolution of software problems. TrackRecord captures this
information, along with other project information, such as milestone
dates, platform configuration data, and code volatility metrics, to help
developers and testers resolve problems quickly and consistently.
Note Refer to the DevPartner Studio Enterprise Edition documentation
for general information on using these products.
DevPartner Studio Enterprise Edition tightly integrates its debugging
and tuning tools with TrackRecord. The DevPartner Studio tools can
send data directly to a TrackRecord project database. The project
database is accessible to developers from within the DevPartner Studio
tool such as BoundsChecker or TrueTime, and from within Visual
Studio. This integration provides users with the information they need
from within the tools they use.
Note Integration of TrackRecord and the DevPartner Studio tools is
version dependent. You many need to upgrade your TrackRecord or
DevPartner Studio software if you purchased the tools at separate times.
114
Integrating TrackRecord with Other Applications
TrackRecord User’s Guide
DevPartner Studio Interaction with TrackRecord
Tip You can choose to
submit DevPartner Studio
session information from
DevPartner Studio tools
automatically. For more
information, refer to
“Configuring General
Options” on page 89.
DevPartner Studio Enterprise Edition derives much of its power from its
underlying ActiveLink connection to TrackRecord. ActiveLink
automates the submission of debugging/tuning tool information to a
database. This accumulated information provides:
⽧
⽧
⽧
⽧
⽧
⽧
Platform configuration data, including hardware resources and
version information about installed software components
Coverage data gathered from all developers using TrueCoverage
Code volatility information
Build matching to registered builds
Task lists for each developer
Detailed error messages from the NuMega error detection tools
Logging In to TrackRecord from DevPartner Studio Tools
When starting a DevPartner Studio tool, you are prompted to log in to
a TrackRecord database. Logging in at this time does not start
TrackRecord, but allows access to tasks and defects within the database.
If you are already logged in to TrackRecord, you can change your login
identity from within any of the DevPartner tools.
To log in to a TrackRecord database, perform the following procedure:
1
From the DevPartner tool’s TrackRecord menu, click Change
Login (Figure 8-13).
Figure 8-13 Changing TrackRecord Login from Within JCheck
2
On the TrackRecord Login Dialog Box:
〫
Enter your login name in the Name field.
〫
Enter your login password in the Password field. Passwords are
case-sensitive.
Identify the database you want to use in the Database field. The
names of the databases you have used recently appear in the
Databases list. You can select the database you want to use
from this list or enter a different database name.
Click OK.
〫
3
TrackRecord User’s Guide
Integrating TrackRecord with Other Applications 115
Automated Session Submission
TrackRecord logs DevPartner Studio developer tool session information
against a specific project build. Most development teams will appoint a
single person to manage the build creation process.
A Project item includes a field for the Current Build Number (Figure 814). This field designates a number for the build registration utility to
use as a starting value when constructing build names. Build
Registration creates a build name that usually includes an
incrementing build number to identify a specific software build, along
with the executable components that define that build.
Current Build Number Field
Figure 8-14 Project Item’s Current Build Number Field
Software developers cannot submit debug tool sessions from
DevPartner tools, such as BoundsChecker and TrueCoverage, to the
TrackRecord database without a registered build, which is done using
the Build Registration utility. A configuration administrator must
create at least an initial build against which developers can submit
debugging information.
Software development groups with multiple developers usually create
an automated build process to construct their applications. This
automated process could use, for example, MS-DOS batch files to call
Make utilities that automate compiler operation and place files in
specified locations.
Administrators can make TrackRecord build registration a part of this
automated build process. Automating build registration ensures that a
build gets registered at the time the build completes.
116
Integrating TrackRecord with Other Applications
TrackRecord User’s Guide
Registering a Single Build Using the Build Registration Utility
1
From the Windows Start menu, select
Programs>Compuware>TrackRecord>Build Registration.
The Build Registration Utility opens (Figure 8-15).
Figure 8-15 Build Registration Utility
2
Select a project from the Project drop-down list.
Click Edit if you want to modify the default formula for
constructing build names.
3
Click New.
The Submit Build Information for <Projectname> dialog opens
(Figure 8-16).
Figure 8-16 Submitting Build Information
TrackRecord User’s Guide
Integrating TrackRecord with Other Applications 117
4
Click Add.
The Add Executable Files to <Buildname> dialog opens and displays
directory and file information.
5
Choose the EXE, DLL, and OCX files that compose this build.
These components include the executable components that your
developers are building for this project.
6
Click Add.
7
Click Submit and then Exit.
Automating Build Registration
1
Open your development groups build automation script in a
file editor.
2
Enter a line to run the command-line version of the build
registration utility, BUILDNEW.EXE (use the /? switch to view the
options and syntax of this command).
For example, enter the lines:
buildnew /P”Wildfire” /U”Joe Developer,mypasswd”
c:\Wildfire\Release\*.exe
buildnew /P”Wildfire” /U”Joe Developer,mypasswd” /A
c:\Wildfire\Release\*.dll
A variation of this syntax uses a file name in place of a list of
components:
buildnew /P”Wildfire” /U”Joe Developer,mypasswd”
@wildfire.bld
Here, the file WILDFIRE.BLD contains the paths, individual files
names, or wildcard references to the executable components you
want to include in the registered build.
3
Save the file.
Platform Configuration
When an application runs under one of the DevPartner tools,
TrackRecord records hardware and software configuration information
about the computer on which the tested application executes. The
hardware configuration information is stored in an item called
Hardware Configuration and is associated to the defect or session via
the Defect’s Configuration field. Software configuration information is
stored as a list of Executable File objects in a Defect or TrackRecord
Session item’s Loaded Components field.
118
Integrating TrackRecord with Other Applications
TrackRecord User’s Guide
The Configuration type contains fields for information such as the type
of processor, amount of memory, screen resolution, and the operating
system.
A Loaded Components field in an item tracks the details of DLL, OCX,
and the EXE files used by the application being debugged. These details
include the link date and time and version resource strings. Many
software vendors, including Compuware and Microsoft, use version
resource strings to provide unique version numbers of components.
Platform configuration information, including software component
version numbers, can aid the process of finding errors caused by
component incompatibility.
Viewing Captured Platform Configuration Data
Tip For more information
on ActiveX, refer to
Appendix A on page 213.
Suppose a tester reports a defect, but a developer cannot duplicate the
defect. One cause for discrepancies of this nature is mismatched
versions of essential software components, such as dynamic link
libraries and ActiveX custom controls. TrackRecord’s Advanced Search
capability gives Team Member one tool for uncovering such
discrepancies.
Viewing Sessions on Hosts Using Specific Components
To view sessions on hosts that use a specific component, perform the
following procedure:
1
Select Advanced Search from the TrackRecord Tools menu.
The Choose a Type Dialog Box opens (Figure 8-17).
Figure 8-17 Choose a Type Dialog Box
2
TrackRecord User’s Guide
Select DevPartner Session and click Search to open the
DevPartner Session Item Search Dialog Box.
Integrating TrackRecord with Other Applications 119
3
Double-click the Loaded Components field.
The Item Browser displays a list of Application Component items.
4
Select the component from the Application Component list and
click OK.
5
Click Search on the DevPartner Session Item Search Dialog
toolbar to open the Search Results Dialog Box.
6
Select any listed item and click Open.
7
Click Close to close the Search Results Dialog Box and Cancel to
close the DevPartner Session Item search Dialog Box.
Using TrackRecord With Interval Pro
TrackRecord integrates with EcoSYSTEM’s Interval Pro, a program
designed to measure application performance and availability to
maintain high service levels.
TrackRecord can integrate with Interval Pro’s Fault Detection to include
captured fault data as part of a defect report automatically.
Note Refer to the Interval Pro documentation for general information on
using this product.
Using TrackRecord With Abend-AID Fault Manager
TrackRecord is an available subscriber to Fault Manager. A subscriber is
an application that Fault Manager exports data to with the purpose of
processing the event data.
For example, Fault Manager can automatically load fault information
into a TrackRecord database, reducing the amount of required data
entry. TrackRecord then enables you to: assign fault notices, track and
report on the status of faults, add information to faults, and create
graphical reports.
Note Refer to the Abend-AID documentation for general information on
using this product.
120
Integrating TrackRecord with Other Applications
TrackRecord User’s Guide
Part 2: Administering
TrackRecord
⽧
“Configuring TrackRecord” on page 123
⽧
“Creating and Maintaining TrackRecord
Databases” on page 169
⽧
“Administering AutoAlert and WebServer” on
page 193
Chapter 9
Configuring TrackRecord
Upon completion of TrackRecord client and server installation, an
administrator must perform various configuration tasks before
TrackRecord can be used. This chapter explains these configuration
tasks. It includes the following sections:
TrackRecord User’s Guide
⽧
Administration Overview — Description of administrative tasks
and privileges as well as information on logging in to TrackRecord
as an administrator.
⽧
Group Administration — Overview of group administration and
determining access rights.
⽧
Share Group Administration — Summary of share group
administration.
⽧
Team Member Administration — Overview of Team Member
administration and instructions for creating Team Members and
users.
⽧
Project Administration — Project administration overview and
procedures for creating projects.
⽧
Global Preferences Administration — Global preferences
administration summary and information about creating global
queries, Outline Reports, favorite types, Home Pages, and
templates.
⽧
Workflow Administration — Workflow administration overview
and instructions on creating/modifying workflow, working with
states and transitions, designing based on type, and adding status
fields.
⽧
Type Administration — Type administration description and
information regarding data type inheritance, categories of type,
abbreviations, identifying imported items, altering access rights,
123
active ink tabs, database lock-out, and creating and modifying
tasks.
⽧
Rules Administration — Instructions regarding the Rules engine
to create policies that govern the behavior of information types.
Note The tasks described in this chapter require administrative privileges
to the database. This chapter assumes familiarity with basic TrackRecord
concepts. For an overview of TrackRecord, refer to Chapter 1, “Introducing
TrackRecord” on page 1.”
Administration Overview
A TrackRecord administrator is usually responsible for creating the key
components of a working TrackRecord project. To guarantee the
security of project data, TrackRecord restricts certain activities to users
with administrative privileges.
Privileges
Administrator privilege includes:
⽧
⽧
⽧
⽧
⽧
⽧
⽧
124
Configuring TrackRecord
Access to the Administrator menu in TrackRecord
Globally sharing queries, Outline Reports, Milestone Status views,
and templates
Deleting queries, Outline Reports, Milestone Status views, and
templates owned by other users
Changing template ownership
Viewing all the types defined for a given database with the Item
Browser
Setting the Home Page and default favorite reports and types for
users
Defining workflow for defects, tasks, and other items
TrackRecord User’s Guide
Tasks
Key components of a working TrackRecord project that are created by
an administrator include:
Tip Although the order in
which you perform these
tasks is flexible, groups
should be created before
other tasks are
performed. If you are new
to TrackRecord, perform
administrative tasks in
the order presented in
this chapter.
⽧
Creating and maintaining TrackRecord databases. See Chapter 10,
“Creating and Maintaining TrackRecord Databases” on page 169.
⽧
Groups that specify access privileges for sets of people. See “Group
Administration” on page 126 for more information.
⽧
Share groups that gather people into logical units for sharing
information. Refer to “Share Group Administration” on page 129
for additional information.
⽧
Team Members who are assigned to groups and share groups. Refer
to “Team Member Administration” on page 131.
⽧
Projects that are a set of milestones, tasks and other items for
different development efforts. See “Project Administration” on
page 134.
⽧
Default user preferences, queries, and reports. “Global Preferences
Administration” on page 137 provides detailed information on this
topic.
⽧
Workflow, which is the set of actions users can perform on an item,
and the set of states that result from those actions. See “Workflow
Administration” on page 140 for more information.
⽧
Types that are the information structures, and corresponding
forms, that provides your database infrastructure. Refer to “Type
Administration” on page 150.
Starting TrackRecord as an Administrator
Tip See “Team Member
Administration” on
page 131 for information
about limiting
administrative access to
TrackRecord databases.
1
From the Windows Start menu, select
Programs>Compuware>TrackRecord.
2
When the login dialog appears:
〫
Enter “admin” in both the Name and Password fields
(lowercase only for Password).
〫
Enter a database name. The default database name was
specified during TrackRecord installation.
If you are using multiple databases, you will perform
Administrative tasks for each database independently.
TrackRecord User’s Guide
Configuring TrackRecord 125
3
Click OK.
Note You should change the administrator password immediately, as
described in “Changing Your Login Password” on page 9.
Group Administration
Group administration is used to control access to TrackRecord
information. There are three steps in Group administration:
⽧
⽧
⽧
"Planning Group Membership and Access Rights" on page 126
"Implementing Group Access Rights" on page 127
"Creating or Modifying a Group" on page 128
Planning Group Membership and Access Rights
Because access rights (privileges) are determined through membership
in a group, it is important to consider the access needs for each
member. For example, some software developers might require read
and write access to certain database entries, while others need readonly access to those entries. In this instance, you would create two
separate groups.
Caution: If you do not assign a user to any group, they will be granted
full read and write privileges across the database.
Considerations When Creating Groups
Things to note about groups:
126
Configuring TrackRecord
⽧
Groups are not the same as departments, although the two might
often coincide. Team Members belonging to several departments
can belong to one Group if their database access rights will always
be equal.
⽧
Users can belong to up to fifteen groups.
⽧
Database access privileges become those of their least restrictive
group.
⽧
Read-only access rights derived from membership in one group will
be replaced by membership in another group that has read and
write access.
TrackRecord User’s Guide
⽧
When you add a new group with read and write access to
TrackRecord, everyone in that group will have full access to all
information types unless you edit the types to reference the new
group.
⽧
If you do not assign a user to any group, they will be granted full
read and write privileges across the database.
Determining Group Access Rights
After you have determined your group membership, you must select
the group’s access rights. These rights include:
⽧
Read and write access — Provides full access.
⽧
Read and add access — Prevents editing of existing items, but
allows the addition of new items.
⽧
Read-only access — Allows viewing of items, but prevents users
from making changes.
⽧
Hide — Field-level privilege setting that allows making a field
invisible on a group-by-group basis.
Implementing Group Access Rights
Now that you have determined the membership and access rights of
the groups, you must decide how you are going to structure the access
rights.
For example, suppose you wish to create a group with read and write
privileges named Documentation Review. There are three levels in
which you can assign access rights to the group you are going to create:
⽧
Global — Retains default permissions for a group.
In the example, users assigned to this group will be able to modify
and add Defect reports as they review documentation.
⽧
Type — Inherits the access control specifications that apply
globally, and then let you restrict access further within each group.
Type permissions use the same names as global permissions: read,
write, and add.
If you edit the Defect type to change the access rights to read and
add, the users in the Documentation Review group of our example
will be allowed to add new Defect items, but are prevented from
editing any existing Defect items. See "Type Administration" on
page 150 for more information.
TrackRecord User’s Guide
Configuring TrackRecord 127
⽧
Field — Inherits the specifications of global and type restrictions
and, optionally, can refine permissions to the field level to add
another restriction, Hide. As with type permissions, field
permissions can be changed in the Type Editor. You can use the
read and write restrictions at the field level, but not add.
You can further restrict the access rights of the Documentation
Review group by field. For example, you could hide Defect details
on the Defect form. For information on setting field permissions,
refer to "Type Administration" on page 150.
Creating or Modifying a Group
To create or modify a group, perform the following procedure:
1
Click the Administrator menu, and then select Group
Administration.
The Group Administration dialog opens.
Figure 9-1 Group Administration
2
Select <Enter a new group here> and enter a new group name,
or select an existing group.
3
Select an access privilege from the drop-down arrow in the
Privileges column.
For more information on access rights, see "Determining Group
Access Rights" on page 127 and "Implementing Group Access
Rights" on page 127.
4
128
Configuring TrackRecord
Click Enter, then click Close.
TrackRecord User’s Guide
Deleting a Group
Caution: Eliminating a group eliminates access to the database for
anyone assigned only to that group.
To delete a group, highlight the name and press the Delete key on the
keyboard.
Share Group Administration
Share groups are groups with whom members can share queries,
Outline Reports, Milestone Status views, and templates. Users can
belong to multiple share groups.
Use of share groups is optional, but useful. A project team may consist
of a few members from different groups that share a common set of
Outline Reports, queries, etc. In this instance, you would create a share
group containing the project’s Team Members, create the reports, and
allow the share group access to these reports.
TrackRecord provides three types of sharing:
⽧
⽧
⽧
Not shared (private)
Share to All (administrators only)
Shared to (sharing with all members of a specified share group)
When TrackRecord users share a query, template, or view of database
data, they can share it with members of any of the share groups to
which they belong. An administrator can share those same items with
all groups, change the owner of a report or query, and share anyone’s
report and queries with everyone.
TrackRecord’s sample database contains a share group type.
Administrators can use this type to create share groups items to mirror
the software development process within their company or
department.
Creating a Share Group
1
From the TrackRecord Toolbar, click the Item Browser icon.
Alternatively, from the Tools menu select the Item Browser
option.
2
Select Share Group and click the New button on the toolbar.
The Share Group item form opens.
TrackRecord User’s Guide
Configuring TrackRecord 129
Figure 9-2 Share Group Item Form
3
Enter a name for the share group.
4
Enter a description of the share group.
5
Click the + button at the right of the Members field to add
Team Members to the group.
If Team Members have not yet been created, you can add members
to Share Groups when you create the member items, as described in
the next section, or you can create Team Members now by clicking
the New button.
6
Double-click on the members to be added to this share group.
7
Click OK to dismiss the Item Browser dialog and then click Save
and Close.
Sharing Information with Share Groups
After you have created Queries, Outline Reports and Milestone Status
views, you can determine what users can access them by assigning
them a sharing property. For more information, refer to “Creating a
Query” on page 33, “Using Outline Reports” on page 39, and “Using
the Milestone Status View” on page 57.
130
Configuring TrackRecord
1
Open a Query, Outline Report, or Milestone Status view.
2
Click Options, and then click Sharing.
TrackRecord User’s Guide
3
Select a sharing option.
Note If you are going to be selecting the Email Me When New Items
Match This Query option, note that AutoAlert will send email notification
only to the owner of the query. The one exception is the query created by
the Admin user. For more information on the Admin behavior, refer to
“Setting Up Mail Queries” on page 199.
4
Click OK.
Team Member Administration
For each project listed in the TrackRecord database, a set of Team
Members should be assigned to work on the project.
Note The sample database supplies a Team Member type that you can
use to create your own which contains links to projects and groups. This
association allows some fields to populate automatically with information
appropriate for that Team Member. Before creating Team Member items,
ensure that this type is suitable to your needs. If not, edit the Team
Member type, as described in “Type Administration” on page 150, before
creating Team Members.
A Team Member does not automatically have access to TrackRecord.
Access is controlled by user names created by the TrackRecord
administrator. The administrator can associate a user name (i.e.,
LoginID) with a Team Member (data item).
The administrator cannot be associated as a Team Member. The Admin
user is a special user identification for TrackRecord and is treated
uniquely within TrackRecord. However, you can create Team Members
with administrative authority.
Non-administrator users can create Team Member items, but they
cannot create user names. Therefore, they cannot authorize access to
the TrackRecord database. If non-administrator users create Team
Member items, an administrator must edit these items to add a login
user name to authorize access to the TrackRecord database. This can be
useful in certain circumstances: for example, you might want to
associate an external vendor to a project by creating a Team Member
item so you could then assign defects to them, but they would not
have authority to access your database.
TrackRecord User’s Guide
Configuring TrackRecord 131
Creating Team Members
1
Click the Toolbar’s Item Browser button, select Team Member
and click the New icon in the Item Browser’s toolbar.
A Team Member item opens, as shown in Figure 9-3.
Figure 9-3 Team Member Item
2
On the Item tab, enter information to identify an individual
Team Member.
During the creation of the first Team Member item, fill in
Company information to create a Company item. When creating
subsequent Team Members, you can add company information by
selecting it.
Caution: The Links and Change History tabs are informational and
should not be edited. The Links tab will show all items to which this
Team Member is linked; the Change History tab will display changes
that have been made to this Team Member item.
3
On the Membership tab, place a checkmark next to the Projects
and Share Groups with which this Team Member is associated.
If you have not created Projects or Share Groups, you can create
them now with the New button, or you can add Team Members
when you create Projects and Share Groups at a later time. Creating
Projects is described in “Project Administration” on page 134.
Creating Share Groups is described in “Share Group
Administration” on page 129.
Some users, such as managers who do not work on a specific
project but who occasionally log in to TrackRecord to view
information, may not require a project membership.
132
Configuring TrackRecord
TrackRecord User’s Guide
4
Click on the TrackRecord User tab.
Note The fields of this tab are inactive because, by default, Team
Member items are not authorized TrackRecord users.
5
Use the TrackRecord User control in the toolbar (Figure 9-4) to
select this user’s status. The user status options are:
TrackRecord User Control
Figure 9-4 TrackRecord User Control.
6
TrackRecord User’s Guide
User’s Status
Description
Inactive (Deny
Login)
Used only to retain user information in the database while locking out that user name and password for TrackRecord logins
Normal
Active with no administrative authority
Administrator
Active with administrative authority
Complete the user information:
〫
Enter this user’s login name in the name field.
〫
Optionally, enter and confirm a password. To allow users to log
in without a password or to change their password the first
time they log in, you may leave the Password field blank.
〫
Enter an email address for this user. An email address is
required if the user will be using the AutoAlert utility.
〫
Enter a Version Control System user name and password. This
step is required if the user name is different from the name just
entered and if you intend to integrate with a version control
system.
Configuring TrackRecord 133
7
Click on the Privileges tab and select the groups to which this
Team Member belongs.
If the Team Member is not a TrackRecord user (Step 4) they cannot
belong to any group; the checkboxes will be inactive.
Each group’s database privileges are displayed for your information.
Users can belong to up to fifteen groups and their database access
privileges become those of their least restrictive group.
8
Click Save and Close when finished.
Creating a User
Administrators can add a new user to the database from the User
Administration dialog, or from a Team Member item.
To create a new user or change an existing user's information:
1
From the Administrator menu, select User Administration.
2
Click New or double-click a user from the displayed list.
This user name will be used for logging in, and to record
information about changes made by this user.
3
Enter or change password, VCS user name, activity status,
Administrative authority, and other pertinent information.
4
Click the Privileges tab to associate this user with a group.
5
Click OK when you are finished.
Project Administration
Before a team starts using TrackRecord, an administrator must define a
project. It provides an organizational framework for completing a
software development deliverable. A project consists mainly of the
tasks required to build a software application, the people who work on
those tasks, and the dates on which the tasks must finish.
Project Administration Privileges
Project administration differs from other administrative duties in one
important respect—project administration requires no administrative
privileges, but does require (when you use the sample database as your
134
Configuring TrackRecord
TrackRecord User’s Guide
starting point) that the designated project administrator belong to the
Project Admin group.
Note The Sample database restricts access to several information types
to members of this group.
Creating a Project
TrackRecord supplies a Project type in its sample database. You can use
this type as shipped, or make modifications to create your own Project
type. If modifications are required, make changes before creating your
projects. Refer to “Type Administration” on page 150 for information
about modifying types.
TrackRecord also supplies a sample project called YourProject. You can
edit this item to create Project items for your organization or start with
a new project. Follow the procedure below to create a new project.
1
From the Toolbar, click the Item Browser button and select
Project.
2
Click the New button in the Item Browser toolbar.
A Project Item form opens (Figure 9-5).
Figure 9-5 Project Item
3
Enter a name and description for the project.
4
If you are using a version control system, click on the check
mark in the VCS Project Name field. Log in to the source
database and select the folder and project name.
You need to associate the TrackRecord project with the VCS project
to make check in/out actions meaningful. Refer to “Utilizing
TrackRecord User’s Guide
Configuring TrackRecord 135
TrackRecord with Version Control Systems” on page 108 for more
information on VCS.
5
Optionally, enter a Current Version and Current Build Number.
This number is used as a starting point to construct build names
that also contain an incrementing build number. Refer to
“Automated Session Submission” on page 116 for information on
build registration.
6
Tip You cannot create
meaningful Milestone
Status views unless at
least one milestone exists.
Optionally, enter Builds/Releases, Milestones, Team Members,
Documents, Functional Areas, Keywords and Sub-projects.
Remember that a form for one type can ‘contain’ forms for other
types. In the sample Project form, the fields listed in this step are
separate types. Clicking the Add (+) symbol allows you to choose
from the existing items of this type and to create new items of this
type.
Note Note that you can modify the project later to add additional items.
If Team Members have not yet been created, you can add them to Projects
when the member items are created, as described in “Team Member
Administration” on page 131.
7
Click the Save and Close toolbar button.
Opening Projects
To open a project, click the Item Browser button from the toolbar.
Select Project from the list and double-click the project you wish to
open.
Cloning Projects
When you create projects, TrackRecord lets you duplicate and reuse the
milestones from an existing project. This feature allows development
teams to create multiple projects that all use the same milestone
events. Using identical milestones promotes consistency across
projects.
To clone a Project, open the Project to be cloned, then select Save and
Duplicate from the Save drop down menu in the toolbar.
Multiple Projects
Projects may share people, code, and other resources. By tracking
multiple projects in a single database, a Team Member can see all the
136
Configuring TrackRecord
TrackRecord User’s Guide
tasks that require completion on a given day, regardless of the project
with which the task is associated. A single database makes it easier to
track problems in shared code, as well.
Data from multiple projects can reveal potential problem areas. For
example, if testers of Project A are finding many installation bugs,
developers of Project B may want to emphasize the test and
development effort on their installation module.
Historical Information
Retaining information after finishing a project provides helpful
historical data. For example, when building a second version of a
product, you could look back at the first version’s bugs and analyze
which parts of the program gave you the most trouble during
development. That knowledge could influence how you staff or
schedule that part of the second version’s development.
Global Preferences Administration
The tasks of global preferences administration include:
⽧
⽧
⽧
Creating queries and Outline Reports for all TrackRecord users
Identifying favorite types, reports, and a Home Page for all users
Creating global templates
Creating Global Queries and Outline Reports
To make the members of a project team productive as quickly as
possible, administrators should provide a representative set of queries
and Outline Reports to TrackRecord users. These data-extraction tools
will allow users to accomplish tasks without spending time learning the
intricacies of TrackRecord. Only administrators can create queries and
Outline Reports that are globally shared with every TrackRecord user.
The sample database shipped with TrackRecord provides a limited set of
global queries and Outline Reports that administrators can study to
learn how these constructs behave.
Tip If you are unfamiliar
with queries and Outline
Reports, review “Creating
a Query” on page 33,
“Using Outline Reports”
on page 39, and “Using
the Milestone Status
View” on page 57.
TrackRecord User’s Guide
Creating a New Global Query
1
From the File>New option, select Query.
Alternatively, if the Query already exists, use the File>Manage
option and select the query.
The New Query dialog or, for existing Queries, the Manage Query
dialog (Figure 9-6), opens.
Configuring TrackRecord 137
Figure 9-6 Manage Queries Dialog Box
2
Create or modify the Query as described in “Creating a Query”
on page 33.
3
Click Options, click the Sharing button, and click the Share to
All option.
Alternatively, you could select share groups to share this query, as
described in “Share Group Administration” on page 129.
4
Click OK to dismiss the dialog boxes.
5
Click Save and Close on the toolbar to close the query.
Creating a New Global Outline Report
1
Select File>New and choose Outline Report.
Alternatively, if the Outline Report already exists, use the
File>Manage option to select the Outline Report.
Tip If you are new to
TrackRecord or have not
created queries to be
used in this report, you
may prefer to use the
Header Wizard. This
option is described in
“Using the Header
Wizard” on page 47.
138
Configuring TrackRecord
An Outline Report Dialog Box opens.
2
Create or modify the Outline Report as described in “Creating
Global Queries and Outline Reports” on page 137.
3
Click Options to open the Outline Options dialog.
4
Click the Sharing button.
5
Click Share to All or select share groups.
6
Click OK to dismiss the Sharing dialog. Click OK again to
dismiss the Options dialog.
7
Click the Save icon when finished.
TrackRecord User’s Guide
Creating Global Favorite Types, Reports, and Home Pages
TrackRecord supports many types of items and many reports, but most
users will generally use only a few of these types and reports. It is
helpful to make it easy for the user to find the types and reports in
which they are most likely interested rather than forcing the user to
select from a long list of all available types.
To assist the user, you can establish global favorite types and reports or
views. These types and reports will be displayed for all TrackRecord
users.
Of the favorite reports and views, you can select one to be the default
Home Page for all users. The Home Page is the report or view that will
be displayed by default when the user logs in to TrackRecord. The user
can always return to this report or view easily by clicking the Home
Page icon on the toolbar.
Individual users can configure their own favorite types, favorite reports
and Home Page, which will override the global favorites. To create
global favorite types, reports, and a Home Page, perform the following
steps:
1
From the Administrator menu, select Default User Options.
The Default User Options dialog opens.
Figure 9-7 Default User Options
2
On the Favorite Types tab, select a type from the All Types list
and click Add to place it in the Favorite Types list.
This action adds the type to the Favorite Types list for every user of
the current database.
3
TrackRecord User’s Guide
Use the Remove button to delete a global favorite type.
Configuring TrackRecord 139
4
On the Favorites tab, click Add to add a new global favorite
report. Choose the type of report - Outline, Milestone or Graph.
The existing reports of that type are listed.
5
Click a report to be listed on the Favorites menu for all users
and click Open.
The report will be added to the list of favorites.
6
Use the Set as Default Home drop down list to select one of the
favorite reports to be used as a default Home Page for all users.
7
Click OK when finished.
Creating Global Templates
TrackRecord uses templates to supply default field information for new
items. Global templates supply default values for every user. Users can
create their own templates and make them private or share them with
members of the groups to which they belong.
Tip See Chapter 6,
“Working With
Templates” on page 79
for more information.
To create a global template, perform the following procedure:
1
Select File>Manage>Templates.
The Manage Templates dialog opens.
2
If a template already exists, select it. If not, click New and click
the type.
The template form opens.
3
In the Summary field, enter a descriptive name for this
template.
This name will identify this template in the Manage Templates
dialog. It will not be displayed when the template is used to enter
items.
4
Enter the information to be displayed to all users.
5
Click Options to select the following:
〫
Check the Apply This Template to All New Items box.
Click the Sharing button and check the Share to All option.
Click OK.
When all template items have been set, click Save and Close.
〫
6
Workflow Administration
A Defect, Task, or other item can pass through a series of states between
the time it is entered and the time it is closed. For example, when a
Defect is entered it is generally in an Unreviewed state. It might then
140
Configuring TrackRecord
TrackRecord User’s Guide
be assigned to someone, resolved, and validated. This series of actions,
and the states resulting from these actions, is called a workflow.
As a TrackRecord administrator, you will establish the workflow for the
items created with TrackRecord.
Caution: When using the Workflow Editor, ensure that all users have
exited the TrackRecord application, both client-server and web.
Tracking the state of items allows for more accurate assessment of a
project's progress. For example, program managers might determine
how to best allocate resources by examining all Defects in the Pending
Validation state or those in the Unassigned state.
Before implementing a workflow, you must think about your defect or
task resolution process— what states items can be in, who has
authority to change each state, and so on. You use TrackRecord groups
to define who can move an item from one state to the next. You can
also create different workflow paths and privileges for specific groups.
Implementing a Workflow
Once you have thought through your task management plan,
implementing a workflow is a two-step process:
⽧
Creating the workflow, as described in “Displaying the Workflow
Editor” on page 142.
⽧
Including a Status field in a type, as described in “Adding a Status
Field to a Type” on page 147.
Optionally, you may also want to design a workflow to use separate
rules for different types (refer to “Designing a Workflow Based on Type”
on page 147 for more information) or customize your workflow by
implementing rules that disable the standard workflow in certain
situations (refer to “Rules Administration” on page 165 and to the
online help for information on creating rules).
The presence of a status field in a type causes an Action button and
Action list to be displayed on the type form. Users will use the Action
button to indicate the actions they perform on the item. TrackRecord
will then automatically set the item's state. The actions listed in the
Action list, and the state to which the item is set after each action, is
determined by the workflow transitions you define.
TrackRecord User’s Guide
Configuring TrackRecord 141
The sample TrackRecord database includes a Status field on the Defect
type. To apply workflow rules to other types, such as Tasks, you must
add a Status field to their type definitions.
The TrackRecord sample database contains types that you can use to
implement workflow for your project data. The sample database
building blocks for workflow include the types:
⽧
⽧
Action – Enter, Open, Validate, Close, and others
Status – Unreviewed, Open, Closed, and others
The following procedures describe setting up workflow using the
building blocks from the sample database.
Displaying the Workflow Editor
A workflow is created and modified with the Workflow Editor utility.
The Workflow Editor assumes the existence of certain types and tags in
your database. If your database does not contain these types and tags
(for example, if you are using an older database or if you have modified
the types in the sample database), the warnings described in Step 2
below are displayed to allow the Workflow Editor to make minor
adjustments to your database.
Display the Workflow Editor by performing the following procedure:
1
From the Administrator menu, select the Edit Workflow option.
2
Two warnings may be displayed advising you to backup the
database and to request users to log off.
If these warnings are displayed, close TrackRecord. The warning
dialogs, and, subsequently, the Workflow Editor, will remain active.
Refer to “Scheduling Back Ups and Restoring Databases” on
page 180 for backup instructions.
Refer to “Database Lock-out” on page 152 for information about
the Active User dialog. When all users have logged off, the dialog is
dismissed, and the Workflow Editor makes database modifications
and unlocks the database. The Workflow Editor opens and displays
the current workflow.
Figure 9-8 illustrates the Workflow Editor and the default workflow.
142
Configuring TrackRecord
TrackRecord User’s Guide
Available
States
Visible
Group
Layers
Work Area
Figure 9-8 Workflow Editor
In addition to the standard menu bar and toolbar, the Workflow Editor
consists of three frames:
⽧
Available States: Lists states that have been defined but are not yet
used in the workflow. Using the buttons, you can create a new
state, edit a state definition, or delete a state, as described in
following sections.
⽧
Visible Group Layers: Lists all groups that have been defined.
Checkmarks indicate the groups whose workflow is visible. The
buttons allow you to quickly display the workflow for all or no
groups. By default, the workflow for all groups is displayed. To view
the workflow of a subset of groups, uncheck the groups that are not
to be displayed or use the Show None button to remove all groups,
then check the group(s) to be displayed. The workflow for Everyone
is always visible (as a watermark if not selected) to prevent the
addition of unnecessary transitions.
⽧
Work Area: The work area is where you create the workflow. Circles
represent states; rectangles represent actions; arrows indicate the
state transition caused by that action. For example, if a defect is in
the Unreviewed state and the action Review is performed, the
defect state will change to Open.
The action text boxes also indicate the groups that are permitted to
perform that action. The numbers correspond to the numbers in the
Visible Group Layers frame.
TrackRecord User’s Guide
Configuring TrackRecord 143
Moving the cursor over a state or action will display a tool tip
describing the state or action.
Working with States
To change a state, select it by clicking on the state circle in the work
area. You can then do one of the following:
⽧
⽧
Move the state— Moving a state may increase the readability of
your workflow. All actions remain attached. To move a state circle,
click in the circle to select it, drag the circle to the desired location
and release.
Remove/delete the state— Right click on the state circle and select
a menu option to either remove the state from the workflow or to
delete the state.
If the state is removed, it will be listed in the Available States frame
and can be reinserted into the workflow. If it is deleted, the state
will no longer be available. (You can recreate the state if necessary
using the New button in the Available States frame.) You will be
prompted to confirm the delete operation. All transitions leading
into or out of this state will also be deleted.
⽧
Create a new transition— Allows an item to leave this state, as
described in “Creating a New Transition” on page 146.
Creating a New State
1
Click on the New button in the Available States frame.
A State Properties dialog is displayed, as shown in Figure 9-9.
Figure 9-9 State Properties Dialog
2
Enter the name of the new state.
You should generally not create a state with the same name as an
existing state.
3
144
Configuring TrackRecord
Enter a description for this state.
TrackRecord User’s Guide
4
If all Defect items should be placed in this state by default,
check the Initial Defect State option.
Note that the default state for other types, such as Tasks, is set
through the use of templates, as described in “Default Status for
New Items” on page 149.
5
Click Save and New to continue creating new states or click
Save if you have completed creating new states.
The state is listed in the Available States frame.
To use the new state, click on the name of the state in the Available
States frame and drag it onto the work area. Create transitions that
cause the item to leave this state, as described in “Creating a New
Transition” on page 146. Click in other states and create transitions
that cause items to enter this state.
Working with Transitions
Each state can have multiple transitions. For example, you might want
to have two possible actions for an item in the Open state: Assign and
Reject. Further, you might want the Reject action to result in a different
state depending on who entered that action. You would create three
transitions:
⽧
Assign transition leading to the Assigned state.
⽧
Reject transition leading to the Closed state if a member of the
Project Admin group enters it.
⽧
Reject transition leading to the Unreviewed state if a member of
any other group, which would allow the defect to be reviewed
again, enters it.
To change a transition, click on any part of the transition line. Handles
(small black squares) are displayed on both ends of the transition line.
Click on a handle and drag it to a new state. You can change the state
in which the transition is generated or the state in which the transition
results.
To change the properties of a transition, double click on any part of the
transition line. A Transition Properties dialog is displayed. You can
change the name of the action or the groups that can perform the
action.
To delete a transition, right click on the action and select Delete from
the menu. The transition is deleted from the work area. The action
associated with the transition, however, is not actually deleted. Once
TrackRecord User’s Guide
Configuring TrackRecord 145
an action name has been created, it is never removed from the dropdown list in the Transition Properties dialog.
Creating a New Transition
1
Click in a state circle to select it.
When you move the cursor, an arrow is displayed.
2
Click on the handle (the small black square) at the end of the
arrow, drag it to another state, and release.
You must release in another state circle or the transition will not be
created.
A Transition Properties dialog is displayed, as shown in Figure 9-10.
Figure 9-10 Transition Properties Dialog
3
Select an action from the drop-down list or enter the name of a
new action.
Note Do not create two identical actions from the same state for a given
group that result in different states.
4
Check the groups that will be allowed to perform this action
from this state.
Users belonging to more than one group will be able to perform
actions permitted for all groups to which they belong.
5
Click OK.
A transition line is created in the work area. The path of the
transition line, the location of the text box and the point at which
the line intersects the state circle are determined automatically and
cannot be altered.
146
Configuring TrackRecord
TrackRecord User’s Guide
Designing a Workflow Based on Type
Each TrackRecord database can have only one workflow, but you can
design that workflow to allow different behavior based on the item
type. To accomplish this, define a separate set of states and transitions
for each type. For example, Figure 9-11 shows a separate set of states
and transitions for Defects and Tasks.
Figure 9-11 Separate Workflow Based on Type
Tip Each set of states
should use unique state
names.
Each type’s initial state determines which set of workflow rules (states
and transitions) the type will follow. The initial state can be set from
within the Workflow Editor only for the Defect type. For all other
types, you can set an initial state by creating a template for the type
and automatically filling the Status field, as described in “Default Status
for New Items” on page 149.
Adding a Status Field to a Type
The TrackRecord sample database includes a status field on the Defect
type. To apply workflow rules to other types, such as Tasks, you must
add a status field to their type definitions.
Refer to “Creating and Modifying Types” on page 153 for a general
discussion of adding fields to types. The following steps are specific to
TrackRecord User’s Guide
Configuring TrackRecord 147
adding status fields. Add a Status Field to a Type by performing the
following procedure:
1
Log on to TrackRecord as an administrator.
2
Use the Administrator menu’s Edit Types option to open the
Type Editor.
If users are logged on using this database, a dialog will be displayed
listing current users. Send a message requesting users to log off.
(Refer to “Database Lock-out” on page 152 if you would like a
description of this dialog.) When no users are logged on using this
database, the Choose a Type dialog opens.
3
Double-click the type to which you want to add a Status field,
click Insert Field (Figure 9-12), and choose Single Item Combo
Box.
Figure 9-12 Adding a Status Field
4
Move the pointer around the form. The pointer indicates where
the field will be added. Click the mouse to drop the new field
onto the Type Editor layout region.
If the type inherits from a parent type and you place the new field
in the inherited section, the new field will be added to all types
inheriting from that parent.
5
On the Field Properties dialog (Figure 9-13), enter a name for
the field and click the Tags button.
The name will be the label for the field. A logical choice might be
Status or State.
148
Configuring TrackRecord
TrackRecord User’s Guide
Click the Tags button to display
the Tags dialog box.
Figure 9-13 Field Properties Dialog
6
Select TR_Item_State, and click Add and OK.
7
From the Type drop-down list, select Status and check any
additional options for this field. Click OK.
The field will be displayed on the type form. Other fields will be
resized or repositioned to accommodate the new field.
To change the field’s properties, right-click on the new field and
select Open. To change the location of this or any other field, click
on the field and drag it to another location.
8
Click OK or Save and Close to close the Type Editor.
9
Click Close to close the Choose a Type dialog.
10 Create a template to set a default status, as described in
“Default Status for New Items” on page 149.
A type should have only one Status field. If a type contains more than
one status field, the first one encountered in the form will be active.
The second will be ignored.
Default Status for New Items
For all types that include a status field, you should specify a default
state to which new items will be set. If you do not set a default state,
users will be able to select any available status when they first create an
item of this type, and the Action button will not be displayed until a
status is set and the item reopened.
For Defect types, you can set the default state through the Workflow
Editor, as described in “Creating a New State” on page 144.
TrackRecord User’s Guide
Configuring TrackRecord 149
For other types, you must set the default state through a template, as
described in “Setting the Default State” on page 85.
Type Administration
Tip For more information,
refer to “Understanding
Data Type Inheritance”
on page 7.
TrackRecord allows you to use the default types provided with
TrackRecord, modify these default types, and create new types. Before
modifying or creating new types, be sure to assess the impact these
types will have on your development process. Once types have been
used by TrackRecord users, the changes you can make to them will be
restricted, as described in “Restrictions” on page 163.
Categories of Types
TrackRecord information types define the structure of the individual
pieces of information stored in a project database. Information types,
therefore, constitute the heart of TrackRecord. Manipulating types
provides control over the structure of the database.
Although all types are equal from a technical point of view,
administrators should think of types as falling into two categories:
Tip Administrators can
determine whether a type
is common or restricted
with the Type Editor
property Display to All
Users, as described in
“Creating and Modifying
Types” on page 153.
Common types will be
displayed to all users;
restricted types will not.
⽧
Common— Privileges set so that most users can create and modify
items of these types.
⽧
Restricted— Privileges set so that only administrators can
manipulate them. There are two restricted types:
〫
Administrative— Items that are behind the scenes, such as the
Priority and Resolution types, for creating items that are
building blocks of other structures.
〫
Contained— Created from within another item and have no
use outside the context of the containing item. For instance,
the Phone Number field within a Team Member item actually
holds a Phone Number item. Phone Number items, however,
have no meaning as stand-alone items.
Administrators can use the Show All check box on the Item Browser to
view both common and restricted types. Unchecking the Show All
check box changes the Item Browser display to common types only.
Altering Access Rights for Types and Fields
Access rights can be set for either an entire type or the individual fields
within a type.
150
Configuring TrackRecord
TrackRecord User’s Guide
Type permissions use the same names as global permissions: read,
write, and add. Refer to “Determining Group Access Rights” on
page 127 for more information on access rights.
Abbreviations
When an item is displayed in a report, TrackRecord must display at
least one field from the item. The field that is always displayed is called
the Default Abbreviation. Each type must identify one Default
Abbreviation. In addition, each type can have one Short and one Long
Default Abbreviation.
Caution: When defining abbreviations as it is possible to create selfreferencing abbreviations that may result in an unstable database.
TrackRecord creates a Default Abbreviation based on the first field in a
type. You can change this default, and you can specify a Short and
Long abbreviation, with the Type Properties dialog, as described in
“Creating and Modifying Types” on page 153.
Identifying Duplicate Imported Items
When items are imported into the TrackRecord database, TrackRecord
must determine if the items are duplicates of existing items. Each type
must contain one field or combination of fields to be compared with
imported items to determine duplicates. This field or fields is identified
with the Dupe option on the Type Properties dialog, as described in
“Creating and Modifying Types” on page 153. If you do not specify a
Dupe abbreviation, the Default Abbreviation will be used.
ActiveLink Tags
Use ActiveLink tags only when you create new types, or delete fields
from an existing type. For more information on tags, consult the
online help or Appendix B: “Using Tags“ on page 237.
TrackRecord administrators can name types, and label the fields on
types, to match their company’s development process. For example, if
TrackRecord User’s Guide
Configuring TrackRecord 151
the organization calls software defects “bugs,” they can name a defect
type “Bug.”
Note Milestone Status views and the Workflow Editor depend on certain
ActiveLink tags. If these tags have been removed or altered, the Milestone
Status and Workflow Editor option might not be available.
Products that integrate with TrackRecord depend on certain types, and
fields within types, to properly integrate its developer tools with the
TrackRecord database to gather information automatically. To provide
for this dependency, TrackRecord supplies ActiveLink tags that let
administrators link the types and fields they create with the underlying
structure that ActiveLink expects. If you use the types shipped with the
sample TrackRecord database, you can change type and label names
without concern for ActiveLink tags.
Database Lock-out
Certain changes to the database, such as creating or modifying types,
cannot be made while users are logged on using the database. If you
attempt these changes while the database is in use, a dialog will be
displayed listing current users and allowing you to advising them to log
off.
To send a message requesting that users log off, click the Send Message
button, edit the default message if desired and click Send. The message
is displayed in the TrackRecord client of all logged on users, including
those accessing the database through the WebServer.
Tip The timing of the
message display depends
on each user’s polling
frequency setting.
By default, new logins are disabled when this dialog is displayed. You
can use the drop-down menu to enable logins; clicking Cancel will also
re-enable logins.
If a user attempts to log in while logins are disabled, a message box will
inform them that logins are disabled. They can choose to log in using a
different database.
The user list is refreshed every few seconds. Once all users have logged
off, this dialog is dismissed and you can make your desired changes.
If the database is being accessed without a logged on user, for example,
by AutoAlert, WebServer, BoundsChecker, or Microsoft Project, the
dialog will include an Automation entry. The administrator must
ensure that these processes are shut down. BoundsChecker users must
exit BoundsChecker.
152
Configuring TrackRecord
TrackRecord User’s Guide
Type Administration Tasks
The tasks of type administration include:
⽧
Creating new types and modifying existing types. See “Creating
and Modifying Types” on page 153 for more information.
⽧
Creating custom items for Choice types (optional). Refer to
“Custom Items” on page 164 for additional information.
⽧
Creating rules for the type (optional). For more information, see
“Rules Administration” on page 165.
Development teams can create any information types they need to
implement any development process they choose. Until a team
understands the possibilities, however, defining information types
might be a haphazard process.
Note When making modifications to the types via the Type Editor, it is
always good practice to: make a backup or image of the database before
using the Type Editor, ensure all users have exited the database, and run a
Check Database after using the Type Editor. See Chapter 10, “Creating and
Maintaining TrackRecord Databases” on page 169 for more information on
running Check Database.
To assist teams in their understanding of information types,
TrackRecord ships with a sample database populated with information
types that were created to set up one kind of development process. By
studying these types, administrators can develop an understanding of
how types integrate to implement a process.
To study the types in the sample database, create new items of a given
type to see what kinds of information that type requires. Also, users
with administrative privileges can use the Type Editor to open a type
and view its fields, including its properties and access rights.
Creating and Modifying Types
While companies can use the sample database shipped with
TrackRecord as a production database, many organizations will see the
need to add to or modify the information types supplied. The
procedures that follow explain type creation and modification. To
create or modify a type:
TrackRecord User’s Guide
Configuring TrackRecord 153
1
Log on to TrackRecord as an administrator and close all items
and views (defects, reports, etc.).
Refer to “Starting TrackRecord as an Administrator” on page 125.
2
From the TrackRecord Administrator menu, click Edit Types.
A warning is displayed advising you to backup your database before
modifying types. Refer to “Scheduling Back Ups and Restoring
Databases” on page 180 if you would like to backup your database
at this time.
Note If users or other TrackRecord clients, such as the WebServer, are
logged on using this database, a dialog will be displayed listing current
users. Refer to “Database Lock-out” on page 152 for information about this
dialog. When this dialog is dismissed, the Choose a Type dialog is
displayed.
3
If you are creating a new type, on the Choose a Type dialog
click New and proceed to Step 5.
If you are modifying a type, click on the Type and click the Edit
button.
4
To modify type properties, click the Type Properties button.
If changing field properties only, skip to “Using the Type Editor” on
page 157.
5
On the Type Properties General tab (Figure 9-14), identify the
name and properties of the type.
Caution: Use ActiveLink tags only when you create new types, or
delete fields from an existing type. For more information on tags,
consult the online help or Appendix B: “Using Tags“ on page 237.
154
Configuring TrackRecord
TrackRecord User’s Guide
Enter a name for the type.
Optionally, select a type
from which your new type
will inherit information. See
“Understanding Data Type
Inheritance” on page 7 for
more information.
Designates as a
common type, or
if left blank, as
restricted. Refer
to “Categories of
Types” on
page 150 if you
are unfamiliar
with this
concept.
Adds tags to this type.
See tAppendix B: “Using
Tags“ on page 237 for
more information on
tags.
Figure 9-14 Type Properties General tab
6
On the Abbreviations tab (Figure 9-15), identify the field(s) to
be used as Default Abbreviation(s).
Tip Setting Abbreviations
is optional. Refer to
“Abbreviations” on
page 151 for a
description of how
abbreviations are used.
Abbreviations list
Add button
Selected Abbreviations
Settings list
Figure 9-15 Type Properties Abbreviations Tab
If you are creating a type that does not inherit from another type,
the list of fields will be empty until you create fields, as described in
later steps. You can return to this tab after you add fields to the
form. If this type inherits from another type, the inherited fields
are displayed.
〫
TrackRecord User’s Guide
To change the Default abbreviation, select Default in the
Abbreviations list. In the Selected Abbreviation Settings list,
select a field (or combination of fields), and check the Default
option.
Configuring TrackRecord 155
〫
To set the Short and Long abbreviations, click the Add button
and add a name for this abbreviation, then select the field or
combination of fields from the Selected Abbreviation Settings
list and check the Short or Long option.
〫
To specify a field to be used to identify duplicate items when
importing data, select the field or combination of fields and
check the Dupe option. If you do not specify a Dupe
abbreviation, the Default Abbreviation will be used.
The control string is similar to a C-style control string. It can
contain alphanumeric characters, which are duplicated in the
abbreviation, and one or more control sequences, which are used
to put information from the item into the abbreviation.
TrackRecord automatically creates the control string.
7
To restrict access to this type, on the Privileges tab click a group
and use the drop-down menu to select the appropriate privilege
for this group.
Tip While you can change
the privilege setting for
any group, you cannot
increase its privileges
beyond the upper limit
established through
Group Administration.
Figure 9-16 Type Properties Privileges Tab
Refer to “Implementing Group Access Rights” on page 127 for a
general discussion of access privileges.
8
When you have completed entering information on these three
tabs, click OK to open the Type Editor.
You can return to make changes on this dialog by using the Type
Properties button in the Type Editor.
156
Configuring TrackRecord
TrackRecord User’s Guide
Using the Type Editor
You use the Type Editor dialog to insert fields into a form, modify fields
on a form, or to modify settings on the Type Properties dialog.
Follow the steps in “Creating and Modifying Types” on page 153 to
display the Type Editor.
Insert Field
Menu
Figure 9-17 Type Editor
To modify Type properties, click the Type Properties button. Refer to
“Creating and Modifying Types” on page 153 for information about
type properties.
⽧
To move a field, click and hold that field and drag it to another
location.
⽧
To modify the properties of a field, right-click on the field and
select Open. The Field Properties dialog opens. Refer to 158-163 for
a description of the Field Properties dialog.
⽧
To insert a field into the type, drop down the Insert Field menu
(Figure 9-17) and select a field category. A pointer is displayed in
the form, indicating where the field will be added. Move the
pointer around the form and click the mouse to position the field.
If the type inherits from a parent type and you place the new field in
the inherited section, the new field will be added to all types inheriting
from that parent.
When you drop the field into a position, a Field Properties dialog is
displayed.
There are three tabs on the Field Properties dialog, each of which is
described in the following sections.
TrackRecord User’s Guide
Configuring TrackRecord 157
Field Properties- General Tab
The Field Properties General tab (Figure 9-18) displays the following
options:
Figure 9-18 Field Properties - General Tab
158
Configuring TrackRecord
Option
Description
Name
Required
Type specification
In general, you cannot change the field type of an
existing field. If you have no database items of the
edited type, you can change its type. Selectable field
types depend on the palette tool used to create the
field. For instance, a field created with the date tool
cannot be specified as a Phone info field type.
Line above, title
Divides form into labeled sections and allows static text
by setting an optional title for the line.
Hot key
(Optional). Used to edit a field directly from within
other views, without using the Item view.
Value required
Determines if it is a required field.
Display label on left
Displays label on left of field rather than above.
Include in mail
Determines if field should be included in the mail message if the AutoAlert utility is used.
(Lists) Overlay values
from item in field:
If field is empty, checks the item for any fields with
duplicate names. If found, its contents are displayed.
TrackRecord User’s Guide
Field Properties- Properties Tab
Note The contents of the Properties tab will vary depending on the type
of field you are creating or changing.
Compound Type Properties (Figure 9-19) fields contain other
TrackRecord items, and are displayed in an Item as drop-down lists and
regular list boxes.
Figure 9-19 Field Properties for Compound Types- Properties Tab
TrackRecord User’s Guide
Option
Description
Is a list
Indicates if the field offer a list of items using a standard Windows list box. Once the list box property has been applied to
a field, it cannot be removed.
Constrain
choices by values in field
When choosing an item for this field, TrackRecord filters the
items shown according to this item. For example, the Fix by
Milestone field in a Defect Report could be constrained by
the Project field. Then, a list of Fix by Milestone Defects
would be limited by Project.
Create new
items when
adding to list
(Only applicable for list fields) If checked, a new item of the
labeled type is automatically created when the Add or Ins
button is clicked, and deleted from the list when the item of
that type is removed.
Expand when
viewing
By default, non-list fields should be expanded inline, showing all of the sub-fields when viewing an item.
Expand when
printing
By default, non-list fields should be expanded inline, showing all of the sub-fields when printing an item.
Configuring TrackRecord 159
Tip The only way to select
the value of a VCS field is
by choosing it from the
version control dialog.
Option
Description
Require checkbox in list items
By default, list fields do not require a checkbox.
VCS source files
VCS source files list should be used and updated when
checking files in and out from TrackRecord.
The String/Notepad Properties dialog (Figure 9-20) appears for all string
and Notepad fields.
Figure 9-20 Field Properties for Strings/Notepads- Properties Tab
160
Configuring TrackRecord
Option
Description
Autoincrementing field
Automatically assigns field value when an item containing
the field is initially created. This attribute is useful for creating fields like task identifiers, when you want a unique
number to identify each new task.
Control string
Text string used to create the identifier. Use a pound sign
(#) in the string where you want the number to appear. For
example, to get identifiers of the form “TrackRecord00001”, you would use the control string “TrackRecord-#”.
Current counter
value
Optional integer that specifies the current value for the
counter number. You can change this value at any time.
Check checkbox
when text present
Named field should be checked if any text is present in the
field, and should be unchecked if no text is present.
TrackRecord User’s Guide
Option
Description
Read only field
Makes field read-only. Use only with auto-incrementing
fields, or with fields that will automatically be filled from
templates in all cases.
VCS file name
Indicates field will contain a file name from VCS.
VCS project/dir
Indicates field will contain a project or directory name from
VCS. Place a field with this attribute both in the project
item and in the source and data file items themselves (if
the VCS project may be different on a file-by-file basis).
VCS comment
Used to initialize the check-in comment field when checking files in from an item of this type. In the standard Defect
type, the Description field is used.
VCS label/release
Check if field contains a VCS release string.
No VCS property
VCS is not being used.
Checkbox/Radio Button Properties (Figure 9-21) tab appears for all
check box and radio button fields.
Figure 9-21 Field Properties for Checkboxes/Radio Buttons- Properties Tab
TrackRecord User’s Guide
Option
Description
Enter date when
checked
Named field, which must be a Date or a Time/Date field,
should contain the current time and date when checked.
Launch executable when
checked
Launches specified executable file. The list of executable
files you can specify appears under Updated Field.
Configuring TrackRecord 161
Option
Description
Update recurring
times
Creates a button instead of a checkbox that will advance
the starting date of the specified time-related field. This
button field is only used for recurring times; for example,
for an appointment that occurs every day, this button could
be clicked to indicate that today's occurrence has passed.
The first time that the button is clicked, the date of the field
advances to “today”. On subsequent clicks, the date
advances to “tomorrow”.
None
Clears previously check options.
Required checkbox for parent
lists
Indicates if field is required
Updated fields
Indicates which fields will be updated.
Date Properties (Figure 9-22) tab appears for all date- and time-related
fields: dates, times, and time spans. The Initialize to Current Date/
Time checkbox initializes the value in the field to the current date and
time when a new item with this field is created.
Figure 9-22 Field Properties for Dates- Properties Tab
162
Configuring TrackRecord
TrackRecord User’s Guide
Field Properties- Privileges Tab
The Privileges tab allows you to specify which groups will have access
to this field. Refer to “Altering Access Rights for Types and Fields” on
page 150 for a discussion of access privileges.
Tip While you can change
the privilege setting for
any group, you cannot
increase its privileges
beyond the upper limit
established through
Group Administration.
Figure 9-23 Field Properties - Privileges Tab
1
Click the Privileges column of the group whose access rights
you want to modify.
2
Click the new privileges setting and click OK.
You can use the Field Properties General tab to Hide a field to
further control access rights to a field. Making a field invisible does
not disable the field and a template could supply a value to that
field, but the template supplied field would not be visible.
When all Field Properties have been set, click OK to see the field on the
type form. When all fields have been added, you can click the Type
Properties button to set Abbreviations, if desired, as described in Step 6
on page 155.
When all type properties and fields have been set, click Save and
Close. The Choose a Type dialog is displayed, showing the newly
created or modified type.
Restrictions
TrackRecord places some restrictions on the modifications
administrators can make to information types.
⽧
TrackRecord User’s Guide
You can delete only the last field added to a type if items of this
type already exist in the database.
Configuring TrackRecord 163
⽧
You cannot move an inherited field past the boundary of the
parent fields when a type inherits from another type. (Note that
you can, however, add a new field to the inherited section.)
Custom Items
The TrackRecord sample database ships with ten Choice types,
including Department, Priority, Severity, and others, and several choice
items for each of these types. For example, the Priority type includes
the choices Critical, High, Normal, Low, and Suggestion. You can use
these Priority items, or you could, for example, delete the Suggestion
choice item and create a new choice item called Wish List.
Note that Status and Action choice items should be set through the
Workflow Editor rather than through this procedure. Refer to
“Workflow Administration” on page 140.
Creating or Deleting a Custom Item
1
From the Tools menu and click Item Browser.
2
Click the Show All check box.
3
Under the Choice Fields type, select the type for which you
want to create a custom item.
For example, under the Choice Fields type you could select the
Priority type to create a custom item.
A list appears under Items.
4
To delete an item, right-click on the item and select Delete.
For example, you could right-click on the “5 - Suggestion” item of
the Priority type, click Delete and click Yes in the confirmation
dialog.
5
To create a new item, click the New icon in the upper left
section of the Item Browser toolbar.
An item form opens.
6
Enter the information for the new item.
For example, for a Priority item you could enter “5” in the Name
field, and “Wish List” in the Description field. Other item types,
such as Department, only contain a name field.
7
164
Configuring TrackRecord
Click Save and Close.
TrackRecord User’s Guide
Modifying a Custom Item
1
Click the Tools menu and click Item Browser.
The Item Browser dialog opens.
2
Click the Show All check box.
3
Under Choice Fields, select a type to modify.
For example, select Department in the Types list to modify a
Department item.
4
Double-click the item to be modified.
For example, double-click the Documentation item.
The item form opens.
5
Make the modification.
For example, you could replace the Name “Documentation” with
“Publications.”
6
Click Save and Close.
Rules Administration
TrackRecord provides a Rules Engine that permits creating policies that
govern the behavior of information types. Administrators can use rules
to require that certain fields of information must be supplied when
certain other fields have a specified value. For example, an
administrator might create a rule that states, “If Priority is equal to
Critical, then Fix by Date is required.”
This allows you to further customize your workflow by implementing
rules that disable the standard workflow in certain situations. Disabling
the workflow causes the Action button to be disabled, which will
prevent a user from changing the status of an item even if the standard
workflow would normally permit them to do so.
Notes About Rules
TrackRecord User’s Guide
⽧
Administrators create rules for individual types, and can create
multiple rules for any given type.
⽧
Rules apply either globally, or to users who belong to specified
groups.
⽧
Rules use the same operators as TrackRecord queries, except for the
“is between” operator.
Configuring TrackRecord 165
⽧
A child type inherits any rules created for its parent. To avoid the
creation of child data types that are identical to parent types,
ensure that there are no additional fields in the child type.
⽧
Inherited rules are applied before a type’s own rules.
⽧
A type’s own rules are applied in the order they appear within the
Rules editor, and administrators can rearrange this order.
⽧
Multiple conditions within a single rule provide an AND logical
operation and all the conditions must be true for the rule to be
applied. Separate rules provide the logical OR operation.
⽧
Rules are applied upon: a loss of focus on a field, a change to a
radio button or check box, and the execution of a workflow action
based on the contents of the item before the action.
⽧
Rules take the form:
IF {condition}, THEN {action}
Adding a Rule
Use the following procedure to create a rule:
1
Click the Administrator menu and click Edit Rules.
The Choose a Type dialog is displayed.
166
Configuring TrackRecord
2
Double-click a type to display the Rules dialog.
3
Click New to add a new rule and open the Rule Wizard.
4
Use the Rule Wizard (Figure 9-24) to build the rule.
TrackRecord User’s Guide
1. Create the IF condition. Click the
Add button when it is complete.
The new rule will appear in the
Conditions list. Click Next.
2. Create the THEN condition
designating the action that you want
taken. Click the Add button.
The new condition will appear in the
Action list. Click Next.
3. Enter a name for the rule, select
groups to which the rule will apply,
and click Finish to close the Wizard.
Figure 9-24 Using Rule Wizard. Use the Rules Wizard online help for additional
assistance.
TrackRecord User’s Guide
5
When multiple rules exist, use the Move Up and Move Down
buttons on the Rules dialog to rearrange the order in which
rules are applied.
6
Click OK to exit and save your work.
Configuring TrackRecord 167
168
Configuring TrackRecord
TrackRecord User’s Guide
Chapter 10
Creating and Maintaining
TrackRecord Databases
This chapter describes the tasks required to set up and maintain the
TrackRecord database. It includes the following sections:
⽧
Database Overview — Overview information on the TrackRecord
database and management tasks regarding the database.
⽧
Best Practices for Maintaining TrackRecord Data — Description
of the best practices used by Compuware and its customers and
guidelines for performance optimization.
⽧
Using the Database Administration Utility — Information on
starting the Database Administration Utility, creating a database,
automatically scheduling Check Database and launching a manual
Check Database procedure, rebuilding a database, scheduling back
ups and restoring your database, and copying the database.
⽧
Importing and Exporting Data — Instructions regarding using
the Wizard, command line interface, and creating template files.
Database Overview
TrackRecord uses a database in which data can be defined so it can be
easily reorganized, managed, updated, and accessed in a number of
ways.
Tip For a general
overview of the
TrackRecord database,
see “About the
TrackRecord Database”
on page 5.
TrackRecord User’s Guide
During installation, Setup prompts for a database name. If the database
does not exist, the TrackRecord installation program creates a database
using the supplied name. This database contains sample types, queries
and views that can be used to familiarize users with TrackRecord.
Once TrackRecord is installed (as described in the TrackRecord
Installation Guide) and configured (as described in Chapter 9,
“Configuring TrackRecord”), users can begin to generate and
accumulate project data. Administrators will then need to protect that
data by managing the database.
169
Best Practices for Maintaining TrackRecord Data
This documentation was created to assist TrackRecord administrators in
maintaining the TrackRecord databases used at their organizations.
Backing Up Information
As with any data that is important to your organization, it is essential
to perform nightly back ups. TrackRecord’s backup utility is intended as
an extra fail-safe, and currently only provides the ability to restore from
the most current backup. For a primary backup, Compuware highly
recommends that you use your own approved backup utility for your
production databases. To do so, simply include the
Compuware\TrackRecord Server\Databases subdirectory in the list of
directories to be backed up. When using the Database Administration
Utility or any third party utility to back up TrackRecord data, ensure
that users are not accessing the TrackRecord database.
Maintaining Data Integrity
TrackRecord includes two features that help maintain data integrity:
⽧
Check Database— A data integrity check done by TrackRecord. It
checks all cross-links, data values, and other references. Then, it
repairs anything suspect.
⽧
Rebuild— A Faircom utility that performs in the same manner as a
relational database “rebuild indices” operation by rebuilding the
indices for each of the database tables. As items are changed/
deleted/added, “empty” space can build within a table. Although
this space has no impact on the performance or behavior, it results
in unnecessarily large file sizes. The compact option provided
during a rebuild removes any unused space within the tables
resulting in a reduced physical size.
Guidelines for Using Check Database and Rebuild
⽧
170
For optimum data integrity, an organization should ensure that the
Check Database utility is run a minimum of once per week. The
Check Database utility can be scheduled to run without user
interaction. This is intended to make it easier to run the utility on a
regular basis at times when the interruption in database access will
have minimal impact to the users. See “Scheduling Check
Database” on page 175.
Creating and Maintaining TrackRecord Databases
TrackRecord User’s Guide
⽧
If you are using Check Database, Compuware recommends an
intermittent examination of the log file. The log file is stored in the
client install directory and is named <database name>.log. For
example, the log file for a database named “Sample” would be
“Sample.log” and would be located in the Windows directory
Program Files>Compuware>TrackRecord by default.
⽧
For optimal performance on large databases, it is generally
recommended that you rebuild/compact the database at least once
per month. See “Rebuilding Databases” on page 179.
⽧
When using the Database Administration Utility or any third party
utility to back up TrackRecord data, ensure that users are not
accessing the TrackRecord database. Refer to “Scheduling Back Ups
and Restoring Databases” on page 180 for more information.
⽧
When making modifications to the types via the Type Editor, it is
always good practice to:
〫
Make a back up or image of the database before using the Type
Editor.
〫
Ensure all users have exited the database. As of version 6.0, the
Type Editor cannot be used unless all other users are logged out
of the database.
〫
Run a Check Database after using the Type Editor.
⽧
When using the Workflow Editor, ensure that all users have exited
the TrackRecord application, both client-server and web.
⽧
TrackRecord’s backup utility is intended as an extra fail-safe, and
currently only provides the ability to restore from the most current
backup. If problems occur, restore your last backup. For a primary
backup, Compuware highly recommends that you use your own
approved backup utility for your production database. When using
a backup utility, Compuware recommends that you shutdown the
Faircom server. If this is not possible, ensure that no live sessions of
TrackRecord are occurring.
⽧
When performing a database, you must manually shut down
AutoAlert and restart it once the backup is complete.
Defining Data
The following guidelines should be followed when defining
TrackRecord data:
⽧
TrackRecord User’s Guide
Do not add an auto-incrementing field after adding an executable
button in the Type Editor as this will result in odd behavior and
Creating and Maintaining TrackRecord Databases
171
possible loss of database integrity. To avoid this situation, always
ensure that the executable button is the last control added to the
type during editing. When editing the type, the executable button
should first be deleted from the type and added only after any
changes have been made.
⽧
If your organization will ever be using the WebServer, note the
WebServer does not recognize the “<“, “>”, or “&” characters in
field names or field names in types greater than 31 characters in
length.
⽧
Use caution when defining abbreviations. It is possible to create
self-referencing abbreviations. For example, you could create type A
abbreviation which references type B whose abbreviation
references type A, etc. This and other combinations may result in
an unstable database.
⽧
Avoid creating child data types that are identical to the parent data
type by ensuring that there are no additional fields in the child
data type.
Optimizing Performance
To optimize performance, ensure that:
⽧
Clients, Database servers, and WebServers meet the system
requirements. For complete system requirement information,
consult your TrackRecord Installation Guide.
⽧
Applications running on the database server are minimized if
possible.
⽧
If connecting over WAN or Internet, use the WebServer not the
Windows client.
⽧
If more than 50 users will be accessing TrackRecord through the
web simultaneously, set up multiple WebServers. Attempt to limit
the number of concurrent connections per WebServer to 50-100.
You can have as many WebServers as you want to access the same
database(s).
⽧
Database maintenance (Check Database, Rebuild) is performed
regularly.
Frequently Asked Questions
For answers to your frequently asked questions, refer to TrackRecord’s
online help. To access the help files, open the Database Administration
Utility and click the Help button.
172
Creating and Maintaining TrackRecord Databases
TrackRecord User’s Guide
Using the Database Administration Utility
TrackRecord’s Database Administration utility provides the primary
tool set for database administration.
Starting the Database Administration Utility
1
From the Start>Programs>Compuware>TrackRecord menu,
select the Database Administration Utility.
2
Log in as a user with administrator privilege.
The Database Administration Utility dialog opens (Figure 10-25).
Figure 10-25 Database Administration Utility
Navigating the Database Administration Utility Interface
The buttons on the main interface of the Database Administration
utility (Figure 10-25) have the following function:
TrackRecord User’s Guide
Button
Function
Availability
New
Create a new database. See “Creating a New
Database” on page 174 for more information.
Always
Check
Check the database for broken internal links,
and repairs any problems. Refer to “Scheduling Check Database” on page 175.
Faircom server is
running
Rebuild
Rebuild the database index. For additional
information, see “Rebuilding Databases” on
page 179.
Faircom server is
halted
Back up
Schedule a recurring back up operation. See
“Scheduling Back Ups and Restoring Databases” on page 180.
Always
Creating and Maintaining TrackRecord Databases
173
Button
Function
Availability
Restore
Restore a backed-up database. Refer to
“Scheduling Back Ups and Restoring Databases” on page 180 for additional information.
Faircom server is
halted
Copy
Copy contents of selected database to a new
location. For more information, refer to
“Copying Databases” on page 182.
Faircom server is
halted
Creating a New Database
The TrackRecord sample database contains several default types
(Defect, Task, Person, and so on) and several default queries and
reports. You can use this database as your production database, making
modifications as appropriate for your environment, or you may choose
to create a new, blank database rather than use the sample. You may
also wish to create new databases to support multiple projects.
You can create new databases with either a:
⽧
Copy of the sample database shipped with TrackRecord that
provides the sample types, queries, Outline Reports, sample data,
and a default workflow
Note Compuware recommends that you make copies of the sample
database prior to making modifications.
⽧
Database containing the types from the sample database, but no
data, queries, Outline Reports, or default workflow
After selecting the type of database you want to use to create a new
database, perform the following procedure:
1
Start the Database Administration Utility.
“Starting the Database Administration Utility” on page 173
contains detailed instructions.
2
Click the New button (Figure 10-25).
A New Database dialog opens (Figure 10-26).
174
Creating and Maintaining TrackRecord Databases
TrackRecord User’s Guide
Figure 10-26 Creating a New Database
3
Enter a name for the new database.
4
Choose a database type, either Blank Database or Sample
Database.
5
Click Create.
Scheduling Check Database
Software developers sometimes experience computer crashes or
network problems, such as the failure of a server acting as a router.
These failures may occur while data is being submitted to TrackRecord,
which may leave the database with incomplete entries. Check Database
opens all of the items and corrects any errors it finds, including dates.
It also re-links all items that it can.
Note If you are using Check Database, Compuware recommends an
intermittent examination of the log file. The log file is stored in the client
install directory and is named <database name>.log. For example, the log
file for a database named “Sample” would be “Sample.log” and would be
located in the Windows directory Program Files>Compuware>TrackRecord
by default.
Automating Check Database
Note This procedure requires Internet Explorer 4.0 or higher to be
installed on your system.
To automate the running of a Check Database, use the Microsoft Task
Scheduler to schedule a Check Database. This is a components of
TrackRecord User’s Guide
Creating and Maintaining TrackRecord Databases
175
Microsoft Internet Explorer 4.0 or higher that is used to schedule the
running of commands or tools on a machine.
Note Compuware recommends that Check Database is run from the
same client machine each time to keep all resulting information in one log
file.
To automate Check Database, perform the following procedure:
1
Ensure that the Microsoft Task Scheduler is active.
〫
Windows NT — From the Start menu, choose
Settings>Control Panel>Services. Verify that the Task
Scheduler’s status is set to Started. If not, click Start. Click Close
when you are finished.
Figure 10-27 Services Dialog Box
〫
Tip Set the Task
Scheduler to launch upon
startup by selecting
Automatic as the startup
type.
2
Windows 2000 — From the Start menu, open
Settings>Control Panel>Administrative Tools. Double-click
the Component Services icon. Verify that the Task Scheduler’s
status is set to Started. If not, click Start. Click OK when you are
finished.
Open the Task Scheduler in one of the following ways:
〫
Windows NT — Open My Computer and select Scheduled
Tasks. Click Add Scheduled Task.
〫
Windows 2000 — From the Start menu, select
Programs>Accessories>System Tools>Scheduled Tasks. Click
Add Scheduled Task.
The Scheduled Task Wizard appears. Click Next.
176
3
Select TrackRecord from the application list. Click Next.
4
On the dialog box (Figure 10-27),
Creating and Maintaining TrackRecord Databases
TrackRecord User’s Guide
Figure 10-28 Scheduling a Task Using the Wizard
〫
Enter a name for the task or retain the default.
〫
Select a frequency for how often you want Check Database to
occur. Compuware recommends that you automate the Check
Database feature to run minimally on a weekly basis to ensure
that Check Database recovers as much data as possible and
places items in a workable state.
Click Next.
5
Select the time and day that you want this task started. Click
Next.
Figure 10-29 Scheduling a Time Using the Wizard
TrackRecord User’s Guide
6
Enter the User’s name and password. Click Next.
7
Select the checkbox to open the Advanced Properties. Click
Finish.
Creating and Maintaining TrackRecord Databases
177
8
In the Run field, append the following line, with your
applicable parameters, to the command line after the
TrackRecord executable (TR.exe):
-uUserName -pPassword -dDatabaseName -r -q
Click OK when you are finished.
For example, to open the database named “Sample” with the user
name “Admin”, the password “admin”, and to run a Check
Database, enter the following in the Run field (Figure 10-30):
TrackRecord
executable
User name
“Admin”
Password Database Runs Check
“admin” name
Database
“Sample”
“Quiet”
mode
Figure 10-30 Example of Command To Run Check Database
The “Quiet” mode will allow you to run Check Database
unattended and not display error dialogs. To view the results of a
quiet mode check, refer to the log file. The log file is stored in the
client install directory and is named <database name>.log. For
example, the log file for a database named “Sample” would be
Sample.log and would be located in the Windows directory Program
Files>Compuware>TrackRecord.
9
Reenter the user name and password under which the task
should run. Click OK.
The new task should appear in the Scheduled Tasks Dialog Box.
178
Creating and Maintaining TrackRecord Databases
TrackRecord User’s Guide
Checking Databases for Errors Manually
If you are running TrackRecord and are logged in to the database to be
checked, you can use the Administrator menu’s Check Database
option to perform this task. To check other databases:
Note Compuware recommends that you automate the Check Database
feature to run minimally on a weekly basis to ensure that Check Database
recovers as much data as possible and places items in a workable state.
Refer to “Automating Check Database” on page 175 for more information.
1
With the Faircom server running, start the Database
Administration Utility.
For more information, refer to “Starting the Database
Administration Utility” on page 173.
2
Select a database from the displayed list.
3
Click the Check button (Figure 10-25).
4
If users are logged on using this database, a dialog will be
displayed listing current users.
You cannot check a database while users are using the database.
Refer to “Database Lock-out” on page 152 for information about
this dialog. When all users have logged off, this dialog is dismissed
and the Check <databasename> Database dialog opens.
5
Click Check to fix broken internal links or Cancel to exit
without checking the database.
If you are not currently logged in to the database, you will be
prompted to log in.
Rebuilding Databases
Rebuild is a Faircom utility that performs in the same manner as a
relational database "rebuild indices" operation by rebuilding the indices
for each of the database tables. As items are changed/deleted/added,
"empty" space can build within a table. Although this space has no
impact on the performance or behavior, it results in unnecessarily large
TrackRecord User’s Guide
Creating and Maintaining TrackRecord Databases
179
file sizes. The compact option provided during a rebuild removes any
unused space within the tables resulting in a reduced physical size.
Caution: Compuware recommends that you rebuild the database on a
bi-weekly basis to preserve database integrity. Regular rebuilds help
prevent problems from spreading in the database and irreparable
damage to certain database items. For example, TrackRecord creates
pointers to attachments that are stored in the database. These
pointers are difficult to restore.
To rebuild your database index:
1
Ensure that all users are logged out and halt the TrackRecord
Faircom server.
See the TrackRecord Installation Guide for instructions for manually
stopping the server. For Windows NT machines running
TrackRecord as a service, use the Control Panel>Services option to
stop the Faircom Server.
2
Start the Database Administration Utility.
Refer to “Starting the Database Administration Utility” on page 173
for more information.
3
From the displayed list, select the database to be rebuilt (Figure
10-25) and click the Rebuild button.
The Rebuild button will be inactive if the Faircom server is running.
4
If you want to defer reclaiming file space, click No Compact
Files.
Compacting files reclaims file space created when you delete
database data. Over time, this unclaimed space might degrade the
performance of a database slightly.
5
Click Rebuild.
Scheduling Back Ups and Restoring Databases
Protection of data requires frequent and regular backups. Database
Administration allows you to schedule daily back ups at any time you
180
Creating and Maintaining TrackRecord Databases
TrackRecord User’s Guide
specify, usually during the overnight period when development Team
Members are not working with TrackRecord.
Caution: TrackRecord’s backup utility is intended as an extra fail-safe,
and currently only provides the ability to restore from the most
current backup. If problems occur, restore your last backup. For a
primary backup, Compuware highly recommends that you use your
own approved backup utility for your production database. When
using the Database Administration Utility or any third party utility to
back up TrackRecord data, ensure that users are not accessing the
TrackRecord database.
Scheduling Back ups of Database
1
Start the Database Administration Utility.
Refer to “Starting the Database Administration Utility” on page 173
for more information.
2
From the displayed list, select the database to be backed up
(Figure 10-25) and click the Backup button.
A Backup Settings for <databasename> dialog opens (Figure 10-31).
Figure 10-31 Backup Settings
3
Check the box labeled Backup Daily At to schedule a regular
daily backup.
4
Click the drop-down arrow to select a time from the displayed
list.
5
Click OK.
Restoring a Backed-up Database
1
Ensure that all users are logged out and halt the TrackRecord
(Faircom) server.
2
Start the Database Administration Utility.
Refer to “Starting the Database Administration Utility” on page 173
for more information.
TrackRecord User’s Guide
Creating and Maintaining TrackRecord Databases
181
3
From the displayed list, select the database to be restored
(Figure 10-25) and click the Restore button.
4
Restart the TrackRecord (Faircom) server.
Copying Databases
You can copy an existing database to a new location and change its
name. This operation lets you make minor modifications to an existing
database without having to start over from scratch. To make a copy of a
database:
1
Halt the TrackRecord Faircom server.
See the TrackRecord Installation Guide for instructions for manually
stopping the server. For Windows NT machines running
TrackRecord as a service, use the Control Panel>Services option to
stop the Faircom Server.
2
Start the Database Administration Utility.
Refer to “Starting the Database Administration Utility” on page 173
for more information.
3
Select a database from the displayed list (Figure 10-25) and click
the Copy button.
This button will not be active if the TrackRecord server is running.
4
Enter a name for the database to be created.
5
Click Copy.
Importing and Exporting Data
TrackRecord allows you to transfer data between TrackRecord
databases, import data from any delimited ASCII file, or export data to
a delimited ASCII file or a Microsoft Access database. For example, you
might import an address list to avoid retyping it, export a developer’s
list of notes or defect reports, or import an appointment book’s
contents.
TrackRecord provides two methods for importing and four methods for
exporting data:
182
⽧
The TrackRecord Import-Export Wizard. This wizard steps you
through the process of importing, exporting, and creating a
template. Refer to “Using the Import-Export Wizard” on page 183
for more information.
⽧
The Import and Export options on the Administrator menu. Note
that you must create a template file before using these options. See
“Setting Import and Export Menu Options” on page 187 for more
Creating and Maintaining TrackRecord Databases
TrackRecord User’s Guide
information regarding the menu options. For more information on
templates, refer to Chapter 6, “Working With Templates”.
⽧
For exporting only, you can use the Copy option to transfer data to
the clipboard. The data can then be pasted into another program.
“Exporting Data With Copy and Paste” on page 188 provides
additional information.
⽧
For exporting only, you can use the command line interface to
automatically create an Access table on a periodic basis, for
example, using Microsoft's Task Scheduler. Refer to “Exporting
Using the Command Line Interface” on page 188.
Troubleshooting the Database
For a detailed listing of troubleshooting and configuration information
for one of the supported version control systems, refer to
“Troubleshooting” in the TrackRecord or Database Administration
Utility online help.
For the most current TrackRecord support information, please visit the
Compuware Web site at: http://www.compuware.com. From this
location, you will have access to our online KnowledgeBase and the
most current patches and updates for the product.
Using the Import-Export Wizard
The TrackRecord Import-Export Wizard guides you through the process
of importing, exporting, and creating a template.
Tip For more information
on templates, refer to
Chapter 6, “Working
With Templates”.
Importing With the Import-Export Wizard
To import data into a TrackRecord database, you must have previously
created a delimited ASCII file. The Import-Export Wizard can create the
ASCII file with the Export option on the Administrator’s menu, or with
any program capable of exporting to a delimited ASCII file, such as
Microsoft Excel.
Caution: When importing data, it is advisable to make a copy of your
database before attempting to import data.
If you are importing data from an ASCII file that was not created by the
Import-Export Wizard, you should verify that the data is in the correct
format by exporting data from your existing database and comparing
the file created with the file you intend to import. If the formats do not
match, you can alter the data to be imported before attempting the
TrackRecord User’s Guide
Creating and Maintaining TrackRecord Databases
183
import. Importing data that was exported with the Import-Export
Wizard is less error-prone.
Note that the format of date fields must correspond to the currently
configured window’s short date format. To import using the importexport wizard, perform the following procedure:
1
From the Start>Programs>Compuware>TrackRecord menu,
select the Import-Export Wizard.
Be sure to log in to the database into which you want to import
data.
2
Select Import from the Wizard dialog box (Figure 10-32).
Figure 10-32 Using the Import-Export Wizard to Import
3
Enter the name of the file containing your exported data or
click Browse to select an existing name.
4
You will be prompted to indicate if you have an existing
template file.
A template file specifies the type and fields to be imported.
〫
If you have already created a template file, click Yes and enter
its filename or browse to the location. Click Next to continue.
If you do not yet have a template file, click No. You will be
prompted through the process of creating one. Select the type
and fields to be imported and choose the delimiter. Click Next
to continue through the Wizard.
Indicate what action should be taken if duplicate data is found
(Figure 10-33). Click Finish.
〫
5
184
Creating and Maintaining TrackRecord Databases
TrackRecord User’s Guide
Figure 10-33 Import-Export Wizard
Duplicate imported data can be discarded or existing data can be
overwritten. Duplicates are determined by comparing the field
whose abbreviation is Dupe. (This abbreviation was established
when the type was created, as described in “Identifying Duplicate
Imported Items” on page 151.)
The data is considered a duplicate if it matches existing data of the
type being added or of a parent type. Note that the data is not
considered a duplicate if it matches a child of the type being added.
A message will display the number of records imported and the Wizard
will be closed.
Exporting With the Import-Export Wizard
You can use the Import-Export Wizard to export data from a
TrackRecord database into a delimited ASCII file or into a Microsoft
Access database. This data can then be imported into another
TrackRecord database or into another program, such as Microsoft Excel
or Microsoft Word.
To export data from a TrackRecord database:
1
Optionally, log in to TrackRecord, being sure to specify the
database from which you intend to export data, and create a
query that would find the information you wish to export.
If you will be exporting all items of a particular type, you do not
have to create a query and can proceed directly to step 2.
TrackRecord User’s Guide
2
From the Start>Programs>Compuware>TrackRecord menu,
select the Import-Export Wizard.
3
Log in to the database from which you want to export data.
4
When the Import-Export Wizard opens, select Export (Figure
10-34) and click Next.
Creating and Maintaining TrackRecord Databases
185
Figure 10-34 Using the Import-Export Wizard to Export
5
Select a radio button to indicate whether you wish to create
either a file or an Access database (Figure 10-35). Enter a name
for the file to be created. Click Next.
Figure 10-35 Creating a Export File
6
Choose whether to export all items of a certain type or the
results of a Query (Figure 10-36).
Use the drop-down lists to select the type or Query. Click Next.
Figure 10-36 Selecting the Type or Query
186
Creating and Maintaining TrackRecord Databases
TrackRecord User’s Guide
7
If you have already created a template, enter its name.
A template file specifies the type and fields to be exported. If you
do not yet have a template file:
〫
Click the New Template button. You will be prompted through
the process of creating a template.
〫
Select the type and fields to be exported. When selecting fields,
note that the Add button is not enabled for Parent fields. You
must add each child field individually.
〫
Choose a delimiter character, being careful to choose a
character that is not contained in the data. The pipe (|) or tilde
(~) characters are often good choices.
If you want to save the template file, enter a file name.
A message will display notifying you if the export was
successful. Click OK.
〫
8
You can choose to run the Wizard again or close the Wizard.
If you created a delimited ASCII file, it can be imported into another
TrackRecord database or into any program capable of importing
delimited ASCII data. If you created an Access database, it can be
opened with Access.
Setting Import and Export Menu Options
The Administrator’s menu contains Import and Export options. These
options allow you to import and export data without using the ImportExport Wizard.
A template file is required for both importing and exporting. You can
use the Import-Export Wizard to create the template file by selecting
the Template Only option. Refer to “Using the Import-Export Wizard”
on page 183 for more information. (Alternatively, you can create a
template file manually, as described in “Manually Creating Template
Files and Importing” on page 188.)
You can choose to export data (the entire database or the results of a
query) or type descriptions.
You can import data, type descriptions, or an outline created with a
previous version of TrackRecord. When importing an Outline, it is
saved as an Outline Report accessible through the current version of
TrackRecord.
TrackRecord User’s Guide
Creating and Maintaining TrackRecord Databases
187
Exporting Data With Copy and Paste
If the information you want to export is displayed in an Outline view,
the easiest way to transfer the information is to use Copy and Paste.
Configure the report to display the columns of information you wish
to transfer, select the header you want to copy, and use the Edit menu’s
Copy option to copy the header. The displayed data will be transferred
to the clipboard and can be pasted into Microsoft Excel, Word, Adobe
FrameMaker or other applications.
Exporting Using the Command Line Interface
You can export TrackRecord data to an Access database through a
command line interface rather than through the Import-Export
Wizard.
Using the command line interface allows you to automatically create
an Access table on a periodic basis, for example, using Microsoft's Task
Scheduler.
The command is TRTOMDB.EXE. The following parameters are
supported:
-d
-u
-p
-t
-a
-q
-o
TrackRecord database to use
User name
Password
Full path to the template file
Full path of the Access table to be created
Optional. Name of the query in this database that is to be used. If not
specified, all items defined in the template will be exported
Optional. When set to TRUE, it will suppress the MDB overwrite dialog.
The default is False
All parameters must be enclosed in double quotes. The following is an
example of a properly formatted command line:
TRTOMDB.EXE -d"Default" -u"Admin" -p"Admin"
-t"c:\template.tpl" -a"c:\access.mdb" -q"Bugs" -o”True”
Manually Creating Template Files and Importing
To import from or export to an ASCII file, you must first create a
template file, which describes the mappings of the fields in your data
files to the equivalent TrackRecord fields. You can use the ImportExport Wizard to create a template, as described in “Using the ImportExport Wizard” on page 183, or you can manually create a template
file.
188
Creating and Maintaining TrackRecord Databases
TrackRecord User’s Guide
Setting up a Template File and Import Information
Tip Importing from ASCII
files can be quite slow in
many situations. The
more items there are in
your database, the slower
importing may be
because TrackRecord
must check for duplicate
data.
1
Determine which TrackRecord types correspond to the type of
information you want to import.
Each ASCII file can only contain items of a single type, but any
subfield of a particular item can also be included in the import file.
For example, you could import Tasks in a single ASCII file, and
since Tasks can include an “Assigned to” field, you could also
import People to fill that field in the Tasks. The People would be
imported as an integral part of each Task in your ASCII file, but
would be created as separate objects contained within the Tasks in
TrackRecord.
2
Determine the delimiter character used to separate fields in
your ASCII file.
Double quote characters can be used in import files at the
beginning and end of fields, but another delimiter character (often
a comma is used) must also be used to delimit the fields.
3
Edit a file called <name>.tpl, where <name> is any title you
choose to assign to the template.
4
Insert the following text into the file:
[Template]
TypeName=<TrackRecord type name>
DelimiterChar=<delimiter char>
where <TrackRecord type name> is the name of the TrackRecord
type for the information you are importing (from step 1), and
<delimiter char> is the delimiter character (from step 2). For
example, you might enter:
[Template]
TypeName=Defect
DelimiterChar=$
To use a newline character as the delimiter, specify
DelimiterChar=\n.
5
List the names of the TrackRecord fields in the type specified
that correspond to the types in your input file.
There are two types of field types:
〫
〫
Basic Types— Simple fields for common types, like names,
addresses, strings, numerics, etc. There may actually be more
than one corresponding “field” in the import or export file
Compound Types— All other types are Compound Types.
In the sample database, there are two fields that contain more than
one field:
TrackRecord User’s Guide
Creating and Maintaining TrackRecord Databases
189
〫
〫
Names— There will be three fields (Last, First, Middle)
Addresses— There will be six fields (Line 1, Line 2, City, State,
Zip, Country)
If a field type is a Compound Type, you must also specify how
many subfields of the Compound Type are in the input file, by
specifying the number after a comma on the FieldName line. For
Basic Types consisting of multiple fields, each of these fields is
considered one field, and the number of fields specified after the
name of the Compound Field should reflect that, as shown in the
Reported By field in the following example.
For example, to import a Defect containing a Description, a Project,
and a Priority, you would use the following lines (without the
comments):
FieldName=Description; The description of the defectFieldName=Project,1; The Project, which has one
subfield.(there is no actual field in the input file
corresponding to thisline; it just affects the interpretation of the next line)
FieldName=Description; The Description field from the
Project (the one subfield)
FieldName=Priority;The Priority of the Bug Report
To ignore a field that exists in the input file, use a FieldName=
specifier, but don’t specify a field name.
To import Check Box and Radio Button items, your ASCII (import)
file should contain either 0 or a blank space for unchecked items,
and 1 or an “X” for checked items.
So our sample would look like this:
[Template]
TypeName=Defect
DelimiterChar=$
FieldName=Description
FieldName=Project,1
FieldName=Description
FieldName=Priority
FieldName=Fixed
A more complex example, which would also export the people in
the Reported by and Fixed by fields (and their names, companies,
and addresses) would be:
[Template]
TypeName=Defect
DelimiterChar=$
FieldName=Description
FieldName=Priority
FieldName=Project,1
FieldName=Description
190
Creating and Maintaining TrackRecord Databases
TrackRecord User’s Guide
FieldName=Reported by,3; 3 fields are specified:
FieldName=Name; Name, Address, and Company
FieldName=Company,1; For the Company, only name is used.
FieldName=Name
FieldName=Address; This is the third field in Reported by
FieldName=Fixed by,3
FieldName=Name
FieldName=Company,1
FieldName=Name
FieldName=Address
6
Ensure your import file is formatted to correspond to the
template file, with each field separated from the next field by
the delimiter character (except for fields at the ends of records,
which use the newline character as a delimiter).
The following is a valid input file for the template described earlier:
Generic bug 1$TrackRecord$2
Generic bug 2$TrackRecord$1
Each record should be on a line by itself, with the newline
character representing the end of the record. The only exception is
that newline characters are allowed within double-quoted fields.
See “Importing File Specifications” on page 192 for information
about specifying Name and Address fields.
Fields corresponding to TrackRecord lists must be terminated with
an extra delimiter character after the last item in the list.
Note The format of date fields must correspond to the currently
configured window’s short date format.
7
Back up the contents of the TrackRecord object database
subdirectory, in case you want to “undo” the import if there is a
mistake in the template or data files.
8
To verify that your data is in the correct format, export data
from your existing database and compare the file created with
the file to be imported.
If the formats do not match, alter the import file.
9
Start TrackRecord and choose Administrator>Import.
Select the Database, template, and input files. Click OK.
If there are any errors, you will see error messages.
After a large import, clicking on a type in the Item Browser may
result in a long pause as TrackRecord updates its indices. The more
items you import, the longer this pause will be. This process can
take several minutes to complete.
TrackRecord User’s Guide
Creating and Maintaining TrackRecord Databases
191
Importing File Specifications
The following Basic Types must have all subfields appear in the
following order in an import file, with each subfield separated by the
delimiter character:
NameLast Name, First Name, Middle Name
AddressAddress Line 1, Address Line 2, City, State,
Zip, Country
For example, the following template could be used to import
information about a person:
[Template]
TypeName=Person
DelimiterChar=,
FieldName=Name
FieldName=Address
FieldName=Phone Numbers,1
FieldName=Phone
Because Name and Address are Basic Type fields, you should only
specify the name of the field (as above), not the name of all the
subfields that make up the name or address. If in doubt about field
names, look at an item in the Item view for the particular type that you
are importing; the name to use is displayed near the field itself.
For this template file, one valid input file might be:
Doe,John,J,123 Any
Street,,Anytown,DC,12345,USA,2024567890,,
Doe,Jane,,456 Any
Street,,Anytown,DC,12345,USA,2024567890,,
The extra comma after each of the phone numbers indicates the end of
the list.
Troubleshooting Input Files
If you are having problems with your input file and you are not sure if
it matches your template, try using the same template to export some
existing items to an ASCII file. After exporting the items, look at the file
TrackRecord created. Your input file should follow much the same
format.
192
Creating and Maintaining TrackRecord Databases
TrackRecord User’s Guide
Chapter 11
Administering AutoAlert and
WebServer
This chapter describes the tasks required to set up and maintain the
TrackRecord AutoAlert and WebServer features. It includes the
following sections:
⽧
AutoAlert Administration — A brief introduction to the AutoAlert
component, instructions for using the AutoAlert Administrator,
setting up users and mail queries, and changing mail messages.
⽧
WebServer Administration — Information on WebServer
processes, log files, and administration menu.
AutoAlert Administration
The TrackRecord AutoAlert utility sends email messages to users to
notify them of changes in the TrackRecord database. AutoAlert lets you
define flexible criteria for notifying each user of changes that might be
of interest to them.
Caution: After the AutoAlert software is installed, you must create a
mailbox and mail profile for AutoAlert’s use. Refer to the TrackRecord
Installation Guide for instructions regarding installing the AutoAlert
Server and the AutoAlert Administrator.
To receive automatic mail notification, the user sets up the notification
criteria by creating TrackRecord queries with the Email Me When New
Items Match This Query option enabled. AutoAlert monitors the
TrackRecord database, periodically checking to see if any new items
match these queries.
Whenever a new or changed item matches one of the queries,
TrackRecord sends an email message to the owner of the query. By
using TrackRecord’s flexible query engine, AutoAlert makes it possible
TrackRecord User’s Guide
193
for users to receive mail notification based on almost any criteria they
require.
Using the AutoAlert Administrator
The AutoAlert Administrator allows you to add and remove databases
to be polled by the AutoAlert service, add and remove servers, show the
users that are AutoAlert enabled, and set a variety of options.
Starting the AutoAlert Administrator
On a machine on which the AutoAlert Administrator has been
installed, select from the Start menu
Programs>Compuware>TrackRecord>AutoAlert. The TrackRecord
AutoAlert- Servers dialog (Figure 11-37) appears.
Figure 11-37 Servers Available for AutoAlert (Example)
Adding, Removing, and Viewing Servers
From the TrackRecord AutoAlert- Servers dialog (Figure 11-37), you
may:
194
⽧
Select Add Server to add an AutoAlert server. A dialog will appear
prompting you to enter the AutoAlert server name and port
number that the AutoAlert server is listening on. Click OK when
finished.
⽧
Select a server from the list and click Remove Server. A
confirmation screen will appear allowing you to continue or cancel
the server removal process. The server is only removed from the
available server’s list.
⽧
Click View Server to select one of the available AutoAlert servers.
The TrackRecord AutoAlert-Databases dialog opens (Figure 11-38).
From this dialog, you may add, remove, and view databases
Administering AutoAlert and WebServer
TrackRecord User’s Guide
associated with the TrackRecord server on this machine as well as
configure server options. The options on this dialog are described
in the following sections.
Tip If password protection
was selected, enter the
password for the
AutoAlert server.
Figure 11-38 AutoAlert- Databases Dialog
Adding Databases
You must identify each database that the AutoAlert server is to poll for
items matching users’ queries. To add a database, click the Add
Database button. Enter the database name and user information
including the user name and password. Click OK when you are
finished. The associated TrackRecord server will verify the existence
and accessibility of the TrackRecord database.
Removing Databases
To remove the database from the list, select the database name and
click the Remove Database button. A confirmation dialog will appear
to allow you to continue or cancel the database removal process. Click
OK to remove the database from the list. If there is a query processor
running for this database, the query processor will be stopped.
Viewing Databases
To view information about the database, click View. The dialog that
appears (Figure 11-39) allows you to start, stop, and view a list of users
that have been enabled for email processing.
TrackRecord User’s Guide
Administering AutoAlert and WebServer
195
Starts the database
Stops the database
Displays the list of users
enabled for email
processing.
Forces email queries to be
immediately executed.
Checks for new Failsafe
items.
Sends daily message
immediately. See “Server
Options” on page 197 for
more information.
Refreshes
screen with
current
information
Synchronizes status file
and the database.
Figure 11-39 AutoAlert View Database Dialog
Displaying Users
Clicking the Users button allows you to view a list of users that have
been enabled for email processing (Figure 11-40). For more
information, refer to "Configuring AutoAlert Users" on page 199 and
"Setting Up Mail Queries" on page 199.
When a user is selected from
the drop down list, the user’s
email address and associated
email queries are displayed.
Figure 11-40 User Information Dialog
196
Administering AutoAlert and WebServer
TrackRecord User’s Guide
Note that any changes to the User name list, or to the properties of any
mail enabled user, must be made in TrackRecord. No user information
can be changed from the AutoAlert interface. Once a status change is
made in TrackRecord, AutoAlert automatically updates the User list.
Server Options
Click the Server Options button and select the following tabs to set the
following:
⽧
Daily Message — (Figure 11-41) Specify if a daily TrackRecord
AutoAlert status message will be sent. To do so, check the Send daily
message option and type a recipient’s email address (commonly the
administrator) and a message.
Note If a user does not specify a message, the default will be sent: This is
the daily automated message from TrackRecord AutoAlert running on machine:
xxxxxx.
Figure 11-41 Daily Message Tab
⽧
TrackRecord User’s Guide
Email Package — Define what email package will be used to send
email messages (Figure 11-42).
Administering AutoAlert and WebServer
197
Select to use the MAPI profile and user
information specified during the install. Enter the
profile, user name, user domain, and password.
Select to enable the AutoAlert server to use SMTP.
Enter the name of the SMTP server and the
address of the user sending the email.
Figure 11-42 Email Package Options
⽧
Status Synchronization — Designate the interval and time at
which the AutoAlert server should synchronize data in the status
file and the associated database.
⽧
Password — Set up a required password to gain access into the
associated AutoAlert server. If a password is not specified, no
password will be required.
⽧
Mail Frequency — Specify the frequency (from ten minutes to
eight hours) that AutoAlert checks for new or changed items. By
default, AutoAlert will send mail every 15 minutes. A higher setting
will result in longer delays before mail notification is sent.
Note For larger groups (20 or more mail users), it is recommended that
you use a polling frequency of 30 minutes or higher. TrackRecord and your
mail package may also have polling frequencies that could result in
additional delays before AutoAlert sends messages.
198
⽧
Message Threshold — Define the threshold at which the AutoAlert
server will consolidate multiple query results into a single email
message. The value can be set from 1 to 100 messages, with the
default setting of 15 messages. A lower setting means you will
receive fewer mail messages, but some messages will have multiple
item notifications in them. A higher setting makes it more likely
that each notification will result in a separate mail message.
⽧
Read Frequency — Specifies the frequency that AutoAlert checks
for new mail entries. These mail entries contain new information if
users add new defects to TrackRecord. The default is every five
minutes.
Administering AutoAlert and WebServer
TrackRecord User’s Guide
Click Apply and OK when your settings are complete.
Configuring AutoAlert Users
For users to receive email notification, their email address must be
included in their TrackRecord login information. If an email address
was not entered when the user’s Team Member item was created, do the
following:
1
Start TrackRecord and log on as a user with administrator
privileges.
Refer to “Starting TrackRecord as an Administrator” on page 125 for
instructions.
2
From the toolbar’s Item Browser button, select Team Member
(Figure 11-43).
Figure 11-43 Using the Item Browser
〫
If the user is listed in the item list, click on the user’s name.
〫
If the user is not listed, click the New button in the Item
Browser’s toolbar.
Refer to “Creating Team Members” on page 132 for additional
information.
Setting Up Mail Queries
A mail query is a TrackRecord query in which the Email Me When
New Items Match This Query option has been checked. Each
AutoAlert recipient must construct a set of queries that describe the
criteria for email notification. For example, most users will probably
want a mail query that selects any items assigned to them. The query
editor provides an Options dialog with a setting for sending out email
whenever a new or changed item matches the query. If you are
unfamiliar with queries, refer to Chapter 3, “Retrieving Data”.
TrackRecord User’s Guide
Administering AutoAlert and WebServer
199
If an owner of a query selects the Email me option, AutoAlert will send
email notification only to the owner. The one exception is the query
created by the Admin user. The Admin options are as follows:
Options
Behavior
Email me option checked, query
is Not Shared
AutoAlert will send notification to the
Admin only
Email me option checked, query
is Shared to All (Recommended)
AutoAlert will send notification to every
user
Email me option checked, query
is Shared to one or more groups
AutoAlert will send notification to every
user (regardless of group)
Users can create their own mail queries or you can set up queries for
users.
Mail Queries for Individual Users
1
Start TrackRecord and log in as the user you are configuring,
consult the right of the status line for the name of the current
user.
To log on as a specific user, close all open windows, and from the
Tools menu select Change Login.
2
Create a query that selects items that this user would be
interested in seeing.
3
On the Query creation dialog (Figure 11-44), click Options and
check the Email Me When New Items Match This Query option.
Figure 11-44 Query Options
4
Repeat Steps 2 and 3 for any other queries that you want to
create.
For example, most users will probably want a mail query that
selects any items assigned to them.
5
200
Repeat this process for each AutoAlert recipient.
Administering AutoAlert and WebServer
TrackRecord User’s Guide
<current user> Feature
If the query includes the <current user> criterion, the email will be
specific to each TrackRecord user. This feature is available only to the
Admin, not to any other user with administrator privilege.
For example, assume that there are three TrackRecord users: Joe Smith,
Kathy Simpson, and Jane Brown. The Admin creates the query to get all
defects where [assigned to]=<current user>, shares it to all, and checks
the Email me option. AutoAlert will run the query in the following
manner:
1
AutoAlert runs query "Retrieve all [defects] where [assigned to]
= Joe Smith.
Joe will receive an email with the results.
2
AutoAlert runs query "Retrieve all [defects] where [assigned to]
= Kathy Simpson.
AutoAlert will email Kathy with the results.
3
AutoAlert runs query "Retrieve all [defects] where [assigned to]
= Jane Brown.
Jane will receive an email with the results.
Changing the Contents of Mail Messages
The message sent by AutoAlert consists of the default abbreviation for
the type of item that triggered the notification and any fields from that
item that are marked with the Include in Mail property. You can
change the fields included in AutoAlert messages.
Changing Fields in Mail Messages
1
Shut down the AutoAlert service and log on to TrackRecord as
an Administrator.
2
Close all TrackRecord items and views (Defects, reports, and so
on).
3
From the TrackRecord Administrator menu, click Edit Types.
A warning is displayed advising you to backup your database before
modifying types. Refer to “Scheduling Back Ups and Restoring
Databases” on page 180 if you would like to backup your database
at this time.
If users are logged on using this database, a dialog will be displayed
listing current users. You cannot edit types while users are using the
database. Refer to “Database Lock-out” on page 152 for
TrackRecord User’s Guide
Administering AutoAlert and WebServer
201
information about this dialog. Once all users have logged off, this
dialog is dismissed and the Choose a Type dialog opens.
4
Open the type you want to change by double-clicking its name.
5
Double click on the field you want included in mail messages
to display the Field Properties dialog.
6
On the General tab (Figure 11-45), check the Include in Mail
checkbox to have this field included in mail messages sent for
this type.
Include in Mail checkbox
Figure 11-45 Field Properties Dialog- General Tab
7
Exit the Field Properties dialog, Type Editor, and the Choose a
Type dialog. Restart the AutoAlert service.
WebServer Administration
WebServer allows users to access a TrackRecord database using a Web
browser such as Microsoft Internet Explorer or Netscape Navigator/
Communicator. The WebServer user interface is described in Chapter 5,
202
Administering AutoAlert and WebServer
TrackRecord User’s Guide
“Using TrackRecord’s WebServer”.” The following sections describe
features available only to users with Administrator privilege.
Note All users authorized to use the Windows TrackRecord client are also
authorized to use the WebServer client. See “Team Member
Administration” on page 131 to create a new Web user who is not already
established in TrackRecord.
Tip Refer to the
TrackRecord Installation
Guide for instructions
regarding installing the
WebServer.
The following sections contain information that will assist you in
interpreting the statistics available through the WebServer
Administrator’s menu. A thorough understanding of this information
is not required to successfully administer WebServer, but can help you
assess system performance and requirements.
WebServer Processes
When a user logs in to WebServer, a session manager process—
TRWebSessionsHost— is automatically created. TRWebSessionsHost
assigns a session identifier to each logged in client and assigns a license
to that session.
When the user makes a request to the database, WebServer creates a
Database Host (TRWebDBHost) process or adds the user’s session to an
existing DBHost process. A DBHost process caches values for a specific
database. When a DBHost reaches its threshold for the number of
sessions it can handle, the WebServer creates another DBHost.
Some important notes about DBHost:
⽧
Each DBHost services requests for only one database.
⽧
There can be multiple DBHosts for each database.
⽧
Each DBHost can serve multiple sessions.
As users log off, their sessions are terminated and their licenses become
available for use by other users. When there are no more user requests,
the TRWebSessionsHost and TRWebDBHost processes will be shut
down automatically.
Permanent and Transient Sessions
The session identifier assigned by the TRWebSessionsHost process is
kept for the entire life of the client session. This is the user’s permanent
session. It identifies this user’s requests until the user logs off to
terminate the session.
TrackRecord User’s Guide
Administering AutoAlert and WebServer
203
When the user makes a first request, WebServer creates a transient
session. Transient sessions are data structures that cache data from
users for a short period of time. They are created for efficiency. If the
transient session is unused for ten minutes (i.e., there have been no
requests from this client), the transient session times out and is
removed. If the client subsequently makes a request, a transient session
is recreated from the information in the permanent session.
Monitoring permanent sessions and transient sessions separately
allows you to accurately assess the requirements of your server and
users.
WebServer Log Files
The Web server (IIS, Netscape, Personal Web Server) on which you are
running TrackRecord WebServer creates a log file. Analysis of this log
file can help you ensure that your system is sized properly.
Since all WebServer requests are logged as CGI requests, be sure to
enable CGI request logging in your log file.
Note Logging of HTML page and GIF file requests are generally enabled;
CGI requests may not be enabled by default.
Ending a Session
There are several ways for a user to end a WebServer session including
clicking the Logout link, closing the browser, accessing a different URL,
and clicking a Home button. In these cases, the session is terminated
and eventually all system processes are stopped.
To ensure that sessions are terminated and processes stopped in
situations such as a loss of power in the client or server machine,
WebServer maintains a license beat between the WebServer application
client and the WebServer. If the license beat is interrupted in one of the
following ways, sessions are terminated and system processes are
stopped.
204
⽧
If the client’s attempt to send a license beat fails four times in a row,
the client will stop sending license beats.
⽧
If a license beat response contains an invalid session ID error, the
client will stop sending license beats. (This error could be
generated, for example, if the NT server running the TrackRecord
WebServer has crashed.)
Administering AutoAlert and WebServer
TrackRecord User’s Guide
⽧
If the server has not received a request (minimally, a license beat)
from a client for an extended time, the server will terminate the
session.
If a user attempts to access the database after their session is
terminated, they will receive a message that the application has
terminated and be prompted to log in again.
WebServer Administration Menu
Using the WebServer interface, the WebServer administrator can
monitor server performance and perform other administrative
functions. To perform administrative functions, perform the following
steps:
1
Open a Web browser, such as Microsoft Internet Explorer or
Netscape Navigator.
2
Enter the following address:
http://www.servername/TrackRecord/Welcome.htmlwhere
servername is the name of the server on which WebServer is
installed.
The TrackRecord WebServer Login page opens.
3
Enter the name of your TrackRecord database, your user name
and your password.
Be sure to log in as a user with Administrator privilege.
4
Click OK to open the TrackRecord WebServer main window.
Refer to Chapter 5, “Using TrackRecord’s WebServer” for
information about using this interface.
5
To perform administrative functions, click the Manage link in
the top frame of the window.
The Administration Menu is displayed, as shown in Figure 11-1.
TrackRecord User’s Guide
Administering AutoAlert and WebServer
205
7
Select to
shut down
or view
session
information
for current
database
Select to
view
information
for all users,
regardless
of database
Figure 11-1 WebServer Administrative Options
Tip In addition to the
options described in this
section, the Web Monitor
utility can be used to shut
down all WebServer
processes in the event of
a catastrophic failure.
Refer to “WebMonitor”
on page 208 for
information about the
Web Monitor utility.
206
The options on this screen are:
⽧
Shutdown databasename Database Hosts - This option allows
you to shut down the Database Hosts for the named database.
(Refer to “WebServer Processes” on page 203 for a description of
database hosts.) Clicking this option prompts you to confirm that
you want to shut down all hosts. Database Hosts will be recreated
when a request, such as a license beat, is received. User sessions will
not be terminated.
⽧
View Sessions for databasename - This option allows you to view
a list of the users currently accessing this database through the
TrackRecord WebServer (Figure 11-2).
Administering AutoAlert and WebServer
TrackRecord User’s Guide
Figure 11-2 View Sessions
All permanent and transient sessions that are accessing this
database are listed, as well as the time of the last request from each
session to the WebServer. Click the Refresh button to update the
information displayed. Click Close to return to the WebServer
Administrator menu.
⽧
Monitoring - This option allows you to monitor permanent and
transient sessions, database hosts, and the requests being issued to
the WebServer. Clicking this option displays a monitor window, as
shown in Figure 11-3.
Figure 11-3 Monitor Window
〫
TrackRecord User’s Guide
Click the Pause button to prevent the Monitor window from
being refreshed. The button text changes to Resume. Click the
Administering AutoAlert and WebServer
207
Resume button to resume monitoring. Since every update to
the monitor is a request, constantly updating the monitor can
load the server unnecessarily.
⽧
〫
Click the Reset Statistics button to reset values to zero. This
allows you to view an accurate representation of the activity
occurring at the current time.
〫
To change the rate at which the monitor window is refreshed,
change the time displayed and click the Set New Rate button.
〫
By default, statistics about Permanent Sessions, Transient
Sessions, DBHosts and Requests are displayed. To remove one
or more of these from the Monitor display, click the View
Control button and uncheck the items to be removed.
View All Sessions on Server - This option allows you to see who is
currently using the TrackRecord Web Server, regardless of the
database they are accessing. Permanent and transient sessions for
all databases are listed, as well as the time of the last request from
each session to the WebServer.
WebMonitor
WebServer contains a process (TRWebSessionsHost) that maintains all
currently active user sessions. This process contains a monitoring
component called the Web Monitor. Assuming that the installer has set
the appropriate DCO options (as described in the TrackRecord
Installation Guide), this monitoring component is visible on the system
on which the WebServer is installed. You cannot display it on all
Administrator systems.
The Web Monitor is equivalent to the View All Sessions option on the
WebServer Administration dialog, but allows two additional areas of
functionality: it allows the administrator to view the internal database,
and it contains a Shutdown Now button. This button shuts down the
TRWebSessionsHost process, which will invalidate all user sessions.
Troubleshooting Common WebServer Issues
For a detailed listing of troubleshooting and configuration information
for one of the supported version control systems, refer to
“Troubleshooting” in the TrackRecord online help.
For the most current TrackRecord support information, please visit the
Compuware Web site at: http://www.compuware.com. From this
208
Administering AutoAlert and WebServer
TrackRecord User’s Guide
location, you will have access to our online KnowledgeBase and the
most current patches and updates for the product.
TrackRecord User’s Guide
Administering AutoAlert and WebServer
209
210
Administering AutoAlert and WebServer
TrackRecord User’s Guide
Part 3: TrackRecord Reference
Material
⽧
Appendix A: “Utilizing ActiveX“ on page 213
⽧
Appendix B: “Using Tags“ on page 237
Appendix A
Utilizing ActiveX
This appendix provides reference material for programmers writing
modules to access the TrackRecord databases. It includes the following
sections:
⽧
ActiveX Interfaces — Overview of ActiveX and its functions.
⽧
Basic Design — Description of the design of ActiveX.
⽧
Object Reference — Explanation of object properties and methods.
ActiveX Interfaces
TrackRecord’s ActiveX (formerly OLE) Automation interface allows any
program with an ActiveX or OLE-compliant extension language to
access a database, run queries, extract items, and perform other
functions.
Using this information, you can write programs that can perform many
useful functions, including:
⽧
⽧
⽧
⽧
⽧
Automatic notification of new bugs
Mail notification based on bug assignment
Reports and calculations based on live TrackRecord data without
exporting
Automatic exporting of daily data, and transfer of the exported
data to an external site
Parsing and submission, by importing, of user-submitted bugs or
feature requests
You have virtually unlimited access to TrackRecord’s types and items
from ActiveX; through some clever programming, TrackRecord can be
customized to do almost anything!
TrackRecord User’s Guide
213
Basic Design
Through Automation, TrackRecord exposes a number of objects that
represent parts of its internal applications. Apart from the main
Application, each object has a singular form, representing a single
instance of the object, and a plural form, representing a collection of
objects. Collections can be iterated over using standard Automation
methods.
Simple Examples
Tip For more examples,
open Windows Explorer
and navigate to Program
Files>Compuware>Track
Record>Examples.
Visual Basic Example 1
Here’s a simple Visual Basic program that retrieves the items that match
a particular query, and displays the results:
Note Since Automation controllers may use different extension
languages, this example may not work exactly as presented here. Despite
that, the general structure and usage of TrackRecord objects, properties,
and methods remains the same.
Dim TR As New TRDatabase.application
Dim MyQuery As TRDatabase.Query
Dim Results As TRDatabase.Items
Dim Item As TRDatabase.Item
Set MyQuery = TR.GetQuery("Tasks Due Today")
Set Results = MyQuery.Run
'If your controller has iteration support, you can
use:
For Each Item In Results
Print Item
Next Item
'Otherwise, you can explicitly iterate using:
NumItems = Results.Count
For i% = 0 To NumItems - 1
Print Results.Item(i%)
Next i%
214
TrackRecord User’s Guide
Visual Basic Example 2
A developer may wish to create a simple Visual Basic program to open a
specific database and create a list of items for available TrackRecord
types in the database. In this example, you might create a form with
two text boxes, a command button, and a combo box such as the one
shown in Figure 11-4. The code would be written as follows:
Figure 11-4 Example of Program Created Using a Visual Basic Program
Note Since Automation controllers may use different extension
languages, this example may not work exactly as presented here. Despite
that, the general structure and usage of TrackRecord objects, properties,
and methods remains the same.
‘A general declaration in the project
Option explicit
Dim trapp As TRDatabase.Application
____________________________________________________
Private Sub cmdOpenDB_Click()
‘Declare Variables
Dim trdb As New TRDatabase.Database
Dim trtypes As TRDatabase.Types
Dim trtype As TRDatabase.Type
‘Initialize
Set trapp = Nothing
Set trapp = trdb.OpenDatabase(txtDBName)
Set trdb = Nothing
TrackRecord User’s Guide
215
‘open database
If trapp Is Nothing Then
txtDBName = txtDBName & ”- Unable to open.”
txtDBName.SetLength = Len(txtDBName)
txtDBName.SetFocus
Exit Sub
Else
txtDBName = trapp.DatabaseDirectory
End If
‘iterate through the types in database.
cboType.Clear
Set trtypes = trapp.GetTypes
For Each trtype In trtypes
‘List types in combobox cboType
cboType.AddItem trtype.Value
Next trtype
‘Clean up workspace
Set trtypes = Nothing
Set trtype = Nothing
cboType.SetFocus
End Sub
____________________________________________________
Private Sub cmdStartScan_Click()
Dim trtype As TRDatabase.Type
Dim tritems As TRDatabase.Items
Dim tritem As TRDatabase.Item
Set trtype = trapp.GetType(cboType.Text)
Set tritems = trtype.Items
List1.Clear
For Each tritem In tritems
List1.AddItem tritem
Next tritem
216
TrackRecord User’s Guide
Set trtype = Nothing
End Sub
Object Reference
The following sections provide object properties and methods.
Application Object
The Application object is the basis for most of the fundamental
operations that you will perform. Before doing anything, you must
create an instance of the application object, using a line like:
Set TR = CreateObject (“TrackRecord.Application”)
Once created, you can call any of the methods in the object to perform
operations on your TrackRecord data.
Properties
CurrentUser
CurrentUser As Object
The user name of the currently logged in user.
DatabaseDirectory
DatabaseDirectory As String
Current database directory.
ServerName
ServerName As Boolean
Name of the server machine.
TypesModifiedDate TypesModifiedDateandTime As String
andTime
Read only. When the type definitions were last changed.
Methods
AutoLogIn
Function AutoLogin([UserName As
String],[Password As String],UserID As Long)
As Boolean
Automatically log in to TrackRecord using previously captured user name and password.
CreateItems
Function CreateItems() As Items
Returns an empty Item collection.
Export
TrackRecord User’s Guide
Function Export (OutputFile As String, TemplateFile As String) As Items
217
Exports all items from the database. TemplateFile is optional; if not specified, all
items are exported to a TrackRecord exchange file. If specified, all items matching
the template specification are exported to OutputFile in delimited ASCII format.
Returns an Items collection containing all the items that were exported.
GetItem
Function GetItem (ItemIdentifier As String)
As Item
Returns a single Item from the database, based on the Item’s unique identifier. This
identifier can be passed to an external program by an Executable button.
GetMaxUsers
Function GetMaxUsers() As Integer
Get the maximum number of users allowed.
GetQueries
Function GetQueries (LocalQueriesOnly As
Boolean) As Queries
Returns all of the Queries in the database, as a Query collection. LocalQueriesOnly is optional, and defaults to FALSE. If TRUE, all private queries for the
currently logged in user are returned. These queries can also be retrieved from the
User object; see “User Object” on page 233 for more information.
GetQuery
Function GetQuery (QueryNameOrIdentifier As
String) As Query
Returns a single Query from the database, based on its name or unique identifier. If
a name is specified, and more than one query has the same name, the first one created is returned. See "Query Object" on page 230 for more information on Query
objects.
GetType
Function GetType (TypeName As String) As
Type
Returns a single Type object, based on its name.
GetUser
Function GetUser(UserName As String) As User
Retrieve a single user by name.
GetUserByUserID
Function GetUserByUserID (UserID As Long) As
User
Retrieve a single user by UserID.
GetTypes
Function GetTypes () As Types
Retrieves all of the Types in the database, as a Types collection.
GetUsers
Function GetUsers () As Users
Returns a collection of User objects corresponding to the list of Users defined for
this database. The User collection returned is “active”, and will update as users are
added and deleted by the database Administrator.
GetUserSetting
Function GetUserSetting(sectionName As
String, variableName As String) As String
Get a preferences setting for the currently logged in user.
Import
218
Import (InputFile As String, FavorDatabase
As Boolean, TemplateFile As String) As Items
TrackRecord User’s Guide
Imports items into the database from the InputFile. FavorDatabase is
optional, and chooses how items are handled when they duplicate items already in
the database. If TRUE (the default), the items in the database are retained if duplicates are imported from InputFile. TemplateFile is also optional; if specified,
InputFile is assumed to be an ASCII delimited file. All the items that have been
imported are returned, as an Item collection, when the import is complete. If the
set is empty on return, there was an error.
IsDBOpen
Function IsDBOpen () As Boolean
Is a database currently open?
LogIn
Function LogIn([UserName As String],[Password As String],UserID As Long) As Boolean
Log in as a specific user.
LogOut
Function LogOut() As Boolean
Logs out of TrackRecord, or rather, Logs in as the Admin user.
ProcessItemChanges
Function ProcessItemChanges(ScriptFile As Filename,
[UserID As Long]) As Items
Process item change script. Item change scripts can be used to make changes to
existing items, and to create new items. Returns the items that were changed. The
format for the script is as follows:
• The first line must always be either [<identifier>] or [“<type name>”]
where <identifier> is an identifier string for an existing item, or <type name> is
the name of the item type that should be used for creating a new item.
• Each of the following lines is of the form:
<field-name>\t<field-value>
where <field-name> is the name of the field, and <field-value> is the value to set for
the field. The \t represents a hard tab character in the file (ASCII 9), which can be
entered with most text editors. Certain types of fields have additional modifiers
other than the name of the field:
• Name — For a field called “Name”, the options are Name.First, Name.Last, and
Name.Middle.
• Address — For a fields called “Address”, the options are Address.Address1,
Address.Address2, Address.City, Address.State, Address.Country, and Address.Zip
• Timespan — For a field called “Timespan”, the options are Timespan.Start Time
and Timespan.End Time, which contain the combined date and time separated
by a null character, and StartDate, StartTime, EndDate, and EndTime for date or
time individually.
• Date/Time Options — For a field called “Date/Time”, the options are Date/
Time.Date and Date/Time.Time
• Checkboxes — For checkboxes and radiobuttons, the <field-value> should start
with a space if the checkbox/radio button should be unchecked, and an ‘X’ if it
should be checked.
• Lists — For a field called Reported By, the options are Reported By.Add and
Reported By.Delete. For either one, the <field-value> should be the identifier of
the item to add or delete.
• Compound type lists — For compound type fields, the <field-value> is the identifier of the item to select.
TrackRecord User’s Guide
219
After all the fields are listed, the item is ended with a line:
[enditem]
Normally, items with an empty default abbreviation are not saved by
ProcessItemChanges. However, if you want to force all items to be saved,
whether they are complete or not, use the following line to end the item:
[enditem save]
To ensure that items are unique, end the item with:
[enditem unique]
Duplicates are determined by comparison of the Dupe field. The new or matching
item will be returned.
Each item can be followed by the end of the file, or by another item.
A sample script might be:
[“person”]
Name.Last Strange
Name.First Mickey
Company a000000
[enditem]
Notes:
1. Notepad field data requires double quotes.
2. Any quote character (“) within a string field requires a preceding backslash (\) character.
PurgeCache
Sub PurgeCache()
Purge the cache.
Quit
Sub Quit()
Obsolete. Provided for backward compatibility.
Abbreviation Object
An Abbreviation represents a specific way of formatting the output of
an Item. The Abbreviations in ActiveX are the same as the
abbreviations used in regular TrackRecord.
Properties
Application
Application (Read only)
Application object.
IsDefault
Boolean (Read only)
Is this the default abbreviation?
IsDup
Boolean (Read only)
TRUE if this is the abbreviation used for duplicate elimination.
220
TrackRecord User’s Guide
IsLong
Boolean (Read only)
TRUE if this is the long default abbreviation.
IsShort
Boolean (Read only)
TRUE if this is the short default abbreviation.
Name
String (Read only)
The name of the abbreviation.
Number
Integer (Read only)
The identifying abbreviation number: typically, you pass in the abbreviation number to other TrackRecord methods.
Abbreviations Object (Collection)
A collection of Abbreviation objects, stored in a standard iterating
form.
Methods
Count
Function Count() As Integer
Returns the number of Abbreviation objects in the collection.
Item
Function Item (Index As Integer) As
Abbreviation
Returns the Abbreviation at Index in the collection.
Database Object
Permits the opening of a specified database.
Methods
AutoLogIn
Function AutoLogin(UserName As
String,Password As String,databaseDir As
String, serverName As String, forceLogin As
Boolean, appObject as Application) As Long
Automatically log in to TrackRecord using previously captured user information.
GetAppFromHandle Function GetAppFromHandle(sessionHandle As
Long]As Application
Gets an application object from its session handle.
OpenDatabase
Function OpenDatabase(Database As String,
(Servername As String)) As Application
Open a database and retrieve an application object.
TrackRecord User’s Guide
221
Field Object
Represents a single field of an item.
Properties
AccessLevel
AccessLevel As Long (Read only)
Access control level.
Application
Application (Read only)
Application object.
DefaultValue
String (Read only)
Returns the name of the field.
FieldValid
Boolean (Read only)
Returns TRUE if the current field object is valid.
GetAbbreviations
Abbreviations
Retrieve the field abbreviation.
IsGroupStart
Boolean
Is this the start of a radio button group?
IsHidden
Boolean
Is this field hidden?
IsList
Boolean (Read only)
Returns TRUE if the Field is a list, FALSE otherwise.
IsMail
Boolean
Is this field marked for mail?
IsReadOnly
Boolean
Is this field read-only?
IsRequired
Boolean
Is this field required?
ItemValid
Boolean (Read only)
Returns TRUE if there is an item associated with the current field, and that item is
valid.
Modified
Boolean (Read only)
Returns TRUE if the field contents could have been modified since they were last
examined. This property automatically resets if you retrieve Value or DefaultValue.
Type
Type (Read only)
Returns a Type object that contains the type of the object stored in the field.
222
TrackRecord User’s Guide
Value
Items
Returns an Items collection containing the contents of the Field. If IsList is
FALSE, there can only be one object in the collection. Otherwise, the collection will
contain the contents of the list.
Note that if the field is empty, the collection will be empty as well. Check the
Count property of the Items collection before examining the collection’s contents.
Valid
Boolean (Read only)
Returns TRUE if the object is still valid. The object could become invalid if the item
containing it was deleted while you still had an instance of the field.
FieldLayout Object
The FieldLayout object is used to get back information about the layout
of an item (fields and their ordering).
Properties
Application
Application (Read only)
Application object.
Methods
Count
Function Count() as Long
Get the number of fields in the collection.
Item
Function Item(Index As Long) As Field
Get specified field.
GetFieldInfo
Function GetFieldInfo(Field As Field, Row As
Long, HorizontalPosition As Long, Width As
Long) As String
Returns information about screen layout for a field. The return value is the actual
contents of the field.
TrackRecord User’s Guide
223
ValuesFromItem
Function ValuesFromItem(Item As Items) As
Boolean
Sets source item(s) for field values. If this function is called, subsequent calls to GetFieldInfo will return field values for the specified item.
ValuesFrom
Templates
Function ValuesFromTemplates(Templates As
Items) As Boolean
Sets source item(s) for field values. If this function is called, subsequent calls to GetFieldInfo will return values based on the set of templates passed in (combined with
the default templates).
Fields Object (Collection)
A collection of Field objects, stored in a standard iterating form.
Properties
Application
Application (Read only)
Application object.
Methods
Count
Function Count() As Integer
Returns the number of Fields in the collection.
Item
Function Item (Index As Integer) As Field
Returns the Field at Index in the collection.
ItemByName
Function ItemByName (Name As String) As
Field
Returns the Field in the collection named Name.
ItemByTag
Function ItemByTag (TagToFind As String) As
Field
Get specified field by tag.
History Object
Represents a single entry in a Change History list.
224
TrackRecord User’s Guide
Properties
Action
String (Read only)
Contains a description of the what was done to the item. Possible values are:
• Changed
• Checked
• ItemCreated
• ItemDeleted
• ListItemAdded
• ListItemDeleted
• Unchecked
Application
Application (Read only)
Application object.
Field
Field (Read only)
Returns the Field that was modified.
NewState
Item (Read only)
What is the new state?
OldCheck
Boolean (Read only)
If the changed Field is a checkbox or radio button, and OldValueAvailable
returns Check, OldCheck returns the previous state of the checkbox or radio button.
OldDate
String (Read only)
If the changed Field is a Date field, and OldValueAvailable returns Date or
DateAndTime, OldDate returns the date in the field before the user changed it.
OldDateAndTime
String (Read only)
If the changed Field is a Time field, and OldValueAvailable returns DateAndTime, OldDateAndTime returns the date and time in the field before the user
changed it.
OldItem
Item (Read only)
If the changed Field is a reference to another item, and OldValueAvailable
returns Item, OldItem returns the previous item in the field. For list actions, it
returns the item added or deleted from the list.
OldNumber
Long (Read only)
If the changed Field is a numeric field, and OldValueAvailable returns Number,
OldDateAndTime returns the date and time in the field before the user changed
it.
OldState
Item (Read only)
What was the old state?
Type
Type (Read only)
Returns the type of the Field that was changed.
TrackRecord User’s Guide
225
User
String (Read only)
Returns the name of the user who modified the item.
Value
String
Returns the value of the current history record.
Methods
DateAndTime
Function DateAndTime() As String
Returns the date and time the item was modified.
OldValueAvailable
Function OldValuesAvailable() As String
Returns the type of “old” value available in this History object. Possible return values are:
• Check
• Date
• DateAndTime
• Item
• Note
• Number
Histories Object (Collection)
A collection of History objects, stored in a standard iterating form.
Properties
Application
Application (Read only)
Application object.
Value
string
Returns the value of all of the History information for the item, each entry on its
own line, separated by “\n”, as it would be displayed in the Change History column of the Outline view.
Methods
Count
Function Count() As Integer
Returns the number of History objects in the collection.
226
TrackRecord User’s Guide
Item
Function Item (Index As Integer) As History
Returns the History object at Index in the collection.
Since
Function Since (DateAndTime As String) As
Histories
Returns the History objects entered since the passed date and time.
Item Object
An Item is a single object from the TrackRecord database.
Properties
Application
Application (Read only)
Application object.
Default
Boolean
Contains TRUE if the item is a default template.
DefaultValue
String (Read only)
Contains the default abbreviation for the Item.
Fields
Fields (Read only)
Contains the collection of Fields available in this object.
Identifier
String (Read only)
Contains the uniquely identifying string that represents this Item. This identifier can
be saved and used later to retrieve the same object.
IsReadOnly
Long 0=read/write, 1=read only, 2=read/add
Is this field read-only?
Modified
Boolean (Read only)
Contains TRUE if the Item may have been modified since the last time you retrieved
one of its properties.
Private
Boolean
Contains whether or not the item is local to the current user. Can only be set if
Template is TRUE.
Template
Boolean
Contains TRUE if the item is a template.
Type
Type (Read only)
Contains the Type object corresponding to the type of the current Item.
Valid
Boolean (Read only)
Contains TRUE if the object is still valid. The object could become invalid if the item
was deleted while you still had an instance of it.
TrackRecord User’s Guide
227
Methods
Cast
Function Cast (Type As Type) As Item
Attempts to cast this item to the passed Type. (For example, if there is an identity
for this item of the specified type, it will return that identity.)
Contents
Function Contents (Field As Field) As Items
Returns the contents of the specified Field.
DeleteItem
Function DeleteItem() As Void
Deletes the specified item from the database. Does not apply access controls to the
operation, so the item is always deleted, regardless of the privileges of the currently
logged in user. This function can be very destructive, so be sure to carefully test any
code that uses it.
Downcast
Function Downcast() As Item
Casts the current Item to its “most derived” identity. For example, if you have
retrieved a Task from the database, and the object also has a Bug Report identity,
Downcast will return the Bug Report Item.
Export
Function Export (OutputFile As String,
TemplateFile As String) As Items
Exports the current Item to the specified OutputFile. TemplateFile is optional;
if specified, the Item is written to a delimited ASCII file as specified in the template.
ExtractAttachment
Function ExtractAttachment(ExtractToFile As
String) As String
Extract attachment to a file.
History
Function History (DateAndTime As String) As
Histories
Returns the History objects associated with this Item. DateAndTime is optional: if
not specified, all associated History items are retrieved. Otherwise, all History items
since DateAndTime are retrieved.
Identities
Function Identities () As Types
Returns the types of the other identities associated with this item, if any.
Value
Function Value (Field As String,
Abbreviation As Integer) As String
Returns the Abbreviation of the specified Field. Abbreviation is optional,
and defaults to the default abbreviation (abbreviation 0).
ValueByFieldAnd
Abbrev
Function ValueByFieldAndAbbrev (Field As
Field, Abbreviation As Abbreviation) As
String
Performs the same function as the previous command, using Field and Abbreviation
objects instead of Strings.
228
TrackRecord User’s Guide
Items Object (Collection)
A collection of Item objects, stored in a standard iterating form. In
addition to the typical methods, an Items collection can also have
various set operations performed on it.
Properties
Application
Application (Read only)
Application object.
Modified
Boolean (Read only)
Are there any modified items in the collection?
Methods
Add
Function Add (ItemToAdd As Item) As Void
Adds ItemToAdd to the collection.
AddIdentifier
Sub AddIdentifier (IdentifierOfItemToAdd As
String)
Add an item to the collection by identifier.
Clear
Function Clear () As Void
Empties the collection.
Count
Function Count () As Integer
Returns the number of Items in the collection.
Export
Function Export (OutputFile As String,
TemplateFile As String) As Items
Exports all the Items in the collection to OutputFile. TemplateFile is optional;
if specified, the Items are exported in delimited ASCII form, as specified in the template.
GetModifiedItems Function GetModifiedItems () As Items
Returns a collection containing all of the Items that may have been modified since
the last time the function was called.
Identifier
Function Identifier(Index As Long) As String
Get specified item identifier.
Intersect
Function Intersect (ItemCollection As Items)
As Items
Performs an intersection with the passed ItemCollection, returning the Items in
common as the result.
Item
Function Item (Index As Integer) As Item
Returns the Item at Index in the collection.
TrackRecord User’s Guide
229
Remainder
Function Remainder (ItemCollection As Items)
As Items
Returns the collection Items that aren’t in both the current Items collection and the
passed ItemCollection.
Remove
Function Remove (ItemToRemove As Item) As Void
Removes ItemToRemove from the collection, if there.
Run
Function Run (QueryToRun As Query,
DateSpecification As String,[Sort As Boolean])
As Item
Runs the passed Query on the Items in the collection, returning the result.
DateSpecification is optional; if specified, the Query is run as a Calendar query,
substituting the passed date as it would in the Calendar view.
Union
Function Union (ItemCollection As Items) As
Items
Combines the items in the current collection with ItemCollection, returning the
result.
Query Object
A Query is a single query object from the database. It can be used to
selectively extract Items based on their content.
Properties
Application
Application (Read only)
Application object.
CalendarQuery
Boolean (Read only)
Returns TRUE if this Query can be used as a Calendar query.
Identifier
String (Read only)
Contains the uniquely identifying string that represents this Query. This can be
saved and used later to retrieve the same object.
MailQuery
Boolean
Returns TRUE if the Query is a Mail query.
Modified
Boolean (Read only)
Contains TRUE if the Query may have been modified since the last time you ran it.
NeedsToRun
Boolean (Read only)
Contains TRUE if the database has changed in such a way that the results of the
query might be different.
Private
Boolean
Contains whether or not the item is local to the current user.
230
TrackRecord User’s Guide
Valid
Boolean (Read only)
Contains TRUE if the object is still valid. The object could become invalid if the item
was deleted while you still had an instance of it.
Value
String (Read only)
Contains the name of the Query.
Methods
Export
Function Export (OutputFile As String,
TemplateFile As String, DateSpecification As
String) As Items
Exports the results of the Query to OutputFile. TemplateFile is optional; if
specified, the Items are exported in delimited ASCII form, as specified in the template. If a DateSpecification is provided, the Query is run as a Calendar query,
substituting the passed date as it would in the Calendar view.
Run
Function Run (DateSpecification As
String,[Sort As Boolean]) As Items
Runs the Query on the database, returning the result. DateSpecification is
optional; if specified, the Query is run as a Calendar query, substituting the passed
date as it would in the Calendar view.
Queries Object (Collection)
A collection of Queries, stored in a standard iterating form.
Properties
Application
Application (Read only)
Application object.
Methods
Add
Function Add (QueryToAdd As Query) As Void
Adds QueryToAdd to the collection.
Clear
Function Clear () As Void
Empties the collection.
Count
Function Count () As Integer
Returns the number of Queries in the collection.
TrackRecord User’s Guide
231
Item
Function Item (Index As Integer) As Query
Returns the Query at Index in the collection.
Remove
Function Remove (QueryToRemove As Query) As
Void
Removes QueryToRemove from the collection, if there.
Type Object
Represents an item Type from the database. Every Item object has a
Type, and a given Type can be derived from other Types, inheriting
their properties, or have Types derived from it.
Properties
Application
Application (Read only)
Application object.
Fields
Fields (Read only)
Retrieves the collection of Fields associated with this Type.
GetAbbreviations
Abbreviations (Read only)
Returns the Abbreviations that can be used with this Type.
GetInheritedTypes Types (Read only)
Contains the Types that this Type is derived from, if any.
IsInShortList
Boolean (Read only)
Is this type in the short list?
NewItems
Items (Read only)
Returns the collection of Items of the current Type that have been created since the
Type object was retrieved, or since NewItems was last checked.
Valid
Boolean (Read only)
Is this type a valid type?
Value
String (Read only)
Returns the name of the Type.
232
TrackRecord User’s Guide
Methods
Field Layout
Function FieldLayout(LayoutType As Long) As
FieldLayout
Retrieve FieldLayout objects for viewing this type. The LayoutType is reserved for
future use; pass 0 for this value.
GetDuplicates
Function GetDuplicates(dupeString As String)
As Items
Returns the set of Items that have the specified Dupe abbreviation.
GetItemInfo
Function GetItemInfo(LastID As String,
NumItems As Long, StartWith As String) As
String)
Retrieve next NumItems items of this type. The strings returned are in the form of
the default abbreviation for the first item, followed by a newline character, followed
by the identifier of the item, followed by another newline character, followed by the
next abbreviation, and so on.
Items
Function Items() As Items
Returns all the Items in the database of the current Type.
Types Object (Collection)
A collection of Types, stored in a standard iterating form.
Properties
Application
Application (Read only)
Application object.
Methods
Count
Function Count() As Integer
Returns the number of Types in the collection.
Item
Function Item (Index As Integer) As Type
Returns the Type at Index in the collection.
User Object
A User is an individual, created by the database administrator, who can
log in to the database and perform operations. Each user has a number
of properties associated with it that can be examined through this
ActiveX object. In addition, the user’s private Query and Template
objects can be retrieved.
TrackRecord User’s Guide
233
Properties
Active
Boolean (Read only)
Returns TRUE if the administrator has activated this user, FALSE otherwise.
Admin
Boolean (Read only)
Returns TRUE if the user is an administrative user and FALSE otherwise.
Application
Application (Read only)
Application object.
DefaultValue
String (Read only)
Returns the name of the User.
MailAddress
String (Read only)
Contains the mail address defined for this User.
MailEnabled
Boolean (Read only)
Returns TRUE if mail processing has been enabled for this user.
Modified
Boolean (Read only)
The property is TRUE if this User may have been modified since it was retrieved.
UserID
Long (Read only)
Returns an integer that can be passed to ProcessItemChanges to specify that the
current user be referenced in any Change History entries that result from script
processing.
UserName
String (Read only)
Retrieves the name of the User.
Valid
Boolean (Read only)
Returns TRUE if the User is still valid, FALSE otherwise. A User can become invalid if
the administrator deletes it while an automation client still has an active reference
to it.
234
TrackRecord User’s Guide
Methods
GetQueries
Function GetQueries (IncludeNonMail As
Boolean, IncludeMail As Boolean) As Queries
Retrieves all the private queries associated with this user. By providing different values for IncludeNonMail and IncludeMail, various combinations of mail and
private queries can be returned.
Note that the collection retrieved from GetQueries remains active. As private
and/or mail queries are added/removed for this user, they’re added to or removed
from the collection.
GetTemplates
Function GetTemplates () As Items
Retrieves all of the private templates associated with this user.
Note that the collection retrieved from GetTemplates remains active. As templates are added/removed for this user, they’re added to or removed from the
collection.
Users Object (Collection)
A collection of Users, stored in standard iterating form.
Properties
Added
Boolean (Read only)
Returns TRUE if there are new users in the collection. These new User objects can
be retrieved with GetAddedUsers, documented below.
Application
Application (Read only)
Application object.
Modified
Boolean (Read only)
Returns TRUE if any users in the collection may have been modified. The potentially
modified User objects can be retrieved with GetModifiedUsers, documented
below.
Methods
Count
Function Count () As Integer
Retrieves the number of users in the collection.
GetAddedUsers
Function GetAddedUsers () As Users
Gets the collection of users that were added since the original Users collection was
instantiated, or since this method was last called.
TrackRecord User’s Guide
235
GetModifiedUsers Function GetModifiedUsers () As Users
Gets the collection of users that may have been modified since the original Users
collection was instantiated, or since this method was last called.
Item
Function Item (Index As Integer) As User
Returns the User at Index in the collection.
236
TrackRecord User’s Guide
Appendix B
Using Tags
This appendix provides reference material for administers mapping
items to access the TrackRecord databases. It includes the following
sections:
⽧
Overview of Tags — A general overview of tags.
⽧
Cautions When Using Tags — Important things to know when
using tags.
⽧
Categories of Tags — Types of tags.
⽧
Tag Naming Conventions — Description of how tags are named.
⽧
Type Tags — Description of each of the types of tags: TrackRecord,
QACenter, and DevPartner.
⽧
Field Tags — Descriptions of each of the types of field tags:
TrackRecord, DevPartner, and QACenter.
Overview of Tags
Many Compuware products use TrackRecord as an essential
component. When these products integrate with TrackRecord, they
depend on types, and fields within types, to properly integrate with the
TrackRecord database. To provide for this dependency, TrackRecord
supplies ActiveLink tags. Tags let administrators link the types and
fields they create with the underlying structure.
When to Use Tags
If you use the types shipped with the sample TrackRecord database, you
can change type and label names without concern for ActiveLink tags.
You only need to use the Tags dialog when:
⽧
TrackRecord User’s Guide
Creating new types designed to exploit a Compuware technology,
such as the build registration capability
237
⽧
Changing previously tagged types or fields
⽧
Deleting a field, which requires assigning its tag to another field
Caution: If you choose to modify types and fields, it is imperative that
administrators verify that all tags are applied correctly to ensure
integration between TrackRecord and DevPartner/QACenter/Fault
Manager.
For example, an administrator deletes the Defect type and substitutes a
new type called Bug Report. In order for the Bug Report type to serve
the same function as the Defect type, it should be given the tag that by
default belonged to the Defect type (QC_Defect). Any associated fields
must also be properly tagged in order to work correctly with QACenter.
Cautions When Using Tags
If you do decide to change the tags, please note the following cautions:
⽧
In order to maintain the integration of TrackRecord with QACenter
and DevPartner, it is important that the tags are not changed unless
it is absolutely necessary.
⽧
TR_User is a special tag that identifies the type a user is associated
with. In the default schema, this type is "Team Member". Do not
create any types that inherit from the type with the TR_User tag
associated with it. Doing so may cause problems with TrackRecord
users.
⽧
TrackRecord will not function properly if the TrackRecord type tags
and their associated field tags do not exist or are not properly set
up. For example, the Workflow Editor will not function properly if
the three tags associated with the workflow: TR_Action, TR_State,
and TR_Transition are not properly set up. To avoid this, ensure
that the proper tags exist and are mapped to the correct types and
fields.
Categories of Tags
There are two categories of TrackRecord tags:
238
⽧
Type-level — Tags associated with data types in the database. See
“Type Tags” on page 239.
⽧
Field-level— Tags associated with fields within types in the
database. Refer “Field Tags” on page 241 for additional
information.
TrackRecord User’s Guide
Any given type or field can be partnered with multiple tags. For
example, the Project field of a Defect type has both the
DC_Defect_Project and QA_Defect_Project tags associated with it.
Tag Naming Conventions
Type tags are written in the format: XX_Description. Where XX is the
external product (or suite) that uses the tag. Some examples include: TR
= TrackRecord, DC = DevPartner Controlled, QC = QACenter, and FM =
Fault Manger. Description is usually the name of the type as it appears in
your default schema. For example, Defect = Defect type and
HardwareConfig = Hardware Configuration type.
Field tags are written in the format: XX_TypeDesc_FieldDesc.
XX_TypeDesc represents the type tag name to which this field must
belong. For example, DC_Defect_ prefixes all field tags within a
DevPartner Reported Defect. FieldDesc is usually the name of the field
as it appears in your default schema.
Type Tags
Tip The first two letters of
the tag name denote the
external product (or
suite) that uses the type:
TR = TrackRecord, DC =
DevPartner Controlled,
QC = QACenter, and FM
= Fault Manger.
TrackRecord information types define the structure of the individual
pieces of information stored in a project database. These types are the
heart of TrackRecord and make integration possible. Manipulating
types provides control over the database structure, but can also result
in integration problems. There are four type tags: TrackRecord,
QACenter, Fault Manager, and DevPartner. The following tables list the
tag name and the default type that is associated with.
Type Tags for TrackRecord
TrackRecord User’s Guide
Tag Name
Description
Default Affiliation
TR_Action
Action item
Action
TR_AttachedFile
Attached external file
Attached File
TR_Defect
Regular defect or bug items
Defect
TR_MSProjectTask
Microsoft Project synchronized task MS Project Task
TR_Person
Person items
Person
TR_Priority
Priority choice items
Priority
TR_Requirement
Requirement item
Requirement
TR_State
Workflow state
Status
239
TR_Task
Regular task items
Task
TR_Transition
Transition information to next state Workflow
in workflow
TR_User
Login users
Team Member
TR_Workgroup
Workgroup for sharing view, templates, and queries
Share Group
Type Tags for QACenter
Tag Name
Description
Default Affiliation
QC_Defect
QACenter submitted defect
QACenter Reported
Defect
QC_Product
QACenter product or test tool
Test Tool
QC_Test
QADirector test items
QADirector Test
Type Tags for DevPartner
240
Tag Name
Description
Default Affiliation
DC_Build
DevPartner registered build
Build
DC_Component
DevPartner registered application Application Compocomponent
nent
DC_Defect
DevPartner submitted defect
DevPartner Reported
Defect
DC_Executable
DevPartner registered executable file
Executable File
DC_FailSafe
FailSafe submitted incident
FailSafe Reported Incident
DC_HardwareConfig
DevPartner submitted hardware
configuration
Hardware Configuration
DC_Incident
DevPartner submitted incident
Incident
DC_Milestone
Project milestone information
Milestone
DC_OS
Operating system
Operating System
DC_Person
DevPartner person
Person
DC_Product
DevPartner product
Product
DC_Project
Software project
Project
DC_Run
DevPartner submitted run
DevPartner Session
DC_Task
DevPartner submitted task
DevPartner Task
DC_TeamMember
DevPartner Team Member
Team Member
TrackRecord User’s Guide
Type Tags for Fault Manager
Tag Name
Description
Default Affiliation
FM_Defect
Fault Manager submitted defect
Fault Reported Defect
FM_Incident
Fault Manager submitted incident
Fault Reported Incident
FM_FaultType
Fault Manager type
Fault Type
Field Tags
Tip The first two letters of
the tag name denote the
external product that
uses the type: TR =
TrackRecord, DC =
DevPartner Controlled,
QC = QACenter.
Each data type consists of fields. Fields hold specific facts about a type,
such as a person’s address or the name of a project that are connected
to items in the TrackRecord database and other applications.
Manipulating fields provides control over the database structure, but
can also result in integration problems. The fields within a type also
contain tags to make integration possible. There are three types of field
tags: TrackRecord, DevPartner, and QACenter.
TrackRecord Field Tags
Tag Name
Description
Derived From
Data Type
TR_Action_Name
Name of action
TR_Action
String
DC_AttachedFile
Notepad
TR_AttachedFile_Descripti Description of file
on
TR_AttachedFile_FileName Name of attachment file DC_AttachedFile
TrackRecord User’s Guide
TR_Item_State
Status of an item
TR_MSProjectTask_Notes
Notes for Microsoft
Project task
String
TR_MSProjectTask Notepad
TR_MSProjectTask_Update Option to allow MS
Name
Project to update task
name
TR_MSProjectTask Checkbox
TR_State_Name
Name of state
TR_State
TR_State_Transitions
Legal transitions to next TR_State
state
TR_Transiti
on (List)
TR_Transition_Action
Action signaling transition
TR_Action
TR_Transition
String
TR_Transition_Description Description of transition TR_Transition
String
TR_Transition_NextState
TR_State
State to change to on
action
TR_Transition
241
QACenter Field Tags
242
Tag Name
Description
Derived From Data Type
DC_Defect_Status
Status of defect
DC_Defect
TR_State
QC_Defect_AssignedTo
Person defect is
assigned to
QC_Defect
TR_User
QC_Defect_Build
Build where defect was QC_Defect
found
DC_Build
QC_Defect_Configuration
Configuration where
defect was found
QC_Defect
DC_Hardw
areConfig
QC_Defect_DatabaseName
Name of QACenter
database containing
test
QC_Defect
String
QC_Defect_DateEntered
Date defect is entered
QC_Defect
String
QC_Defect_Description
Description of defect
QC_Defect
Date
QC_Defect_EnteredBy
Person entering defect
QC_Defect
TR_User
QC_Defect_ExecutionDateTi
me
Date and time of test
execution
QC_Defect
Time
QC_Defect_ExecutionDetails
Detailed information
about test run
QC_Defect
Notepad
QC_Defect_FailureReason
Reason for test failure
QC_Defect
String
QC_Defect_JobName
QADirector job associated with defect
QC_Defect
String
QC_Defect_OS
Operating system running when defect is
submitted
QC_Defect
DC_OS
QC_Defect_Project
Project that defect
occurred in
QC_Defect
DC_Project
QC_Defect_ReportedBy
Person(s) reporting
defect
QC_Defect
TR_Person
QC_Defect_ScriptDescription Description of QADirec- QC_Defect
tor Script
String
QC_Defect_ScriptName
QADirector Script asso- QC_Defect
ciated with defect
String
QC_Defect_Status
Status of defect
TR_State
QC_Defect
QC_Defect_Synopsis
Defect summary
QC_Defect
String
QC_Defect_Test
QADirector test item
associated with defect
QC_Defect
QC_Test
QC_Defect_TestTool
QACenter product that
was running test
QC_Defect
QC_Produ
ct
QC_Product_Name
QACenter product
name
QC_Product
String
TrackRecord User’s Guide
QC_Product_Version
QACenter product version
QC_Product
String
QC_Test_Details
QADirector test details
QC_Test
Notepad
QC_Test_ID
Test ID for QADirector
test
QC_Test
Numeric
QC_Test_ProcedureName
Procedure name for
QADirector test
QC_Test
String
QC_Test_ProcedureSummary Procedure summary for QC_Test
QADirector test
String
QC_Test_Purpose
QADirector test purpose QC_Test
Notepad
QC_Test_Requirement
Requirement for QADirector test
QC_Test
String
QC_Test_SuiteName
Suite name for QADirec- QC_Test
tor test
String
DevPartner Field Tags
There are thirteen types of DevPartner field tags which are described in
the following sections:
⽧
⽧
⽧
⽧
⽧
⽧
⽧
⽧
⽧
⽧
⽧
⽧
⽧
“Build Type Field Tags” on page 243
“Component Type Field Tags” on page 244
“Defect Type Field Tags” on page 244
“Executable Type Field Tags” on page 245
“Hardware Config Type Field Tags” on page 245
“Milestone Type Field Tags” on page 246
“Miscellaneous Type Field Tags” on page 246
“OS Type Field Tags” on page 246
“Product Type Field Tags” on page 247
“Project Type Field Tags” on page 247
“Run Type Field Tags” on page 247
“Task Type Field Tags” on page 248
“Team Member Type Field Tags” on page 248
Build Type Field Tags
Each build type is derived from DC_Build.
Tag Name
TrackRecord User’s Guide
Description
Data Type
DC_Build_BuildNumber
Number of build
Numeric
DC_Build_Checksum
DevPartner checksum information from Attachment
build
DC_Build_Components
Components included in build
DC_Component
(List)
243
DC_Build_DateTime
Date and time when build was created Time
DC_Build_Name
Build name/description
String
DC_Build_ProjectVersion Project version
String
DC_Build_Submitter
DC_Person
Person registering build
Component Type Field Tags
Each component type is derived from DC_Component.
Tag Name
Description
Data Type
DC_Component_DateTimeModified Last modified date and time
Time
DC_Component_Name
Name of component
String
DC_Component_Size
Size (in bytes)
Numeric
DC_Component_Tag
Tag associated with component String
Defect Type Field Tags
Each Defect type field tag is derived from DC_Defect.
Tag Name
Description
Data Type
DC_Defect_AssignedTo
Person assigned to
DC_Person
DC_Defect_Build
Build where defect was found
DC_Build
DC_Defect_Components
Other system components excluding components from recognized
builds
DC_Component
DC_Defect_Configuration
Configuration where defect was
found
DC_HardwareCo
nfig
DC_Defect_DateEntered
Date entered
Date
DC_Defect_Description
Description of defect
Notepad
DC_Defect_EnteredBy
Person entering defect
DC_Person
DC_Defect_Key
Key field for locating duplicate items String
DC_Defect_OS
Operating system running when
DevPartner defect is submitted
DC_OS
DC_Defect_Product
DevPartner product submitting
defect
DC_Product
DC_Defect_Project
Project that defect occurred in
DC_Project
DC_Defect_ReportedBy
Person reporting defect
DC_Person
DC_Defect_SessionFile
244
Attachment
DC_Defect_Stack
Stack traceback from DevPartner
Notepad
DC_Defect_Synopsis
Defect summary
String
TrackRecord User’s Guide
Executable Type Field Tags
DC_Executable derives each of these types.
Tag Name
Description
Data Type
DC_Executable_DateTimeLinked
Date and time file was linked Time
DC_Executable_FileVersion
File version
String
DC_Executable_Instrumentation
Type of instrumentation in
file
DC_Product
(List)
DC_Executable_ProductVersion
Product version
String
Hardware Config Type Field Tags
All Hardware Config types are derived from DC_HardwareConfig.
TrackRecord User’s Guide
Tag Name
Description
Data Type
DC_HardwareConfig_Country
Country setting for operating
system
String
DC_HardwareConfig_CPU
CPU type
DC_CPU
DC_HardwareConfig_DBCSEnabled
Operating system is DBCS
enabled
Checkbox
DC_HardwareConfig_Language
Language setting for operating String
system
DC_HardwareConfig_MachineName Name of machine
String
DC_HardwareConfig_Memory
Numeric
Amount of memory (in MB)
DC_HardwareConfig_MidEastEnable Operating system is Middle
d
Eastern enabled
Checkbox
DC_HardwareConfig_Monitors
Number of monitors
Numeric
DC_HardwareConfig_MouseButtons
Number of mouse buttons
Numeric
DC_HardwareConfig_MouseWheel
Indicates whether the mouse
has a mouse wheel
Checkbox
DC_HardwareConfig_NumProcessors Number of processors
Numeric
DC_HardwareConfig_OS
Operating system
DC_OS
DC_HardwareConfig_Palette
Display palette
Numeric
DC_HardwareConfig_Resolution
Display resolution
String
245
Milestone Type Field Tags
All Milestone type tags are derived from DC_Milestone.
Tag Name
Description
Data Type
DC_Milestone_Completed
Milestone has been completed
Checkbox
DC_Milestone_DateActual
Actual end date
Date
DC_Milestone_DateProjected Projected end date
Date
DC_Milestone_DateStart
Starting date
Date
DC_Milestone_Description
Description of milestone
Notepad
DC_Milestone_ExcludeBuilds
Builds excluded from milestone
DC_Build (List)
DC_Milestone_Name
Name of milestone
String
Miscellaneous Type Field Tags
Tag Name
Description
Derived From
Data Type
DC_Person_Name
Name of person
DC_Person
Name
TR_Item_State
State field in any type of
item
Any
TR_State
TR_Workgroup_Members
Members of a sharing
workgroup
TR_Workgroup TR_User
(List)
OS Type Field Tags
Each operating system type is derived from DC_OS.
Tag Name
Description
Data Type
DC_OS_AdditionalInfo Additional operating system information String
246
DC_OS_Build
Operating system build number
Numeric
DC_OS_Comments
Additional operating system comments
String
DC_OS_MajorVersion
Major operating system version
Numeric
DC_OS_MinorVersion
Minor operating system version
Numeric
DC_OS_Name
Operating system name
String
TrackRecord User’s Guide
Product Type Field Tags
The Product types are derived from DC_Product.
Tag Name
Description
Data Type
DC_Product_Name
DevPartner product name
String
DC_Product_Version
DevPartner product version
String
Project Type Field Tags
The Project types are derived from DC_Project.
Tag Name
Description
Data Type
DC_Project_BuildFormatString String used to control formatting Notepad
of builds
DC_Project_BuildNumber
Current build number counter
Numeric
DC_Project_Builds
Builds done for project
DC_Build
DC_Project_Description
Description of project
Notepad
DC_Project_Milestones
Milestones in project
DC_Milestone
(List)
DC_Project_Name
Project name
String
DC_Project_TeamMembers
Team Members on project
DC_TeamMemb
er (List)
DC_Project_VCSProject
Corresponding version control
project
VCSProject
DC_Project_Version
Current version of project
String
Run Type Field Tags
Each Run type is derived from DC_Run.
TrackRecord User’s Guide
Tag Name
Description
Data Type
DC_Run_Build
Build used for run
DC_Build
DC_Run_Comments
Additional user comments on run Notepad
DC_Run_Components
Components loaded by run
DC_Component
(List)
DC_Run_DateTime
Date and time of run
Time
DC_Run_HardwareConfig
Hardware configuration for run
DC_HardwareCo
nfig
247
DC_Run_Product
DevPartner product used for run
DC_Product
DC_Run_Project
Project used for run
DC_Project
DC_Run_SessionFile
Session file associated with run
Attachment
DC_Run_User
User submitting run
DC_Person
Task Type Field Tags
All Task types are derived from DC_Task.
Tag Name
Description
DC_Task_Build
Build running when task was sub- DC_Build
mitted
Data Type
DC_Task_Completed
Task has been completed
DC_Task_CompletedInBuilds
List of builds where task was com- DC_Build
pleted
DC_Task_CompletedInRuns
List of runs where task was completed
Checkbox
DC_Run
DC_Task_DateCompleted
Date task was completed
Date
DC_Task_DateDue
Date due
Date
DC_Task_Description
Task description
Notepad
DC_Task_HardwareConfig
Hardware configuration when
task was submitted
DC_HardwareCo
nfig
DC_Task_Identifier
Identifier of task item
String
DC_Task_Key
Key field for locating duplicate
items
String
DC_Task_Priority
Priority
TR_Priority
DC_Task_Product
DevPartner product submitting
task
DC_Product
DC_Task_Project
Project that task is logged against DC_Project
DC_Task_RepeatEachBuild
Indicates whether tasks should be Checkbox
repeated for each build
Team Member Type Field Tags
Each Team Member type is derived from DC_TeamMember.
248
Tag Name
Description
Data Type
DC_TeamMember_Email
Email addresses
String
DC_TeamMember_Projects
Team Member projects
DC_Project (List)
TrackRecord User’s Guide
Glossary
Abend-AID Fault
Manager
An automated fault management tool to help IT managers reduce
downtime and optimize resources. Provides real-time and historical
reports and graphs for monitoring the fault resolution process.
abbreviation
Text used to identify an item in the TrackRecord database.
absolute date
Entry in a date field that identifies a specific date; for example, May 19,
1999 or 2/14/87. Compare relative date.
access control
Function of an application that restricts user access to data according to
permissions derived from the user’s identity or membership in groups.
ActiveLink tags
A mechanism to allow administrators link the types and fields they
create with the underlying structure.
ActiveX control
An interface object on a form that enables or enhances a user’s
interaction with an application. ActiveX controls have an .ocx file
name extension.
administrator
The person responsible for installing, configuring, and maintaining
TrackRecord user accounts. The TrackRecord administrator may or may
not be responsible for maintaining the network and database for a site.
API
An application program interface (API) is the specific method used by a
computer operating system or by another application program by
which a programmer writing an application program can make
requests of the operating system or another application.
ASCII file
American Standard Code for Information Interchange (pronounced
ASK-ee). Code in which numbers from 0 to 255 represent individual
characters, such as letters, numbers, and punctuation marks. Standard
for text representation.
audit trail
Record identifying each change made to an item or report and the
identity of the person making the change. See change history.
AutoAlert
An optional component that provides email notification to users of the
defects that pertain to them.
TrackRecord User’s Guide
249
AutoAlert
Administrator
A tool that allows you to add and remove databases that are being
polled by the AutoAlert service, show users that have AutoAlert
enabled, and set a variety of AutoAlert options.
available states
The Workflow Editor’s list of states that have been defined, but are not
yet used in the workflow.
bug report
See defect.
calendar
TrackRecord automatically displays a list of appointments and tasks.
CGI request
Common gateway interface (CGI) is a standard way for a Web server to
pass a Web user's request to an application program and to receive data
back to forward to the user. For example, when a user fills out a form
on a Web page and sends it in, it usually needs to be processed by an
application program. The Web server typically passes the form
information to a small application program that processes the data and
may send back a confirmation message. This method or convention for
passing data back and forth between the server and the application is
called the common gateway interface (CGI). It is part of the Web's
Hypertext Transfer Protocol (HTTP).
change history
Record identifying each change made to an item or report and the
identity of the person making the change. See audit trail.
child
An item that is subordinate to another item.
child header
A header that is subordinate to another header within an Outline
Report. In the following example, Open Bugs is a child header of Bugs,
and Priority 1 is a child header of Open Bugs. Compare parent header,
sibling header.
Bugs
Open Bugs
Priority 1
Priority 2
Closed Bugs
cloning projects
Duplicating and reusing information from existing projects.
Command Line
Interface
A CLI (command line interface) is a user interface to a computer's
operating system or an application in which the user responds to a
visual prompt by typing in a command on a specified line, receives a
response back from the system, and then enters another command,
and so forth.
coverage
Percentage of a project that has been tested, expressed as a percentage
of lines tested or a percentage of the functions tested.
250
TrackRecord User’s Guide
data type inheritance
TrackRecord uses a data hierarchy to develop related data types. When
one data type (the child) is based on another data type (the parent), the
child type inherits all the fields and controls of the parent type. See
child and parent for more information.
database
A collection of data that is organized so that its contents can easily be
accessed, managed, and updated. TrackRecord uses a relational
database, a tabular database in which data is defined so that it can be
reorganized and accessed in a number of different ways.
database lock-out
A error that will result if attempting to change the database (usually by
creating or modifying types) while in use. A dialog will appear listing
current users to allow the administrator to advise them to log off.
DBHost
Database Host. It caches values for a specific database.
defect
Report describing a problem found with software or hardware
undergoing testing. A defect report is updated over time as a problem is
reported, reproduced, fixed, and tested.
Defect
Item in the TrackRecord database describing a specific problem
identified during project testing.
derived type
A data type that inherits all of the fields of its parent’s type. For
example, a Software User object inherits all the fields from the Person
data type.
DevPartner Studio
See NuMega DevPartner Studio.
export
To generate a formatted file containing data from the TrackRecord
database for use by another application.
Fault Manager
See Abend-AID Fault Manager.
favorite reports
Frequently used reports or views.
fields
Holds specific facts about an item, such as a person’s address or the
name of a project.
filter
Process that selects information from the database according to userspecified criteria.
function coverage
A measure of how much of the code for a project has been tested,
expressed as a percentage of functions tested across all TrueCoverage
sessions relative to the total number of functions in a project.
global favorite types
Favorite types that are shared with every TrackRecord user.
global Outline Report
Outline Reports that are shared with every TrackRecord user.
Global Preferences
Administration
Creating queries, reports, and global templates, and identifying Home
Pages and favorites for all users.
TrackRecord User’s Guide
251
global query
Queries that are shared with every TrackRecord user.
global template
Templates that are shared with every TrackRecord user.
graph
A visual summary of information.
Group Administration
Creating groups and establishing group access rights.
header
Entry in an outline report that corresponds to a database query.
Header Wizard
TrackRecord utility that simplifies the process of defining and
formatting outline reports. The Header Wizard was called the Header
Engineer in previous TrackRecord releases.
hide
A field-level privilege setting that allows making a field invisible on a
group-by-group basis.
Home Page
A report that opens automatically when TrackRecord is launched and
can be accessed through the Home Page button.
import
To bring data generated by another application into the TrackRecord
database.
inheritance
Property of data types that allow them to derive their structures from
parent types.
Interval Pro
Product designed to validate end-user response time from the end-user
perspective and proactively measure application performance and
availability to maintain high service levels.
item
Object or entity of a specific type in the TrackRecord database.
Equivalent to a record in a relational database.
Item Browser
Provides access to information in the TrackRecord database and allows
the creation of new items.
label
User-defined name you can attach to a specific software release or build
in version control systems.
line coverage
A measure of how much of the code for a project has been tested,
expressed as a percentage of code lines tested across all TrueCoverage
sessions relative to the total number of code lines in a project.
link
Relationship between items in the TrackRecord database. A link is
created whenever one item references another. For example, attaching
a note to a Person object creates a link between the two items.
mail query
A TrackRecord query in which an option is enabled to email users when
new items match the query.
menu bar
Displays on the TrackRecord user interface below the window title and
contains the following menus: File, Edit, Administrator, Favorites,
Tools, Window, and Help.
252
TrackRecord User’s Guide
merging
The process of compiling coverage information across multiple test
sessions.
milestone
An event or point in a schedule that marks the transition of a project
from one phase to another.
Milestone Status
Report that identifies the current status of a project with respect to a
specified milestone, the volatility of a project from one build to
another, data submitted from DevCenter or QACenter tools, and
custom queries that summarize project information.
NuMega DevPartner
Studio
TrackRecord is part of the Compuware NuMega DevPartner Studio suite
of Windows-based, software debugging tools. Easily integrated into
every team’s development process, including web-enabled, ecommerce, and distributed applications to help developers
automatically detect, diagnose, and facilitate resolution of software
errors; maximize code performance; and ensure optimum code
coverage and testing.
OLE-compliant
A set of APIs to create and display a document, OLE (Object Linking
and Embedding) is Microsoft's framework for a compound document
technology. Part of Microsoft's ActiveX technologies, OLE is part of a
larger, more general concept, the Component Object Model.
Outline Report
Structured view of information in the TrackRecord database that is
updated dynamically.
parent
An item that has one or more subordinate items.
parent header
A header that owns one or more subordinate headers within an outline
report. In the following example, Bugs is the parent header of Open
Bugs, and Open Bugs is the parent header of Priority 1 and Priority 2.
Compare sibling header, child header.
Bugs
Open Bugs
Priority 1
Priority 2
Closed Bugs
password
Text string used to verify the identity of a user before granting the user
read or write access to TrackRecord information.
priority
Arbitrary integer value assigned to a defect to indicate its significance
relative to other defects. Depending on the standards of your site, you
can use a higher or lower number to indicate that one defect is more
important than another.
Project Administration
Determines the organizational framework for completing a deliverable
including tasks required to build an application, people who work on
those tasks, and dates on which the tasks must finish.
TrackRecord User’s Guide
253
QADirector
QADirector is a powerful, extensible test management solution for full
lifecycle testing of distributed large-scale applications.
query
A means to specify criteria for data retrieval.
Reconcile
An enterprise-wide requirement management system. It allows a
project team to create, change, track, and report on project
requirements.
recurring events
Event scheduled to occur at regular intervals, such as Every Thursday.
relative date
Entry in a date field that identifies a date relative to the current system
date; for example, Yesterday or Tomorrow. Compare absolute date.
Remainder Header
A None of the Above summary item used in an Outline Report. It is
typically used to identify items belonging to a parent header that fail to
match all criteria.
Rich Text Format (RTF)
A file format that lets you exchange a text file between different word
processors and different operating systems.
right-click
Pressing and releasing the right mouse button while positioning the
cursor over an object or control on the screen. Typically opens a
shortcut menu, which displays options applicable to the control or
item over which the cursor is positioned.
share groups
Groups whose members share queries, Outline Reports, Milestone
Status views, and templates.
shared
Property of a report that allows TrackRecord users other than the
report’s owner to view it. Only the owner of a report can modify a
shared report, though other users can copy it (by saving it under a new
name) and then modify their copy.
shortcut menu
Menu that appears when you right-click a control or item in a window.
sibling header
A header that is at the same level as another header within an outline
report. In the following example, Open Bugs is a sibling header of
Closed Bugs, and Priority 1 is a sibling header of Priority 2. Compare
parent header, child header.
Bugs
Open Bugs
Priority 1
Priority 2
Closed Bugs
status bar
Located at the bottom left of the screen, this bar provides suggestions
for the actions you can perform with a tool or a selected object.
subproject
A project that is one component of a larger or more complex project.
task
Any activity in a project that has a beginning date and an end date.
254
TrackRecord User’s Guide
Task
An item in the TrackRecord database that identifies a task in a project.
Team Member
An individual assigned to work on a project.
template
A document or file having a preset format, used as a starting point for a
particular application so that the format does not have to be recreated
each time it is used.
TestPartner
An automated functional testing tool that has been specially designed
for testing complex applications based on Microsoft, Java and web
based technologies.
toolbar
Contains shortcuts to the most commonly used tasks such as creating a
new item or view, opening an existing item, displaying the Item
Browser, opening the Home Page, or searching.
transient sessions
Efficient data structures that cache data from users for a period of ten
minutes before it is removed.
type
An organizational system that provides the framework on which the
TrackRecord database is built. Information is organized into categories
such as Person, Company, Defect, or Project.
Type Editor
Inserts fields into a form, modifies fields on a form, and modifies
settings.
type inheritance
See data type inheritance.
version control system
(VCS)
An application that maintains multiple versions of source files,
controls who can read and update source files, and records information
about changes to source files.
views
A specification for how data is displayed.
visible group layers
A list of all defined groups in the Workflow Editor.
volatility
A measure of the stability of code from one build to another, expressed
as a percentage of the functions that changed between two builds.
WebMonitor
A monitoring component that maintains all currently active users
sessions.
WebServer
An optional component that allows access to the TrackRecord database
through a Web browser.
work area
Area where the workflow is created in the Workflow Editor.
workflow
A series of actions and the states resulting from these actions.
Workflow Editor
Creates and modifies the workflow and consists of these frames:
available states, visible group layers, and work area.
TrackRecord User’s Guide
255
256
TrackRecord User’s Guide
Index
A
Abbreviations
cautions about creating, 151
default described, 151, 155
definition, 249
long, 151
short, 151
About this guide, xii
About window, displaying, xiv
Access rights
altering for types and fields, 150
assigning to Team Members, 134
definition of, 249
field access limit for groups, 163
hide, 127
limiting, 127
planning and assigning, 126
read and add, 127
read and write, 127
read-only, 127
Action button
creation of, 141
using, 25
Actions in workflow, 145
ActiveLink
definition of, 249
description, 115, 237
tags and Milestone status, 152, 237
ActiveX, programming interface, xii, 213, 237,
249
Add and Delete Item buttons, 16
TrackRecord User’s Guide
Adding
groups, 128
rule for types, 165
rules, 166
Administration
description of, 2
global preferences, 137, 251
groups, 126, 252
logging in as, 125
overview of, 124
privileges of, 124
project, 134, 253
rules, 165
share group, 129
tasks of, 125
Team Member, 131
type, 150
WebServer, 202
workflow, 140
Administrator, see Administration, 124
Advanced search, 21
API, definition of, 249
Area graphs, 55
ASCII, definition of, 249
Associating project with VCS, 109
Associating templates with a header, 86
Audience for guide, xi
Audit trail, 6, 249
Authorizing TrackRecord users, 133
AutoAlert
adding and removing databases, 195
257
adding servers, 194
administration, definition of, 250
administrator options, 197
changing content of mail messages, 201
configuring, 193
definition of, 249
installation notes, 193
mail frequency, 198
message threshold, 198
overview, 193
read frequency, 198
removing servers, 194
sending daily message, 197
setting up mail queries, 199
setting up users, 199
show users, 196
starting, 194
synchronizing data, 198
user status options, 133
viewing servers, 194
Automatic login, 90
Automatically submit DevPartner sessions, 90
Automating build registration, 116
Automation interface, xii, 213, 237
B
Backup database, 181
Bar graphs, 54
Basic concepts, 22
Basic tasks, 22
Basic types, for importing, 192
Before you begin, 8
Boldface, xii
Browser, 202
access to a database, 69
see also WebServer, 202
Builds, automating registration, 116
Buttons
add and delete, 16
calendar, 16
controls on, 15
258
expand item, 15
expand text field, 17
run query now, 35
C
Calendar
adding tasks, 67
button, 16
definition of, 250
description of, 38
opening view, 67
setting up view, 66
specifying preferences, 66
view, 64
CGI, definition of, 250
Change History
definition of, 249, 250
description, 6
tab, 15
Changes, to product, xii
Changing
queries, 35
the database, lock-out during, 152
the status of an item, 25
views, 38
your password, 9
Check Database
automating, 175
defined, 170
manual, 179
notes about, 170
quiet mode, description of, 178
scheduling, 175
troubleshooting, 183
Checkbox, displaying in reports, 43
Checking database for changes, 90
Checking files in and out of a VCS system, 111
Child headers, 45
Child types, 7
Choice item, 164, 165
CLI, definition, 250
TrackRecord User’s Guide
Client-Server architecture, described, 6
Cloning projects, 136
Code volatility information, 60
Columns
displaying multiple lines, 43
in Outline Reports, 42
labeling with Show As, 43
Command line interface for exporting, 188
Command line interface, definition, 250
Compuware, World Wide Website, xiii
Configuration tasks, 125
Configuring TrackRecord, 123
Copy database, 182
Coverage, 250
function, definition of, 251
line, definition of, 252
Creating
a project, 135
a query, 33
a rule for types, 165
a shared query, 137
a user, 134
a Workflow, 142
favorite types, 139
graphs, 53
groups, 128
Home Pages, 139
Item in WebServer, 74
items in Outline Reports, 51
Milestone Status, 59
new databases, 174
new state, in Workflow Editor, 144
new transition, in Workflow Editor, 146
reports, 139
share groups, 129
Team Members, 132
templates, 83
types, 153
Customizing
description of, 164
modifying, 165
TrackRecord User’s Guide
TrackRecord, 89
workflow, 141
D
Data
best practices for maintaining, 170
defining, 171
entering, 13
entering in a form, 23
entering in WebServer, 70
entering, overview of, 4
finding, 20
finding with queries, 29
from Outline Report, 95
hierarchy defined, 7
import and export, 182
import cautions, 183
retrieving, overview of, 4
type inheritance, 251
update frequency, 90
using calendar view, 64
using the Change History tab, 15
using the Item tab, 13
using the Links tab, 14
viewing with Outline Reports, 39
viewing, overview of, 4
Database
access through a browser, 69
adding in AutoAlert, 195
Administration Utility interface, 173
backups, 170
best practices, 170
cautions about backup, 171, 181
changing name on login screen, 72
check, 175
Check Database, 170
copy, 182
create new, 174
definition of, 251
description of, 5
frequency of Check Database, 177, 179
259
frequency of rebuild, 180
guidelines when defining data, 171
lock-out, 152, 251
logging in to, 9
overview, 5, 169
performance optimization, 172
polling, 90
rebuild, 180
rebuilding, 170
removing in AutoAlert, 195
restoring, 181
schedule backups for, 181
starting the Administration Utility, 173
troubleshooting, 183
Dates
absolute, definition of, 249
relative, definition of, 254
Dates, entering on forms, 16
DBHost, notes, 203, 251
Default abbreviation
defining, 155
described, 151
using for column labeling, 43
Default behavior, setting, 89
Default font for Outline Reports, 92
Default status
for defects, 149
for other types, 149
Defects, 23, 251
Deleting
groups, 129
items, 16
queries, 35, 36
views, 38
Derived type, definition of, 251
Description of product, 1
DevCenter, definition, 114
DevPartner, definition, 114, 253
DevPartner, integration with TrackRecord, 114
Disabling the workflow, 141, 165
Displaying Workflow Editor, 142
260
Dragging headers, 45
Dupe option on the Type Properties dialog, 151
Duplicate items
merging, 26
when importing, 151
E
Edit types, 153
Email
displaying enabled users, 196
frequency, 198
MAPI, 197
messages enabling, 193
read frequency, 198
see also AutoAlert, 193
sending daily message, 197
SMTP, 197
using TrackRecord with Outlook, 97
Enhancements, xii
Entering data
on a form, 23
overview, 4
restrictions, 70
Executable commands, 6
Executable files, versions of, 119
Expand Item button, 15
Expand Text Field button, 17
Export, 251
command line interface, 188
data, 182
menu option, 187
template files, 188
using copy and paste, 188
Wizard, 182
F
Fault Manager
definition, 249
integration with TrackRecord, 120
Favorite reports, identifying, 91
Favorite types, 91, 139
TrackRecord User’s Guide
Favorites, adding report to menu, 91
Field properties
general tab, 158
privileges tab, 163
properties tab, 159
Fields
access rights, 150
definition of, 251
inserted into inherited section of form, 157
inserting into a form, 157
limiting access to, 127
overview of, 5
rearranging on a form, 157
Files
attaching in WebServer, 75
checking in/out of a VCS system, 111
deleting in WebServer, 77
opening in WebServer, 76
Filter, definition of, 251
Filtering data in Milestone Status views, 60
Finding data
using queries, 29
using search, 20
Font, for Outline Reports, 92
Forms
controls on, 15
described, 13
example of using, 23
how to open, 23
FrontLine technical support website, xiii
Function coverage, 58
shared views, 129
templates, creating, 140
Glossary, 249
Graphics applications, integration with, 96
Graphs
area, 55
bar, 54
copying to other applications, 96
creating from Outline Reports, 56
definition of, 252
description of, 38
formatting, 57
line, 55
overview of, 53
pie, 53
stacked bar, 54
trend, 55
types of, 53
Groups
administration, 126, 252
creating, 126, 128
deleting, 129
impact of no assignment, 126
modifying, 128
rules about, 126
share groups, definition of, 254
sharing information, 130
GUI, described, 10
Guides
client/server licensing, xii
Compuware License Installation, xii
TrackRecord and Reconcile Installation, xii
G
General concepts, 22
Getting started, 8
Global
access, 127
administration, 251
Outline Report, 138
preferences, 137
query, 137
TrackRecord User’s Guide
H
Header
child, definition of, 250
definition of, 252
parent, definition of, 253
remainder, definition of, 254
sibling, definition of, 254
Header wizard, 47, 252
261
Headers
associating with a template, 86
collapsing and expanding, 40
creating with header wizard, 47
levels in Outline Reports, 45
rearranging, 45
remainder, 46
using in Outline Reports, 45
Help
Compuware hotline, xiii
FrontLine website, xiii
how to use, 19
online, xii
technical support, xiv
Hide, definition of, 252
Hierarchy, data, 7
Historical information, value of, 137
Home page
changing, 91
creating, 139
definition of, 252
displaying at start of session, 89
identifying, 91
I
Import, 252
cautions about, 183
data, 182
duplicate types, 151
file specifications, 192
manually creating templates for, 188
menu options, 187
resources into Project, 103
template files, 188
troubleshooting, 192
Wizard, 182
Inheritance
definition of, 251, 252
description of, 7
of rules, 166
Inserting fields into a form, 157
262
Installation
Adobe Acrobat, xiii
TrackRecord Guide, xii
Integration, 1
overview, 100
with DevPartner, 114
with Fault Manager, 120
with graphics applications, 96
with Microsoft Project, 100
with QACenter, 113
with text editors, 95
with version control systems, 108
Interval Pro
defined, 252
integration with TrackRecord, 120
Italic, xii
Item browser, 252
button on Toolbar, 12
items list, 18
types list, 18
window, 18
Item tab, on a form, 13
Items
changing status of, 25
creating new in Outline Reports, 51
definition of, 252
merging, 26
opening in Outline Reports, 51
overview of, 5
L
Label, definition of, 252
Labels, 112
Licensing, client/server guide, xii
Line coverage, 58
Line coverage, definition of, 252
Line graphs, 55
Links tab, on a form, 14
Links, overview of, 5, 252
Locking the database, 152
Logging in, 9
TrackRecord User’s Guide
as administrator, 125
automatically, 90
changing database name, 72
changing passwords, 9
from DevPartner tools, 115
to TrackRecord, 8
to TrackRecord from Project, 102
to VCS, 109
to WebServer, 71
Logging out of WebServer, 72
Login ID, for database access, 131
Login window, 9
Logins disabled, 152
M
Macros
added TrackRecord menu items, 102
Microsoft Project, 101
Mail query, definition of, 252
Main window, described, 10
Maintaining database, 170
Manuals
Licensing, xii
TrackRecord and Reconcile Installation, xii
Mapping priorities with Microsoft Project, 104
Membership in a team, 132
Menu bar, 11
Menu, definition of, 252
Menu, TrackRecord items in Microsoft Project,
102
Merging
definition of, 253
items, 26
Microsoft Outlook, integration with TrackRecord, 97
Microsoft Paint, copying graphs into, 96
Microsoft Project
importing resources, 103
installing macros, 101
integration with, 100
logging into TrackRecord, 102
TrackRecord User’s Guide
overview of integration, 100
priorities, 104
setting up project, 102
synchronization overview, 106
synchronizing project information, 108
table of synchronization, 107
TrackRecord menu items, 102
Milestone
definition of, 253
status, definition of, 253
Milestone Status, 57
code volatility in, 60
creating, 59
description of, 38
filtering data, 60
function coverage, 58
line coverage, 58
not available due to missing tags, 152
queries in, 60
session information, 60
sharing, 59
types of information, 57
use of tags in, 58
volatility, 58
volatility graph, 63
volatility statistics, 62
Modifying
a workflow, 142
custom item, 165
groups, 128
queries, 35, 36
types, 153
views, 38
Multiple
projects, 136
workflow states, 147
N
New items, in Outline Reports, 42
Notes about DBHost, 203
NuMega DevPartner Studio, definition, 253
263
Numeric reports, 40
O
Office assistant, 102
OLE, see ActiveX, xii
OLE-compliant, definition of, 253
Online help, xii, 19
Opening
a project, 136
Home Page button on toolbar, 12
item button on Toolbar, 12
items in Outline Reports, 51
queries, 35, 36
Optimizing, performance, 172
Options window
favorite types tab, 92
General tab, 89
Outline Reports tab, 92
Order of rules inheritance, 166
Outline Reports, 39
adding headers, 40
checkboxes in, 43
creating, 40
creating a global, 138
creating from inside a query, 35
creating graphs from, 53, 56
creating items in, 51
default font, 92
definition of, 253
description of, 37
displaying multiple columns, 43
double-clicking headers, 93
embedding in text document, 96
global, 138
header wizard, 47
multiple headers in, 45
new items in, 42
opening items in, 51
opening through WebServer, 77
pasting data, 95
printing, 43, 52
264
rearranging headers in, 45
setting up columns, 42
setting up defaults, 92
templates for creating items in, 81
using headers, 45
using queries, 40
Outlook, integration with TrackRecord, 97
Overview
of Administration, 124
of AutoAlert, 193
of database concepts, 5
of databases, 169
of integration with Microsoft Project, 100
of process, 3
of product, 1
P
Parent types, 7
Parent, definition of, 253
Parent/child relationships, 7
Password, 9, 253
Permissions, see also Access rights, 150
Pie graphs, 53
Platform configuration, with DevPartner tools,
118
Popup frames in online help, 19
Preferences
global, 137
individual, 89
Preserving window layout, 89
Printing
online books, xiii
Outline Reports, 43, 52
Priorities, in Microsoft Project, 104
Priority, definition of, 253
Privileges
assigning to Team Members, 134
hide, 127
of project administration, 134
planning and assigning, 126
read and add, 127
TrackRecord User’s Guide
read and write, 127
read-only, 127
Process overview, 3
Product enhancements, xii
Product integration, 1
Programming
ActiveX, xii
Tags, xii
Project
administration, 253
administration tasks, 134
associating TrackRecord with VCS, 109
cloning, 136
creating, 135
defined, 134
definition of cloning, 250
displaying list of labels, 112
multiple, 136
opening, 136
see also Microsoft Project, 100
synchronizing TrackRecord and Microsoft
Project, 108
Q
QACenter, integration with TrackRecord, 113
QADirector
defined, 254
integration with, 113
Query
composition guidelines, 30
creating, 33
creating AND specification, 31
creating OR specification, 31
defined, 29, 254
deleting, 35, 36
for email notification, 35
global, 137
in Milestone Status views, 60
mail, definition of, 252
modifying, 35, 36
naming, 33
TrackRecord User’s Guide
opening, 35, 36
overview of, 4
shared, 137
sharing, 35
sorting, 34
testing, 35
with Outline Reports, 40
R
Rearranging headers, 45
Rebuild
notes about, 170
Rebuild database, 180
Rebuild, defined, 170
Reconcile
defined, 254
integration with, 113
Recurring events, definition, 254
Registering builds, 116
Related publications, xii
Release, associating VCS labels to, 112
Remainder header, 46, 254
Report, see Outline Report, 96
Resources (Project), 103
Restoring a database, 181
Restricting access to a type, 156
Retrieving data, overview, 4
Right-click menu, 51, 254
RTF, definition, 254
Rules
about groups, 126
adding, 166
creating for types, 165
notes about, 165
Rules Wizard, 166
Run Query Now button, 35
S
Sample project, description of, 135
Save options, 25
Search tool, hiding, 12
265
Search, on Toolbar, 12
Searching
advanced, 21
for data, 20
for data using queries, 29
simple, 20
using an AND specification, 31
using an OR specification, 31
Security, see also Access rights, 126
Sending a message for database lock-out, 152
Servers
adding in AutoAlert, 194
AutoAlert options, 197
removing in AutoAlert, 194
viewing, 194
Sessions
automatic submission, 90
information in a Milestone Status, 60
Share groups, 129, 254
Sharing
information with share groups, 130
queries, views, templates, 129
templates, 140
types of, 129
Sharing, definition of, 254
Shortcut menu, 51
Shortcuts, on the Toolbar, 11
Show All check box, for types, 150
Show As, in column set up, 43
Sibling header, definition of, 254
Sibling headers, 45
Simple search, 20
Stacked bar graphs, 54
Starting TrackRecord, 8
States and actions, described, 140
States, in workflow, 144
Status
bar, 12
changing, 25
default, 149
field, adding to a type, 147
266
field, used with workflow, 141
Status bar, definition of, 254
Subproject, definition of, 254
Summary of changes, xii
Summary reports, 40
Support
Compuware hotline, xiii
FrontLine website, xiii
online help, xii
using online help, 19
Synchronization, 106, 108
T
Tags, xii, 237, 249
cautions about, 238
naming conventions, 239
types of, 238
Task
adding to calendar, 67
assigning priority, 104
basic, 22
of Administrator, 125
Team member
caution about tabs, 132
change history tab, 132
creating, 132
definition of, 255
description of, 131
in a share group, 129
item tab, 132
links tab, 132
membership tab, 132
user tab, 133
username for database access, 131
without database access, 131
Technical support, xiv
Templates
associating with a header, 86
cautions when creating, 80
creating, 83
creating global, 140
TrackRecord User’s Guide
default status, 149
definition of, 255
description of, 79
for importing, creating manually, 188
manually creating, 188
naming, 84
nested order, 81
setting default, 85
sharing, 140
within Outline Reports, 81
Testing a query, 35
TestPartner
defined, 255
Text editor
embedding Outline Report, 96
integration with TrackRecord, 95
Toolbar
definition of, 255
description, 11
Tracking states in workflow, 140
TrackRecord menu, in Project toolbar, 101
Transient sessions, definition of, 255
Transitions in workflow, 145
Trend graphs, 55
Troubleshooting
Database, 183
input files, 192
Version control systems, 112
WebServer, 183, 204, 208
TRTOMDB.EXE, 188
Type properties
button, 154
general tab, 154
Types
access rights, 150
adding a rule, 166
adding a status field to, 147
administration of, 150
administrative tasks, 153
best practices, 171
categories of, 150
TrackRecord User’s Guide
child, 7
creating, 153
creating rules for, 165
definition of, 255
favorites, 91
inheritance, 7
limiting access to, 127
modifying, 153
notes about rules, 165
of users, 2
overview of, 5
parent, 7
restricting access to, 156
restrictions on modifications, 163
show all, 150
using Type editor, 157
U
User
authorizing, 133
AutoAlert enabled, 196
creating, 134
description of, 2
description of, WebServer, 2
interface, described, 10
interface, for WebServer, 73
types, 2
Usernames, for database access, 131
V
VCS, 108
associating label to release, 112
associating project with TrackRecord, 109
checking files in and out, 111
definition of, 255
logging in, 109
synchronizing with, 112
troubleshooting, 112
Version Control System, see also VCS, 111
Version resource strings, 119
Viewing
267
data through calendar, 64
data using Outline Reports, 39
data, overview, 4
milestones, 57
online books, xiii
Views
defined, 37
definition of, 255
deleting, 38
modifying, 38
Volatility, 58
definition of, 255
graph, 63
statistics, 62
W
WebMonitor, defintion of, 255
WebServer
administering, 202
administrator menu, 205
canceling changes in, 71
control area, 73
creating an item, 74
definition of, 255
deleting attachments, 77
description of, 69
description of user, 2
ending a session, 204
entering information, 70
file attachment requirements, 75
file attachments, 75
installation notes, 203
interface described, 73
log files, 204
logging in, 71
logging out, 72
notes, 74
opening an Outline Report, 77
opening attachments, 76
Outline Reports, 70
Outline Reports in, 77
268
processes, 203
restrictions, 70
sessions, 203
status bar, 74
troubleshooting, 183, 208
using, 69
web monitor, 208
work area, 74
Workflow
actions, 145
adding a status field to a type, 147
based on type, 147
best practices when using, 171
building blocks of, 142
creating, 142
customizing, 141
definition of, 255
described, 140
disabling, 141, 165
modifying, 142
states in, 144
transitions, 145
Workflow Editor
creating new state, 144
creating new transition, 146
definition of, 255
definition of available states, 250
description, 142
displaying, 142
World Wide Web, Compuware sites, xiii
X, Y, Z
YourProject, sample project, 135
TrackRecord User’s Guide