1
Creative Commons License
™
A New User's Guide to MakerBot's
Replicator 2
Photo: MakerBot Industries website.
DigiFabLab has no relationship to MakerBot Industries. LLC. This guide is intended to assist new users who wish to learn more
about, and get the most out of, their Replicator 2. Information provided is the result of testing by DigiFabLab and insights from
hundreds of Replicator 2 users, shared generously in user forums. While the information provided is believed to be accurate, users
assume sole responsibility for employing methods suggested—some of which are at variance with MakerBot's recommendations.
DigiFabLab: ZERØ TO HERO Replicator 2 Guide !
!
DRAFT: 2013-04-06
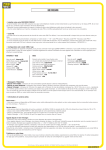
»QUICKSTART: USEFUL REMINDERS FOR REPLICATOR 2 USERS
•
1. Open Object in MakerWare
‣
Must be in .STL or .OBJ format.
•
•
‣
All face normals must be oriented
in the same direction (out is best).
'Add' Button » {Select desired file}
Supports are needed if there
are any horizontal geometries
or elements projecting less
than 45° from the build plate.
-
Geometries greater than 45°
are self-supporting and do not
need supports.
Default Units are in mm.
‣
Scaling from inches to millimeters
may be performed in MakerWare.
Advanced Options allows default
values to be adjusted.
‣
Export (to create .X3G toolpaths)
•
‣
-
Must be watertight, with no gaps.
2. Verify Size, Scale, and Location
‣
‣
Select Supports if needed.
Scale » Inches -> mm
Make sure object is on the platform
•
Move » On Platform
3. Click 'Make It' Button
4. Save .Thing file and close MW.
5. Put .X3g file onto SD Card
6. Turn on Replicator2
‣
Switch located on back
7. Insert SD Card into Printer
‣
Slot is behind LCD display
8. Wipe Build Plate with Alcohol
9. Verify that Build Plate is Level
‣
If not, scroll to Utilities » Level Build
Plate » Enter
10. Is Filament Loaded?
‣
‣
‣
Select Export to a File
Select Low, Medium (recommended),
or High Quality (not recommended).
11. Scroll to "Build from SD" » Enter
‣
Select Raft if desired.
12. {Select Your File} » Enter
Export For: The Replicator 2
•
Raft provides a base and better
adhesion, but requires more
cleanup and will affect the finish.
‣
If not, scroll to Utilities » Change
Filament » Load » Enter
13. Be sure first layers adhere to plate.
‣
Should lay down a thin, flat bead.
For in depth details, see ZERØ TO HERO sections
DigiFabLab: ZERØ TO HERO Replicator 2 Guide !
!
DRAFT: 2013-04-06
» INTRODUCTION:
ABOUT:
CONTEXT:
The goal of this guide is to help novice users
achieve remarkable print results by better
understanding 3D printing methods and
specific aspects of the Replicator 2.
3D printing began in the late 1970's. Today,
with technologies becoming more affordable
(and patents expiring), this area is currently
experiencing explosive growth—largely due
to experimental efforts by the open-source
community. DIY kits vary widely and require a
degree of skill to assemble and use.
RepRap.org, founded in 2005 by Dr. Adrian
Bower. is ground-zero for open-source efforts
of many types and well-worth checking out.
MakerBot Industries, is among a group of
companies that aim to put 3D printing in the
hands of every-day users.
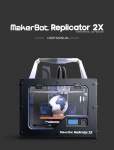
The Replicator 2 is a single head printer
using PLA (Polylactic Acid) filament—a
biodegradable, organic plastic. MakerBot
recently introduced an experimental dual
head printer—the Replicator 2X—which
prints with ABS and possibly other materials.
COMMON NEW USER ISSUES:!
FILAMENT FEEDING & PRINT ADHESION
While the Replicator 2 is capable of very high
quality printing, it has a few known
challenges which resourceful users may
easily address. Proper initial setup is crucial
for optimal print results. [See INITIAL SETUP,
TROUBLESHOOTING, and MODS sections
for more information.]
NOTE: The OEM extruder mechanism
is not addressed in this guide due to its
setup challenges. DigiFabLab
recommends that new users upgrade
this immediately. Order the upgrade kit
from MakerBot (requesting ABS parts).
Or tackle your first project and visit
Thingiverse.com, download, print, and
install the Replicator 2 Extruder
Upgrade designed by whpthomas2, or
MakerBot's new derivation of this
design, the Replicator 2 Extruder
Alternative. You'll be glad you did!
DigiFabLab: ZERØ TO HERO Replicator 2 Guide !
MakerBot's roots are within the open-source
community; however, the Replicator 2 is a
significant departure from this tradition. It is
not a DIY kit, but a pre-assembled,
proprietary consumer product with its own
simplistic slicing software — MakeWare.
MakerBot has been celebrated (by Wired,
BBC, Gizmodo, Make, and others) for the
Replicator 2, as well as criticized for
abandoning open-source solutions. From a
tech-transfer point of view, MakerBot's
evolving business model raises intriguing
questions which are being played out now.
Interested in more information? See Make
magazine's Ultimate Guide to 3D Printing
($9.99) for a comprehensive survey of the
state-of-the-art as of December 2012. This
downloadable PDF includes a wealth of
information on other 3D printers, hardware,
software, materials, tips, and techniques.
If (when) you get stuck, MakerBot's online
and phone support is helpful, but not always
available. Be sure to visit the MakerBot
Operators group, the independent 3D
Printer Tips, Tricks and Reviews group and
the new WIKI at Makerbot.wikia.com.
Tremendous know-how, assistance, and
solutions from users are just a click away.
2 of 44!
DRAFT: 2013-04-06
PURPOSE:
The purpose of this guide is to assist the new user in getting the most out of their Replicator 2.
While some advanced concepts are mentioned (either out of necessity, or as avenues for further
exploration), the main goal is to help new users—who may have no prior 3D modeling or
printing experience—successfully explore the exciting world of 3D printing. Experienced users
may wish to skip the more introductory content covered in the ZERØ TO HERO sections.
Knowledge about the Replicator 2 grows daily as experience is rapidly gained by users. As a
result, communicating ALL current information in one place is inherently a fast-moving target;
yet the need for a reference guide for new users (even if incomplete) may be handy.
Feedback and suggestions for improvements are very much welcomed. Drop DigiFabLab a line
and let us know if this resource helped and/or how it can be improved.
David Celento, Founder
DigiFabLab
[email protected]
TABLE OF CONTENTS:
»OVERVIEW OF WORKFLOW!
6
3 Step Process for 3D Printing:!
Tips for 3D Digital Model Making:!
6
6
» ZERØ TO HERO: MAKERWARE SOFTWARE DETAILS!
About MakerWare Software:!
Details—Size, Format, & Units:!
Launch MakerWare:!
7
7
7
8
Left Buttons: Navigation & Positioning!
Scale (S):!
Turn (T):!
Move (M):!
Look (L):!
Camera Home:!
9
9
10
11
12
12
Top Buttons: Add, Make IT, & Save!
Add:!
Make It: Basic Settings!
Make It: Advanced Settings!
Export:!
Save:!
13
13
14
17
19
19
» ZERØ TO HERO: MAKERBOT REPLICATOR 2 DETAILS!
DigiFabLab: ZERØ TO HERO Replicator 2 Guide !
3 of 44!
20
DRAFT: 2013-04-06
TABLE OF CONTENTS
Turn on the Replicator 2:!
Navigating the Interface:!
Orienting and Preparing the Acrylic Build Plate:!
Leveling the Build Plate:!
Unload / Load Filament:!
Fan Orientation:!
Printing:!
20
20
21
21
22
25
25
» TROUBLESHOOTING: FIXES FOR A FEW COMMON PROBLEMS!
Poor Adhesion and Failures:!
Shrinkage, Lifting & Curling Problems:!
Stripping:!
Filament Jams:!
Clogged Nozzle:!
Squeaking or Screeching:!
28
30
31
32
34
34
» INITIAL SETUP: RECOMMENDED BEFORE YOU START PRINTING!
Check All Fasteners:!
Remove Spring Pin Holding Cables for X Drive:!
Proper Cooling Fan Orientation:!
Prepping the Spool Holder & Spools:!
Oiling the Filament Feed Tube:!
Proper Drive Wheel Adjustment:!
35
35
35
36
36
37
37
» MODS: OPTIMIZING AND HOT-RODDING YOUR REPLICATOR 2!
Extruder Upgrade: **AN ESSENTIAL MOD**!
Glass Build Plate:!
Sailfish Firmware:!
Aluminum Table Arms:!
38
38
39
40
40
» TOOLS & SUPPLIES, SOFTWARE, AND RESOURCES:!
Recommended Tools & Supplies:!
A Software Sampling:!
A Few Resources:!
41
41
41
42
» FAQ's: FROM MAKERBOT'S WEBSITE!
43
My build is the wrong size:!
My Replicator 2 can't see my SD card:!
I can't find my file on the SD card:!
Help! My bot sounds like it's shaking itself to pieces!:!
How do I update firmware on my Replicator 2?:!
Do I need to do any maintenance on my Replicator 2?:!
» ACKNOWLEDGEMENTS, ABOUT DIGIFABLAB, & SHARING:!
Acknowledgements:!
About DigiFabLab:
!
[email protected]!
DigiFabLab: ZERØ TO HERO Replicator 2 Guide !
28
43
43
43
43
43
43
44
44
44
4 of 44!
DRAFT: 2013-04-06
TABLE OF CONTENTS
Use of this Material:!
DigiFabLab: ZERØ TO HERO Replicator 2 Guide !
44
5 of 44!
DRAFT: 2013-04-06
»OVERVIEW OF WORKFLOW
All 3D printing processes use these basic steps. Details for MakerWare are shown here.
1. NOVICE: Start by printing an example file included with MakerWare.
2. NOVICE: Download an existing object from Thingiverse.com — an amazing collection of
free 3D models designed and submitted by enthusiasts.
3. ADVANCED: Design and print your own digital models; thus improving your design (and
modeling) skills. Note that unique designs require very careful modeling!
3 Step Process for 3D Printing:
‣
1: Use a Valid 3D Digital Model
•
•
‣
‣
Polygon Format Needed: If created
in NURBS, or Sub-Divisions, you
must convert model to Polygons.
‣
Valid Model Characteristics:
Use Netfabb (free), Rhinoceros
(Windows trial, OSX free) to check.
NOVICE: Go to Thingiverse.com
» {Download desired file} » {Open
in MakerWare}.
•
ADVANCED: Create a 3D digital
model of your own design.
•
Use any 3D software which
exports .STL or .OBJ files.
•
See 'Tips for 3D Digital Model
Making' in next column.
2: Tooling the Model - Software:
•
‣
NOVICE: Open MakerWare {Free
download here}, File » Example
» {Choose desired file}
Tips for 3D Digital Model Making:
Position, Orient, and Scale the
model in MakerWare.
•
Use 'Make-It' to 'slice' model into
layers and generate toolpaths
(known as G-code).
•
Save an .X3G to SD card. Direct
connections are also possible, but
are more prone to failures.
•
•
•
Watertight: No gaps in model.
Face Normals: Same direction.
Manifold Edges: Edges do not
share three polygon faces.
‣
Thickness: Desired wall thicknesses
should be constructed digitally. If not,
the model will print as a solid.
‣
‣
File Format: Export as .STL (binary).
Rhinoceros Repair & Test Methods:
•
Watertight: Analyze » Edge Tools
» Show Edges » Naked Edges.
Repair gaps if found.
•
Normals: Type 'Dir' to check.
Click to flip faces. Or Type 'Flip'.
-
3: Printing the Model - Hardware:
•
•
•
•
Select .X3G file on SD card .
Level and prepare the print bed.
Load the extrusion filament.
Print the file.
DigiFabLab: ZERØ TO HERO Replicator 2 Guide !
•
Windows recommended
feature to color face normals:
File » Properties » View »
Display Modes » Shaded. {On
right side} » Backface Settings
» Single Color for all Backface
Settings » {Select a color}.
Convert to Polygons: Mesh »
From NURBS object. Higher
counts = accuracy = large files.
6 of 44!
DRAFT: 2013-04-06
» ZERØ TO HERO: MAKERWARE SOFTWARE DETAILS
This section contains detailed instructions to prepare ("tool" or "slice") a 3D model for printing
using MakerWare software (which creates G-code for the printer). Other "slicers" exist (such as
ReplicatorG—which is very popular with advanced users—Slic3r, and Repetier-Host) but are not
covered here. The model must be 'valid'. See 'Tips for 3D Digital Model Making' above.
1. About MakerWare 1 Software:
‣
SLICER: The primary function of this software is to 'slice' your model per the desired
layer thickness, then generate toolpaths (or 'G code' instructions) for the printer to follow.
For this reason, 3D printer software packages are generically referred to as 'Slicers'.
‣
‣
OS: Windows, Mac, and Ubuntu Linux available.
‣
‣
Download MakerWare Here 2
‣
CONS:
FREE DOWNLOAD: If you install MakerWare, you can tool files on your own computer,
then transfer them to the MakerBot printer via an SD card. This is very convenient since
you don't have to be hooked up to the printer while printing. While MakerWare will print
directly from a computer to the printer (via a USB cable) this is not recommended since
the computer is tied up and the network connection is easily interrupted.
PROS: Fast (Low and Medium settings) and Easy. Customizable. Pretty good slicing
routines for most basic jobs.
•
The slicing algorithm for the MakerBot Slicer (used for the Low and Medium options)
instructs the head to continue to extrude while "traveling" creating diagonal lines in
the print layer. These lines may be objectionable or render intricate prints unusable.
•
Advanced control is not easily done as a few parameters are less developed in the
customizable scripting profiles than are possible using Skeinforge in ReplicatorG.
2. Details—Size, Format, & Units:
‣
LAYER THICKNESS HEIGHTS: (Note that the extruder tip is 0.4 mm wide.)
•
The Low default height (0.34 mm) is very fast, but layers are more visible. Variables
can be customized.
•
The Medium default height (0.27 mm) is recommended for most prints, balancing
speed, finish, and reliability nicely. Variables can be customized.
•
The High default height (0.10 mm) uses a different slicing engine (Skeinforge) which
is much slower to generate. Prints done at the default resolution often fail with the
stock MBI extruder (a delrin plunger). Variables can be customized and setting the
layer thickness to 0.15 mm seems more reliable if finer prints are desired than
Medium.
1
Tutorial based on MakerWare Beta v 1.1 with updates from v 2.0 included. Check for frequent MakerWare Beta updates!
2
http://www.makerbot.com/makerware/%23downloads
DigiFabLab: ZERØ TO HERO Replicator 2 Guide !
7 of 44!
DRAFT: 2013-04-06
» ZERØ TO HERO: MAKERWARE SOFTWARE DETAILS
‣
‣
You may fine-tune various parameters under Advanced Options.
‣
‣
FORMAT: Files must be in .STL or .OBJ format and 'valid'. [See prior instructions]
MAX SIZE: The maximum build envelope is 285mm L x 153mm W x 155mm H
[11.2" L x 6.0" W x 6.1" H ]
UNITS: MakerWare works only in millimeters (mm). If you add a file that is in inches, you
may be prompted to convert it to mm.
•
If not prompted, you can convert inches to mm as follows: {Select object} »Click the
Scale button » Click the Triangle » Change Dimensions » Inches --> mm
3. Launch MakerWare:
‣
Objects You can print:
•
•
•
‣
Designs by others. [Check out Thingiverse.com, and download something].
Your own designs. [Consider sharing your work on Thingiverse.com].
Learning the interface:
•
!
Examples included with MakerWare.
Load an Example File: File » Examples » {Select desired item}
or
•
Load Your Own .STL or .OBJ File: File » Open, or Click the Add button.
DigiFabLab: ZERØ TO HERO Replicator 2 Guide !
8 of 44!
DRAFT: 2013-04-06
» ZERØ TO HERO: MAKERWARE SOFTWARE DETAILS
LEFT BUTTONS: NAVIGATION & POSITIONING
4. Scale (S):
With your object selected, click the Scale button, then click-drag your mouse to scale your
object up or down (units shown in millimeters). Click the Triangle next to the button (or
double-click the button), to open the Change Dimensions options window. 'S' is the Hotkey.
‣
Inches -> mm: Scale inches to mm if you did not do this when loading your file.3 (You
need to do this if your object looks teeny weeny).
‣
‣
Uniform Scaling: Likely you want to leave this checked unless you're into distortion.
X,Y, Z: Easily set a known or desired dimension in mm. If Uniform Scaling is selected,
the result will be as predicted. If not, distortion ahead!
•
3
X is the LONG direction, Y is the SHORT direction, and Z is the VERTICAL direction.
‣
Maximum Size: This fills the entire print bed. Your print will be gigantic, will take forever
to print (and may fail), use a lot of material, and is NOT RECOMMENDED!
‣
Scale To: Easy to dial in percentages. [NOTE: The percentage readout does not
change with arrow input, but object size changes.]
‣
Reset Scale: Always useful if you mess things up. Takes you back to the original size.
Feature Request: A preference that permits working in inches would be welcomed by U.S. users.
DigiFabLab: ZERØ TO HERO Replicator 2 Guide !
9 of 44!
DRAFT: 2013-04-06
» ZERØ TO HERO: MAKERWARE SOFTWARE DETAILS
5. Turn (T):
With your object selected, click the Turn button, then click-drag your mouse to rotate your
object in degrees. Click the Triangle next to the button (or double-click the button) to open
the Change Rotation options window. This is similar to the Rotate command in many other
programs. 'T' is the Hotkey.
‣
X, Y, Z: You can rotate around the X, Y, or Z axes.
•
‣
The + 90° and - 90° are useful for positioning your model in the optimal orientation,
minimizing, or eliminating, the need for support material.
Reset Rotation: Takes you back to your original orientation.
DigiFabLab: ZERØ TO HERO Replicator 2 Guide !
10 of 44!
DRAFT: 2013-04-06
» ZERØ TO HERO: MAKERWARE SOFTWARE DETAILS
6. Move (M):
With your object selected, click the Move button, then click-drag your mouse to move it.
Coordinates will be displayed in relevant axes. Click the Triangle next to the button (or
double-click the button) to open the Change Position options window. 'M' is the Hotkey.
‣
On Platform: **It is CRITICAL that this be Clicked.**
•
‣
Center: This is a convenient way to put your model in the center of the platform. Tests
indicate that this is not always accurate, but it is helpful.
‣
X, Y, Z: An obvious mechanism to move your model about.
‣
‣
4
If an object is below the platform, tests indicate that the MakerBot print head
may crash into the table. 4
•
It is unclear why one would use the Z adjustment, since this would raise or lower the
object off of the platform. Be careful with this!
•
If you move your object up in the Z direction, this creates additional support. In rare
cases this may be useful such as for tightly nesting multiple parts?
•
Down in the Z direction moves your object below the platform and will likely crash the
print head. Avoid this. Really.
Reset Position: Restore your original position if you wish.
NOTE: If your object is not oriented to be flat on the bottom when you export it,
MakerWare will not automatically position it flat on the build plate. Instead, it will simply
place the lowest point on the build plate, regardless whether it is flat or not.
Feature Request: Ideally, MakerWare would not recognize anything below the table and slice only what is above the table — this
would be convenient for quick tooling and partial test prints using various settings.
DigiFabLab: ZERØ TO HERO Replicator 2 Guide !
11 of 44!
DRAFT: 2013-04-06
» ZERØ TO HERO: MAKERWARE SOFTWARE DETAILS
7. Look (L):
Click the Look button, then click-drag your mouse to change your view. Click the Triangle
next to the button (or double-click the button) to get the Change View options.5 'L' is the
Hotkey.
‣
‣
‣
Top, Side, Front: These are self explanatory
‣
‣
Rotate: Rt Click-Drag (Mouse). Alt + Click-Drag (Trackpad)
Reset View: Returns to Perspective (or Camera Home)
Pan: Shift + Left Click-Drag (Mouse) or Middle Mouse Button (MMB). Shift + Alt + ClickDrag (Trackpad)
Zoom: Scroll Wheel (Mouse). Two Fingers (Trackpad)
8. Camera Home:
Simply restores the default perspective view. The + and - buttons zoom in and out.
5
Feature Request: It is difficult to tell the precise location of your object with perspective on. A button that turns off perspective,
giving just orthographic information, would be useful to ensure the object fits within the build envelope.
DigiFabLab: ZERØ TO HERO Replicator 2 Guide !
12 of 44!
DRAFT: 2013-04-06
» ZERØ TO HERO: MAKERWARE SOFTWARE DETAILS
TOP BUTTONS: ADD, MAKE IT, & SAVE
9. Add:
‣
Add your own design or a downloaded file:
•
Click Add Button » {Select desired file}.
!
•
•
OR
File » Add » {Select desired file}.
Both methods permit multiple parts to be inserted and printed.
DigiFabLab: ZERØ TO HERO Replicator 2 Guide !
13 of 44!
DRAFT: 2013-04-06
» ZERØ TO HERO: MAKERWARE SOFTWARE DETAILS
10. Make It: Basic Settings
This is the step where your design is sliced into layers and 'tooling' instructions are made
for the printer (an operation which occurs in the background). Tooling is referred to as G
code or NC code, which is essentially a text file with instructions for machine movement.
This operation will generate a proprietary .X3G file which can be read by the MakerBot.
At this time there is no way to view (or edit) the G code, visually preview the tool paths, or
estimate time and/or material usage—all of which are areas for future improvements..6
‣
6
Click Make It Button
Feature Request: All of these features would be very useful. Material usage, in particular, is a critical calculation for environments
where printers are shared and material usage fees are charged to users.
DigiFabLab: ZERØ TO HERO Replicator 2 Guide !
14 of 44!
DRAFT: 2013-04-06
» ZERØ TO HERO: MAKERWARE SOFTWARE DETAILS
‣
You may be prompted to Save » Select Yes to create a .Thing file.
•
.Thing is actually a sort of .zip file which saves your .stl and a separate .json file. If
you lose your .stl file, but have your .Thing file, you can rename the extension and
open a folder which contains both.
!
‣
I want to:
•
•
Export to a File—Preferred. This saves the tooled file in .X3G format. The file can
be put onto an SD card and printed without the MakerBot being hooked up to a
computer the entire time it is printing.
-
Note that the SD card can be no larger than 2G and must be formatted as
FAT16.
-
Recommended is that you also save a .gcode file. While you don't need this to
print, you may use other applications to view the slicing toolpaths to identify any
problems before you print, such as Repetier-Host and Pleasant 3D (Mac only).
Make it Now—Not Preferred. Choose only if the computer will be hooked up to the
MakerBot for the duration of the print. If using this method, with the MakerBot
connected to the computer via the USB cable and turned on, you must establish a
connection by doing the following: MakerBots » Type of MakerBot » Replicator 2.
Also Services » Restart Background Service if it is not recognizing the printer.
DigiFabLab: ZERØ TO HERO Replicator 2 Guide !
15 of 44!
DRAFT: 2013-04-06
» ZERØ TO HERO: MAKERWARE SOFTWARE DETAILS
‣
‣
Export For: The Replicator 2
Material: PLA is the material of choice for Rep2. [ABS requires a heated build plate]
•
‣
‣
Quality:
•
•
Low (Faster)—Fastest option. Roughest finish. Layer height is 0.34 mm
•
High (Slower)—Slowest option. Smoothest finish. Layer height is 0.10 mm. Note that
this option uses a different slicing engine (Skeinforge) and is much more prone to
failure during larger prints. Tests have shown that tweaking the thickness to 0.15 mm
in the Advanced Options creates more reliable prints of similar finish and in less time.
The build plate must be flat and nozzle clearance must be precise.
7
Medium—Recommended. Good balance between speed and finish. Layer height is
0.27 mm. Troubleshooting is best done with this setting.
Raft: This puts your object on a printed bed of support material, slightly above the plate.
You will have to remove this support material, compromising the finish on the bottom.
•
•
‣
Some users have reported good results printing with Nylon (with a wooden or
bamboo plate, higher heat, and with no cooling fan), PVA, and HIPS (both of which
are soluble materials).
Useful if your object is fragile or not flat on the bottom.
Often this improves adhesion of the model to the plate.
Supports: 7
•
Supports are a less dense grid of PLA to support horizontal overhangs or any
elements which are at a shallower angle than 45° to the build plate.
•
You will have to remove this support material and this can be very time-consuming
(and frustrating), compromising the finish. At this time, it is best to minimize or
eliminate the need for supports when designing and/or orienting a part, if at all
possible.
•
Enable Supports if your object has overhangs or low angles. By default, you will also
have to enable Raft (which is unfortunate).
•
If you have conditions which require support and you do not enable Supports, your
print may 'droop', or fail, in unsupported areas.
Note that some dual head printers—such as the new Replicator 2X—permit dissolvable support material made from PVA. This
capability would be very useful; however, software slicing to create separate supports is not yet integrated in MakerWare. Further,
PVA has not yet been widely adopted. DigiFabLab is not yet able to offer guidance using this material.
DigiFabLab: ZERØ TO HERO Replicator 2 Guide !
16 of 44!
DRAFT: 2013-04-06
» ZERØ TO HERO: MAKERWARE SOFTWARE DETAILS
11. Make It: Advanced Settings
It is worth playing with the various options here and customizing them to your liking.
Tweaking the Advanced Settings —especially Infill, Shells, Layer Height, and Temperature
—can go a long way toward delivering optimal results.8
One can even dive into advanced coding through the Create Profiles 9 button—which is not
for the meek! See here.10
Once you gain confidence with MakerWare, you may wish to experiment with other opensource slicing programs, such as ReplicatorG+Sailfish (a popular slicer which offers a high
degree of control and works very well with Sailfish firmware installed on your Replicator 2).
You can get it here. 11 Repetier-Host, KISS, Cura, and Slic3r are a few others of possible
interest.
!
‣
Quality: This displays the Default values being used
•
Infill %—Refers to the density of infill inside a solid part.
-
0% means no infill. Print will be hollow.
-
100% means the print will be entirely solid.
8
Feature Request: For SD card users, the ability to select a bot and save modified profiles when not hooked to a bot.
9
Feature Request: The ability to edit the Default Profiles in Create Profile, to make slight adjustments.
10
http://www.makerbot.com/support/makerware/documentation/advanced/
11
http://www.thingiverse.com/thing:32084
DigiFabLab: ZERØ TO HERO Replicator 2 Guide !
17 of 44!
DRAFT: 2013-04-06
» ZERØ TO HERO: MAKERWARE SOFTWARE DETAILS
-
•
Number of Shells—Refers to the number of passes which make up your wall
thickness. Zero means only one skin. The higher the number, the thicker the 'skin',
the stronger the surface.
-
‣
Infill between these numbers is an eggcrate of the assigned density. It is stronger
than you think, will save material, decrease print time, and help reduce curling.
If you encounter curling problems, try reducing the shell numbers.
•
Layer Height—This number defines the smoothness of the finished product in the Z
dimension. Lower numbers result in thinner layers and longer print times. Higher
numbers result in thicker layers and shorter print times.
•
The High setting uses a different slicing engine (Skeinforge) than Low or Medium
(which uses MakerBot Slicer). Processing is slower and toolpath outcomes may vary
significantly as a result. One benefit is that the diagonal extrusions while traveling
(from MakerBot Slicer) are eliminated.
Temperature (°C): Temperature of the extruder head which melts the filament.
•
•
Extruders—The default is 230°C (for all default settings).
-
Worth noting is that RepRap.org indicate melting temperatures from 180°C to
220°C; thus if you are having problems with curling, lowering the temperature
may be worth experimenting with. As one lowers the temperature adhesion
between layers begins to reduce until it fails entirely.
-
DigiFabLab has found reliable extrusions between 210°-220°C. The lower the
temperature, the less glossy the print is.
Platform—While indicating 110°C, this item is greyed out since the platform on the
Replicator 2 is not heated.
-
Heated beds are not essential for printing with PLA (but are for ABS printing on
other machines). Despite this, a heated bed may be beneficial to help reduce
lifting and improve adhesion with PLA. Keep an eye out for a possible future
upgrade from MBI.
DigiFabLab: ZERØ TO HERO Replicator 2 Guide !
18 of 44!
DRAFT: 2013-04-06
» ZERØ TO HERO: MAKERWARE SOFTWARE DETAILS
‣
Speed (mm/s):
•
•
Speed while Extruding—The rate of the extruder head while printing.
Speed while Traveling—The rate of the extruder head while transitioning between
printing locations. While shown as 100 on Medium, the other default settings indicate
150. Tests show that changing this to 150 seems to work fine, decreasing print time.
12. Export:
‣
This will make an .X3G File that contains the tooling information.
•
•
‣
Copy this file onto the SD card to insert into the printer.
Note that the SD card can be no larger than 2G and must be formatted as FAT16.
As noted earlier, it is also worth saving a .gcode file if you wish to pre-visualize slicing
toolpaths in another program before printing the file. Power users may also edit
the .gcode (which is simply a text file).
13. Save:
‣
Before quitting, save your file (in .Thing format) in case you need to perform any editing
later. As noted earlier, this is essentially a .zip file with a different extension, containing
your .stl file and a text file with instructions for MakerWare. You can access these files by
changing the extension to .zip.
DigiFabLab: ZERØ TO HERO Replicator 2 Guide !
19 of 44!
DRAFT: 2013-04-06
» ZERØ TO HERO: MAKERBOT REPLICATOR 2 DETAILS
This section contains detailed instructions on printing with the Replicator 2. Basic introductory
information is included, as well as a few more detailed topics. No prior experience is needed.
» IMPORTANT «
The INITIAL SETUP section should be reviewed before using your
machine for the first time to ensure optimal printing results!
1. Turn on the Replicator 2:
‣
‣
Power switch on rear.
Current firmware should be displayed on front. 12
•
•
•
If prompted to update firmware, in MakerWare, follow instructions for download.
Connect computer to MakerBot via the provided USB cable.
MakerWare Menu » MakerBots » Upload Firmware
2. Navigating the Interface:
‣
‣
‣
12
Blinking M: Waiting for Input.
Solid M: Performing Work.
Arrow Buttons: Performs functions as described in image below.
Current MakerBot firmware for Replicator 2 is version 7.2 as of this writing. Experienced users may wish to upgrade to the more
fully featured and transforming Sailfish Firmware, from Jetty Firmware. http://www.thingiverse.com/thing:32084
DigiFabLab: ZERØ TO HERO Replicator 2 Guide !
20 of 44!
DRAFT: 2013-04-06
» ZERØ TO HERO: MAKERBOT REPLICATOR 2 DETAILS
3. Orienting and Preparing the Acrylic Build Plate:
‣
Which Face to Print On?: 13
•
Smooth Face w/ Logos: This surface provides the strongest adhesion of the print to
the plate if the logos are covered. While difficult to remove the print, this appears to
be the best option for prints with large surface area or if you're experiencing
adhesion problems.
•
Frosted Face: This surface provides weaker adhesion. If the print is small and the
first few layers stick, this permits the easiest removal of finished prints.
•
Blue Painter's Tape: A number of users swear by blue painters tape by 3M (#2090)
covering the top of the build plate. Tests at DigiFabLab produced mixed results.
Users are cautioned to not leave prints unattended if using tape. If the print gets
dislodged, the tape may force the print into the nozzle causing it to ball up on the
head.
-
Use a plastic spreader to firmly apply the tape, without gaps.
-
Be sure to re-adjust the plate height afterwards by re-leveling it.
‣
Glass Plate: DigiFabLab recommends that users install a glass plate (with a thick coat
of AquaNet hairspray on it) since very few MBI acrylic plates appear to be entirely flat.
[See the MODS section for details.]
‣
Removal and Installation of Plate:
‣
•
Removal: The plate is removed by pushing the black tab towards the rear to release
the plate. Angle the plate out of notches and lift free of the table.
•
•
Installation: Installation is the reverse of removal.
Shimming the Plate: Tests have shown greatly improved results when shimming the
table so the plate firmly locks into the notches. This increases stability while printing.
Cleaning the Surface - VERY IMPORTANT!!!
•
Acrylic Plate: Use a razor scraper to remove residue. Isopropyl alcohol (91%)
should then be applied with a paper towel to the entire surface to remove
fingerprints, dust, etc.
•
Blue Painter's Tape: If using blue painter's tape, some users report success lightly
sanding the surface with 400 grit sandpaper, then wiping down with alcohol.
4. Leveling the Build Plate:
It is CRITICAL that the build plate be trammed (which MBI calls "Leveling") and properly
adjusted so that prints adhere properly. Improper adjustment results in poor adhesion of
initial layers and failed prints. Tests have shown that a tighter gap between the nozzle and
the plate (0.10 mm) provides better adhesion. If one hears 'clicking' sounds or the nozzle
drags on the plate while printing, the gap is too tight.
13
The stock acrylic plate is rarely completely flat. This is a significant problem when trying to print at resolutions below 0.27 mm. An
entirely flat surface is critical for all prints, but especially so for fine resolution prints. Many have upgraded this component with
great success to glass, using Aqua Net hairspray after cleaning. See MODS section for details.
DigiFabLab: ZERØ TO HERO Replicator 2 Guide !
21 of 44!
DRAFT: 2013-04-06
» ZERØ TO HERO: MAKERBOT REPLICATOR 2 DETAILS
The Run Startup sequence below offers a good overview of adjusting the build plate. This is
highly recommended for the first-time user.
»
! !
A number of self-explanatory steps follow which are not shown…
‣
Utilities » Level Build Plate. This routine will ask you to adjust the gap under the
extrusion nozzle at various points on the build plate, adjusting the three leveling screws
on the bottom of the table.
•
A 0.10 mm (0.004") feeler gauge (or a crisp U.S. $1 bill) is recommended. You
should adjust the screws, starting at the rear center, so you feel slight drag under the
nozzle.
•
You will likely find that the plastic build plate is slightly warped and not entirely flat
throughout; thus, the outer point adjustments may not match the inner point
adjustments. The most critical points to adjust accurately are the points above the
leveling screws (rear center first, front mid-right, front mid-left) for small prints that
are centered on the plate.
•
If the stock plate is warped, exiting from this routine after the first three points are
adjusted (left button on control panel), then re-running the script to verify these three
points, is the most useful approach for smaller prints that are centered.
-
Note that if you are attempting large prints and the build plate is not flat, you will
likely have adhesion problems and possible failures.
•
Non-intuitively, turning the screws on the bottom of the table CW (clockwise) makes
the gap bigger. CCW (counter-clockwise) makes the gap smaller.
•
Some users report significant printing improvements after replacing the build plate
with glass to correct the warping of the plastic plate—an upgrade well worth
considering for large prints, or prints finer than 0.27 mm height. [See MODS section]
5. Unload / Load Filament:
Filament should unroll from the bottom of the spool and extend up into the tube. If using the
left holder (looking at the back), the spool should unwind counter-clockwise. If using the
right holder, the spool should unwind clockwise.
‣
‣
‣
Be sure to keep spools free of dirt and particulates to prevent nozzle clogging!
Be sure that the inside of the spool is completely smooth. Sand if not.
If you have not slightly filed down the top edges of your spool holder, this is also advised.
DigiFabLab: ZERØ TO HERO Replicator 2 Guide !
22 of 44!
DRAFT: 2013-04-06
» ZERØ TO HERO: MAKERBOT REPLICATOR 2 DETAILS
!
»
!
»
! !
»
! !
»
! !
14
‣
Vegetable Oil: A number of users have reported success rubbing a few drops of
vegetable oil on the end of a section of filament, then "flossing" the protective tube. This
seems to reduce stiction between the filament and the tube, allowing the filament to be
pulled more freely by the drive wheel.
‣
Loading Tips: During Loading, remove plastic tube on top, trim filament on a diagonal,
and gently assist the filament when feeding it in. The drive wheel should catch the
filament and begin extruding. If you have the stock extruder (a delrin plunger), you are
advised to visit the MakerBot website that addresses proper adjustment, here.14
http://www.makerbot.com/support/replicator2/documentation/maintenance/
DigiFabLab: ZERØ TO HERO Replicator 2 Guide !
23 of 44!
DRAFT: 2013-04-06
» ZERØ TO HERO: MAKERBOT REPLICATOR 2 DETAILS
•
‣
‣
DigiFabLab does not recommend use of the Replicator 2 with this OEM part due to a
number of challenges with proper adjustment and inconsistent filament pressure.
If Using an Upgraded Extruder: This section applies only to machines with the
upgraded extruder mechanism by whpthomas15, or MakerBot,16 etc. This upgrade is
strongly recommended for all Replicator 2 machines, as soon as possible.
•
Depress the thumb lever only enough to insert the filament between the drive wheel
and the pressure bearing. Once inserted and advancing, release the thumb lever for
the filament to advance on its own.
•
The pressure on the filament is now automatically regulated by the spring and no
longer needs to be adjusted.
•
You should be able to squeeze the filament with your fingers, but not stop it. If you
can stop the filament, your spring is too weak.
•
If you hear "clicking" from the drive wheel, your spring is either too tight or your
extruder is binding and needs to be loosened, sanded, and/or lubricated. If warped,
you must replace it.
•
You may print the major parts for the upgraded extruder yourself. You will need to
purchase the spring, screw, and bearing listed on the Thingiverse.com sites, or
directly from the MakerBot store, if using their design. [See MODS for details.]
•
Instead of fabricating this upgrade, users may purchase an upgraded extruder
assembly from MBI.
•
NOTE: PLA warps with heat, thus printing an assembly on a Rep 2 in PLA may only
provide a semi-temporary solution, requiring replacement every now and then. If one
can get these parts printed in ABS (from MakerBot or a friend), these do not seem to
warp with heat and are more durable.
If Using the Stock Extruder (Delrin Plunger): It is likely that you will need to adjust the
delrin plunger mechanism to apply proper pressure to the filament before, during, and/or
after loading. This requires removing the lower cooling fan, is time consuming, and will
be short-lived since heat changes the o-ring's properties.
•
Be VERY careful to not snap the wires off of the fan! Routing them under the retainer
clip, and placing tape over them is advised.
•
If you hear 'clicking', or can not get the filament to contact the drive wheel, the
plunger pressure is too tight.
•
If you can squeeze the filament with your fingers and stop the extrusion, or if the
extrusion is not uniform, the plunger pressure is likely too light.
•
MBI reviews methods to adjust the stock plunger mechanism here 17 and has posted
a video here.18 [Good luck -- especially with prints finer than 0.27 mm layer height.
You'll soon understand why MBI copied whpthomas' excellent solution, and why you
should upgrade this part.]
15
http://www.thingiverse.com/thing:42250
16
http://www.thingiverse.com/thing:53125
17 http://www.makerbot.com/support/replicator2/documentation/maintenance/
18 http://www.youtube.com/watch?v=QOJN_8AAC9U
DigiFabLab: ZERØ TO HERO Replicator 2 Guide !
24 of 44!
DRAFT: 2013-04-06
» ZERØ TO HERO: MAKERBOT REPLICATOR 2 DETAILS
‣
Filament Not Advancing?: If filament does not advance and start extruding from the
nozzle, you likely have a jam. The only solution is to disassemble the extruder head to
manually clear the jam. [See the TROUBLESHOOTING section for details]
‣
Straight Extrusion: Filament should extrude straight down and uniformly. If your
filament is tilting to one side, or curling as it comes down, you likely have a particle
jammed in your nozzle. Only disassembly and cleaning or replacement of the nozzle will
correct this.
•
•
MakerBot offers instructions here 19 for a similar unit.
Be sure that nozzle is hot before trying to remove it, or you will snap the nozzle.
6. Fan Orientation:
‣
Blowing IN not OUT: While loading filament, the fan on the front of the extruder head
should be spinning, to cool the heat sink. Verify that this fan is blowing IN towards the
heat sink, not out, away from the heat sink.
‣
If you can read the label on the front of the fan, reverse the fan to blowing in. This will
improve cooling of heat sink. [Turn the bot off to do this!]
7. Printing:
‣
‣
Insert SD Card (slot on top, behind LCD screen).
Scroll up » Select 'Build from SD' » {Select File by Scrolling Up and Down} » Enter
»
! !
19
http://www.makerbot.com/support/replicator/troubleshooting/nozzle-swap/
DigiFabLab: ZERØ TO HERO Replicator 2 Guide !
25 of 44!
DRAFT: 2013-04-06
» ZERØ TO HERO: MAKERBOT REPLICATOR 2 DETAILS
»
! !
»
! !
‣
‣
Extruder: Value on left is actual head temp, value on right is target temp in celsius.
‣
‣
Pause/Cancel: Prints may be paused or cancelled. [Left arrow shows mid-print options]
‣
A partial Octopus print is shown above with interior scaffolding evident for 10% infill.
Percentage: Completion is shown in upper right corner while printing.20 It is believed
that this percentage is based upon the number of layers processed, rather than the
percentage of the actual volume of the model printed.
Change Filament: Filament may be changed during mid-print (by pausing). [Try
switching filament colors for interesting results.]
8. Removing the Model from the Build Plate:
‣
‣
Small Prints: Carefully use a razor blade/scraper for removing small prints.
Large Prints: A wide metal putty knife or craft spatula may help remove large prints.
9. Removing Scaffolding from the Model:
This can be very time-consuming and challenging.
‣
‣
Needle nose pliers work well for rough work.
‣
Detail work and tight crevices may be addressed with dental picks.
A razor scraper works well for finish work. Be very careful and ALWAYS cut away from
you! Because PLA is very hard, the razor scraper can easily slip off the PLA.
10. Finishing the Model:
‣
‣
20
Nothing need be done if you like the look of the plastic and the layer lines, as many do.
If a smooth finish is desired, you will find that PLA is VERY tough material. Sanding with
100 grit sandpaper, then working up to 400 grit for a smooth surface is generally the best
method to remove flaws or inconsistencies—especially those from a base Raft.
Feature Request: An option to show print time remaining. Sailfish firmware , a recommended MOD, provides this, and a number
of other nice features which improve print results and user experiences. A highly recommended upgrade!
DigiFabLab: ZERØ TO HERO Replicator 2 Guide !
26 of 44!
DRAFT: 2013-04-06
» ZERØ TO HERO: MAKERBOT REPLICATOR 2 DETAILS
‣
•
The MSDS sheet for PLA suggests that the dust is quite hazardous, recommending
the serious measure of a pressurized face mask. With this being a relatively new
material, even if organic, extreme caution is advised when sanding, presumably
because of the molecular structure of the compounds used.
•
Pressurized face masks are extremely expensive, and used most often when
working with volatile materials which have hazardous off-gassing fumes. Being that
particulates are involved, sanding should, at a minimum, be done only when wearing
canister filter style masks, rather than simple fiber-based white dust masks.
For a very smooth finish, users report good results using several layers of Krylon paint,
then wet-sanding (with 400 grit minimum). Using several base coats of Filler Primer will
help fill the voids more quickly, prior to painting.
DigiFabLab: ZERØ TO HERO Replicator 2 Guide !
27 of 44!
DRAFT: 2013-04-06
» TROUBLESHOOTING: FIXES FOR A FEW COMMON PROBLEMS
The most common problems using the Replicator2—after upgrading the feed mechanism—are
adhesion to the build plate and lifting or curling of the corners of a print. Occasionally, you may
also experience stripping and filament jams (both of which are very common problems with the
OEM feed mechanism). These issues are defined and addressed below.
1. Poor Adhesion and Failures:
Poor adhesion of initial layers—such as clumps, strings, ropey-ness, peeling, and general
inconsistencies—are usually the result of one or more of the following (listed in descending
order of frequency): A) a dirty build plate, B) warped build plate, C) a gap that is too large
between the build plate and the extruder head, D) incorrect pressure on the filament at the
drive wheel, E) too slow a print speed at a fine resolution, G) a clogged nozzle, or H) a
head temperature that is either not reporting or heating properly. Poor adhesion may occur
at one or more areas, or across the entire build surface.
‣
Step 1: Check the build plate flatness with a long straight edge across the entire
surface. Using a dial gauge is even better. Can you see any gaps or slip a thin feeler
gauge under the edge anywhere?
•
‣
If so, your build plate is not flat (few stock plates seem to be flat across the entire
surface). If you can not add thin glass on top of the plate, or replace the plate with
3/8" thick glass, you will have to position your model where it is most flat.
Step 2: Use the shiny side of your build plate (with the logos on it) for maximum
adhesion. Adjust the tramming of the build plate and the gap between head and (the
flattest part of) the plate using the leveling function under Utilities on the bot.
•
•
•
The use of a Raft often helps improve adhesion.
•
Whpthomas, once again, offers a nice leveling solution on Thingiverse—the
Interactive Build Plate Levelling - Print Aid.22
Placing Helper Disks at the corners also helps. File » Examples » Helper Disks.
Some users like to use a dial gauge and jog it across the plate. Whpthomas has
provided a very nice dial gauge attachment on Thingiverse—The Snap-on Dial
Indicator Holder for Replicator 2.21
‣
Step 3: Clean the build plate with rubbing alcohol before printing. Even fingerprints will
reduce adhesion.
‣
Step 4: If you have upgraded your extruder to a spring-loaded version, be sure there is
no "stiction" in the lever. It should operate smoothly and freely when it is depressed. If it
feels a little "sticky", and you need more force to initiate movement than is needed to
sustain motion, you need to disassemble the mechanism and loosen screws, sand parts,
and/or lubricate the hinge mechanism. Be sure it is not warped and binding. If so,
replace it (ideally with ABS pieces).
21
The Snap-on Dial Indicator Holder for Replicator 2 http://www.thingiverse.com/thing:41090
22
Interactive Build Plate Levelling - Print Aid, by whpthomas: http://www.thingiverse.com/thing:39430
DigiFabLab: ZERØ TO HERO Replicator 2 Guide !
28 of 44!
DRAFT: 2013-04-06
» TROUBLESHOOTING: FIXES FOR A FEW COMMON PROBLEMS
‣
‣
‣
‣
23
Step 5: If you have a stock OEM delrin plunger installed, you need to readjust the
pressure before proceeding. 23
•
Note that the OEM plunger is not well-suited for prints that are less than 0.27mm
thick. Finer layers may work if this is perfectly adjusted, but often prints fail later
during the print as 'heat soak' begins to occur, changing the pressure applied by the
stock plunger.
•
The symptom of a heat-soak failure is "fuzzy" ends on the last few layers, then a
phenomenon known as 'air printing', with nothing coming out of the extruder, as if it is
blocked, but the extruder continuing to move. Most likely, the filament is stripped.
[Perhaps this is a good time to mention yet again the importance of upgrading the
extruder?]
Step 6: Load a solid color filament for troubleshooting—white if possible.
•
Avoid the clear filament shipped with your machine for troubleshooting. Numerous
users report difficulties with this filament due to diameter variations, inflexibility of the
material, and possibly increased "stiction"—all of which easily overwhelm even a
properly functioning stock delrin plunger.
•
Spring loaded extruders seem to handle clear filament better, but again, this is not
the ideal material to use to troubleshoot your machine.
Step 7: Try your print again. Be sure the first layer goes down in a flat, thin bead! If not,
you probably have leveling problems (or less commonly, but still possible, heating
problems).
•
MakerWare's Medium Default settings (layer thickness of 0.27 mm) are
recommended for slicing, to eliminate other variables.
•
If you are having success printing at 0.27 mm, but failures at finer layer thicknesses,
—and you have installed an upgraded extruder mechanism—especially experiencing
"air printing" further into a print, the following may be occurring:
-
Your upgraded extruder either is not operating smoothly, in which case
disassembly, sanding and lubing the hinge is needed. Note that extruder
upgrades printed in PLA are prone to warping over time. This is why the ABS
parts are better suited for upgraded extruders.
-
The spring may be too strong for the print speeds if you are seeing skipping or
hearing 'clicking' from the drive motor.
-
Print speeds may be too slow and heat soak is causing the filament to soften and
the drive wheel to slip. Increasing the print speed causes the filament to move
more quickly, thus soaking up less heat.
-
For those not using MakerWare, but ReplicatorG or another slicer, some users
report improvements by reducing the retraction values.
Step 8: If the print fails when using MakerWare's Medium Default settings, you may
have a clogged nozzle, or heat problems. Clogs are evident if the extrusion is not
coming down perfectly straight, or is very thin. Measuring the extrusion should indicate a
value slightly larger than 0.40 mm.
http://www.makerbot.com/support/replicator2/documentation/maintenance/ and http://www.youtube.com/watch?
v=QOJN_8AAC9U
DigiFabLab: ZERØ TO HERO Replicator 2 Guide !
29 of 44!
DRAFT: 2013-04-06
» TROUBLESHOOTING: FIXES FOR A FEW COMMON PROBLEMS
‣
•
If significantly less than 0.40, you must clean or replace the nozzle. [See Clogged
Nozzle, below]
•
After cleaning or replacing the nozzle, repeat all steps above.
Step 9: Head temperature issues are the prime remaining suspect if all of the above
checks out. These are notoriously difficult to track down for one simple reason—if there
is an error, but the Temp Error message is not activated, the Replicator2 overrides the
output to the heating core to prevent a fire. However, the display may no longer
accurately display actual temperature information.24
•
Check the thermocouple wire going into the head. This is in a very vulnerable
location and early units had shrink-wrap at the end that was too long, thus this wire
was sometimes damaged during assembly. Check this at the hot end. Gently wiggle
it to see if there is any play. Ideally, one will get a Temp Error message when this is
loose, but not always.
•
If you have received a Heater Temp Error, you must replace the thermocouple wire,
being very careful when replacing it.
•
If you have not received a Heater Temp Error, power cycle the machine, leaving it off
for one full minute. Then restart and try printing again.
•
If the print fails again, check all wires to the heater core very carefully. Even a small
nick in the sheathing may cause electrical fluctuations to trip the over-ride. Call MBI
support to discuss additional troubleshooting or repair. Typically, this involves
replacing the entire hot end and mounting bar.
2. Shrinkage, Lifting & Curling Problems:
‣
Shrinkage of PLA: For precision work, it is useful to keep in mind that PLA shrinks
slightly. Shrinkage is about 0.2% (or one-fifth of one percent). Scaling one's model up
before slicing it in MakerWare may be useful if precision fitting is involved.
‣
Lifting & Curling: Tests have shown that lifting or curling of the print (off of the build
plate) is a common problem—especially if the print is very long in the X direction. This is
due to shrinkage of the model when cooling and an inherently cooler build plate.
‣
•
Even if you have good adhesion at the outer limits of the print (at the far left and far
right of the build plate) the acrylic plate will actually deflect and be pulled upwards
while printing as the model cools and shrinks.
•
If the Replicator 2 had a heated build plate (similar to the Replicator 2X), this might
help counteract or possibly eliminate the problem. Thus, this appears to be an
inherent limitation with the Replicator 2. Keeping this challenge in mind may be
useful when digitally modeling and/or orienting large prints.
•
Try reducing the number of shells if you have frequent curling.
Helper Disks: One method to help counteract lifting and curling is to use Helper Disks 25
in MakerWare (as of version 2.0.0.161). File » Examples » Helper Disks. Placing these
flat disks at the corners increases the surface area of the print on the plate, resisting
lifting and curling. The Helper Disks may be peeled away or cut off after the print.
24
This is an area that should be corrected in the future. If temp over-rides are tripped the LED display should indicate this,
instructing a power cycling for further testing and or correction.
25
Helper Disks were originally designed by ctheroux at http://www.thingiverse.com/thing:51066.
DigiFabLab: ZERØ TO HERO Replicator 2 Guide !
30 of 44!
DRAFT: 2013-04-06
» TROUBLESHOOTING: FIXES FOR A FEW COMMON PROBLEMS
‣
Glass Plate Upgrade: As mentioned earlier, some users report significant printing
improvements after replacing the build plate with glass (done to improve flatness) and
using a heavy coat of AquaNet hairspray on the glass. [See MODS section]
3. Stripping:
‣
‣
Definition: This occurs when the drive wheel is working properly, but the warm filament
is not advancing or retracting. No clicking is heard during this type of failure. Much like a
car tire spinning in the mud without the car moving, a rut is created in the filament
strand. The more the drive wheel spins without the filament moving, the deeper the rut
becomes and the less likely the filament will advance or retract properly.
•
The stock delrin plunger is especially prone to this condition, the thinner the layer
being printed, the more likely that filament stripping will occur.
•
This is due to the fact that very small drive wheel movements are being made on the
filament while it is absorbing heat from the hot extruder below; thus softening. The
drive wheel starts to slip on the softened filament, carving into it deeper and deeper.
•
Symptoms of this are often seen in a printed model which has failed part way
through the print. The last few layers are often fuzzy, the extruder continues to move
but stops extruding (aka "air printing"), and there is no 'clicking' heard from the drive
motor.
Identifying stripping: If your print head shows the proper temperature, but is not
extruding when it should be—during a print, or when you try to Load or Unload—you
likely have a stripped filament if there is no 'clicking' heard from the head. If there is
'clicking' and the nozzle is not touching anything, your nozzle may be clogged, or you
have too much pressure against the filament.
[If you have the OEM plunger, as noted earlier, your delrin plunger pressure is likely too
tight and your extruder is not clogged — especially if the unit is relatively new.]
•
Step 1: Run the Unload routine, gently tugging on the filament with the thumb lever
fully depressed after the head has heated.
-
If you do not fully depress the thumb lever, you may snap off straggling 'blobs' of
molten plastic, causing a jam.
•
Step 2: If you are unable to remove the filament, or if it breaks while pulling, proceed
to the next section on Filament Jams.
•
Note: Loading when the filament is stripped is not recommended since it is difficult, if
not impossible, to perform successfully with a stripped filament. By attempting to
Load, you may create a severe jam by forcing more filament in, breaking the weak
spot in the filament and, in essence, pushing new filament on top of the jammed
filament beneath the drive wheel. [See the following section for images of a jam]
DigiFabLab: ZERØ TO HERO Replicator 2 Guide !
31 of 44!
DRAFT: 2013-04-06
» TROUBLESHOOTING: FIXES FOR A FEW COMMON PROBLEMS
4. Filament Jams:
‣
Definition: A filament jam is caused by a piece of filament breaking off in the space
between the drive wheel and the heated chamber, blocking new filament from entering
the extruder head.
‣
Common Causes of Jams:
•
•
Pushing too hard on the filament while Loading.
•
Pulling on the filament too hard while Unloading; thus ripping the filament apart, or
leaving "the blob" behind, below the drive wheel.
•
Not fully depressing the thumb lever on the upgrade extruder mechanism while
Unloading, thus catching "the blob" and tearing it off.
While Unloading, failing to assist the filament. The proper method is to very slowly
and gently pull filament straight up and out, while the thumb lever on your extruder is
held down. Be aware that there will generally be a wider blob at the very end. Be
careful to not break this off.
The best method to prevent jams while Unloading is to pull the white plastic tube
from the extrusion assembly and, with your fingers, very gently assist the filament
straight out while fully depressing the thumb lever until the filament is removed.
‣
Fixing a Jam: Instructions are below. [Note that a stripped filament will also need to be
corrected the same way as a jam]
‣
Step 1: On the front cooling fan of the extruder assembly, remove the two allen screws
(turning CCW).
•
Be careful withdrawing these long screws since there are two black plastic spacers
hidden inside between the fan and the heat sink.
•
When these screws are removed, the drive motor is now loose, as well.
THIS FAN IS
BACKWARDS
and
blows out.
If you can read the
label on the fan
REVERSE IT
TO
BLOW IN!
!
DigiFabLab: ZERØ TO HERO Replicator 2 Guide !
32 of 44!
DRAFT: 2013-04-06
» TROUBLESHOOTING: FIXES FOR A FEW COMMON PROBLEMS
‣
Step 2: In the images below (with the fan shown upside down, so you can see the
screws), note that the screws pass through two black plastic spacers, then through an
aluminum heat-sink.
•
Cleverly, these screws perform quadruple-duty. What is not visible is that the screws
also pass through the aluminum cooling and mounting block, then draw the drive
motor assembly tight against the cooling block.
•
Note the position of the wiring as you remove the fan. It should be free of the fan and
not be pinched anywhere.
»
! !
‣
Step 3: The image below (left) shows a serious jam. Less severe jams are common and
equally debilitating to the filament loading process.
•
•
The filament sticking out of the head has been bent by the drive motor.
•
If you are having difficulty—and as a last resort—with great care you may preheat
the extrusion chamber to permit withdrawal of molten filament. Be very careful of the
HOT extrusion chamber, the fan, and the routing of wires. Gloves are recommended.
•
Be sure to clean the little teeth in the drive wheel!
To clear a jam you may trim the filament close to the hot end, or carefully pull it out of
the extrusion chamber with a pair of needle nose pliers, and trim it.
»
DigiFabLab: ZERØ TO HERO Replicator 2 Guide !
33 of 44!
DRAFT: 2013-04-06
» TROUBLESHOOTING: FIXES FOR A FEW COMMON PROBLEMS
5. Clogged Nozzle:
‣
This is a somewhat rare issue (provided you keep a clean work area) and is not
addressed in detail here. Unless a particle was embedded in your PLA during
manufacture (rare, but possible, especially with very cheap filaments), PLA is burning
inside the extruder if you are running temperatures higher than 230°C. Thus, deposits
build up which block the hole in the extruder, or reduce the passageway of molten
filament. This is not unlike a person's arteries with plaque building up in them, reducing
flow and increasing pressure.
•
If you encounter this condition frequently, likely you are running your extruder at too
high a temperature. Temperatures above 230°C are unnecessary and to be avoided.
•
MBI uses 230°C as the default head temperature; however, PLA will extrude and
bond (at non-accelerated speeds) at temperatures as low as 190°C.
•
More experienced users often use temperatures between 210°C and 220° to avoid
clogging and to assist in removing small models from the build plate. This is because
cooler temps reduce adhesion to the plate slightly.
•
For details on cleaning a nozzle see Nozzle Cleaning Tool26 on Thingiverse, by
whpthomas.
•
Worth noting is that the lower the temperature, the less shiny the surface of the
model will be. This is useful if you are trying to achieve more uniform or matte
surface finishes. A temperature of 210°C works well to produce matte finishes for
white filament.
6. Squeaking or Screeching:
‣
This indicates a lack of lubrication, which is normal after ± 50 hours of operation. The X
and Y metal guide rails and the Z direction threaded screw should be wiped with silicone
grease every fifty hours, or so, of printing.
‣
A couple drops of oil should be applied to the bearing surface of the black plastic
toothed-roller on the left side of X drive belt.
•
If you accidentally get oil on the drive belt, clean it off immediately with rubbing
alcohol.
26 http://www.thingiverse.com/thing:56597
DigiFabLab: ZERØ TO HERO Replicator 2 Guide !
34 of 44!
DRAFT: 2013-04-06
» INITIAL SETUP: RECOMMENDED BEFORE YOU START PRINTING
1. Check All Fasteners:
Inexplicably, a number of users have reported loose fasteners on their newly delivered
Replicator 2 units. While it is hoped that this simple matter is soon corrected by MBI, at the
time of this writing, this problem persists.
‣
Check and tighten the following:
•
•
•
The two bolts on the bottom of the extruder carrier.
•
Any other bolts that relate to moving parts.
All bolts which hold the drive motors in place. Be sure that belts are tight.
Lower cooling fan should be screwed tight into the black plastic housing. These will
be difficult to turn initially because they are self tapping.
2. Remove Spring Pin Holding Cables for X Drive:
A number of users have reported cable chafing and resulting failures for the X axis drive
due to contact with the slotted spring pin which holds the cable in the housing.27 This is a
poor use of a spring pin by MBI since these pins are, A) intended for holes, and B) are
sharp on the ends to permit entry into said holes. In addition, the slot of the pin—which can
also be sharp—usually faces the cables. This is a recipe for disaster, sooner or later, and is
best addressed before using the machine.
27
‣
Removal of the spring pin is recommended before you begin using your machine
to prevent possible damage to the X drive cables
‣
You may retain the cables in the slot (to prevent accidental damage) in one of the
following ways.
Thanks goes to Jetguy, on the MakerBot Google Group for identifying this problem.
DigiFabLab: ZERØ TO HERO Replicator 2 Guide !
35 of 44!
DRAFT: 2013-04-06
» INITIAL SETUP: RECOMMENDED BEFORE YOU START
‣
‣
‣
Remove the six allen bolts (5 mm allen wrench) holding the right side panel.
Remove the spring pin.
Macgyver Method:
•
Use two small binder clips around the outside of the ABS housing to retain the wires
and remove the wire handles on the binder clips.
--- OR ---
‣
‣
Meddler Method:
•
•
•
•
•
Remove the four allen bolts (2.5 mm allen wrench) holding the X drive motor.
•
Reinstall motor, firmly tensioning the belt.
Slide the motor out of the slots and move the cables out of the way (note routing).
Carefully drill two 3/32" holes up through the ABS carrier (near the front edge).
Install two small zip ties (3/32" wide x 4" long) to keep the cables in place.
Verify the full range of motion (in the Y axis) before you tighten and trim the zip ties—
movement should not tension the cables.
Reinstall the right side panel.
3. Proper Cooling Fan Orientation:
Several users have reported that their Replicator 2 arrived with the front cooling fan
installed so it blew OUT (away from the heat sink) rather than blowing IN (towards the heat
sink).
‣
‣
If you can read the label on the fan, it is likely blowing out and should be reversed.
To reverse the fan, simply unbolt the lower screws and flip the fan, being careful to route
the wires appropriately.
4. Prepping the Spool Holder & Spools:
Smooth delivery of the filament is crucial for reliable printing. Unfortunately, the design of
the spool holder is less than optimal because it has a fairly crisp lip on the top. With the
majority of the weight of a spool bearing on this lip, spools need to have ultra-smooth
interiors for smooth delivery. Unfortunately, the spools are not always smooth inside.
DigiFabLab: ZERØ TO HERO Replicator 2 Guide !
36 of 44!
DRAFT: 2013-04-06
» INITIAL SETUP: RECOMMENDED BEFORE YOU START
‣
‣
Using sandpaper or a file, round off the crisp edges on the top of the spool holder.
Before mounting a new spool, check the interior smoothness, sanding as necessary.
5. Oiling the Filament Feed Tube:
To further assist with smooth delivery of the filament, it is recommended that users place a
few drops of vegetable oil on a section of filament and run it back and forth through the
filament tube to lubricate it.
6. Proper Drive Wheel Adjustment:
The set screw on the drive wheel is incorrectly installed, potentially causing the drive wheel
to slip. The drive motor shaft has a flat ground face which the set screw on the drive wheel
is meant to firmly engage. However, this slot is not long enough and the set screw is
tightened onto the round part of the drive shaft. Since the shaft is made of hardened steel,
the engagement of the screw is poor and prone to slipping, leading to skipping of the
filament during the print.
‣
‣
‣
‣
Disassemble the extruder head [as described in the Filament Jam section above].
‣
To reduce heat transfer between the cooling block and the drive motor, a
recommendation from whpthomas is recommended—insert two pieces of cardstock
(cardstock from a six-pack carrier works well), cutting away the center and the mounting
holes.
‣
Reassemble the drive motor and tighten the set screw on the wheel, being careful that
the drive wheel is centered on the bearing of the upgraded extruder, and is directly
above the inlet on the hot end. [An easy method to use is to insert a section of filament
to visually aid in centering].
Remove electrical wires from the drive motor and remove motor from assembly.
Loosen the set set screw on the drive wheel and remove the drive wheel from the shaft.
Using a small flat file, or a dremel, extend the flat slot on the motor shaft an additional
± 3/16" [± 5 mm].
DigiFabLab: ZERØ TO HERO Replicator 2 Guide !
37 of 44!
DRAFT: 2013-04-06
» MODS: OPTIMIZING AND HOT-RODDING YOUR REPLICATOR 2
In this section, upgrades are described for more reliable and high-precision printing. In
particular, the Extruder Upgrade and Glass Build Plate are virtually necessary for fine resolution
printing of 0.10 mm, optimal adhesion for large parts, and lengthy prints without failure.
All users are strongly advised to install the Extruder Upgrade described below!!!
1. Extruder Upgrade: **AN ESSENTIAL MOD**
As indicated throughout this tutorial, the stock extruder mechanism (an allen screw
controlling a delrin plunger & o-ring) is believed to be inadequate for longer prints at fine
resolutions. While you may achieve prints of Low (0.34 mm) and Medium (0.27 mm)
thickness, it is unlikely that you will achieve High (0.10 mm) thickness prints for large
objects, resulting in "air printing".
DigiFabLab, like many other experienced users, believes that installation of an
upgraded extruder is the single best improvement one can make for reliable printing.
‣
‣
‣
Visit Thingiverse.com, download, print, and install upgraded extruders
OPTION 1: Grab the Replicator 2 Extruder Upgrade 28 designed by whpthomas
•
•
You will need to purchase the hardware specified.
•
Installing two layers of card stock behind the upgraded lever assists with reducing
heat transfer and warping (suggested by whpthomas). Cardstock from a six-pack
carrier works well. Be sure to move the drive wheel out the same distance as the
thickness of the card stock.
If you print the items in PLA, keep an eye on them, since heat warps PLA. You will
likely have to replace these parts every now and again over time.
OPTION 2: Grab MakerBot's new derivation of whpthomas' design, from
Thingiverse.com, or from their store—the Replicator 2 Extruder Alternative.29
•
•
•
Purchase the upgrade hardware from the MakerBot Store.30
Cost for bearing, spring, and screws is $8 USD.
Be sure to request the ABS parts, since printing them in PLA on a Rep2 creates parts
that are prone to warping from heat.
28
Replicator 2 Extruder Upgrade by whpthomas (aka Wingcommander) http://www.thingiverse.com/thing:42250.
This was derived this wonderful and essential upgrade from emmet, infinityplusplus, & whosawhatsis
29
Replicator 2 Extruder Alternative by MakerBot http://www.thingiverse.com/thing:53125. Derived from whpthomas, et al.
30
http://store.makerbot.com/parts-accessories/replicator-2-repair-parts-accessories.html
DigiFabLab: ZERØ TO HERO Replicator 2 Guide !
38 of 44!
DRAFT: 2013-04-06
» MODS: OPTIMIZING AND HOT-RODDING YOUR REPLICATOR 2
•
On this particular part, it is important that the shoulder bolt seat firmly against the
drive block. If not, it will loosen each time you use the lever.
‣
OPTION 3: Just released is an extruder upgrade in aluminum from WotzBotz which
(obviously) will not deform due to heat! Cost is ± $99 + shipping. See here.31
‣
Be sure that the lever operates smoothly and freely. File or sand parts as needed. Do
not over-tighten the hinge mechanism. Silicone grease at the hinge is advised.
‣
Whichever upgrade you choose, you'll be VERY glad you installed it!
2. Glass Build Plate:
This is the second most important upgrade you can make if you're having adhesion problems
and are sure you've set the gap (0.10 mm) correctly. This upgrade is virtually essential if you are
interested in large prints (which span the build plate) or have fine layer resolutions (0.10 mm —
0.15 mm). Upgrading the (often) warped MBI acrylic build plate with glass offers significant
improvements in adhesion and accuracy. Prepping the surface with a heavy coat of Aqua Net
Unscented hairspray seems to work well. Cost is ± $10 to ± $75 USD depending on the
thickness of glass desired.
‣
Dimensions: Rectangular glass sheet (which will fit between the tabs) measures 11.25"
x 6.375".
‣
Macgyver Method: Have your local glass or hardware store cut a piece of single pane
window glass. [± 2.22 mm thick] and place this on top of your MBI build plate.
•
Also available from most custom glass shops are one-sided acid-etched sheets. [±
3.36 mm thick]. The benefit of etched glass, other than increased strength due to
greater thickness, is that adhesion is stronger than on smooth sheets. The drawback
is that setting one's clearance gap is more difficult due the greater thickness and the
resulting spring tension.
-
‣
31
If installing one of these thicker sheets, placing a small shim on the back of the
table, under the Z limit switch is advised to permit proper leveling.
•
•
Place the glass sheet on top of your MBI acrylic plate.
•
If your MBI build plate is very badly warped, tightly binding the glass may cause it to
also warp slightly.
Using a continuous strip of 1" masking tape on the left and right edges, loosely wrap
the tape around the sides and to the bottom of the stock acrylic build plate. You don't
want to bind it too tightly—you're simply trying to prevent the glass from shifting.
Meddler Method: Replace the entire MBI build plate with thick glass. For reference, the
stock build plate is about 8.40 mm thick. 3/8" (0.95 mm) thick glass works well.
•
You will have to devise a method to secure the glass in place around the existing
tabs on the table unless the glass has been cut to match the MBI profile.
•
If your total assembly (from the plastic of the bed to the top of the glass), exceeds 12
mm, you may not be able to adjust your clearance without altering the Z home limit
switch.
•
Check the MakerBot Google Group to see if anyone is offering custom shaped
plates.
http://www.wotz101.com/wotzbotz/index.html
DigiFabLab: ZERØ TO HERO Replicator 2 Guide !
39 of 44!
DRAFT: 2013-04-06
» MODS: OPTIMIZING AND HOT-RODDING YOUR REPLICATOR 2
‣
•
Or, for the very industrious, make a cad file of an exact copy of the existing plate and
have a 3/8" thick piece of glass water-jet cut by a local supplier to fit into the existing
tabs.
•
•
Silicon gasket material or pads can be used to keep the glass in place on the table.
Worth noting is that some have speculated that the glass is best not locked into
place due to reasons of thermal expansion. DigiFabLab has not tested this theory,
but it's an interesting one.
Preparing the Glass Surface: Clean surface with rubbing alcohol. Spray a heavy film of
(Aqua Net unscented) hairspray on smooth glass; a lighter film on etched glass.
3. Sailfish Firmware:
The good folks at Jetty Firmware have created a spectacular firmware upgrade for the
Replicator 2. This upgrade permits improved printing speeds, using acceleration, and
makes the Rep2 feel like a professional grade printer. The firmware works well with
MakerWare and ReplicatorG slicers (and probably any other that generates .X3G files).
This upgrade is highly recommended and it's free.
‣
Among the many excellent features are:
•
•
•
•
•
temperature and speed over-rides while printing
filament used
time remaining
bed leveling by simply moving the extruder head by hand
and far, far more!
4. Aluminum Table Arms:
The ABS plastic table arms are prone to vibration, deflection, and possible sagging.
Sagging is perhaps less of a problem with the Rep2 (which is not enclosed), but seemingly
likely for the enclosed Replicator 2X (or if one encloses their Replicator 2). Bottleworks is
offering aluminum table arm upgrades32 on the MakerBot Operators Group. For users
interested in exploring precision printing, this upgrade makes a good deal of sense. Cost is
± $125 USD + shipping.
5. Aluminum Hot End Carriage Mount:
The ABS carriage mount is prone to deformation at higher temperatures. If you plan to print
in nylon, this presents a significant challenge. Carl Raffle has created an aluminum
carriage mount for the Hot End which is currently being fabricated. See here 33 for his post
on MakerBot Users Group. Cost is ± $160 USD including global shipping.
32
https://groups.google.com/forum/#!msg/makerbot/wGLpDVxcpqM/12u74HDDIBwJ
33
https://groups.google.com/forum/#!searchin/makerbot-users/carriage/makerbot-users/rxthvz49wa0/Sv766tBj_7EJ
DigiFabLab: ZERØ TO HERO Replicator 2 Guide !
40 of 44!
DRAFT: 2013-04-06
» TOOLS & SUPPLIES, SOFTWARE, AND RESOURCES:
1. Recommended Tools & Supplies:
‣
‣
‣
‣
‣
‣
‣
‣
‣
‣
Small diagonal cutters (aka "dikes")
Small needle nose pliers
Flat and Phillips head screwdrivers
Razor scraper and razor blades
Thin putty knife or craft spatula
Digital calipers (that read mm and inches)
7 mm wrench (for nozzle replacement)
Isopropyl Alcohol 91%
AquaNet Hairspray (if using a glass build plate)
Blue painter's tape (3M #2090), possibly worth experimenting with.
2. A Software Sampling:
Software is a highly personal choice, largely dependent upon one's skills and goals. The
following is an incomplete sampling of programs commonly used for both Mac OSX and
Windows. Software over $1,000 is not listed. Ultimately, the best software is the one that
helps you create what you want, in ways you like. It needs to create watertight models and
export in .STL format. Effort = Reward. Got a program you love? Let us know about it.
‣
Netfabb. Available in free and pro versions, this does incredible things for repairing
models which are not watertight.
‣
Meshmixer. A wonderfully fun environment to play with sculptural shapes. Very "kid
friendly".
‣
Blender. The big-daddy of free open source 3D modeling software. You can create
anything you want, but the learning curve can be a bit steep due to differing conventions.
‣
SketchUp. Another heavy hitter in the free software area. Can also purchase pro
versions. Very simple but somewhat limited capabilities. Watertight modeling can be a bit
elusive with complex shapes.
‣
AutoDesk 123D Design. Relatively new and free. Can be used online, on an iPad, or on
your computer. Getting good reviews.
‣
AutoDesk Fusion 360. Cloud based, in beta currently. Based on Inventor. Fees
unknown at this time.
‣
‣
‣
ViaCAD 2D/3D. $99. Many speak highly of this solid modeler. Pro versions available.
MoI3D. $295. Powerful and simple. Works well with pen interfaces.
Bonsai. Free for students, $495. A newer arrival from the makers of FormZ, one of the
original surface modeling innovators.
DigiFabLab: ZERØ TO HERO Replicator 2 Guide !
41 of 44!
DRAFT: 2013-04-06
» TOOLS & SUPPLIES, SOFTWARE, AND RESOURCES:
‣
Rhinoceros. Free trial Windows. Free Mac Beta, $995 Windows. $195 student license.
Exceptionally powerful surface modeler with solid features. Highly developed NURBS
modeling, but weaker Polygon modeling. Also offers Grasshopper visual scripting plugin.
Great features include colored backfaces (in Windows version) and naked edge
analysis. Rhinoceros is employee-owned, rock solid, and has a strong user community.
This program is DigiFabLab's workhorse software.
3. A Few Resources:
‣
"Getting Started with MakerBot"34 by Pettis, Kaziunas-France, and Shergill. Published
by O'Reilly Media and "MAKE" magazine, 2013. Useful information, tips and projects.
‣
‣
Thingiverse.com.35 Thousands of great projects that you can download and print.
‣
RepRap.org.37 This is where it all started and continues to thrive. Be sure to check out
the forums.
‣
Google Groups: MakerBot Operators,38 (moderated by MakerBot), MakerBot-Users,39
and 3D Printer Tips, Tricks and Reviews.40
‣
MakerBot Wikia.41 Fledgling wiki created by and for MakerBot enthusiasts.
Make magazine's Ultimate Guide to 3D Printing,36 December, 2012. ($9.99). A superb
shootout comparing a number of FDM printers, mentions of other style printers, and
numerous projects.
34
http://shop.oreilly.com/product/0636920026723.do
35
http://www.thingiverse.com
36
http://www.makershed.com/Make_Ultimate_Guide_to_3D_Printing_p/1449357377.htm
37
http://reprap.org/wiki/Main_Page
38
https://groups.google.com/forum/%23!forum/makerbot
39
https://groups.google.com/forum/%23!forum/makerbot-users
40
https://groups.google.com/forum/%23!forum/3dprintertipstricksreviews
41
http://makerbot.wikia.com/wiki/Replicator_2
DigiFabLab: ZERØ TO HERO Replicator 2 Guide !
42 of 44!
DRAFT: 2013-04-06
» FAQ's: FROM MAKERBOT'S WEBSITE
The items below are excerpted from MakerBot's support website for convenience.
1. My build is the wrong size:
‣
Sometimes the intended size of an object can get lost in translation between your design
software and slicing. Our software expects units to be set to millimeters, so make sure
that your modeling software is also set for millimeters. If you are not using MakerWare to
prepare your objects for building, you may wish to do so, as the Scale button allows you
to size models precisely.
2. My Replicator 2 can't see my SD card:
‣
If your Replicator 2 does not recognize that there is a card in the SD slot, make sure
you're using a FAT16 formatted SDSC card no larger than 2GB. If the card is formatted
correctly but is unreadable, something may be wrong with the card.
3. I can't find my file on the SD card:
‣
Your Replicator 2 can't read file names longer than 26 characters. Shorten the file name
and try again. Files should end with .X3G
4. Help! My bot sounds like it's shaking itself to pieces!:
‣
Check to make sure you have acceleration turned on. Attempting to print at high speeds
with acceleration turned off can harm your Replicator 2. You can turn it off and on
through General Settings in your Replicator 2's onboard menus or through Onboard
Preferences in MakerWare or ReplicatorG. If you are running non-accelerated firmware
or have acceleration turned off, you should not print at speeds above 40 mm/s.
Firmwares from Replicator Firmware 7.0 use a new type of acceleration command, and
should only build from .x3g files. Running an .s3g file on a bot running Firmware 7.0 or
later is equivalent to temporarily turning off acceleration, and will result in loud, jerky
motion.
5. How do I update firmware on my Replicator 2?:
‣
Select the Upload Firmware option from the Bots menu in MakerWare or the Machines
menu in ReplicatorG. The software will walk you through the process. Unlike earlier
MakerBots, your Replicator 2 does not have a reset button, so any instructions
referencing a reset button can be ignored.
6. Do I need to do any maintenance on my Replicator 2?:
‣
Not much! But if you've been printing for more than fifty hours or if you start hearing
squeaking noises while building then it's probably time to lubricate your threaded rod and
idler pulley, and it's also a good idea to clean out your drive gear once in a while. Consult
our Maintenance page or your User Manual for instructions on how to do this.
DigiFabLab: ZERØ TO HERO Replicator 2 Guide !
43 of 44!
DRAFT: 2013-04-06
» ACKNOWLEDGEMENTS, ABOUT DIGIFABLAB, & SHARING:
Acknowledgements:
This guide would not have been possible without assistance from MakerBot Support and
the generosity of countless MakerBot enthusiasts found at Google Groups: MakerBot
Operators, 42 MakerBot-Users,43 and 3D Printer Tips, Tricks and Reviews. 44 In
particular, gratitude is extended (in alphabetical order) to: dnewman, Eighty, Enginewiz,
Jetguy, and whpthomas/Wingcommander for sharing their efforts, knowledge, and
enthusiasm. Without the collective wisdom of all the enthusiasts in this group, the
tremendous potentials of the Replicator 2 would be elusive to many.
DigiFabLab is particularly indebted to Norwich University, School of Architecture + Art,
which generously loaned one of their MakerBot Replicator 2 printers. This served as a testbed for the exploration of the Replicator 2's capabilities and for the development of this
guide. Faculty and students at Norwich also provided invaluable feedback during three
days of in-depth workshops held there during Spring 2013.
About DigiFabLab:!
[email protected]
DigiFabLab is a design consultancy dedicated to assisting people with digital design and
fabrication topics. David Celento, Founder, is a registered architect with over two decades
of university teaching experience. His research and creative works have been presented
widely at conferences with numerous workshops conducted globally. David currently serves
on the Board of ACADIA (Association for Computer Aided Design in Architecture) and is
presently writing a book intended to introduce and demystify digital design and fabrication
methods. Digital Toolbox (working title) is scheduled for publication by John Wiley and Sons
in the Fall of 2014.
Use of this Material:
The information provided in this guide was gathered from many sources and is meant to be
shared without charge or restriction. Content may be used in accordance with Creative
Commons Licensing version 3.0. Thus, any aspect of this guide may be shared freely;
attribution of images and content is requested; and derivative works are permitted—
provided they are not for commercial purposes. It takes a village to raise a 3D printer!
42
https://groups.google.com/forum/#!forum/makerbot
43
https://groups.google.com/forum/#!forum/makerbot-users
44
https://groups.google.com/forum/#!forum/3dprintertipstricksreviews
DigiFabLab: ZERØ TO HERO Replicator 2 Guide !
44 of 44!
DRAFT: 2013-04-06