Download Flexsafe® 3D Bag For Palletank®
Transcript
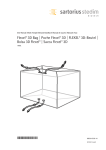
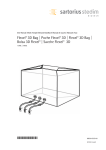
User Manual Flexsafe® 3D Bag For Palletank® 1000L 85037-550-77 IU114789 Vers. 09 | 2015 Table of Contents Flexsafe® 3D Bag 1000L . . . . . . . . . . . . . . . . . . . . . . . . . . . . . . . . . . . . . . . . . . . . . . . . . . . . . . . . . . . . . . . 4 1.Introduction . . . . . . . . . . . . . . . . . . . . . . . . . . . . . . . . . . . . . . . . . . . . . . . . . . . . . . . . . . . . . . . . . . . . . . 4 2.Palletank® & Flexsafe® Bag Description . . . . . . . . . . . . . . . . . . . . . . . . . . . . . . . . . . . . . . . . . 5 2.1Palletank® Description . . . . . . . . . . . . . . . . . . . . . . . . . . . . . . . . . . . . . . . . . . . . . . . . . . . . . . . . 5 2.2Flexsafe® 3D Bag Description . . . . . . . . . . . . . . . . . . . . . . . . . . . . . . . . . . . . . . . . . . . . . . . . . 5 3.Flexsafe® 3D System 1000L Instructions for Use . . . . . . . . . . . . . . . . . . . . . . . . . . . . . . . 6 3.1 Preparation of the Palletank® . . . . . . . . . . . . . . . . . . . . . . . . . . . . . . . . . . . . . . . . . . . . . . . . . 6 3.2Flexsafe® 3D Bag 1000L Installation . . . . . . . . . . . . . . . . . . . . . . . . . . . . . . . . . . . . . . . . . . 7 3.3 Filling of Flexsafe® 3D Bags 1000L . . . . . . . . . . . . . . . . . . . . . . . . . . . . . . . . . . . . . . . . . . . 10 3.4 Emptying of Flexsafe® 3D Bags 1000L . . . . . . . . . . . . . . . . . . . . . . . . . . . . . . . . . . . . . . . 12 4. Troubleshooting Guide . . . . . . . . . . . . . . . . . . . . . . . . . . . . . . . . . . . . . . . . . . . . . . . . . . . . . . . . . . 12 5. Precautions for Use . . . . . . . . . . . . . . . . . . . . . . . . . . . . . . . . . . . . . . . . . . . . . . . . . . . . . . . . . . . . . 13 6.Flexsafe® 3D Bag Storage Conditions . . . . . . . . . . . . . . . . . . . . . . . . . . . . . . . . . . . . . . . . . . 13 7. Shelf Life of a Flexsafe® 3D Bag . . . . . . . . . . . . . . . . . . . . . . . . . . . . . . . . . . . . . . . . . . . . . . . . 14 8. Product Complaint . . . . . . . . . . . . . . . . . . . . . . . . . . . . . . . . . . . . . . . . . . . . . . . . . . . . . . . . . . . . . . 14 9.Disclaimers . . . . . . . . . . . . . . . . . . . . . . . . . . . . . . . . . . . . . . . . . . . . . . . . . . . . . . . . . . . . . . . . . . . . . . 15 10.Warranty . . . . . . . . . . . . . . . . . . . . . . . . . . . . . . . . . . . . . . . . . . . . . . . . . . . . . . . . . . . . . . . . . . . . . . . . 15 11.Trademark . . . . . . . . . . . . . . . . . . . . . . . . . . . . . . . . . . . . . . . . . . . . . . . . . . . . . . . . . . . . . . . . . . . . . . . 15 3 Table of Contents Flexsafe® 3D Bag 1000L For use with: −− Palletank® for In-Process Fluid Handling 1000L 1. Introduction Flexsafe® 3D standard Bags are designed for processing and storage in Sartorius Stedim Biotech’s Palletank® containers. Flexsafe® meets your requirements for outstanding robustness and ease of use for all your single-use bioprocessing needs. The Flexsafe® 3D System is composed of a disposable sterile bag, the Flexsafe® 3D Bag and the Palletank® rigid container constructed of stainless steel. The Palletank® supports the fluid contained within the Flexsafe® 3D Bag. The two make up the System and must be used together to ensure a robust process solution. When filling, the bottom and sides of the bag conform to the shape and dimensions of the Palletank®. The exact fit ensures bag functionality by eliminating folds or creases in the bag film. The Flexsafe® 3D System has been designed with a bottom port that allows bottom drainage of the bag for virtually 100% fluid recovery. Typical applications for the Flexsafe® 3D System include processing and storage of large volume biopharmaceutical solutions under sterile conditions. The extended standard product range with proven application specific designs in combination with the Palletank® allows the Flexsafe® 3D System to meet your need for a wide range of bioprocessing applications. Flexsafe® 3D Bags and corresponding Palletank® are currently available from 100L to 1000L. The System can be moved with a pallet jack, forklift, or a dolly (up-to 1000L). Purpose This Instruction for use describes the operations required to prepare, fill and drain a 1000L Flexsafe® 3D Bag in its dedicated Palletank®. Flexsafe® 3D Bag 1000L | Introduction 4 2. Palletank® & Flexsafe® Bag Description 2.1 Palletank® Description Sartorius Stedim Biotech currently offers the Palletank® for In-Process Fluid Handling for use with Flexsafe® 3D Bags 1000L (see Fig. 1). Fig. 1 2.2 Flexsafe® 3D Bag Description (see Fig. 2) 1. K-seals 2. 4-port system 3. Bottom ports 4. Filling tubes | Dispensing tubes 5. Filling tubes | Dispensing tubes 6. Clamp Fig. 2 5 Palletank® & Flexsafe® Bag Description 3. Flexsafe® 3D System 1000L Instructions for Use 3.1 Preparation of the Palletank® 1. Open the hinged front doors by removing the four locking systems (see Fig. 3). Fig. 3: Preparation of the Palletank® 2. Before installing the Flexsafe® 3D bag in the Palletank®, check that the internal surfaces of the Palletank® are dry, smooth and free of any particles that might damage the bag surface. 3. Open the 2 bottom gates (see Fig. 4): −− Check that the Palletank® does not contain a filled Flexsafe® 3D Bag (failure to follow this instruction may result in product loss). −− Unlatch the retaining clip from the fastening point on the jaw of the gate. −− Grasp the mobile side of the gate and swing the bottom gate completely open. Fig. 4: Bottom gate closed | Bottom gate opened Flexsafe® 3D System 1000L Instructions for Use 6 1. Swinging portion of bottom gate 2. Fixed portion of bottom gate 3. Retaining clip fastening point 4. Retaining clip 3.2 Flexsafe® 3D Bag 1000L Installation 1. Obtain a packaged Flexsafe® 3D bag of the appropriate size and position it on a smooth table with no sharp angular corners. Bag size matches Palletank® size. 2. On a table, position the bag in such a way that the 4-port system is positioned on the back and the bottom port in front of you. This correct positioning will ensure a proper insertion of the Flexsafe® 3D Bag in the Palletank®. 3. Check that the irradiation indicator on the label is red to indicate irradiated product. Record the batch number of the bag (as seen on the product label) (see Fig. 5). Fig. 5 4. To open and remove the secondary (external) packaging (see Fig. 6): −− Tear open one of the corners and open completely by tearing along the weld. −− Remove the secondary packaging by sliding it away from the Flexsafe® 3D bag. 5. Check that the Flexsafe® 3D bag secondary packaging is free from any damage that could compromise the sterility. 6. Repeat the 4. and 5. steps for the primary (internal) packaging. Fig. 6 7. Remove any adhesive tapes or protective foams from the Flexsafe® 3D Bag without unfolding the bag (see Fig. 7). Fig. 7 ® 7 Flexsafe 3D System 1000L Instructions for Use 8. Remove the reversible cable tie on the bottom lines (see Fig. 8). Fig. 8 9. To position the bag inside the Palletank®: −− Hold the folded bag on both arms with the 4-port system uppermost and on the back, and the two (bottom) ports underneath (see Fig. 9). −− Position yourself on the side of the Palletank® closest to the bottom gates −− Introduce the folded bag in the Palletank® by the front opening in such a way that the bottom ports are positioned towards the bottom gates. 10. Remove the bottom port tubes from the Flexsafe® 3D Bag folds and remove the reversible cable tie from the top lines (see Fig. 8). Fig. 9 Fig. 10 11. Insertion of the bottom port tubes in the bottom gates: −− Carefully feed the bottom drain line through the Palletank® bottom gate using two hands to ensure the line does not reach the floor. −− Maneuver the bag bottom port so that the groove in the bottom is inserted with the fixed portion of the bottom gate (see Fig. 10). −− While holding the bottom port firmly, close the mobile jaw of the gate. Ensure that the groove of the bottom port is captured by both halves of the gate to prevent movement of the bottom port during filling (see Fig. 11). −− Latch the bottom gate to secure the bottom port within the gate. −− The port should be snug in the gate and not have room for movement. Check that the bottom port is properly seated in the bottom gate by firmly but gently tugging on the bottom port and checking for movement. If the bottom port appears to have freedom of movement, repeat step 11). −− Repeat the 11 step for the second bottom port. 12. Remove the reversible cable tie from the top lines (see Fig. 8). 13. Unfold the bag and drape the 4-port system and the top tubing onto the Palletank® front wall. Fig. 11 Flexsafe® 3D System 1000L Instructions for Use 8 14. Ensure that the corners of the bag are in contact with the front corners of the Palletank® so that the bag will take the shape of the Palletank®. Position then the 4-Port system in contact with the side of the Palletank® (see Fig. 12). Fig. 12 15. Check that the K-seal of the Flexsafe® 3D Bag is correctly positioned along the centerline and parallel to the front and back of the container (see Fig. 13). Fig. 13 16. Position all clamps as close as possible to their bag ports, remove their protection cap and close all of them (see Fig. 14). Fig. 14 ® 9 Flexsafe 3D System 1000L Instructions for Use 3.3 Filling of Flexsafe® 3D Bags 1000L Sartorius Stedim Biotech recommends filling through the top ports of bag. 1. Check that all clamps are closed (see Fig. 14). 2. Connect the bag to the supply line in accordance with the aseptic procedures used on your site. When filling through the top, be particularly careful not to connect any tubing through the front doors. 3. Open any clamps on the filling line (see Fig. 15). Fig. 15 4. Start to fill the Flexsafe® 3D Bag – Sartorius Stedim Biotech recommends the use of peristaltic pumps for filling and dispensing from the bag (see Fig. 16). Fig. 16 Fig. 17 As the bag fills, make sure the liquid do not get entrapped into the bag fold and regularly lift the bag from the top to have the liquid falling at the bottom of the Palletank® (See Fig. 17). As the bag fills, make sure that no tubing becomes trapped between the bag and the Palletank®. Flexsafe® 3D System 1000L Instructions for Use 10 5. After filling to 5 – 6% of the bag nominal volume, stop the filling and (see Fig. 18): −− Remove the top port of the bag from the front side of the Palletank® and allow it to sit freely within the Palletank®. −− Manually adjust each bag corner to its appropriate position. −− Close the hinged front doors and secure the four locking systems. Sartorius Stedim Biotech recommends the use of the Self Deploying Accessory which eases the installation and the filling of the Flexsafe® Bag, saves operator time and eliminates risky bag manipulations post installation. As the bag fills, the Self- Deploying Accessory removes all tension from the top of the bag by allowing the top tubing to gradually slide along the Accessory allowing for a reproducible and effortless bag deployment to its appropriate position within the Palletank® for In-Process Fluid Handling. Please contact your sales representative for further details. Fig. 18 6. Fill the bag to its nominal volume (see Fig. 19). Fig. 19 7. If you have chosen to fill through the top, empty the liquid contained in the filling line into the bag by raising the tube vertically over the bag (see Fig. 20). 8. Close the clamps (see Fig. 14) and disconnect the filling line. Fig. 20 ® 11 Flexsafe 3D System 1000L Instructions for Use 3.4 Emptying of Flexsafe® 3D Bags 1000L Sartorius Stedim Biotech recommends dispensing through the bottom. 1. Connect bottom tubing line to receiving system according to the standard procedures for your site. 2. Open any clamps (see Fig. 16) on the draining line. Drain the bag – Gravity can be used, but for faster draining Sartorius Stedim Biotech recommends the use of a peristaltic pump (see Fig. 21) 3. The bag collapses as it is drained. The sloped bottom of the Palletank®, and the position of the drain hole, provide nearly 100% fluid recovery. This efficiency can be improved by lifting the bag at the end of the operation (see Fig. 22). Fig. 21 4. When the dispensing is complete, clamp the line (See Fig. 14) and disconnect the Flexsafe® 3D Bag from receiving system. 5. Unlatch and open the bottom gate (see Fig. 11). 6. Lift the collapsed bag and remove it from the Palletank®. 7. Discard the Flexsafe® 3D Bag in accordance with the procedures used on your site. Fig. 22 4. Troubleshooting Guide The bag will not fill. yyCheck that any clamps on the filling line are open and that the tubing is not pinched. When filling through the bottom, the bag comes out of the bottom gate. yyThe edge of the jaw is not closed inside the groove of the bottom port. Position it correctly in the groove as described in step 11 of the installation procedure. The bag looks very full before reaching the nominal volume: The bag is most likely inserted backwards into the Palletank®. yyIf possible given the volume in the bag, spin the bag 180° around the bottom gates and close the bottom gates. Examine Fig. 12 & 13 for proper bag positioning. It is critical that the bottom seam of the bag is along the centerline of the Palletank® for proper deployment. The bottom of the bag is incorrectly positioned. yyPlace the corners of the bag in the corners of the Palletank® (make sure that only 5 – 6% of nominal volume is filled before adjusting, otherwise bag failure may occur). Many folds appear in the bag during filling. yyThe bag is too big for the Palletank®. Verify the bag size from the outer packaging and use the bag suitable for the size of the Palletank®. The bag does not reach the walls of the Palletank®. yyThe bag is too small for the Palletank®. Verify the bag size from the outer packaging and use the bag suitable for the size of the Palletank®. The bag will not drain. yyCheck that any clamps on the drain line are open and that the tubing is not pinched. Flexsafe® 3D System 1000L Instructions for Use | Troubleshooting Guide 12 5. Precautions for Use yyTo ensure trouble-free operation, the Sartorius Stedim Biotech Flexsafe® 3D Bag must be used with the Sartorius Stedim Biotech Palletank®. yyThe Palletank® must be clean and dry before inserting the Flexsafe® 3D Bag. Traces of cleaning agents left on the Palletank® can potentially damage the Flexsafe® 3D Bag. yyIt is under the user’s responsibility to verify the compatibility of the Flexsafe® 3D Bag materials with the solutions used in your process. Sartorius Stedim Biotech can provide guidelines for chemical compatibility, bio-compatibility and extractables. yyAvoid the use of sharp objects (scissors, cutters, scalpels, etc.) in the vicinity of the Flexsafe® 3D Bag. yyThe Flexsafe® 3D Bag should never be handled or carried by its connections (i.e. tubing). yyAvoid folding the Flexsafe® 3D Bag other than the original folds. yyWhen positioning the Flexsafe® 3D Bag in the Palletank® and during any adjustment after the initial fill, handle the bag with care and use appropriate force. Avoid pulling with your full strength. If such is required, it is likely inappropriate to adjust the bag at this time due to the fill volume. yyThe Flexsafe® 3D Bag is for single-use and should not be re-used. 6. Flexsafe® 3D Bag Storage Conditions Flexsafe® 3D Bags should be stored in their original primary packaging at room temperature (5°C to 40°C), in a dry environment. 13 Precautions for Use | Flexsafe® 3D Bag Storage Conditions 7. Shelf Life of a Flexsafe® 3D Bag The shelf life after gamma sterilization has been validated as indicated on the labeling (product packaging and case) and in the specifications. Details are available from Sartorius Stedim Biotech upon request. 8. Product Complaint When is a complaint justified? When a deficiency related to the safety, quality, identity or purity or a deficiency in providing a service is identified on a marketed product. To whom should the complaint be sent? To your Sartorius Stedim Biotech commercial contact or distributor. How and which information should be conveyed? A complaint form will be provided by your Sartorius Stedim Biotech commercial contact and should be returned by e-mail, fax or letter with the following information: −− the bag or bag system product part number and lot number −− the description of the issue −− the description of the process in which the issue was detected −− the amount of products affected −− samples (or pictures if no samples are available) If samples are returned, they must be empty, rinsed and decontaminated (if applicable). They must be returned with the signed the Health and Safety part of the complaint form. Shelf Life of a Flexsafe® 3D Bag | Product Complaint 14 9. Disclaimers 1. Sartorius Stedim Biotech Flexsafe® 3D Bag is for single-use only. Sartorius Stedim Biotech will not endorse any responsibility of any kind for re-use of the Flexsafe® 3D Bag. 2. Sartorius Stedim Biotech will accept no responsibility for the use of Flexsafe® 3D Bags with any containers other than Sartorius Stedim Biotech Palletank®. 3. Sartorius Stedim Biotech will not assume any responsibility if the Flexsafe® 3D Bag instructions for use as described in this document are not strictly followed and the above mentioned Precautions for Use are ignored. Upon request, Sartorius Stedim Biotech Application Specialist can provide training to any interested end users. 4. Sartorius Stedim Biotech will not be responsible for any special, incidental or consequential damages resulting from any legal theory, including lost profits, downtime, goodwill, damage to or replacement of equipment or property. 10.Warranty Sartorius Stedim Biotech warrants that the Flexsafe® 3D Bag is produced according to specifications. Unless otherwise provided for in agreed upon specifications, the general Sartorius Stedim Biotech specifications will apply. In the case of a defective bag, please follow the above-mentioned Product Complaint Procedure. 11.Trademark Flexsafe® and Palletank® are registered trademarks of Sartorius Stedim Biotech. 15 Disclaimers | Warranty | Trademark Sartorius Stedim Biotech GmbH August-Spindler-Strasse 11 37079 Goettingen, Germany Tel.: +49.551.308.0 Fax: +49.551.308.3289 www.sartorius-stedim.com Copyright by Sartorius, Goettingen, Germany. No part of this publication may be reprinted or translated in any form or by any means without prior written permission from Sartorius. All rights reserved by Sartorius in accordance with copyright law. The information and figures contained in these instructions correspond to the version date specified below. Sartorius reserves the right to make changes to the technology, features, specifications and design of the equipment without notice. Last updated: 09 | 2015 Sartorius Stedim Biotech GmbH, Goettingen, Germany Printed in the EU on paper bleached without chlorine. | W Publication No.: SPT6013-e150902





![[PDF:1.8MB]](http://vs1.manualzilla.com/store/data/005784847_1-870925f3dac8740272ffb6793e13348f-150x150.png)
