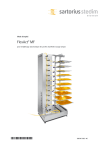
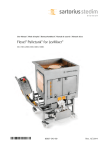
Download pH probe calibration and insertion in a Flexel® Bag for LevMixer
Transcript
85032-541-21
IU113351
85032-541-21
Directions for use
pH probe calibration and insertion in a Flexel® Bag for LevMixer® | Magnetic Mixer
According to the mixing technology used, please refer to the
relevant manual:
–Flexel® for Magnetic Mixer 50L | 100L | 200L | 400L | 650L |
1000L (Ref. 85032-537-50)
–Flexel® Palletank® for LevMixer® 50L | 100L | 200L | 400L |
650L | 1000L (Ref. 85037-541-12)
5. Connect the cable of the pH probe (DIN plug) to the
pH-meter.
To connect the cable of the pH probe to a Sartorius portable
pH-meter (PT-10 or PT-15), a DIN to BNC adapter (Reference
FMA114320) is required.
If the Flexel® Bag for LevMixer® | Magnetic Mixer is also
equipped with a conductivity device, please also refer to the
directions for use “Conductivity probe used in a Flexel® Bag
for LevMixer® | Magnetic Mixer” (Ref. IU114256).
!Warning:
Please stack horizontally and not more than
the required number allowed.
Before pH probe calibration, Good Laboratory Practices
(GLP) recommends to place the pH probe and the
standard pH solutions at the process temperature.
8.3 Connect the filled 60 mL Luer® syringe to the blue
25 mm diameter Minisart® filter (inlet of the probe’s
chamber).
11. Open the door of the Palletank® and check that it is free
from particles.
Connection of the pH probe (DIN)
Connection to the pH-meter (BNC)
6. Check the functionality of the pH electrode.
An initial pH value of 6.5 ± 0.3 (at room temperature)
is indicative of a functional electrode.
Remove the sliding gate.
8.4 First point calibration (refer to the User Manual of
the pH-meter for detailed instructions).
!Warning:
For the first point calibration, hold the pH probe in a
vertical orientation (Minisart® filter and inlet of the
Flexboy® Bag at the top) at the rinsing of the 30 first
milliliters. Air initially trapped into the storage chamber
is removed.
1. On a flat surface, position the Flexel® Bag for LevMixer® |
Magnetic Mixer in such a way that the 8” protective cap
is uppermost and the pH probe is in front of you.
12. Flip over the Flexel® Bag for LevMixer® | Magnetic Mixer
in order to get the 8” protective cap at the top and the
pH probe facing you.
2. Open the flap on the side of the pH probe by removing
the tape.
If the pH value is not stable, gently shake the probe
to remove possible residual air bubbles stuck onto
the electrode.
If the pH value is still not correct, flush the storage
chamber with one calibration solution.
7. Verifications before calibration
7.1 Make sure that the 2 pinch clamps of the silicone tubing
and the pinch clamp of the waste bag are open.
Open
position
Open
position
Flush the probe with a minimum of 120 mL of the first
standard pH solution.
If the pH value is not stable, gently shake the probe
to remove possible residual air bubbles stuck onto the
electrode.
3. Flexel® Bag for LevMixer® | Magnetic Mixer preparation
for pH probe calibration
3.1 Flip over the Flexel® Bag for LevMixer® | Magnetic Mixer
in such a way that the protective shield (red component)
is uppermost and the pH probe is facing you.
!Note:
Even if some crystals or liquid appear inside the tubes
or in the flush bag, the pH sensor remains functionnal
if the initial value is 6.5 ± 0.3 (at room temperature).
7.2 Make sure that the waste bag is supported on a table
without sharp edges.
8.5 Second point calibration.
Repeat the above operations (8.4) to calibrate the probe
with the second standard pH solution.
8.6 Calibration evaluation.
The pH-meter automatically evaluates the calibration.
Refer to the User Manual of the pH-meter to check if
the calibration evaluation is within the range of the
acceptance criteria.
9. Rinsing of the pH probe’s chamber.
Rinse the pH probe with a minimum of 120 mL of WFI
(Water For Injection) before insertion of the pH electrode
into the Flexel® Bag for LevMixer® | Magnetic Mixer to
remove the standard pH solutions.
Possibly: Disconnect the pH-meter to facilitate the
handling of Flexel® Bag for LevMixer® | Magnetic Mixer.
!Warning:
Do not disconnect the waste bag in the case a 2nd
calibration is further required by an aseptic process
Hold the Flexel® Bag for LevMixer® | Magnetic Mixer with
both arms in such a way that the waste bag is supported.
10. Close the 2 pinch clamps of the silicone tubing and the
pinch clamp of the waste bag.
3.2 Remove the red protective shield
(there is no need to remove its pouch).
13. Insert the Flexel® Bag for LevMixer® | Magnetic Mixer
as per the below picture (refer to the User Manual ref.
85034-536-18 for detailed instructions).
!Warning:
Failing to check point 7.1 may result in a leakage
of the standard solution into the Flexel® bag for
LevMixer® | Magnetic Mixer.
8. pH probe calibration :
3.3 Position the centering aligner in the dedicated fitting
on the Flexel® Bag for LevMixer® | Magnetic Mixer.
8.1 Set the temperature of the first standard pH solution
into the pH-meter using a 3 mm OD temperature
probe that will be later inserted in the thermowell
of the Flexel® Bag for LevMixer® | Magnetic Mixer.
The temperature acquisition in the pH-meter can be
performed automatically or manually (refer to the
User Manual of the pH-meter for detailed instructions).
14. Insert the sliding gate.
Before inserting the pH sensor into the Flexel® Bag for
LevMixer® | Magnetic Mixer, make sure that the sliding
gate is well installed.
3.4 Install the magnetic clamp onto the centering aligner.
8.2 Fill a 60 mL Luer® syringe with the first standard pH
solution. Remove any air residual by slightly pressing
the syringe.
Close the Palletank® door.
Do not insert a temperature probe into the thermowell
of a dry bag. The thermowell must be fully immersed to
fit the temperature probe.
!Warning:
Fitting a temperature probe in the thermowell of a dry
Flexel® Bag for LevMixer® | Magnetic Mixer may result
in a damage of the thermowell that results in a leak.
!Warning:
Failing to correctly install the centering aligner and
magnetic clamp may result in a Flexel® Bag for
LevMixer® | Magnetic Mixer damage during filling
operations.
4. Remove the protective foam from the pH probe.
!Warning:
Failing to remove air from the syringe may result
in the impossibility to flush the electrode.
17. Check that the pH probe is fully inserted into Flexel® Bag
for LevMixer® | Magnetic Mixer.
19.2 Open the 2 pinch clamps of the silicone tubing and
the pinch clamp of the waste bag.
Open
position
End stop
(open position)
!Warning:
Check that the waste bag is well supported by the
tubing holder.
18. Set the temperature from the Flexel® Bag for LevMixer® |
Magnetic Mixer by inserting a 3 mm OD temperature probe
into the 3 mm ID thermowell.
The temperature acquisition in the pH-meter can be
performed automatically or manually (refer to the User
Manual of the pH-meter for detailed instructions).
Open
position
15. Start filling the mixing bag (refer to the User Manual ref.
85034-536-18 for detailed instructions).
19.3 pH probe 2nd calibration
!Warning:
Check that the two pinch clamps on the silicone tubing
and the pinch clamp of the waste bag are opened.
!Warning:
Make sure that the thermowell is fully immersed before
fitting the temperature probe.
Fitting the temperature probe in the thermowell of a
dry bag may result in a damage of the thermowell that
results in a leak.
19. pH probe recalibration
Repeat the above operations (8) to recalibrate the
pH probe.
19.4 Rinsing of the pH probe chamber.
At the end of calibration process, rinse the pH probe
with 120 mL of WFI (Water For Injection) before
insertion of the pH electrode into the Flexel® Bag for
LevMixer® | Magnetic Mixer.
19.5 Close the 2 pinch clamps of the silicone tubing and
the pinch clamp of the waste bag.
19.1 Hold the pH probe device with both hands:
– One on the pH probe main body (static part)
– The other on the pH probe holder (mobile part)
Closed
position
16. pH Probe insertion into the Flexel® Bag for LevMixer® |
Magnetic Mixer.
End stop
(open position)
!Warning:
Check that the two pinch clamps on the silicone tubing
and the pinch clamp of the waste bag are closed.
Hold the pH probe device with both hands:
– One on the pH probe main body (static part)
– The other on the pH probe holder (mobile part)
Turn (anti-clockwise) and pull the pH probe holder
(mobile part) out of the pH main body.
End stop
(closed position)
Closed
position
19.6 pH probe re-insertion
!Warning:
Check that the two pinch clamps on the silicone tubing
and the pinch clamp of the waste bag are closed.
Turn (clockwise) and push the pH probe holder (mobile part)
into the pH main body until the end.
Repeat the above operations (16) to re-insert the pH probe
into Flexel® Bag for LevMixer® | Magnetic Mixer.
19.7 Check that the pH probe is fully inserted into Flexel®
Bag for LevMixer® | Magnetic Mixer.
!Warning:
The injected pH probe is designed to enable
3 activations
(1: 1st insertion, 2: withdrawal, 3: 2nd insertion)
while preserving the sterility into the Flexel® Bag
for LevMixer® | Magnetic Mixer.
End stop
(closed position)
Check that the pH probe is fully “in closed position”
(see picture above)
Phone +49.551.308.0
Fax +49.551.308.3289
www.sartorius-stedim.com
Specifications subject to change
without notice. Printed and copyrighted
by Sartorius Stedim Biotech GmbH. | W
Publication No.: S--6017-e13112
Ver. 11 | 2013
!Warning:
The absence of sliding gate on a Palletank® used with a
filled Flexel® Bag for LevMixer® | Magnetic Mixer with
pH sensor may result in a bag’s exposure with a possible
damage of the bag.
Sartorius Stedim Biotech GmbH
August-Spindler-Strasse 11
37079 Goettingen, Germany


