Download FlexClock Z18

Transcript
Multi-Purpose Time Device
Z18 Setup Guide
FlexClock Z18 User Manual
Printed in the USA
08/18/2009
16
1
The company distributing this product does not accept liability or
responsibility for inaccurate or missing information with this manual.
Any and all content within this document is subject change and may
be updated at any time without notice.
Copyright (2009)
2
15
Table of Contents
Troubleshooting
When you enroll a fingerprint, the system tries to capture between ten
and fifteen minutiae for use in recognizing the employee. But if for one
employee the image quality is poor enough that the system can only
manage to capture a few (such as three or four), there is a risk that the
simplistic pattern may be found on other employees’ fingers, resulting
in a false recognition. The enrollment system tries to eliminate as many
of these as possible by rejecting them during the verification step.
In case of misidentification, it is important to delete both the employee
being misidentified and the employee whose PIN is appearing on the
screen. It is most likely that the problematic template file belongs not to
the person touching the sensor, but the person whose time card is getting
the punches.
3 Table of Contents
4 Overview
5 Quick Setup
6 Time Clock Settings
7 Clocking In & Out
8 Fingerprint Enrollment
You can eliminate the risk of misidentification by having employees
type their PIN number before touching the sensor. After a PIN number
is entered, only the correct fingerprint enrolled for that PIN can be
considered a match.
9 The Fingerprint System
Additionally, you can change the sensitivity setting on the fingerprint
menu (option #6) to tighten the matching tolerance, but doing this
unnecessarily can make the fingerprint reader difficult to use, so you
should only do this if you are having problems.
11 Manager Access
10 Testing
12 Troubleshooting
Problem: Sensor Contact Surface
The fingerprint lens in the Z-series clock needs to be clean to function
properly. A toothbrush and light soap can be used.
Additional Questions
If you have any additional questions regarding the installation or use
of your FlexClock, please contact your service provider.
14
3
Overview
Troubleshooting
The FlexClock Z18 delivers superior value and features with its integration
of timekeeping and universal proximity badge card access. It connects to
the web in near real-time (Ethernet) and offers additional value in its
ability to support a “bell chime” and biometric employee identification
with PrintReader.
This is normal if an employee PIN number is entered that has never had a
fingerprint enrolled. This is intentional so that new hires can immediately
begin using the clock with minimal inconvenience. Once a fingerprint has
been associated with that PIN the clock will always require fingerprint
verification in order to accept that PIN in the future.
The Z18 offers a variety of unique features to help employers effectively
maintain a work force including universal proximity badge support
(Wiegand), Ethernet data connectivity, bell “chime” support (sold
separately), and biometric add-on support (sold separately).
It is true that employees can simply make up non-existent PIN numbers
and clock them in and out, without any verification. But this provides them
no benefit. Since they cannot be matched to any employee’s time card,
the timekeeping website shows them as “unprocessed punches,” where
they can be viewed by a supervisor and then either posted to a time card
manually (if considered valid), or simply deleted.
Punch Data Collection
Collecting employee punches with the Z18 is
primarily accomplished through the use of a
proximity badge card (Wiegand), but can also
easily be done through the entry of an employee
PIN code if a proximity badge has not yet been
assigned or is temporarily unavailable. The
PrintReader is a popular data collection option
which is sold separately, providing employers with
biometric fingerprint verification.
Installation
The Z18 is a wall-mounted unit that requires a “fixed mounting,” with its
wiring and connections concealed behind the wall. As such, the Z18
requires professional grade installation by an electrician, “handy man,”
or qualified technician.
Problem: Misidentification
Misidentification is rare, but possible – particularly since the clock is
calibrated by default to err on the side of convenience rather than
rejection. You can adjust the sensitivity from the menu.
Any time the fingerprint reader mistakenly identifies one person as a second person, it virtually always means that the second
person’s original enrollment
was poor quality. In most scenarios, the same one or
two employees are involved every time.
Connectivity
The Z18 connects to the web to send employee data for online editing
exclusively through a near real-time Ethernet data connection, also
commonly referred to as “digital,” Internet-based, or IP based. Punches are
sent continuously throughout the day as employees clock in/out for immediate supervisory editing and reporting.
To minimize the time spent by employees at the clock, “background”
punch transmission permits employees to clock in/out as punches are sent
simultaneously to the server.
4
13
Quick Setup
Troubleshooting
Network Connection
Time Clock
You can always force the time clock to attempt to contact the timekeeping
server at any time by pressing the 9 key.
The time clock’s ability to transmit depends on your Internet connection. If
you are having trouble transmitting, ensure your Internet connection is up.
There are only two cables required to set up your new FlexClock Z18. One
is for power, and the other is an Ethernet cable that connects to your
network. Follow the quick setup steps below to set up your Z18. For
detailed time clock setup instructions, see page 6.
You can unplug the clock’s power at any time and plug it back in to force it
to acquire a new IP address using Dynamic Host Control Protocol (DHCP).
1.
Run a “in wall” power source and Ethernet connection to the time
clock location
Fingerprint Recognition
2.
Use the enclosed template to cut hole(s) in drywall for installation
Problem: Enrolled Finger Not Recognized (Red Light)
3.
Find the power cable and the Ethernet connection cable
(set aside remaining cables)*
4.
Plug the Ethernet connection cable into the Z18 cable jack, in the
bottom left, on the back of the clock
5.
Plug the power cable jack into the Z18 on the bottom left, on the back
of the clock
6.
Connect the newly run Ethernet cable to the Z18 Ethernet cable, and
the power connection to the power supply
7.
Once the clock has power follow displayed clock prompts and page
6 for setup
•
•
•
•
•
•
•
•
•
Is the employee using the same finger as enrolled? (Different
fingers won’t work.)
Is the placement of the finger correct? (The center peak of the
fingerprint needs to be touching the center of the sensor.)
Is the finger injured, dirty, or wet?
Is the fingerprint sensor clean and not damaged?
Has the enrollment been deleted? (Deletions can occur on other
clocks, and pass from clock to clock if you have more than
one clock.)
Has the same number been enrolled by somebody else?
(This also can happen on another clock.)
Is the fingerprint possibly not enrolled? (Use Finger Test mode,
option 7, as an easy way to find out.)
Try deleting and re-enrolling the fingerprint.
Try entering the PIN number before touching the sensor. (This
tells the clock which finger to expect, so it can perform a stricter
match on just that one fingerprint template, instead of looking
at the entire database.)
Problem: Punches Without Finger Verification
A common technical support complaint is that the clock seems to
accept punches without requiring any fingerprint verification at all.
*You do not need the other cables shipped in the box for standard Z18
functions. Please call your PDS for instructions on adding a third-party
proximity badge or bell support. The A/C power adapter is not included in
the time clock box. The adapter is shipped as a separate item.
12
5
Manager Access
Time Clock Settings
Clock Setup
The clock settings are retrieved from the timekeeping server. This
includes time, date, time zone, Daylight Saving Time (DST), etc. Once the
clock is connected to the network, you can press the 9 key to force the
device to communicate. If you receive the message “UNKOWN SERIAL #,”
it means that your account has not been set up on the server. It can take up
to 10 minutes for the Z18 to become active after it has been added to the
timekeeping website.
Setting a Manager Password
Once your clock is set up , it will automatically transmit periodically. There
is no need to force it to transmit with the 9 key, although, you can do this
at any time.
Your payroll company can generate a one-time ”unlock” code to reset
this password if it is ever lost.
Network Setup
The Z18 is compatible with most small business networks and the initial
device start up and connectivity is automated.
Your company’s IT department can tell you if you need to set up a “Static
IP address.” Usually, you do not need to do this. If you do, you can reach a
hidden Network Configuration menu. To access this menu, press * or MENU
(depending on your model), and enter the following password: “2663”.
Firewall
Notify your firewall administrator that the FlexClock will make outgoing
connections on TCP ports 8288 and 8289. By default, most firewalls allow
this sort of outgoing connection without any additional setup. FlexClock
only makes outgoing connections, so it does not need any setup for
inbound connections.
Daylight Saving Time
Your clock automatically adjusts for Daylight Saving Time (DST) as
instructed by the server. The adjustment takes place immediately when
the clock reaches the designated time (i.e. 2:00 a.m.) Adjustments occur
on a Sunday. From Sunday through Tuesday the clock will show a “DST
checkmark” icon next to the time, to remind employees that the DST
correction has taken place.
From the enrollment menu, the master
manager password can be set. This password
always provides access to the fingerprint menu,
and never needs fingerprint verification. The
default is “1234”. You should change it
immediately, and keep the password secure.
The master manager password always has full access to the
enrollment menu. It is not possible to reduce the master manager
password to “limited access.”
The manager password is set per-clock. Manager passwords do not
automatically copy from clock to clock.
Setting Manager Fingerprints
From the enrollment menu, you can also set up to four (4) manager
fingerprints. This lets you give employees access to the manager
menu.
The employees’ fingerprints must already be enrolled. Further, they
can only enter the fingerprint menu with their fingerprint—NOT with
their PIN number.
You can create two kinds of managers. A “limited” manager can only
enroll new employees. A “full” manager has access to all options in
the enrollment menu, including creating and deleting other mangers.
Manager privileges are set per-clock. Although fingerprint templates
automatically copy from clock to clock the manager settings do not
copy.
6
11
Testing
Clocking In & Out
About Fingerprints
All fingerprints are unique. Even identical twins
have unique fingerprints. All ten fingers on every
person are uniquely distinct from the other. If a
person enrolls their index finger, that same finger
must be used when clocking in and out.
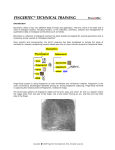
Fingerprints come in three basic types: whorl,
arch, and loop. When reading a finger, the very
first thing your fingerprint reader will do is classify
the print into one of these three categories. Most
people have a combination of two, or even all
three types. As a point of interest, you may be able to classify each of
your own fingers into these three categories just by looking at them.
Test Mode
On the enrollment menu, option 7 (The test menu) allows you to test
the automatic identification capability of the fingerprint reader without
punching anybody in or out.
In test mode, the clock will attempt to identify the finger on the sensor, and
show the corresponding PIN number. The test mode can be used to train
employees on the best way to touch the sensor.
It is normal for a finger to not identify correctly on the first try or two,
especially if it is dirty, dry, or not centered properly on the sensor. If a
fingerprint cannot be identified repeatedly, you should re-enroll it.
The timekeeping website automatically performs adjustments to ensure
everything is correct. There should rarely, if ever, be a need to adjust time
cards—even if employees worked overnight during the time change.
If you live in an area that does not observe Daylight Saving Time (such
as Arizona), the automatic adjustment is disabled by your payroll
provider from the web site.
Clocking In & Out
Clocking in and out is simple: Press 1 to clock in. Press 2 to clock out. After
you press 1 or 2, enter your PIN number, swipe your card, or place your
finger on the PrintReader sensor. If your PIN number has been enrolled with a
fingerprint, you must also touch the fingerprint sensor to verify your identity.
If the fingerprint has never been enrolled, and associated with a PIN,
a fingerprint check is not required. This is intended as a convenience
to new-hires. Once a fingerprint is enrolled with the PIN number, the
fingerprint will be required in order to use the clock.
Additional prompts (such as department, job, or tip prompts) may appear.
These are configured by your administrator from the timekeeping web site.
The 4 and 5 keys can be used to clock “in” and “out,” if enabled from the
web site. This allows an alternate set of prompts to be shown to certain
employees, but not others. This feature is commonly used at restaurants.
For example, non-tipped employees may use these keys to bypass a
prompt that asks “enter total tips.” Contact your service provider for more
information.
The “score” is an indication of how well the finger matched the original
template. You should try for a score of 100 whenever possible.
10
7
The Fingerprint System
Fingerprint Enrollment
Fingerprint enrollment is simple and only needs to be done once per
employee. If you own more than one FlexClock Z-Series unit, the fingerprint
enrollments will automatically be copied to all of your other clocks. The
timekeeping server stores a backup copy of the fingerprint template files,
and they will automatically be restored if you ever replace or clear the
memory of your clock.
Accessing the Enrollment Menu
The enrollment menu can be accessed by pressing 3 from the main “date/
time” screen. The default password for the manager menu is “1234,” and
can be changed through the menu. We strongly recommend that you
change this password immediately to avoid any unauthorized changes
to the setup. For example, if employees can delete their own fingerprint
enrollments, then they can bypass the fingerprint check entirely —
reintroducing the risk of “buddy punching.”
Enrolling Prints
When you select the re-download option, nobody can use the clock until
the re-download is complete. This only takes a couple of minutes.
The following things should be avoided during enrollment.
•
•
•
Avoid moving the finger.
Avoid using a dirty, extremely dry, or injured finger.
Avoid using a wet finger. The finger should be towel dried if wet.
About Enrolled Fingerprints
A fingerprint template maps key points on a finger. For example, it’s not
possible to create a map of California from numbers, but given the map
of all 50 states, an intelligent computer program can uniquely detect
numbered dots assigned to the topographical region, that only match
California. The fingerprint reader works exactly the same way to recognize
and associate a fingerprint with an employee.
To enroll a print, press 1 from the Enrollment Menu. First you’ll be asked to
enter the PIN number for the employee. This is the same number used to
identify the employee on the timekeeping web site. The employee will be
asked to touch the fingerprint sensor a total of four times: three to capture
the enrollment and once more for verification.
The system does not store or record any fingerprint images. The only thing
stored is a numerical series of key points taken from the finger. These are
called “minutiae.” Fingerprint minutiae are landmarks—encoded as a series
of numbers—that can be used to verify whether a fingerprint is the same.
The original fingerprint image cannot be recreated from minutiae.
Getting Good Results
Using this criterion as well as several others, through the process of
elimination, the reader can quickly determine which prints cannot match,
until it narrows it down to a single best match. For this process to work
properly, it is vital that the central part of the finger containing this vital
feature be placed in the middle of the sensor. Without proper training,
employees may place their fingers too high or too low, making accurate
distinction difficult or impossible. For optimum results, train users to find
this important part of their fingerprint so they will know how to correctly
position their finger on the sensor.
We strongly recommend that immediately before enrollment, each
person completely wash then completely dry his or her hands. It is always
important to have high image quality, but even more so for the enrollment
process. Poor image quality at enrollment will cause poor matching.
A supervisor should ensure that the employees touch the sensor the proper
way. The finger should be touched firmly enough to the sensor so that the
skin is flattened and easily read. The center point of the finger should be in
the center of the sensor.
Re-downloading Fingerprints
At any time, you can force the clock to re-download the entire fingerprint
database from the server. This is done by selecting option 5 from the menu.
You can choose whether the clock should download prints from other
clocks (assuming you have more than one), or whether it should download
only prints enrolled on the same clock.
If multiple fingers need to be enrolled for the same person an additional
code can be associated with that employee (up to 3 unique ID’s) on the
timekeeping website. A different finger could then be enrolled with each
unique ID number.
8
9