1
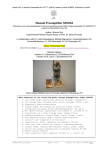
PrintPartner 12V
PAGE PRINTER
PRODUCT DESCRIPTION
FUJITSU LIMITED
Communications and Electronics
Tokyo, Japan
(20) IS0 French (ID:1F)
REVISION RECORD
Edition
01
Date published
January 1998
Page
Revised contents
First issue
Specification No. C145-C031-0 1EN
The contents of this manual may be revised without prior notice.
All Rights Reserved, Copyright © 1998 FUJITSU LIMITED. Printed in Japan.
No part of this manual may be reproduced in any form without permission.
Address your comments and inquiries on this manual to:
FUJITSU COMPUTER PRODUCTS OF
AMERICA, INC.
2904 Orchard Parkway, San Jose
CA 95134-2022, U.S.A.
TEL: (l-408) 432-6333
FAX: ( l-408) 894- 1709
FUJITSU ITALIA S.p.A.
Via Nazario Sauro, 38
20099 Sesto S, Giovanni (MI), ITALY
TEL: (39-2) 26294-l
FAX: (39-2) 26294-201
FUJITSU CANADA INC.
2800 Matheson Boulevard East
Mississauga, Ontario L4W 4X5, CANADA
TEL: ( l-905) 602-5454
FAX: (l-905) 602-5457
FUJITSU KOREA LTD.
9th Floor, Korean Reinsurance Bldg.
80, Susong-Dong, Chongro-Gu
Seoul Special City, KOREA
TEL: (82-2) 739-3281
FAX: (82-2) 739-3294
FUJITSU AUSTRALIA LIMITED
475 Victoria Avenue, Chatswood
N.S.W., 2067, AUSTRALIA
TEL: (61-2) 410-4555
FAX: (61-2) 41l-8603
FUJITSU NORDIC AB
Kung Hans Väg 12
S-191 76 Sollentuna, SWEDEN
TEL: (46-8) 626-6000
FAX: (46-8) 626-6711
FUJITSU DEUTSCHLAND GmbH.
Frankfurter Ring 211
80807 Munchen, GERMANY
TEL: (49-89) 32378-O
FAX: (49-89) 32378-100
FUJITSU (SINGAPORE) PTE. LTD.
75 Science Park Drive
#02-06 CINTECH II, SINGAPORE 0511
TEL: (65) 777-6577
FAX: (65) 777-8794
FUJITSU ESPANA, S.A.
Almagro 40,28009 Madrid, SPAIN
TEL: (34-l) 581-8400
FAX: (34-l) 581-8125
FUJITSU SYSTEMS BUSINESS
(MALAYSIA) SDN. BHD.
Fujitsu Plaza, 1A, Jalan Tandang 204
P.O. Box 636 Pejabat Pos Jalan Sultan
46770 Petaling Jaya
Selangor Darul Ehsan, MALAYSIA
TEL: (60-3) 793-3888
FAX: (60-3) 793-0888
FUJITSU EUROPE LTD.
2 Longwalk Road, Stockly Park, Uxbridge
Middlesex UB 11 1 AB, ENGLAND
TEL: (44-8 1) 573-4444
FAX: (44-8 1) 573-2643
FUJITSU FRANCE S.A.
1, place des Etats-Unis Silic 310
94588 RUNGIS Cedex, FRANCE
TEL: (33-l) 41-80-38-80
FAX: (33-l) 41-80-38-66
FUJITSU SYSTEMS BUSINESS
(THAILAND) LTD.
12th Floor, Olympia Thai Tower
444 Rachadapisek Road, Samsennok
Huaykwang, Bangkok 103 10, THAILAND
TEL: (662) 5 12-6066
FAX: (662) 512-6068
FUJITSU HONG KONG LIMITED
Room 2521, Sun Hung Kai Centre
30 Harbour Road, HONG KONG
TEL: (852) 827-5780
FAX: (852) 827-4724
FUJITSU TAIWAN LTD.
8th FL., NO. 170, Hung Tai Center
Tun Hwa N. RD., Taipei, TAIWAN
TEL: (886-2) 545-7700
FAX: (886-2) 717-4644
FUJITSU ICIM LTD.
Nagar Road, Pune 411 014, INDIA
TEL: (91-212) 681-528
FAX: (91-212) 680-238
FUJITSU LIMITED
Computer Products Business Group
Kamikodanaka 4- 1 - 1, Nakahara- ku
Kawasaki-shi 211, JAPAN
TEL: (81-44) 754-8633
FAX: (8 l-44) 754-8510
PREFACE
This manual gives the product specifications for the PrintPartner 12V (PP12V) page printers. The manual
provides prospective customers with required engineering specifications.
Chapter 1:
Describes the main features.
Chapter 2:
Gives the model configuration and equipment structure.
Chapter 3:
Gives the functional, electrical, environmental, and paper specifications.
Chapter 4:
Describes the control panel (LED indicators, LCD, and push-button switches). It also summarizes
control panel’s setup functions and the printer utility programs, MarkVision and PPMENU.
Chapter 5:
Gives information on the interface, its hardware specifications, and software specifications. It also
summarizes command sets.
Chapter 6: Explains maintenance.
Chapter 7:
Lists options and supplies.
Appendixes: Give information on symbol sets, fonts, and nameplate and label locations.
CONTENTS
CHAPTER 1
1.1
FEATURES
Fine Print Quality
1-1
l-3
1.2 Quiet Operation
1-3
1.3
l-3
Easy Paper Handling
1.4 User-Friendly Operation
l-3
1.5
High Reliability and Easy Maintenance
l-4
1.6
Compact Design (Small Footprint)
l-4
1.7
Wide Variety of Interfaces and Emulation
l-5
1.8 Environment Friendly
l-5
CHAPTER 2
.2-1
MODEL CONFIGURATION AND EQUIPMENT STRUCTURE
2.1 Model Configuration
2-l
2.2 Block Diagram
2-2
2.3 Structure
2-5
CHAPTER 3 SPECIFICATIONS
3-1
3.1 General Specifications
3-l
3.1.1 Printer mechanism
3-l
3.1.2 Printer controller
3-2
3.1.3 Interfaces
3-3
3.1.4 Fonts
3-3
3.1.5 Paper
3-4
3.1.6 Control panel
3-4
3.1.7 Printer utility programs
3-5
3.1.8 Other specifications
3-5
3.2 Electrical Specifications
3-5
3.3 Environmental Specifications
3-6
3.4 Physical Specifications
3-6
3.5 Reliability
3-7
3.6
3-7
Protection and Limits
3.7 Paper Specifications
3.7.1
Type, size, and thickness
3-8
3-8
3.7.2 Printing area
3-9
3.7.3 Other precautions
3-11
3.7.4 Paper storage
3-l 1
i
CHAPTER 4
CONTROL PANEL AND PRINTER UTILITY PROGRAMS
4-l
4.1 Control Panel
4-1
4.1.1 Indicators
4-1
4.1.2 LCD
4-2
4.1.3 Buttons
4-2
4.1.4 Menu modes
4-2
4.2
Printer Utility Programs
4-4
4 . 2 . 1 MarkVisionTM
4-4
4.2.2 PPMENU
4-6
4.3 Printer Drivers
4-8
4.3.1
Standard printer drivers for Windows 3.1,95, and NT 4.0
4-9
4.3.2
Standard printer drivers for Windows NT 3.5 1
4-10
CHAPTER 5
INTERFACE INFORMATION
5-l
5.1 Overview
5-l
5.2 Parallel Interface Specifications
5-1
5.2.1 Hardware requirements
5-I
5.2.2 Connector pin assignment
5-2
5.2.3 Data transmission timing
5-5
RS-232C Serial Interface
5-7
5.3.1 Hardware requirements
5-7
5.3.2
Connector pin assignment
5-8
5.3.3
Serial data format
5.3
5-9
5.3.4 Cable connection diagrams
5-9
5.3.5 Data protocols
5- 10
5.4 Command Sets
5.4.1 Printer emulation
5-12
5-12
5.4.2
HP LaserJet 5 PCL mode command set summary
5-13
5.4.3
HP LaserJet 5 HP-GL/2 mode command set summary
5-19
5.4.4
HP LaserJet 5 PJL mode command set summary..
5-23
CHAPTER 6
MAINTENANCE
6-1
6.1 Overview
6-l
6.2 Preventive Maintenance
6- 1
6.3 Maintenance Philosophy
6- 1
6.4 Diagnostics
6- 1
ii
6.4.1 ROM/RAM check
6- 1
6.4.2 Error display
6- 1
6.5 Maintenance Tool
Self test printing
6-2
Recommended Spare Parts
6-2
6.5.1
6.6
6-2
CHAPTER 7
OPTIONS AND SUPPLIES
7-1
7.1 Options
7-1
7.2 Consumables
7-2
7.3
7-2
Periodic Replacement Parts
7.4 Documentation
7-2
APPENDIX A SYMBOL SETS
A-l
APPENDIX B RESIDENT FONTS
B-l
APPENDIX C PRINTER LOGO AND LABELS
c-1
...
111
ILLUSTRATIONS AND TABLES
Figure 1.1 PrintPartner 12V printer ..............................................................................................................
l-2
Figure 1.2 Printer dimensions .......................................................................................................................
l-4
Figure 1.3 Optional interfaces and emulation ...............................................................................................
l-5
Figure 2.1 Printer block diagram ..................................................................................................................
2-2
Figure 2.2 Structure ......................................................................................................................................
2-6
Figure 2.3 Laser unit .....................................................................................................................................
2-8
Figure 2.4 Printer mechanism .......................................................................................................................
2-10
Figure 2.5 Power supply unit ........................................................................................................................
2-l I
Figure 2.6 Control board ...............................................................................................................................
2-12
Figure 3.1 Printing area ................................................................................................................................
3-9
Figure 3.2 Printable area (HP LaserJet 5 emulation) .................................................................................... 3-10
Figure 4.1 Control panel ...............................................................................................................................
4- I
Figure 4.2 Printer utility programs ...............................................................................................................
4-4
Figure 5.1 Parallel interface input circuit .....................................................................................................
5-l
Figure 5.2 Parallel interface output circuit ...................................................................................................
5-2
Figure 5.3 Parallel interface connector .........................................................................................................
5-2
Figure 5.4a Data transmission timing (compatible mode) ............................................................................ 5-5
Figure 5.4b Data transmission timing (nibble mode) .................................................................................. .5-6
Figure 5.5 RS-232C interface input circuit ...................................................................................................
5-7
Figure 5.6 RS-232C interface output circuit .................................................................................................
5-7
Figure 5.7 Serial interface connector ............................................................................................................
5-8
Figure 5.8 RS-232C data format ...................................................................................................................
5-9
Figure 5.9a Example of RS-232C cable wiring (25-pin connector at coputer side). ................................... .5-9
Figure 5.9b Example of RS-232C cable wiring (g-pin connector at coputer side) ...................................... 5-10
Table 5.1
Parallel interface signals .............................................................................................................
5-2
Table 5.2
RS-232C interface signals ..........................................................................................................
5-8
Figure 1.1 PrintPartner 12V printer
l-2
1.1
Fine Print Quality
The PrintPartner 12V uses electrophotography and a laser unit that is compact, easy to control, and consumes
very little power.
The print resolution is 600 x 600 dpi (23.6 lines/mm), for example, 64 x 64 dots for 8-point characters. Natural
curves and very fine lines are printed clearly.
The print resolution is equivalent to 2,400 x 600 dpi (horizontally 95.4 lines/mm and vertically 23.6 lines/mm),
for example, about 256 x 64 dots for 8-point characters. Graphic and curve are printed quite smoothly. The
print resolution is equivalent to 1,200 dpi using the smoothing technology FEIT (Fujitsu Enhanced Imaging
Technology). FEIT is valid in 600 dpi mode.
See Appendix B about font samples.
1.2 Quiet Operation
The PrintPartner 12V generates about 48 dBA of sound pressure during printing making it quiet enough for an
office environment.
1.3 Easy Paper Handling
The PrintPartner 12V uses a 250-sheet fixed size paper tray (tray 1). An additional 500-sheet paper tray is
offered with an optional paper feeder (tray 2).
Paper is loaded automatically from the paper tray and ejected to the top cover (output stacker) face-down in the
correct order.
The manual feed slot and an optional multi-function feeder are provided for printing on the media shown below.
The rear stacker is also provided for this printing.
l
l
l
l
l
Envelopes
Adhesive labels
Transparencies
Heavy or special paper
Nonstandard size paper
1.4 User-Friendly Operation
The control panel consists of eight push-button switches, four LED indicators, and an LCD (two lines by sixteen
characters).
The LED indicators and LCD provide printer status information and error messages.
Print menu, such as a message language, paper size, and line spacing, can be set easily using the control panel or
remotely using the utility programs, MarkVision and PPMENU.
l-3
1.5
High Reliability and Easy Maintenance
The PrintPartner 12V design has been simplified. The print unit and the toner bottle can be removed and
replaced easily without getting hands dirty.
A variety of functions are integrated onto the single printed circuit board (main controller, mechanism controller,
and driver).
The self-diagnostics function checks printer hardware.
Almost all printer operations and regular maintenance procedures are performed from the front, right side, and
rear of the printer. The side cover is removable.
The above items have improved reliability and made maintenance easier, both for general users and service
technicians.
1.6
Compact Design (Small Footprint)
The PrintPartner 12V is so compact (it has a small footprint) that it fits easily beside a personal computer on the
same desk. Also, it is so light-weight that it can be transported easily.
Figure 1.2 shows the printer’s dimensions.
Figure 1.2 Printer dimensions
l-4
1.7
Wide Variety of Interfaces and Emulation
The PrintPartner 12V comes standard with a bidirectional Centronics parallel interface (IEEE1284 TYPE-B
connector) and an RS-232C serial interface (D-SUB 9-pin connector). Four optional interface boards, LocalTalk
(AppleTalk compatible), Ethernet (TCP/IP and NetWare corresponding), bidirectional parallel (Centronics
IEEE1284 TYPE-B connector), and IrDA are offered.
The PrintPartner 12V comes standard with the HP LaserJet 5 emulation. Two optional emulation cards,
PostScript level 2 compatible and IBM/EPSON compatible, are offered.
An interface board slot and an emulation card connector are provided. Figure 1.3 shows installation of the
interface board and the emulation card.
Ex.
Emulation card
Standard
interface
connectors
Bottom connector
Figure 1.3 Optional interfaces and emulation
1.8 Environment Friendly
The PrintPartner 12V uses a newly-developed printing process that does not generate toner waste. This means
that the printer uses toner effectively and an operator does not need to deal with wasted toner.
The power-saving design (intelligent heater on/off sensing) reduces power consumption.
Ozone emission is low, so there is no need to exchange ozone filter as regular maintenance.
Plastic parts are marked with the plastic content for ease of product recycling.
The user-selectable economy mode extends the lifetime of the toner bottle.
1-5
CHAPTER 2 MODEL CONFIGURATION AND
EQUIPMENT STRUCTURE
This chapter gives the model configuration and equipment structure. Printer specifications differ between the
120V version printers and the 220V version printers.
2.1 Model Configuration
Input power
12OV, 50/60 Hz
PrintPartner 12V
page printer
220-240 V, 50/60 Hz
Options
Paper tray (tray 1)
A4, A5, Letter, Legal, Executive
Paper tray (tray 2)
A4, A5, Letter, Legal, Executive
Paper feeder (feeder unit + paper tray (tray 2))
A4, Letter
Feeder unit (paper feeder without paper tray)
Multi-function feeder (MFF)
Extended interface board
LocalTalk (AppleTalk compatible)
Ethernet C or D (NetWare, TCP/IP, and EtherTalk corresponding)
IrDA (Infrared adapter)
Centronics (bi-directional parallel, IEEE1284 type B connector)
Memory card (SIMM)
Memory expansion card (1,2,4,8, 16,32 MB)
Barcode card (barcode and OCR fonts)
Flash ROM card (4 MB, for PCLSe only)
Emulation card
IBM/EPSON card (IBM Proprinter 4202 or Epson EX-800 compatible)
FPS (PostScript level 2 compatible)
This printer is shipped with a fixed size of paper tray (A4 or letter size).
The resident emulation is the HP LaserJet 5 (PCL6).
The standard interfaces are a Centronics parallel (bi-directional) and an RS-232C serial.
2-l
2.2 Block Diagram
Figure 2.1 shows a block diagram of the PrintPartner 12V printers.
Figure 2.1 Printer block diagram
(1) Printer mechanism
The printer mechanism consists of a printing unit, paper feed mechanism, power supply, and a controller.
The printing unit consists of a laser unit, a print unit (photoconductive drum, developing magnet roller,
precharger, and toner), a transfer charger, and a fuser unit.
2-2
Images are printed using an electrographic process:
The laser unit, modulated by video signals, sends light to the photoconductive drum and generates a latent
electrostatic image that is converted to a toner image in the print unit. The paper attracts the toner image
from the photoconductive drum, and the image is transferred to the paper.
Heat generated by the heat roller fuses the transferred toner image to the paper, and the page is ejected from
the printer module.
The photoconductive drum is then cleaned for the next printing.
The above operations are continuous and enables uninterrupted quality printing.
(2) Controller
The controller controls the interfaces to the computer, mechanism controller, and control panel.
(3) Control panel and MarkVision/PPMENU
The control panel has LED indicators, LCD, and push-button switches. The LED indicators display basic
printer status, for example, whether the printer is online, whether the power supply is on, and whether an
error has occurred. The LCD shows status or error messages. The push-button switches control printer
operation, for example, resetting the printer and printing a status report.
The printer setup can be changed using the control panel (menu mode). It can also be changed remotely
using the printer utility programs, MarkVision and PPMENU.
See Chapter 4 for details on control panel operation and MarkVision/PPMENU.
(4) Interfaces
A bi-directional Centronics parallel and an RS-232C serial interface are standard. Other interfaces are
available as an accessory. See Chapter 5 for details.
(5) Memory Expansion cards
The RAM card is used to expand the resident RAM memory (4 MB) to download soft fonts or to process
more data.
The RAM card is a SIMM type board and its memory capacity is lM, 2M, 4M, 8M, 16M, or 32M bytes.
RAM cards are installed to the top and middle SIMM connectors on the controller board. So, up to 64 MB
can be added.
2-3
(6) Emulation card
The emulation card is used to add a printer emulation.
The emulation card is a SIMM type board and is installed to the bottom SIMM connector on the controller
board.
An FPS card (PostScript level 2 compatible emulation) and an IBM/EPSON card are available.
2-4
2.3 Structure
The standard printer without options has the following structure, shown in Figure 2.2. The main power supply
and fuser unit differ with AC input voltage (120 or 220 - 240 VAC).
Print Partner 12V
2-5
Figure 2.2 Structure
2-6
(2) Laser unit
The laser unit is provided in the upper cover.
Images are written on the photoconductive drum of the print unit by laser beams emitted from the laser unit.
Caution label
Figure 2.3 Laser unit
: Do not look at a laser beam directly.
This label is put on the laser unit.
2-8
(3) Printer mechanism
Metal frame
This frame is the basic frame of he printer mechanism and made of sheet metals.
All parts are tightened with screws or snap-fitted to this frame.
The fan (FANl) is installed on this frame.
Process drive mechanism
This mechanism consists of the mechanism that drives the print unit and fuser unit, a DC motor, and drive
system (gears, etc.).
Paper pick-up mechanism
This mechanism feeds paper loaded in the paper tray to the base frame of the printer mechanism sheet by
sheet.
This mechanism consists of a stepping motor and drive system (gears, etc.).
Base frame
This frame is main part of the mechanism that transports paper and transfers toner to the paper.
Sensor that detects the picked paper
Transfer unit (service technicians replaceable)
Paper feed mechanism
(A stepping motor, resist roller, paper feed roller, and pick-up roller are tightened with screws or snapfitted to this frame.)
Paper guide assembly 2
This guide transports printed paper to the output stacker. This guide is snap-fitted to the frame on which the
paper eject roller is installed.
The stacker-full sensor is installed on this assembly.
Print unit guide
This guide is used to install the print unit in the printer.
The cover open switch that detects opening and closing of the upper door is installed on the left guide.
This guide is snap-fitted to the frame.
2-9
Volume board
The volume board has a variable resistor to control the print density. The control dial is accessible when the
upper door is open.
Multi-function feeder board (MFF board)
This board has a connector for the optional multi-function feeder (MFF).
Figure 2.4 Printer mechanism
(4) Print unit (user replaceable)
The print unit consists of a photoconductive (OPC) drum unit and a developing unit. It lasts about for
40,000 pages printed at 5% coverage in continuous print mode at 25°C (77°F) and 50% RH.
It can be changed easily by the user.
Toner bottle (user replaceable)
The toner bottle contains new toner. It lasts for about 5,000 pages printed at 5% coverage in continuous
print mode. However, the toner bottle installed on the new print unit has a shorter life. It can be changed
easily by the user.
2-10
(5) Power supply unit
This unit consists of the following parts:
Main power supply
- Power switch
- AC inlet
- Fuser unit
- Cover
- Paper guide assembly 1
- Paper eject sensor
- Paper guide
- Guide open switch
Fan (FAN 2)
Main power supply
The main power supply supplies +5 VDC and +24 VDC for the logic devices and printer mechanism.
There are two types of power supplies: one for input voltage of 120 VAC and the other for 220 to 240
VAC.
The main power supply is equipped with a power switch and an AC inlet.
The main power supply is attached with screws to the cover of the fuser unit.
Figure 2.5 Power supply unit
Fuser unit (service technicians replaceable)
The fuser unit has an aluminium heat roller and a pressure roller. It fixes the image of toner particles on the
paper using heat and pressure.
It has a temperature sensor and a thermal fuse for safety.
It lasts about for 100,000 pages printed at 5% coverage in continuous print mode. There are two types: one
for input voltage of 120 VAC and the other for 220 to 240 VAC.
2-11
Cover
This cover, classified as a component belonging under the fuser unit category, covers the main power
supply. It is attached on the bottom of the fuser unit and the power supply is installed under (inside) the
cover. The paper guide assembly 1 is also installed at the edge of the cover.
Paper guide assembly 1
This assembly transports paper from the fuser unit to the eject roller.
When a paper jam occurs, the paper guide assembly can be drawn out to remove the jammed paper.
A guide open switch detects normal installation of the paper guide assembly.
Fan (FAN 2)
This fan ventilates the power supply unit.
This fan is tightened with screws to the right side of the power supply unit.
(6) Shield plate
This plate covers the control board.
This plate is tightened with screws to the right side of the printer mechanism frame.
(7) Control board
The control board is the main controller of this printer. It has four ROMs for firmware, mechanism control,
and interface control. It has connectors for a Centronics interface cable, an RS-232C serial interface cable,
an optional interface board, an optional emulation card, and optional memory expansion cards.
Figure 2.6 Control board
2-12
(8) Sensor board assembly
Sensor boards
There are two sensor boards.
They detect the presence of paper, the size of paper, paper empty, and paper ejection.
High-voltage power supply board (I-IV board)
The high-voltage power supply, which supplies high voltage to the pre-charger and the transfer unit, is
tightened with screws to the left side of the sensor board assembly.
(9) Paper tray
The paper size is universal among A4, Letter, and Executive. The capacity of the paper tray (tray 1) is 250
sheets for 0.09 mm thick paper. An optional 500-sheet paper feeder (tray 2) is provided. Its paper size is
universal among A4, A5, Letter, Legal, and Executive.
(10) Multi-function feeder (MFF)
The multi-function feeder is optional. It feeds envelopes, labels, transparencies, heavy paper, and
nonstandard size paper. The capacity is 100 sheets for 0.09 mm thick paper or 30 envelopes.
2-13
CHAPTER 3 SPECIFICATIONS
This chapter gives detailed specifications of the PrintPartner 12V, starting with general specifications like printer
mechanism specifications and going on to electrical specifications such as input voltage and power consumption,
environmental specifications, and paper specifications.
3.1 General Specifications
3.1.1 Printer mechanism
Color of Enclosures
Light gray (Munsell No. 2.5Y 7.2/0.4)
Printing Technology
Laser unit and electrophotography
Developing
Toner and magnetic roller
Fusing
Fuser unit (heat roller)
Printing Speed
A4 size (tray 1):
Resolution
600 x 600 dpi
Smoothing
Equivalent to 2,400 dpi (horizontally) with Fujitsu Enhanced
Imaging Technology (FEIT)
Warm-up Time
At 25°C (77°F):
12 pages per minute
60 seconds or less
Warm-up Time means the time that the printer takes to
become ready to print (READY message is displayed) after
the power switch is turned on.
First Print Time
At 25°C (77°F):
30 seconds or less
First Print Time means the time that it takes to start picking up
an A4 size paper from the paper tray and eject to the output
stacker.
Copy
Up to 99 copies
Recommended Duty Cycle
5,000 pages per month (about 250 pages per day)
Up to 35,000 pages per month
3-1
3.1.2 Printer controller
Main Controller
NKK NR4645 (75 MHz)
LSI specially designed for DMA
Partial bit map
Emulation
Automatically sensed or selected by the control panel (menu mode)
or the host (printer utility programs, MarkVision and PPMENU)
Resident:
HP LaserJet 5 (PCL6)
Optional:
PostScript level 2 compatible
IBM Proprinter 4202/EPSON EX-800 compatible (9-wire dot
matrix printer)
Firmware ROM
Flash ROM or mask ROM on the controller board
System RAM (resident):
4M bytes
RAM expansion card (SIMM, optional):
IM, 2M, 4M, 8M, 16M, and 32M bytes
Barcode SIMM card (optional)
For barcode printing
Scalable barcode (PCL5e only)
Scalable OCR-A/OCR-B fonts
HP Jet CAPS commands compatible
Flash SIMM card (optional)
For overlay printing
4MB capacity
Able to store overlay data permanently (Printer driver has an
overlay manager.)
Transmission time saved
For PCL5e only
SIMM Connectors
Three connectors
Top & middle connectors (2 slots):
RAM cards for memory expansion
Bottom connector (1 slot):
Emulation card
Printer right side view with the side cover open
3-2
3.1.3 Interfaces
Computer Interfaces
Standard:
Automatically sensed by the printer
l
Bidirectional parallel (Centronics, IEEE 1284 TYPE-B, ECP
mode corresponding)
l
Optional:
Serial (RS-232C, D-SUB 9-PIN)
One of the following optional interfaces can be used at a time.
l
LocalTalk (AppleTalk compatible, FPS card required)
l
Ethernet C or D (NetWare, TCP/IP, and EtherTalk corresponding)
l
l
Bidirectional parallel (Centronics, IEEE 1284 TYPE-B)
IrDA (Infrared interface adapter with the following specs.)
- 1.5 m cable, infrared receiver movable to up/down/left/right,
power supplied from printer
- IrDA 1.0 SIR and 9600 to 115,200 bps
- Windows 95 IR driver 2.0
3.1.4 Fonts
Fonts
Selectable via application software or from the control panel (menu
mode) or the host (printer utility programs, MarkVision and
PPMENU)
Standard:
HP LaserJet 5 emulation: 1 bitmap font and 114 scalable fonts
1 bitmap
Line Printer
114 scalable
Antique, Aries, Leos, Libra, EF Bodoni,
Bodoni, EF Clarendon, Cooper,Courier,
Century Schoolbook, URW Clarendon,
Coronet, Saturn, Dorado, Goudy Old
Style, Garamond No. 8, EFGrandera,
Letter Gothic 75, Mauritius, Nimbus Sans,
Nimbus Sans Condensed, Nimbus Roman,
Taurus, Gemini, EFRivero, Morrison,
Lyra, Cassiopeia, Symbol, Sorts, Saturn
Monospaced
Downloading:
Bit map fonts and scalable fonts (outline fonts)
The user’s own fonts and logos
3-3
Font Orientation
Portrait or landscape, rotatable in any direction
Paper
feed
Portrait
Symbol Sets (HP LaserJet 5 emulation)
Landscape
Selectable via application software or from the control panel (menu
mode) or the host (printer utility programs, MarkVision and
PPMENU)
Standard:
USASCII, ECMA-94, Roman-8 and the following Roman
extensions
(IS0 IRV, IS0 Italian, IS0 Swedish, IS0 Spanish, IS0
Portuguese, IS0 Norwegian)
International Symbol Sets
Selectable via application software
Some symbol sets for several languages
(American English, British English, French, German, Italian,
Swedish, Spanish, Portuguese, Norwegian, etc.)
3.1.5 Paper
Paper specifications
See Section 3.7.
Paper tray
A4 or Letter size at shipment for both standard and optional trays
Capacity:
Stacker
250 sheets (0.09 mm thick paper) for standard tray
500 sheets (0.09 mm thick paper) for optional tray
Face-down (upper cover) and face-up (rear stacker)
Capacity:
250 sheets (0.09 mm thick paper) for face-down stacking
20 sheets (0.09 mm thick paper) for face-up stacking
Capacity may decrease depending on paper types and paper
curl conditions.
Paper Feed Control
Selectable via application software or from the control panel (menu
mode) or the host (printer utility programs, MarkVision and PPMENU)
Paper tray:
Automatic feeding
Manual feed slot:
Manual insertion
3.1.6 Control panel
3-4
Push-button Switches
READY, FORM FEED, CONT., TRAY SELECT, MENU, ENTER, +, -,
RESET, RESET MENU, MFF PAPER SIZE, SELF TEST, PRINT FONT
LED Indicators
POWER, ONLINE, DATA, ERROR (basic status)
LCD
2 lines by 16 characters (status and error messages)
Print density dial
Accessible when the upper door is opened
3.1.7 Printer utility programs
MarkVision™ by Lexmark
Remotely monitors printer status and displays optional printer’s
features. MarkVisionT M runs in Windows 95 or Windows NT 4.0.
PPMENU
Remotely sets up printer features. PPMENU runs in PC DOS 5.02,
MS DOS 3.3 or higher, or Windows 3.X or Windows 95 in DOS
full screen mode.
3.1.8 Other specifications
Standard and Regulations
Safety:
The following are approved.
UL 1950
FDA 21 CFR Chapter 1, Subchapter J Class I
CNAKSA-C22.2 No.950
EN60950
EN60825 Chapter 1
Radiation (EMI):
FCC Part 15 Class B
CE mark
Canadian standard (DOC) class B
VCCI class B
C-Tick mark AS/NZS 3548: 1995 class B
(complies with Class A when the Ethernet interface board is
used.)
Acoustic Noise
Sound pressure level (bystander position)
Printing:
48 dBA
Sleep mode:
Background noise level
Declared noise emissions in accordance with IS09296 and
IS07779 and EN 27779- 1991 (less than 70 dB A)
Ozone Emission
0.1 ppm or less (average)
This value is for eight-hour continuous printing in a room with a
volume of 1000 cubic feet without air ventilation at 25°C, 50% RH.
It however depends on printing conditions such as office environments and printing cycle.
3.2 Electrical Specifications
Input AC Power
120 VAC + l0%, 50/60 Hz +2/-4 Hz, single-phase
220 to 240 VAC +6%/-10%, 50/60 Hz +2/-4 Hz, single-phase
Power Consumption
Maximum 600 W
Average 450 W or less (operating)
30 W or less (sleep mode)
3-5
3.3 Environmental Specifications
Temperature
Humidity
Operating
10 to 35°C (50 to 95°F)
Storage
Unpacked: 0 to 40°C (32 to 104°F)
Packed: - 20 to 40°C (- 4 to 104°F)
Gradient
15°C/h or less
Operating
20 to 80% RH
Storage
Unpacked: 20 to 80% RH (noncondensing)
Packed: 10 to 95% RH (noncondensing)
Gradient
30% RH/day or less
Max wet bulb
29°C (84°F)
Altitude (Packaged)
0.25 atmospheric pressure (10300 m, 34000 feet)
Vibration
Operating
0.2 G (printing quality not guaranteed)
Idle
0.5 G
Operating
Withstanding a drop test from 3 cm-height aslant.
Drop Test
(printing quality not guaranteed)
Packed
Withstanding a 45-cm (18-in) drop test.
Tilt
Operating
2°
Electrostatic Strength
9 kV minimum (measuring instrument: Capacitor, 150 150 pF)
When executing test printing by the contact method (10 Hz, 3 minutes)
To keep print quality good:
l Keep the printer away from direct sunlight or light beam, high temperature, high humidity, and dust.
l Leave space around the printer for air ventilation.
l Place the printer on a sturdy, level surface.
3.4 Physical Specifications
Dimensions
Weight
3-6
Width
376.5 mm (14.8 inches)
Depth
385 mm (15.2 inches)
Height
251 mm (9.9 inches)
17 kg (37.5 pounds)
3.5 Reliability
MTBF
4000h
(MTBF: powered on for eight hours per day in the recommended
duty cycle)
MTTR
0.5 h
Machine Life
About 500,000 pages (A4 paper) or 5 years, whichever comes first.
Consumables Life (average)
Print unit
About 40,000 pages of 5% coverage printing,
continuous printing on A4 paper or about one
year after unpacking, whichever comes tirst.
The print unit life depends on print coverage,
paper type and operating and/or storage conditions.
Toner bottle
About 5,000 pages of 5% coverage continuous
printing on A4 paper.
About 2,500 pages of 5% coverage continuous
printing on A4 paper when installed on a new
print unit.
The print unit and/or toner bottle can be changed
by the operator.
Fuser unit
About 100,000 pages of continuous printing on
A4 paper.
The fuser unit can be changed by a service
technician.
3.6 Protection and Limits
Power to the printer is automatically turned off to protect the mechanism, control unit, and power supply when
the following abnormal conditions are detected:
l
High temperature of the fuser unit (overheating or malfunction)
Short-circuit or cut-off of the fuser unit’s thermal sensor
. Short-circuit of a motor driver
l
l
Fire alarm check of a motor
3-7
3.7 Paper Specifications
The PrintPartner 12V prints on a variety of types and sizes of paper, so long as they meet the requirements
shown below. Pretest unspecified or unusual printing materials to ensure that they do not cause a problem in
charging, heating, or paper feeding.
3.7.1
Type, size, and thickness
Type
Paper tray:
Plain cut-sheet photocopy paper (equivalent to Xerox 4024) and
bond paper
Manual feed slot or MFF:
In addition to the above, overhead projector transparencies (equivalent to 3M 731), envelopes (COM-10, Monarch, C5, DL, and B5),
and labels
Size
Paper tray:
Manual feed slot or MFF:
A4
210 mm x 297 mm (8.3 x 11.7 in)
A5
148 mm x 210 mm (5.8 x 8.3 in)
Letter
215.9 mm x 279.4 mm (8.5 x 11 in)
Legal
215.9 mm x 355.6 mm (8.5 x 14 in)
Executive
184.2 mm x 266.7 mm (7.25 x 10.5 in)
Min. 100 mm wide x 148 mm long (3.94 x 5.81 in)
Max. 216 mm wide x 356 mm long (8.5 x 14 in)
Thickness (weight)
Practical values depend on paper quality.
Paper tray:
60 to 90 g/m² (50 to 70 kg or 17 to 24 lb. bond)
Manual feed slot or MFF:
60 to 105 g/m2 (50 to 90 kg or 17 to 28 lb. bond)
Special paper (transparency films, envelopes, adhesive labels)
Note:
The ream weight is given in parentheses: kilogram weight of 1000 sheets of 788 mm x 1091 mm paper (1.16
g/m2) or pound weight of 500 sheets of 17 inch x 22 inch paper (3.76 g/m’)
3-8
3.7.2 Printing area
No characters can be printed outside the bold line in Figure 3.1 because of the physical restrictions of the
printing mechanism.
Figure 3.1 Printing area
3-9
Printable areas vary with the emulation. Figure 3.2 shows the printable areas for the HP LaserJet 5 emulation.
See Programmer’s Manuals for other emulations.
A: Physical page width
B: Physical page length
C: Left print-inhibited area
D: Right print-inhibited area
E: Top print-inhibited area
F: Bottom print-inhibited area
Unit: dot (l/600 in)
Size
Legal
Letter
Executive
A4
A5
B
C
D
E
F
8.5 x 14 in
8.5 x 11 in
7.25 x 10.5 in
210 x 297 mm
A
5100
5100
4350
4960
8400
6600
6300
7014
150
150
150
142
150
150
150
142
100
100
100
100
100
100
100
100
148 x 210 mm
3496
4960
142
142
100
100
Width x Length
Landscape made
A: Physical page width
B: Physical page length
C: Left print-inhibited area
D: Right print-inhibited area
E: Top print-inhibited area
F: Bottom print-inhibited area
Printable area
Print-inhibited
area
Size
Legal
Letter
Executive
A4
Width x Length
8.5 x 14 in
8.5 x 11 in
7.25 x 10.5 in
2 10 x 297 mm
A
8400
6600
6300
7014
B
5100
5100
4350
4960
C
120
120
120
118
D
120
120
120
118
A5
148 x 210 mm
4960
3496
118
118
Figure 3.2 Printable area (HP LaserJet 5 emulation)
3-10
Unit: dot (l/600 in)
F
E
100
100
100
100
100
100
100
100
100
100
3.7.3 Other precautions
l
Use good-quality paper.
l
Ensure that paper is not wrinkled or curled.
l
Handle and store paper carefully to make sure they are not warped or damaged.
l
Do not use stapled paper or paper having metal parts. They will seriously damage the photoconductive drum.
l
Select envelopes from the following five types: COM-10, Monarch, CS, DL, and B5.
l
Do not use “Unacceptable” envelopes and labels illustrated below.
Envelopes:
Labels:
Unacceptable
Acceptable
‘Carrier sheet is exposed.
3.7.4 Paper storage
To avoid problems with print quality and jams, store paper as follows:
l
Do not expose paper to moisture or direct sunlight. Overly damp paper may cause electrostatic charge to be
lost. Excessively dry paper may cause undesired electrostatic charge. Both cause poor print quality.
l
Store remaining paper in tits original package, if possible. Otherwise, repackage them.
l
Storing paper vertically may cause paper to curl, and cause jams.
CHAPTER 4 CONTROL PANEL AND PRINTER
UTILITY PROGRAMS
4.1 Control Panel
The control panel consists of four LED indicators, an LCD (two lines by sixteen characters), and eight pushbutton switches.
Figure 4.1 Control panel
4.1.1 Indicators
The indicators show the printer’s status, as follows:
Main meaning
POWER: Indicates printer power is on.
ONLINE: Indicates the printer is online and ready to print.
DATA: Flashes when data is being sent from the computer. Lights steadily when the printer buffer contains unprocessed data.
ERROR: Indicates an error has occurred. Details are indicated by the message displayed in the LCD.
4-1
4.1.2 LCD
The liquid-crystal display (LCD) shows status and error messages with two lines by sixteen characters.
l
Error message informs the user of a condition requiring an action, such as TRAYn PAPER OUT, COVER
OPEN, or PAPER JAMn
l
l
Status message informs the user of a condition requiring no action, such as WARMING UP or SELF TEST
A certain status message informs the user of a condition requiring an action, such as TONER LOW or
REPLACE PARTS
4.1.3 Buttons
One or two functions are assigned to a button. To use the functions represented by the top labels, simply press
the button. To use the functions represented by the bottom labels, press and hold down the button for five or
more seconds.
4.1.4 Menu mode
The menu mode allows the user to change the printer’s defaults using the four buttons on the control panel. The
control panel has the menu mode to configure the printer to suit the requirements of user‘s computer, software,
and documents. The menu mode is structured as a tree consisting of submenus, items, and options as shown in
the next page.
4-2
The following shows the structure of the menus in menu mode. An asterisk (*) indicates a default option,
Menu Mode
Page Format Menu
E
I
-PCL Font Menu
-PCL Menu
M e n u
- Config Menu
- Parallel Menu
- Serial Menu
- Network Menu
- 001 l to 999
Paper/Envelope
Orientation
- A4* (Europe), A5 Letter* (USA), Legal, Executive, COM-10, DL, Monarch, 85, C5
- Portrait’or Landscape
Form Lines
- 060* (USA), 064* (Europe), or 005 to 128
Page Protect
- Auto*, On
Smoothing (FEIT) - On* or Off
- Quality Menu
- F P 8
Copies
Resolution
- 600* or 300 dpi
Economy Mode
- Off* or On
Thick Paper
-Off*or On
Font Source
- Internal’, Soft, SIMM
Font Number
- ooo*, 001) 002, . ..) N (depending on the font source, max. 999)
Pitch Size
- 0.44* to 99.99 (characters/inch, 0.01 increments)
Point Size
- 4.00* to 999.75 (point, 0.25 increments)
- Roman 8*, ISOL1, ISOL2, ISOL5, PC8 etc...
Symbol Set
Courier
- Regular’or Dark
Top Offset
- 0.0* or -25.0 to +25.0 (mm, 0.1 increments)
Left Off set
- 0.0 or -25.0 to +25.0 (mm, 0.1 increments)
A4 Print Width
- Normal* or 80 Columns/Line
Auto Attach FF
- No* or Yes
Auto CR
Auto LF
- LF* or LF+CR
Jam Recovery
- Off*or On
Print FPS Errors
- On* or Off
Job Timeout
- 0* or 10 to 300 (0: no check)
Wait Timeout
Manual Timeout
Model Selection
- 0 or 10 to 300* (0: no check)
- 40*, 0 or 10 to 300 (0: no check)
- Auto Model*, Memory Model, Speed Model
Personality
- Auto*, PCL, PS
Auto Continue
- Off* or On
I/O Timeout
- 15* or 5 to 300 (seconds)
I/O Buffers
- Auto*, 32K, 64K, 128K, 256K (bytes)
Power Save
Acknowledge
- On after 15 min*, 30 min, 60 min, 120 min, Off
- ACK Width 1* , ACK Width 2, ACK Width 3
Bi-direction
- On* or Off
NPAP Mode
- Auto’or On, Off
Baud Rate
- 1200,2400,4800,9600*, 19200,38400,57600
Pacing
DTR Porality
- DTR* or XorVXoff
- Hi* or Low
ROBUST XON
- On* or Off
NPAP Mode
- Auto’or On
BootP
- No* or Yes
IP Address
- ##I, ###, ###, ### (### = 0, 1, 2, . . . . 255)
IP Netmask
- ###, ###, ###, ### (### = 0, 1, 2, . . . . 255)
IP Gateway
EtherTalk TR
- lst*, 2nd, 3rd, 4th, Non
- CR* or CR+LF
- ###, ###, ###, ### (### = 0, 1, 2, . ..) 255)
- Clear Warning - <Clear Warning> - Print Unit
4-3
4.2 Printer Utility Programs
The PrintPartner 12V is equipped with the three printer utility programs: Printer Management Utility Program,
MarkVision TM; Printer Remote Setup Utility Program, PPMENU; and Remote Printer Utility Program. This
section describes MarkVisionTM and PPMENU, standard for the PrintPartner 12V.
These utility programs can be used in the environments shown below:
Figure 4.2 Printer utility programs
4.2.1 MarkVisionTM
MarkVision TM by Lexmark is an integrated software for managing printers, stored in the “PrintPartner Software
CD-ROM” which comes with the printer. It has the following main functions:
l
Monitoring the printer
l
Displaying the printer status and features (including options) and statistics
l
Providing the printer control panel on the computer’s screen (remote control panel)
These functions are most effective and valuable for remote printers in network environments.
MarkVisionTM is automatically activated when an abnormal condition occurs in the printer. It operates in
Windows 95 environments only.
The remote control panel is quite a nice function that enables the user to easily and remotely operate the printer
even if the printer is set up remotely. MarkVision TM displays the printer control panel on the computer’s screen
and gives the user the exactly same functions as available with the control panel of the printer. The user can
perform a function by clicking a button on the computer’s screen without pushing a button of the printer’s
control panel.
4-4
To use MarkVisionTM , the computer and its operating environments must be as follows:
l IBM PC/AT or compatible or PS/2
l Microsoft Windows 95 (not Windows 3.1/3.11)
l VGA (640 x 400) or higher display
l Hard disk drive installed (9 MB essential for MarkVision™ )
l CD-ROM drive
Menu Bar Functions
The top menu bar offers three functions. The screen displays information and a graphic of the printer corresponding to the function selected. The bottom line displays printer status. Help is available from each screen.
The three functions of the top menu bar are as follows:
Status: Shows a printer status message which is identical to the message appearing on the printer control panel.
The status is also indicated graphically. The user can determine what the printer is doing and what the printer
needs to complete the task. It also includes information about the printer’s features including options which are
installed on the printer.
With an optional setting, the MarkVision™ icon flashes to let the user know there is a problem with the printer
even if the icon is minimized on the monitor.
Control Panel: Allows the user to remotely operate the printer. It displays an exact replica of the physical
control panel on the printer, on the monitor. The user can click the appropriate button on the screen by the mouse
as if he is pressing the real button on the printer control panel by a finger. Both panels have exactly the same
functions.
Statistics: Summarizes details about jobs such as the total number of jobs printed, total pages, and average print
time.
4-5
4.2.2 PPMENU
PPMENU, stored in the “PrintPartner Software CD-ROM” which comes with the printer, allows the user to
change printer’s features directly from the computer display and keyboard. Operations are easy enough that the
user’s manual need not be referenced once the user is familiar with the printer.
PPMENU is useful to configure the printer to suit the requirements of user’s computer, software, and documents
to be printed.
The parameters changed using PPMENU affect page layout, font, and printer control. If software programs have
printer drivers, the printer drivers control these parameters for the user. The user may never need to change the
settings manually using PPMENU.
To use PPMENU, the computer and its operating environments must be as follows:
l
IBM PC/AT or compatible or PS/2
l
PC DOS 5.02, MS-DOS 3.3, or higher or
Windows 3.X or Windows 95 in DOS full screen mode
l
l
l
VGA (640 x 480 dots) or higher display
Hard disk drive installed (1 MB essential for PPMENU)
CD-ROM drive
Main Menu and Menu Bar Functions
The PPMENU’s main menu offers functions to select print options for user documents. It also offers an operation guide of some keys and a help message line. If the printer is not ready or has an error, a status message is
displayed.
The top menu bar offers the three pull-down menus: library, special, and options. The user can select prameter
options or perform a function by using the main menu and top menu bar accessed through the mouse or keyboard.
One of the six languages is selectable for messages when installing PPMENU.
4-6
4-7
4.3.1
Standard printer drivers for Windows 3.1,95, and NT 4.0
4-9
4.3.2
4-10
Standard printer drivers for Windows NT 3.51
CHAPTER 5 INTERFACE INFORMATION
5.1 Overview
The PrintPartner 12V printer communicates with the host through a parallel interface and a serial interface or an
optional interface. The printer automatically selects the interface proper to the occation. This chapter describes
the parallel and serial interfaces. For locations of the parallel and serial interface connectors and the optional
interface’s slot, see Figure 1.3.
5.2 Parallel Interface Specifications
The parallel interface is a bidirectional Centronics interface (nibble mode of the IEEE 1284 standard is supported).
52.1 Hardware requirements
Signal levels: TTL-compatible
0.0 to +0.4 V for low-level
+2.4 to +5.0 V for high-level
Input circuit: SN74LS14 or equivalent
Figure 5.1 shows the parallel interface input circuit.
Data Strobe
Input Prime
Figure 5.1 Parallel interface input circuit
5-l
Output circuit: SN74LS06 or equivalent
Figure 5.2 shows the parallel interface output circuit.
Figure 5.2 Parallel interface output circuit
5.2.2
Connector pin assignment
Connector (cable side): Shielded plug
Amphenol DDK57FE-30360 or equivalent (IEEE1284 TYPE-B)
Figure 5.3 shows the parallel interface connector.
Figure 5.3 Parallel interface connector
Signal definition:
Table 5.1 lists parallel interface signals and their functions.
Table 5.1 Parallel interface signals
Table 5.1 Parallel interface signals (continued)
5-3
Table 5.1 Parallel interface signals (continued)
5-4
5.2.3 Data transmission timing
The PrintPartner 12V uses a bi-directional parallel interface complying with IEEE 1284. This interface is also
compatible with the conventional Centronics interface. Data transfer from host to printer is performed according
to Centronics standard, called compatible mode. Data transfer from printer to host is performed according to the
IEEE 1284 standard, called nibble mode.
In compatible mode, the printer receives data from the computer in handshaking mode based on the Busy and
Acknowledge signals from the printer and the Data Strobe signal from the computer. For the Data Strobe and
Acknowledge signals, the timing of the Busy signal must be as shown in the compatible mode of Figure 5.4a.
To send data from the printer to the host, the interface enters the nibble mode where data is sent in units of four
bits (nibble) using four output signal lines as data paths. The data transfer sequence in nibble mode involves
negotiation phase, reverse iddle phase, reverse data transfer phase, and termination phase. Figure 5.4b shows the
reverse data transfer phase where data is sent.
Data 1 to 8
Data Strobe
Busy
Acknowledge
* The values of T4 and T6 are assumed that the host uses ITTL for
its input circuits.
Tl, T2,T3 > 0.5 us
T4 < 0.5 us (*)
T5,T7 = 0 us
T6 = 0.5 us (*)
Figure 5.4a Data transmission timing (compatible mode)
5-5
Figure 5.4b Data transmission timing (nibble mode)
5-6
5.3 RS-232C Serial Interface
53.1 Hardware requirements
Signal levels:
-3 V or lower for a mark condition (logical 1)
+3 V or higher for a space condition (logical 0)
Input circuit:
An MC1489AL or equivalent is used to convert from the RS-232C level to the TI’L level.
Figure 5.5 shows the RS-232C interface input circuit.
Figure 5.5 RS-232C interface input circuit
Output circuit:
An MC1488L or equivalent is used to convert from the TI’L level to the RS-232C level.
A l000-pF capacitor suppresses noise on the output signal line.
Figure 5.6 shows the RS-232C interface output circuit
T
1000 pF
Figure 5.6 RS-232C interface output circuit
5-7
5.3.2 Connector pin assignment
Connector (cable side):
D-subminiature Cannon or Cinch DB-9 plug or an equivalent connector that conforms to EIA standards
Figure 5.7 shows the serial interface connector.
(Cable side)
(Male type)
Figure 5.7 Serial interface connector
Signal definition:
Table 5.2 lists RS-232C interface signals and their functions.
Table 5.2 RS-232C interface signals
Pin
number
Signal name
Direction
1
RTS
output
Request to Send
Space state when the printer is ready to transmit data
2
TD
output
Transmitting Data
3
RD
Input
Receiving Data
4
DSR
Input
Data Set Ready
The printer can receive or transmit data when this signal is in the
space state.
5
SG
6, 8
DTR
Description
Signal Ground (common return)
output
Data Terminal Ready
Space state when the printer is ready to receive or transmit data
Notes:
1.
2.
5-8
The space state corresponds to the high level of the interface signal.
The direction (output or input) is viewed from the printer side.
5.3.3 Serial data format
The format of 10-bit or 11-bit serial data, given in Figure 5.8, consists of a start bit, data bits, a parity bit, and
stop bits. A bit is in the mark state when not being transmitted. Data bits start with the least significant bit
(LSB). For example, the character “K” (hexadecimal 4B) is transmitted as shown in Figure 5.8 (7 data bits,
even parity).
Figure 5.8 RS-232C data format
5.3.4
Cable connection diagrams
The connector at the printer side is a 9-pin type. The connector at the computer side is a 9-pin type or a 25-pin
type
Printer (DTE)
Computer (DTE)
# Open wire
Figure 5.9a Example of RS-232C cable wiring (25-pin connector at computer side)
5-9
Printer (DTE)
Computer (DTE)
# Open wire
Figure 5.9b Example of RS-232C cable wiring (9-pin connector at computer side)
53.5 Data protocols
Different types of protocols are used for the RS-232C serial interface, depending on the computer manufacturer.
These protocols prevent the print data receive buffer from overflowing because interface data transmission is
faster than buffer data printing. The printer uses specific character codes or an interface signal for each protocol
to inform the computer of the buffer status, as follows:
(1) X-ON/X-OFF or DCl/DC3 protocol
With either protocol, the XOFF (DC3) code (hexadecimal 13) is transmitted from the printer when less than
255 bytes of buffer space remains. The XON (DCl) code (hexadecimal 11) is transmitted when less than
255 bytes of data remains in the buffer.
Normal data processing cannot be guaranteed if data is transmitted to the printer when insufficient buffer
space is available after the XOFF code has been transmitted.
When the printer is first turned on, the DTR signal is set to the space state (ready) and an XON (DC 1) code
is transmitted from the printer. When the printer is placed offline, the XOFF code is transmitted even if the
buffer is not full. The XON code is transmitted when the printer is placed online again.
5-10
(2) DTR protocol
The DTR signal is set off (low). That is, the Busy signal is issued when 255 bytes of data remain in the
buffer. When the printer is placed offline, the DTR signal is set off (low).
Transmission must stop within 255 bytes after the DTR signal is set off (low).
The validity of data cannot be guaranteed if data exceeding the buffer capacity is transmitted regardless of
the DTR signal.
Buffer-full recovery timing:
Data transmission is suspended while the DTR signal is set off (low), but printing continues. When the
buffer empty area exceeds 255 bytes, the DTR signal is set on (high) indicating that the printer is ready to
accept data.
5-11
5.4 Command Sets
5.4.1 Printer emulation
This section gives an overview of the Hewlett-Packard LaserJet 5 command set which this printer executes as the
resident emulation. It does not provide the command details and programming examples needed to modify
software packages or write user programs.
This printer is designed to emulate PostScript (level 2) by using an optional emulation card. This command set
is not listed in this section.
With the emulation card installed, the printer automatically senses the proper emulation. Either emulation can be
set by the menu mode (config menu, personality item) of the control panel, according to the table shown below.
Printer emulation
Option to be selected in menu mode
HP LaserJet 5 (PCL6)
PCL
PostScript level 2 (with an optional FPS card installed)
FPS
If the specified emulation card is not installed, the printer uses the HP LaserJet 5 emulation.
When a new emulation is selected, the printer initializes control information on printer features. All downloaded
fonts and page format data are lost.
The following sections (5.4.2,5.4.3, and 5.4.4) list commands in PCL mode, HP-GL/2 mode, and PJL mode
available in HP LaserJet 5 emulation.
5-12
5.4.2
HP LaserJet 5 PCL mode command set summary
The printer responds to all HP LaserJet 5 control codes and escape sequences the same way as the native printer.
The following listing is in command level sequence:
.
.
Control code
Description
BS
Backspace. Move the cursor left one column (HMI).
HT
Horizontal tabulation. Move the cursor to the next horizontal tab stop.
LF
Line feed. Move down the cursor one line (VMI).
FF
Form feed. Print the current page and move the cursor to the top of the next
page.
CR
Carriage return. Move the cursor to the left margin of the current line.
so
Shift out. Select the secondary font.
SI
Shift in. Select the primary font.
ESC
Begin an escape sequence.
SP
Space. Move the cursor right one column (HMI).
Level 1 escape code
Description
ESC 9
Clear left and right margins.
ESC E
Reset all settings to the defaults and set the PCL mode.
ESC =
Half line feed. Move down the cursor half a line.
ESC Y
Display functions mode on. Print all codes received.
ESC Z
Display functions mode off
ESC z
Start the self test function. It is ignored by this printer.
Level 2 escape code
ESC(#@
Select a symbol set or font attributes for the primary font. (#: 0 or l=default
symbol set, 2=current primary symbol set, 3=default font’s attributes)
ESC(#Z
Select a symbol set for the primary font. (#Zn: symbol set ID; #: 0 to 2047,
Zn: A-Z, (, \, ), and )
ESC(#X
Select the primary font by the font ID. (#: font ID; 0 to 32767)
ESC)# @
Select a symbol set or font attributes for the secondary font. (#: 0=default
symbol set, l=default primary symbol set, 2=current primary symbol set,
3=default secondary font’s attributes)
ESC)#Z
Select a symbol set for the secondary font. (#Zn: symbol set ID; #: 0 to
2047, Zn: A-Z, (, \, ), and )
ESC)#X
Select the secondary font by the font ID. (#: font ID; 0 to 32767)
5-13
Level 3 escape code
ESC&a#C
Move the cursor to the new column. (#: column number; plus
signed=relatively right, minus signed=relatively left, no sign=absolutely
from the left edge)
ESC&a#G
Feed paper.
ESC&a#H
Move the cursor to the new horizontal position. (#: l/720” increments; plus
signed=relatively right, minus signed=relatively left, no sign=absolutely
from the left edge)
ESC&a#L
Set the left margin at column #. (Left edge=column 0)
ESC&a#M
Set the right margin at column #. (Left edge=column 0)
ESC&a#P
Rotate the printing direction. (#: 0 to 90 (<90)=0°, 90 to 180 (< 180)=90°,
180 to 270 (<270)= 180°, 270 or larger=270°)
ESC&a#R
Move the cursor to the new line. (#: row; plus signed=relatively downward,
minus signed=relatively upward, no sign=absolutely from the top margin)
ESC&a#V
Move the cursor to the new vertical position. (#: l/720” increments; plus
signed=relatively downward, minus signed=relatively upward, no
sign=absolutely from the top margin)
ESC&d#D
Auto underline on. (#: 0=fixed position, 3=floating position)
ESC&d#@
Auto underline off. (#: any value)
ESC&f#S
Store or recall (push or pop) the cursor position (#: 0=store the current
position, l=move to the last stored position)
ESC&f#X
Select a macro control function. (#: 0=start definition, l=stop definition,
2=execute, 3=call, 4=enable auto overlay, 5=disable auto overlay, 6=delete
all macros, 7=delete all temporary macros, 8=delete last ID macro, 9=make
temporary, 1 0=make permanent)
ESC&f#Y
Specify a macro ID. (#: macro ID; 0 to 32767)
ESC&k#G
Specify the interpretation of line termination codes, CR, LF, and FF.
ESC&k#H
Set the horizontal spacing (HMI). (#: l/120” increments; O-32767, 12= 10
cpi) Select a font pitch for the primary and secondary fonts. (#: 0= 10 cpi,
2=16.66 cpi, 4=12 cpi)
ESC&k#S
5-14
Set the pitch for the primary and secondary fonts (#: 0= 10 cpi, 2= 16.66 cpi)
ESC&e#A
Set the page size. (#: l=executive, 2=letter, 3=legal, 26=A4, 80-letter
(Manarch 7-3/4), 8l=Business (Commercial l0), 90=International DL,
91=International C5, l00=International B5)
ESC&e#C
Set the vertical spacing (VMI). (#: l/48” increments; 0 to 32767, 8=6 lpi)
ESC&e#D
Set the line spacing. (#: lines per inch; 1,2, 3,4,6, 8, 12, (or 0), 16, 24, or
48)
ESC&e#E
Set the top margin, (#: lines)
ESC&e#F
Set the text length (#: lines)
ESC&e#H
Select a paper source. (#: 0=unchange, l=bin 1,2=manual feed slot.
3=manual feed slot for envelope, 4=bin 2,254=auto select)
ESC&e#L
Perforation skip on/off. (#: 0=off, l=on)
ESC&e#O
Set the page orientation. (#: 0=portrait, l=landscape, 2=reverse portrait,
3=reverse landscape)
ESC&e#P
Set the page length. (#: lines; 63=Executive, 66=letter, 70=A4, 84=legalwith 6 lpi)
ESC&e#U
Move the long edge (left edge) of virtual physical paper. (#: l/720” increments; -paper width < # > +paper width)
ESC&e#X
Set the number of copies for each page. (#: 1 to 32767)
ESC&e#Z
Move the short edge (top edge) of virtual physical paper. (#: l/720”
increments; -paper length < # < +paper length)
ESC&p#X<data>
Transparent print data. Print any characters even those allocated in the
control character code area. (#: byte count of transparent print data)
ESC&R#F
Enable od disable accepting read data until printing the page data is finished.
(#: 0=Flush all complete pages, l=flush all pages)
ESC&s#C
End-of-line wrap on/off. (#: 0=on, l=off)
ESC(f#W
Define symbol set. (#: 0 to 32767)
ESC(s#B
Set the stroke weight for the primary font. (#: - 127 to 127 but available
from -7 to +7; -7=ultra thin, -6=extra thin, -5=thin, -4=extra light, -3=light, 2=demi light, -l=semi light, 0=medium book or text, l=semi bold, 2=demi
bold, 3=-bold, 4=extra bold, 5=black, 6=extra black, 7=ultra black)
ESC(s#H
Set the pitch for the primary font. (#: cpi)
ESC(s#P
Set the spacing mode for the primary font. (#: 0=fixed, l=proportional) ,
ESC(s#S
Set the style for the primary font. (#: 0 to 32767; 0=upright, l=italic,
4=condensed, 5=condensed italic, 8=compressed or extra condensed,
24=expanded, 32=outlined, 64=inlined, 128=shadowed, 160=outlined
shadowed)
5-15
ESC(s#T
Select a type face for the primary font. (#: 0 to 32767; 0 to 255 (one byte
specification) and 256 to 32767 (two byte specification)
One byte: 0=Line Printer, l=Pica, 2=Elite, 3=Courier, 4=Helv, 5=Tms Rmn,
6=Letter Gothic, 7=Script, 8=Prestige, 9=Calson, l0=Orator, etc.)
Two bytes: 4 l00=CG Triumvirat, 4 10 l=CG Times, 4 1 l0=Futura 2,
411l=CG Palatino, 4112=ITC Souvenir, etc.)
ESC(s#V
Set the point size for the primary font. (#: points; 1 point is l/72” height.)
ESC(s#Wcdata>
Download a character. (#: byte count of character header and character
pattern data; 0 to 32767)
ESC)s#B
Set the stroke weight for the secondary font. (#: -127 to 127 but available
from -7 to +7; -7=ultra thin, 6=extra thin, -5=thin, -4=extra light, -3=light, 2=demi light, -l=semi light, 0=medium book or text, l=semi bold, 2=demi
bold, 3=-bold, 4=extra bold, 5=black, 6=extra black, 7=ultra black)
ESC)s#H
Set the pitch for the secondary font. (#: cpi)
ESC)s#P
Set the spacing mode for the secondary font. (#: 0=fixed, l=proportional)
ESC)s#S
Set the style for the secondary font. (#: 0 to 32767; 0=upright, l=italic,
4=condensed, 5=condensed italic, 8=compressed or extra condensed,
24=expanded, 32=outlined, 64=inlined, 128=shadowed, 160=outlined
shadowed)
ESC)s#T
Select a type face for the secondary font. (#: 0 to 32767; 0 to 255 (one byte
specification) and 256 to 32767 (two byte specification)
One byte: 0=Line Printer, l=Pica, 2=Elite, 3=Courier, 4=Helv, 5=Tms Rmn,
6=Letter Gothic, 7=Script, 8=Prestige, 9=Calson, l0=Orator, etc.)
Two bytes 41OO=CG Triumvirat, 4101=CG Times, 4110=Futura 2,
4111 =CG Palatino, 4112=ITC Souvenir, etc.)
ESC)s#V
Set the point size for the secondary font. (#: points; 1 point is l/72": height.)
ESC)s#W<data>
Download the font header. (#: byte count of font header data; 26=HP
LaserJet +, 64=HP LaserJet -, -D, -P, -)
ESC *b#M
Set the raster graphics compression mode. (#: 0=no compression, l=runlength mode, 2=TIFF revision 4.0 mode, 3=delta compression mode,
5=adaptive mode)
ESC*b#W<data>
Transfer one row of data for rester graphics. (#: byte count)
ESC*b#Y
Move the cursor vertically to provide blank areas in a raster graphics area.
(#: number of dots at the current resolution; 0 to 32767)
ESC*c#A
Specify the horizontal size of a rectangle. (#: PCL unit; -32767 to 32767)
ESC*c#B
Specify the vertical size of a rectangle. (#: PCL unit; -32767 to 32767)
ESC*c#D
Specify the font ID for the subsequent soft font management. (#: 0 to
32767)
5-16
ESC*c#E
Specify the character code for the character downloaded next. (#: 0 to
65535)
ESC*c#F
Select a soft font management function. (#: 0=delete all, l=delete all
temporary fonts, 2=delete last ID font, 3=delete last character of last ID font,
4=make temporary, 5=make permanent, 6=copy the current font with the
current ID)
ESC*c#G
Specify the shading level or the fill pattern ID. (#: 0 to 32767;
For shading l=l00; l=l% dark, l00=100% dark
For pattern l-6; l=horizontal line, 2=vertical line, 3=diagonal line (///),
4=diagonal line (\\\), 5=square hatching, 6=diamond hatching)
ESC*c#H
Specify the horizontal size of a rectangle. (#: l/720” increments; -32767 to
32767)
ESC*c#P
Fill the rectangle.
&solid fill, l=white fill, 2=shaded fill, 3=cross-hatched fill, 4=fill with the
user defined pattern, 5=fill with the current pattern)
ESC*c#Q
Control user defined pattern.
(#: 0=delete all, l=delete last temporary pattern, 2=delete last ID pattern.
4=make temporary last ID pattern, 5=make permanent last ID pattern)
ESC*c#R
Set symbol set ID code. (#: 0 to 32767)
ESC*c#S
Symbol set control.
ESC*c#V
Specify the vertical size of a rectangle. (#: l/720” increments; -32767 to
32767)
ESC * c # W <data>
User defined pattern.
ESC *p#X
Move the cursor to the new horizontal position. (#: dots; plus
signed=relatively right, minus signed=relatively left, no sign=absolutely
from the left edge)
ESC*p#R
Set pattern reference point.
(#: 0=rotate with the print direction, l=fix)
ESC*p#Y
Move the cursor to the new vertical position. (#: PCL unit; plus
signed=relatively downward, minus signed=relatively upward, no
sign=absolutely from the top margin)
ESC*r#A
Start printing raster graphics. Specify the left margin of raster graphics. (#:
0=position 0, l=current position)
ESC*r#C
End printing raster graphics. Specify the end of raster graphics data transfer.
(#: any value)
ESC*r#F
Set the raster graphics presentation mode. (#: 0=raster row in X axis of
logical page, 3=raster row in lateral axis of physical page)
5-17
ESC*s#I
Request status readback storage information.
(#: 0=font, l=macro, 2=user defined pattern, 3=symbol set (for unbound
scalable font), 4=font extended)
ESC*s#T
Set status readback location type. (#: 0=invalid location, l=currently
selected, 2=all locations, 3=internal, 4=downloaded, 5 and 7=SIMMs)
ESC*s#U
Set status readback location unit.
Location type #
0
* (invalid location)
1
* (currently selected)
2
* (all locations)
3
0=all internal
4
0=all down loaded
l=temporary down load
2 =permanent download
5
0=all SIMMs
and
l=highest priority SINNMMs
7
2=lowest priority SINNMMs
ESC*s#X
Return the reply data to the host computer.
ESC * s 1 M
Replay the total capacity of available memory.
ESC*t#R
Set the raster graphics resolution. (#: dots per inch; ex. for 600 dpi: 0 to
75=75,75 (<75) to l00=l00, 100 (<l00) to 150=150, 150 (<150) to
200=200,200 (<200) to 300=300,300 or larger =600)
ESC*t#S
Specify the width of the raster graphics area. (#: 0 to logical paper width
minus current left graphics margin)
ESC*t#T
Specify the height of the raster graphics area. (#: 0 to logical paper length
minus current vertical cursor position)
ESC*v#N
Select a source transparency mode. (#: The remainder when # is divided by
256 is used as the parameter; 0=source is transparent, l=source is opaque)
ESC*v#O
Select a pattern transparency mode. (#: The remainder when # is divided by
256 is used as the parameter; 0=pattern is transparent, l=pattern is opaque)
ESC*v#T
Set the print model pattern. (#: 0=solid fill (default), l=white fill, 2=PCL
shading pattern, 3=PCL cross-hatching pattern)
5-18
5.4.3
HP LaserJet 5 HP=GL/2 mode command set summary
The HP-GL/2 mode is useful when using the PrintPartner 12V page printer instead of an HP X-Y plotter or
equivalent.
Picture Frame Set Commands
ESC*c#X
Set the horizontal size of the picture frame on the actual physical paper. (#:
l/720” increments; 0 to 32767)
ESC*c#Y
Set the vertical size of the picture frame on the actual physical paper. (#: l/
720” increments; 0 to 32767)
ESC*c#T
Set the anchor point of the picture frame to the current cursor position in
PCL6 mode. (#: 0)
ESC*c#K
Set the horizontal plot size in HP-GL/2 mode, or assume the horizontal size
of the picture frame in PCL6 mode to be this size. (#: inches; 0 to 32767)
ESC*c#L
Set the vertical plot size in HP-GL/2 mode, or assume the vertical size of the
picture frame in PCL6 mode to be this size. (#: inches; 0 to 32767)
ESC*%#B
Enter HP-GL/2 mode from PCL6 mode. (#: 0 or even number = the pen
position is set to the last pen position in the last HP-GL/2 mode, 1 or odd
number = the pen position is set to the current cursor position in the current
PCL6 mode)
ESC*%#A
Enter PCL6 mode from HP-GL/2 mode. (#: 0 or even number = the cursor
position is set to the last cursor position in the last PCL6 mode, 1 or odd
number = the cursor position is set to the current pen position in the current
HP-GL/2 mode)
Configuration and Status Set Commands
DF
Set defaults to parameters other than scaling points, pen position, pen
thickness, pen up/down state, and rotation in HP-GL/2 mode.
IN
Set defaults to all parameters to initialize the plotter.
IP
Set (or input) scaling points Pl and P2 with absolute plotter coordinates.
IR
Set (or input) scaling points Pl and P2 by the ratios to the picture frame
sizes.
IW
Set (or input) the window area (soft clipping area).
PG
Advance a full page. Not supported by HP LaserJet 5
RO
Rotate the coordinate system in 90 degrees.
RP
Replot. Not supported by HP LaserJet 5.
SC
Scaling on/off. Set the user unit coordinate system or reset to the absolute
plotter unit coordinate system.
5-19
VectorCommands
AA
Plot (or move along) an arc around the center specified by absolute coordinates.
AR
Plot (or move along) an arc around the center specified by relative coordinates.
AT
Plot (or move along) an arc through the three points specified by absolute
coordinates.
CI
Plot a circle around the current pen position.
PA
Plot (or move to) the points specified by absolute coordinates.
PU
Pen up. Raise the pen and move to the points specified.
PR
Set the relative plot mode and move to the points specified by relative
coordinates.
RT
Plot (or move along) an arc through the three points specified by relative
coordinates.
PD
Pen down. Lower the pen and plot the points specified.
PE
Plot a polyline encoded from parameters of PA, PR, PU, PD, and SP commands to reduce data.
BR
Plot a Bezier curve specified by relative coordinates.
BZ
Plot a Bezier curve specified by absolute coordinates.
Polygon Commands
PM
Polygon mode on/off.
EP
Edge (or outline) the polygon stored in the polygon buffer.
FP
Fill the polygon stored in the polygon buffer.
RA
Fill (but do not edge) the rectangle specified by absolute coordinates.
RR
Fill (but do not edge)the rectangle specified by relative coordinates.
EA
Edge (or outline) the rectangle specified by absolute coordinates.
ER
Edge (or outline) the rectangle specified by relative coordinates.
WG
Fill (but do not edge) a wedge around the current pen position.
EW
Edge (or outline) a wedge around the current pen position.
Line and Fill Attributes Select Commands
AC
Specify the anchor corner (start point) of the fill pattern by absolute coordinates.
5-20
FT
Select the type of a fill pattern for an area fill command.
LA
Select the line attribute, or the shape of the end or joint of lines.
LT
Select the line type, or the lengthwise pattern of lines, and the length the
pattern.
PW
Specify the width of the logical pen, or the thickness of lines. The unit of
pen width is determined by the WU command.
RF
Define the raster fill pattern, or fill pattern created by users dot by dot in
matrix.
SM
Symbol mode on/off. Plot the specified character (marker) at each end of
vectors.
SP
Select a logical pen.
sv
Specify the screened vector, or the type of a image pattern imposed on lines.
TR
Transparency mode on/off. With mode on, the background is visible
through blank areas of the foreground.
UL
User-defined line type. Create a type of line which is substituted for a line
type defined by the LT command.
WU
Select the unit of pen width for the PW command.
Character Plotting Commands
AD
Define characteristics of the alternate font.
CF
Specify an outline character fill mode and whether or not characters are to be
edged (outlined).
CP
Character plot. Move the logical pen by the specified numbers of character
cells (character spaces and lines).
DI
Set the direction (inclination) of characters relative to the absolute plotter
coordinates.
DR
Set the direction (inclination) of characters relative to the scaling points PI
and P2.
DT
Define a terminator character that specifies the end of printing a character
string in label mode.
DV
Define variable text path. Set the plotting direction of a character string in
90 degrees and set the direction of line feeding.
ES
Extra spaces. Increase or decrease the character spacing and line spacing.
FI
Font primary. Specify the font, to which the font ID is assigned in PCL
mode, as the standard font.
FN
Font secondary. Specify the font, to which the font ID is assigned in PCL
mode, as the alternate font.
LB
Label mode. Plot a character string using the current active font.
5-21
The following control characters are available. Other characters are NOP
commands.
I
Char
ETX
BS
HT
LF
CR
SO
SI
SP
DEL
Function
Default of terminator character
Back space
Double space
Line feed
Carriage return
Alternate character set selection
Standard character set selection
Space
Space
LO
Label origin. Move the origin of plotting a character string in label mode.
SA
Select alternate font. Make the alternate font active.
SB
Scalable or bitmap fonts. Enable or disable scalable fonts to be changed to
bitmap fonts.
SD
Define characteristics of the standard font.
SI
Specify the character width and height in absolute size (cm).
SL
Specify the slant of characters by tana+.
SR
Specify the character width and height relative to the distance between the
scaling points Pl and P2.
SS
Select standard font. Make the standard font active.
TD
Transparent data. Plot characters assigned to control codes, for example,
“ « ” to the escape code (decimal 27) in the PC-8 character set.
5-22
5.4.4
HP LaserJet 5 PJL mode command set summary
This section lists all the Printer Job Language (PJL) commands, which arrange printing jobs in a shared printer
system and read printer status messages back to the user. Except UEL, PJL commands start with @PJL followed by a command name, option data, and an LF character.
Kernal Commands
Description
UEL
Universal Exit Language. Unlike other PJL commands, the command is an
escape sequence: ESC % -- 1 2 3 4 5 X. All printing jobs controlled by PJL
start with UEL and end with UEL. The UEL command has a function to exit
the current printer language and return control to PJL.
ENTER
Specify the current printer language.
Option: LANGUAGE
COMMENT
Insert notes among the PJL command lines.
Job Separation Commands
Description
JOB
Make the printer recognize start of jobs and reset the page count.
It enables specifying the pages to be printed in jobs, naming jobs, and
separating jobs.
Option: NAME, JOB, EOJ
EOJ
Make the printer recognize stop of jobs and reset the page count.
Option: NAME
Environment Commands
Description
DEFAULT
Set or change default values in the user default environment.
SET
Enable changing to the specified value until a job is finished in the PJL
current environment.
INITIALIZE
Change the user default environment or the PJL current environment to the
factory default values.
RESET
Change the PJL current environment to the user default values.
Status Readback Commands
Description
INQUIRE
Request specified environment variables in the PJL current environment.
DINQUIRE
Request specified environment variables in the user default environment.
ECHO
Reture <words> in this command to the host computer.
INFO
Respond with information of specified statuses.
Option: ID, CONFIG, MEMORY, STATUS, VARIABLES, USTATUS,
PAGECOUNT
5-23
USTATUS
Enable responding with status information asynchronously, that is, when the
printer status changes, when a job starts or ends, when a printed page is
ejected, or when specified seconds elapsed.
Option: DEVICE, JOB, PAGE, TIMED
USTATUSOFF
Disable responding with asynchronous status information in the current
interface.
Additional Commands
Description
PRINTREPORT
Print a status report or a font report.
Option: SELFTEST, PRINTFONT
CLEARWARNING
5-24
Clear the consumables replacement request to the print unit or the fuser unit.
Option: PRINTUNIT
6.5 Maintenance Tool
6.5.1
Self test printing
The SELF TEST button prints a setup report page which summarizes printer option settings. It can be used to
easily check the electrical and mechanical states of the printer without the help of a computer. It also distinguishes between printer and computer errors, and confirms correct operation after an error recovery. The PRINT
FONT button can be used instead. It prints font report pages which list all available fonts.
6.6 Recommended Spare Parts
The following parts can be replaced.
1
Printer mechanism unit
2
Upper cover assembly
3
Pick-up roller assembly
4
Feed roller assembly
5
Cover-open switch
6
Main motor
7
8
Pick-up motor
Transfer unit
9
Fan 1
10
Fan 2
11
Power supply board
100 to 120 VAC
220 to 240 VAC
6-2
12
High-voltage power supply board (HV board)
13
14
Separator assembly (friction pad)
Stacker-full sensor assembly (SF sensor board)
15
Control panel unit
16
Multi-function feeder board (MFF board)
17
18
Mechanism board (shield plate)
19
ROM board (controller board and ROM)
20
Volume board (print density control board)
Paper sensing switch (PSS board)
CHAPTER 7 OPTIONS AND SUPPLIES
7.1 Options
(1) Paper trays (tray 1)
A4
Letter
Executive
A5
(2) Extended interface boards
LocalTalk board 2 (AppleTalk compatible)
Ethernet board C or D (NetWare, TCP/IP, and EtherTalk corresponding)
IrDA board (infrared adapter)
Centronics board (bi-directional parallel interface)
(3) Memory expansion cards
1MB RAM card
2MB RAM card
4MB RAM card
8MB RAM card
16MB RAM card
32MB RAM card
* Two cards can be installed.
(4) Emulation cards
FPS card (PostScript level 2 compatible)
IBM/EPSON card (IBM Proprinter 4202 or EPSON EX-800 compatible)
(5) Other cards
Barcode card (barcodes and OCR fonts)
Flash ROM card (4MB, for PCL5e only)
(6) Paper feeders (second paper tray: feeder unit and tray 2)
Legal
A4
Letter
Executive
A5
(7) Feeder unit (without paper tray)
(8) Multi-function feeder (MFF)
7-l
7.2 Consumables
(1) Print unit
(2) Toner pack (two toner bottles)
7.3 Periodic Replacement Parts
(1) Fuser unit
.
120 VAC
. 220 to 240 VAC
7.4 Documentation
(1) User’s Manual
(2) Maintenance Manual
(3) Schematic Diagrams
(4) Parts Catalogue
7-2
APPENDIX A SYMBOL SETS
(1) Roman-S (ID:8U)
A-1
(2)
A-2
ISO8859-1 Latin 1 (ID:ON)
(3) PC-8 (ID:10U)
A-3
(5) PC-85 (ID:12U)
A-5
(6)
A-6
Windows 3.1 Latin 1 (ID:19U)
(7)
DeskTop (ID:7 J)
A-7
(8) PS Text (ID:10J)
A-8
(9)
Ventura International (ID:13 J)
A-9
(10) Ventura US (ID:14 J)
A-10
(11) Microsoft Publishing (ID:6J)
A-l 1
(12) Legal (1D:1U)
A-12
(13) IS0 United Kingdom (ID:1E)
A-13
(14) ASCII (ID:0U)
(15) IS0 Swedish (ID:OS)
A-15
(16) IS0 Italian (ID:OI)
A-16
(17) IS0 Spanish (ID:2S)
A-17
(18) IS0 German (ID:lG)
A-18
(19) IS0 Norwegian (ID:OD)
A-19
(21) Windows 3.0 Latin 1 (ID:9U)
A-21
(22) MC Text (ID:l2J)
(24) PC-Turkish (ID:9T)
A-24
(25) Windows 3.1 Latin 2 (ID:9E)
A-25
(26) Windows 3.1 Latin 5 (ID:5T)
A-26
(27) IS0 8859-l Latin 2 (ID:2N)
A-27
(28) IS0 8859-2 Latin 2 (ID:5N)
A-28
(29) Math-8 (ID:8M)
A-29
(30) PS Math (ID:5M)
A-30
(31) Ventura Math (ID:6M)
A-31
(32) PI Font (ID:15U)
A-32
(33) Symbol (ID:19M)
A-33
(34) Wingdings (ID:579L)
This appendix gives printing samples (scanned in 400 dpi) of resident fonts.
There are 115 types of resident fonts (one bitmap font and 114 scalable fonts):
One bitmap font
B-l
B-2
B-3
APPENDIX C PRINTER LOGO AND LABELS
PrintPartner 12V page printer
Back
Front
Logo and labels
Logo or label
Position
Logo
A
Regulation-approved label
B
Spec, number, and revision label
C
C-l