Transcript
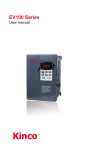
Z-VentEV100QuickStartGuide
Specifications
•
•
The EV100 Z-Vent requires 2x AAA batteries (not included with the unit). The batteries must be equal (both equally
new or equally worn). Two new, good quality alkaline AAA batteries should last for over a year with an average use of 2
operations a day. For best results and extended operation time (over 2 years of normal use), use Lithium AAA batteries.
The EV100 Z-Vent can be paired with, and controlled using, any Z-Wave compatible controller.
Pairing the EV100 Z-Vent with a Z-Wave Controller
1.
2.
Place your Z-Wave controller in unpairing (un-learning) mode. Once the controller is in unpairing mode, bring the ZVent close to the Z-Wave controller (several feet) and press the SET button 3 or more time rapidly (within 1.5 seconds).
This will clear the Z-Vent’s memory of any previous pairings.
Exit the unpairing procedure and place the Z-wave controller in pairing (learning) mode. Then bring the Z-Vent close to
the controller and press the SET button 3 or more times rapidly (within 1.5 seconds). This will pair the Z-Vent with your
Z-Wave controller. Exit the pairing mode and you should see the Z-Vent under your devices. Some devices (like the
Vera controller) require that you reload or refresh the controller so it polls, identifies, and configures the new vent.
Once the configuration is complete, you can control the Z-Vent through your Z-Wave controller’s interface.
Controlling the EV100 Z-Vent through the Z-Wave Wireless Interface
•
•
The Z-Vent features an analog control that allows it to open in increments of 10% from 0% (fully closed) to 100% (fully
open). To accomplish this, the Z-Vent calibrates its path each time a command is issued. For instance, when the vent is
set to 40% open, the vent will open, close, and then open to the specified setting.
If the vent is set to a specific value (like 40%) and the “On” command is issued, the vent will open to 100% and the
previous value will be overwritten. You will, however, still be able to set your schedules (or scenes) to open the vent to
a specific percentage or select a specific percentage through your controller interface.
Controlling the EV100 Z-Vent Manually
•
•
•
•
The three buttons on the Z-Vent control box (SET, OPEN, and CLOSE) allow you to open/close the Z-Vent manually.
The SET button wakes the Z-Vent from sleep mode and puts it in button priority mode. Once the SET button is pressed,
the Z-Vent will be in ‘awake’ mode for approximately 5 seconds. During this time, the button commands take priority
over controller-issued commands and any button-issued commands will override any saved, controller-specified vent
position.
To open the Z-Vent manually, press the SET button (this wakes the controller from its sleep state), then the OPEN
button. The green light will flash and the Z-Vent will open fully (100%).
To close the Z-Vent manually, press the SET button (if not in ‘awake’ mode), then the CLOSE button. The red light will
flash and the Z-Vent will close.
Caution:
Physically changing the Z-Vent’s position can cause damage to the motor gears. The Z-Vent’s position should only be
changed manually using the interface buttons on the control module or through a compatible Z-Wave controller.
If you have any questions or if you are experiencing any issues with the EV100,
please contact EcoNet Controls Support at [email protected] or at 905-332-8856.
For more details, please visit www.EcoNetControls.com.