Transcript
TM
User Manual
GBH909
Bluetooth headset
PACKAGE CONTENTS
BEFORE YOU BEGIN
Before using this product, please take a moment to familiarize yourself with your new GBH909 headset.
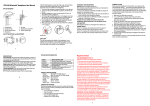
Identifying Parts
1. GBH909 headset unit
2. Adjustable Earloop
3. Small, medium and large ear tips
4. USB Cable
5. AC Power Adapter
6. User guide
8
5
1
2
4
9
3
7
CHARGE
The headset has a built-in battery. You can charge the
headset by using the AC power adapter or USB charging
cable through the computer. Before using the headset,
you must first charge it. Indicator light is steady red when
battery is charging.
1. Charging with AC power adapter
6
1. Multi-Function Button
3. Volume Down Button
5. Charging interface
7. Mic-2
9. Receiver
2. Volume Up Button
4. Indicator Light
6. Mic-1
8. Adjustable Ear Loop
(1) Verify the headset is powered off.
1
2
(2) Plug the charger into the end of the headset, the
indicator light turns red when the battery is charging.
When the headset is fully charged (about 3 hours), the
indicator light turns off.
(3) Disconnect the charger.
2. Charging with the computer (USB charging
cable is an optional accessory)
Plug one end of the USB charging cable into the computer USB port, and plug another end into the end of the
headset.
Please refer to 1. Charging
with AC power adapter
for the charging process.
is off while charging.
3. Charging circuit would not work if you charge the headset only after a very short time using. Please go on using
the headset and do not recharge it until the battery gets
low.
4. The power source can be only connected to SELV
circuit and complies with limited power source.
GENERAL DESCRIPTION
The GBH909 is a small, lightweight headset designed for
extended comfort and excellent audio performance.
Advanced Digital Signal Processing (DSP) uses two
microphones to focus your voice and virtually eliminate
background noise from your call. Perfect for high-noise
environments such as restaurants and airport terminals.
With DSP technology, you can have the confidence that
you will always be heard clearly.
PAIR
This headset comes with EASYPAIR feature so pairing
with your Bluetooth phone is even easier.
EASYPAIR
Follow the instructions below to pair your phone and the
headset for the first time.
PAIRING FIRST DEVICE
Notes:
1. The headset cannot be used while charging, For the
optimal performance, please don't use the headset
during charging.
2. For optimal performance, make sure that the headset
GBH909
GBH909
3
4
1. Prepare headset-Make the headset enter
pairing mode
GBH909
Begin with headset turned off. Turn headset on (press
Multi-Function button for 3 seconds), it will automatically
go into pairing mode, flashing red and blue.
0000
2. Prepare Phone-Turn on Bluetooth
Scroll to the Bluetooth menu in your phone and search
for active devices. (Refer to the phone's user manual for
details) And when the search completes, a list of devices
is displayed. (The screen examples here are from a
Nokia 6230)
3. Pairing
Begin with headset turned off
1. Press and hold Multi-Function button more than 5
seconds until the headset status indicator begins to flash
blue then red. The headset is now in pairing mode for the
next 180 seconds.
Select GBH909 from the list. When prompted for a passkey, enter the default passkey (0000). When successfully paired, the red/blue LED on the headset changes to
steady blue for 1 second. It is now powered on and ready
to use.
2. While the headset is flashing red/blue, use the phone
menu to search for Bluetooth devices and select “GBH909”.
You can refer to Easypair for the details of this step.
FIRST PAIR Cont'd
3. When prompted for a passkey, enter 0000. Headset
will be steady blue for 1 second when paired successfully.
Note:
1. The headset can pair to multiple Bluetooth devices,
but will only connect to one device at a time.
2. If the headset is disconnected from the Bluetooth
device, you can re-connect it by briefly pressing MultiFunction button.
Note: Normally you only need to pair the headset and
handset once. If headset has been previously paired with
another device, follow pairing instructions below.
PAIRING OTHER DEVICES
If headset has ever paired with another device before,
please follow these instructions for pairing.
OTHER PAIR Cont'd
5
6
ADJUSTING FIT
NOTE: the headset can be worn without the earloop.
wearing on right ear
You can mount the ear loop in different way to
accomodate right/left wearing.
adjust
the earloop
wearing on left ear
USING YOUR HEADSET
TURNING HEADSET ON AND OFF
To turn your headset on, press MultiFunction button for 3 seconds. The (1)
indicator light is steady blue for 0.5
second accompanied with an increasing tone, and then flashes blue once
every 5 seconds. To turn your headset
off, press and hold Multi-Function
button for 5 seconds, indicator light is
steady red for 0.1 second accompanied (1) Multi-Function
Button
with a decreasing tone and then turn off.
7
8
ANSWERING/ENDING/MAKING CALLS
DISABLE/ENABLE LED STANDBY AND ONLINE INDICATION
For best performance, position your
phone on the same side of your
body as the headset.
When the headset is connected, press and hold Volume
Down button for 10 seconds, and then LED will only light
for low battery, Pairing, etc…but not for standby or in-use
modes. Press and hold Volume Up button for 10
seconds, and then LED is enabled again.
To answer or end a call, briefly press
the Multi-Function button.
To make a call, enter number on your phone, press send,
and the call is automatically transferred to headset; no
need to press Multi-Function button.
ADJUSTING THE VOLUME
ADDITIONAL FEATURES
Redialing Last Number
To activate last number redial, double press the MultiFunction button. You will hear two low tone after each
double key press.
Rejecting a Call
Volume Up Button
When a call is incoming, press and hold the MultiFunction button until phone stops ringing.
Switching a Call from Phone to Headset
Volume Down Button
Briefly press Volume up or Volume down button for incremental volume steps. You can also press and hold
volume Up/Down button to adjust the volume continuously. You will hear a high tone at the volume limit.
To switch an active call from your phone to your headset,
press and hold the Multi-Function button until the call is
available in the headset.
Switching a Call from Headset to Phone
To switch an active call from your headset to your phone,
press and hold the Multi-Function button until the call is
available in the handset.
9
10
Headset Status
Reset the Headset
Indicator light
Power on
Steady Blue for 0.5 second
Power off
Steady Red for 0.5 second and goes off
Erasing Paring Information
Paring mode
Blue/Red flashes
Press the Volume up and Volume down button synchronously for 3 seconds, and then the paring information
can be erased completely.
Standby
Blue flashes. Repeat
(0.2 second on 5 seconds off)
Ongoing call
Blue flashes. Repeat
(0.5 second on 2 seconds off)
Successful paring
Steady Blue for 1 second
Press and hold the Multi-Function button for more than
10 seconds, and then the headset can be reset.
Turn on/off DSP feature
Press the Multi-Function and volume up button synchronously for 3 seconds, and then DSP feature algorithm is
turned on. Press the Multi-Function and volume down
button synchronously for 3 seconds, and then DSP
feature algorithm is turned off.
INDICATOR LIGHTS
With the Charger Plugged In
Headset Status
Indicator light
Charging (headset is powered off)
Steady Red
Charging complete
Off
Unsuccessful paring Steady Red for 1 second
TROUBLESHOOTING
1. My headset can not discover my phone.
Make sure your phone has the Bluetooth Voice Gateway
function built in.
Make sure the Bluetooth feature of your phone has
turned on and you have accords with the accurate
pairing steps.
2. My headset can not work well with my phone.
Make sure the headset has turned on. Press the MultiFunction button for 3 seconds until you hear a increasing
tone or see the indicator light steady blue for 0.5 second
to turn the headset on.
11
12
Make sure your headset is not out of the working range.
Move the headset closer to the phone or Bluetooth device.
Make sure your headset battery is not drained. Charge
your battery using the AC power adapter supplied.
The listening volume is too low. Press the Volume Up to
increase the sound heard in the headset.
PRODUCT SPECIFICATION
Talk Time
Up to 4 hours
Standby Time
160 hours
Charge Time
3 hours
Working Range
Bluetooth standard 33 feet (10 meters)
Bluetooth Version
Bluetooth 2.0
Supported Bluetooth profile
Headset Hands-free
Weight
10 g
Dimension
53 * 17 * 10 mm (length * width * height)
Storage and Usage
Temperature
50 °F-104 °F (10 °C-40 °C)
GFM Guarantee
If you are not totally satisfied with this GFM product, you may return it
to any Meijer store for a full refund within 6 months (180 days) of
purchase when accompanied by a receipt.
Dist. by Wholesale Merchandisers, Inc.,
2929 Walker, NW,
Grand Rapids, MI 49544
Made in China
FCC part 15.21
Warning: Changes or modifications to this unit not expressly approved
by the party responsible for compliance could void the
user’s authority to operate the equipment.
FCC part 15.105
NOTE: This equipment has been tested and found to comply with the
limits for a Class B digital device, pursuant to Part 15 of the FCC
Rules. These limits are designed to provide reasonable
protection against harmful interference in a residential
installation. This equipment generates, uses, and can radiate
radio frequency energy and, if not installed and used in
accordance with the instructions, may cause harmful
interference to radio communications. However, there is no
guarantee that interference will not occur in a particular
installation. If this equipment does cause harmful interference
to radio or television reception, which can be determined by
turning the equipment off and on, the user is encouraged to try
to correct the interference by one or more of the following
measures:
Reorient or relocate the receiving antenna.
Increase the separation between the equipment and receiver.
Connect the equipment into an outlet on a circuit different from
that to which the receiver is connected.
Consult the dealer or an experienced radio TV technician for help.
For customer support please call (866) 845-9436 or go to
www.gfmproducts.com
13
14