1
The TeamBots Environment for Multi-Robot
Systems Development
Tucker Balch
Georgia Institute of Technology
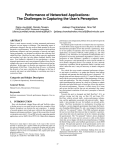
Abstract
TeamBots is a collection of application programs and libraries designed
to support multiagent mobile robotics research. TeamBots supports simulation of robot control systems and execution of the same control systems
on mobile robots. The simulation can execute complex scenarios involving
multiple heterogeneous, possibly adversarial agents. The robot executive
runs on several popular commercially available robot platforms including
Nomadic Technologies’ Nomad 150 robot, Personal Robotics’ Cye robot,
ActivMedia’s AmigoBot, and RWI’s ATRV series. In addition to simulation and real robot execution, the TeamBots environment includes a
communications package (RoboComm), and Clay, a library to support
coding of behavior-based control system.
1
Figure 1: A RoboCup robot soccer simulation running in the TeamBots simulator.
1
1.1
Introduction
Audience
This document was written to introduce robotics researchers and other technically inclined people to the TeamBots environment. Example code and some
details of the system are provided to illustrate various features, but this is not
meant to serve as a stand alone user manual. Additional information, including
installation details are are provided on the TeamBots website http://www.teambots.org.
1.2
What is TeamBots?
TeamBots is a system for developing and executing control systems on mobile
robots and in simulation. Individual and multi-robot simulations are supported,
including multiple different robot types in the same simulation. TeamBots’
modular design enables researchers to easily integrate sensors, machine learning
and hardware with robot architectures.
TeamBots was initially developed as a simulation tool for investigating robot
soccer (Figure 1). The ease with which behaviors can be designed and tested,
and the flexibility of the simulation environment led us to consider the system
for use in a foraging task on mobile robots (Figure 2). In this project, two
Nomadic Technologies’ Nomad 150 robots were entered as a multi-robot team
in AAAI’s 1997 Mobile Robot Competition. The project was completed in less
than three months, with the robots going on to win first place in the “Find Life
on Mars” event. The compressed time in which the development took place
speaks to the integrative advantages of the system.
2
Figure 2: Two Nomad 150 robots programmed to forage using TeamBots.
1.3
Components & Features
TeamBots is a collection of application programs and libraries designed to support multiagent mobile robotics research. The primary components of TeamBots
are:
TBSim: a multi-robot simulator that supports heterogeneous teams of robots
in complex environments including walls, roads, slow terrain, and other
environmental complexities.
TBHard: the mobile robot executive that enables control systems prototyped
in simulation to run on robots as well.
RoboComm: a communications package that supports broadcast, multi-cast
and uni-cast messages between robots. The complexities of networking
and marshaling and unmarshaling data are hidden from the developer.
RoboComm works in simulation and on robots.
Clay: a library of Java classes that can be easily combined to create behaviorbased robot control systems.
One of the most important features of the TeamBots environment is that it
supports prototyping in simulation of the same control systems that can be run
on mobile robots.
The TeamBots simulation environment is extremely flexible. It supports
multiple heterogeneous robot hardware running heterogeneous control systems.
Complex (or simple) experimental environments can be designed with walls,
roads, opponent robots and circular obstacles. All of these objects may be
included in a simulation by editing an easily understandable human-readable
description file.
3
Figure 3: The TeamBots system design. Robot control systems can use the
same API to interact in simulation or with real robot hardware.
Because the software is written in Java, it is very portable. TeamBots runs
on Windows, Linux, MacOS and any other operating environment supporting
Java 1.2 or later.
The TeamBots distribution is a full source-code release. The simulation
environment is written entirely in Java. Execution on mobile robots sometimes
requires low-level libraries in C, but Java is used for all higher-level functions.
1.4
Acquiring and Installing TeamBots
The TeamBots distribution, and instructions for installing it are available online
at http://www.teambots.org. We do not include details of installation here,
because they are subject to change as TeamBots is updated and revised.
1.5
System Design
TeamBots is not a robot architecture.. It is, rather, a set of Java classes
and APIs that bridge robotic software components together. One of these components, of course, is the robot architecture used in the development of a control
system. TeamBots is bundled with a robot architecture, Clay (described in later
sections), but researchers are free to use the other features of TeamBots without
using Clay.
The robot control system interfaces with real and simulated robot hardware
through a common API (Figure 3). The API provides access to robot sensors
and actuators through a basic set of accesor methods. Any control system using
the interface is automatically supported in simulation and on mobile robots.
Several types of robots are supported, including Nomadic Technologies’ Nomad 150 robot, Personal Robotics’ Cye robot, ActivMedia’s AmigoBot, and
RWI’s ATRV series. All the robots share a common subset of interface methods. Additional methods are added when a specific platform offers a new or
unique sensor or actuator (e.g. vision or a manipulator). A few examples of the
common methods include:
• getHeading() returns the heading of the robot;
• getPosition() returns the location of the robot;
• setSpeed(s) moves the robot along its current heading at s meters/sec.
4
• setSteer(h) steers the robot in the h direction.
A new platform can be supported simply by implementing the API for that
robot. This means that, not only can the same control system run in simulation
and on hardware, but it can run on different types of robots as well.
1.6
Why Java?
One of our goals in developing TeamBots is to provide a stable, portable platform
for the robotics research community. We hope that TeamBots will serve as a
common platform for the exchange and evaluation of new architectures, learning
techniques and other robot technologies. The choice of Java as the language for
this system is a crucial decision supporting our goals:
• Portability: TeamBots runs under Windows, NT, Solaris, SunOS, MacOS, OS X, Linux and IRIX as well as several embedded platforms without
an OS. All other robotic development environments we know of are tied
to specific operating environments. This is an important issue when one
considers the wide range of platforms used by robotics researchers.
• Productivity: It is our experience that programmers produce working
code much more quickly in Java than in C or C++. Additionally, the
object-oriented features of Java provide for code reuse in many situations.
• Modularity and code reuse: Packages supporting reinforcement learning, communication, planning, motor schema-based navigation, vision,
hazard sensing and manipulation have all been integrated and reused in
several projects.
There are two important issues with Java that concern some robotics researchers: performance and garbage collection. With regard to performance:
Because Java is interpreted, may conclude it isn’t fast enough for robotics applications. In contrast, we have experienced no problems in the performance
of our behavior-based control systems. In simulation on a 200MHz Pentium,
ten agents can be simulated with double buffering at 40 Hz. On mobile robots
the system, including vision, sonar sensing and motor control, runs at 10Hz.
The primary bottleneck is serial I/O to the robot hardware. It is also important to mention that many new Java compilers generate native machine code.
Executables run directly on the hardware.
Another potential performance concern is garbage collection. In Java, the
programmer doesn’t have to worry about memory allocation or disposal. Instead, the language handles this automatically through periodic garbage collection. This is a key factor in its ease of use, but a potential obstacle to predictable
real-time performance. Garbage collection can happen at any time and may take
several tenths of a second — thus cycle times can become unpredictable. Our
solution is to explicitly call for garbage collection on every execution cycle. In
simulation overall performance degrades by about 10%, but cycle times never
fluctuate. On mobile robots there is no measurable change in performance.
5
Figure 4: Several example domains implemented in the TeamBots simulator,
TBSim. From left to right: an office navigation environment with walls and
circular obstacles; two robots foraging; a complex traffic simulation involving
10s of agents.
Figure 5: Three of the commercial robot systems that TeamBots supports, from
left to right: the ActivMedia AmigoBot, Probotic’s Cye, RWI’s ATRV Mini.
2
TeamBots Run Time Environments: TBSim
and TBHard
There are two run time environments provided in TeamBots: TBSim for simulation and TBHard for robot hardware.
The simulation application TBSim begins by reading in a description file
that specifies the physical environment for the simulation. Example simulated
environments are illustrated in Figure 4. Among other things, the description
file specifies the locations of robots, the control systems to run on them, locations
of walls and other obstacles, as well as the locations and types of objects in the
environment that the robots can manipulate. An example description file is
included in the Appendix.
Control systems that run in simulation can also run immediately on mobile
robots using TBHard. TBHard is started at the command line on the appropriate computer attached to the robot. The control system to run is included
as one of the command line arguments to the program.
6
Both run time environments require robot control systems compiled as Java
classes. These control systems can be developed according to any architecture.
However, developers may find it convenient to use the provided Clay architecture.
3
Configuring Behavior with Clay
Users are free to develop TeamBots control systems using whatever control
architecture they like. However, we have developed Clay, an integrated behaviorbased control architecture that is available for use with TeamBots.
Clay is a group of Java classes that can be easily combined to create behaviorbased robot control systems. Clay takes advantage of Java syntax to facilitate
combining, blending and abstraction of behavior. Clay can be used to create
simple reactive systems or complex hierarchical configurations with learning and
memory.
The basic building block in Clay is a node. There are two important phases
in a node’s life: initialization and run time. Most nodes have only two methods, corresponding to these phases: the constructor, used for initialization; and
Value(), called repeatedly at run time.
3.1
Configuration of Behavior & Code Reuse
Nodes often have other nodes embedded within them (e.g. an avoid obstacle
node typically has a detect obstacle node embedded within it). The embedding is specified at initialization time using the node’s constructor. Here is an
example of how we’d embed one node in another:
detect_obstacles = new va_Obstacles_r(abstract_robot);
avoid_obstacles = new v_Avoid_va(2.0, 1.0, detect_obstacles);
In this example, a detect obstacles node is created using the va Obstacles r
class (the va Obstacle r class knows how to query the robot hardware for information about obstacles). Next an avoid obstacles node is generated by
embedding the detect obstacles node in a v Avoid va object. The lowercase letters before and after the node names refer to the input and output types
of the node; these hints are helpful when configuring nodes. More on that later.
Note that the embedding provides for code re-use. We could, for instance,
avoid robots instead by embedding detect robots versus detect obstacles
in the v Avoid va node. It is also possible to re-use instantiated nodes by
embedding them in several other nodes. In this next example, detect obstacle
is embedded in an avoid obstacle node and a swirl obstacle node:
detect\_obstacles = new va_Obstacles_r(abstract_robot);
avoid\_obstacles = new v\_Avoid\_va(2.0, 1.0, detect\_obstacles);
swirl\_obstacles = new v\_Swirl\_va(2.0, 1.0, detect\_obstacles, heading);
7
Nodes are combined or blended by embedding them in a blending node.
v StaticWeightedSum va is an example blending node class. If you are familiar
with motor schema theory, this type node is used for the “sum and normalize”
step of schema and assemblage combining. v StaticWeightedSum va takes an
array of Nodes and an array of weights as input at configuration time. At
run time, it multiplies the output of each embedded node by the associated
weight or gain, then sums them. The following statements generate a new
node, avoid n swirl, that is the average of its two embedded nodes:
avoid_n_swirl = new v_StaticWeightedSum_va();
avoid_n_swirl.embedded[0]
= avoid_obstacles;
avoid_n_swirl.weights[0]
= 0.5;
avoid_n_swirl.embedded[1]
= swirl_obstacles;
avoid_n_swirl.weights[1]
= 0.5;
3.2
Run time
Once a Clay-based behavioral system has been specified, it is repeatedly called
at run time for it’s present value, based on the current situation of the robot.
The configuration is the entire behavioral system encapsulated in a single object.
For convention, we usually call this object configuration. It is often useful
to create separate configurations for each actuator, as might be the case with a
Nomad 150 that has steering and turret actuators. In this case we would call
the configurations steering configuration and turret configuration.
At each time step the configuration is activated through a call to configuration.Value().
configuration.Value() implicitly activates any embedded nodes through calls
to their Value() methods, and so a hierarchical top-down chain of calls is initiated. How do we avoid a computational explosion? Several mechanisms are
included in Clay to address this potential problem.
First all the Value() methods take a time stamp as a parameter. They
remember the last time they were called, and if the time stamp has not increased,
they return the last computed value. Thus if a node is reused by embedding in
several other nodes, it will only go to the trouble of computing its value once
per time step. To ensure this, all nodes call embedded nodes with the time
stamp they were passed. The time stamp is never incremented by a node. It is
set at the highest level by the object calling the configuration (either TBHard
or TBSim).
Second, Clay includes some node types that select rather than blend. In a
selection node, only one embedded sub-node is activated at a time, thus fan-out
calls are eliminated.
3.3
Designing New Clay Nodes
Developing a new node is fairly easy. There are two things to consider first:
what types of input will it require? and what will its output type be? Input
is provided by the Value() method of embedded nodes or by fixed parameters
8
passed to the constructor at initialization time. Java type-checking ensures that
we can only embed nodes whose output types match the input type specified
by the parent node’s constructor.
As mentioned above, input types for a node are specified by the constructor
declaration. The output type is specified by its Value() definition. You should
implement your node by extending one of the following classes, based on the
desired output type for your node:
NodeBoolean: the node outputs a boolean.
NodeDouble: the node outputs a double.
NodeInt: the node outputs an int.
NodeScalar: the node can output an int, double or boolean, as requested by
the caller.
NodeVec2: the node outputs a 2-dimensional vector.
NodeVec2Array: the node outputs an array of 2-dimensional vectors.
Although Clay can be utilized for other types of behavioral paradigms, it
specifically targets motor schema-based control. Several motor and perceptual
schemas have already been designed, and are included in the Clay distribution.
Motor schemas are usually NodeVec2s. Perceptual schemas may be NodeVec2s
or NodeVec2Arrays depending on what sorts of things they sense. Perceptual
features are typically NodeBooleans or NodeInts.
Once you have selected the input and output types of your node, you must
implement the constructor and Value() methods. Probably the best way to get
started is by looking at some of the existing nodes for inspiration. v LinearAttraction v
and v AvoidArray va are good examples.
3.4
Naming Conventions in Clay
To help make it easier for designers to determine which nodes are which,we have
developed a naming convention. Each node class is named as follows:
{output type}_{name}_{embedded node 1 type}{embedded node 2 type}{...}
The “name” is the name you give your node. Variations that provide slightly
different outputs or use many instead of one input are distinguished by the output and embedded type prefix and suffixes. Note that a node can only have one
output type. The types are given by one or two letter abbreviations as follows:
9
abbreviation
i
ia
d
da
v
va
b
ba
s
sa
r
type
int
int[]
double
double[]
Vec2
Vec2[]
boolean
boolean[]
Scalar
Scalar[]
robot only valid as an input
So a node named Avoid that takes an array of Vec2s as input and outputs
a single Vec2 would be called v Avoid va. The name of the node should clearly
and succinctly indicate its purpose (e.g. Obstacle, LinearAttraction). Nodes
taking a robot object as input usually provide some sort of sensor output.
va Obstacles r for example, outputs a list of detected obstacles.
4
RoboComm
Because TeamBots is a multi-robot environment, communication between robots
is an important consideration. RoboComm was written to provide easy to program asynchronous robot to robot communication. Although the system is primarily targeted for autonomous robot applications, there is no reason it cannot
be employed in other applications as well.
The RoboComm API is implemented in TBSim for robot communication in
simulation. It is also implemented using TCP/IP sockets for communication
between mobile robots. To aid rapid prototyping, the APIs are implemented so
that a user process (usually a robot control system) cannot distinguish between
the simulated and TCP/IP versions.
Sending and receiving messages is easy. Here is a code snippet illustrating
how a string message can be sent to robot 2:
t.unicast(2, new StringMessage("hello!"));
The process on robot 2 receives the message using code like this:
new_message = r.getNextElement();
RoboComm is composed of a server application and client software. The
client software is in the EDU.gatech.cc.is.communication package. Once you
have installed the software, you can test it using the included demonstration
program. First, open a window and start the server:
java RoboComm.RoboComm
Open another window and start client number 1:
10
java RoboComm.Client 1
Open another window and start client number 2:
java RoboComm.Client 2
The text output in the server window should look like this:
RoboComm 0.91 (c)1998 Tucker Balch
RoboComm.run: started on pilot.cc.gatech.edu
Listening for connections on port 7462
RoboComm: client 1 registered
RoboComm: client 2 registered
There will also be several messages printed in the client windows.
4.1
The RoboComm Server
At initialization time, each robot initiates a socket connection to the RoboComm
server. When a robot sends a message the server looks at the destination information, then duplicates and forwards the message to each intended receiver.
To start the server, type:
java RoboComm.RoboComm
The server will start up and wait for robots to request a connection. It will
print informative messages when important events occur, Usually, you can just
start the server once and forget about it. Note: you do not need to start the
server if you only need communication in simulation.
4.2
Sending and Receiving Messages
The methods for communication are defined by the Transceiver interface. The
interface is implemented by the TransceiverHard class for real TCP/IP communication, and by the TransceiverSim class for communication in simulation.
To communicate, the first thing to do is to create a Transceiver object:
Transceiver t = new TransceiverHard("desoto.cc.gatech.edu", 2);
This will open a connection to the RoboComm server on desoto and register
the process as robot number 2. A thread to monitor for incoming messages is
automatically started up. All messages transmitted to robot 2 will be handled
by the thread.
As messages are received, they are inserted into a buffer and made available
for processing by the higher level software. To access received messages, you
need to ask for a “receive channel” as follows:
Enumeration messages_in = new t.getReceiveChannel();
11
You can allocate as many receive channels as you like; all incoming messages
will be duplicated and inserted in a queue for each receive channel. You can test
to see if any messages are queued by calling the hasMoreElements() method.
In this example, we loop while messages are available and print them:
while (messages_in.hasMoreElements())
System.out.print(messages.nextElement());
Sending messages is also fairly straightforward. RoboComm supports broadcast, unicast, and multi-cast transmissions. Here are examples of broadcast and
unicast:
t.broadcast(message);
t.unicast(1,message);
A broadcast call will send a copy of message to all processes registered on
the same server1 . Unicast just sends one message to the specified robot.
Look at Client.java in the RoboComm sub-directory for a complete example
client program.
4.3
Developing New Message Types
RoboComm takes advantage of Java’s serialization capability to enable the
transmission of any serializable Java object. Several useful message types are
already defined (e.g. LongMessage for sending long integers), but you may need
to create your own if you need to send other types of data. To do this, just
extend the Message class. The Message class is really just a wrapper containing
information about the message destination. Take a look at some of the other
message types defined in the EDU.gatech.cc.is.communication package for
inspiration.
5
Research With TeamBots
TeamBots is utilized in research at a number of universites and research labs.
This section will be expanded in the future to include a list of some TeamBots
users.
6
Acknowledgments
TeamBots was initially developed in Georgia Tech’s Mobile Robot Laboratory.
The Mobile Robot Lab’s director, Ron Arkin, provided access to robots and
computing equipment used in its development. Further development and refinement of TeamBots was carried out at CMU in the MultiRobot Lab with
1 in
the case of simulation, messages can only be sent to robots on the same team.
12
Manuela Veloso. TeamBots is now under continuing development in the BORG
Lab at Georgia Tech.
A number of collaborators have contributed to TeamBots, including, but
not limited to: Ashley Stroupe, Rosemary Emery, Kevin Sikorski, and Maria
Hybinette.
TeamBots development was funded partly under DARPA’s MARS program.
13
A
Example Simulation Description File
// This is an example description file for specifying the environment
// when using TBSim.
//======
// SIMULATION BOUNDARY
//======
//
// bounds left right bottom top
//
// bounds statements set the bounds of the visible "playing field" in
// meters for a simulation.
If the aspect ratio of the bounds are not
// the same as the graphical area set aside by the simulation, then
// the robots may wander off the screen.
bounds -5 5 -5 5
//======
// SEED
//======
//
// seed number
//
// The seed statement sets the random number seed.
// -1
The default is
seed 3
//======
// TIMEOUT
//======
//
// timeout time
//
// The timeout statement indicates in milliseconds when the
// simulation will terminate.
// The program automatically terminates when this time
// is reached. If no timeout statement is given, the default is no
// termination. NOTE: you *must* use a timeout with a trials statement.
//
// timeout 10000 // ten seconds
//======
// TRIALS
//======
//
14
// trials num_trials
//
// The trials statement indicates that the simulation should be run
// a certain number of times. Each trial automatically terminates when the
// timeout time is reached, then a new trial is begun. Note: certain hooks
// are available in the ControlSystem class for you to know when trials
// begin and end. See the javadoc documentation.
//
trials 100 // 100 trials
//======
// TIMESTEP
//======
//
// timestep milliseconds
//
// timestep statements set the time (in milliseconds) transpices
// between discrete simulation steps.
timestep 100 // 1/10th of a second
//======
// WINDOWSIZE
//======
//
// windowsize width height
//
// The windowsize statement gives a default window size.
// overridden on the command line.
windowsize 500 500
This can be
//======
// BACKGROUND COLOR
//======
//
// background color
//
// A background statement sets the background color for the simulation.
// The color must be given in hex format as "xRRGGBB" where RR indicates
// the red component (00 for none, FF for full), GG is the green component,
// and BB is the blue. Here we use white:
background xFFFFFF
//======
// ROBOTS
//======
//
// robot robottype controlsystem x y theta forecolor backcolor
15
//
//
//
//
//
//
//
//
visionclass
robot statements cause a robot with a control system to be instantiated
in the simulation. Be sure to include the full class name for the
abstract robot type and your control system. The x y and theta
parameters set the initial position of the robot in the field.
You can used different colors to tell robots apart from one another.
The visionclass indicates which color the robots see each other as.
robot EDU.gatech.cc.is.abstractrobot.MultiForageN150Sim
forage 0 -1.5 0 x000000 xFF0000 2
robot EDU.gatech.cc.is.abstractrobot.MultiForageN150Sim
forage 0 1.5 0 x000000 xFF0000 2
//======
// OBJECTS
//======
//
// object objecttype x y theta radius forecolor backcolor visionclass
//
// Pbject statements instantiate things without control systems (like
// balls, bins, obstacles, etc. Be sure to include the full class name for the
// object. The x y and theta parameters set the initial position of
// object in the field. Forecolor and backcolor are the foreground
// and background colors of the object as drawn. The visionclass
// parameter is used to put each kind of object into it’s own perceptual
// class. That way when the simulated sensors of robots look for things
// they can be sorted by this identifier.
// simulation of bin
//object EDU.gatech.cc.is.simulation.ObstacleSim 0
0 0 0.10 xC0C0C0 x000000 4
// obstacles
object EDU.gatech.cc.is.simulation.ObstacleSim -2.0 -1.0 0 0.30 xC0C0C0 x000000 2
object EDU.gatech.cc.is.simulation.ObstacleSim 2.0 2.0 0 0.10 xC0C0C0 x000000 2
object EDU.gatech.cc.is.simulation.ObstacleSim 2.3 1.8 0
16