1
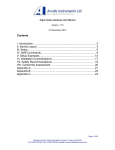
ThermCal130
Dry Block Temperature Calibrator
INSTRUCTION MANUAL
Please read all the information in this booklet before using the unit.
January 2015
Rev 1.0
The ThermCal130
Introduction
The ThermCal130 calibrator provides a safe, dry, constant temperature source for checking and calibrating a wide
range of temperature sensors, systems, indicators and thermometers. It is fast and economical and can be used
either on a bench top or as a portable field unit. The weight of the unit is only 17 pounds/7.7 kilograms. The unit
covers the temperature range from -20°C to +130°C in an ambient of 20°C using a machined aluminum block as
the heat transfer medium. The temperature control circuit is built into the unit.
Features include:
•
•
•
•
Maximum temperature of 130°C/266°F
Minimum temperature of -20°C/-4°F
Up to eight setpoints can be stored & recalled
insert well & ¼” diameter reference well
Even though the unit heats up and cools down rapidly, highly efficient insulation and an internal cooling fan
ensures that the case remains safe enough to handle even at maximum operating temperatures. The
ThermCal130 calibrator has been designed to comply with all relevant electromagnetic interference and electrical
safety regulations.
-1-
Specification
Figures quoted are at the base of the well at the time of calibration.
Temperature range:
-20°C/-4°F to 130°C/266°F at an ambient of 20°C/68°F
NOTE: the typical minimum achievable temperature is 40°C/72°F below the room ambient temperature
Display resolution:
0.1°
Accuracy:
±0.4°C (-20 to 130°C)
±0.8°C (-4 to 266°F)
Stability (10 minutes):
±0.050°C
(10 minutes after reaching setpoint)
±0.060°C
Heat up time -20 to 130°C:
9 minutes
Heat up time 20 to 100°C:
4 minutes
Cool down 20 to -20°C:
9 minutes (ambient of +20°C)
Cool down 130 to 20°C:
4 minutes
Immersion Depth:
4" (101mm)
Insert well:
½” diameter x 4” depth
Reference well:
¼” diameter x 4” depth
Fan Cooling:
Automatic
Weight:
17 lbs (7.7 Kg)
Dimensions* (H x W x D):
11 x 9 x 8 inches/279 x 229 x 203 mm
*excluding the carrying strap
Electrical supply
Voltage
230V
120V
Note:
Cycles
Power
50/60Hz
50/60Hz
150W
150W
The above specifications are quoted for an ambient temperature range of 10°C/50°F to 30°C/86°F.
Outside this range, the quoted figures may deteriorate but the unit will still work safely. NOTE: The
minimum achievable temperature is 40°C/72°F below the room ambient temperature.
-2-
Working environment
The calibrator units are designed to work safely under the following conditions:
Ambient temperature range: 5°C/9°F to 40°C/104°F
Humidity: Up to 95% relative humidity, non-condensing
Warning
Warning:
Aviso:
HIGH TEMPERATURES ARE DANGEROUS
LAS TEMPERATURAS ELEVADAS SON PELI
HIGH TEMPERATURES ARE DANGEROUS: They can cause serious burns to operators and ignite combustible
material. Accurate Thermal Systems has taken great care in the design of these units to protect operators from
hazards, but operators should pay attention to the following points:
•
•
•
•
•
USE CARE AND WEAR PROTECTIVE GLOVES TO PROTECT HANDS
DO NOT put hot objects on or near combustible objects
DO NOT operate the unit close to inflammable liquids or gases
DO NOT place any liquid directly in your unit
At all times USE COMMON SENSE
Operator Safety
All operators of Accurate Thermal Systems equipment must have available the relevant literature needed to
ensure their safety. It is important that only suitably trained personnel operate this equipment in accordance with
the instructions contained in this manual and with general safety standards and procedures. If the equipment is
used in a manner not specified by Accurate Thermal Systems, the protection provided by the equipment to the
operator may be impaired. All Accurate Thermal Systems units have been designed to conform to international
safety requirements. If a safety problem is encountered, switch off at the power socket and remove the plug
from the supply. Please use caution when removing probes and inserts as burns to the skin can occur if in
contact.
-3-
Installation
1. All Accurate Thermal Systems units are supplied with a power cable.
2. Before connecting the power supply, check the voltage against the rating plate. Connect the power
cable to a suitable plug according to the table below. Note that the unit must be earth grounded
to ensure proper electrical safety.
Electrical connections:
Live
Neutral
Earth ground
220V-240V
110V-120V
Brown
Blue
Green/yellow
Black
White
Green
The fused plug supplied with the power lead for use in the UK is fitted with the following value fuse to
protect the cable: 230V UK 4 AMP
The fuse in the unit protects the unit and the operator
Note that units marked 230V on the rating plate work at 220V; units marked 120V work at 110V. In
both cases, however, the heating rate will degrade by approximately 8%. The rating plate is on the
rear of the unit.
3. Plug the power cable into the socket on the rear of the unit.
4. Place the unit on a suitable bench or flat workspace, or in a fume cupboard if required, ensuring that
the air inlet vents on the underside are free from obstruction.
After use, when you have finished heating samples, remember that parts of the unit may be very hot.
Take the precautions listed earlier.
-4-
OPERATION
Preparation
1.
2.
The heater design, temperature sensor and control circuit give good temperature control and
uniformity, but make sure that there is a close fit of the probes in the block to allow efficient heat
transfer. Contact us about an insert that more closely fits your probe or device being calibrated.
Plug the power cable into the socket in the back of the unit. Connect the power cable to the
electrical supply and switch the power on. 1 = power on, 0 = power off
Setting the operating temperature
1.
To set the operating temperature required, press and hold either the up or down arrow button to
increment to the value required. Alternatively you can press the («PF) key to move over to
individual digits to set higher values much quicker. After 2 seconds your value will be set & retained.
2. When you have the correct set temperature displayed the unit will start to heat or cool to that
value.
3. Once the process value/actual temperature reaches the set point, allow the block to fully stabilize for
at least 10 minutes before performing a calibration.
4. When calibrating sensors and thermometers a best practice method is to start at higher
temperatures first and then work down to lower ones. This will allow devices to be removed safely.
Entering up to 8 setpoints for fast recall
1. To input up to 8 setpoints press the first button on the left and then the 2nd button from the left
until the top line displays SP-0. Here you can enter up to 8 values for fast future recall. Do not
change any of the settings or values after SP-7. When finished entering values press the button on
the left one time.
You’ll need to note which value is in which location for future recall.
2. To select one of the 8 setpoints for use from the main display press the 2nd button from the left so
the top line displays M-SP. Next use the up arrow key to select one of the 8 setpoint values. Press
the 1st key on the left twice for the value to be accepted.
-5-
Operation near ambient
For best results, to calibrate at a setpoint near ambient when cooling down from a higher temperature set
parameter (AL-1) 3 °C higher than you room ambient. When heating up from a lower temperature set (AL-1) 3 °C
lower than ambient. Access the AL-1 parameter by pressing the mode button (2nd from the left). Do not change
AL-2 which should be set at 1.0
Factory default control parameters
The parameters used in the controller have been developed by Accurate Thermal Systems to give the best unit
performance for most applications. If the need arises the “AT” autotune command can be run to further optimize
results based on the thermal block load and ambient conditions. Contact us for further support and details.
Switching the display from Degrees C to Degrees F and vice versa
To switch the display press and hold down the left key until the display indicates “CN-t”, next press the 2nd key
from the left one time and the top line will show “d-U” which is display units. Switch to either C or F. After setting
this value hold down the left most key so the controller resets and accepts the new value.
Next press the first button on the left and then the 2nd button from the left until the top line displays CN5.
Set CN5 to ____ for degrees F operation and ____ for degrees C. Unit S/N: _____________
When done press the button on the left one time.
-6-
Operator maintenance
NOTE THAT THIS EQUIPMENT SHOULD ONLY BE DISMANTLED BY PROPERLY TRAINED PERSONNEL. REMOVING
THE FRONT OR REAR PANELS EXPOSES POTENTIALLY LETHAL VOLTAGES. THERE ARE NO OPERATOR
MAINTAINABLE PARTS WITHIN THE EQUIPMENT.
In the unlikely event that you experience any problems with your unit which cannot easily be remedied, you
should contact your supplier and return the unit if necessary. Please include any details of the fault observed and
remember to return the unit in its original packing. Accurate Thermal Systems will accept no responsibility for any
damage to units that are improperly packed for shipment. If in doubt, contact your supplier.
1.
2.
Cleaning: Before cleaning your unit, ALWAYS disconnect it from the power supply and allow it to
cool to 30° C. Your unit can be cleaned by wiping with a damp soapy cloth. Care should be
exercised to prevent water from running inside the unit. Do not use abrasive cleaners.
Fuses: Your unit is protected by fuse. They should only be changed by suitably qualified
personnel. If the fuse blow persistently, a serious fault is indicated and you may need to return the
unit to your supplier for repair.
ADDITIONAL INFORMATION
The controller is factory preset with all parameters and calibration data and therefore cannot be
calibrated or serviced in the field. Please contact Accurate Thermal Systems for arrangements to have
your unit calibrated or serviced.
-7-
Replacement Parts
The following parts may be obtained from Anville Instruments Ltd. if replacements or alternatives are required:
Part Number
4163
4164
4150
4282
4150
4285
ATS3074
ATS3075
ATS3076
ATS3077
ATS3078
Description
UK 240 volt power cable with 13amp UK plug (5 amp fuse)
Euro style 240 volt power cable with R/A Schuko plug
US style 120 volt power cable
Instruction manual
Unit carrying strap
Insert extractor
insert for 1/8” diameter probes
Insert for 3/16” diameter probes
Insert for ¼” diameter probes
Insert for 5/16” diameter probes
Insert for 3/8” diameter probes
Spare Parts
Part Number
4224
4174
4147
4221
4223
4280
4283
Description
Peltier
Temperature controller
PRT
Solid state relay
Power supply
3 PDT power relay
2 amp fuse, 5 x 20mm
-8-
Contact Information
Accurate Thermal Systems LLC
4106 Sylon Blvd
Hainesport, NJ 08036 USA
Ph: 609-326-3190
Fax: 609-479-5124
Email: [email protected]
Website: www.accuthermal.com
GUARANTEE
The unit is guaranteed against any defects in material or workmanship for the period of 1 year. This period is
from the date of purchase, and within this period, all defective parts will be replaced free of charge provided that
the defect is not the result of misuse, accident or negligence. Servicing under this guarantee should be obtained
from the supplier. Not withstanding the description and specification(s) of the units contained in the Operator’s
Manual, Accurate Thermal Systems hereby reserves the right to make such changes as it sees fit to the units or
to any component of the units. This manual has been prepared solely for the convenience of Accurate Thermal
Systems customers and nothing in this Instruction Book shall be taken as a warranty, condition or representation
concerning the description, merchantability, fitness for purpose or otherwise of the units or components.
-9-