1
Tested for you in our cooking studio
en
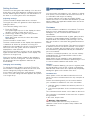
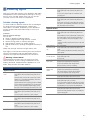
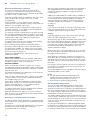
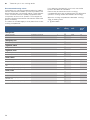
Tips on baking
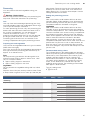
You want to find out whether the cake Push a cocktail stick into the highest point on the cake. If the cocktail stick comes out clean with no dough resis completely cooked in the middle.
idue, the cake is ready.
The cake collapses.
Next time, use less liquid. Alternatively, set the temperature to be 10 °C lower and extend the baking time.
Adhere to the specified ingredients and preparation instructions in the recipe.
The cake has risen in the middle but Only grease the base of the springform cake tin. After baking, loosen the cake carefully with a knife.
is lower around the edge.
The fruit juice overflows.
Next time, use the universal pan.
Small baked items stick to one
There should be a gap of approx. 2 cm around each item. This gives enough space for the baked items to
another during baking.
expand well and brown on all sides.
The cake is too dry.
Set the temperature 10 °C higher and shorten the baking time.
The cake is generally too light in col- If the shelf position and the cookware are correct, then you should increase the temperature if necessary or
our.
extend the baking time.
The cake is too light on top, and too Bake the cake one level higher in the oven the next time.
dark underneath.
The cake is too dark on top, and too Bake the cake one level lower in the oven the next time. Select a lower temperature and extend the baking
light underneath.
time.
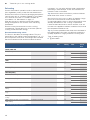
Cakes baked in a tray or tin are too
Place the baking tray in the middle of the accessories, not directly against the back wall.
brown at the back.
The whole cake is too dark.
Select a lower temperature next time and extend the baking time if necessary.
The cake is unevenly browned.
Select a slightly lower temperature.
Protruding greaseproof paper can affect the air circulation. Always cut greaseproof paper to size.
Ensure that the baking tin does not stand directly in front of the openings in the cooking compartment back
wall.
When baking small items, you should use similar sizes and thicknesses wherever possible.
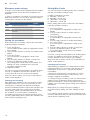
You were baking on several levels.
Always select 4D hot air when baking on several levels. Baked items that are placed into the oven on trays or
The items on the top baking tray are in baking tins/dishes at the same time will not necessarily be ready at the same time.
darker than those on the lower baking
tray.
The cake looks good, but is not
Use a lower temperature and bake slightly longer; if necessary, add slightly less liquid. For cakes with a moist
cooked properly in the middle.
topping, bake the base first. Sprinkle it with almonds or breadcrumbs and then place the topping on top.
The cake cannot be turned out of the Allow the cake to cool down for 5 to 10 minutes after baking. If it still sticks, carefully loosen the cake around
dish when it is turned upside down.
the edges again using a knife. Turn the cake tin upside down again and cover it several times with a cold, wet
cloth. Next time, grease the baking tin/dish and sprinkle with breadcrumbs.
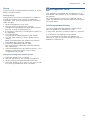
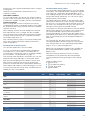
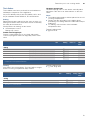
Bread and rolls
Your appliance offers you a range of heating types for
baking bread and rolls. You can find the ideal settings
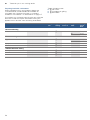
for many dishes in the settings tables.
Also refer to the notes in the section on allowing dough
to rise.
Only use original accessories supplied with your
appliance. These have been tailored to the cooking
compartment and the operating modes of your
appliance.
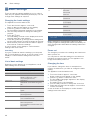
Shelf positions
Use the indicated shelf positions.
Baking on one level
When baking on one level, use the following shelf
position:
■
Level 1
Baking on two levels
Use 4D hot air. Baked items that are placed into the
oven on trays or in baking tins/dishes at the same time
will not necessarily be ready at the same time.
■
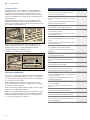
Universal pan: Level 3
Baking tray: Level 1
■
Baking tins/dishes on the wire rack
First wire rack: Level 3
Second wire rack: Level 1
By preparing several dishes at the same time, you can
make energy savings of up to 45 per cent. Position
baking tins/dishes next to one another or offset and
vertically stacked in the cooking compartment.
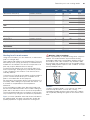
Accessories
Ensure that you always use suitable accessories and
that they are placed in the oven the right way around.
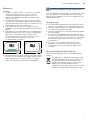
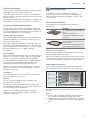
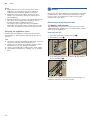
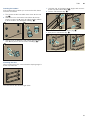
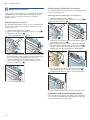
Wire rack
Slide the wire rack in with the imprint "Microwave"
facing the appliance door, and the outer rail facing
downwards.
31