1
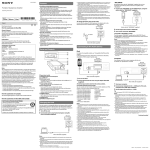
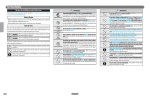
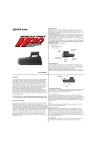
4-297-824-11(1)
Head
Mounted
Display
Reference Guide
Before Initial Use
Refer to the “Startup Guide” for instructions on
connecting the system, wearing the unit, and completing
initial settings.
HMZ-T1
Warning
To reduce the risk of fire or electric shock, do not
expose this apparatus to rain or moisture.
To prevent fire or shock hazard, do not place objects
filled with liquids, such as vases, on the apparatus.
Install this system so that the power cord can be
unplugged from the wall outlet immediately in the
event of trouble.
Do not install this equipment in a confined space such
as a bookshelf or similar unit.
Precaution
The set is not disconnected from the AC power source
(mains) as long as it is connected to the wall outlet,
even if the set itself has been turned off.
Notice for customers in the U.S.A.
and Canada
This symbol is intended to alert the
user to the presence of uninsulated
“dangerous voltage” within the
product’s enclosure that may be of
sufficient magnitude to constitute a
risk of electric shock to persons.
This symbol is intended to alert the
user to the presence of important
operating and maintenance
(servicing) instructions in the
literature accompanying the
appliance.
Notice for customers in the U.S.A.
Important Safety Instructions
1)
2)
3)
4)
5)
6)
7)
2
Read these instructions.
Keep these instructions.
Heed all warnings.
Follow all instructions.
Do not use this apparatus near water.
Clean only with dry cloth.
Do not block any ventilation openings. Install in
accordance with the manufacturer’s instructions.
8) Do not install near any heat sources such as
radiators, heat registers, stoves, or other apparatus
(including amplifiers) that produce heat.
9) Do not defeat the safety purpose of the polarized
or grounding-type plug. A polarized plug has two
blades with one wider than the other. A grounding
type plug has two blades and a third grounding
prong. The wide blade or the third prong are
provided for your safety. If the provided plug
does not fit into your outlet, consult an electrician
for replacement of the obsolete outlet.
10) Protect the power cord from being walked on or
pinched particularly at plugs, convenience
receptacles, and the point where they exit from
the apparatus.
11) Only use attachments/accessories specified by the
manufacturer.
12) Use only with the cart, stand, tripod,
bracket, or table specified by the
manufacturer, or sold with the
apparatus. When a cart is used, use
caution when moving the cart/
apparatus combination to avoid
injury from tip-over.
13) Unplug this apparatus during lightning storms or
when unused for long periods of time.
14) Refer all servicing to qualified service personnel.
Servicing is required when the apparatus has been
damaged in any way, such as power-supply cord
or plug is damaged, liquid has been spilled or
objects have fallen into the apparatus, the
apparatus has been exposed to rain or moisture,
does not operate normally, or has been dropped.
The following FCC statement applies
only to the version of this model
manufactured for sale in the U.S.A.
Other versions may not comply with
FCC technical regulations.
NOTE:
This equipment has been tested and found to comply
with the limits for a Class B digital device, pursuant
to Part 15 of the FCC Rules. These limits are designed
to provide reasonable protection against harmful
interference in a residential installation.
This equipment generates, uses, and can radiate radio
frequency energy and, if not installed and used in
accordance with the instructions, may cause harmful
interference to radio communications.
However, there is no guarantee that interference will
not occur in a particular installation. If this equipment
does cause harmful interference to radio or television
reception, which can be determined by turning the
equipment off and on, the user is encouraged to try to
correct the interference by one or more of the
following measures:
– Reorient or relocate the receiving antenna.
– Increase the separation between the equipment and
receiver.
– Connect the equipment into an outlet on a circuit
different from that to which the receiver is
connected.
– Consult the dealer or an experienced radio/TV
technician for help.
If you have any questions about this
product, you may call: Sony
Customer Information Center
1-800-222-SONY (7669) or
http://www.sony.com/. The number
below is for the FCC related matters
only.
Regulatory Information
Declaration of Conformity
Trade Name:
Model No.:
Responsible Party:
Address:
SONY
HMZ-T1
Sony Electronics Inc.
16530 Via Esprillo, San
Diego, CA 92127 U.S.A.
Telephone No.:
858-942-2230
This device complies with Part15 of the FCC Rules.
Operation is subject to the following two
conditions.: (1)This device may not cause harmful
interference, and (2)this device must accept any
interference received, including interference that
may cause undesired operation.
You are cautioned that any changes or modifications
not expressly approved in this manual could void
your authority to operate this equipment.
Notice for the customers in Canada
THIS CLASS B DIGITAL APPARATUS
COMPLIES WITH CANADIAN ICES-003.
Notice for customers in the United
Kingdom
A molded plug complying with BS1363 is fitted to
this equipment for your safety and convenience.
Should the fuse in the plug supplied need to be
replaced, a fuse of the same rating as the supplied one
and approved by ASTA or BSI to BS1362, (i.e.,
marked with
or
mark) must be used.
If the plug supplied with this equipment has a
detachable fuse cover, be sure to attach the fuse cover
after you change the fuse. Never use the plug without
the fuse cover. If you should lose the fuse cover,
please contact your nearest Sony service station.
Notice for customers: the following
information is only applicable to
equipment sold in countries applying
EU directives.
The manufacturer of this product is Sony
Corporation, 1-7-1 Konan Minato-ku Tokyo, 1080075 Japan. The Authorized Representative for EMC
and product safety is Sony Deutschland GmbH,
Hedelfinger Strasse 61, 70327 Stuttgart, Germany.
For any service or guarantee matters please refer to
the addresses given in separate service or guarantee
documents.
This equipment has been tested and found to comply
with the limits set out in the EMC Directive using a
connection cable shorter than 3 meters.
Disposal of Old Electrical
& Electronic Equipment
(Applicable in the
European Union and other
European countries with
separate collection
systems)
This symbol on the product or on its packaging
indicates that this product shall not be treated as
household waste. Instead it shall be handed over to
the applicable collection point for the recycling of
electrical and electronic equipment. By ensuring this
product is disposed of correctly, you will help prevent
potential negative consequences for the environment
and human health, which could otherwise be caused
by inappropriate waste handling of this product. The
recycling of materials will help to conserve natural
resources. For more detailed information about
recycling of this product, please contact your local
Civic Office, your household waste disposal service
or the shop where you purchased the product.
3
Correct Use
Health Precautions
Age Limitations
Watching video images or playing games by
this device may affect the health of growing
children. This device should not be used by
children 15 and under.
Use password protection feature (page 22) of
this device to restrict children from using this
device.
Watching Video with the Head Mounted
Display
• Some people may experience discomfort (such
as eye strain, fatigue, nausea, or motion
sickness) while watching video images or
playing games. Sony recommends that all
viewers take regular breaks while watching
video images or playing games. The length and
frequency of necessary breaks will vary from
person to person. You must decide what works
best. If you experience any discomfort, you
should stop watching the video images or
playing games until the discomfort ends;
consult a doctor if you believe necessary.
• Avoid wearing the unit in environments where
your head may shake, or while you are walking
or performing exercise, because there is a
higher possibility that you experience
discomfort.
• You should also review (i) the instruction
manual of any other device or media used with
this device and (ii) our website below for the
latest information.
For customers in Europe, Russia and UK:
http://support.sony-europe.com/
For customers in the U.S.A.:
http://esupport.sony.com/
For customers in Canada:
http://esupport.sony.com/CA/
For customers in China:
http://service.sony.com.cn/index.htm
For customers in other countries/regions:
http://www.sony-asia.com/support/
4
• Ensure that you are wearing the head mounted
unit correctly.
– For instructions on wearing the unit, refer to
the “Startup Guide.”
– To avoid watching with the screens skewed,
check screen alignment by referring to the
confirmation screen displayed initially.
– Note that dropping the unit or handling it
roughly may skew the screens.
• The head mounted unit can be adjusted in a
range of 55 mm – 72 mm (2 1/4 in. – 2 7/8 in.) to
suit the distance between your eyes
(interpupillary distance). If you cannot use the
system within this range, refrain from using the
system.
• By default, a warning message for automatic
shutdown will be displayed after three hours of
continuous viewing. If you clear the message
and continue watching, the system will
automatically turn off after another 3 hours.
For Comfortable Viewing
Images are perceived as appearing some distance
from the viewer.
If you normally wear glasses or contact lenses,
wear them as usual during use (with the exception
of reading glasses). Note that watching with
bifocals may be less than optimal.
Lens Care
Precautions
Power Supply
Position the system near the wall outlet used. In
case of strange noises, fumes, or smoke from the
system, immediately unplug the AC power cord
to turn all power off. Only pressing the power
button on the head mounted unit will not turn the
system off completely.
• Handle the lenses on the head mounted unit
carefully to avoid smears or scratches. If the
lenses become dirty, wipe them gently with a
soft lens-cleaning cloth.
• Do not use liquid solutions, such as lenscleaning fluid, water, or alcohol-based cleaners.
Cleaning the System
Clean outer surfaces of the system using a soft
cloth lightly moistened with a mild detergent. Do
not use solvents, such as thinner, benzine, or
alcohol, which may damage surfaces.
Installation Environment
Avoid installation in the following environments.
• Places subject to vibration
• In direct sunlight, or where it is very hot or
humid
• Places that are extremely cold
Also avoid putting liquid-filled containers (such
as flower vases) on top of the processor unit, or
using the system where it may be splashed. The
system may be damaged if splashed with water.
Condensation
Condensation occurs when moisture in the air
condenses on metal panels or other parts, forming
droplets. Condensation may form on outer
surfaces or internally if the system is suddenly
moved from a cold to a warm environment, or
when a heater is turned on in a cold room where
the system is installed. If condensation forms, do
not use the system until the droplets evaporate.
• If the system is not plugged into a wall outlet
Leave the system unplugged, and wait until the
droplets evaporate.
• If the system is not on
Leave the system off, and wait until the droplets
evaporate.
• If the system is on
Leave the system on, and wait until the droplets
evaporate.
Using the system when condensation has formed
may damage it.
Extended Listening at High Volume
Listening at high volume over extended periods
may harm hearing. To protect your hearing, avoid
listening at excessive volume.
Initial Volume
To avoid sudden loud output, keep the initial
volume low. Increase the volume gradually until
the desired level is reached.
Packaging Materials
Keep the original box and protective cushioning
for future use, in case you move or need to ship
the system for repair or other reasons.
5
HDMI Jacks and Connectors
Head Mounted Unit Cord Handling
Take these precautions to avoid damaging HDMI
jacks and connectors.
• When inserting cables, note the shape and
orientation of the connector and the HDMI jack
on the back of the processor unit.
Take these precautions to avoid damaging the
HMD OUT jack or cord connector.
• When inserting the connecting cord, note the
shape and orientation of the connector and the
HMD OUT jack on the front of the processor
unit.
• Before moving the processor unit, always
disconnect the connecting cord.
• When connecting or disconnecting the
connecting cord, hold the connector straight.
Do not hold the connector at an angle or force it
into the HMD OUT jack.
HDMI input and output
The connector is upside-down
HDMI input and output
The connector is not straight
• Before moving the processor unit, always
disconnect the HDMI cable.
• When connecting or disconnecting HDMI
cables, hold the connector straight. Do not hold
the connector at an angle or force it into the
HDMI jack.
• Use either the supplied HDMI cable or a
commercially available High-Speed HDMI
cable.
6
Contents
Health Precautions . . . . . . . . . . . . . . . . . . . . . . . . . . . . . . . . . . . . . . . . . . . . . 4
Precautions . . . . . . . . . . . . . . . . . . . . . . . . . . . . . . . . . . . . . . . . . . . . . . . . . . . 5
Product Highlights . . . . . . . . . . . . . . . . . . . . . . . . . . . . . . . . . . . . . . . . . . . . . 8
Supplied Accessories . . . . . . . . . . . . . . . . . . . . . . . . . . . . . . . . . . . . . . . . . . . 8
Parts and Controls. . . . . . . . . . . . . . . . . . . . . . . . . . . . . . . . . . . . . . . . . . . . . 10
Fitting the Head Mounted Unit. . . . . . . . . . . . . . . . . . . . . . . . . . . . . . . . . . . 12
Confirming Screen Alignment . . . . . . . . . . . . . . . . . . . . . . . . . . . . . . . . . . . 15
System Settings . . . . . . . . . . . . . . . . . . . . . . . . . . . . . . . . . . . . . . . . . . . . . . 17
Troubleshooting . . . . . . . . . . . . . . . . . . . . . . . . . . . . . . . . . . . . . . . . . . . . . . 24
Specifications . . . . . . . . . . . . . . . . . . . . . . . . . . . . . . . . . . . . . . . . . . . . . . . . 30
License and Trademark Notice. . . . . . . . . . . . . . . . . . . . . . . . . . . . . . . . . . . 31
7
Product Highlights
Wearing the head mounted display, you can
watch 3D movies and play 3D games from
connected Blu-ray Disc™ player and game
consoles.
Product highlights are as follows.
• Enjoy video with impact, simulating the
big-screen cinematic experience through a
wide 45° horizontal field of view.
• Watch high-contrast, high-definition
video produced by Sony HD OLED
(Organic Light-Emitting Diode) panels in
the head mounted unit.
• Connect the system to 3D-compatible
equipment for a realistic 3D viewing
experience. Simultaneous display on both
OLED screens eliminates the cross-talk
(double images) that older systems with
alternating images are susceptible to.
• Hear immersive multi-channel virtual
surround-sound with depth, produced by
the headphones in the head mounted unit
and by Virtualphones Technology (VPT).
Supplied Accessories
Make sure the following items are included
with the system after purchase. If any items
are missing, contact your Sony dealer or a
local authorized Sony service center.
• AC power cord (1)
• HDMI cable (1)
• Light blocker (1 each for the left and right)
• Headband strap clip (1)
• Connecting cord holder (1)
8
• Forehead supporter (3)
Type A
(thin)
Type B
(medium)
Type C
(thick)
The type B forehead supporter is attached to
the head mounted unit at the time of
purchase.
• Forehead supporter cover (1)
• Reference Guide (this guide) (1)
• Startup Guide (1)
9
Parts and Controls
Head Mounted Unit
Forehead supporter
Headband strap release
button
Top headband strap
Bottom headband
strap
Illumination
Headband strap release
button
Control buttons (v/V/
b/B, MENU*)
VOL +/– buttons
1 (Power On/Standby)
button
Lens span adjusters
* The MENU button serves two purposes.
Press the MENU button to view setting menus as well as to
confirm setting changes (when it functions as an Enter
button).
Lenses
Connecting cord
10
Nose pad
Headphones
Processor Unit (Front)
HMD OUT jack (HMD Output)
Insert the connecting cord of the
head mounted unit.
PASS THROUGH indicator
Lit in amber when HDMI
pass-through is used.
Power indicator
Lit in green when the system is
on, and lit in red in standby mode.
Processor Unit (Back)
HDMI IN jack
(HDMI Input)
HDMI OUT jack
(HDMI Output)
AC IN terminal
Note
• Source signals cannot be passed through
the HDMI OUT jack until the HDMI passthrough is enabled (page 22) and the Head
Mount system is turned off.
11
Fitting the Head Mounted Unit
The head mounted unit can be adjusted in several ways to ensure a personalized, comfortable
fit. For a more comfortable fit, always adjust the head mounted unit before putting it on.
1
2
Nose pad
Ear pad
4
3
1 Adjusting the forehead supporter
Forehead supporters in two thicknesses are
included. Choose the best thickness for your
needs, accounting for image focus, pressure
on your nose, distance between your glasses
and the lenses and other considerations.
Top axis
Slit
Attach the forehead supporter cover as desired.
Attach the included cover
to the forehead
supporter.
2 Light blocker
If external light reflected on the screens is
distracting, attach the light blockers.
Bottom axis
The forehead supporter can be detached by pulling
it diagonally up and away from the unit, so that you
can attach the supporter of your preferred
thickness. Also choose the best supporter height
(on top or bottom axis) for your forehead. To attach
the supporter, align the supporter slits with the axes
on both sides and push until the supporter clicks
into place.
Light blocker
The left light blocker is labeled “L,” and the right
one, “R.” Attach the correct blocker on each side by
pushing the tabs into the three holes on the bottom
of the lens section.
Notes
• It may not be possible to attach the light
blockers when wearing some sorts of glasses.
12
• If external light is still distracting with the light
blockers on, dim the room lights or move away
from external light.
3 Further headband strap adjustment
If necessary, you can tighten the lower
headband strap even more by using the
supplied clip to shorten it.
For a Comfortable Fit
Have the weight of the head mounted unit
balanced between your forehead and the
back of your head
Forehead
supporter
Lower
headband
strap
Headband
strap clip
4 Attaching the connecting cord holder
To keep the connecting cord of the head
mounted unit out of the way, use the
supplied connecting cord holder and attach
the connecting cord to the lower headband
strap.
Wear the head mounted unit so that it is
supported both by the forehead supporter
and the lower headband strap. Fasten it to
keep it level on your head. If there is too
much pressure on the nose pad, remove the
unit and adjust the fit. Try moving the lower
headband strap down on your head or
switching forehead supporters (page 12).
Ensure a secure fit
Connecting cord
holder
Hook for bottom
headband strap
If either headband strap is too loose or too
tight, adjust the strap length for a better fit.
Hook for connecting
cord
13
Replacing Consumables
The following replacement parts are
available.
• Ear pad (EP-G1)
• Ear cushion
• Nose pad
• Forehead supporter (Type A (thin),
Type B (medium) or Type C (thick))
• Forehead supporter cover
• Headband strap clip
• Light blocker (1 each for the left and right)
• Connecting cord holder
When these consumables break or show
signs of wear, consult your nearest Sony
dealer or Sony service center.
You can replace the ear pads, the ear
cushions, and the nose pad as shown below.
Adhesive backing
Peel the new ear cushions away from the adhesive
backing. When attaching them, align the slit with
the ear cushion’s opening. After replacing the ear
cushions, reattach the ear pads.
Replacing the nose pad
Removing ear pads, replacing ear
cushions
Pull off the nose pad to remove it. To attach a new
nose pad, push the nose pad clip into the opening.
Pull the ear pad toward the edge, away from the
headphone. Be careful not to pull too forcefully,
which may tear the ear pad.
Slit
Ear cushion
Remove the ear cushion.
14
Confirming Screen Alignment
Confirm screen alignment by referring to the confirmation screen displayed initially after lens
span adjustment. Screens on the head mounted unit are described below, with an explanation
of how to confirm alignment.
The display section of the head mounted unit consists of two small screens, on the left and
right. Images on each screen overlap to form a single image.
Always check screen alignment by referring to the confirmation screen before use to make sure
the screens are aligned properly.
Left image
Right image
Image perceived with both eyes
15
Correct Display
For correct display, slide the lens span adjusters as needed so that all three “I” marks and the
horizontal line intersect.
It is acceptable if the “I” marks and the horizontal line intersect in a position other than the
center of the screen.
Incorrect Display
If even one of the “I” marks and the horizontal line do not intersect, the head mounted unit may
have been bent out of shape, or it may be damaged. If this condition occurs, contact your
nearest Sony dealer or local authorized Sony service center.
“I” marks and the horizontal line
do not intersect.
16
The horizontal line appears to
be extremely slanted.
The middle “I” mark does not
intersect the horizontal line.
System Settings
Setting menus can be accessed at any time to change or adjust a variety of system settings, such
as video picture quality, audio output format, and 3D display format. To view the menus, press
the MENU button on the head mounted unit.
Basic Menu Operations
1
Press the MENU button on the head
mounted unit.
2
Press the v/V button to select the
desired setting category icon, and
then press the MENU button.
3
4
Press the v/V button to select the
desired menu, and then press the
MENU button.
Press the v/V/b/B buttons to
change or adjust settings as needed,
and then press the MENU button to
enter your changes.
A
B
C
D
E
Setting category icons
Category
Setting menu
Current settings in each menu
Summary of the selected menu
Note
• After 90 seconds of inactivity, the setting menu
will automatically close.
Tips
• To return to the previous menu, press the b
button.
• To exit the setting menu, press the b button in
the setting category icon menu.
17
Menus
Default settings are underlined.
Information
Identifies input signals (video and audio signals) from the equipment connected to the
processor unit. “Unsupported signal” indicates that the input signal is incompatible with the
system, and “No signal” is shown when no signals are input.
Lens span adjustment
Back
Returns to the previous menu.
Lens span
adjustment
Adjusts the lens span of the head mounted unit to match the
distance between your eyes (interpupillary distance), for an
optimal viewing experience. Use the lens span adjusters on the
head mounted unit for adjustment. For details, refer to the
“Startup Guide.”
Notes
• Without the lens span adjusted correctly, you cannot enjoy an optimal
viewing experience. Always adjust the lens span before use.
• Audio is muted during adjustment.
• The volume cannot be changed during adjustment.
3D Settings
18
Back
Returns to the previous menu.
Reset
Resets all “3D Settings” items to the original default values.
3D Display
Manually select the display format for 3D content. Available
settings vary depending on whether the source signal includes a
3D format identification signal, as follows.
For 3D content without a 3D format identification
signal
Over-Under: Select for top-and-bottom 3D content, with
similar images displayed on top and bottom.
Side-by-Side: Select for side-by-side 3D content, with similar
images displayed side by side.
Off: Select to display content in 2D format.
For 3D content with a 3D format identification signal
On: Select to display content in 3D format.
Off: Select to display content in 2D format.
Notes
• If 3D content is not displayed correctly using the selected settings, try
changing “Over-Under” to “Side-by-Side” or vice-versa.
• When selecting “Over-Under” or “Side-by-Side,” change the setting to
“Off” after viewing 3D content.
Auto 3D
On: Automatically switches to 3D display mode when a 3D
format identification signal is detected. If the 3D format
identification signal is no longer detected, the system will
automatically switch to 2D display mode.
Off: Deactivates this function.
Note
• If images do not appear in 3D when “Auto 3D” is set to “On,” try
changing the “3D Display” setting.
3D Signal
Notification
On: Notifies you when a 3D format identification signal is
detected.
Off: Deactivates this function.
Display
Back
Returns to the previous menu.
Picture Mode
Vivid: Vivid colors and sharp contrast, for concerts, sports, and
other televised content.
Standard: Emphasizes a natural picture. Standard picture
quality for a variety of video sources.
Cinema: Picture quality designed especially for cinematic
content.
Custom: Stores your customized preferred picture quality,
adjusting from original flat picture.
19
Reset
Restores all the values (except for values of “Wide Mode,”
“Auto Display Area,” and “Display Area” in “Display”) of the
selected mode in the “Picture Mode” menu to the default
settings when selecting “Yes.”
Picture
Adjusts image contrast.
Brightness
Adjusts the brightness of the image.
Color Temperature
Adjusts image color temperature.
Cool: Cool blue color tones.
Neutral: Color tones between “Cool” and “Warm 1/Warm 2.”
Warm 1/Warm 2: Warm red color tones. “Warm 2” is redder
than “Warm 1.”
Sharpness
Enhances image edges to make images stand out, or smooths
edges for a softer effect.
Frame Noise
Reduction
Reduces random image noise, similar to static.
High/Medium/Low: Select the level of this effect.
Off: Deactivates this function.
Not available with 1080/
24p frame packing format.
Block Noise
Reduction
Not available with 1080/
24p frame packing format.
Mosquito Noise
Reduction
Not available with 1080/
24p frame packing format.
Cinema Conversion
Not available with 1080/
24p frame packing format.
20
Reduces mosaic-like block noise in the image.
High/Medium/Low: Select the level of this effect.
Off: Deactivates this function.
Reduces faint “mosquito” noise around image edges.
High/Medium/Low: Select the level of this effect.
Off: Deactivates this function.
Auto: The system automatically detects whether you are
watching video content (such as TV dramas and
animation) or film content (movies) and switches to the
corresponding conversion method.
Video: The system always displays in a format for video
content, whether playing video or film content.
Clear Black
Adjusts the appearance of dark image areas. Beautiful black
reproduction, without a loss of overall shading.
Contrast Remaster
Automatically optimizes black and white levels, for good
contrast without faded blacks or whites.
High/Medium/Low: Select the level of this effect.
Off: Deactivates this function.
Wide Mode
Not available during 3D
playback.
Normal: Displays the images at the original 4:3 aspect ratio.
Full: Displays 4:3 content in full-screen, stretching the images
horizontally. 16:9 content is also displayed full-screen, at
the original aspect ratio.
Zoom: Enlarges the images vertically and horizontally,
preserving the original aspect ratio.
Note
• “Normal” is not available with HD input sources (1080i, 720p, or
1080p).
Auto Display Area
Not available during 3D
playback.
Display Area
Available only when “Auto
Display Area” is set to
“Off.”
On: Automatically adjusts the picture to the optimal display
area.
Off: Deactivates this function.
+1: Displays images in the original display area.
Normal: Displays the images in the recommended display area.
–1: Enlarges the images to cover screen edges. Use this option
if there is distracting noise or image artifacts by the screen
edges.
Sound
Back
Returns to the previous menu.
Reset
Resets all “Sound” settings to the original default values.
Surround
Standard: Provides standard surround-sound with moderate
reverberation. Creates spacious soundstage for a range of
content.
Cinema: Emphasizes a natural soundstage, especially for
spoken dialog. Surround-sound with a soundstage rivaling
the impressive acoustics of movie theaters. Immersive,
with each channel blended naturally. A good choice for
movies.
Game: Provides pinpoint sound localization, for a clear sense
of where sounds originate. A good choice when playing
immersive content such as games with multi-channel
surround-sound effects.
Music: Emphasizes detail and purity of source audio. Faithful
reproduction, similar to monitor equipment at recording
studios. A good choice for music, sports, and
documentaries.
Off: Deactivates surround-sound effects.
Note
• Volume may vary depending on the source audio signal and selected
surround-sound mode.
21
Treble
Adjusts high-frequency audio output.
Bass
Adjusts low-frequency audio output.
General Setup
Back
Returns to the previous menu.
Set password
A password can be set to restrict use of the system. Once a
password is specified, it must be entered each time the system is
turned on.
To cancel password protection, select “Cancel password” and
enter the password.
The name of this setting
item changes to “Cancel
password” after your
password is entered.
Note
• The system automatically turns off in the following situations. Either
turn the system on and enter the password again or cancel password
protection.
– When the password is entered incorrectly, and you close the
displayed setting menu by using the MENU or b button
– After 90 seconds of inactivity on the password input screen
HDMI pass-through
On: Activates pass-through, enabling you to watch or listen to
content on a TV or other display device when the system
is in standby mode. For details, refer to the “Startup
Guide.”
Off: Deactivates this function. To save power, select “Off”
when a TV or other display device is not connected to the
processor unit.
Control for HDMI
On: Activates control for HDMI CEC (Consumer Electronic
Control)-compatible equipment connected to the
processor unit using the v/V/b/B buttons on the head
mounted unit.
v button: Starts playback.
V button: Pauses playback.
b button: Jumps to the previous chapter. Hold the
button down for fast-rewind.
B button: Jumps to the next chapter. Hold the button
down for fast-forward.
Off: Deactivates this function. Use the remote control of the
connected equipment to control it.
Note
• If control is not possible with this setting activated, the connected
equipment is not compatible with the system’s “Control for HDMI”
function. Control connected equipment directly.
22
Power off when
unmounted
On: Turns the system off automatically 30 minutes after you
take the head mounted unit off.
Off: Deactivates this function.
Tip
• Regardless of this setting, the screens will go off automatically
10 seconds after you remove the head mounted unit.
Illumination
On: Activates the illumination on the head mounted unit.
Off: Deactivates this function.
Language setting
Sets the language used for menus and other interface elements.
Notes
• Audio is muted while this setting is configured.
• The volume cannot be adjusted while this setting is configured.
Prolonged viewing
warning
On: Activates automatic display of a warning about whether to
turn the power off after 3 hours of continuous viewing.
Selecting “Yes” on the warning screen will turn the power
off. Selecting “No” will cause the power to be turned off
3 hours later, after 6 hours of continuous viewing.
Off: Deactivates this function.
Notes
• When the warning is displayed after 3 hours of viewing, if no response
is made in 90 seconds, the power will automatically be turned off.
• A warning screen will be displayed at 30 minutes and 5 minutes before
the system will turn itself off.
Startup viewer
warning
On: Activates automatic display of a startup warning.
Off: Deactivates this function.
Reset to factory
settings
Resets all settings to the original default values.
Note
• The password set in “Set password” (in “General Setup”) will also be
cleared.
Guide of HDMI device control
Displays the operation guide for head mounted unit buttons that can be used with “Control for
HDMI” function (page 22).
23
Troubleshooting
If the following symptoms occur when using the system, check the Cause/Action column
before requesting service. If the issue persists, contact your Sony dealer or local authorized
Sony service center.
Power Supply
24
Symptom
Cause/Action
The system does not turn
on
p Confirm that the AC power cord is fully plugged in.
p Make sure the head mounted unit connecting cord is fully
inserted in the HMD OUT jack.
p Startup normally takes a few seconds.
The system does not go off
p Hold down the 1 (Power On/Standby) button for at least
one second.
Video
Symptom
Cause/Action
No video, or output video
is distorted
p Refer to the “Startup Guide” and confirm that the AC power
cord, HDMI cable, and connecting cord of the head mounted unit
are connected correctly.
p Make sure that equipment connected to the HDMI IN jack on the
processor unit is on.
p Confirm that the source signal is supported by the system. For
information on supported signals, see “Supported HDMI input
and output signals:” in “Specifications” (page 30).
p When the PlayStation®3 (PS3™) is used with this system and if
the video and audio output settings on the PS3™ do not match
those of this system or the cable and TV in use, there may be no
video and audio outputs. If such symptoms occur, turn off the
PS3™, and then turn it on again by pressing its power button for
at least 5 seconds until you hear a beep sound twice. The video
and audio output settings will automatically be reset to the
standard settings.
p The HDMI cable may be loose. Confirm that the HDMI cable is
fully plugged in. If video quality does not improve, the HDMI
cable may be damaged. In this case, try a new cable.
p When selecting “Over-Under” or “Side-by-Side” in “3D
Display” (in “3D Settings”), change the setting to “Off” after
viewing 3D content (page 19).
p If equipment is connected to the processor unit via an AV
amplifier (receiver), try connecting the equipment directly to the
processor unit instead. For details, refer to the instruction manual
of the equipment used.
p When using an HDMI selector, make sure the input on the
selector is switched correctly.
p Use either the supplied HDMI cable or a commercially available
HDMI cable identified as a High-Speed cable.
p Make sure to disable video output with the Deep Color signal on
the connected equipment. If this option is not available on the
equipment and the content is being output at 1080/60p, change
the HDMI video output mode to 1080i video mode.
The screen is dark or
blurry
p Refer to the “Startup Guide” and confirm that the AC power
cord, HDMI cable, and connecting cord of the head mounted unit
are connected correctly, and that you are wearing the head
mounted unit correctly.
p The lens span may have been adjusted incorrectly (page 16).
Perform adjustment again by accessing “Lens span adjustment”
in the setting menu (page 18).
p If the lenses in the head mounted unit are dirty, wipe them with a
soft dry cloth to clean them.
25
26
Symptom
Cause/Action
The screens suddenly go
off
p After 3 hours of continuous viewing, the system will display a
warning screen and go off after 90 seconds of inactivity. If you
clear the message and continue watching, the system will
automatically go off after another 3 hours to encourage healthy
viewing habits. For details, see “Prolonged viewing warning”
(page 23).
p Wear the head mounted unit correctly. 10 seconds after the
sensor in the head mounted unit detects that you have removed
the unit, the displayed screen will automatically go off. For
details, see “Power off when unmounted” (page 23).
Image display dims over
time
p Although image display of photos or nearly motionless images
may dim over time, this does not indicate system damage. To
restore normal brightness, perform some operation on the head
mounted unit or the connected equipment directly.
Some pixels on the
screens are not lit, or some
pixels are always lit
p Although OLED panels are produced using extremely highprecision manufacturing technologies, in some cases pixels may
be permanently black or lit in red, blue, or green. This does not
indicate system damage.
Video is not shown in 3D
p If the same image is displayed side by side or on top and bottom,
the 3D display format setting may be incorrect. Try changing the
“3D Display” setting in “3D Settings” (page 19).
p 3D perception varies by viewer.
p If the “3D Settings” menu is displayed but images are not shown
in 3D, try restarting the connected equipment used for 3D
playback.
p The system does not support 2D to 3D conversion (simulated
3D).
p Viewing anaglyphic images in 3D requires anaglyphic glasses
(with red and blue lenses, for example).
p Also check the settings of playback equipment connected to the
processor unit.
3D display is not activated
automatically
p Make sure the “Auto 3D” setting in “3D Settings” is set to “On”
(page 19).
p 3D content without a 3D format identification signal is not
automatically displayed in 3D. Try changing the “3D Display”
setting in “3D Settings” to “Over-Under” or “Side-by-Side”
(page 19).
Audio
Symptom
Cause/Action
There is no sound /
There is static /
Volume cannot be
increased
p Adjust the volume using the VOL +/– buttons.
p Refer to the “Startup Guide” and confirm that the AC power
cord, HDMI cable, and connecting cord of the head mounted unit
are connected correctly.
p Confirm that the source signal is supported by the system. For
information on supported signals, see “Supported HDMI input
and output signals:” in “Specifications” (page 30). If the input
signal is unsupported, check the audio output settings of
connected equipment.
p When the PlayStation®3 (PS3™) is used with this system and if
the video and audio output settings on the PS3™ do not match
those of this system or the cable and TV in use, there may be no
video and audio outputs. If such symptoms occur, turn off the
PS3™, and then turn it on again by pressing its power button for
at least 5 seconds until you hear a beep sound twice. The video
and audio output settings will automatically be reset to the
standard settings.
p If equipment is connected to the processor unit via an AV
amplifier (receiver), try connecting the equipment directly to the
processor unit instead. For details, refer to the instruction manual
of the equipment used.
p When the system is connected to HDMI CEC-compatible home
theater systems or AV amplifiers (receivers), check the following
settings.
– Make sure the “Control for HDMI” setting in “General Setup”
is set to “On” (page 22).
– Make sure “Control for HDMI” is activated on the AV
amplifier (receiver) or other equipment. For details, refer to the
instruction manual of the equipment used.
There is no surroundsound effect
p Make sure the “Surround” setting in “Sound” is not set to “Off”
(page 21).
p Sound perception varies by listener.
27
HDMI Control
Symptom
Cause/Action
Connected equipment
cannot be controlled using
the buttons on the head
mounted unit
p Make sure the connected equipment supports the HDMI CEC
functions.
p Make sure “Control for HDMI” setting of the connected
equipment is configured correctly. For details, refer to the
instruction manual of the equipment used.
p The connected AV amplifier (receiver) may not be compatible
with the system’s “Control for HDMI” function. “Control for
HDMI” function will not work correctly in this case.
p Controlling connected equipment by pressing buttons on the
head mounted unit may not be possible immediately after turning
the system on, or immediately after activating “Control for
HDMI” in “General Setup.”
p Make sure the “Control for HDMI” setting in “General Setup” is
set to “On” (page 22).
Other Issues
28
Symptom
Cause/Action
The power indicator keeps
flashing in red
p If the indicator flashes twice every 3 seconds, the head mounted
unit or processor unit may be damaged. Contact your Sony dealer
or local authorized Sony service center.
p If the indicator flashes three times every 3 seconds, the processor
unit has overheated. Wait until the unit cools off and flashing
stops. Make sure not to cover or obstruct the ventilation openings
of the processor unit for proper ventilation.
p If the indicator flashes four times every 3 seconds for a minute,
the head mounted unit has overheated. Wait until the unit cools
off and flashing stops.
p If the indicator flashes five times every 3 seconds for a minute,
both the head mounted unit and processor unit have overheated.
Wait until the units cool off and flashing stops.
When the system is off,
video and audio from the
playback equipment is not
played on a TV connected
to the HDMI OUT jack
p
p
p
p
“Control for HDMI” on a TV
cannot be used to control
the playback equipment
even when the system’s
HDMI pass-through is used
p Refer to the instruction manual supplied with your TV, and in the
TV’s “Control for HDMI” setting, specify this system as the
controlling device.
Head mounted unit buttons
are unresponsive
p Buttons on the head mounted unit do not function unless you are
wearing it.
Confirm that the HDMI cables are fully connected.
Set “HDMI pass-through” in “General Setup” to “On” (page 22).
Switch the input source on the TV to this system.
Check the HDMI output settings on the playback equipment.
Symptom
Cause/Action
“DEMO” appears in the
upper-right corner of the
setting menu screen
p Contact your Sony dealer or local authorized Sony service center.
29
Interpupillary distance
Specifications
Power requirements
North American model:
120 V AC, 60 Hz
UK, Hong Kong, and European models:
220 V – 240 V AC, 50/60 Hz
Russian model:
220 V – 240 V AC, 50/60 Hz
Taiwan model:
110 V AC, 60 Hz
Chinese model:
220 V – 240 V AC, 50/60 Hz
Power consumption
15 W (in operation)
0.35 W (in standby mode)
1.6 W (in standby mode using HDMI passthrough)
Operating temperature
5 °C to 35 °C (41 °F to 95 °F)
Operating humidity
25 % to 80 %
Dimensions (W×H×D, including largest
protrusions)
Head mounted unit:
Approx. 210 mm × 126 mm ×
257 mm
(8 3/8 in. × 5 in. × 10 3/8 in.)
Processor unit:
Approx. 180 mm × 36 mm ×
168 mm
(7 1/8 in. × 1 7/16 in. × 6 5/8 in.)
Mass
Head mounted unit:
Approx. 420 g (15 oz) (excluding
connecting cord)
Processor unit:
Approx. 600 g (22 oz) (excluding
AC power cord)
55 mm – 72 mm (2 1/4 in. – 2 7/8 in.)
Headphones
Frequency response: 12 Hz – 20,000 Hz
Inputs and outputs
HMD OUT:
Dedicated 15-pin connector
HDMI IN and HDMI OUT*:
HDMI 19-pin standard connector
Supported HDMI input and output signals:
Video input (2D formats):
480/60p, 576/50p, 720/24p, 720/
50p, 720/60p, 1080/50i, 1080/60i,
1080/24p, 1080/50p, 1080/60p
Video input (3D: Frame Packing, Sideby-Side and Top-and-Bottom formats):
720/50p, 720/60p, 1080/50i, 1080/
60i, 1080/24p
Audio input:
Up to 5.1 channel linear PCM audio
formats (32/44.1/48 kHz, 16/20/24bit)
* When HDMI pass-through is activated, signals
supplied to the processor unit are passed
through the processor unit to the HDMI output.
However, the following signals are not
compatible with pass-through.
– Deep Color signals
– Video signals at 4k resolution (at a high
resolution exceeding 3,840 (horizontal) ×
2,160 (vertical) pixels)
Supplied accessories
AC power cord (1)*
HDMI cable (1)
Light blocker (1 each for the left and right)
Headband strap clip (1)
Connecting cord holder (1)
Forehead supporter (2)
Forehead supporter cover (1)
Reference Guide (this guide) (1)
Startup Guide (1)
* Use the supplied AC power cord only with this
system, not with other electronics.
System specifications and appearance are
subject to change for improvement without
notice.
30
License and Trademark
Notice
Trademarks
• This product incorporates High-Definition
Multimedia Interface (HDMI™)
technology.
HDMI, the HDMI logo, and HighDefinition Multimedia Interface are
trademarks or registered trademarks of
HDMI Licensing LLC in the United States
and other countries.
• “PlayStation” is a registered trademark of
Sony Computer Entertainment Inc. Also,
“PS3” is a trademark of the same
company.
• VPT, Virtualphones Technology is a
registered trademark of Sony Corporation.
• Other system and product names are
generally trademarks or registered
trademarks of the manufacturers. ™ and ®
marks are not indicated in this document.
Notices and Licenses for
Software Used in this Product
Portions of the software in this product are
licensed under the FreeType Project
License.
Portions of this software are copyright
© 2006 The FreeType Project
(www.freetype.org). All rights reserved.
31
© 2011 Sony Corporation Printed in Japan
4-297-824-11(1)