1
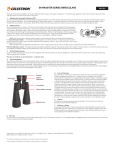
UniqueTek “Tips” File #5:
Rev. 5; 01/2016
“Cleaning Precision Optics”
By Lee Love
Cleaning A Lens, whether it is eyeglasses, camera, binoculars or a rifle or pistol scope, is a
delicate matter. It is very easy to do more harm than good. But if you follow a few simple rules,
and use the right tools, your optics can be maintained in perfect condition.
The “Rules” for Lens Cleaning
Rule #1: Don’t Get Your Lenses Dirty!
It seems like a snide thing to say, but it is true. If you protect your lenses from getting dirty, you
won’t have to clean them. And lens cleaning often causes more damage than anything else you do
to your optics. In fact, this is such an important rule; it should be the first 3 rules!
Rule #2: Less Is More.
When you do need to clean your lens, less is more. The less cleaning you do, the less likely you are
going to cause some kind of damage. So, if the lens only needs to have a few dust particles blown
off, do only that.
Rule #3: Use Only Specialized Lens-Cleaning Products And Use Them Only For Lens Cleaning.
There are many specialty lens-cleaning products on the market. Their cost is negligible compared
to the cost of replacing a scratched lens. Keep them all together in a small zipper lock bag or other
dustproof container and use them only for cleaning your lenses.
NEVER use household products for lens cleaning! It is just begging for problems. Window cleaner
(e.g. Windex) has very strong chemicals that can damage or even remove certain lens coatings.
Never use Kleenex, toilet tissue, paper towels, a handkerchief, the tail of your shirt, etc. to clean
a lens as they can scratch or add contaminants.
Rule #4: Clean A Dirty Lens ASAP!
When anything does get on a lens, you should clean it off immediately. This is especially true with
liquids as, once they have dried, any residues they leave behind will be more difficult to remove.
The only exception to this rule is if cleaning the lens immediately could potentially expose the lens
to more contamination or damage. If you are in the middle of a dust storm or rain storm, you
better wait and clean the lens later.
Keeping Lenses Clean
OK. So, in accordance the Rule #1, just what do you need to do to keep your lenses clean? Well,
that depends on what the lens is on.
Camera Lenses: Of course you should always keep the lens cap on any time you are not actually
taking a picture. But, as an extra layer of protection, you should screw on a 1A Skylight filter. They
are only $10 to $30, depending on size, and are cheap insurance. Just buy one at the same time
you buy the lens, install it immediately (before the lens ever has a chance to get dirty) and leave it
on for the life of the lens. Any cleaning will be done to the filter and you may never have to clean
the actual camera lens. And, if you ever do scratch the filter, it is easily and (more importantly)
cheaply replaced.
© 2008-2015 UniqueTek, Inc.
UniqueTek, Inc.
540 W. Iron Ave, Suite 118
Mesa, AZ 85210
-1Ph: 480-507-0866
Fax: 480-507-0867
Toll Free: 855-507-0866
Rev. 4 06/15
Email: [email protected]
Web Sales: www.uniquetek.com
Tip: A collapsible rubber sunshade also works well on a rainy day to minimize the number or
raindrops that hit the lens. Plus it adds a bit of extra protection against accidental impacts to the
lens.
Binoculars and Scopes: Keep the lens caps on any time you are not actually using binoculars and
scopes. Some come with flip-up lens covers that flick open in an instant and close just as easily.
The best thing about these is that they can’t be dropped in the dirt or lost. If your binoculars or
scope didn’t come with these, you can also buy them separately. Earlier versions were just black
plastic but new versions are available with polarizing and/or contrast enhancing filters, so you get
the equivalent effect of the 1A Skylight filter mentioned above. You don’t even have to flip them
open to use the scope so you won’t miss that quick shot. Plus, if the filter gets dust or raindrops on
it, you can just flip it up in an instant. These run about $10 a set so, once again, are cheap
insurance.
Eyeglasses: Not much can be done to prevent eyeglasses from getting dirty as you are wearing them
or handling them constantly. You will need to clean them much more frequently than any other
type of lenses. If you have the option for “hard coat” when they are being made, it will help them
survive the frequent cleanings.
LCD Displays: Like eyeglasses, LCD displays are going to get dirty quickly. It is amazing just how
quickly portable electronic devices have permeated every aspect of our lives. The list of portable
electronic devices that have LCD displays has expanded far beyond cellphones and now includes
Clocks, Printers, GPS Navigation, Fish Finders, Game Camera Viewers, Marine Radar, Metal
Detectors, etc. Regardless of the type of device, all LCD displays will need frequent cleaning …
especially those that have touchscreens. Generally speaking all the same rules will apply …
including not spraying cleaner directly onto them. There are just too many pathways for excess
liquids to get inside and wreak all sorts of havoc. Although many of the devices mentioned above
are fully waterproof (check the user manual), there are still many that are not - (my smart phone
certainly isn't). So it is good practice to apply cleaner to a cleaning cloth and then use it to wipe
the LCD surface.
Tip: Don’t forget a screen protector. LCD displays can be exposed to a lot of abuse. In fact they are
so vulnerable that a screen protector is highly recommended … just like using a 1A Skylight filter on
a camera lens. I nearly ruined a digital camera by carrying it around my neck while driving on a
dusty desert road. The dust on my clothes acted like sand paper and scratched the display as the
camera swung back and forth. But a button or zipper tab could do as much damage or more. If a
custom screen protector isn’t available for your device, just trim down one for a larger display.
Tools of the Trade
OK. So you reach a point where you absolutely must clean a lens. First you need the correct tools
for the job.
Lens Blower: A lens blower is the best way to remove loose dust particles. It is the first, and often
the only step you need to clean a lens. I find the small blowers with a brush attached are too small
to make much of a puff. Larger blowers work much better (e.g. the PROMASTER® Hurricane Blower,
about $8.00). Give it a few squeezes each time before you use it to ensure there are no particles
inside. Lastly, keep in mind that the rubber can dry up with age and eventually start releasing
particles, so plan on replacing it every year or so.
© 2008-2016 UniqueTek, Inc.
UniqueTek, Inc.
540 W. Iron Ave, Suite 118
Mesa, AZ 85210
-2Ph: 480-507-0866
Fax: 480-507-0867
Toll Free: 855-507-0866
Rev. 5 01/16
Email: [email protected]
Web Sales: www.uniquetek.com
Tip: An ear syringe works great. They are inexpensive, come in several sizes, and are available at
any drug store. If nothing else, they make a great emergency backup if you lose your Hurricane
Blower. Before you use it for the first time, squeeze it repeatedly to eject any particles that may
be inside. There is often a powder inside that helped release it from the mold when it was
manufactured. This can also be true for puffers made specifically for cameras, so don’t think you
are safe just because it says “for camera lenses” on the package.
Canned Air: Instead of a lens blower, you can use one of the many “canned air” products. But you
must be very careful! If any comes out as a liquid, the extreme cold can instantly damage lens
coatings. To prevent this from happening, always keep the can upright and use only short puffs,
never a long blast.
Tip: You may want to also keep a lens blower in your kit, as it will never run out just when you
need it the most.
Never blow particles off with your mouth! Even if you can’t see it, you will always blow microdroplets of saliva onto the lens. The chemicals naturally in your saliva can do nasty things to lens
coatings.
Lens Brush: Lens brushes are simple camel hair or synthetic fiber brushes. The handiest type is
called a “lipstick” brush because the brush can be retracted into the housing and a cap placed over
it. The cap protects the brush from getting dirty or the bristles getting bent. My favorite is the
ORION® Ultra Brush, which has synthetic bristles and runs about $6.
Lens-Cleaning Solution: There are many quality lens-cleaning solutions available. The instruction
manual that came with the optics will usually tell you the manufacturer’s recommendation. If no
recommendation is given, or if the recommended product is not readily available, any lens-cleaning
solution manufactured by a reputable company should fit the ticket. Just make sure to read the
ingredients list and avoid any lens-cleaning solutions that contain Ammonia or Silicones (used as an
anti-fog).
The best lens cleaning solution I have found is Clarity® CLEAN It™ by Nanofilm, Inc.
Never exhale on a lens to fog it over for cleaning! The chemicals naturally in your exhaled breath
can do nasty things to lens coatings.
Superhydrophobic lens coatings have made lens cleaning more difficult. Many lens cleaners will
simply bead up and run off so they can’t effectively clean the lens. Newer products have been
specially formulated to wet and effectively clean superhydrophobic lens coatings. Read the product
label, or call the manufacturer. Clarity® CLEAN It™ by Nanofilm, Inc. has been formulated specially
for this purpose and has proven to be very effective.
Gel Lens Cleaners have recently hit the market and just about every manufacturer has jumped on
the bandwagon. They serve only one purpose, to appease customers who complained about lens
cleaner dripping off their eyeglasses and onto their lap or floor. The manufactures add chemicals
(e.g. carbomer) to thicken the solution into a gel. It is my recommendation to avoid using them for
cleaning anything other than eyeglasses. The gel is just one more thing that needs to be wiped off
the lens and I question if the gel reduces the efficiency of the cleaning agents … if for no other
reason than making it more difficult for them to interact with the lens surface and lift the crud.
© 2008-2016 UniqueTek, Inc.
UniqueTek, Inc.
540 W. Iron Ave, Suite 118
Mesa, AZ 85210
-3Ph: 480-507-0866
Fax: 480-507-0867
Toll Free: 855-507-0866
Rev. 5 01/16
Email: [email protected]
Web Sales: www.uniquetek.com
One-Shot Lens Wipes: These are individually packaged, disposable lens wipes, pre-saturated with
lens-cleaning solution and packaged in a tear-open foil pack. The big advantage is that they are
much more compact than carrying a bottle of lens-cleaning solution and microfiber cloth. Let’s
face it, there are times when it just isn’t convenient to carry your full lens-cleaning kit, like when
you are out hunting for the day. Tuck a few of these in your pocket and you can survive for the
day. But on a rainy day, you should still keep a microfiber cloth on hand just to soak up raindrops.
Lens wipes are handy, especially for eyeglasses, but I recommend that you use the lens-cleaning
solution and microfiber cloth for serious cleaning and the lens wipes just for a “quickie” in the
field. Also, keep in mind that you should still try to blow off or brush off any particles before using
any type of lens wipe.
Tip: You can use a disposable lens wipe to remove dust particles by rolling it into a wand or
twisting it up into a flower shape and using just the edge of the material to gently sweep any
particles off the lens. Then use another disposable lens wipe for final cleaning.
Most manufacturers of lens-cleaning solutions (including Nanofilm, Inc.) now offer one-shot lens
wipes.
Lens-Cleaning Cloth: In the old days, the only choices in this department were a high quality cotton
cloths (which often came with binoculars, scopes and cameras), or lens tissue. If you have an old
package of lens tissues, just toss them out. The new “microfiber” lens cloths are now the best way
to go. One Is often included with a bottle of lens-cleaning solution. When it gets too dirty, don’t
bother trying to wash it. Just toss it out and get a new one. This may seem wasteful and expensive,
but it is a whole lot cheaper than replacing scratched optics. You may be able to get a deal from
the seller if you buy several … or even a whole box … at a time.
Tip: Carry more than one microfiber cloth. I’ve dropped mine on the ground more times than I care
to admit, so a spare is handy. Multiple spares is even better!
Tip: On rainy days, you may want to keep an extra microfiber cloth just for drying water off the
lens and reserve the others just for use with lens cleaning solution.
NEVER use paper towels, napkins, toilet tissue or facial tissue as they are likely to scratch the lens.
Cotton Swabs: A small supply of cotton swabs (e.g. the proverbial Q-Tips® swab) is very handy.
Don’t ever use one directly on a lens, but you can use them to clean areas adjacent to the lens
rather than get your lens cloth dirty.
Tip: You can wrap a microfiber cloth around the tip of a cotton swab and use it to reach into small
spots that are difficult to get to with a finger.
There are ultra-clean, scratch free synthetic tipped swabs that can be used directly on lenses.
They tend to be expensive and difficult to find, but can be a valuable tool. Make absolutely certain
that they are rated for use on lenses and compatible with lens cleaning solutions.
Gloves: This is the one tip that you never hear mentioned in any discussion of lens cleaning. Often
we are out and about when we need to clean a lens and our hands are covered with particles and,
as always, coated with natural skin oils. The last thing you want to do is accidentally touch a lens
with your finger while cleaning. If you are wearing gloves, you will be much less likely to transfer
particles from your hands to the lens. Any disposable latex or nitrile glove will work, but make
© 2008-2016 UniqueTek, Inc.
UniqueTek, Inc.
540 W. Iron Ave, Suite 118
Mesa, AZ 85210
-4Ph: 480-507-0866
Fax: 480-507-0867
Toll Free: 855-507-0866
Rev. 5 01/16
Email: [email protected]
Web Sales: www.uniquetek.com
absolutely certain you are buying “powder free” gloves. I don’t recommend vinyl or poly gloves as
they are slippery and tend to hold a static charge that attracts particles. My favorite is the nitrile
gloves. Keep several pairs in your lens cleaning kit and dispose of used gloves after EVERY cleaning
session.
LensPen: A few years ago, a new lens-cleaning product hit the market … the LensPen®. The
LensPen® contains very fine particles of activated carbon. The activated carbon is capable of
adsorbing fingerprints and other oily substances from the lens surface. You must still be diligent
about first removing any particles that might scratch the lens before using a Lens Pen. In fact, use
of a lens brush is recommended in the LensPen® instructions.
Due to the cupped shape of the LensPen® tip, it works best on convex lens surfaces like those
commonly found on scopes, binoculars, cameras and the front face of eyeglass lenses. It doesn’t
work quite so well on flat or concave lenses (such as the backside of eyeglass lenses). In the case of
eyeglasses, this is not only because of the shape of the LensPen® tip, but also because the back
side of eyeglasses get very dirty, very quickly. You may get better results, faster with conventional
lens cleaning techniques (e.g. the disposable lens towelettes described earlier). Finally, the
LensPen® comes in two different sizes for different diameter lenses. So you may need to carry two
of them to cover the various lens sizes of your optics.
At the 2009 Shot Show, LensPen® was demonstrating new products designed for cleaning small flat
LCD displays (e.g. digital camera view screens, cell phones and PDAs), large CRT and LCD displays
(e.g. desktop and laptop computers) and even the CCD and CMOS sensors inside digital cameras.
Definitely worth taking a look at!
CAUTION: There are now a lot of cheap imitations of the LensPen® on the market. Most don’t work
as well, or at all. Make sure the one you buy is an original.
Anti-Fog Products: I have saved discussion of anti-fog products for last as they are not really part of
lens cleaning and are most frequently, and most effectively, applied after the lens has been
cleaned. But some lens-cleaning solutions have anti-fog agents added to the formula. In particular,
avoid any that contain silicones as these can permanently attach to certain lens coatings, leaving a
smeary film that can’t be removed. I always avoid lens cleaners that contain an anti-fog. I prefer
to use a dedicated cleaner when cleaning the lens, and then apply an anti-fog after cleaning … if,
and only if, I feel the need to apply an anti-fog. When you do need an anti-fog, always purchase it
from a reputable manufacturer … starting with the manufacturer of your lens-cleaning solution.
© 2008-2016 UniqueTek, Inc.
UniqueTek, Inc.
540 W. Iron Ave, Suite 118
Mesa, AZ 85210
-5Ph: 480-507-0866
Fax: 480-507-0867
Toll Free: 855-507-0866
Rev. 5 01/16
Email: [email protected]
Web Sales: www.uniquetek.com
Cleaning the Lens
Step 1: Blow. Blow off any particles (or water droplets) with the blower or canned air. If you use
canned air, make sure to hold the can upright and only use short puffs.
Step 2: Brush. Use a lens brush to gently dislodge any particles that didn’t come off with the
blower. When using the brush, start in the center of the lens and work in a spiral pattern toward
the edge. DON’T use the brush if the lens is still wet, as you will just contaminate the brush.
Step 3: Blow. Blow off the loosened particles with the blower or canned air. This is not an
accidental repeat. Particles, once dislodged by the brush, should be blown free from the surface
before proceeding.
Tip: Use the blower or canned air to blow particles off the lipstick brush before putting it away.
Don't forget Rule #2: If the lens is clean after just blowing off the particles, stop! If there is a
fingerprint or other residues that can't be blown off or brushed off, proceed to Step 4, otherwise,
skip to Step 5.
Step 4: Clean. Use a few drops of lens cleaning solution on a microfiber cloth. Wipe the lens
gently. You don’t need to scrub hard. Work from the center of the lens to the edge.
Tip: If you are removing a fingerprint or other localized spot of contamination, use an isolated
corner of the microfiber cloth just for that spot, and then switch to a clean part of the cloth to
clean the rest of the lens. This way you are less likely to spread the contamination around the lens.
Tip: Don’t apply lens-cleaning solution directly to the lens. You can easily over apply lens-cleaning
solution and it can become trapped around the outer diameter of the lens and lens retaining ring
and possibly seep into the lens housing. If you apply it to the microfiber cloth, the possibility of
this is virtually eliminated.
The one exception to this rule is for cleaning eyeglasses (including sunglasses and safety glasses),
since there isn’t really any damage that excess lens cleaning solution can do (there is no place for
it to seep into). Many lens-cleaning solutions come in a metered spray bottle. You can take
advantage of the spray to help dislodge any remaining particles and float them off the lens surface.
Give each lens surface a couple of squirts making sure that the entire lens surface is wetted. Then
let the lens-cleaning solution work for several seconds. Allow the excess to drip off … taking most
of the particles and grunge with it … before using the microfiber cloth. Allowing the excess to drip
off also means less solution and dirt will be soaking into the microfiber cloth, so it will stay cleaner
longer and dry faster to be ready for the next use.
Step 5: Clean The Lens Cap! This is often the most overlooked part of the lens cleaning procedure.
I can’t tell you how many times I’ve watched photographers spend a lot of time to clean a lens,
then waste all their effort by putting on a dirty lens cap. The lens cap must also be cleaned or it
will transfer particles to the lens. Since the lens cap isn’t sensitive, you can resort to more
extreme measures, including washing it under running water if needed. But the same basic cleaning
tools and techniques described above can also be applied.
Step 6: Put All Your Lens Cleaning Tools Away! Now that you are done cleaning the lens, place all
lens cleaning tools and materials neatly away in your zipper-lock bag so they are ready for the next
© 2008-2016 UniqueTek, Inc.
UniqueTek, Inc.
540 W. Iron Ave, Suite 118
Mesa, AZ 85210
-6Ph: 480-507-0866
Fax: 480-507-0867
Toll Free: 855-507-0866
Rev. 5 01/16
Email: [email protected]
Web Sales: www.uniquetek.com
time. Don’t include any waste materials! Remember that this bag is only for clean materials or
materials that can be used multiple times before discarding.
Tip: Keep an extra zipper-seal bag in your kit that can be used to hold trash for later disposal. This
is important, as it doesn’t just keep things tidy; it keeps the particles, moisture, etc. isolated so it
can’t contaminate your cleaning materials or other items.
Maintain Your Lens Cleaning Kit
Your kit will quickly become useless if you don’t keep it prepared for the next use. This should be
done as soon as possible after each use. At minimum, the trash should be discarded immediately
and a clean zipper-lock bag placed back in your kit. Then refill lens cleaner bottles, and replace
the disposable items as needed. If you are on a long trip, make sure to pack an extra bag with
additional supplies.
Also, take out any microfiber cloths that have been used and allow them to dry … assuming they
are not too dirty for reuse. This is especially important on rainy days, as a soaking wet microfiber
cloth will be of little help on the next day of your photo safari, hunt or shooting match. Just hang
them up to dry in as clean a location as possible. If that isn’t possible, plan ahead and have enough
clean, dry microfiber cloths in your spares kit to cover your needs.
Tip: A few paper clips kept in your bag of tricks can be used as clothespins to hang up the
microfiber cloths while they dry. Actually, the best way to use them is more like a fishhook than a
clothespin. That way the microfiber cloth does not contact any other surface while drying. A small
coil of monofilament fishing line makes a handy “clothesline”.
oOo
PROMASTER® is a registered trademark of PROMASTER.
ORION is a registered trademark of Orion Telescopes & Binoculars.
Clarity is a registered trademark of Nanofilm, Inc.
CLEAN It is a trademark of Nanofilm, Inc.
Q-Tips is a registered trademark of Unilever.
LensPen is a registered trademark of Parkside Optical Inc.
© 2008-2016 UniqueTek, Inc.
UniqueTek, Inc.
540 W. Iron Ave, Suite 118
Mesa, AZ 85210
-7Ph: 480-507-0866
Fax: 480-507-0867
Toll Free: 855-507-0866
Rev. 5 01/16
Email: [email protected]
Web Sales: www.uniquetek.com