1
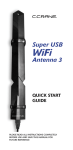
Super USB
WiFi
Antenna 3
QUICK START
GUIDE
PLEASE READ ALL INSTRUCTIONS COMPLETELY
BEFORE USE AND SAVE THIS MANUAL FOR
FUTURE REFERENCE
Table of Contents
Introduction ....................................................................... 2
Included Contents ............................................................ 2
Specifications ................................................................... 3
Introduction to Software Installation ............................... 3
Windows 2000 - 7 Installation .......................................... 4
Mac OS 10.3 – 10.5 Installation ........................................ 8
WiFi Tips ........................................................................... 13
FAQs and WiFi Troubleshooting ..................................... 14
FCC Interference Statement and Safety Instructions ... 15
Warranty Information ...................................................... 16
Introduction
Thank you for purchasing the Super USB WiFi Antenna 3.
To ensure many years of service, please read this manual
carefully.
Included Contents
USB Antenna
Software CD
15' USB cable
Suction Cups (2)
Hook and Loop Mounting Strip
Cable Tie
Rubber Grommets (2)
Lanyard
Copyright © 2011 by C. Crane Company, Inc.,
Fortuna, CA 95540
Phone: 1-800-522-8863 Web: ccrane.com
All rights reserved. No part of this booklet may be reproduced,
in any form or means whatsoever, without permission in writing
from C. Crane Company, Inc.
Page 2
Super USB WiFi Antenna 3
Specifications
Compatability
• Windows 2000™ through Windows 7™
• Mac OS® 10.3 (Tiger) through 10.6 (Snow Leopard)
• Linux operating systems
• USB 1.1 - 2.0 interface
• 802.11b, 802.11g, and 802.11n
• WEP, WPA, and WPA2 encryption
Features
• Line of sight (no obstructions) operation of up
to one mile.
• WiFi Strength: 28db EIRP (+/- 2db)
• Waterproof design (IP65 Standard)
• High-quality 15' USB cable (Optional 30' cable available
at www.ccrane.com/SPC)
• Up to 150MBps file transfer rate
Introduction to Software Installation
Since not all operating systems are the same (e.g. Windows, Apple/Mac, Linux), we have supplied installation
directions for each type. Please read and follow each
step of the installation and connection instructions for
your operating system.
Please install the software on the CD according to
the instructions in this Quick Start Guide, BEFORE
the antenna is plugged in.
Linux users: See instructions on the Software CD.
Windows is a registered trademark of Microsoft Corporation in the
United States and other countries. Windows 7 is a registered trademark
of Microsoft Corporation in the United States and other countries. Mac
OS is a registered trademark of Apple Inc.
Super USB WiFi Antenna 3
Page 3
Windows 2000 – 7 Installation
Installation
NOTE: Please install the software on the CD
according to the instructions in this Quick Start
Guide, BEFORE the antenna is plugged in.
1. Insert the supplied CD into your computerʼs disk
drive. The setup software should start automatically
after a few seconds.
2. When the first screen appears, click “Driver Installation”.
3. When the “License Agreement” screen appears,
click “I accept the terms ... ”, then click “Next”.
4. When the “Setup Type” screen appears, click “Install
driver only”, then click “Next”.
Note: Installing the “Driver Only” is the easiest way to
use your antenna. We recommend that only advanced
users and Windows 2000 users install the Ralink WLAN
Utility. For more assistance using the Ralink WLAN Utility, refer to the full user manual on the supplied CD.
Page 4
Super USB WiFi Antenna 3
Windows 2000 – 7 Installation
5. Click “Install” to continue the installation.
6. When the computer has finished installing the driver,
click “Finish” to exit the setup and begin using your
antenna.
Super USB WiFi Antenna 3
Page 5
Windows 2000 – 7 Installation
7. Connect the USB cable between the Super USB
WiFi Antenna 3 and your computerʼs USB port. If
you have two USB ports available, both connectors
can be plugged in for better performance. If you only
have one USB port available, the antenna will still
work well. USB cables plug in just one way and
should not be forced in.
Note: When connecting the USB cable to the Super USB
WiFi Antenna, be sure that it is tightly connected and that
there is no gap between.
For Outdoor Use: We recommend using the supplied
rubber grommet between the antenna and the cable, to
protect the antenna connector from weather.
Connecting to a WiFi Site
Access the built-in Windows wireless utility using the icon
that shows up in the clock taskbar. For each Windows
operating system, the utility works differently. Please follow the directions below.
Windows XP
1. Left click the icon below. A small window will appear
titled "Wireless Network Connection Status".
Note: If there are more than one wireless icon that appear in this area, hover your cursor over each icon and
choose the one with highest number after "Wireless Connection" (example: "Wireless Connection 2").
2. Left click "View Wireless Networks".
3. Left click the network of your choice from the list,
then left click "Connect".
Note: If the network site shows “Security-enable wireless
network”, you are required to enter the correct key to
make a successful connection. If the network site shows
"Unsecured Wireless Network" then you will not need to
enter a key before connecting. Successful connection to
a wireless network usually requires a minimum of 2 bars
of signal.
4. Once you are connected, you will be able to access
the internet using your default web browser.
Page 6
Super USB WiFi Antenna 3
Windows 2000 – 7 Installation
Windows Vista
1. Left click the icon below. A small window will appear
titled "Wireless Network Connection Status".
2. Left click "Connect to a Network".
3. Left click the network of your choice from the list,
then left click "Connect".
Note: If the network site shows “Security-enable wireless
network”, you are required to enter the correct key to
make a successful connection. If the network site shows
"Unsecured Wireless Network" then you will not need to
enter a key before connecting. Successful connection to
a wireless network usually requires a minimum of 2 bars
of signal.
4. Once you are connected, you will be able to access
the internet using your default web browser.
Windows 7
1. Left click the icon below. A small window will pop up
showing wireless networks that can be detected.
Note: If you have built-in WiFi in your computer, you may
have to scroll down the list of networks to see the additional ones that your new antenna can detect. Successful
connection to a wireless network usually requires a minimum of 2 bars of signal.
2. Left click the network of your choice from the list,
then left click "Connect".
3. Once you are connected, you will be able to access
the internet using your default web browser.
Windows 2000
Note: Since Windows 2000 does not have its own built-in
wireless utility, you will be required to install the Ralink
WLAN Utility from the CD. Refer to the full userʼs manual
supplied on the CD for more assistance.
Super USB WiFi Antenna 3
Page 7
Mac OS 10.3 – 10.6 Installation
Installation
NOTE: Please install the software on the CD
according to the instructions in this Quick Start
Guide, BEFORE the antenna is plugged in.
1. Insert the supplied CD into your computerʼs disk
drive.
2. Double click on the CD icon.
3. Double click on the “Mac” folder.
4. Double click on your Mac OS version.
5. When the “Introduction” screen appears, click
“Continue”.
6. When the “Destination Select” screen appears, click
“Continue”.
7. When the “Installation Type” screen appears, click
“Install”.
Page 8
Super USB WiFi Antenna 3
Mac OS 10.3 – 10.6 Installation
8. When prompted, enter your “Name” and
“Password”.
9. When prompted, click “Continue Installation”.
10. When the “Summary” screen appears, click
“Restart”.
Super USB WiFi Antenna 3
Page 9
Mac OS 10.3 – 10.6 Installation
Note: During Restart, a “Updating Boot Caches” screen
will appear. Click “OK” and the restart will continue.
11. When the computer is fully powered on, plug in the
Super WiFi USB Antenna into your computerʼs USB
port. If you have two USB ports available, both connectors can be plugged in for better performance. If
you only have one USB port available, the antenna
will still work well. USB cables plug in just one way
and should not be forced in.
Note: When connecting the USB cable to the Super USB
WiFi Antenna, be sure that it is tightly connected and that
there is no gap between.
For Outdoor Use: We recommend using the supplied
rubber grommet between the antenna and the cable, to
protect the antenna connector from weather.
12. MAC OS 10.5 and MAC OS 10.6 users: Click “Network Preferences … ” and then click “Apply” to activate the antenna.
MAC OS 10.3 and 10.4 users: Go to the “System
Preferences” panel and then click “Network”. A
message displays “New Port Detected”. Click “OK”
and then click “Apply” to activate the antenna.
Page 10
Super USB WiFi Antenna 3
Mac OS 10.3 – 10.6 Installation
Connecting to a WiFi Site
1. From the dock, click the “Ralink” icon to activate the
“WLan” utility, or find it in the “Applications”/
“Utilities” menu.
2. Select your desired WiFi network from the “Site
Survey” list, then click “Connect”.
3. If the selected network requires a WPA security key,
enter it into the corresponding space. If your network
requires a WEP key, then enter it into the space after
“Key #1” Hexadecimal. Then click “OK”.
4. When you are successfully connected to the wireless site, a handshake icon will appear in the first
column, next to your SSID (network name).
At this point, you will be able to access the internet using
your default web browser.
Super USB WiFi Antenna 3
Page 11
Mac OS 10.3 – 10.6 Installation
Creating a Profile
We recommend that you create a profile for your wireless
connection so that you will not need to re-enter your network information every time your computer is turned on.
To get started, click your desired SSID from the “Site
Survey” list, then click “Add Profile”. You will need to reenter your wireless security key again, then click “OK”.
5. Once your profile is complete, you can activate it by
selecting it from the “Profile” tab and then click
“Connect”.
Page 12
Super USB WiFi Antenna 3
WiFi Tips
For more WiFi Tips, see the C. Crane web site at:
www.ccrane.com/US3
1. Receiving an outside signal while inside a
building:
Place the Super USB WiFi Antenna oriented vertically
in the center of a window. It is best to place it in a window that is facing the WiFi source. Obstructions between the source of the WiFi signal and the antenna
will greatly reduce the effective WiFi range.
2. Receiving a better signal with the antenna
mounted outside:
For an even better signal, place the antenna outside
where it is not inhibited by walls or windows. It is best
to place the antenna as high as possible and at least
3ft away from metal objects. There is also an
optional 30ft cable available at www.ccrane.com/SPC
which will allow you to place the antenna in a farther
location. Be sure to use the rubber grommet between
the antenna and the cable to protect the connection
from weather.
3. Receiving an inside signal from within the same
building:
If the WiFi source is located on the same floor, orient
the Super USB WiFi Antenna vertically. If the WiFi
source is located on a floor above or below, it may be
necessary to adjust the angle of the antenna to
receive in the direction of WiFi source.
4. Mounting Options:
Supplied with the antenna are mounting options for
most situations.
• For mounting on a vertical pole, use the Cable
Tie. Place it around the narrowest part of the antenna, near the middle, to secure it to the pole.
• For mounting on a horizontal tree branch, clothesline, or other object, use the supplied Lanyard.
Loop the small section through the hole at the top
of the antenna. Loop the larger ribbon section
around, or hang it on the object. Both sections of
the Lanyard detach for easy installation and removal.
• For smooth surfaces like a window or back of a
laptop screen, use the supplied Suction Cups.
Slide the suction cups onto the antenna and
dampen the cup portion before application.
• For a porous wall or shelf, you can use the sticky
Hook and Loop material. Attach one piece to the
antenna and the other to the mounting surface.
Super USB WiFi Antenna 3
Page 13
FAQs and WiFi Troubleshooting
Q. My computer is not showing that the antenna is
plugged in. What is wrong?
A. Check the connection between the antenna and the
cable to be sure they are tightly connected.
Q. My software shows that the antenna is connected
but when I try to use my internet browser I am unable to view anything. What should I do?
A. You may not have a strong enough WiFi connection.
Successful connection to a wireless network usually
requires a minimum of 2 bars of signal. If the signal is
low, you can try relocating or repositioning the antenna with a better line-of-sight view to the WiFi
source.
Q. I purchased the USB WiFi Antenna and when it is
hooked up it does not improve my WiFi reception.
Is there something I can do to make it work better?
A. Be sure that the antenna is positioned vertically in the
center of the window, if the WiFi source is outside
your location. Using the optional 30ft accessory cable,
you can mount your antenna outside and up high for
best reception. Visit www.ccrane.com/SPC for more
information or to purchase the 30ft cable.
Q. Is there a location on the web to download another
copy of the software CD?
A. Yes, see the C.Crane web site at this address:
www.ccrane.com/US3
Q. Which side (front or back) faces the window when
using the suction cups?
A. Itʼs up to you. The Super USB WiFi Antenna 3 is
omni-directional, and so it can receive the signal
from any direction.
Q. My computer has an internal WiFi antenna; do I
need to disable it before installing the software and
the Super USB WiFi Antenna?
A. It is not required, but if both WiFi connections are
going at the same time, it will require more power
from your computer and create extra heat. Usually
there is a button, switch, or key on a laptop that disables the built-in WiFi device.
For more troubleshooting and FAQs, see the C. Crane
web site at: www.ccrane.com/US3
Page 14
Super USB WiFi Antenna 3
FCC Interference Statement and Safety
Federal Communication Commission
Interference Statement
This equipment has been tested and found to comply
with the limits for a Class B digital device, pursuant to
Part 15 of FCC Rules. These limits are designed to provide reasonable protection against harmful interference in
a residential installation.
Operation is subject to the following two conditions:
1. This device may not cause harmful interface, and
2. This device must accept any interface received, including interface that may cause undesired operation. This equipment generates, uses, and can radiate radio frequency energy and, if not installed and
used in accordance with the instructions, may cause
harmful interference to radio communications. However, there is no guarantee that interference will not
occur in a particular installation. If this equipment
does cause harmful interference to radio or television reception, which can be determined by turning
the equipment off and on, the user is encouraged to
try to correct the interference by one or more of the
following measures:
a. Reorient or relocate the receiving antenna.
b. Increase the separation between the equipment and receiver.
c. Connect the equipment into an outlet on a circuit different from that to which the receiver is
connected.
d. Consult the dealer or an experienced radio
technician for help.
Changes or modifications not expressly approved by the
manufacturer could void the userʼs authority to operate
the equipment.
CAUTION:
1. To comply with FCC RF exposure compliance requirements, a separation distance of 20 cm
(about 8 inches must be maintained between the
antenna of this device and all persons.
2. This transmitter must not be co-located or operating
in conjunction with any other antenna or transmitter.
Super USB WiFi Antenna 3
Page 15
Warranty Information
One Year Limited Warranty
C. Crane Company Inc. warrants this product to be free from defects in material and
workmanship under normal use and conditions for a period of one year from the date of
original purchase on parts and labor.
Should service be necessary for any reason due to a manufacturing defect or malfunction
during the warranty period, C. Crane Company Inc., at its sole discretion, will repair or replace the defective merchandise at no charge, upon receipt of this item at its service center with a copy of proof of date of purchase. The consumer purchaser is responsible for
shipping the unit to C. Crane Company Inc.ʼs service center.
In order to obtain performance of any obligation under this warranty or any implied warranty, the consumer purchaser must:
1) Carefully pack the unit in the original packing cartons or a suitable, well-padded corrugated box.
2) Call 1-800-522-8863 for a Return Authorization (RA) number, and mark the RA number on the outside of the packing carton. Also enclose a copy of proof of date of purchase and a note describing your specific problem.
3) Ship the unit insured for full retail value via Parcel Post or a common carrier of your
choice.
NOTE: This warranty does not cover:
A) Antennas that have been misused, neglected or damaged by accident.
B) Antennas that have been opened, repaired or altered by persons other than
C. Crane Company Inc.
This warranty is valid only in the United States of America and Canada and extends only
to the original consumer purchaser. Any applicable implied warranties, including the warranty of merchantability, are limited in duration to a period of one year from the date of the
original purchase at retail and no warranties, whether expressed or implied, shall apply to
this product thereafter. Under no circumstances shall C. Crane Company Inc. be liable for
any loss or damage, direct or consequential arising out of the use of, or inability to use
this product, (some states do not allow limitations on implied warranties or exclusion of
consequential damage, therefore, these restrictions may not apply to you).
This warranty gives you specific legal rights and you may also have other rights that may
vary from state to state.
Copyright © 2011 C. Crane Company Inc. All rights reserved.
FCC ID: TKZAWUHN2405
THIS DEVICE COMPLIES WITH PART 15 OF THE FCC
RULES.
OPERATION IS SUBJECT TO THE FOLLOWING TWO CONDITIONS:
(1) THIS DEVICE MAY NOT CAUSE HARMFUL INTERFERENCE, AND
(2) THIS DEVICE MUST ACCEPT ANY INTERFERENCE RECEIVED, INCLUDING INTERFERENCE THAT MAY
CAUSE UNDESIRED OPERATION.