1
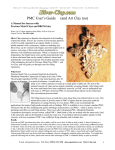
Fused Glass without Boundaries – Creating with GlasClay:
GlasClay™ is glass.... but not exactly glass as you may know it. Ceramic artists will feel a kinship to this
medium, but remember.... it is GLASS, not ceramic. You can produce your work with a matte finish, shiny
finish, and glossy finish.... depending on the number of times fired, and the firing schedule. Think out of the
box.
Structural GlasClay™ allows you to shape your creations, into solid, high relief, hollow or 3 dimensional pieces.
It may be rolled flat and placed into an oiled RTV mold, dried and fired with no mold in the kiln....allowing an
artist to make multiple pieces that may be fired at the same time.
Warm Glass artists have been long been bound by flat work. Not anymore! It is hard to imagine glass that is
free standing and 3 dimensional yet can be fired in a kiln without a mold. Sculptors can create multi-colored
pieces, either hollow or solid, large or small. Carvers can form a block out of Structural Opaque GlasClay™,
allow it to dry, and then carve it and embellish the piece with additional colors of freshly mixed material. The
piece can then be fired after drying.
-SAFE WORKING PRACTICESAlways wear a HEPA particulate filter dust mask when mixing or sanding GlasClay™ . Do not use on or
near food preparation or consumption areas.
GlasClay™ is sold in a powder form, to mix when you are ready.
Mixing Instructions:
1) Shake sealed package of powder well, pour entire contents into a small glass dish.
2) With a knife or spoon, cut in 1 ½ teaspoons of warm distilled water. (Tap water may be used, however the
minerals present in tap water may alter the color of the clay.) Mix well. Water measurements may vary slightly,
depending on the glass color and your environmental humidity.
3) Slowly add another ¼ teaspoon of water. Apply a small amount of Olive Oil to your hands and remove the
mixed clay from its bowl for “conditioning”. If it is sticky, add a little more olive oil to your hands. If too dry, you
can sprinkle water on your hands and work it in slowly, until the clay feels elastic. Never add all the water at
once. It is easier to add more water than to take some out! If too much water is accidentally added, leave it
open to the air for the extra moisture to evaporate.
4) Knead the GlasClay™ by balling it up. To “condition”, roll and squeeze between your palms, until it feels like
“clay”. It should be smooth and pliable, not gooey. Cover with clear plastic wrap when not in use. Store
GlasClay™ in a re-sealable, airtight container. A sandwich bag is fine. Best when used within a week of
mixing, it may last 3 - 4 weeks with proper storage in an air-tight container in a refrigerated space.
DelphiGlass.com • 800-248-2048
© Copyright 2011 Delphi Creativity Group
Forming Tips:
Work GlasClay™ on a silicon mat for best results. Any type of plastic is ok, but silicon works best. Wax paper
may be used as a last resort, but will not hold up well to repeated use and may need to be replaced often.
To join multiple pieces use a bit of water to moisten pieces and smooth together taking care to avoid trapping
air bubbles.
Use Teflon, plastic or other synthetic tools for rolling, sculpting or stamping. Lightly coat with olive oil to prevent
sticking – use olive oil sparingly.
Form and fire Opal and Opaque GlasClay™ creations separately for best results. Pieces can be tack fused
together or onto other glass as a second firing.
Allow the pieces to completely air dry before firing. You may place your work on a food dehydrator to facilitate
fast drying.
FIRING INSTRUCTIONS – Farenheit (You must convert for Celcius temperatures.)
Ramping & Annealing –Read Completely!
AVERAGE RAMP FOR JEWELRY AND SMALL ART PIECES (6” x 6” x 3/8” – 1/2” thick or less) All ramp, hold
and firing times and temps are subject to variation, including your working elevation, thickness of your work,
size and type of kiln and your desired outcome. Adjust firing times, and use appropriate cool down times and
temps.
Test fire a piece and record the results for your reference. Some colors may tolerate faster ramp times and
higher temperatures.
Firing- Schedule: Accommodates all colors.
Place dried piece(s) on a prepared kiln washed shelf or firing paper, leave space between each piece. Follow
all 7 steps!
1) Ramp @ 340 to 340 Hold 1hr.
2) Ramp @ 340 to 600 Hold 1hr.
(You may ramp as low as 1225 F or as high as 1470 F. Test your kiln with the product.)
3) Ramp @ 600 to 1250 hold 30 min
4) Ramp @ 1000 to 1450 hold 30 min.
Annealing- (Slow Cooling for Stability)
DelphiGlass.com • 800-248-2048
© Copyright 2011 Delphi Creativity Group
5) Ramp @ 300 F to 1140 F. Hold 45 min.
6) Ramp @ 200 F to 940 F. Hold 45 min.
7) Ramp @ 300 F to 600 F. Hold 45 min.
Cool naturally to below 100 F., open kiln
GlasClay™ does not work like just plain glass, or glass frit. The binder and the amount of air that is trapped in
the GlasClay™ after it is mixed, causes this product to have it own quirks. The desired outcome / condition of
the finished product may vary from artist to artist as well. Some want glossy bright colors, some want matte or
sugary textured surfaces…. Some want hollow works of art, high relief or 3 dimensional designs, others only
want to use it in molds so they can fire in production quantities without using a multitude of slump molds.
Whatever your personal desires are, you can achieve them with GlasClay™.
“Structural” GlasClay™ has a lot of air trapped in the frit due to the fine powder of the frit and the fine powder
of the binder. The Opaque colors do not generally fire to a mature look, at the same end temperatures as the
Opal colors. This is due to chemicals in the glass powder itself. Therefore, making a project using both colors
in the same initial firing, could cause different looks to the glass, that you may not want. It is possible that the
end temperature may be too high for one color or the other.
We encourage testing and experimentation to be successful with your end project. If you want to use Opal
and Opaque colors together, make the pieces of your project first, and do not place the two different kinds of
GlasClay on the same initial piece. Fire the pieces separately, and when finished, put them together and fire
again at a temperature around 1220-1230 so they will “tack- fuse”. There is no “one” perfect temperature for
any one color. Not all people want the same look as the other. Keeping notes for yourself is important to gain
the same results again and again, after you have learned how your kiln works with the GlasClay™ product.
Be aware that many kilns fire at a temperature not true to the pyrometer…. For example, if the pyrometer says
the inside temperature of your kiln is 1280F, it is possible that is actually 1380F or the other way around.
There often is a 100F degree difference between kiln brands. Test firing the GlasClay™ colors individually, in
your kiln, and making careful notes could be critical to your success.
GlasClay™ shrinks, about 15% from the original size, when fired. The initial firing ramp is designed to allow the
maxim possible amount of trapped air, to escape from the piece, and let the binder burn out….. BEFORE a
hard “skin” forms on the top of the piece, sealing it over, no longer allowing trapped air to release. If air
remains trapped in your piece, it may puff up, and distort slightly in shape. Depending on your choice end
temperature, some of that trapped air could or could not release later in the firing process. By making small
“kisses” (similar to chocolate kisses) of GlasClay™, with a curled over top, you can have test pieces for your
personal firing information. If the pieces fire too hot, the curled top will soften or slump. This indicates what
could happen to an intricate high relief or hollow object if fired too hot. Items not fired hot enough, may be refired at a higher temperature, and re-fired again and again if desired, until you reach the ideal temperature for
the look you are trying to achieve.
©2011 Claymania Art Clay, Inc.
DelphiGlass.com • 800-248-2048
© Copyright 2011 Delphi Creativity Group