Download TIBO TI1000 speakers manual.indd
Transcript
Turn it back on
User Guide
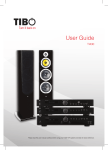
TI 1000 5.1 Speakers
Please read this user manual carefully before using your TI 1000 5.1 Speakers and retain for future reference.
Turn it back on
CONTENTS
IMPORTANT SAFETY INSTRUCTIONS . . . . . . . . . . . . . . . . . . . . . . . . . . . . . . . . . .3 - 5
INCLUDED IN THE BOX . . . . . . . . . . . . . . . . . . . . . . . . . . . . . . . . . . . . . . . . . . . . . . . 6
SETUP . . . . . . . . . . . . . . . . . . . . . . . . . . . . . . . . . . . . . . . . . . . . . . . . . . . . . . . . . . . . 6
LOUDSPEAKER POSITIONING . . . . . . . . . . . . . . . . . . . . . . . . . . . . . . . . . . . . . . . . . 7
CONNECTIONS . . . . . . . . . . . . . . . . . . . . . . . . . . . . . . . . . . . . . . . . . . . . . . . . . . . . . 8
WALL MOUNTING SPEAKERS . . . . . . . . . . . . . . . . . . . . . . . . . . . . . . . . . . . . . . . . . . 8
SUBWOOFER CONTROLS . . . . . . . . . . . . . . . . . . . . . . . . . . . . . . . . . . . . . . . . . . . . . 9
SPECIFICATIONS . . . . . . . . . . . . . . . . . . . . . . . . . . . . . . . . . . . . . . . . . . . . . . . . . . . 10
AV AMPLIFIER CONFIGURATION. . . . . . . . . . . . . . . . . . . . . . . . . . . . . . . . . . . . . . . 10
2
Turn it back on
SAFETY
Safety precautions
A triangle with a
lighting symbol draws
the user’s attention to
“dangerous voltage”
without insulation in the cabinet,
which may be high enough to
entail a risk of an electric shock.
A triangle with an exclamation mark draws
the user’s attention to
important instructions
for use and maintenance in the accompanying manual, which should
be studied and adhered to.
The symbol for a
CLASS II (double
insulation) product.
Warning:
To minimise the risk of fire or electric shock, do not expose the unit to liquid or moisture. Do not open the cabinet
as it contains dangerous voltages. Only qualified technicians are allowed to carry out repair and service of this
system.
If the plug of the power cord needs to be replaced. It is important that the replacement is identical to the plug that
needs to be replaced, or that the new plug has been recommended by the manufacturer.
Caution:
To avoid electric shock, it is important to insert the plug correctly into the wall outlet.
Important safety instructions
Warning:
It is important that you read and observe both the instructions in this manual and the instruction on the unit.
Keep this manual for safe future reference. This unit was designed and manufactured with a view to providing
maximum safety for the user. Incorrect use of the unit may cause an electric shock or fire. The protection devices
built into this unit will protect the user if the procedures below are observed in connection with installation, use
and repair. This unit is fully electronic and contains no parts that can be repaired by the user.
Read the manual
Cleaning
After unpacking the unit, please read the manual carefully and observe all the instructions given.
Unplug the unit before cleaning. Do not use liquid
detergents and aerosol cleaning agents. Use a dry
clean cloth.
Power supply
Only the power supply indicated on the rating plate
must be used for this unit. If you are not sure which
power supply you have, please contact your local
dealer.
Earthing or polarisation
If the plug cannot be inserted properly into the
socket, or if the plug does not fit, the unit must not be
used in your country.
Heat
Do not place the unit near sources of heat such as
radiators, ovens or other units that produce heat.
Water and moisture
The unit must not be placed close to water, such
as bathtub, wash basin, kitchen sink or washing
machine, in a damp cellar or close to a swimming
pool, etc.
3
Power cords
Wiring must be organised to prevent people from stepping on the cables and to avoid pinching by objects
placed on or beside them. Take special care around
sockets and plug boxes and where the power cords
leave the unit.
Lightning
Unplug the unit for additional protection during storms
or when the unit is not used for prolonged periods.
This will prevent damage to the unit from lightning and
power surges.
Turn it back on
SAFETY
Important safety instructions
Penetration of objects and liquid
Never push any foreign objects through the openings into the unit, as they may touch dangerous voltage points
or short-circuit parts and cause fire or an electric shock. Do not spill liquid onto the unit.
Accessories
Do not place the unit on unstable surfaces such as a trolley, stand, tripod, shelf or table. The
unit may fall and cause serious injury to persons or damage to the unit. Use only trolley, stand,
tripod, shelf or table that is very stable or provided with the unit. The unit must be installed in
accordance with the manufacturer’s instructions and by means of installation equipment recommended by the manufacturer. If the unit is placed on a trolley, the trolley must be moved very
carefully. Sudden stops, unnecessary force and uneven surfaces may cause the trolley to turn
over.
Loads
Do not place heavy loads on the unit and do not step on it. The load may fall and cause serious injury to persons
or damage to the unit.
Damage
Unplug the unit and contact qualified technicians in the following cases:
A. If the power cord or the plug is damaged.
B. If liquid has been spilled on the unit or objects have
fallen into the unit.
C. If the unit has been exposed to liquid or moisture.
D. If the unit does not work properly after adhering to the instructions in the operation manual. Only the settings
described in the operation manual must be made as incorrect setting may result in damage and often will
make it difficult for a qualified technician to make the unit work properly again.
E. If the unit has been dropped or damaged in any other way.
F. When the operation of the unit changes drastically, the unit requires service.
Service
Do not attempt to carry out any service work by yourself. By opening or removing the cover, you will be exposed
to dangerous voltage or other hazards. Any service work should be carried out by qualified technicians.
Recycling
If at any time in the future you need to dispose of this product please note that waste electrical
products should not be disposed of with household waste. Please recycle where facilities exist.
Check with your Local Authority or retailer for recycling advice.
Approval
This product complies with European Low Voltage and Electromagnetic Compatibility Directives
when used and installed according to this instruction manual.
4
SAFETY
Turn it back on
Important safety instructions
Overloading
Do not overload wall outlets or extension cords as this can result in the risk of fire or
electric shock. Overloaded AC outlets, extension cords, frayed power cables, damaged
or cracked wire insulation, and broken plugs are dangerous. They may result in electric
shock or fire hazard. Periodically examine the power cable - if its appearance indicates
damage have it replaced by your service technician.
Heat dispersion
Leave at least 10 cm of space between the top, back and sides of the unit
and the wall or other components for proper ventilation.
Plug fitting instructions (UK only)
The cord supplied with this appliance is factory-fited with a UK mains plug
fited with a 5-amp fuse inside. If it is necessary to change the fuse, it is important that a 5-amp fuse is used. If the plug needs to be changed because
it is not suitable for your socket, or becomes damaged, it should be cut off
and an appropriate plug fited following the wiring instructions below. The plug
must then be disposed of safely, as insertion into a mains socket is likely to
cause an electrical hazard. Should it be necessary to fit a 3-pin BS mains
plug to the power cord, the wires should be fited as shown in this diagram.
The colours of the wires in the mains lead of this appliance may not correspond with the coloured markings
identifying the terminals in your plug. Connect them as follows: The wire which is coloured BLUE must be connected to the terminal which is marked with the letter ‘N’ or coloured BLACK. The wire which is coloured BROWN
must be connected to the terminal which is marked with the letter ‘L’ or coloured RED. The wire which is coloured
GREEN/YELLOW must be connected to the terminal which is marked with the letter ‘E’ or coloured GREEN.
If a standard 13-amp (BS 1363) plug is used, a 5-amp fuse must be fited or, if any other type of plug is used, a
5-amp fuse must be fited, either in the plug or adaptor, or on the distribution board.
5
Turn it back on
INCLUDED IN THE BOX
Accessories
Included with the TI1000 5.1 Speakers are the following accessories:
1 x User Manual
1 x Mains Plugs
1 x 25m Speaker Cable
1 x 5m RCA Cable
Turn it back on
User Guide
TI 1000 5.1 Speakers
Please read this user manual carefully before using your TI 1000 5.1 Speakers and retain for future reference.
1 x Centre Speaker
1 x Front Speaker
1 x Front Speaker
1 x Surround
round Speaker
1 x Surround Speaker
S
1 x Subwoofer
Please save your packaging as you will need this in the event of warranty/service repair or support. We are
unable to carry out warranty/service if you are unable to package it correctly. The safest way to package your
item in the event of warranty/service repair is in it’s original box/packaging.
SETUP
Turn off all equipment
Installation
6
Turn it back on
LOUDSPEAKER POSITIONING
Standard speaker setup for surround sound
1
3
2
4
5
8
6
1. TV or Screen
4. Centre speaker
7. Surround Right Speaker
2. Front Left Speaker
5. Front Right Speaker
8. Listening Position
7
3. Subwoofer
6. Surround Left Speaker
Standard speaker setup for surround sound
1. Front Right and Left speakers - These are the main speakers providing the front stereo effect of the sound
image.
2. Centre speaker - Produces a rich sound image by serving as a sound source for the front right and left speakers and enhancing the sonic movement.
3. Surround Right and Left speakers - Adds three-dimensional sonic movement and produces environmental
sound associated with the background and effect sound for each scene.
4. Subwoofer - Produces powerful and heavy bass.
Important points regarding speaker placement
Front Right, Left speakers and Centre speaker
Place these three speakers all at the same height.
Place each speaker so that it is aimed at the location of the listener’s ears when at the listening position.
Place left and right speakers at the same distance from the listening position.
Subwoofer
Ideally a subwoofer should always be located in front of the listening position between the Front Left and Right
speakers. Since all rooms vary, experiment with the placement of your subwoofer for the best overall sound image (placing a subwoofer in the corner of a room often helps to disperse the sound).
Surround Left and Right Speakers
Place these two speakers all at the same height.
Place each speaker so that it is aimed at the location of the listener’s ears when at the listening position.
Place left and right speakers at the same distance from the listening position.
7
Turn it back on
CONNECTIONS
WALL MOUNTING SPEAKERS
Mounting of this unit to the wall should be carried out by qualified technicians. Install in an appropriate location
only afterchecking wall structure and durability for accident prevention. Also make sure there are no cables nor
pipes in the wall before drilling. Consult a qualified builder if in any doubt as to the structural integrity of the wall.
TIBO can accept no responsibility for damage to equipment whilst assembling or mounting this unit.
8
Turn it back on
SUBWOOFER CONTROLS
1.
2.
3.
4.
5.
6.
7.
Sensitivity
Phase
Crossover
Level
Status
Line Input
AC Power Input
5
4
6
1
2
3
7
With this switch set to AUTO (1), when not in use the Subwoofer shuts down to save power
and switches on when it senses a signal. This can be over-ridden by switching to ON or
OFF.
The Phase Switch (2) changes the phase of the Subwoofer so that it works in phase
with the rest of the speakers in the system. Place the Subwoofer more than 1 metre away
from the front speakers and switch the phase between 0° and 180°. When the Subwoofer
sounds louder and fuller then it is in phase.
The Crossover control (3) changes the frequency at which the Subwoofer starts to work.
It is recommended that the crossover point is set to the ‘AV‘ setting on the dial when used
with the TI 1000 5.1 System. If you are using the Subwoofer with a non TIBO system then
you change the crossover point to suit your system.
The Level Control (4) increases or decreases the volume of the Subwoofer in relation
to the other speakers in the system. Start with the volume at 0 on the dial then turn it up
slowly until you can hear it. The Subwoofer should be heard as part of the overall sound
and not overpower the rest of the system. There is no rule for setting the volume on the
Subwoofer so experiment with different music and films to set it to your tastes.
The Line Input-LFE (6) is TIBO prefered AV connection to the amplifier. Using the cable
provided, connect this to the Subwoofer output on your AV amplifier or DVD. Use R and L if
your amplifier output is split left and right.
9
Turn it back on
SPECIFICATION
Front LCR Satellite speaker
8inch (20.32cm) active subwoofer
» Enclosure Type: 2-way bass reflex enclosure.
» Enclosure Type: Sealed Enclosure.
» Enclosure Material: MDF with Leather.
» Enclosure Material: MDF with Leather.
» Low Frequency (woofer): 2pcs x 3inch (7.62cm) glass
» Low Frequency (woofer):
fiber cone Long Throw.
8inch High-Excursion Driver.
» High Frequency (tweeter): 0.75inch (1.9cm) silk dome
with Neodymium magnet.
» Power: 100V-240V 50/60Hz.
» Power Handling: 150W Class-D.
» Power Handling: 15 - 100W.
» Frequency: 35Hz - 200Hz.
» Frequency: 95Hz - 20Khz.
» Overall Dimensions:
» Sensitivity: 85dB @ 2.83V (Free Space).
» Impedance: 6 ohm.
(HxWxD) 271x271x271 (Excluding feet).
» Weight (Net): 6.6Kg.
» Overall Dimensions: (HxWxD) 101 x 241 x 101mm.
» Weight (Net): 1.48Kg.
Rear LR Satellite speaker
» Enclosure Type: 2-way bass reflex enclosure.
» Enclosure Material: MDF with Leather.
» Low Frequency (woofer):
3inch glass fiber cone Long Throw.
» High Frequency (tweeter): 0.75inch (1.9cm) silk dome
with Neodymium magnet.
» Power Handling: 15 - 70W.
» Frequency: 110Hz - 20Khz.
» Sensitivity: 83dB @ 2.83V (Free Space).
» Impedance: 6 ohm.
» Overall Dimensions: (HxWxD) 151x101x101mm.
» Weight (Net): 0.92Kg.
* Design and specifications are subject to change without notice.
AV AMPLIFIER CONFIGURATION
Front Speakers
Centre Speakers
Surround Speakers
Subwoofer
Subwoofer Frequency
Small
Small
Small
Yes
30Hz - 220Hz
All speakers must be set to Small in the AV Amplifier menu. Failure to configure your system correctly may result
in damage to the speakers.
10
CONTACTS
Tibo Ltd.
DSV House,
Maidstone Road,
Milton Keynes
MK10 0AJ
United Kingdom
tel.: +44 (0) 845 2711 906
e-mail: [email protected]
Proof of purchase (attach your receipt here).
11
Turn it back on
Turn it back on
www.tibo-electronics.com


