1
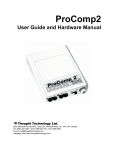
Thought Technology Ltd. ProComp 2 Quick Start and User's Guide ProComp 2TM Quick Start and User’s Guide 1 ProComp 2 Quick Start and User's Guide Thought Technology Ltd. 2180 Belgrave Ave. • Montreal, Que. Canada H4A 2L8 Phone 514.489.8251 • Fax 514.489.8255 ProComp 2TM Quick Start and User’s Guide 2 ProComp 2TM Quick Start and User’s Guide 3 0413 The Manufacturer: Thought Technology Ltd. 2180 Belgrave Avenue Montreal, Quebec, Canada H4A 2L8 System Name: ProComp 2 Biofeedback System System #: T7400M, T7400-BRI Device Name: ProComp 2 Biofeedback Unit Device Number: SA7400, SA7400-BRI Classification: Class 1 with a Measuring Function Rule(s) used for classification: Annex IX, rule 12 Notified Body: SEMKO (0413) ProComp 2TM Quick Start and User’s Guide 4 CLASSIFICATION • Type BF Equipment • Internally powered equipment • Continuous operation • Read Instruction Manual CAUTION • WARNING • • • • • • US Federal Law restricts this device to sale by or on order of licensed health care practitioners Do not operate Myoscan-Pro sensor within 10 feet of an operating cellular phone, similar radio transmitting device, other powerful radio interference producing sources such as arc welders, radio thermal treatment equipment, x-ray machines or any other equipment that produces electrical sparks etc. Do not connect inputs or outputs of the encoder or sensors to line powered devices, except through the fiber optic cable. All encoders are totally isolated from line (110 or 220VAC) power due to battery operation and fiber optic connections to computers. However, many hospitals and the FDA require that computers, printers and any other equipment used with medical devices be electrically isolated from line voltage to UL or CSA medical safety standards. The PC used with ProComp 2 must be placed outside the patient/client environment (more than 3 meters or 10 feet) or the PC must comply with EN60601-1.1 (system safety). After use, the Disposable Electrodes may be a potential biohazard. Handle, and when applicable, dispose of these materials in accordance with accepted medical practice and any applicable local, state and federal laws and regulations. Radiated radio frequency electromagnetic fields can cause performance degradation in the MyoScan-Pro EMG sensor. In the worst case, an RF field strength of 22mV/M can cause a degradation of 1µV in the signal from the MyoScan-Pro sensor. Be sure to keep in mind that a very relaxed muscle should provide an EMG reading of approximately 1-3µV. ATTENTION • To prevent static discharge from damaging the sensor and/or encoders, use anti-static mats or sprays in your working area. A humidifier may also be used to prevent static environments by conditioning hot, dry air. • Do not apply any electrode gel or equivalent directly on the sensor snaps. Always use electrodes as a medium between the sensor and the client. • Do not use in the presence of a flammable anesthetic mixture with air or with Oxygen or Nitrous Oxide. • Not to be immersed in water, clean case with a damp cloth only. • Not for Diagnostic Purposes, Not Defibrillator Proof • To prevent voiding warranty by breaking connector pins, carefully align white guiding dot on sensor plug with slot on sensor input. Sharp bends or winding the fiber optic cable in a loop smaller than 4 inches (10cm) may destroy the cable. • • • A fiber optic cable not fully pushed into its receptacle may cause the unit not to operate; make sure that both ends of the cable are fully inserted into their receptive jacks and the nut is tightened firmly. Make sure to remove electrodes from sensor snaps immediately after use. • Apply conductive gel only to electrodes, never put gel directly to sensor snaps. • Always use electrodes between the subject and the sensor. ProComp 2TM Quick Start and User’s Guide 5 • • Do not plug third party sensors directly into instrument inputs. Plug only Thought Technology Active Sensor cable connectors into instrument inputs. All EMG electrodes and third party sensors must be connected to MyoScan sensors, either directly or through an adapter. Remove batteries when the device is not being used for extended period of time. Please dispose of battery following national regulations. It is recommended that you replace batteries with Alkaline AA type. CONTRAINDICATIONS • None INTENDED PURPOSE • Biofeedback, Relaxation & Muscle Re-Education purposes. NOTE • No preventive inspections are required, maintenance must be performed by qualified personnel. • The supplier will make available, upon request, circuit diagrams, component parts lists and description or other information required for the repair of product by qualified personnel. Manual # SA7420 Rev 3.0 ProComp 2TM Quick Start and User’s Guide 6 ProComp 2TM Quick Start and User’s Guide 7 TABLE OF CONTENTS INTRODUCTION......................................................................................................................10 System components................................................................................................................10 SETTING-UP THE PROCOMP 2 HARDWARE..................................................................10 Connecting to the computer ..................................................................................................11 Battery Replacement .............................................................................................................11 SENSOR INPUTS......................................................................................................................12 Sensor Input configurations ..................................................................................................12 Protected pins........................................................................................................................13 Guiding dot............................................................................................................................13 Electrical interference...........................................................................................................13 Sensor information ................................................................................................................13 Sensor anatomy .....................................................................................................................13 CONTACT WITH THE SKIN .................................................................................................14 Disposable electrodes ...........................................................................................................14 Skin preparation....................................................................................................................14 Triodes and extender cables..................................................................................................14 EQUIPMENT STORAGE ........................................................................................................14 GENERAL INSTRUCTIONS FOR USE ................................................................................15 USING THE PROCOMP 2 WITH BIOGRAPH INFINITI..................................................15 USING THE PROCOMP 2 WITH BIOGRAPH 2.1..............................................................15 Channel Sets..........................................................................................................................16 Channel Set Modifications ....................................................................................................16 Copying Personalized screens ..............................................................................................20 Reviewing remote session data .............................................................................................23 TECHNICAL SUPPORT AND ORDER PLACING .............................................................24 Returning Equipment ............................................................................................................24 Technical Support Line .........................................................................................................24 PRODUCT NUMBERS & ACCESSORIES ...........................................................................25 Device and sensors................................................................................................................25 Accessories ............................................................................................................................25 PLACING ORDERS .................................................................................................................26 SPECIFICATIONS....................................................................................................................26 ProComp 2TM Quick Start and User’s Guide 8 PROCOMP 2 ENCODER SPECIFICATIONS......................................................................26 EEG- Sensor (T9305M).........................................................................................................27 MyoScan Pro EMG Sensor (T9401M) ..................................................................................27 Temperature Sensor (SA9310M)...........................................................................................27 HR/BVP Flex/Pro Sensor (SA9308M)...................................................................................27 Respiration Sensor (SA9311M).............................................................................................27 EKG- Sensor (T9306M) ........................................................................................................28 Skin Conductance Flex/Pro Sensor (SA9309M) ...................................................................28 Voltage Isolator (SA9405).....................................................................................................28 INDEX.........................................................................................................................................29 WARRANTY..............................................................................................................................30 EXTENDED WARRANTY OPTIONAL ................................................................................30 REPAIR RETURN FORM .......................................................................................................31 ProComp 2TM Quick Start and User’s Guide 9 Introduction The PROCOMP 2TM encoder is a two-channel, multi-modality physiological monitoring device for use with biofeedback software applications, such as Thought Technology’s BioGraph Infiniti software with the Legacy Suite (ProComp 2 also works with BioGraph 2.1 and other software). Although the device has four input connectors on its front panel, because of their disposition, only two sensors can be connected at a time. Inputs A and B sample data at 256 samples per second. Inputs C and D sample at 32 samples per second. Input A is dedicated to recording EEG as it incorporates an internal EEG sensor within its circuitry. The ProComp 2 device can be used for data acquisition, physiological signal monitoring and biofeedback. System components The PROCOMP 2 basic package includes the following hardware: • One two-channel PROCOMP 2TM encoder unit with one integrated EEG sensor • One EEG Extender Cable • One TT-USB or PRO-SB serial interface unit • One supply of fiber-optic cable (15’ cables) • One 9-pin female to 25-pin male adapter (when using the PRO-SB unit) • Other physiological sensors may be purchased separately Setting-up the ProComp 2 Hardware The ProComp 2 encoder samples the incoming sensor information signals and transmits the sampled data to the interface unit (TT-USB or PRO-SB) via a fiber-optic cable. The interface unit is connected to one of the host computer’s USB or Serial (COM1 or 2) communication ports. It receives the data arriving from the encoder in optical form and converts it into the format that the port requires in order to communicate with the software. When using the PROSB unit, one of the computer’s serial ports must be committed exclusively to handling the incoming data via the interface unit. ProComp 2TM Quick Start and User’s Guide 10 Note: Thought Technology encoders, sensors, and interface units carry parts that may be damaged by static electric discharges. Exercise care when handling this equipment in static-prone environments. Thought Technology instruments are not warranted against damage caused by static discharge. In dry areas or carpeted areas, use anti-static mats or sprays and condition the air by using humidifiers. Connecting to the computer Using the gray fiber-optic cable, insert one end of the cable into the fiber optic connector on the front of the ProComp 2 unit. Ensure that the cable is inserted all the way into the connector, about ¾ of an inch, and that the connector’s head is tightened, but not too tightly. In the same fashion, insert the other end into the fiber optic connector on the rear face of the interface unit. IMPORTANT: Winding the fiber optic cable in a loop smaller than 4 inches (10 cm) or bending it sharply may damage the cable! If you’re using a TT-USB interface (not for BioGraph 16 or MultiTrace software), connect one end of the Type-A to Mini-B adapter cable to the interface unit and the other end to one of your computer’s USB ports. If you are using a PRO-SB interface (only for ProComp+ or Legacy mode), you need to have a computer with a free and dedicated serial port. On a desktop, this is usually COM 1 or 2. On a laptop, COM1 is generally available. The interface fits any 25-pin male connector. If a 9-pin connector is present, the 9-pin female to 25-pin male adapter (included in your system) must be used. Note: Many new computers do not have a serial port. In this case, you can use a PCMCIA to Serial adaptor. Please contact your computer vendor for a brand that is compatible with your computer. USB to Serial adaptors can also work, but not with all computers. Battery Replacement The ProComp 2 device requires a single AA, 1.5 volt, alkaline battery. Looking at the underside of the ProComp 2 device, you will see a small panel with engraved arrow (<<) marks. To open it, place your thumb on the arrows and push out, towards the side. The door should snap open. When the door has been slid out, place one AA battery in the slot, respecting the polarity, as indicated in the compartment. Slide the plastic door back into the ProComp 2 case, gently pushing it in until you feel the click of the locking mechanism. To remove the battery, slide the cover off and tap the ProComp 2 against your hand, until the battery slides out. ProComp 2TM Quick Start and User’s Guide 11 Since each sensor draws a small amount of power from the batteries when connected to the ProComp 2, it is better to connect only the sensors that are going to be used for a session before you start recording; this will ensure maximal battery life. Most Thought Technology software applications will display a battery power indicator; we recommend that you replace the battery as soon as this indicator falls below about 50% of the battery power. Sensor Inputs In order to record a given physiological signal, the proper type of sensor must be connected to one of the ProComp 2’s front panel inputs. The device is able to monitor two physiological signals, simultaneously. Sensors can be connected to inputs A and B, A and D, C and B or C and D, but not from A and C or B and D. Trying to connect sensors in inputs A and C or B and D can damage the ProComp 2, since these connectors have been purposely placed too close together to allow it. Possible sensor types include: Electroencephalography (EEG) Electrocardiography (EKG) Electromyography (EMG) Respiration (waveform) Skin Temperature Blood Volume Pulse (waveform) Skin Conductance Third-party through the Voltage Isolator Force sensor adapter Goniometer adapter Sensor Input configurations • Input A: Fast Input. Samples data at 256 samples per second. Input A already incorporates an EEG sensor in its circuitry, and so, it is dedicated to EEG. Only an EEG extender cable can be connected to this input. • Input B: Fast Input. Samples data at 256 samples per second. Can be used to monitor EEG, EKG or BVP. Requires that an external active sensor be connected. • Inputs C and D: Slow Inputs. Sample data at 32 samples per second. Can be used to monitor any other sensor type. Require that external active sensors be connected. The following table outlines all the sensor configurations, it should be recalled that it is not possible to use inputs A/C or B/D simultaneously. Possible Sensor Combinations st 1 Input Sensors 2nd Input Sensors A EEG cable only B EEG, EKG or BVP A EEG cable only D SC, Temp, RESP, MyoScanPro, Voltage isolator, etc. C SC, Temp, RESP, MyoScan-Pro, Voltage isolator, etc. B EEG or EKG C SC, Temp, RESP, MyoScan-Pro, Voltage isolator, etc. D SC, Temp, RESP, MyoScanPro, Voltage isolator, etc. ProComp 2TM Quick Start and User’s Guide 12 Protected pins A number of regulatory bodies (like the FDA in the USA) have adopted safety specifications requesting that all medical products for physiological monitoring be manufactured with electrode leads that have no exposed metal plugs. For this reason, the ProComp 2 encoder and all our sensors use specially designed connectors that have all metallic surfaces recessed within the plastic casing. These connectors, with protected pins, require some care when plugging and unplugging the sensors to the ProComp 2 device or the extender cable to the sensor head. Guiding dot When connecting a sensor into the ProComp 2, ensure to properly line up the guiding dot on the plug with the connecting socket, at approximately 10:00 O’clock. Forcing the plug in the jack in any other position may damage your equipment. Electrical interference When performing a biofeedback session, it is best to avoid placing the ProComp 2 near the computer, display monitor or any other electrical device, where it can be exposed to electromagnetic fields. We recommend that you try to keep the encoder within the patient's natural electrical field. In most cases, you can do so by fastening the belt-clip to the client. Sensor information The Thought Technology sensors are completely non-invasive and require little or no skin preparation, when used for feedback purposes. They include sensors specialized for electromyography (EMG), electroencephalography (EEG), electrocardiography (EKG), blood volume pulse (BVP), skin conductance (SC), respiration and temperature. Sensor anatomy The EMG, EKG and EEG sensors have a positive, a negative and a ground electrode. The signal is measured between the positive and negative. The ground acts as a reference point, and is used for filtering out electrical "noise" that is picked-up from all three electrodes. Sometimes, the negative electrode is called the reference. When an extender cable is being used, remember to remove the electrodes from the snaps on the sensor head. Only one set of electrodes should be connected at one time. ProComp 2TM Quick Start and User’s Guide 13 Contact with the skin Because some biofeedback sensors are applied directly to the skin or scalp, some consideration must be given to using proper hygienic controls. Whenever possible, we recommend the use of disposable electrodes. The electrodes on skin conductance sensors are replaceable but not disposable. They must be cleaned with an alcohol wipe after each use. Disposable electrodes Before an EMG or an EKG sensor can be used, you must snap on a set of disposable electrodes. Three types of electrodes are available from Thought Technology: Triodes, Single-Strip and Uni-Gels. The Triode and Single electrodes are dry, while the Uni-Gel electrodes are covered with a thin layer of conductive gel, to enhance their contact with the skin. All three types are designed like snap-on buttons. The Triode electrodes can be snapped directly onto the sensor head. The Single and Uni-Gel electrodes are designed to be used with extender cables. Skin preparation Many physiological monitoring devices will require you to prepare the client’s skin before affixing sensors. Because they have high input impedance, the Thought Technology sensors can be utilized with little or no skin preparation, depending on the purpose of your intervention. For most biofeedback applications, simply cleaning the skin with a bit of cotton and rubbing alcohol is sufficient to ensure good sensor readings. For EEG biofeedback and muscle function assessments using EMG, we recommend that you use abrasive paste and conductive gel. Since body hair can form an insulated layer between the skin and the electrode surface, be careful not to place the electrodes over hairy areas. In some rare cases, shaving may be required. Triodes and extender cables The EMG sensor can be used with a Triode electrode, snapped onto the sensor head, or with Single electrodes, individually snapped onto each of the three leads of an extender cable. If you have to alternate between the two methods, make sure to leave only one set of electrodes connected to the sensor at any one time. Forgetting to remove the unused electrodes could degrade the quality of the recorded signal because of the extra susceptibility to noise. Equipment storage As a general rule, we recommend that you remove any electrode from the sensor heads and extender cable leads when you are done using your equipment. Many electrodes are coated with a very conductive substance that can cause the sensor’s metal parts to corrode if they are left in contact with it for long periods of time. Also, please be careful, when unsnapping electrodes, not to damage the wires. Avoid twisting and pulling on the wires by holding the sensor head or the extender cable’s rounded snap. ProComp 2TM Quick Start and User’s Guide 14 General Instructions for Use 1. Using the fiber-optic cable and the TT-USB or PRO-SB Interface, connect the ProComp 2 to the computer. Make sure that both ends of the cable are inserted all the way into the connectors (about ¾ inch). Remember to tighten the connector knobs. 2. Wind excess fiber-optic cable into a large loop (approx. 4") and use a twist-tie to hold it in place. 3. Plug the sensors you wish to use into the input connectors on the front of the ProComp 2 and connect the required extender cable(s), making sure to use clean electrodes, onto the sensor head. 4. If necessary, clean the skin area where the electrodes will be placed. 5. Place the encoder on or near the patient, to avoid signal degradation. For EEG, the ProComp 2 can be can be clipped to the collar of a shirt, clipped to a headband or placed in a shirt pocket. For non-EEG uses, clip to a belt. 6. Turn the ProComp 2’s power switch ON and check that the green power indicator is lit; if it is not, turn the device OFF and check the condition and orientation of your battery. If the green indicator starts to flash, there is approximately ½ hour of use left in the battery (if using an alkaline battery). Keep a spare battery nearby. 7. Start the software program as instructed in the user’s manual. 8. After the session, turn the device’s power OFF and disconnect all electrodes. We recommend that you clean the EEG electrodes as soon as possible after use. Using the ProComp 2 with BioGraph Infiniti The BioGraph Infiniti Legacy Suite incorporates a number of channel sets and screens that are specially designed for use with the ProComp 2 device. Generally, these are named starting with the “P2” identifier (ex. P2 eeg-a sc-d.chs). For each ProComp 2 channel set, there may be a different sensor configuration. You can use the Physical Configuration button to verify which sensor needs to be connected to which input for the selected channel set. For more information about the different channel sets and screens available for use with the ProComp 2, read the “P2 Biograph Infiniti Legacy Suite” instruction document (in PDF format) that is installed on your system with the Legacy Suite. For more information on using the BioGraph Infiniti software, please refer to the software manual or on-line help document. Note: When the ProComp 2 encoder is sold with the Infiniti software, an Encoder Key Code and an Application Key Code are generated to allow the software to recognize this particular ProComp 2. If you do not have these key codes, you will not be able to use the Infiniti software with your ProComp 2. Using the ProComp 2 with BioGraph 2.1 The ProComp 2 device, when purchased as a secondary system, is serialized with the same ID number as the system’s parent ProComp+ device. This means that the ProComp 2 can simply be connected to an existing BioGraph installation and, if the program has already been registered to the ProComp+, the system should work without requiring the use of the Key ProComp 2TM Quick Start and User’s Guide 15 Disk. Please refer to the BioGraph User’s Manual or On-Line Help system for detailed instructions on how to use the software. Channel Sets Since the BioGraph screens were designed for the ProComp+, which has 8 inputs, and the ProComp 2 only offers combinations of two inputs, out of four, some of the BioGraph screens need to be modified in order to be able to run properly with the ProComp 2. The required modifications involve redefining the sensor type for inputs C or D and assigning the new input letters to the existing channels in the channel set (a detailed example is given in the next section). Some screens are designed to use more than two sensors at the same time. These, of course, cannot be used with the ProComp 2. Within many screens, BioGraph’s default channel set expects the following sensor type to input letter correspondence: Input Sensor Type Input Sensor Type A EEG E SC B EEG F TEMP C EMG G BVP D EMG H RESP • EEG Screens: All the EEG screens, since they work with inputs A and B, will function without modification. EMG Screens: The 1- and 2-channel EMG screens will work without modification because they call for inputs C and D. Screens for 4 and 6 channels of EMG, of course, can only be used with the ProComp+. • Skin Conductance (SC) Screens: The skin conductance sensor is usually assigned, by default, to input E (E and F on the bilateral screen). It has to be reassigned to input C or D. • Temperature Screens: The Temp sensor is assigned to Input F. It has to be reassigned to input C or D. • BVP Screens: The BVP sensor is assigned to Input G. It has to be reassigned to input C or D. • Respiration Screens: The Respiration sensor is assigned to Input H. It has to be reassigned to input C or D. Channel Set Modifications The procedure to modify a sensor type input for use with the ProComp 2 is relatively straightforward. The following example describes how to modify the “Simple 1 channel line graph with numeric” display screen: ProComp 2TM Quick Start and User’s Guide 16 1. Load the “Simple 1 channel line graph with numeric” display screen and, if necessary, the Sample 3 session file from the John Sample client file. 2. Once the screen is loaded, select the Sensors/Inputs option in the Config menu: 3. In the System and Sensor Configuration dialog box, re-define input C to expect a skin conductance sensor type by clicking on the drop-down list button and selecting “SC/GSR” instead of “EMG (rms)”: 4. When you’ve done that, you should see Input C assigned to a “SC-Flex” sensor type: 5. Click OK to close the System and Sensor Configuration dialog box and right-click over one of the skin conductance display instruments to get the instrument’s pop-up ProComp 2TM Quick Start and User’s Guide 17 menu. Because both instruments are connected to the same data channel, you can make the change in either one. Click on Define Data Channel: 6. In the Data Channel Definition dialog box, click on the Signal Type drop-down list and select the line that says: “C: SC/GSR” 7. Click OK to close the dialog box. You should now see that both instrument labels, on the screen, have changed to say “C:” instead of “E:”: Note: If the label on the instrument title bars does not show the change, select the “Refresh Screen” option in the Screen menu. ProComp 2TM Quick Start and User’s Guide 18 If you want to make the change a permanent one, you have to save the screen. Select the Save Display Screen option in the File menu: 8. In the Save Display Screen dialog box, we recommend that you select SAVE AS NEW, instead of Overwrite, so as to keep the original screen intact. 9. When you have entered a description for the screen, be sure to click NO in the pop-up that asks if you want to use the “Default Channel Set”, otherwise the channel configuration changes that you’ve just done will be restored to the default settings, the next time you load the screen: 10. Once the screen has been saved, BioGraph should report that it has been saved with its own data channels: ProComp 2TM Quick Start and User’s Guide 19 Once the screen has been saved with its own data channels, it will always be configured with the new changes, each time it is loaded. Copying Personalized screens If the screen that you wish to use is not one of those that are installed from the system CD and is on another PC, then you will have to be able to locate the screen file and transfer it to the proper folder, in the second system. You need to know how to use a Windows utility, called Windows Explorer, in order to be able to do this. BioGraph stores all its display screens in a “\Vports” sub-folder, below the BioGraph system folder (by default: “C:\Biog2_0”). Each time a new screen is saved, BioGraph automatically generates a file name for it, based on the date of creation. For example, if you created a screen on August 16th, 2002, you would find a string of numbers like “081602” in the file name. The last two numbers of the file name is a number between 00 and 99, which allows BioGraph to sequence all the screens that are built on the same date, 00, 01, 02, etc… The final file name for the screen in our example is: “08160200.vpt”. BioGraph uses the “VPT” extension to identify screen files. In order to find a given screen in the Vports folder, here is what you have to do: 1. Load the screen: From within BioGraph, select the Load Display Screen option in the Files menu. Locate and highlight the desired screen and click Load. 2. Save it as a new screen: Without making any modifications, select the Save Display Screen option, in the File menu, and click the SAVE AS NEW button. Enter a description for the screen (ex: “Beta Training Exercise”). If BioGraph asks, make sure to save the screen with its own data channels (see previous section). 3. Open Windows Explorer: Once the screen is saved, locate the Windows Explorer icon in the Start menu. It is usually located in the Programs or in the Accessories section. 4. Locate the hard drive: By default, BioGraph is installed in the “C:” drive. All your computer’s drives are located under the My Computer section. Click on the small “+” sign, next to the drive’s icon, to open the folder structure on the drive. ProComp 2TM Quick Start and User’s Guide 20 5. Find the screen folder: Folder names should be sorted alphabetically. Find the main “\Biog2_0” folder and click on the “+” sign next to it. Within the main folder, you should see a “\Vports” folder. Click on it to highlight it. 6. View the list of screen files: Inside the “\Vports” folder, you should see all the screens that have been saved on your system. If you can’t find the desired screen easily, you can change the way files are displayed in Windows Explorer by selecting the Details option in the View menu. This should show the screen names in a table format. ProComp 2TM Quick Start and User’s Guide 21 7. Identify the most recent file: With the Details enabled, there should be columns of information relevant to each file. Click on the Modified button to sort the screen files by their order of creation/modification. The most recent file should appear, relatively easily, by looking at the top- or bottom-most file in the list. 8. Cut the file out of the C drive: Since the new screen is a duplicate from another screen in the list, you can simply remove it from the C drive by right-clicking on the file name and selecting the Cut option in the pop-up menu. 9. Paste it onto a floppy: To transfer the screen file onto a floppy disk, you must, first, insert an empty and formatted floppy into the floppy drive. Then, you can highlight the “A:” drive, under the My Computer section, to select the drive. Open the pop-up option menu with a right-click and click the Paste option in the menu. ProComp 2TM Quick Start and User’s Guide 22 10. The screen file should now appear in the list of files contained on the floppy disk. 11. To place the file onto the second system, use the same method, copying it from A to C, instead. More advanced users can use a larger temporary storage device, like an Iomega ZIP drive, to transfer the whole “\Vports” folder from one system to the other. Keep in mind that some screens may also need that you transfer sound or animation file if you have added any to the original installation. Note: If you decide to burn files to a CD, be aware that the copied files may have had their attributes set to “ReadOnly”, instead of “Archive”. BioGraph will only detect files that are set to “Archive”. To verify and modify a file’s attributes, right click over it and then select the “Properties” option from the pop-up menu. Then, in the dialog box, uncheck “Read-Only” and check “Archive”. Reviewing remote session data BioGraph was not designed to facilitate client file transfer between systems. Although it is conceivable to consider copying the session folders from one computer to the other, we advise not to, because of the high risk of damaging the file structure of your BioGraph database. \ ProComp 2TM Quick Start and User’s Guide 23 Technical Support and Order Placing Returning Equipment Be sure to call for an authorization number (RA) before returning any equipment! 1. Send the unit(s) postage prepaid and insured, with proof of purchase to one of the addresses below. 2. If you are shipping from outside Canada and the USA to Canada, mark the package ‘Goods to be repaired - Made in Canada’ to avoid unnecessary customs charges. 3. All customs and duties charges will be billed to you if incurred by sending the unit to the wrong address. 4. Provide a detailed description of the problem you are experiencing, and your telephone/fax number (see form on the last page of this manual. In the USA, ship insured to: Thought Technology Ltd. Cimetra Industrial Park 8396 Route 9 West Chazy, New York 12992-2718, USA In Canada and all other countries, contact your dealer or ship insured to: Thought Technology Ltd. 2180 Belgrave Avenue Montreal, Quebec Canada H4A 2L8 Technical Support Line Canada 1-514 489-8251 [email protected] ProComp 2TM Quick Start and User’s Guide 24 Product Numbers & Accessories Device and sensors T7400 (-A, -BRI, -C, M) ProComp 2 Encoder (protected pins) T9305M EEG Sensor T9401M-50 MyoScan-Pro EMG sensor (50Hz) (protected pins) T9401M-60 MyoScan-Pro EMG sensor (60Hz) (protected pins) SA9308M BVP-Flex/Pro Blood Volume Pulse sensor (protected pins) SA9309M SC-Flex/Pro Skin Conductance sensor (protected pins) SA9310M Temp-Flex/Pro Temperature sensor (protected pins) SA9311M Resp-Flex/Pro Respiration sensor (protected pins) T9405 Voltage Isolator T9306M EKG Sensor T9405M Force Sensor Adapter T9545M Goniometer Adapter Accessories SA9350 Protected Pin replacement sensor cable SA3403 Electrode extender cables (three pack) T8720M Sensor extender cable (protected Pin) T3402M Triode disposable adhesive electrodes (x 100) T3404 Single disposable electrodes (x 300) T3425 UNI-GEL electrodes (x 100) SA8950 PRO-SB Interface T7700 TT-USB Receiver Kit T8952 Dual PRO-SB interface T8740 EEG DIN Extender cables T8725 EEG Extender Cables Monopolar T8730 EEG Extender Cables Bipolar T3470 Nuprep EEG skin prepping gel 114 gm T3480 Elefix electrode gel 180 gm ProComp 2TM Quick Start and User’s Guide 25 Placing Orders Outside USA Tel: 1-514-489-8251 Fax: 1-514-489-8255 In USA Toll-Free Tel:1-800-361-3651 E-Mail: [email protected] Or contact your local authorized distributor. Specifications System Accuracy +/- 5% (see notes below) PROCOMP 2 ENCODER SPECIFICATIONS Approx. Size Approx. Weight w/o Batteries Input Impedance (Input A) Input Impedance (Input B, C, D) Resolution (Input A only) Signal Input Range (Input A) Signal Input Range (Input B, C, D) CMRR (Input A) Channel Bandwidth Sample Rate/Channel (A, B) Sample Rate/Channel (C, D) Supply Voltage Current Consumption Battery Life (Alkaline) Low Battery Warning Data Output Protocol Analog to Digital Conversion ProComp 2TM Quick Start and User’s Guide 2 ½" x 2 3/16" x 5/8" (64mm x 56mm x 16mm) 40 g >1,000,000 mΩ >2 mΩ ≤0.1 µV RMS 0-200 µV RMS 2.0V – 3.6V ≥-130 @ 2 Hz to 45 Hz 0 Hz – 45 Hz 200 OR 256 samples/second 20 or 32 samples/second 1.0V – 1.6V 75 mA - 150 mA @ 1.5 V 10 Hours (minimum) 1.1 V ± 0.2 V 19.2 or 38.4 Kbaud, 8 Bits, 1 Stop, No Parity 13 bits 26 EEG- Sensor (T9305M) Size (Approx.) 37mm x 37mm x 12mm (1.45” x 1.45” x 0.45”) Weight 25g (1 oz) Input Impedance 1,000,000MΩ in parallel with 10pF Input Range 0 – 200µV Sensitivity <0.1µVRMS Bandwidth 2Hz – 40Hz (software limited) Accuracy ±5%, ±0.3µVRMS MyoScan Pro EMG Sensor (T9401M) Size (Approx.) 37mm x 37mm x 15mm (1.45” x 1.45” x 0.60”) Weight 25g (1 oz) Input Impedance 1,000,000MΩ in parallel with 10pF Input Range 0 – 400µVRMS, 0 – 1600µVRMS Sensitivity <0.1µVRMS Bandwidth 20Hz – 500Hz, 100Hz – 200Hz Accuracy ±5%, ±0.3µVRMS Temperature Sensor (SA9310M) Length (Approx.) 152cm (60”) Weight 10g (0.33 oz) Temperature Range 10°C – 45°C (50°F – 115°F) Accuracy 20°C – 40°C (68°F – 104°F) ± 1.0°C (±1.8°F) HR/BVP Flex/Pro Sensor (SA9308M) Size (Approx.) 20mm x 34mm x 10mm (0.72” x 1.33” x 0.41”) Weight 20g (0.66 oz) Input Range Unitless quantity displayed as 0% – 100% Accuracy ±5% Respiration Sensor (SA9311M) Size (Approx.) 132cm (52” Long) Weight 30g (1.0 oz) Range Unitless quantity displayed as 0% – 100% ProComp 2TM Quick Start and User’s Guide 27 EKG- Sensor (T9306M) Size (Approx.) 37mm x 37mm x 12mm(1.45” x 1.45” x 0.45”) Weight 25g (1 oz) Input Impedance 1,000,000MΩ in parallel with 10pF Input Range 0 – 12mV Sensitivity <1µVRMS Bandwidth 0.05Hz – 40Hz (software limited) Accuracy ±5%, ±3µVRMS Skin Conductance Flex/Pro Sensor (SA9309M) Size without electrode leads (approx.) 3.5 cm (1.4”) Size with electrode leads (approx.) 15 cm (6.0”) Cable Length (approx.) 127 cm (50”) Weight (approx.) 25 g (1 oz) Signal Input Range 0 – 30.0 µS Accuracy ±5% and ±0.2 µS Voltage Isolator (SA9405) Size (Approx.) 95mm x 57mm x 32mm (3.75” x 2.25” x 1.25”) Weight 55g (2 oz) Input Impedance 1MΩ Input Range 0 – 200mV, 0 – 2V, 1.952 – 3.648V Bandwidth 0Hz – 1KHz Accuracy ±5% and ±1mV (0 – 200mV range) ±5% and ±10mV (0 – 2V range) ±5% (1.952V – 3.648V range) NOTE: ProComp 2TM and its sensors are sensitive electronic instruments and should be handled as such. Be especially careful to avoid both pulling on the electrode cable and getting moisture or electrode gel on the sensor snaps. If necessary, wipe the surface with a damp cloth or use a moistened Q-tip to remove gel from inside the sensor snaps. Wipe with a dry cloth. ProComp 2TM Quick Start and User’s Guide 28 Index A Accessories, 25 B BioGraph Channel set modifications, 16 Copying screens, 20 Reviewing session data, 23 Screens and channel sets, 16 Using ProComp 2 with, 15 Blood Volume Pulse. See Sensors C Connectors Guiding dot, 13 Protected Pins, 13 E Electrical interference, 13 Electrocardiography. See Sensors Electrodes Skin preparation, 14 Types of, 14 Electroencephalography. See Sensors Electromyography. See Sensors F fiber-optic cable Caring for, 11 Connecting, 11 H Hardware set-up, 10 O Order Placing, 24 ProComp 2TM Quick Start and User’s Guide P PROCOMP 2 basic package, 10 Storage, 14 Product Numbers, 25 R Repair Return Form, 31 Returning Equipment, 24 S Sensor Inputs, 12 Configuration, 12 Dedicated input, 12 Sampling rates, 12 Sensors Active sensor, 12 Anatomy, 13 BVP, 12 EEG, 12 EKG, 12 EMG, 12 Respiration, 12 Skin Conductance, 12 Skin Temperature, 12 Serial Port 9 to 25 pin adapter, 11 System Specifications, 26 T Technical Support, 24 V Voltage Isolation, 12 W Warranty, 30 29 Warranty The ProComp 2TM encoder and all equipment including optional items are guaranteed to be free from defects in material and workmanship for 1 year from the date of purchase. In the unlikely event that repair is necessary, call Thought Technology Ltd. to receive a Return Authorization. Then send the unit back by a traceable method--Thought Technology will not be responsible for items not received. We will repair or replace your unit(s) free of charge. This warranty does not apply to damage incurred through accident, alteration, or abuse, nor to sensor damage created by static electricity. Do not use this equipment in a dry, static area unless using an anti-static mat or anti-static spray on carpeted areas. Do not immerse in water. IMPORTANT: Remove dead batteries promptly to prevent corrosion damage. Extended Warranty Optional Please contact Thought Technology for further details. ProComp 2TM Quick Start and User’s Guide 30 Repair Return Form Be sure to call for authorization before returning any equipment! Remove and include with the unit(s). Include copy of original invoice and return to the address in the Returning Equipment section. Name Company Address Phone No. Fax No. Date Purchased From Whom Model Name Serial Number Problem ProComp 2TM Quick Start and User’s Guide 31