1
© 2015. All Rights Reserved.
Acer Chromebase DC221HQ User’s Manual
This revision: 02/2015
Product Registration
When using your product for the first time, it is recommended that you immediately
register it. This will give you access to some useful benefits, such as:
•
Faster service from our trained representatives.
•
Membership in the Acer community: receive promotions and participate in
customer surveys.
•
The latest news from Acer.
Hurry and register, as other advantages await you!
How to register
To register your Acer product, please visit www.acer.com. Select your country, click
Register a product and follow the simple instructions.
After we receive your product registration, you will be sent a confirmation email with
important data that you should keep in a safe place.
Obtaining Acer accessories
We are happy to inform you that Acer's warranty extension program and accessories
are available online. Come and visit our online shop and find what you need at
store.acer.com.
The Acer store is being progressively rolled out, and, unfortunately may not be
available in some regions. Please check back regularly to see when it will be
available in your country.
Model number: __________________________________
Serial number: ___________________________________
Date of purchase: ________________________________
Place of purchase: ________________________________
English
Table of contents
Table of contents
Your Acer Chromebase tour
4
Front view .................................................................................... 4
Base view .................................................................................... 5
Rear view ..................................................................................... 6
Environment................................................................................. 7
Getting started
8
Plug in and set up your Acer Chromebase .................................. 8
Turn on your Acer Chromebase................................................... 8
Using the touchscreen ................................................................. 8
Select your language settings...................................................... 9
Connect to a network ................................................................... 9
Sign in to your Google Account ................................................... 9
The Chrome OS Desktop
11
Desktop overview.......................................................................11
Apps
13
Managing apps ..........................................................................13
Google Drive .............................................................................13
Gmail ........................................................................................15
Google Docs ..............................................................................15
YouTube ...................................................................................15
Playing video or audio files ........................................................16
Other Supported File Types.......................................................16
Chrome Web Store ...................................................................16
Chrome tips and tricks
17
Settings
23
Changing the language settings ................................................23
Changing the clock settings .......................................................24
Customizing appearance ...........................................................24
Setting up a printer ....................................................................25
Updating Chrome OS.................................................................25
26
Online and offline help .............................................................. 26
Information for your safety and comfort
27
Safety instructions ..................................................................... 27
Radio frequency interference .................................................... 30
Medical devices......................................................................... 30
Vehicles..................................................................................... 31
Potentially explosive environments ........................................... 32
Emergency calls ........................................................................ 32
Disposal instructions ................................................................. 32
Tips and information for comfortable use .................................. 33
Regulations and safety notices
36
FCC notice ................................................................................ 36
LCD pixel statement .................................................................. 37
Federal Communications Commission
Declaration of Conformity.......................................................... 38
English
Help
English
4
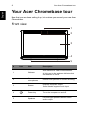
Your Acer Chromebase tour
Your Acer Chromebase tour
Now that you are done setting it up, let us show you around your new Acer
Chromebase.
Front view
1
2
3
4
5
#
Icon
Item
Description
1
Webcam
Web camera for video communication.
A light next to the webcam indicates that
the webcam is active.
2
Stereo
microphones
Internal microphones for sound recording.
3
Screen
Displays computer output.
Some models support touch input.
4
Power key
Turns the computer on and off.
5
Speakers
Left and right speakers deliver stereo
audio output.
5
English
Base view
1 2 34
#
Icon
Item
Description
1
USB ports
Connect to USB devices.
If a port is black it is USB 2.0 compatible,
if it is blue it is also USB 3.0 compatible
and supports fast charging.
2
HDMI-out port
Supports high-definition digital video
connections.
3
Ethernet (RJ45) port
Connects to an Ethernet 10/100-based
network.
4
DC-in jack
Connects to an AC adapter.
English
6
Your Acer Chromebase tour
Rear view
1
2
3
4
5
#
Icon
Item
Description
1
USB port
Connects to USB devices.
If a port is black it is USB 2.0
compatible, if it is blue it is also USB
3.0 compatible.
2
Headset/speaker
jack
Connects to audio devices
(e.g., speakers, headphones), or a
headset with microphone.
3
SD™ card reader
Accepts Secure Digital (SD™) cards.
Note: The card reader uses one card
at a time.
Kensington lock
slot
4
5
Shutdown / reset
pinhole
Connects to a Kensington-compatible
computer security lock.
Note: Wrap the computer security lock
cable around an immovable object such
as a table or handle of a locked drawer.
Insert the lock into the notch and turn
the key to secure the lock. Some
keyless models are also available.
Shuts down and resets the computer.
Insert a small, thin object (such as a
paperclip).
7
Environment
•
Temperature:
•
•
Operating: 5 °C to 35 °C
•
Non-operating: -20 °C to 65 °C
Humidity (non-condensing):
•
•
Operating: 20% to 80%
Non-operating: 20% to 80%
English
Note: Items 1, 2, and 3 are located behind a cover on the rear of your
computer.
English
8
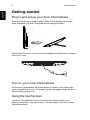
Getting started
Getting started
Plug in and set up your Acer Chromebase
Open the stand until it snaps in place. Then, tilt the display panel to an
angle of between 15 and 75 degrees from an upright position.
Connect the DC-in jack to your Acer Chromebase and plug the AC adapter
into an AC outlet.
Turn on your Acer Chromebase
On the Acer Chromebase, the power button is located in the lower-right
corner beneath the screen. A "connect" screen will appear when the Acer
Chromebase first boots up.
Using the touchscreen
Your Acer Chromebase uses a touchscreen for selecting items and
entering information. Use your finger to tap the screen. You may use the
following gestures:
9
Drag: Hold your finger on the screen and drag across the screen to select
text and images.
Tap and hold: Tap and hold an item to see a list of actions available for
that item. From the pop-up menu that appears, tap the action you want to
perform.
Scroll: To scroll up or down the screen, simply drag your finger up or down
the screen in the direction that you want to scroll.
Select your language settings
Use the "Select your language" drop-down list to choose your default
language setting. If there is more than one way to type in your language,
you may be prompted to select a keyboard input method as well.
Connect to a network
Connect to a network using the built-in LAN jack at the rear of the computer
or select a wireless network from the "Select a network" list to connect to
the Internet. If wireless network access is protected, you will need an
access password to connect to it.
Accept the Terms of Service
Once connected to a network, accept the Terms of Service. Your Acer
Chromebase will then download any available system updates, so you
automatically get the latest Chrome OS features.
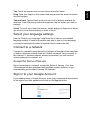
Sign in to your Google Account
If you already have a Google Account, enter your username and password
in the sign-in box that appears and click on the Sign in button.
English
Tap: Touch the screen once to open items and select items.
English
10
Getting started
Important: Sign in with your primary Google Account. This account
will be set as the owner and is the only account that will be able to
change certain Chrome settings.
Create a new Google Account
You can create a new Google Account if you don’t already have one. Click
Create a Google Account on the right to set up a new account. A Google
Account gives you access to useful web services developed by Google,
such as Gmail, Google Docs, and Google Calendar.
Browse as a guest
You can also use the Acer Chromebase without a Google Account by
clicking Browse as a Guest on the left.
Set your account picture
This picture will represent your account on the main sign-in screen and
status area. If you like, you can use the Acer Chromebase’s built-in
webcam to take a photo. If you don’t want to take a photo at this time, you
can choose an icon instead. You can always update your picture after
you’ve signed in.
Also, your Acer Chromebase is integrated with your Google account
profile. After signing in with your Google account you have the option of
choosing your Google account profile picture.
11
Desktop overview
Launcher
Window controls
Status area
and settings
Window controls
Icon
Description
Icon
Description
Close a tab
Open a new tab
Minimize, maximize, or dock
the window on the left or
right
Close the window
Back to the previous page
Go to the next page
Reload the page
Search
Bookmark
Chrome controls
English
The Chrome OS Desktop
English
12
The Chrome OS Desktop
Launcher
Icon
Description
Icon
Description
Google Chrome
Gmail
Google Search
YouTube
Google Drive
Apps list
Status area and settings
Icon
Description
Icon
Description
Chrome OS help
Shut down
Lock screen
Settings
Battery status
Volume control
Bluetooth status
Wireless network
connection
Note: Specifications vary. Some icons may not be applicable to your
Acer Chromebase.
13
English
Apps
Managing apps
Installing apps in Chrome OS
See "Installing new apps from the Chrome Web Store" on page 16.
Removing apps from Chrome OS
1. Click the apps list button (
).
2. Right-click on the app you want to remove.
3. Select Remove from Chrome.
Customizing apps pinned to the launcher
1. Click the apps list button (
).
2. Right-click on the app you want to add to the launcher.
3. Select Pin to Launcher.
To reorder the apps in the launcher, just drag them around.
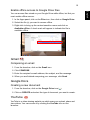
Google Drive
All files saved to your Google Drive are saved online and are accessible to
other devices, such as your smartphone or tablet. Files saved to the
Downloads folder are saved to your local drive and are only accessible to
your Acer Chromebase.
Note: You must be connected to the Internet to do the following
Google Drive operations.
Sync files from Downloads to Google Drive
1. In the apps list, click on the Files icon.
Apps
English
14
2. If this your first time accessing your Google Drive, click on the Google
Drive icon to enable access.
3. Once your Google Drive is enabled, select the files that you want to
upload.
4. Drag-and-drop the files on to Google Drive.
15
Enable offline access to Google Drive files
1. In the Apps panel, click on the Files icon, then click on Google Drive.
2. Select the file (s) you want to access offline.
3. Right-click to bring up the context sensitive menu and click on
Available offline. A check mark will appear to indicate the file is
available offline.
Gmail
Composing an email
1. From the launcher, click on the Gmail icon.
2. Click COMPOSE.
3. Enter the recipient’s email address, the subject, and the message.
4. When you are finished composing your message, click Send.
Google Docs
Creating a new document
1. From the launcher, click on the Google Drive icon ( ).
2. Click on CREATE and select the type of document you want to create.
YouTube
YouTube is a video-sharing website on which users can upload, share and
view videos. You can access it by clicking the YouTube icon on the
launcher.
English
You can access files stored on your Google Drive while offline, but first you
must enable offline access:
English
16
Apps
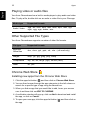
Playing video or audio files
Your Acer Chromebase has a built-in media player to play audio and video
files. To play a file, double-click on an audio or video file in your Files app.
Media type
Supported formats
Audio / Video
.3gp, .avi, .mov, .mp4, .m4v, .m4a, .mp3, .mkv, .ogv,
.ogm, .ogg, .oga, .webm, .wav
Other Supported File Types
Your Acer Chromebase supports a number of other file formats.
File type
Supported formats
Microsoft
Office files
.doc, .docx, .ppt, .pptx, .xls, .xlsx – (all read-only)
Images
.bmp, .gif, .jpg, .jpeg, .png, .webp
Compressed
.zip, .rar, .tar, .tar.gz (.tgz), .tar.bz2 (.tbz2)
Other
.txt, .pdf
Chrome Web Store
Installing new apps from the Chrome Web Store
1. Click the apps list button (
) and then click on Chrome Web Store.
2. You can then browse through the app categories in the left column or
search for a specific type of app using the search box.
3. When you find an app that you would like to add, hover your mouse
over it and then click on ADD TO CHROME.
4. A verification window will pop up, click on Add to download and install
the app, or click on Cancel.
5. To open your new app, click the apps list button (
the app.
) and then click on
17
Your Acer Chromebase is a new type of computer that works somewhat
differently than what you may be used to, so you might like to know how
easy and useful things are when using it. Here are some tips and tricks.
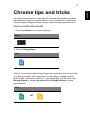
How to create documents
1. Press the Search key on your keyboard.
Press
2. Click on Google Docs.
Click
That’s it. You’ve just created a new document in less than one second. With
your new document, you can add text, insert images, change the font,
make it bold, underline it, italicize it – you get the gist. You can also click
Google Sheets to create spreadsheets and Google Slides to create
presentations.
Click
or
English
Chrome tips and tricks
English
18
Chrome tips and tricks
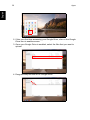
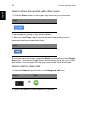
How to share documents with other users
1. Click the Share button in the upper right corner of your document.
Click
2. Add people by typing in their email address.
3. After you click Done, they’ll receive an email letting them know a
document has been shared with them.
Click
To find your document later, press the Share key and click on the Google
Drive icon – this opens Google Drive, which shows you a list of your files
and folders. You can search for files by name at the top of the screen.
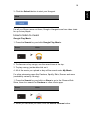
How to start a video chat
1. Press the Search key and click on the Hangouts call icon.
Press
Click
>
2. Type in the name or email address of a person.
19
Click
For all you Skype users out there, Google+ Hangouts are free video chats
for up to ten people.
How to listen to music
Google Play Music
1. Press the Search key and click Google Play Music.
Press
Click
>
2. To discover or buy songs, use the search box at the top.
3. To play a song, just double-click on it.
4. All of the music you upload or buy will be saved under My Music.
For other streaming apps like Pandora, Spotify, Rdio, Deezer and more
(availability varies by country):
1. Press the Search key and click on Store to go to the Chrome Web
Store, then do a search for Pandora or other music apps.
Press
Click
>
2. When you find what you want, click the Add to Chrome button.
English
3. Click the Submit button to start your Hangout.
English
20
Chrome tips and tricks
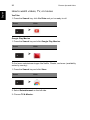
How to watch videos, TV, or movies
YouTube
1. Press the Search key, click YouTube and you’re ready to roll.
Press
Click
>
Google Play Movies
1. Press the Search key and click Google Play Movies.
Press
Click
>
To find more entertainment apps like Netflix, Flixster, and more (availability
varies by country):
1. Press the Search key and click Store.
Press
Click
>
2. Select Entertainment on the left side.
3. Choose TV & Movies.
21
1. Press the Search key and click Files.
Press
Click
>
2. Double-click on any Microsoft Office file stored in Google Drive or on
an external hard drive or USB flash drive connected to your Acer
Chromebase.
You can convert Microsoft Word and Excel files into Google Drive
Documents and Spreadsheets and edit them. You can also export Google
Drive documents and spreadsheets as Microsoft Office files.
How to use your Acer Chromebase when there’s no
internet
Gmail:
1. Press the Search key and click on Store to go to the Chrome Web
Store, then search for Gmail Offline in the upper left corner search box,
and add it.
Press
Click
>
2. The next time you find yourself offline, press the Search key.
Press
English
How to open Microsoft Word and Excel documents
English
22
Chrome tips and tricks
3. Click Gmail Offline to open it, and use Gmail like you normally would.
It’ll update and send your emails the next time you log on to the internet.
Click
Google Docs, Sheets, and Slides:
1. When you open Google Drive while connected to the internet, it will
automatically enable Offline Drive.
2. Once the process completes, the next time you want to create a
document offline, simply press the Search key and click on Google Docs,
Google Sheets, or Google Slides.
Find other useful offline apps at the Chrome Web Store by pressing the
Search key and clicking on Store. When the Chrome Web Store opens,
click on Collections in the left column and then Offline Apps.
The Get Started app and Help on your Acer Chromebase have a lot of
additional very useful information. They are well worth a look.
23
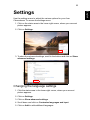
Use the settings menu to adjust the various options for your Acer
Chromebase. To access the settings menu:
1. Click on the status area in the lower-right corner, where your account
picture appears.
2. Click on Settings.
3. To show the advanced settings, scroll to the bottom and click on Show
advanced settings.
Changing the language settings
1. Click the status area in the lower-right corner, where your account
picture appears.
2. Click on Settings.
3. Click on Show advanced settings.
4. Scroll down and click on Customize languages and input.
5. Click on Add to add additional languages.
English
Settings
English
24
Settings
6. To enable a language for keyboard input, select the checkbox next to
the language after adding it.
7. Click on OK when finished.
Changing the clock settings
You can change the time format and time zone on your Acer Chromebase.
If the date or time is incorrect on your Acer Chromebase, try adjusting the
time zone.
To change the time zone:
1. Click the status area in the lower-right corner, where your account
picture appears.
2. Click on Settings.
3. Click on Show advanced settings.
4. Scroll down and click on the drop down box next to Time zone.
Customizing appearance
Customizing the wallpaper
1. Click the status area in the lower-right corner, where your account
picture appears.
2. Click on Settings.
3. Click on Set wallpaper.
4. Select a preloaded wallpaper or click Browse to select your own
image. You can also choose I’m feeling lucky to have the wallpaper
change randomly.
5. Once selected, click OK.
Customizing the theme
1. Click the status area in the lower-right corner, where your account
picture appears.
2. Click on Settings.
3. Click on Get themes.
4. You’ll be taken to the Chrome Web Store, where you can find extra
resources for the Chrome browser.
5. Once you find a theme that you’d like to try out, click Choose theme.
25
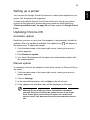
You can use the Google Cloud Print service to send print requests to your
printer. Not all printers are supported.
To learn more about Google Cloud Print and how to set up your printer,
connect to the Internet to access the more extensive online help from
"Online and offline help" on page 26 and then search for Google Cloud
Print.
Updating Chrome OS
Automatic update
Each time you turn on your Acer Chromebase, it automatically checks for
updates. When an update is available, this update icon (
the status area. To apply the update:
) will appear in
1. Click the status area in the lower-right corner, where your account
picture appears.
2. Click Restart to update.
3. Your Acer Chromebase will shutdown and automatically restart, with
the update applied.
Manual update
To manually check for an update or check what version of Chrome OS you
are using:
1. Click the status area in the lower-right corner, where your account
picture appears.
2. Click on Settings.
3. In the new tab that opens, click on Help in the left column.
4. If any updates are available, they will be displayed on the page.
Warning! Do not modify your Acer Chromebase’s hardware
yourself. Doing so will cause the update function to no longer
work. Please get in touch with your dealer or an authorized
service center. Visit www.acer.com to find an authorized service
site.
English
Setting up a printer
English
26
Help
Help
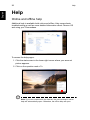
Online and offline help
Additional help is available both online and offline. Help covers basic
troubleshooting as well as more detailed information about Chrome OS
and using your Chromebase.
To access the help pages:
1. Click the status area in the lower-right corner where your account
picture appears.
2. Click on the question mark <?>.
Note: If you are connected to the Internet, the more extensive online
help will automatically open. Otherwise, the offline help will open.
27
Safety instructions
Read these instructions carefully. Keep this document for future reference.
Follow all warnings and instructions marked on the product.
Turning the product off before cleaning
Unplug this product from the wall outlet before cleaning. Do not use liquid
cleaners or aerosol cleaners. Use a damp cloth for cleaning.
CAUTION for plug as disconnecting device
Observe the following guidelines when connecting and disconnecting
power to the power supply unit:
Install the power supply unit before connecting the power cord to the AC
power outlet.
Unplug the power cord before removing the power supply unit from the
computer.
If the system has multiple sources of power, disconnect power from the
system by unplugging all power cords from the power supplies.
CAUTION for Accessibility
Be sure that the power outlet you plug the power cord into is easily
accessible and located as close to the equipment operator as possible.
When you need to disconnect power to the equipment, be sure to unplug
the power cord from the electrical outlet.
CAUTION for bundled dummy cards (only for certain models)
Your computer shipped with plastic dummies installed in the card slots.
Dummies protect unused slots from dust, metal objects or other particles.
Save the dummies for use when no cards are in the slots.
Warnings
•
•
Do not use this product near water.
Do not place this product on an unstable cart, stand or table. If the
English
Information for your
safety and comfort
English
28
•
•
•
•
•
Information for your safety and comfort
product falls, it could be seriously damaged.
Slots and openings are provided for ventilation to ensure reliable
operation of the product and to protect it from overheating. These
openings must not be blocked or covered. The openings should never
be blocked by placing the product on a bed, sofa, rug or other similar
surface. This product should never be placed near or over a radiator or
heat register, or in a built-in installation unless proper ventilation is
provided.
Never push objects of any kind into this product through cabinet slots
as they may touch dangerous voltage points or short-out parts that
could result in a fire or electric shock. Never spill liquid of any kind onto
or into the product.
To avoid damage of internal components and to prevent battery
leakage, do not place the product on a vibrating surface.
Never use it under sporting, exercising, or any vibrating environment
which will probably cause unexpected short current or damage rotor
devices, hard disk drive, optical drive, and even exposure risk from
lithium battery pack.
The bottom surface, areas around ventilation openings and AC
adapter may get hot. To avoid injury, ensure they do not come in
contact with your skin or body.
Note: Reduce the risk of heat-induced injury or fire by adhering to the
following:
1) Do not place the computer or AC adapter on a soft surface, such as
a bed.
2) Do not rest the computer or AC adapter on your lap for extended
periods.
3) Use the computer on a flat, hard surface, such as a desk.
4) Ensure that the ventilation is not obstructed.
•
•
Your device and its enhancements may contain small parts. Keep
them out of the reach of children.
The surface temperature of the base will rise during normal operation,
particularly when AC power is present. Allowing sustained contact with
exposed skin can cause discomfort.
Using electrical power
•
•
This product should be operated from the type of power indicated on
the marking label. If you are not sure of the type of power available,
consult your dealer or local power company.
Do not allow anything to rest on the power cord. Do not locate this
29
•
•
product where people will walk on the cord.
If an extension cord is used with this product, make sure that the total
ampere rating of the equipment plugged into the extension cord does
not exceed the extension cord ampere rating. Also, make sure that the
total rating of all products plugged into the wall outlet does not exceed
the fuse rating.
Do not overload a power outlet, strip or receptacle by plugging in too
many devices. The overall system load must not exceed 80% of the
branch circuit rating. If power strips are used, the load should not
exceed 80% of the power strip's input rating.
This product's AC adapter is equipped with a three-wire grounded
plug. The plug only fits in a grounded power outlet. Make sure the
power outlet is properly grounded before inserting the AC adapter
plug. Do not insert the plug into a non-grounded power outlet. Contact
your electrician for details.
Warning! The grounding pin is a safety feature. Using a power
outlet that is not properly grounded may result in electric shock
and/or injury.
Note: The grounding pin also provides good protection from
unexpected noise produced by other nearby electrical devices that
may interfere with the performance of this product.
•
The system can be powered using a wide range of voltages: 100 to
120 or 220 to 240 V AC. The power cord included with the system
meets the requirements for use in the country/region where the system
was purchased. Power cords for use in other countries/regions must
meet the requirements for that country/region. For more information on
power cord requirements, contact an authorized reseller or service
provider.
Product servicing
Do not attempt to service this product yourself, as opening or removing
covers may expose you to dangerous voltage points or other risks. Refer all
servicing to qualified service personnel.
Unplug this product from the wall outlet and refer servicing to qualified
service personnel when:
•
The power cord or plug is damaged, cut or frayed.
English
•
English
30
•
•
•
•
•
Information for your safety and comfort
Liquid was spilled into the product.
The product was exposed to rain or water.
The product has been dropped or the case has been damaged.
The product exhibits a distinct change in performance, indicating a
need for service.
The product does not operate normally after following the operating
instructions.
Note: Adjust only those controls that are covered by the operating
instructions, since improper adjustment of other controls may result in
damage and will often require extensive work by a qualified technician
to restore the product to normal condition.
Radio frequency interference
Warning! For safety reasons, turn off all wireless or radio
transmitting devices when using your laptop under the following
conditions. These devices may include, but are not limited to:
wireless LAN (WLAN), Bluetooth and/or 3G.
Remember to follow any special regulations in force in any area, and
always switch off your device when its use is prohibited or when it may
cause interference or danger. Use the device only in its normal operating
positions. This device meets RF (Radio Frequency) exposure guidelines
when used normally. It should not contain metal and you should position
the device the above-stated distance from your body. To successfully
transmit data files or messages, this device requires a good quality
connection to the network. In some cases, transmission of data files or
messages may be delayed until such a connection is available. Ensure that
the above separation distance instructions are followed until the
transmission is completed. Parts of the device are magnetic. Metallic
materials may be attracted to the device, and persons with hearing aids
should not hold the device to the ear with the hearing aid. Do not place
credit cards or other magnetic storage media near the device, because
information stored on them may be erased.
Medical devices
Operation of any radio transmitting equipment, including wireless phones,
may interfere with the functionality of inadequately protected medical
devices. Consult a physician or the manufacturer of the medical device to
31
Pacemakers. Pacemaker manufacturers recommend that a minimum
separation of 15.3 centimeters (6 inches) be maintained between wireless
devices and a pacemaker to avoid potential interference with the
pacemaker. These recommendations are consistent with the independent
research by and recommendations of Wireless Technology Research.
Persons with pacemakers should do the following:
•
•
Always keep the device more than 15.3 centimeters (6 inches) from
the pacemaker
Not carry the device near your pacemaker when the device is switched
on.
If you suspect interference, switch off your device, and move it.
Hearing aids. Some digital wireless devices may interfere with some
hearing aids. If interference occurs, consult your service provider.
Vehicles
RF signals may affect improperly installed or inadequately shielded
electronic systems in motor vehicles such as electronic fuel injection
systems, electronic anti-skid (anti-lock) braking systems, electronic speed
control systems, and air bag systems. For more information, check with the
manufacturer, or its representative, of your vehicle or any equipment that
has been added. Only qualified personnel should service the device, or
install the device in a vehicle. Faulty installation or service may be
dangerous and may invalidate any warranty that may apply to the device.
Check regularly that all wireless equipment in your vehicle is mounted and
operating properly. Do not store or carry flammable liquids, gases, or
explosive materials in the same compartment as the device, its parts, or
enhancements. For vehicles equipped with an air bag, remember that air
bags inflate with great force. Do not place objects, including installed or
portable wireless equipment in the area over the air bag or in the air bag
deployment area. If in-vehicle wireless equipment is improperly installed,
and the air bag inflates, serious injury could result. Using your device while
flying in aircraft is prohibited. Switch off your device before boarding an
aircraft. The use of wireless teledevices in an aircraft may be dangerous to
the operation of the aircraft, disrupt the wireless telephone network, and
may be illegal.
English
determine if they are adequately shielded from external RF energy or if you
have any questions. Switch off your device in health care facilities when
any regulations posted in these areas instruct you to do so. Hospitals or
health care facilities may be using equipment that could be sensitive to
external RF transmissions.
English
32
Information for your safety and comfort
Potentially explosive environments
Switch off your device when in any area with a potentially explosive
atmosphere and obey all signs and instructions. Potentially explosive
atmospheres include areas where you would normally be advised to turn
off your vehicle engine. Sparks in such areas could cause an explosion or
fire resulting in bodily injury or even death. Switch off the device at refueling
points such as near gas pumps at service stations. Observe restrictions on
the use of radio equipment in fuel depots, storage, and distribution areas;
chemical plants; or where blasting operations are in progress. Areas with a
potentially explosive atmosphere are often, but not always, clearly marked.
They include below deck on boats, chemical transfer or storage facilities,
vehicles using liquefied petroleum gas (such as propane or butane), and
areas where the air contains chemicals or particles such as grain, dust or
metal powders. Do not switch the notebook on when wireless phone use is
prohibited or when it may cause interference or danger.
Emergency calls
Warning: You cannot make emergency calls through this device. To make
an emergency call you shall dial out through your mobile phone or other
telephone call system.
Disposal instructions
Do not throw this electronic device into the trash when
discarding.
To minimize pollution and ensure utmost protection of the global
environment, please recycle. For more information on the Waste
from Electrical and Electronics Equipment (WEEE) regulations,
visit www.acer-group.com/public/Sustainability/sustainability01.htm.
ENERGY STAR
Acer's ENERGY STAR qualified products save your money
by reducing energy cost and protecting the environment
without sacrificing features or performance. Acer is proud to
offer our customers products with the ENERGY STAR mark.
What is ENERGY STAR?
Products that are ENERGY STAR qualified use less energy and prevent
greenhouse gas emissions by meeting strict energy efficiency guidelines
set by the U.S. Environmental Protection Agency. Acer is committed to
33
Acer ENERGY STAR qualified products: (only for certain models)
•
•
•
•
Produce less heat and reduce cooling loads, and warmer
climates.
Automatically go into "display sleep" and "computer sleep" mode
after 10 and 30 minutes of inactivity respectively.
Wake the computer from sleep mode by pushing keyboard or
moving mouse.
Computers will save more than 80% energy at "sleep" mode.
ENERGY STAR is only available for certain models and have the ENERGY
STAR certification mark on the palm rest.
ENERGY STAR and the ENERGY STAR mark are registered U.S. marks
Tips and information for comfortable use
Computer users may complain of eyestrain and headaches after prolonged
use. Users are also at risk of physical injury after long hours of working in
front of a computer. Long work periods, bad posture, poor work habits,
stress, inadequate working conditions, personal health and other factors
greatly increase the risk of physical injury.
Incorrect computer usage may lead to carpal tunnel syndrome, tendonitis,
tenosynovitis or other musculoskeletal disorders. The following symptoms
may appear in the hands, wrists, arms, shoulders, neck or back:
•
•
•
•
•
Numbness, or a burning or tingling sensation.
Aching, soreness or tenderness.
Pain, swelling or throbbing.
Stiffness or tightness.
Coldness or weakness.
If you have these symptoms, or any other recurring or persistent discomfort
and/or pain related to computer use, consult a physician immediately and
inform your company's health and safety department.
The following section provides tips for more comfortable computer use.
English
offering products and services worldwide that help customers save money,
conserve energy and improve the quality of our environment. The more
energy we can save through higher energy efficiency, the more we reduce
greenhouse gases and the risks of climate change. More information refers
to
www.energystar.gov or www.energystar.gov/powermanagement.
English
34
Information for your safety and comfort
Finding your comfort zone
Find your comfort zone by adjusting the viewing angle of the monitor, using
a footrest, or raising your sitting height to achieve maximum comfort.
Observe the following tips:
•
•
•
•
•
•
•
Refrain from staying too long in one fixed posture.
Avoid slouching forward and/or leaning backward.
Stand up and walk around regularly to remove the strain on your leg
muscles.
Take short rests to relax your neck and shoulders.
Avoid tensing your muscles or shrugging your shoulders.
Install the external display, keyboard and mouse properly and within
comfortable reach.
If you view your monitor more than your documents, place the display
at the center of your desk to minimize neck strain.
Taking care of your vision
Long viewing hours, wearing incorrect glasses or contact lenses, glare,
excessive room lighting, poorly focused screens, very small typefaces and
low-contrast displays could stress your eyes. The following sections
provide suggestions on how to reduce eyestrain.
Eyes
•
•
•
Rest your eyes frequently.
Give your eyes regular breaks by looking away from the monitor and
focusing on a distant point.
Blink frequently to keep your eyes from drying out.
Display
•
•
•
•
Keep your display clean.
Keep your head at a higher level than the top edge of the display so
your eyes point downward when looking at the middle of the display.
Adjust the display brightness and/or contrast to a comfortable level for
enhanced text readability and graphics clarity.
Eliminate glare and reflections by:
•
•
•
•
•
placing your display in such a way that the side faces the window
or any light source
minimizing room light by using drapes, shades or blinds
using a task light
changing the display's viewing angle
using a glare-reduction filter
35
•
•
Developing good work habits
The following work habits make computer use more relaxing and
productive:
•
•
•
•
Take short breaks regularly and often.
Perform some stretching exercises.
Breathe fresh air as often as possible.
Exercise regularly and maintain a healthy body.
Warning! We do not recommend using the computer on a couch
or bed. If this is unavoidable, work for only short periods, take
breaks regularly, and do some stretching exercises.
English
using a display visor, such as a piece of cardboard extended from
the display's top front edge
Avoid adjusting your display to an awkward viewing angle.
Avoid looking at bright light sources for extended periods of time.
•
English
36
Regulations and safety notices
Regulations and safety
notices
FCC notice
This device has been tested and found to comply with the limits for a Class
B digital device pursuant to Part 15 of the FCC rules. These limits are
designed to provide reasonable protection against harmful interference in a
residential installation. This device generates, uses, and can radiate radio
frequency energy and, if not installed and used in accordance with the
instructions, may cause harmful interference to radio communications.
However, there is no guarantee that interference will not occur in a
particular installation. If this device does cause harmful interference to
radio or television reception, which can be determined by turning the
device off and on, the user is encouraged to try to correct the interference
by one or more of the following measures:
•
Reorient or relocate the receiving antenna.
•
Increase the separation between the device and receiver.
•
Connect the device into an outlet on a circuit different from that to
which the receiver is connected.
•
Consult the dealer or an experienced radio/television technician for
help.
Notice: Shielded cables
All connections to other computing devices must be made using shielded
cables to maintain compliance with FCC regulations.
Notice: Peripheral devices
Only peripherals (input/output devices, terminals, printers, etc.) certified to
comply with the Class B limits may be attached to this equipment.
Operation with non-certified peripherals is likely to result in interference to
radio and TV reception.
Caution
Changes or modifications not expressly approved by the manufacturer
could void the user's authority, which is granted by the Federal
Communications Commission, to operate this computer.
37
This device complies with Part 15 of the FCC Rules. Operation is subject to
the following two conditions: (1) this device may not cause harmful
interference, and (2) this device must accept any interference received,
including interference that may cause undesired operation.
Notice: Canadian users
This Class B digital apparatus complies with Canadian ICES-003.
Remarque à l'intention des utilisateurs canadiens
Cet appareil numérique de la classe B est conforme a la norme NMB-003
du Canada.
LCD pixel statement
The LCD unit is produced with high-precision manufacturing techniques.
Nevertheless, some pixels may occasionally misfire or appear as black or
red dots. This has no effect on the recorded image and does not constitute
a malfunction.
English
Operation conditions
38
English
Regulations and safety notices
Acer America Corporation
333 West San Carlos St., Suite 1500
San Jose, CA 95110, U. S. A.
Tel : 254-298-4000
Fax : 254-298-4147
www.acer.com
Federal Communications Commission
Declaration of Conformity
This device complies with Part 15 of the FCC Rules. Operation is subject to
the following two conditions: (1) this device may not cause harmful
interference, and (2) this device must accept any interference received,
including interference that may cause undesired operation.
The following local Manufacturer /Importer is responsible for this declaration:
Product:
Chrome All-in-One
Model Number:
DC221HQ
SKU Number:
DC221HQ xxxxxx
("x" = 0~9, a~z, or A~Z)
Name of Responsible Party:
Acer America Corporation
Address of Responsible Party:
333 West San Carlos St.
Suite 1500
San Jose, CA 95110
U. S. A.
Contact Person:
Acer Representative
Phone No.:
254-298-4000
Fax No.:
254-298-4147