1
3. Easy Operation
3.1 Power Supply
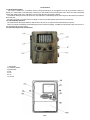
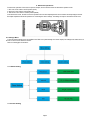
Open the battery cover. Confirm that the power switch is at the OFF position, load the fully charged lithium battery into the depot. Push back
the battery cover.
When in Test Mode, camera will be automatically shut down to save power if without any operation within 3 minutes; it could be waked up by
any movement detection.
When in low-battery state, camera will be also automatically shut down. Please change the batteries in time.
3.2 Insert the SD-Card
Insert SD-card into the card slot with marked side upwards.
Please note that the SD-card can only be plugged in one direction. Make sure that the write-protect switch of the SD-card is on the “write”
position.
3.3 Power on and Enter into the ON Mode
Before switching on, please pay attention to the following:
1. Avoid temperature and motion disturbances that could be construed as animals or humans such as trees that are exposed to direct
sunlight for much of the day or any other heat source. These may cause false triggers
2. The height from ground for placing the camera should 1 meter with the object. For example for deer waste height is good size
appropriately. In general, one to two meters are preferred.
Slide the power switch to the ON position to power on the camera and enter into the ON mode.
After switching on the camera, the motion indication LED (red) will blink for about 15s. The 15s is a buffering time before automatic capturing
photos or videos, e.g. for closing and locking the bottom cover, fixing the camera on a tree and walk away.
In ON mode, the camera will take pictures or videos automatically according to the default settings or previous custom settings.The camera
has the sound recording function, so the sound will be embedded in the video clip while capturing a video(Optional).
3.4 Enter into the TEST Mode
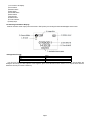
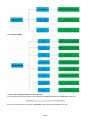
Slide the power switch to the TEST position to enter into the TEST mode. There are some functions in TEST mode: Custom settings, manual
capture, preview.
3.4.1 Custom Settings
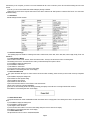
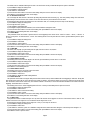
Press the MENU switch to enter into menu setting. The camera can be taken over control to manually customize the camera settings which
display on the camera or external TV monitor. The detailed operations will be described in “Advanced Operations” chapter.
3.4.2 Manual Capturing
You can press SHUTTER to manually capture photos or recording video.
3.4.3 View Images or Videos
There are two ways to view the captured images or videos:
1. LCD screen on camera
2. TV monitors which connects to camera with TV cable
Turn right the select switch to view images, the latest image will be shown in the LCD screen on camera or TV monitor. Press UP to view
the previous image and press DOWN for the next. The detailed operations like deleting images or videos will be described in “Advanced
Operations” chapter.
3.5 Power Off
Slide the power switch to OFF position to power off the camera. Please note that even in the OFF mode, the camera still consumes certain
power at µA level.
Therefore, please remove the battery if the camera will not be used for a long time.
Page4