1
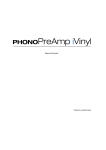
English Manual
Version: 11/9/2006
CE Declaration
We:
TerraTec Electronic GmbH, Herrenpfad 38, D-41334 Nettetal, Germany
hereby declare that the product:
PhonoPreAmp iVinyl
to which this declaration refers is in compliance with the following standards or standardizing
documents:
EN 55013
The following are the stipulated operating and environmental conditions for said compliance:
residential, business and commercial environments and small-company environments.
This declaration is based on:
Test report(s) of the EMC testing laboratory
The information in this document is subject to change without notice and shall not be deemed as a warranty by the
seller. No warranties, express or implied, are made with regard to the quality, suitability or accuracy of this document. The manufacturer reserves the right to change the contents of this document and/or the associated products
at any time without the provision of prior notice to specific persons or organizations. The manufacturer shall not be
held liable for damages of any kind arising from the use, or the inability to use this product or its documentation,
even if the possibility of such damage is known. The information in this document is subject to copyright. All rights
reserved. No part of this manual may be reproduced or transmitted in any form or for any purpose without the express written permission of the copyright holders. Product and brand names contained in this document are used
for identification purposes only. All registered trademarks, product designations or brand names used in this document are the registered property of their respective owners.
©TerraTec® Electronic GmbH, 1994-2006. All rights reserved (11/9/2006).
2
PhonoPreAmp iVinyl (English)
Contents
Pre-amplified Congratulations................................................................................................. 4
Technical data .........................................................................................................................5
Connection and Control Elements ........................................................................................... 6
All about Vinyl......................................................................................................................... 8
Tips and Tools ..................................................................................................................... 8
Just one Groove, but a Lot of Music...................................................................................... 8
RIAA filtering........................................................................................................................ 8
Shielding............................................................................................................................. 9
Recording ............................................................................................................................ 9
Wav, Mp3 or AP ..................................................................................................................10
Links .................................................................................................................................. 11
Sound Rescue TerraTec Edition 2.1......................................................................................... 12
1. Overview ......................................................................................................................... 12
2. First steps....................................................................................................................... 13
3. User Interface ................................................................................................................. 15
4. Recording .......................................................................................................................18
5. Rescuing Audio Material .................................................................................................19
6. Descratcher ................................................................................................................... 20
7. Denoiser ......................................................................................................................... 21
8. Burning CDs................................................................................................................... 22
9. Application Notes ...........................................................................................................23
10. Contacting Us................................................................................................................25
11. Restoration on the Macintosh........................................................................................25
Service at TerraTec. ............................................................................................................... 26
PhonoPreAmp iVinyl (English)
3
Pre-amplified Congratulations
With the TerraTec PhonoPreAmp iVinyl, you have made a great choice. The PhonoPreAmp iVinyl is the complete solution for digitizing analog sound sources, like your beloved LP record
collection, in top high-fidelity quality. The USB connection to the computer is almost too easy.
Even so, please read the following information so that you can start using all of the benefits of
your phono PreAmp Studio USB right away.
Furthermore, the chapter entitled, “All about Vinyl”, provides useful background information
on the LP recording medium as well as worthwhile information on the topic of “digital restoration on the PC”.
The following description is based on use with a PC but can be applied to Mac use without
modification.
Tip: Don't forget to stop in at our website at http://www.terratec.de. There you can find regular software updates, tutorials and instructions to make your experience with your TerraTec
product easy and successful. If you run into problems, checking to make sure you have the
newest drivers and software version, and then going to our FAQs page will solve most issues.
We hope you find great satisfaction in using your TerraTec PhonoPreAmp iVinyl
...your TerraTec Team
4
PhonoPreAmp iVinyl (English)
Technical data
•
Stereo input for record player, can be switched to analog line input (RCA/cinch)
•
USB bus power supplied by the computer—no separate power adapter necessary
•
Suitable for moving magnet (MM) pickups and moving coil (MC) systems with high output
level (at least 2-3mV); standard moving coil (MC) pickups are not supported
•
Sampling frequencies of 32 kHz / 44.1 kHz / 48 kHz / 96 kHz are supported
•
Input capacity adjustable in three stages (100 pF, 250 pF and 430 pF)
•
Filter function with high-precision RIAA equalizer (20 Hz-20 kHz / ± 0.4 dB)
•
Harmonic distortion < 0.007 % (5 mV)
•
Signal-to-noise ratio: > 86 dB (A)
•
EMC-compliant aluminum case
•
LED display for level and signal
•
Bundled software (Algorithmix Sound Rescue 2.1 TerraTec Edition)
•
Windows 2000/XP
•
Mac OS X
PhonoPreAmp iVinyl (English)
5
Connection and Control Elements
Phono line input (cinch / red = right channel, white = left channel)
This is where you connect the output cable from your turntable. Note that the PhonoPreAmp iVinyl is designed for moving-magnet (MM) pickup systems. Standard movingcoil (MC) systems are not supported. If you have a high-output MC system, you can use
it with the “phono PreAmp Studio USB”. However, the output level must be at least 2-3
mV. Alternatively, you can connect devices with line level output, such as tape decks
(refer to the input-level selector switch (point
)).
Ground screw
To prevent so-called “AC hum,” you should connect the grounding wire from your record player to the thumbscrew located on the connection side of the PhonoPreAmp iVinyl. This ensures that your record player is grounded through the computer.
USB jack for connecting to the computer's USB port
The USB port is how the audio data, digitized in the PhonoPreAmp iVinyl, is sent to
your computer. It also acts as the power supply for your PhonoPreAmp iVinyl. Don't
bother searching for an audio jack for your sound card: you don't need one! It all works
digitally through USB.
Using the USB cable provided, simply connect the PhonoPreAmp iVinyl to any free USB
port on your computer.
6
PhonoPreAmp iVinyl (English)
Input-range selector switch
Please refer to the technical documentation of your phono pickup system for the recommended input capacity range for the preamplifier. Then set this selector switch to a
value that best matches this range. If you cannot find any technical documentation for
your pickup cartridge, set the selector switch to its middle position. Your selection will
be indicated by the LED.
Signal and peak display
These two LED lamps conveniently let you know that the PhonoPreAmp iVinyl hardware is working. If the unit is connected correctly and is receiving an audio signal, the
signal LED is lit (blue, bottom). Its brightness changes according to the strength of the
input signal. The peak LED (red, top) lights if the signal level is too high, causing
overamplification. For adjusting input levels, see item
regarding the “Input-level
selector switch”.
Input-level selector switch
Use this to select the type of input signal and how it is to be preamplified. You can select between minimum (Input Level MAX for devices with maximum output signal) and
maximum (Input Level MIN for devices with minimum output signal) preamplification.
If you are recording a line-in signal, select the Line-IN option. Your selection will be indicated by the LED. In this case, also refer to the chapter entitled Recording.
PhonoPreAmp iVinyl (English)
7
All about Vinyl
Tips and Tools
When CD technology took hold of the music recording industry, it eventually replaced all production of vinyl records, to the regret of many collectors and enthusiasts. Today, it has become easy for just about anyone to create his own CDs using a computer and a CD burner. This
is the time when the idea of eternalizing (or at least conserving them for the “half-life period”
of a CD blank ...) your old vinyl treasures has become most interesting. Even the restoration
software available on the market today has become more affordable and easier to use.
How, however, do you get the phono recordings into the computer?
First of all, turntables do not provide a signal that is directly usable with sound cards (and
other line devices). Second, many of today's commercial HiFi amplifiers do not even come
integrated with the special phono-input preamplifier required for use with turntables.
Of course, you can always set up your (turntable-compatible) HiFi amplifier directly next to
your PC—that is, if you don't mind having to move all your nicely connected equipment all the
time. That is precisely why Terratec came up with the concept of the PhonoPreAmp iVinyl. The
PhonoPreAmp iVinyl amplifies the output signal of the turntable, turns it into a high-quality,
usable signal, and then digitizes it—all within the device. The digital data are then “copied”
straight to the computer through the USB port. Now you can even archive your records on a
laptop in comfort— without having an unnecessary mess of cables lying around—because the
PhonoPreAmp iVinyl takes its power supply directly from the computer's USB port.
For those interested in the details of the good old phonograph technology, the following is for
you.
Just one Groove, but a Lot of Music
The audio signal is stored on a record as a pattern in the record's groove. This pattern is picked up mechanically by the turntable's stylus, which converts the “audio data” pressed into
the vinyl into a weak electrical signal. There are two different pickup systems: Moving Coil
(MC) and Moving Magnet (MM or MD for magnetodynamic).
In MM systems, a permanent magnet is moved; in MC systems, the coil follows the movement
of the record's groove. The advantage of MC systems is their lower moving mass, but they
have the disadvantage of an output signal that is lower than that of MM systems by a factor of
10, making it more difficult to achieve a good S/N ratio.
Both MM and MC systems are capable of outstanding musical reproduction, but in practice
the first system is the more common one.
RIAA filtering
Perhaps you've accidentally connected your turntable to the wrong input of your HiFi amplifier
at one time or another. You probably noticed that the signal was not only very quiet, but also
8
PhonoPreAmp iVinyl (English)
distorted. The reason: as the deflection of the needle is limited to specific range, high frequencies (= low amplitude) are amplified and low frequencies (= high amplitude) are weakened on the record. The signal from the pickup must therefore be processed (filtered) before it
can be used.
The Recording Industry Association of America (RIAA) has defined a standard for the changes
to the frequency ranges to ensure that all records can be played using the same filtering. The
quality of the equalization process is thus an important factor in the overall quality of a phono
preamplifier.
Shielding
Due to the relatively low output levels that even moving-magnet systems achieve (MM approx.
2-5 mV, MC approx. 0.1-0.4 mV), a certain amount of protection has to be provided against
external sources of noise. For example, using an overly simple power supply design can result
in unpleasant AC hum.
Unfortunately, the mounting number of electronic devices in an average household means an
increasing amount of electromagnetic interference. While these waves are very weak, they can
still interfere with the signal from the pickup, which is also very weak, as mentioned above.
This problem can be dealt with by carefully shielding the amplifier, as is the case with the
PhonoPreAmp iVinyl.
The ground wire of your turntable, if present, also fits in with this topic. This wire establishes
an electrical connection between the turntable and the shielding to help prevent AC hum.
We've got this one covered, too. The PhonoPreAmp iVinyl is equipped with an extra ground
connection, which passes completely through the device, to the USB port, and then into the
computer. This guarantees maximum shielding.
Recording
Included with the PhonoPreAmp iVinyl is Sound Rescue TerraTec Edition 2.1, a professional
software application for restoring your audio recordings. For more information, refer to the
Recording chapter later in this manual. Start Sound Rescue TerraTec Edition 2.1 as described
in the manual and begin recording.
To achieve optimal level control when recording, it is important to adjust the input level of the
PhonoPreAmp iVinyl correctly. Play the record you want to record and watch the peak LED on
the PhonoPreAmp iVinyl while doing so. Whenever possible, set the input level to MAX. If the
blue LED lights up, it means the input signal is being amplified to strongly. In this case, set the
input level back to MIN. With this setting, the LED should not indicate any more overamplification (peaks). Unlike recordings that you may have made in the past with a tape deck, digital
recordings must never exceed the maximum level. In the analog world, this might have passed
for a desirable “tape saturation” effect, but with digital recording technology it leads to clearly
audible distortion which is virtually impossible to “repair”.
PhonoPreAmp iVinyl (English)
9
After you have recorded your music using the PhonoPreAmp iVinyl and the Sound Rescue TerraTec Edition 2.1 software, you can also use the Sound Rescue TerraTec Edition 2.1 to edit your
recordings directly on a digital level. This software is a powerful tool for the restoration of old
records, yet it is intuitive and easy to use. If you would prefer to use a different application to
edit your recording, it should include at least the following functions: removing short, loud
pops (de-click); removing quiet background crackling (de-crack), noise suppression (de-noise)
and the automatic adjustment of the audio signal strength (normalization). The normalization
function should always take place in a separate step after the audio material has been restored successfully.
Some programs offer additional functions such as the broadening of the stereo image (this is
rather restricted on vinyl records in comparison to CDs) and equalizers with which you can
freshen up the sound quality or add a bit of punch. However, please remember that less is
generally better than too much, and that too much tinkering can destroy the authentic sound
of the original recording.
If you generally record the entire side of a record at once, you can cut the recording into individual tracks if you want. To do so, you can use Sound Rescue TerraTec Edition 2.1 or another
audio editing tool. Depending on the software you are using, this function can be automated.
Finally, you can burn the recordings you have made in this way to CD with your usual burning
software.
Wav, Mp3 or AP
All files are recorded by Sound Rescue TerraTec Edition 2.1 in *.wav format. The raw, uncompressed data of the recording are stored in this container format. The advantage of this is that
all of the song's audio information is available, allowing it to be easily adapted or restored.
The disadvantage is the relatively large amount of space required; as a result, this format has
only limited usefulness, particularly as a trading format.
Therefore, the *.mp3 format is in much more widespread use today. *.mp3 is a compressed
music file in which more or less inaudible portions are filtered out in order to save storage
space. The result is usually no different from a *.wav file. If the compression rates are too high,
however, a significant loss of audio quality can result.
If you do not want to burn your music files to CD or want to trade them as allowed by copyright
law, we recommend that you convert them to an *.mp3 file. Various freeware programs exist
on the Internet for this purpose. In our experience, a program called Audiograbber works especially well. This program lets you convert files not only from *.wav to *.mp3, but also into
many other formats, some of which are less common. Another useful feature is the connection
to the CDDB. CDDB is a database in which album and artist information is stored. Since track
information can also be stored in *.mp3 files, there is no need for the time-consuming process
of entering them manually.
It is not possible to record in *.wav format at 24bit/96Khz because this sampling rate is too
high for this format. Instead, Sound Rescue TerraTec Edition 2.1 uses the *.ap format, which is
a special internal container format that can handle recordings at 24bit/96Khz. You can easily
10
PhonoPreAmp iVinyl (English)
load and edit this format in Sound Rescue TerraTec Edition 2.1. Then, the saved file is in 32-bit
float 96 kHz *.wav format, which is compatible with all common sound editors (such as
Wavelab, SoundForge, Audition, CoolEdit, Audacity etc.).
For additional information on Audiograbber, go to:
http://www.audiograbber.com-us.net/
You can also download the software at no charge from this site.
Links
If you are interested in more information, here are some of our recommended Internet links
that you may want to check out. We hope you find them useful and entertaining.
http://fabdp.fh-potsdam.de/lehre/studpro/steffen/record/head/head.htm
This site provides a lot of information on the history of the LP record.
http://www.aaanalog.de/
Information on records, record players and analog technology. A first-class magazine with
informative articles! Highly recommended.
PhonoPreAmp iVinyl (English)
11
Sound Rescue TerraTec Edition 2.1
1. Overview
Sound Rescue TerraTec Edition 2.1 is a powerful tool that lets you clean up problematic material such as older recordings, directly on your PC. It lets you remove or significantly reduce
unwanted noise while maintaining the authentic sound and quality of the original recording.
Sound Rescue TerraTec Edition 2.1 is an ideal compliment to recording and CD programs, especially if you want to eternalize all of your tape cassettes and vinyl treasures—even your shellac phonograph records on CD. Sound Rescue TerraTec Edition 2.1 offers a vast variety of functions and is specially developed for the multimedia user who does not want to spend hours
learning complicated editing processes or use the multitude of parameter settings necessary
for other professional software. For the two editing modules, Descratcher and Denoiser, only
two parameters need to be set to achieve optimal sound, which normally takes only a few
seconds to do. You can adjust these settings with no trouble during real-time playback. Likewise, you can adjust the volume and tone (bass and trebles) of the “cleaned” output signal to
remaster “dusty” recordings.
Features:
•
Real-time operation at 800 MHz or better under Windows® 2000/XP
•
High stability using its own, separate drivers
•
Recording in 44.1 kHz/16-bit (CD format) “red book” WAV format or internal 96 kHz/24-bit
AP format
•
Worldwide, the fastest off-line processing
•
Fast, intuitive menu prompts
•
Removes noises such as popping, crackling, static, scratches and surface noises
•
Reduces constant background noises such as tape static, line hum and thyristor hum
•
Softens digital distortions and covers signal drops
•
Real-time operation during the fine tuning of parameters
•
Unique Difference function for listening to the noises that are removed
•
All measurements are precise to up to 80-bit decimal accuracy
12
PhonoPreAmp iVinyl (English)
Typical Applications:
•
Archives and restores old audio media
•
Remasters old recordings to CD: from shellac, vinyl and tape
•
Removes interference noises on cassette tape recordings
•
Filters out and removes distortion in noisy dialogs and in recorded telephone clips
•
Reduces distortion in radio broadcasts from medium wave, short wave and FM
2. First steps
Sound Rescue TerraTec Edition 2.1 is located on the product CD, which is configured for automatic installation. If the autorun application on the CD does not launch automatically, go to
“My Computer” and double-click the icon for your CD-ROM drive. The autorun application
should appear in a few seconds. Select your language and go to the Software menu item. This
is the location of the item Sound Rescue TerraTec Edition 2.1. Clicking it starts the installation
routine; after a few brief installation steps, click “Finish” to conclude the routine.
The first time it is launched, the system is searched for compatible CD-recording applications.
Sound Rescue TerraTec Edition 2.1 has been tested with WinOnCD™ 3.6 to 8.0, EasyCDCreator™ 5.0 to 6.0, EasyMediaCreator 7.0 to 8.0, Nero 4.0 to 7.0 and Feurio 1.63. If a compatible
CD-recording application is found, a dialog appears and asks you whether the found application should be used for writing audio CDs. Answer “Yes” if the application mentioned is your
preferred burning program. If a compatible CD-recording application cannot be found, verify
that one of the CD-recording programs listed above is installed correctly on your system. You
can start a search for CD-recording applications at any time by selecting “CD recording” in the
system menu, which you can open by clicking the icon in the upper-left area of the window.
The dialog window for selecting burner software
Select the program that you prefer most for burning your audio CDs. Also refer to Chapter 8.
Burning CDs.
To quickly verify that Sound Rescue TerraTec Edition 2.1 was installed successfully, simply
click the
button and select the democlic.wav file for editing. Sound Rescue TerraTec Edi-
tion 2.1 supports *.wav files according to the Red Book “16-bit/44.1 kHz” standard, as well as
the internal 96 kHz *.ap format, which processes data into 32-bit float / 96 kHz *.wav files,
which can then be opened and used in an external audio editor.
PhonoPreAmp iVinyl (English)
13
User Interface
Sound Rescue TerraTec Edition 2.1 has an intuitive interface. Its features are clearly arranged
and truly easy to use and, at the same time, it offers powerful functionality. The upper half of
the window contains the areas for the DeScratcher, Analyzer and DeNoiser features, and below these is a strip with other adjustment options for sound optimization. Below this is the
Playback area, which displays the actual audio material in the Waveform window as well as
control buttons for other program functions.
Quick Instructions
Follow the steps listed below to achieve—in very little time—a high-quality, remastered, recording of, for example, and old, scratched LP record. More details are provided in the chapters that follow.
1. Click the
2. Click the
button, enter a file name and start recording your new audio material.
button to open the “Select Input File” menu. Select the WAV file that you
want to process. The file you selected is loaded and its waveform is displayed in the Waveform window.
3. Start playback with the
button. You should now hear the audio material and be able
to view the level-control indicator. In the Analyzer window, the frequency profiles of the
input and output signals are dynamically displayed as is the noise print. You can pause
playback with the
button and “rewind” back to the beginning of the clip by clicking
. During playback, you can restart playback at any position you like simply by clicking
the position in the Waveform window.
4. If your recording contains sudden popping noises, use the Declick adjuster to try to filter
them out.
5. If your recording has humming or buzzing noises or, in the case of a recording from an LP
record, a constant background crackling, use the Decrackle adjuster to filter it out.
6. To reduce or remove noises such as tape static or constant LP surface noises, use the Denoiser feature by adjusting the threshold and reduction adjusters.
7. To compare the original sound with the filtered signal, click the
8. Use the
button.
function to listen to the noise that has been filtered out.
9. Adjust the volume slide so that the volume level never quite reaches the red range.
10. Use the
button to clip off the extra audio material to the left of the current marker
position.
11. Click
to save the remastered audio material to a new file.
12. Click
to optimize the loudness level of the audio material.
14
PhonoPreAmp iVinyl (English)
13. If you click the
button, the current audio material is sent to the associated burning
software as a new track. Simply repeat this step to put together an audio CD instantly,
which you can then burn.
14. The functions of the parameters for the Descratcher and Denoiser features are described in
the chapters entitled, Descratcher, Denoiser and Application Notes.
3. User Interface
Editing area
The editing area of Sound Rescue TerraTec Edition 2.1 consists of four main parts: Descratcher
(left), Denoiser (right), Analyzer (in the middle) and the Bass/Treble/Volume controls (bottom). Two sound-level meters let you control the output level while, at the same time, you can
adjust the volume and the bass and treble levels using the sliders mentioned above.
Because the processor requirements of Sound Rescue TerraTec Edition 2.1 are quite low, you
can optimize all parameters and simultaneously hear the results in real time while editing your
tracks.
The editing area of Sound Rescue TerraTec Edition 2.1.
lets you listen separately to the noises that are being filtered out during
processing in real time.
lets you listen to the input signal by bypassing the DeScratcher and DeNoiser filters.
indicates the CPU usage of the computer, i.e. the percentage of CPU time
being used by Sound Rescue TerraTec Edition 2.1.
Analyzer
graphically displays the volume and frequency curves, which is useful for
visually verifying the filter levels.
DeScratcher
effectively removes pops and crackling from the audio material.
PhonoPreAmp iVinyl (English)
15
DeNoiser
removes noise and static from the audio material.
Playback Area
The Playback area is located in the lower section of the Sound Rescue TerraTec Edition 2.1
interface. Using its features, you can record a WAV file, load a file for editing, start and stop
playback, and jump to any position in the WAV file by moving the cursor within the Waveform
display.
After loading a WAV file, its name and format are displayed in the status window below the
Analyzer and its waveform is displayed in yellow in a normal view, meaning it is adapted to fit
within the width of the Waveform window.
The playback area of Sound Rescue TerraTec Edition 2.0
The edited audio material can be stored offline. To this end, select the file dialog with the
button. The sampling frequency of the output file corresponds to that of the input file
(44.1 kHz or 96 kHz for .ap files). If converting these formats or converting the sampling rate,
for example, from 96 kHz to 44.1 kHz, always use a suitable, high-quality tool provided in your
editing or sound card software.
Note that the functions “Norm”, “Split”, “Track” and “CD” only work with 16-bit, 44.1 kHz wav
files. For .ap files, these functions are disabled, because the resulting file format would not be
compatible for creating audio CDs.
The Buttons and Controls in the Playback Area
File Functions
opens the “load” file dialog box
opens the “save” file dialog box
Audio Functions
normalizes the audio material to maximum loudness
splits the audio material at the current marker position
sets the marker at a position in the audio material at which a new track
most likely begins
sets the marker at the position where the loudness is at its maximum
16
PhonoPreAmp iVinyl (English)
starts the associated CD burning software
opens the help file
Control Functions
asks for a file name and opens the recording window
starts playback
interrupts playback
returns the playback cursor to the beginning of the clip
View Functions
shows the entire audio material of the file
zooms in on a length of about 20 seconds of the audio material
PhonoPreAmp iVinyl (English)
17
4. Recording
With Sound Rescue TerraTec Edition 2.1, you can also make recordings, of course. To do so, click
the
button and specify a location and name for the resulting WAV file in the dialog box
that opens. You will now see the AlgoRec window, which shows you the input level for the
standard recording device as configured in Windows. Recording at first is paused
.
The AlgoRec recording window of Sound Rescue TerraTec Edition 2.1
Adjust the level so that it never quite reaches 0dB, i.e. the red range. Going into the red range
can cause digital crackling noises, which cannot be completely filtered out by the editing
tools. Clicking the
Click
button opens the Windows recording controls.
to start the recording. The recording is written to the file in Red Book format
(44.1 kHz, 16-bit, stereo .wav) or in an internal 96 kHz .ap format. Both formats can be edited
directly with Sound Rescue TerraTec Edition 2.1. To create an audio CD, however, only the
44.1 kHz, 16-bit, stereo .wav format will do. After being processed in Sound Rescue TerraTec
Edition 2., the internal 96 kHz .ap format is saved as a 32-bit float 96 kHz wav file, which can
then be opened and used in external audio editors. Use the system menu to select the format
you want to use (click the title bar of the recorder using the right mouse button). Click
quit recording to the file you selected earlier. If you like, you can now press
to
again to spec-
ify a new file and create a new recording.
18
PhonoPreAmp iVinyl (English)
5. Rescuing Audio Material
This section provides more details on how you can edit your recordings.
Restoration
After you have recorded the entire side of an LP, for example, you may want to rescue and restore the recorded audio material using Sound Rescue TerraTec Edition 2.1. Start playback
with the
button. If you enable the
button, the DeScratcher and DeNoiser
filters are bypassed so that you can listen to the original recording. Disable the bypass option
to listen to the effects of the restoration filters in real time. You can adjust the settings of the
DeScratcher and DeNoiser filters during playback and see the difference in the Analyzer while
hearing it at the same time. To hear only the noises and crackling sounds that are being filtered out of the audio material, click
. Adjust the control slider to your liking and
refer to the chapters on the DeScratcher and DeNoiser functions for more information. Adjust
the volume slide so that the peak level never quite reaches the red range. Once you are satisfied with the results, stop playback by pressing
and save the results by clicking the
button. The new audio material is loaded and displayed automatically. To avoid mistakenly
filtering a file that has already been filtered, the bypass option is enabled automatically.
Optimization
Use
to find the positions having the highest peaks and check whether they are the result
of pops or the normal audio material. When you are completely convinced that the quality of
the material is good, you can raise its recorded volume without your recording being overamplified by clicking the
button. Now save your results again.
Creating Tracks
After successfully restoring your digital recording, you will probably want to pull out certain
tracks from the length recording. If you click
, Sound Rescue TerraTec Edition 2.1 automatically finds for you a position that is likely a pause between two tracks. You can of course
search for such pauses manually simply by listing to the audio material with
, stopping
the marker with
. Then you can zoom in on the section of the recording using the
button and reposition the marker more accurately.
Use
to write the audio material to the left of the marker to a new file or to delete it alto-
gether.
The Split window of Sound Rescue TerraTec Edition 2.1
Select the option you want to execute, provide a name for a new file if necessary and then
click OK. Save your individual track here and burn it onto a CD.
PhonoPreAmp iVinyl (English)
19
6. Descratcher
The Descratcher function effectively removes pops and crackling noises from old vinyl and
shellac records as well as from audio files in which the tone quality has been decreased during recording because of switch noise, digital crosstalk or thyristor humming.
The Descratching algorithm consists of two parts: the Declicking Filter and the Decrackling
Filter. While the Declicking filter is running, usually to remove relatively loud clicks and pops
from old vinyl records or switch noise from digital or analog audio devices, the Decrackling
filter removes any remaining, usually quiet but dense crackling.
The higher you set the Declick parameter, the more cracking noise is removed. When it is set to
0, the filter lets through nearly all cracking noises. To remove cracking noises from soiled vinyl
records, a Declick value of about 50 is good in most cases.
A typical popping noise in a signal from a vinyl record (left) and the reconstructed signal (right).
The higher you set the Decrackle parameter, the more crackling noise is removed from the
original. The highest setting, nearly 100, dampens the actual input signal. In general, this parameter can be set to 80 without resulting in any audible depletion of the original sound. In
some cases, an extremely high setting, even up to 100, can be used to improve the quality of
the audio material.
To minimize the depletion of the original sound in the Descratching procedure, you should
listen very carefully to the effects of the Declick and Decrackle parameters at various points of
the recording before deciding on their final values. In doing so, the Difference function in the
Playback area will certainly be a great aid. It allows you to set the parameters in a very intuitive manner. With it, you can switch between the original input signal and the input/output
signal difference, i.e. the portion that has been removed by the Descratching algorithm. Normally, you do not want the signal difference to contain any part of the original signal that you
want to keep. For more notes on optimizing the settings of the Declick and Decrackle parameters, see to the Application Notes.
Note also that the Difference functions can be applied to the Descratcher and Denoiser functions simultaneously. If you want to run the Descratcher only, leave the sliders (threshold and
reduction) for the Denoiser set to 0.
20
PhonoPreAmp iVinyl (English)
7. Denoiser
The Denoiser is what is known as a noise reduction system, although no encoding process is
required before recording, as is the case with the very widespread tape noise reduction system from DOLBY™ Labs. The Denoiser efficiently removes all types of wideband noises from
recorded audio tracks. The Algorithmix® Denoiser is used to remove tape hiss, static noise in
telephone clips and residual noise on old records after they have been edited using the Descratcher.
This version of the Denoiser uses a typical wideband noise print that has been optimized for
reducing surface noise on vinyl records and tape hiss.
The noise reduction process of the Denoiser is controlled by only two parameters, making it
easy to optimize the results for various output material.
The frequency band of the input signal (red), the noise print used for processing the audio
material (white) and the frequency band of the output signal after processing (green) can be
viewed in the Analyzer window.
The noise print (white) indicates the threshold value beyond which no more noise reduction
takes place. You can move this noise print up and down using the threshold parameter. You
can also use this parameter to adjust the noise print so that it is just above the backgroundnoise level. At a specific threshold, the reduction parameter then determines the range of removed noise within the selected noise print.
A good starting point for the threshold is to set the noise print just above the backgroundnoise level (at about 10 dB). Increasing the reduction parameter would then reduce the background noise significantly. If distortions such as whistling sounds or robot-like noises (caused
by the phenomenon called time aliasing) are clearly audible, decreasing the reduction parameter and increasing the threshold (to about 30 dB above the background-noise level) usually helps.
PhonoPreAmp iVinyl (English)
21
8. Burning CDs
When Sound Rescue TerraTec Edition 2.1 is started for the first time, it checks whether a CD
burner and burner software are installed on your system. Sound Rescue TerraTec Edition 2.1
has been tested with WinOnCD™ 3.6 to 5.0, EasyCDCreator™ 5.0, Nero 4.0 to 7.0 and Feurio
1.63. However, all common burning software should be detected. A dialog window asks you
which burner program you want started directly from Sound Rescue TerraTec Edition 2.1.
The dialog window for selecting burner software
Select the program that you prefer most for burning your audio CDs. If you want to change this
program at a later time, simply click the small icon in the upper-left corner of the Sound Rescue TerraTec Edition 2.1 window and select the CD-Recording item.
The selected burner software is now linked to the
button. You can now send the current,
restored track from Sound Rescue TerraTec Edition 2.1 on the burner software with a single
click. When you do so, you are asked whether you want to add the audio file to the burner
program's CD list.
Adding an audio track from Sound Rescue TerraTec Edition 2.1
Simply add individual audio tracks to the burner program's CD list after you have restored
them to your liking. When you are finished, simply start the burning process.
Alternatively, of course, you can insert the tracks directly into your burning software. This is
particularly useful if the software you are using is not supported by Sound Rescue TerraTec
Edition 2.1.
Congratulations on your remastered, digital “record”!
22
PhonoPreAmp iVinyl (English)
9. Application Notes
The Descratcher and the Denoiser are user-friendly audio-restoration tools based on an extremely effective signal-processing algorithm. In most cases, they automatically produce good
results. To get the most out of these tools, especially when working with badly damaged audio
material, use the following, practical guidelines:
•
Create your recordings using the WAV file format and do not use any editing devices, such
as limiters or compressors, before applying the Descratching filter.
•
If the audio material you are restoring contains loud crackling noises, you can limit them
during the digital recording process. We recommend recording various versions with different input amplification levels and comparing the results after carrying out the Descratching process.
•
To avoid digital distortion, do not set the Declick and Decrackle parameters too high. When
working with badly damaged material, we recommend finding a good acoustic compromise between the remaining level of noise and the digital distortions that result within the
signal. Make allowances when trying to improve hopelessly damaged audio sources, because even the best of tools cannot bring back the original sound where none is left.
•
If the sound level and/or sound characteristic changes several times within a recording,
you may want to split the original into separate segments, edit these individually using
various Denoising settings and then normalize them.
•
To avoid digital distortions such as whistling sounds and robot-like noises (time aliasing),
do not set the threshold and reduction parameters too high. Start by using a moderate setting by adjusting the noise print to just above the background-noise level (about 10 dB),
and then increase the reduction parameter gradually. Finally, try determine the optimal
correlation between these two parameters.
•
The Analyzer can be a great help when optimizing the setting of the Denoiser parameter.
During the Denoising process, it makes visible the influence that the noise print and the
parameter setting have on the audio signal.
•
If you find the output signal too quiet, increase the volume while watching the left and
right sound-level bars. If the red range lights up at all, the volume is set too high and you
have reached the so-called threshold range, which can lead to audible distortions.
•
Use the bass and treble sliders to increase (+) or decrease (-) the values of the bass and
treble frequencies to achieve the tone that sounds best. Be aware, however, that setting
the bass and treble levels too high increases the output signal volume level and in some
cases can put it into the threshold range. In this case, lower the volume slider until the level no longer reaches the threshold range (so that the red LEDs at the top of the level bars
no longer light up).
•
If you do not use the PhonoPreAmp iVinyl to record your audio material, the type of the
sound card and the type of analog/digital converter it uses have an important influence on
PhonoPreAmp iVinyl (English)
23
the quality of the recorded signal. Be sure to use a high-quality sound card for recording
your audio material, such as the PHASE 24FW by TerraTec Producer.
•
If you save your audio files with a sampling frequency other than 44.1 kHz (for example,
96 kHz), you will have to convert them to a sampling frequency of 44.1 kHz if you want to
burn the results to CD. Here, too, be sure to use a high-quality software application for
converting the frequency.
•
You can attain optimum results using your ears together with the Difference function during playback. This mutes all sound except for that filtered out by the Descratching and Denoising algorithms. In the best circumstances, you should only be able to hear noise with
this function. If you can detect the presence of the original signal in the Difference signal,
the amount of filtering should be decreased.
•
If you record and edit your audio files using a sampling frequency of 48 kHz or even 96
kHz, you need to use a high-quality conversion tool to reduce the files to the CDcompatible sampling rate of 44.1 kHz.
Important note:
Sound Rescue TerraTec Edition 2.1 is a fast and effective tool. You will be amazed by how
much you can improve the sound quality of old records and distorted audio files. However,
please do not expect any miracles when trying to restore material that contains gaps or jumps.
Once the signal has been lost to the point where there is insufficient redundancy in the remaining material, it becomes impossible to recover the original material. In cases as hopeless
as these, experienced professional sound editors apply highly complex audio editors to try to
copy similar sounding, already existing passages into the gaps. Likewise problematic is the
attempt to rescue material that is so full of noise that the original signal can no longer be distinguished. If, for all practical purposes, the information consists almost entirely of noise (an
extremely bad signal-to-noise ratio) and there is insufficient information available on the
characteristics of the original signal, or even worse, if nonlinear distortions occur too, the
quality of the Denoising results will be limited.
24
PhonoPreAmp iVinyl (English)
10. Contacting Us
®
For more information on extensions, updates and new products from Algorithmix visit us on
the Internet at:
http:// www.algorithmix.com
or send an e-mail:
to [email protected]
if you want information on the installation and features of this product,
or to [email protected]
if you have general comments or questions regarding the Algorithmix® product range.
Algorithmix® and Sound Rescue are trademarks of Algorithmix GmbH. All the other products
and company names mentioned in this documentation are ™ or ® trademark of their corresponding owners.
This document is subject to change without notice. This document may not be copied, reproduced, transmitted or otherwise recorded in full or in part without prior consent from Algorithmix GmbH.
11. Restoration on the Macintosh
Of course, the TerraTec PhonoPreAmp iVinyl hardware is also recognized by the Mac. The prerequisite is a G4 System with OS X or later. In some cases, older systems may also be supported, but the possibility of problems and crashes cannot be excluded.
In terms of software, we have had very good experiences with Toast7 from roxio. A comprehensive user manual with application examples is provided on your Toast DVD/CD.
For more information on Toast7, go to: http://www.roxio.com in the “Mac Products” area. You
can also order the software directly online here.
PhonoPreAmp iVinyl (English)
25
Service at TerraTec.
“Nothing seems to work!” — This can happen even on the best systems. In such a case, the
TerraTec Team is always ready to provide service and support.
Hotline, Internet.
In case of a serious problem—where you can neither solve the problem on your own nor with
the guided help found in this manual, nor with the help of your dealer—please contact us directly.
If you have access to the Internet, please check our service and support at
http://supporten.terratec.net/ first. There you'll find the answers to frequently asked questions (FAQ) and a form for e-mail support requests.
If you can't access our website, please check the service request form that came with the product for country-specific helpline numbers with which you can contact our support team.
Regardless of whether you contact us by e-mail or phone, you must have the following information at hand:
•
your registration number,
•
this documentation.
In addition, it would be helpful to our technicians if the device is within reach during the phone call so that you can carry out our support tips directly. Please do not forget to write down
the name of the respective support technician if you contact our Support Team. You will need
this name if a defect is present and your device needs to be mailed to us.
26
PhonoPreAmp iVinyl (English)


![[ENG] CE16-2 Manuale v2-8](http://vs1.manualzilla.com/store/data/005660444_1-7046d8e9760149eb635bc594076a0e4d-150x150.png)