1
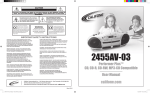
2395-02 Music Maker Plus™ Dual Cassette Multimedia Player/Recorder User Manual califone.com 2395-02 Music Maker™ Plus Player/Recorder User Manual Thank you for purchasing the Music Maker Plus™ Multimedia Player. We encourage you to visit our website to register your 2395-02 for its warranty coverage, and while there please signup to receive our enewsletter, and learn more about the complete line of Califone audio visual products including: portable and installed public address systems, multimedia players and recorders, headphones and headsets, computer peripheral equipment, visual presentation products and language learning materials. Warranty Registration Thank you for purchasing the Califone® model 2395-02. We encourage you to visit www.califone.com/registration to register your product for its one year warranty coverage, to sign up to receive our newsletter, download our catalog, and learn more about the complete line of Califone® audio visual products, including portable and installed wireless PA systems, multimedia players and recorders, headphones and headsets, computer peripheral equipment, visual presentation products and language learning materials. All Damage Claims Must Be Made With The Freight Carrier Notify the freight carrier immediately if you observe any damage the shipping carton or product. Repack the unit in the carton and await inspection by the carrier’s claim agent. Notify your dealer of the pending freight claim. Returning your unit for service or repairs Should your unit require repair, first contact the dealer or Califone Service Department at: (800) 722-0500 to obtain a Return Authorization number. After receiving the RA, write it clearly on the outside of the shipping box and ship the unit to Califone prepaid. Collect shipments will be refused. Please DO NOT SHIP ANY UNIT TO THE FACTORY WITHOUT PRIOR AUTHORIZATION AND INSTRUCTIONS. Before operating the system, please read this guide thoroughly and keep it for future reference. Unpacking your Music Maker Plus Player/Recorder Check carefully for damage which may have taken place during transit. Although the shipping carton & packaging materials are designed to prevent damage during shipment, you should inspect the carton for any signs of mishandling or damage immediately upon receiving your new unit. Carefully lift the unit from the carton and inspect it for any signs of damage. Save all packaging materials for possible later use. Report any damage claim directly to the freight carrier immediately. Save the product and packaging for inspection by the carrier’s claim agent. Notify your dealer of the pending claim. Contents a) 2395-02 CD/Dual Cassette/AM/FM Radio b) Remote Control c) User Manual 1 Initial Setup AC Line Operation 1. The power cord is located at the rear of the unit. Release the cord retainer tab and uncoil the cord. 2. Plug the cord into a standard 120 volt 50-60 Hz AC outlet. Be sure the plug blades are fully inserted. THE UNIT IS ON WHEN PLUGGED IN. Battery Operation 1. The battery compartment is located at the rear of the unit. Push the lever at the center of the door toward the rear of the unit and then lift the door free. 2. Eight “D” or UM-1 size batteries are required. When installing the batteries refer to the orientation diagram shown inside the battery compartment. Place the batteries on top of the nylon ribbon. This helps to “pop” old batteries out when you need to replace them. 3. Replace the battery cover. IMPORTANT: Remove all batteries from your cassette unit if it will not be used for an extended period of time. DO NOT LEAVE DISCHARGED BATTERIES IN THE BATTERY COMPARTMENT. DAMAGE TO THE UNIT FROM BATTERY CORROSION IS NOT COVERED UNDER WARRANTY. NOTE: Califone cassette recorders are designed for use only with 60-minute Type 1 Normal Bias recording tape. Using a longer tape could prematurely wear out the cassette tape or cause damage to the 2395-02. Visit us online at califone.com 2 Front View 46 13 2 31 3 47 38 36 13 23 44 42 40 34 43 37 39 35 45 Back View 28 27 29 28 3 30 40 Top View 9 26 11 32 18 21 20 14 19 41 1 7 8 16 10 4 22 5 6 10 15 24 25 17 Features Listing 1. Power On 2. Power/Standby Switch 3. LCD Display 4.Tape 5.AM/FM 6.CD 7. Volume Down 8. Volume Up 9. Treble Up 10. Treble Down 11. Bass Up 12. Bass Down 13. Telescoping Antenna 14. Tuner Up 15. Tuner Down 16.Preset/Repeat 17.Program 18. CD Door 19.Play/Pause 20. Skip Forward 21. Skip Backward 22.Stop 23.Record 24.Random 25. Play Time 26. 3.5 mm Headphone Jack 27. 1/4” Headphone Jack 28. External Speaker Jacks 29. Microphone Jack 30. Mic. Remote On/Off Jack 31. Internal Built-in mic 32. Balance Control 33. Carrying Handle 34 & 35. Stop/Eject 36. Tape Cassette A 37. Tape Cassette B 38 & 39. Play 40.Pause 41.Stereo/Mono 42 & 43. Rewind 44 & 45. Fast Forward 46. Tape Counter 47. Recessed Speaker 4 Getting Started When the ‘Power’ button (1) is depressed the LED (2) to the left of the LCD display (3) will be red for standby mode. Pushing the LED will cause the LED to be green indicating the unit is fully powered up. • Depressing the ‘Tape’ (4) button will cause the LCD display to show ‘Tape’. • Depressing the ‘AM/FM’ (5) button will cause the LCD display to show ‘AM’ or ‘FM’. • Depressing the ‘CD’ (6) button will cause the LCD display to show ‘Disc’. Digital Volume Control • Press ‘VOL’ q(7) to reduce or ‘VOL’ p(8) to increase the volume.Tthe level will be shown in the LCD panel. Minimum volume will show ‘00’ and maximum volume is ‘40’ on the LCD display. Electronic Volume Control Display VOL 04 VOLUME Treble and Bass Controls ‘TREBLE’ p (9) and ‘TREBLE’ q (10) can be used to adjust the Treble up and down respectively, while ‘BASS’ p (11) and ‘BASS’ q(12) can be used to adjust the Bass up and down respectively. Both Treble and Bass can be adjusted in the range of +5 to –5. TREBLE BASS TRE+2 BA-1 EQ Control Press ‘EQ’ (9) to select the equalizer as sequence. Radio Function • Press ‘AM/FM’ (5) to select the desired reception band. Extend the telescoping antenna (13) for FM. There is a built-in antenna for AM reception. For FM stereo reception the ‘stereo’ will show on the LCD display. AM 570 KHz AM BAND SELECTION • Press the ‘TUNER’ p (14) or ‘TUNER’ q(15) button repeatedly until the desired station shows on the LCD display. • To automatically scan through the frequency bands, hold the ‘TUNER’ button down until you see the speed of the LCD display increase. Scanning will stop when a strong signal is detected. continued page 6 Visit us online at califone.com 5 Radio Function continued Programming Stations Twenty FM stations and Twelve AM stations can be saved in memory with the ‘PRESET’ (16) function. • To save a station into memory, first select a station and then press the ‘PROGRAM’ (17) button to see ‘_ _’ appear on the LCD display. Memory Display CH FM 89.90 MHz _ _ • Press ‘PRESET’ key to choose the desired channel (e.g. channel 1) then press ‘PROGRAM’ again to save. Memory Display FM 89.90 MHz CH 1 • Select another station and press ‘PROGRAM’ again, then press ‘PRESET’ to select channel 2. Press ‘PROGRAM’ again to save. To access preset stations simply press the ‘PRESET’ button until the desired channel is found. AM/FM Radio Operation The Music Maker Plus™ features an AM/FM PLL (phase locked loop) stereo radio and telescopic antenna for local AM and FM stereo reception. To operate the radio: 1. Plug the unit in. 2. Set the FUNCTION selector to Radio. 3. Extend the telescope antenna. 4. Select AM, FM or FM Stereo reception band. 5. Use the Tuning buttons to select the desired station. 6. Adjust antenna for best reception. Note: When tuning FM stereo stations the FM indicator will light when an FM stereo station is tuned in continued on page 7 Visit us online at califone.com 6 CD Function ‘ The CD player will accept both 12 cm and 8 cm discs and will read CD, CD-R and CD-RW formats. • Before opening the CD door (18) the LCD will show dashed lines. Open the CD door and the LCD display will show ‘Open’. Insert a CD, close the door and the LCD will display the number of tracks and total play time of the disc. READING TOC AFTER READING TOC ———— — — 45:06 TRACK 11 • Press the ‘PLAY/PAUSE button’ (19) to play the CD and the LCD display will flash while reading the disc. Then it will show track 1 and the elapsed playing time. SEARCHING TRACK 1 -- : -- PLAYING TRACK 1 TRACK 11 0 : 01 TRACK 1 • To Pause press the ‘PLAY/PAUSE’ button (19) while the disc is playing, the playing time will flash. Pressing the ‘PLAY/PAUSE’ button again will start the disc again from where it paused. • To select a track to play, press the ‘SKIP FORWARD’ | (20) or ‘SKIP BACKWARD’ | (21) button either from ‘Stop’ or ‘Pause’. Each press will change the track number by one. • If the CD is playing, pushing and holding the ‘SKIP’ | button will advance through the current track until it is over, then proceed to advance through the next track as long as the button is held down. Conversely, pushing and holding the ‘SKIP’ | button will scan in the reverse direction through the track currently playing and continue through previous tracks as long as the button is held down. • To stop playing the disc, press the ‘STOP’ button (22). Repeat Playing • To repeat one track, press the ‘REPEAT’ button (23) one time either while playing or in pause. ONE TRACK REPEAT (FLASHREPEAT 4 : 05 TRACK 5 • To replay all tracks, press the ‘REPEAT’ button a second time either while playing or in pause. • A third press of the ‘REPEAT’ button will cancel the repeat command. continued page 8 Visit us online at califone.com 7 CD Function continued Memory Programming Up to 16 tracks can be programmed. With the CD stopped press the ‘PROGRAM’ button one time. Select a track to play by pushing the ‘Skip Forward’ | or ‘Skip Back’ |button. Push the ‘PROGRAM’ button again to enter another track to save in memory. When finished, press the ‘PLAY/PAUSE’ button to start the program. Pressing ‘STOP’ at any time exits the Program function. Note: When the CD door is opened all programming is cleared. PROGRAM INPUT MODE MEMORY Pr:01 TRACK __ PROGRAM INPUT COMPLETE CHOOSE TRACK 4 MEMORY Pr:01 TRACK 04 MEMORY Pr:02 TRACK __ Random Play Function Pressing the ‘RANDOM’ button (24) during CD play or stop condition will engage random play. Pressing again will cancel the function. Note: If the CD has memory programmed, the random function cannot operate until the program is cleared. Play Time Mode Pressing the ‘PLAY TIME’ button (25) changes the time format on the LCD from elapsed time of each track to the total time remaining on the CD. Compact Disc Player Operation The 2395-02 Programmable Compact Disc Player plays both 12cm and 8cm CDs, CD-R, CD-RW without requiring an adapter. Up to 20 tracks can be programmed for play. Loading a Compact Disc 1. Lift to open the CD door and see “OPEN” on the LCD display. 2. Place a CD in compartment with label side up. 3. Press the CD door down to close. Compact Disc Play : To play a loaded CD 1. Turn power ON. 3. The LCD will show the number of tracks and playing time. 2. Set the FUNCTION Selector to CD. 4. Press the ‘PLAY/PAUSE’ button. The CD Display will show the current track and playing time. To pause while playing CD Press the ‘PLAY/PAUSE’ button again. The pause indicator “II” will appear on the display. Press ‘PLAY/PAUSE’ again to resume play. To stop playing CD Press the ‘STOP’ button. The Display shows, “—”. Note: When you press ‘PLAY’ again the Player will return to the first song. The Display will show “00” and then “01”. To skip forward or backward from track to track during playback Press the (‘SKIP’ |) button once and the next track will be displayed and begin playing. Press repeatedly to move forward to the desired track. Press the (‘SKIP’ |) button once to return to the beginning of the current track. Press repeatedly to skip back to earlier tracks. Playback resumes from the selected track. continued page 9 8 CD Function continued To search forward or backward to a particular point on a track during playback Press and hold the (‘SKIP’|) or (‘SKIP’ |) buttons to search forward or backward through the current track. Playback resumes at the point you release the button. Program Playback Up to 20 tracks can be programmed for playback. To program a song sequence: 1. Press ‘STOP’ first if the CD is playing. 2. Press the ‘PROGRAM’ button. The CD display will show P:01 3. Press the (‘SKIP’ |) and or (‘SKIP’|) buttons to select the first track to program. 4. Once the desired track is reached, press the PROGRAM button to enter the track number into memory. 5. Repeat steps 3 & 4 to program additional tracks. 6. Press the ‘PLAY/PAUSE’ button to start programmed playback. Note: The program will be erased when you press the ‘CD PROGRAM’ button. Repeat CD Selections Repeat one or all programmed selections using the ‘CD REPEAT’ button. Push the button once to replay any single selection. Push the button twice to replay all programmed selections (in programmed order). Push the button three times to clear the ‘REPEAT’ function. ‘REPEAT ONE’ or ‘REPEAT ALL’ will appear on the CD PROGRAM DISPLAY when the ‘CD REPEAT’ button is pushed. Cassette Function Dual Cassette Operation The 2395-02 features a cassette for playback and recording from radio, CD, cassette and microphone. The dual cassette decks offer playback, continuous playback (Deck B to Deck A) and recording from tape, radio, microphone or CD on Deck A only. Loading a Tape To load a cassette tape, press the ‘STOP/EJECT’ button (34) on Tape A or (35) on Tape B to open the cassette door. Insert tape with playing side label facing you. Close the cassette door to lock the tape in position. Note: While Deck A is in playback mode, Deck B must be stopped and not in ‘PLAY’ or ‘PAUSE’ mode for Deck A to playback. Tape Playback To play a loaded cassette tape: 1. Set ‘FUNCTION’ button to TAPE 2. Press ‘PLAY’ Deck A or B (38) (39) 3. Adjust VOLUME’ (7) (8) 4. Adjust ‘TREBLE’ (9) (10) and ‘BASS’ controls (11) (12) To Stop Playback Press the ‘STOP/EJECT’ key (34) (35). To Pause Playback Press the ‘PAUSE’ key (40) (41) all the way down to lock. To resume play, press the ‘PAUSE’ key again, and release. continued page 10 Visit us online at califone.com 9 Cassette Function continued To Fast Wind/Rewind Press the REWIND’ (42) (43) or ‘FAST-FORWARD’ (44) (45) key. Press the ‘STOP/EJECT’ key to stop winding at the desired position. During fast winding, regular play, or recording, the tape will stop automatically when its end is reached. Continuous Play from one cassette deck to the other cassette deck 1. Set the ‘FUNCTION’ selector to ‘TAPE’. 2. Load prerecorded cassettes into Deck A and Deck B. 3. Press the ‘PLAY’ button on Deck B. 4. Press the ‘PAUSE’ and ‘PLAY’ buttons on Deck A. 5. Adjust the Volume and Tone controls. 6. When the tape in Deck B reaches its end, it will automatically stop and the tape in Deck A will begin playing automatically. To Record from Microphone, Tape, Radio or CD This unit has an ALC (Automatic Level Control) circuit and no further adjustment of the Volume control is necessary while recording. Set the ‘FUNCTION’ Selector to: • TAPE (4) to record from external microphone or from built-in mic. Plug mic into jack (29) or (30) • AM/FM (5) to record from radio • CD (6) to record from CD 1. Insert a blank tape into cassette Deck A. 2. Press the ‘PAUSE’ button then the ‘RECORD’ button on Deck A to prepare for recording. As the ‘RECORD’ button is pressed the PLAY button will follow. 3. Press ‘PAUSE’ again to start recording. Recording from Tape B to Tape A 1. Insert a blank tape into cassette Deck A, and the source or prerecorded tape into Deck B. 2. Press the ‘PAUSE’ button then the ‘RECORD’ button on Deck A to prepare for recording. As the ‘RECORD’ key is pressed the PLAY button will follow. 3. Press the ‘PLAY’ button on Deck B, the ‘PAUSE’ button on Deck A will release automatically and recording will begin. Note: Every new cassette tape has erase prevention tabs. Commercially prerecorded tapes have the tabs removed to prevent recording over the original material or accidental erasure. Cover the openings with adhesive tape if you wish to record over such cassette tape. To Stop Recording Press the ‘STOP/EJECT’ button on Deck B or press the ‘PAUSE’ key on Deck A to momentarily stop recording. Cueing with the Tape A Counter (46) Rewind the tape to the beginning. Press the ‘RESET’ button to reset the counter to (000). Use the Tape A Counter Display to note precise points on an audio tape during playback and to cue the tape to those precise points using the Fast-Forward/Cue or Rewind/Review buttons. continued page 11 10 Headphone Listening Listening with Wired Headphones Two headphone jacks are located on the Music Maker Plus™ - a single 3.5 mm jack (26) on the top and one 1/4” phone jack (27) on the rear of the cabinet. A jackbox can be plugged into either for multiple listeners. Califone recommends using headphones for group listening situations. 3068AV 1210AVPS 2924AVPS Use a jackbox for listening groups with more than two students. 2800BL 1114AVPS 2810PA Audio from speakers or to headphones Audio will project from either the speakers OR to the headphones - not to both at the same time. Visit us online at califone.com 11 Other Features and Functions Extension Speaker Jacks Stereo extension speakers may be plugged into the 1/4” L (left) and R (right) speaker jacks (28) on the rear of the cabinet. NOTE: WHEN EXTENSION SPEAKERS ARE PLUGGED IN THE INTERNAL SPEAKERS ARE DISABLED Microphone Jack To record using a dynamic microphone, plug into the 3.5mm jack (29) on the rear of the cabinet. Another jack, 2.5mm (30) is provided for use with Califone model 4805AV microphone with remote Start/Stop. RC-2300 Remote Control • The RC 2300 provides most functions available on the Music Maker Plus™ controls. It does not, however, function with tape operations. • INTRO : One feature added to the remote is the Intro function. While in the CD mode press the ‘PLAY’ button, then press the ‘INTRO’ button. This will give a preview of each track for 10 seconds. Press the INTRO button again to resume normal play. If the INTRO button is not pushed a second time, the preview will continue through the last track. Pushing ‘PLAY’, ‘PAUSE’ or ‘STOP’ will not disengage the Intro function. • MUTE : Mute is another feature added to the remote. It works with tape, AM/FM and CD functions. • 10+ : This button allows you to jump forward a number of tracks rather than use the scan forward feature. From stop, pause or play, pushing the 10+ button once will show a 1 and a flashing – (dash) see 1-. To jump to track 15 enter 5. To go to track 23 from track 6 press 10+ twice and see 2-. Enter 3 and jump to track 23. Other Notes - The ‘SCAN/SKIP’ buttons are the same as the Tuner p, ‘Skip forward|’ and Tuner q, ‘Skip back |’ buttons on the boombox. - The ‘REPEAT’ button is the same as the ‘PRESET/REPEAT’ button on the boombox. - The ‘TIME’ button is the same as the ‘PLAY TIME’ button on the boombox. Care and Maintenance Care and Handling of Compact Discs 1. Handle the disc by its edges or center hole. To keep the disc clean, avoid touching the data surface. 2. Data is embedded directly beneath the label, protected only by a thin lacquer layer and is more vulnerable to damage than the bottom. A scratch that penetrates the label will certainly destroy data, whereas a scratch on the bottom can often be overlooked or corrected by the laser pickup. 3. Do not write on the label surface. A ballpoint will damage data; marking pens have solvents that may penetrate the top layer. 4. Do not stick paper or tape on the label surface; this probably won’t hurt the disc but might jam the disc drive. 5. Do not expose a disc to high temperature or humidity for an extended period of time. The disc material will soften at around 200 degrees Fahrenheit. Allow the disc to reach room temperature before playing if it has been subjected to extreme cold. 6. Preventive cleaning is unnecessary and potentially harmful. Clean only when required. 7. Clean a disc with a soft moistened cloth. Pat dry. Wipe the disc from the center out like spokes of a wheel. Never wipe across a disc as you would an LP record. 8. Never use solvents, commercial cleaners or sprays designed for LP’s. Plain lukewarm water is recommended. 9. Keep discs protected at all times. continued page 13 12 Care and Maintenance continued Cassette Maintenance & Service Cleaning The heads, capstan and pinch roller should be cleaned from time to time to prevent buildup of tape oxide, which degrades performance. 1. Remove cassette tape before cleaning. 2. Clean the head of all visible, reddish-brown oxide with a cotton-tipped swab moistened with a methyl alcohol or any solution specifically manufactured for this purpose. Caution: DO NOT scrape the head surface with hard, sharp or abrasive objects. This will permanently damage the heads. 3. Clean the pinch roller by scrubbing the surface of the roller with the moistened swab. Rotate the roller by hand until the entire surface is clean. 4. Clean external case surfaces with a moist, soft cloth. Use only a mild detergent water solution. Tape Head Demagnetization It is recommended that the tape heads be demagnetized from time to time. This eliminates residual magnetism which degrades sound reproduction and the recording function. 1. After cleaning the heads and capstan, place the demagnetizer several feet away from the cassette unit and plug it into an AC outlet. 2. Follow the manufacturer’s operating instructions supplied with the demagnetizer. Specifications Transmission Frequency 2.3 MHz IR Transmission Range 15 feet @ 360 degrees Output Power 6W Radio Frequency Range AM 525-1710KHZ FM 88 – 108 MHz Cassette Frequency Response 80Hz – 12000Hz CD Frequency Response 20Hz-20000Hz Power Supply AC 110V – 60Hz, 8”D” (UM-1) Cells Dimensions (WxHxD) 16 1/4”W x 6 1/4”H x 9 1/4”D Weight7 lbs. CAUTION: USE OF ANY CONTROLS, ADJUSTMENTS, OR PROCEDURE OTHER THAN THOSE SPECIFIED HEREIN MAY RESULT IN HAZARDOUS RADIATION EXPOSURE. Visit us online at califone.com 13 Troubleshooting PROBLEMSITEMS TO CHECK General The unit does not operate. Is the AC power cord unplugged? Are the batteries fully charged? Cassette Cassette cannot be loaded. Is cassette being loaded properly? Is the PLAY key depressed? The tape does not move. Is the PAUSE key depressed? The tape gets caught in the tape transport mechanism. Is the pinch roller or capstan dirty? Is there excessive slack in the tape? Tape speed is slow. Is the tape too old or the quality bad? Tape running is unstable. Is there excessive slack in the tape? There is excessive noise, the sound quivers or there are breaks in the sound. Are the tape heads dirty? Recording The RECORD key cannot be depressed. Is a cassette loaded? Is the cassette’s erasure prevention tab broken off? Recording cannot be done. Are the heads dirty? The previous recording cannot be erased. Is the erasure head dirty? Is the tape type other than type 1 normal bias? No sound output. Is the master volume turned up? CD CD play does not begin. Is the AC power cord unplugged or loose? Is the CD upside down? Is the CD or lens excessively dirty? Is the disc holder closed properly? Is the PAUSE mode on? Is the FUNCTION switch on CD mode? The CD produces no sound Is there condensation inside the unit? If so, let stand for 1-2 hours until dry. The CD sound jumps. Is the lens or CD excessively dirty? Is the unit subjected to excessive vibration? Are there any bad scratches on the CD? CD stops immediately. Is CD loaded upside down? Is CD not set properly in tray? Is CD excessively dirty? CD takes too long to start Press STOP and PLAY/PAUSE again, repeat if necessary. AM/FM Radio No sound or signal Is FUNCTION Selector set to Radio? Is Band Selector set properly? Signal is unclear. Is telescoping antenna fully extended and properly positioned for best reception? FM Stereo reception is unclear. Tune Radio so FM Stereo LED is lit. Adjust antenna if necessary. 14 CAUTION RISK OF ELECTRIC SHOCK - DO NOT OPEN CAUTION: TO REDUCE THE RISK OF ELECTRIC SHOCK, DO NOT REMOVE COVER OR BACK. NO USER SERVICEABLE PARTS INSIDE. REFER SERVICING TO QUALIFIED PERSONNEL. The lightening flash with arrowhead within a triangle is intended to tell the user that parts inside the product are a risk of electric shock to persons. This product is not designed to function normally in strong electromagnetic fields. Consequently, the audio quality may degrade while the product is exposed to strong electromagnetic fields. Normal audio quality operation will be recovered when the strong electromagnetic field is no longer present. ! WARNING: TO REDUCE THE RISK OF FIRE OR ELECTRIC SHOCK, SO NOT EXPOSE THIS APPLIANCE TO RAIN OR MOISTURE. ! The exclamation point within a triangle is intended to tell the user that important operating and servicing instructions are in the papers with the appliance. Ce produit n’est pas conçu pour un fonctionnement dans de forts champs électromagnétiques. Par conséquent, la qualité sonore peut diminuer si ce produit est exposé à un fort champ életromagnétique. La qualité sonore redeviendra normale après affaib-lissement du champ électromagnétique. IMPORTANT SAFETY INSTRUCTIONS ATTENTION: ALL SAFETY AND OPERATING INSTRUCTIONS SHOULD BE READ BEFORE OPERATING APPLIANCE. ALL OPERATING AND USE INSTRUCTIONS SHOULD BE FOLLOWED WHEN OPERATING THE APPLIANCE. HEED AND ADHERE TO ALL WARNINGS ON THE APPLIANCE AND IN THE OPERATING INSTRUCTIONS. RETAIN ALL SAFETY AND OPERATING INSTRUCTIONS FOR FUTURE REFERENCE. WATER & MOISTURE - DO NOT USE THE APPLIANCE NEAR WATER; IE. BATHTUB, WASHBOWL, KITCHEN SINK, LAUNDRY TUB, WET BASEMENT OR SWIMMING POOL. VENTILATION - DO NOT SITUATE THE APPLIANCE SO THAT ITS LOCATION OR POSITION INTERFERES WITH ITS PROPER VENTILATION. FOR EXAMPLE, THE APPLIANCE SHOULD NOT BE SITUATED ON A BED, SOFA, RUG OR SIMILAR SURFACE THAT MAY BLOCK THE VENTILATION OPENINGS. THE APPLIANCE SHOULD NOT BE PLACED IN A BUILT-IN INSTALLATION, SUCH AS A BOOKCASE OR CABINET, THAT MAY IMPEDE THE FLOW OF AIR THROUGH THE VENTILATION OPENINGS. HEAT - SITUATE THE APPLIANCE AWAY FROM HEAT SOURCES SUCH AS RADIATORS, HEAT REGISTERS, STOVES OR OTHER APPLIANCES (INCLUDING AMPLIFIERS) THAT PRODUCE HEAT. POWER SOURCES - CONNECT THE APPLIANCE ONLY TO A POWER SUPPLY TYPE DESCRIBED IN THE OPERATING INSTRUCTIONS OR MARKED ON THE APPLIANCE. GROUNDING OR POLARIZATION - PRECAUTIONS SHOULD BE TAKEN SO THAT THE GROUNDING OR POLARIZATION MEANS OF THE APPLIANCE ARE NOT DEFEATED. POWER CORD PROTECTION - POWER SUPPLY CORDS SHOULD BE ROUTED SO THAT THEY ARE NOT LIKELY TO BE WALKED ON OR PINCHED BY ITEMS PLACED UPON OR AGAINST THEM, PAYING PARTICULAR ATTENTION TO CORDS AT PLUGS, CONVENIENCE RECEPTACLES, AND THE POINT WHERE THEY EXIT FROM THE APPLIANCE. CLEANING - THE APPLIANCE SHOULD BE CLEANED ONLY AS RECOMMENDED BY THE MANUFACTURER. NON USE PERIODS - UNPLUG THE APPLIANCE POWER CORD FROM THE OUTLET WHEN LEFT UNUSED FOR A LONG PERIOD OF TIME. OBJECT & LIQUID ENTRY - CARE SHOULD BE TAKEN SO THAT OBJECTS DO NOT FALL AND LIQUIDS ARE NOT SPILLED INTO THE ENCLOSURE THROUGH OPENINGS. DAMAGE REQUIRING SERVICE - THE APPLIANCE SHOULD BE SERVICED BY QUALIFIED SERVICE PERSONNEL WHEN: (A) THE POWER SUPPLY CORD OR THE PLUG HAS BEEN DAMAGED (B) OBJECTS HAVE FALLEN OR LIQUID HAS BEEN SPILLED INTO THE APPLIANCE (C) THE APPLIANCE HAS BEEN EXPOSED TO RAIN (D) THE APPLIANCE DOES NOT APPEAR TO BE OPERATING NORMALLY OR EXHIBITS A MARKED CHANGE IN PERFORMANCE (E) THE APPLIANCE HAS BEEN DROPPED OR THE ENCLOSURE DAMAGED. SERVICING - THE USER SHOULD NOT ATTEMPT TO SERVICE THE APPLIANCE BEYOND THAT DESCRIBED IN THE OPERATING INSTRUCTIONS. ALL OTHER SERVICING REFER TO A QUALIFIED SERVICE PERSONNEL. Califone® International Inc. • 1145 Arroyo Avenue, # A • San Fernando, CA 91340 USA Toll Free 800.722.0500 | Toll Free Fax 877.402.2248 International Customers call 818.407.2400 or Fax 818.407.2405 califone.com