1
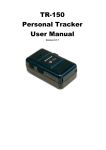
GS-102
Personal Tracker
User Manual
Version 1.7
GS-102
page 2
1 Introduction .................................................................................................................... 4
1.1 Introduction ............................................................................................................4
1.2 Features .................................................................................................................4
1.3 Hardware................................................................................................................5
2 Start-up ........................................................................................................................... 6
2.1 Accessories .............................................................................................................6
2.2 Charging the battery ................................................................................................7
2.3 Install SIM card .......................................................................................................7
2.4 Appearance .............................................................................................................8
2.5 Button description ....................................................................................................9
3 Operating the device ..................................................................................................... 11
3.1 Turn on / Turn off................................................................................................... 11
3.2 Answer / Hang up the phone ................................................................................... 11
3.3 Adjust the volume .................................................................................................. 11
3.4 Making a phone call................................................................................................ 12
3.5 Send out emergency SMS ....................................................................................... 12
4 GS-102 Management Center Setup ................................................................................ 13
4.1 Install the USB driver ............................................................................................. 13
4.2 Install, Update, Uninstall the TR Management Center program...................................... 15
4.2.1 Install TR Management Center ............................................................................15
4.2.2 Update TR Management Center ..........................................................................16
4.2.3 Uninstall TR Management Center .......................................................................16
4.3 TR Management Center Screen Introduction .............................................................. 17
4.3.1 Tracker and GPRS Tool Bar ....................................................................................19
4.3.2 Query Tool ....................................................................................................................20
4.3.3 Data Output Area ......................................................................................................21
4.4
4.5
4.6
4.7
Skype Setup.......................................................................................................... 22
Firewall Setting...................................................................................................... 28
TR Management Center System Requirement ............................................................. 29
Copyrights and Example Information ........................................................................ 29
5. GS-102 Management Center Operation......................................................................... 30
5.1 TR Management Center Basic Setup.......................................................................... 30
5.2 Tracker Management .............................................................................................. 31
5.2.1 Adding and setting a GS-102 tracker ................................................................32
5.2.2
5.2.3
5.2.4
5.2.5
Tracker Management ...............................................................................................40
Deleting a GS-102 tracker......................................................................................41
Editing a GS-102 tracker ........................................................................................42
Selecting Country Code/Area Code....................................................................43
5.3 Instruction of Using TR Management Center............................................................... 45
5.3.1 Instructions for Beginners .....................................................................................45
5.3.2 Making GPRS connection between GS-102 and TR Management Center
.....................................................................................................................................................46
5.3.3 Asking GS-102 to send GPRS position report to TR Management Center
.....................................................................................................................................................48
5.3.4 Asking GS-102 to send SMS position report by Skype...............................50
5.4 TR Management Center Query ................................................................................. 51
5.4.1 Look up for history data .........................................................................................51
5.4.2 Export the data into KML format ........................................................................54
GS-102
page 3
5.4.3 Delete the history data in the database...........................................................55
5.5 Using Google Map .................................................................................................. 56
5.5.1 Google map data .......................................................................................................57
5.5.2 Google map operation .............................................................................................59
6 Making GS-102 send or stop position report by SMS...................................................... 60
6.1 How to ask GS-102 to return immediate position report by SMS? .................................. 60
6.2 How to ask GS-102 to return periodic position report by SMS? ...................................... 61
6.3 The format of return SMS from GS-102 ..................................................................... 62
7 How does GS-102 work by SMS and GPRS? ................................................................... 63
8 Troubleshooting and Safety info.................................................................................... 66
GS-102
page 4
1 Introduction
1.1 Introduction
GS-102 is a personal remote positioning device with built-in GPS and GSM modules; it’s compact and portable. Not
only can GS-102 transmit the longitude and latitude coordinate to your cell phone by the short message service, but
it can also transmit the longitude and latitude coordinate to your personal computer via GPRS network and then
displaying the location by specific map software. There are three speed-dial keys and one emergency key on the
GS-102. You can use these keys to protect and search children and old people. Further, you can use it as a security
purpose and other purpose which needs remote positioning.
1.2 Features
1.
GPS/GPRS personal locator.
2.
GSM/SMS/GPRS communication.
3.
Omni-directional high sensitive GPS antenna which can receive GPS signal from all direction.
4.
New technology and latest GPS SiRF-Star III chipset! Excellent for fixing the position even at a weak signal
status.
5.
Remote command control via mobile phones or through online software.
6.
Receive phone calls to have two way communications.
7.
Monitors can track the person without interfering him, LIVE! Real-Time tracking!
8.
Locate the locator holder just by pressing a button on PC software or through mobile phone via SMS (short
messaging system).
9.
Three quick dialing buttons for 3 preset phone numbers.
10.
Works worldwide! Support 4-frequency GSM 850/900/1800/1900 MHz and GPRS class 12.
11.
Independent SOS (emergency) button for sending GPS location information via SMS up to 3 preset phone
numbers (it can be 3 sets of different numbers than the 3 sets of quick dialing numbers).
12.
Device can be connected to PC via a USB cable for setup the arguments (package comes with mini USB
cable when you purchase the device).
13.
Report device holder’s position at a preset time interval.
14.
Low battery notification before the battery dies out! Worrying free on why the locator wouldn’t respond for this
kind of situation!
GS-102
page 5
1.3 Hardware
GSM module:
GPS Chipset:
Frequency:
C/A code:
Channels:
Antenna Type:
Position Accuracy:
Velocity Accuracy:
Time Accuracy:
Default datum:
Reacquisition:
Hot start:
Warm start:
Cold start:
Altitude Limit:
Velocity Limit:
Acceleration Limit:
Jerk Limit:
Operating
temperature:
Humidity:
Dimension:
Voltage:
Charging connector:
Standby time:
Talking time:
LED:
Key:
USB port:
SAR:
embedded GSM 850/900/1800/1900 MHz , GPRS class 12
SiRF Star III
L1, 1575.42 MHz
1.023 MHz chip rate
20 channel all-in-view tracking
Omni-directional GPS antenna
10 meters, 2D RMS
0.1 m/s
1 us synchronized to GPS time
WGS-84
0.1 sec., average
1 sec., average
38 sec., average
42 sec., average
18,000 meters (60,000 feet) max.
515 meters/second (1000 knots) max.
Less than 4g
20 m/sec3
-20° to 55° C
5% to 95% Non-condensing
115 mm × 45 mm × 22.5 mm
Rechargeable and replaceable 1300 mAh battery (3.7V), 5V
for charging input.
DC 5V
Over 100 hours
5 ~ 6 hours
3 LED showing Power, GPS and GSM status.
7 Keys for Power On/Off key, Emergency key, Intimate call * 3,
Lock key and Answer/Reject key.
Mini USB port for connecting to PC.
GSM850 Head: 0.758
GSM900 Head: 0.576
PCS1800 Head: 0.582
PCS1900 Head: 0.735
GSM850 Body: 0.21
PCS1900 Body: 0.223
GS-102
page 6
2 Start-up
2.1 Accessories
AC power adapter
GS-102
1300 mAh Li-ion Battery
Mini USB cable
Leather case (Optional)
CD-ROM
GS-102
page 7
2.2 Charging the battery
Fully charge the battery. Before using of GS-102 for the first time, please connect it with AC power
adapter for battery charging at least 10 hours under the power-off condition. (The attached battery is specially
designed for GS-102. Please do not use other types of battery; otherwise it will damage the device. If you need to
change the battery for GS-102, please contact your local dealer.)
2.3 Install SIM card
Install SIM card:
1.
Press on the battery cover, and then pull it downward to open it.
2.
Take out the battery.
3.
Insert the SIM card into the holder according to the direction shown, and close the cartridge when done.
4.
Put back the battery, and close the battery cover.
GS-102
page 8
2.4 Appearance
(1)
SOS button
(2)
Power button
(3)
GSM LED
(4)
GPS LED
(5)
Power LED
(6)
Speaker
(7)
Answer / Hang up
(8)
Quick Dial 1 / Volume up
(9)
Quick Dial 2 / Mute the microphone
(10)
Quick Dial 3 / Volume down
(11)
Microphone
(12)
Button Lock
(13)
Power Adapter Jack
(14)
Mini USB connector
GS-102
page 9
2.5 Button description
Power button
Turn on / Turn off: Please see page 11 for details.
SOS button
You can assign up to 3 sets of phone numbers to the
SOS button. When this button is pressed, GS-102 will
send its location information to these 3 sets of phone
numbers by SMS.
Answer /
When there is an incoming call, you can answer the call
Hang up
by pressing this button. During the phone call, press it
will hang up the phone.
Quick dial 1 /
You can assign a phone number for this button; when
Volume up
this button is pressed, GS-102 will dial the preset
number. During the phone call, you can increase the
volume by pressing this button.
Quick dial 2 /
You can assign a phone number for this button; when
Mute the
this button is pressed, GS-102 will dial the preset
microphone
number. During the phone call, the other party will not
hear from you if this button is pressed to mute the
microphone; press it again to enable the microphone.
Quick dial 3 /
You can assign a phone number for this button; when
Volume down
this button is pressed, GS-102 will dial the preset
number. During the phone call, you can decrease the
volume by pressing this button.
GSM LED
LED is on: GS-102 is turned on, but not connected to
GSM network yet.
Blinking quickly (once per second): GS-102 is in
dialing or talking mode.
Blinking slowly (once per 3 seconds): GS-102 is in the
standby mode.
GPS LED
The LED will blink when GS-102 is fixing its location.
More details please see page 12 for SOS button and
page 46 for GPRS mode.
Power LED
The LED will turn orange when AC adapter is plugged
for charging the battery. If the battery power is low, this
LED will be on in red, and GS-102 will send a warning
SMS to SOS number.
Power adapter
Plug in the Power adapter to GS-102's power adapter
jack
jack for battery charging.
Mini USB
Connecting GS-102 to PC by a Mini USB cable, you can
connector
setup all its features and functions from application
GS-102
page 10
software in PC.
Button Lock
Switch to lock all the buttons for the purpose of
preventing buttons from been accidentally touched.
When Button Lock is on, the LED indicators will flash 3
times if any other button is pressed. (Only when power
is off and USB cable is connected, you can press the
power button to turn on GS-102.)
GS-102
page 11
3 Operating the device
3.1 Turn on / Turn off
●
Turn on: Press and hold the Power button for 3 seconds, three LED will start to
flash quickly from top to bottom. After the startup process, it will enter standby
mode and blue LED will flash slowly. (During the startup process, GS-102 can not be
turned off.) And then GPS will do cold start to get fixed of its position for the first time
nd the green GPS LED will flash. After it gets fixed of the location, the GPS LED will
be on for a few seconds and then go out. If it cannot get fixed the location
within 3 minutes, the GPS function will enter sleep mode for 30 minutes. After 30
minutes, it will start to get fixed of the location again. It is suggested that you stay at outdoor place or near the
window where GS-102 can receive better GPS signal while you turn on the device.
NOTICE: If it does not successfully get the location fixed after turning the power on, GS-102 may be located in
the weak signal area or on the move.
●
Turn off: Press and hold the Power button for 3 seconds, three LED will start to flash slowly from bottom to top.
When the power is turned off, LED will go out.
3.2 Answer / Hang up the phone
●
When there is an incoming call, press this button to answer the incoming call.
●
During the phone call, press it will hang up the phone.
3.3 Adjust the volume
●
During the phone call, you can increase the volume by pressing the "+" button.
●
During the phone call, the other party will not hear from you if the mute button
is pressed to mute the microphone; press it again to enable the microphone.
●
During the phone call, you can decrease the volume by pressing the "-" button.
GS-102
page 12
3.4 Making a phone call
●
After setting up the Quick dial number by TR Management center (refer to
5.2.1.3 GS-102 Return Phone Number), you can press and hold the Quick dial
button for 1 second to make a call to the preset number.
3.5 Send out emergency SMS
●
After assigning 3 sets of phone numbers to the SOS button by TR Management
center (refer to 5.2.1.3 GS-102 Return Phone Number), you can press this button
to send out the location information to these 3 sets
of phone numbers by SMS.
To avoid accidentally touching of this button, when you want to send out
the emergency SMS, please make sure you press and hold this button for over 2
seconds.
●
GS-102 will firstly send SMS to the SOS number 1, then to SOS number 2, and then to SOS number 3.
How does it work when you press the SOS button?
1.
To confirm that you have pressed SOS button correctly, GS-102 will long flash the red LED about 2 times.
2.
GS-102 will start to position itself with green GPS LED flashing; when the GPS position is fixed, the LED will be
on.
3.
Then, GS-102 will turn off GPS and green LED goes out.
4.
GS-102 begins to send SMS with blue LED flash once per second.
5.
When it finished sending SMS, the blue LED comes back to standby mode with flash once per three seconds.
6.
If the SMS has been sent out successfully, GS-102 will again long flash the red LED about 2 times.
7.
If the GPS position can not be fixed for 3 minutes, it will send back the SMS with a "no fixed" message and the
last fixed position.
TR-102
page 13
4 GS-102 Management Center Setup
4.1 Install the USB driver
If the operating system of your PC is Vista, please click on the “USB Driver for Vista” button to install PL2303
USB driver of Vista version. Follow the screen instruction to finish the driver installation.
TR-102
page 14
If the operating system of your PC is not Vista, please click on the “Install USB Driver” button to install PL2303 USB
driver. Follow the screen instruction to finish the driver installation and reboot your PC to activate the USB driver.
TR-102
page 15
4.2 Install, Update, Uninstall the TR Management Center program
4.2.1 Install TR Management Center
Step 1: Click “English PC Software” button to install the TR Management Center program.
Step 2: Please follow the instruction of the Install Shield Wizard to install the English TR
Management Center.
TR-102
page 16
4.2.2 Update TR Management Center
If you download a new version of the TR Management Center software from
website, you could install the downloaded software to upgrade the TR Managemen
center without un-installing the previous version of TR Management center.
The update process is as follows:
Step 1: Launch the update program. Press “Yes.”
Step 2: Please follow the instruction of the Install Shield Wizard to install the upgraded version of
TR Management Center.
4.2.3 Uninstall TR Management Center
Step 1: Run "Start"
"Globalsat"
"TR Management Center"
"Uninstall TR Management
Center" Press “Yes”
Step 2: Please follow the instruction to uninstall TR Management center
TR-102
page 17
4.3 TR Management Center Screen Introduction
Menu
Google Map
Query Tool
Data Output Area
GPRS Tool
TR Management Center Main Screen
TR-102
page 18
There are five parts of TR Management Center Screen as below.
Menu: The basic menu options
GPRS
and
Tools: Shows
the
trackers'
connection
status,
GPRS
service
status
the tracker's latest location
Query Tool: Used for searching history data and finding coordinates
Data Output Area: Shows the tracker login status, received GPRS data and query results
Google Map: Shows the Google Map
The detailed description of each part is as following.
GS-102
page 19
4.3.1 Tracker and GPRS Tool Bar
GPRS tool is for managing trackers and showing the GPRS server status
Trackers List
Show tracker trace on Google Map
display
Skype Messaging Status
GPRS Service Status
Latest Tracker’s Location Data
GS-102
page 20
4.3.2 Query Tool
Query tool is for looking up for the history data and coordinate.
Find history
data
Data Tool
buttons
Coordinate Location
Tool
GS-102
page 21
4.3.3 Data Output Area
Data output area is for displaying the GPRS data, GPRS log, and query result.
The Output area is divided into GPRS Data, GPRS Log and Query Result
GPRS Data: Shows the data sent from connected trackers. Only the last 100 entries from each
tracker are shown.
GPRS Log: Shows the record of all tracker connections and disconnections including the raw
transmitted data.
Query Result:
Shows all matching results from the trackers' history data.
GS-102
page 22
4.4 Skype Setup
In stead of sending SMS to trackers by mobile phones, TR Management Center sends SMS to
trackers by Skype. You can not only send SMS to trackers for asking report by Skype, but send
SMS to set the parameters of TR-151’s function.
In order to send SMS by Skype, please complete the following steps to activate the SMS function
of Skype.
Step 1: Install Skype Software
You can download Skype from www.skype.com or the website of the local Skype distributor.
Please refer to the instruction of Skype to install the software.
Note: The pictures and instructions provided in this manual are based on Skype version
3.6.1.xxx. If they do not match the version of Skype you are currently using, please download
and upgrade to the latest version from the Skype website.
Step 2: Please create a user account.
Once you have created an account, you can login and use Skype's basic functions.
Step 3: Buy Skype credit
GS-102
page 23
Step 4: Test the Skype SMS function
After completing the above process, please check if Skype's SMS functions can work by
sending a test message to mobile phone. Follow the SMS messaging procedure below to send a
SMS message and check that your Skype is working normally.
Sending a test SMS
From the
Skype
menu, select "Tools"
"Send
Message" then follow the
Choose Send SMS Message from the menu
GS-102
page 24
At the Send SMS interface, add the recipient's mobile phone number
Write the content of SMS and click Send SMS button
GS-102
page 25
Step 5: When you launch the TR Management Center program, the following
security
verification pop-up window will appear in the lower right corner of the screen asking you to allow
Click the blue text to request Skype access.
Select "Allow this program to use Skype"
GS-102
page 26
If you accidentally select "Do not allow this program to use Skype", please change this from
within the Skype program at "Options
"Advanced"
Note:
The exact procedure may vary from the version of Skype. Please refer to the Skype manual
for more information.
GS-102
page 27
If the TR Management Center is not allowed to use Skype, please click on the "Change" button
and select "Allow this program to use Skype".
GS-102
page 28
4.5 Firewall Setting
The TR Management
must be
Center
sends
data
via
GPRS
network,
so
the
firewal
configured to allow external access. When you launch the GPRS service, a
Windows Security Alert window will appear. Click on the "Unblock" button to let the TR
GS-102
page 29
4.6 TR Management Center System Requirement
The computer system requirements of the TR Management Center program:
1. The computer must be equipped with at least an Intel Pentium 4 or equivalent AMD CPU,
256MB of RAM and a network card.
2. Supports the following operating systems: Windows XP, Windows 2000, Windows 2003
or Windows Vista. (It does not support 64 bits OS)
3. The graphics card must support at least 256 colors and a resolution of
800x600 or
4. Skype must be version 3.6 or higher. The latest version can be
downloaded from
5. A fixed IP address is required. If a dial-up network connection is used, the program must
be
must
provided
with
this
computer's
external
IP
address.
TR-151
trackers
be configured with this IP.
4.7 Copyrights and Example Information
The copyright on all software and hardware mentioned in this manual belon
to their
1.
2.
3.
4.
5.
The copyright of Windows XP, Windows 2000, Windows 2003 and
Windows Vista
belong to the Microsoft Corporation.
The copyright of the Skype program belongs to Skype Technologies S.A.
The copyright of Google Map belongs to Google Inc.
The copyright of Intel Pentium belongs to the Intel Corporation.
All text and telephone numbers mentioned in this manual are used as an example only. We
apologize in advance for any coincidences.
Any copyrights not mentioned in this manual belong to their respective owners.
GS-102
page 30
5. GS-102 Management Center Operation
5.1 TR Management Center Basic Setup
Before operating the TR Management Center, please set the operation parameters of the TR
Management Center in the Basic Setup. It will make the afterward operation work properly.
Basic Setup
Basic Setup Interface
GS-102
page 31
Item
Function
Description
Map Source
Choose to use Google
Map or Google China Map
TCP Port
Set the communication
port for connecting GPRS
network
Auto start
GPRS
Choose to automatically
start GPRS service or not
Time Zone
Set the time zone
SMS Return
Set the phone number
phone number
for receiving the SMS
SMS report
format
Set the SMS format
Auto Start Skype
Choose to automatically
start Skype
The default is 5000. You can set
form1024~5000.
Note: Please do the Basic Setup for the first time of using TR Management Center. If you want to
use the China’s map, please choose Google China Map in the Map Source and re-start TR
Management Center.
5.2 Tracker Management
TR Management Center can track and manage up to 5 trackers. You have to set the parameters
of GS-102 while adding a set of GS-102 in the TR Management Center. If you have already set 5
trackers in the TR Management Center and want to set one more tracker, please delete one of
the existing trackers in the TR management center.
The
using
tracker’s
information
and
parameters
must
be
properly
configured
before
other functions of TR Management Center. Then your tracker can correctly send report
back to the TR Management Center and that the program can correctly display the tracker's
current location on the map.
GS-102
page 32
5.2.1 Adding and setting a GS-102 tracker
You can add a new tracker by making GS-102 Setup, please follow the steps below.
Step 1: Connect the GS-102 to the computer's USB port by the GS-102 USB cable.
Step 2: Turn on the power of GS-102:
(I) Please wait for a while until the startup process is finished.
(II) Press and hold the "Answer/Hang up" button about 5 seconds until you see the
three LED flashing slowly and simultaneously. Release the button and it will enter the
setup mode.
Step 3: From the "Management" menu, select "GS-102 Setup" and enter the setup interface.
Step 4: After selecting "GS-102 Setup", please select the COM Port. If you are not sure which
COM port you are using, click "Scan COM Port". Then please click "Setup" button to open the
Setup window.
TR-102 Setup Interface
Click on Scan COM Port to find the port the GS-102 is connected to
GS-102
page 33
Scan Com Port interface
Note: If your SIM card asks for SIM PIN entry, a window will appear prompting you for the
PIN password. (Please make sure you enter the correct code as the SIM card will be locked
after three failed attempts. If you do not know the PIN code or the SIM card is locked, please
contact your GSM network service provider for assistance.)
SIM PIN Code Interface
GS-102
page 34
5.2.1.1 GS-102 Basic setup
Item
Description
IMEI code
International Mobile Equipment Identity
Firmware Version
Version of GS-102 firmware.
Tracker name
Please enter tracker name. (English or Arabic name
only)
Phone number
Please enter the phone number for this GS-102 and
select the country/area code.
GS-102
page 35
5.2.1.2 GS-102 Phone Mode
Item
Return
Type
Option
GPRS
Description
GS-102 will send the location information by GPRS.
SMS
GS-102 will send the location information by SMS.
SMS
Protocol
Type One,
No matter what content of SMS sent to TR-102, TR-102 will only
return one piece of SMS with the latest location information
Type Two
GS-102 will return SMS according to the command type of SMS:
“Immediate report”, “Period report”, and “Stop report”.
1~10
Maximum
GPS Fixing (minute)
Time
The maximum time allowed for a GPS fix. If GS-102 cannot
get fixed of the location within the specified time, GS-102 will
turn off GPS and send back its last known position.
Check
Phone List
Answer Mode GS-102 will receive any phone numbers’
incoming calls and SMS. While receiving SMS,
ON
GS-102 will return the location information
according to the setting of “Return Type.
Off
Answer Mode GS-102 will only ring one time and then hang up
for any phone numbers’ incoming calls. It can
OFF
receive any phone numbers’ SMS and return the
location information according to the setting of
“Return Type.
On
Answer Mode GS-102 will receive incoming calls and SMS from
Phone List’s phone numbers. While receiving
ON
SMS, GS-102 will return the location information
according to the setting of “Return Type.
Answer Mode GS-102 will not ring for the phone number not
under Phone List. It will neither return location
OFF
information to the SMS not send from Phone
GS-102
page 36
List’s phone numbers. While receiving incoming
call from Phone List’s phone number, GS-102 will
only ring one time and then hang up. While
receiving the SMS send from Phone List’s phone
number, GS-102 will return the location
information according to the setting of “Return
Type.”
Time zone
On
It is only available when the SMS Protocol is set to Type 1. The
time information of GS-102’s returned SMS will be the same
time zone of the PC where you install the TR
Management Center. For example, if the PC is in the Germany,
the time information of GS-102’s returned SMS will be
Coordinated
Universal
Time added with one hour
Off
The time information of GS-102’s returned SMS will be
Coordinated Universal Time, abbreviated UTC.
Note:
1. When you select Type 1 for SMS Protocol, the format of SMS from GS-102 to your mobile phone will be like the
following example
Position Report:
GS102
2005/01/02 11:20:30
24.9965,121.4877
GPS fixed
•
•
•
•
The second line shows your Tracker Name (default is "GS102").
The third line contains the date and time. (yyyy/mm/dd hh:mm:ss)
The fourth line contains the latitude and longitude. You can copy this value and input it to "Google Earth" or
maps.google.com to find this position on map.
The fifth line indicates "GPS fixed" or "GPS not fixed". (If it is "GPS not fixed", then the information of third and
fourth lines will be the one from last time GPS fixed.)
2.When you select Type 2 for SMS Protocol, the format of SMS from GS-102 to your mobile phone will be
Command_Head,IMEI,status,GPS_fix,date,time,longitude,latitude,altitude,speed,heading,number of
satellites in use,HDOP,Command_End
Format
Command_Head
IMEI
Status
GPS_fix
date
time
longitude
Value
?
(The number of IMEI)
0
1
1
2
3
ddmmyy
hhmmss
(E or
W)dddmm.mmmm
latitude
(N or S)ddmm.mmmm
altitude
speed
xxxxx.x
xxxxx.xx
Note
0: Immediate report
1: Period report
1: Fix not available
2: GPS 2D Fix
3: GPS 3D Fix
Example:
E12129.2186
E
121°29.2186’
Example:
N 24°59.8915’
N2459.8915
unit: meters
unit: knots (1knots = 1.852km)
GS-102
page 37
heading
number of satellites in use
HDOP
Command END
ddd
xx
x.x
!
Example :
?355632000166323,1,1,040202,093633,E12129.2252,N2459.8891,00161,0.0100,147,07
,37!
5.2.1.3 GS-102 Return Phone Number
Item
SOS Number
1~3
Description
Assign phone numbers to the 3 SOS buttons. When SOS button is pressed, GS-102 will
Quick Dial 1~3
Assign phone numbers to Quick Dial button 1~3 respectively. (see page 46 figure 5)
send location information to these 3 phone numbers by SMS.
GS-102
page 38
5.2.1.4 GS-102 Phone List
If you choose On for “Check Phone List” in the Phone Mode (5.2.1.2 GS-102 Phone Mode),
GS-102 will only accept the phone call and SMS from the phone numbers in this Phone List.
Item
Description
Phone
Number 1~3
These 3 numbers are set as the phone numbers of the Quick Dial
Number.
Phone
Number 4~10
You can specify phone numbers 4~10. If you select “On” for Check
Phone List under Basic Setup tab, TR-102 will only receive the phone
calls and SMS from these phone numbers.
GS-102
page 39
5.2.1.5 GS-102 GPRS Setting
GPRS Setup Interface
Item
Description
GPRS Port
The default GPRS connection port is "5000". Do not specify a
port already in use as this may result in conflict.
GPRS user name
Please consult with your GPRS network service provider for all
other parameter values.
GPRS user password
GPRS APN
GPRS_DNS1
GPRS_DNS2
GPRS server IP address or
Domain Name.
Enter the IP address of GPRS server or Domain Name.
Once you have set up all of the parameters, please click on "OK" to apply the settings or click on
"Cancel" to cancel the setup.
Note 1: Once the parameters have been applied, the GS-102 will restart. Once it has finished
reinitializing it can be used.
Note 2: If the data is lost for any reason, clicking on the "Default" button will restore the tracker to
its default settings.
TR-102
page 40
5.2.2 Tracker Management
Tracker Management is used to manage registered or previously configured
trackers. In Tracker Management, you can edit or delete trackers.
You can find Tracker Management from the Menu "Management"
The Tracker Management option under Management in Menu
Tracker Management interface
"Tracker Management".
GS-102
page 41
5.2.3 Deleting a GS-102 tracker
There are two ways for deleting GS-102 trackers in the TR Management Center
1. Select "Management"
"Tracker Management" from menu bar.
Choose the GS-102 you want to delete, and then click on the "Delete" button.
2. The other way of deleting GS-102 tracker is selecting a tracker from the Trackers List and right
clicking the mouse button to bring the tracker menu. Now click on Delete Tracker to delete the
selected tracker.
Method 2 for deleting a tracker
GS-102
page 42
A confirmation window will appear when deleting a tracker
Note: Deleting a tracker does not actually delete its history data from the database. To
delete all history data, please use the editing features in Microsoft Access.
5.2.4 Editing a GS-102 tracker
If you want to change the information of TR-151 tracker, you can edit the information by “Edit
tracker”
There are two ways of bring up “Edit tracker”
“Tracker Management” from menu.
1. Click “Management”
Double click a tracker, and then the window of “Edit tracker” will be brought up.
GS-102
page 43
\
5.2.5 Selecting Country Code/Area Code
It requires adding country code/Area prior to the phone number while sending SMS
Skype to GS-102 or sending SMS to GS-102 by mobile phone when you and GS-102 are in the
different country or area.
Please click the button beside the phone number in the window of “Edit tracker” The window for
selecting country code/ area code will be brought up.
GS-102
page 44
You can press the first letter of the country name by the keyboard to go to the countries with the
same first letter. After selecting the country code, please click OK.
GS-102
page 45
5.3 Instruction of Using TR Management Center
5.3.1 Instructions for Beginners
If it is the first time for you to use GS-102, please refer 5.2.1 Adding and setting a GS-102 tracker
to set GS-102. It will ensure GS-102 can send the report to TR Management center via GPRS
network and display the location on the map.
Precautions before use:
1. The SIM card installed in GS-102 should support GPRS connection. This is usual
what GSM/GPRS network operators refer to as a 2G or 3G SIM card. Please check if the
SIM
card
supports
GPRS
connection
with
your
GSM/
GPRS
network
service
provider.
2. Please make sure the computer where you install TR Management center has a fixed IP.
If the PC uses a dial-up network, please check the float IP address should be the same
IP with GS-102’s setting.
3. Please check that the firewall on your computer or router does not block the receiving TCP
Port. If this port is not unblocked in the firewall, GS-102 will not be able to send its data to TR
Management center through this port.
4. Please consult with your GSM/GPRS network service provider about the GPRS setting, GPRS
will not connect properly if the settings are incorrect.
5. In order to send SMS by Skype, please install the Skype software, create a
user account and buy Skype credits. The Skype SMS messaging function must be set up
correctly as well. Skype only can send SMS. It is unable to receive SMS from TR-151
GS-102
page 46
5.3.2 Making GPRS connection between GS-102 and TR Management Center
In order to make GPRS connection between GS-102 and TR Management Center, there is some
setting should be made.
Step 1: Activate GPRS service
Please set the GPRS port. (You can refer to 5.2.1.5 GS-102 GPRS setting) After setting GPRS
port, please activate GPRS server
To activate the GPRS service, please click the "Start" button at GPRS Service. After activating
the GPRS service, the GPRS service status will be shown as the right screen below.
->
Step 2: Send command to connect GS-102.
Please make the “Return Type” of GS-102 to be “GPRS” (refer to 5.2.1.2 GS-102 Phone Mode)
If you set the Answer Mode as “Off”, you can also make a phone call to GS-102 to ask it to
make GPRS connection with TR Management Center. If Answer Mode is “ON”, please send
SMS by Skype to GS-102 to make GPRS connection with the TR Management center. About
the Answer Mode setting, please refer to 5.2.1.2 GS-102 Phone Mode.
Please select the GS-102 under Tracker list and right click the mouse to bring out the menu as
below.
Please select “Connect Tracker (Skype)” to ask GS-102 to make GPRS immediate report to TR
Management center.
Step 3: When GS-102 is making GPRS connection with TR Management center, you will see
GS-102 show the status on the tracker list as the screen below.
GS-102
page 47
GS-102
page 48
5.3.3 Asking GS-102 to send GPRS position report to TR Management Center
You can ask GS-102 to immediately or periodically send its position report
Before asking GPRS position report, please refer to 5.3.2 to make GPRS connection between
GS-102 and TR Management center.
Step1: Select a GPRS connected GS-102, right click the mouse to bring up the option menu, and
select “Send GPRS command”
Step 2: Select the Report mode. If you select GPRS Period report or Stop connection and set
period report, please also set the Report interval.
Item
Description
GPRS Immediate Report
Ask the connected GS-102 to report its
latest position immediately.
GPRS Period Report
Ask the connected GS-102 to report according
to the Report interval periodically
Stop Report
Ask the connected GS-102 to disconnect from
TR Management center
Stop connection and set period report
Ask the connected GS-102 to disconnect
from TR Management center and then
periodically according to the report interval
Step 3: Click OK.
GS-102 will send the position report to TR Management center shown as the picture below.
GS-102
page 49
You can make the location of that position report to show on Google map by clicking that report.
You can also click Satellite to see the location on satellite map.
GS-102
page 50
5.3.4 Asking GS-102 to send SMS position report by Skype
You can ask GS-102 to immediately or periodically send its position report to the phone number
by sending SMS via Skype
.
Step 1: Please make the Return Type of GS-102 as “SMS” (refer to 5.2.1.2 GS-102 Phone
Mode)
Step 2: Select the GS-102, right click the mouse to bring up the option menu, and select “Send
Command (Skype)”
Step 3: Select the return mode. If you select SMS Period Report, please also set the Report
interval, and number of report (Times)
Step 4: Click Send.
GS-102 will send the position report to the phone number you set in Basic setup. (Refer to 5.1 TR
Management Center Basic Setup.)
GS-102
page 51
5.4 TR Management Center Query
All the data sent from GS-102 will be stored in the database of TR Management center. You can
make this data show on Google map or export them into KML format.
5.4.1 Look up for history data
You can look up for the history data that GS-102 sent to TR Management center by Query Tool.
"Query Tool"
Item
Description
Tracker
Select the tracker whose history data you’d like to look up for
Type
To look up for the data according to the time of Tracker’s timer
Start time
(Tracker Time) or the receiving time of the PC (Local Time)
The start time of the period of looking up the history data
End Time
The end time of the period of looking up the history data
Find
Start to look up for the data
Export
Export the data into KML format
Delete
Delete query results
After specifying all the queried conditions, click the Find button and the query results will be
GS-102
page 52
shown on the Data Output Area..
Query Result list
The results will also be shown on the Google Map.
Query results displayed on the Google Map
GS-102
page 53
If you select a piece of result under the Data Output Area, its location and corresponding details
will be shown on the Google Map.
If you click on one of the tracker icon on the Google map, the selected tracker’s data under Data
Output Area will be highlighted.
GS-102
page 54
5.4.2 Export the data into KML format
You can export the queried data into KML format for others to show the data on the Google map
or Google earth.
Step 1: Please refer to 5.4.1 to look up for the history data.
Step 2: Please click the Export button on the Query Tool. And then enter a name for the exported
data in the field of File name.
Enter a name for the exported KML file
GS-102
page 55
5.4.3 Delete the history data in the database
You can delete the history data in the database.
Step 1: Select the name of the tracker and time interval whose data you’d like to delete.
Step 2: Click the Delete button.
GS-102
page 56
5.5 Using Google Map
Google Map is an online map developed by Google Inc. It offers access to major maps of the
world and is constantly updated.
As Google Map is integrated into TR Management center, TR Management center can work
under Internet connected status. If you start TR Management center under no Internet
connection, a warning window of No Internet connection will appear.
Below please see the introduction of Google Map
Map Navigation Controls
Change Map
Index Map
GS-102
page 57
5.5.1 Google map data
Google Map includes the basic map, satellite map, hybrid map and other map data.
You can switch the map by the buttons on the upper right corner of Google map.
Basic Map
GS-102
page 58
Satellite Map
Hybrid Map
GS-102
page 59
5.5.2 Google map operation
Move the map: You can move the map by right clicking and dragging the map. Or you can move
the map by the tool
on the Google map.
Zoom the map: You can zoom in or zoom out the map by scrolling forward or backward the
mouse. Or you can zoom in or out the map by the tool
GS-102
page 60
6 Making GS-102 send or stop position
report by SMS
You can ask GS-102 to send immediate or periodic position report or stop periodic report by
sending SMS via mobile phone or SMS tool.
Before sending SMS to ask GS-102 to return the position report, please make the SMS protocol
to be Type 2, and Return Type to be SMS. Please refer to 5.2.1.2 GS-102 Phone Mode.
6.1 How to ask GS-102 to return immediate position report by SMS?
You can ask GS-102 to send immediate position report by sending SMS with the following
content.
Immediate report content: “?0,IMEI, Report format,Return phone number!”
GS-102 will return a confirmation message of “?0,IMEI,Immediate report setting OK !” to imform it
has got the setting before sending the position report.
The description of SMS
Format
Description
?0
IMEI
Report format
Return phone number
!
Start sign and function code of immediate position report
IMEI of GS-102
Report format is set to be 1.
The phone number for receiving the position report
End sign
For example, if you want GS-102 to send immediate report to the phone number 626-123456.
You can send SMS as ?0,355632000166323,1,626123456!
GS-102 will return “?0,355632000166323,Immediate report setting OK!” to the phone number of
626123456.
For the position report from GS-102, please refer to 6.3 The format of return SMS from GS-102
GS-102
page 61
6.2 How to ask GS-102 to return periodic position report by SMS?
You can ask GS-102 to send periodic position report by sending SMS with the following
content. Periodic report content: “?1,IMEI,Report_Interval,Number of Reports,Report
format,Return phone number!”
GS-102 will return a confirmation message of “?1,IMEI,Period report setting OK !” before sending
the position report.
The description of SMS
Format
Description
?1
IMEI
Report Interval (sec)
Number of reports
Report format
Return phone number
!
Start sign and function code of periodic report
IMEI of GS-102
The interval between sending data report
How many reports will be sent
Report format is set 1.
The phone number for receiving the position report
End sign
Number of reports :
0 : continuous report
X : X times report
For example, if you want GS-102 to continuously send periodic reports for every 120 seconds to
the phone number of 626123456.
You can send SMS of ?1,355632000166323,120, 0,1,626123456!
GS-102 will return “?1,355632000166323,Period report setting OK!” to the phone number of
626123456.
And then GS-102 will send position report every 120 seconds. For the position report from
GS-102, please refer to 6.3 The format of return SMS from GS-102
If you want GS-102 to send 10 pieces of periodic reports for every 180 seconds to the phone
number of 626123456
You can send SMS as ?1, 355632000166323,180,10,1,626123456 !
And then GS-102 will send position report every 120 seconds.GS-102 will return
“?1,355632000166323,Period report setting OK!” to the phone number of 626123456.
Stop periodic position report:
If you want to stop sending the periodic report, you can SMS of “?2,IMEI,Return Phone Number”
to GS-102 to stop the periodic report.
For example, if you want GS-102 to stop periodic report, you can send SMS of “?2,
355632000166323,626123456!”
GS-102 will return “?2,355632000166323,stop report setting OK!”
Note: Return phone number:
GS-102 will send confirmation message and position report back to this return phone
number.
If return phone number is empty, GS-102 will send report back to caller ID.
GS-102
page 62
6.3 The format of return SMS from GS-102
If you send SMS to GS-102 for asking immediate or periodic position report, you will get the
position report like the following format.
Command_Head,IMEI,status,GPS_fix,date,time,longitude,latitude,altitude,speed,heading,number of
satellites in use,HDOP,Command_End
Format
Command_Head
IMEI
Status
date
time
longitude
Value
?
(The number of IMEI)
0
1
1
2
3
ddmmyy
hhmmss
(E or W)dddmm.mmmm
latitude
(N or S)ddmm.mmmm
altitude
speed
heading
number of satellites
in use
HDOP
Command END
xxxxx.x
xxxxx.xx
ddd
xx
GPS_fix
x.x
!
Note
0: Immediate report
1: Period report
1: Fix not available
2: GPS 2D Fix
3: GPS 3D Fix
Example:
E12129.2186
E 121°29.2186’
Example:
N2459.8915
N 24°59.8915’
unit: meters
unit: knots (1knots = 1.852km)
GS-102
page 63
7 How does GS-102 work by SMS and
GPRS?
GS-102
page 64
Mobile Phone
Call
Answer
TR-102
Figure 1
Answer mode is
“On”
Mobile Phone
SMS (any content, includes blank SMS)
TR-102
Figure 2
Answer mode is
“On”
Mobile Phone
Call or SMS
(any content, includes blank SMS)
TR-102
Figure 3
Answer mode is
“Off”
GS-102
page 65
Mobile Phone
Figure 4
GS-102
SMS (example)
Position Report:
GS102
2005/01/02 11:20:30
24.9965,121.4877
GPS fixed
SOS number 1
When SOS button is
pressed.
SOS number 2
SOS number 3
Mobile Phone
Figure 5
GS-102
Answer
Call
Quick Dial number
When Quick Dial
button is pressed.
GS-102
page 66
8 Troubleshooting and Safety info
status
cause
solution
After turning on the
power of GS-102,
the three LED are
flashing
simultaneously.
The SIM card is
not inserted.
The SIM card is
inserted in the
GS-102, but it asks
for SIM PIN entry
and the PIN code
is mismatched.
After you turn on
the power of
GS-102, the Blue
GSM LED is on.
The signal is too
weak.
Please insert the SIM card into
GS-102.
Please take out the SIM card, use
your mobile phone to disable the
PIN entry and then insert the SIM
card back to GS-102. Then you
will not be asked the PIN code.
Or connect the GS-102 to PC and
enter the setup mode of TR
Management Center program to
enter the correct SIM PIN.
Please take GS-102 to a location
where there is a stronger signal.
In general situation, it needs about 4 ~ 5 hours to fully charge the battery under the power-off condition.
charge the battery under the power-on condition, it may need longer charging time depending on different
usage mode.
If you
GS-102
page 67
There is a little tenon on the rubber cover of GS-102 USB port (please see the
right figure). You have to press it a little harder downward to close it firmly. There
will be a click sound if you do the right way.
Please do not connect GS-102 to AC power adapter during its startup process;
otherwise it can not be turned on properly.
Please do not connect GS-102 to a USB cable when you are changing the battery,
otherwise it will make some beep sound.
If GS-102 can not be turned off properly, please open the battery cover and remove the battery for 3 seconds
at least. Put the battery back and then restart it.
When the device is turned on, it will begin to do the initialization process, and you will hear a short “toot”
sound from the speaker. This is a normal situation, not a defect.
Please avoid storing the device in an excessive heat or humidity place.
your car under the direct sunshine with windows closed.
Please do not leave the device in
A high temperature environment may damage the
device or even cause the battery explosion.
When you use GS-102 to make a call, but the other party can not be reached for some reason (not turn on,
busy line, reject the call), you may hear the voice that requests you to leave a message in the voice box. If you
don't want to leave a message, please make sure to press the hang up button on GS-102 to end the call,
otherwise GS-102 will keep hanging on with the voice box system and can not come back to standby mode.
Do not hold GS-102 to your ear when it rings! When you receive a call, press the answer button to accept the
call before bringing GS-102 to your ear in order to avoid ear damage caused by the loud ring tones.
GS-102
page 68
FCC Regulations:
• This mobile phone complies with part 15 of the FCC Rules. Operation is subject to the following two conditions: (1)
This device may not cause harmful interference, and (2) this device must accept any interference received,
including interference that may cause undesired operation.
•
This mobile phone has been tested and found to comply with the limits for a Class B digital device, pursuant to
Part 15 of the FCC Rules. These limits are designed to provide reasonable protection against harmful
interference in a residential installation. This equipment generates, uses and can radiated radio frequency energy
and, if not installed and used in accordance with the instructions, may cause harmful interference to radio
communications. However, there is no guarantee that interference will not occur in a particular installation If this
equipment does cause harmful interference to radio or television reception, which can be determined by turning
the equipment off and on, the user is encouraged to try to correct the interference by one or more of the following
measures:
-
Reorient or relocate the receiving antenna.
Increase the separation between the equipment and receiver.
Connect the equipment into an outlet on a circuit different from that to which the receiver is connected.
Consult the dealer or an experienced radio/TV technician for help.
Changes or modifications not expressly approved by the party responsible for compliance could void the user‘s
authority to operate the equipment.
GS-102
page 69
RF Exposure Information (SAR)
This model phone meets the government’s requirements for exposure to radio waves.
This phone is designed and manufactured not to exceed the emission limits for exposure to radio frequency (RF)
energy set by the Federal Communications Commission of the U.S. Government.
The exposure standard for wireless mobile phones employs a unit of measurement known as the Specific
Absorption Rate, or SAR.
The SAR limit set by the FCC is 1.6W/kg.
*Tests for SAR are conducted using
standard operating positions accepted by the FCC with the phone transmitting at its highest certified power level in
all tested frequency bands.
Although the SAR is determined at the highest certified power level, the actual SAR
level of the phone while operating can be well below the maximum value.
This is because the phone is designed to
operate at multiple power levels so as to use only the poser required to reach the network.
In general, the closer
you are to a wireless base station antenna, the lower the power output.
The highest SAR value for the model phone as reported to the FCC when tested for use at the ear is 0.758 W/kg for
GSM850 / 0.735 W/kg for PCS1900 and when worn on the body, as described in this user guide, is 0.21 W/kg for
GSM850 / 0.223 W/kg for PCS1900
(Body-worn measurements differ among phone models, depending upon
available enhancements and FCC requirements.)
While there may be differences between the SAR levels of various phones and at various positions, they all meet the
government requirement.
The FCC has granted an Equipment Authorization for this model phone with all reported SAR levels evaluated as in
compliance with the FCC RF exposure guidelines.
SAR information on this model phone is on file with the FCC
and can be found under the Display Grant section of http://www.fcc.gov/oet/fccid after searching on FCC ID:
RID-TR101.
For body worn operation, this phone has been tested and meets the FCC RF exposure guidelines for use with an
accessory that contains no metal and the positions the handset a minimum of 1.5 cm from the body.
Use of other
enhancements may not ensure compliance with FCC RF exposure guidelines.
If you do no t use a body-worn
accessory and are not holding the phone at the ear, position the handset a minimum of 1.5 cm from your body when
the phone is switched on.