1
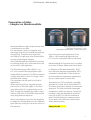
LCM Protocols - RNA Handling
Carl Zeiss Microscopy
LCM Protocols – RNA handling
1
LCM Protocols
RNA handling
Non contact Laser Capture Microdissection
Carl Zeiss Microscopy Germany
Content
5
6
7
7
9
9
9
9
9
10
10
10
11
11
12
12
12
12
13
13
14
14
14
15
15
16
16
16
17
17
17
17
18
18
20
21
23
23
24
24
25
26
27
Introduction - Some remarks on RNA
The DOs and DON’Ts on handling RNA
Preparation of slides
Samples on MembraneSlide
Samples on glass slides
Archived samples: Removing the coverslip
Treatment to remove RNases
Suggested UV treatment
Poly-L-Lysine treatment
Mounting samples onto slides
Frozen sections
Formalin Fixed Paraffin Embedded (FFPE) sections
Cytospins
Blood and tissue smear
Staining procedures
Formalin Fixed Paraffin Embedded (FFPE) sections
Frozen sections
Cresyl Violet
Hematoxylin/Eosin (HE)
Storage
Non-contact Laser Capture Microdissection (LCM) Procedures
Tips to improve morphological information
Diffusor
AdhesiveCap opaque
LiquidCover Glass
Collection devices
AdhesiveCap
Other microfuge tubes
Collection procedures
“Dry” collection (AdhesiveCap)
“Wet” collection (other microfuge tubes)
Capture check - looking into the cap to see the lifted samples
Downstream Applications
RNA from frozen sections
miRNA from frozen sections
RNA from FFPE sections
miRNA from FFPE sections
Using other extraction methods
One sample for DNA and RNA
Quality control of RNA
General remarks on RNA (distribution, content, RNase activity)
ZEISS Microscopy Labs: Tips for working with RNA
Other protocols (DNA, Chromosomes, Live Cells,...)
Introduction
Some remarks on RNA
RNA is a biological macromolecule with many different functions.
Messenger RNA (mRNA), transcribed from DNA, serves as template for synthesis
of proteins. This protein synthesis is carried out by ribosomes, which consist of
ribosomal RNA (rRNA) and proteins.
Amino acids for protein synthesis are delivered to the ribosome on transfer RNA (tRNA)
molecules. RNAs are also part of riboproteins and ribozymes.
Analysis of RNA can provide a good reflection of an organism’s gene expression
profile. Gene expression profiling of material isolated by microdissection has
become a very important method for analyzing cellular behavior in a micro scale
and is used in research and clinical applications.
Therefore the isolation of high quality RNA is crucial for all subsequent steps and
the success of the overall experiment.
5
LCM Protocols - RNA Handling
The DOs and DON’Ts of handling RNA
RNA degradation is a common reason for failing experiments. RNA is prone to
digestion by a wide variety of endogenous and exogenous RNases.
These RNases are present on almost any object that comes into contact with human
skin and are difficult to inactivate. Even minute amounts are sufficient to destroy RNA.
Some precautions can make the difference between an intact and degraded RNA prep
(see also: www.ambion.com) and therefore between successful and unsuccessful experiments.
DOs
•
•
•
•
•
•
•
•
•
•
•
•
designate a special area for working with RNA
clean benches with special cleaning solutions e.g. RNaseZap (AMBION, #9780)
wear gloves and change them frequently
use sterile, disposable plasticware
glassware should be treated with 0.1% DiEthylPyroCarbonate (DEPC)
or oven baked at 180°C for at least 4 hours before use
use pipette tips with filters
aqueous solutions should be treated with 0.1% DEPC
use only RNase-free reagents, tubes and tips
for best results use samples that have been snap frozen on dry ice or in liquid nitrogen;
all required reagents should be kept on ice
store prepared RNA at -80°C
to avoid condensation of moisture during thawing, the slides should be frozen
at -80°C and rethawed in a tightly sealed container (e.g. 50 ml Falcon tube)
in general use protocols (e.g. staining) with short incubation times on ice
DON’Ts
•
•
•
•
6
don’t touch anything with bare hands
don’t autoclave pipette tips, as water vapor may contain RNases
don’t allow frozen tissue to thaw
don’t resuspend RNA in DEPC water; residual DEPC can inhibit downstream reactions
LCM Protocols - RNA Handling
Preparation of slides
– Samples on MembraneSlide
MembraneSlides are glass slides covered with
a membrane on one side.
This membrane is easily cut together with
the sample and acts as a stabilizing backbone
during lifting. Therefore even large areas
are lifted by a single laser pulse without affecting the morphological integrity.
Use of MembraneSlide is especially important
for isolating single cells, chromosomes as well
as live cells or small organisms.
Carl Zeiss Microscopy offers slides (1 mm,
0.17 mm) covered with polyethylene naphthalate (PEN)-membrane. This PEN-membrane
is highly absorptive in the UV-A range, which
facilitates laser cutting.
The membrane can be used for all kind of
applications.
When working with low magnifying objectives like 5x or 10x both regular 1 mm thick
glass slides and 0.17 mm glass slides can be
used. To keep this flexibility for higher magnifications (20x, 40x or 63x) ZEISS recommends
using long distance objectives.
With those objectives you have the possibility
to adapt the working distance to the different
glass slides by moving the correction collar on
the objective.
Regular glass slide (1 mm thick) => 1,
thin slide (0.17 mm thick) => dot,
DuplexDish and FrameSlide => between dot and 0.
Due to the short working distance of the
100x or 150x magnifying objectives only
0.17 mm thin cover glass slides can be used.
MembraneSlide NF (nuclease free) is certified
to be free of DNase, RNase and human DNA.
In addition to PEN-MembraneSlide, ZEISS
also offers polyethylene teraphthalate (PET)membrane covered slides. These slides are
recommended for fluorescence applications
due to a better signal to noise ratio.
Alternatively the PET-membrane is available
attached to a metal frame (FrameSlide PET).
This frame structure is resistant to microwave
treatment. The slide should be submerged
completely in buffer for heating. The special
bonding is inert and adapted to heat treatment (up to 95°C) so that the membrane
does not ruffle during the heating process.
If you need more information about these
slides, please contact:
[email protected]
7
MembraneSlide 1.0 PEN
MembraneSlide 1.0 PEN NF
MembraneSlide 0.17 PEN
MembraneSlide 50x1.0 PEN
MembraneSlide 1.0 PET
FrameSlide PET
- Order No. 415190-9041-000 (white)
- Order No. 415190-9081-000 (white)
- Order No. 415190-9061-000 (uncolored)
- Order No. 415190-9091-000 (doublewidth)
- Order No. 415190-9051-000 (blue)
- Order No. 415190-9101-000 (metal)
LCM Protocols - RNA Handling
Preparation of slides
– Samples on glass slides
With PALM MicroBeam almost every kind
of biological material can be microdissected
and lifted directly from glass slides using
the “AutoLPC” function of PALM RoboSoftware.
Even archival pathological sections can be
used after removing the cover slip and the
mounting medium.
To facilitate easy lifting additional adhesive
substances or “Superfrost + charged slides”
should only be applied when absolutely
necessary for the attachment of poorly
adhering material (e.g. some brain sections
or blood vessel rings). In those cases higher
laser energy is needed for lifting.
Archived samples:
Removing the coverslip
Depending on the applied mounting
medium (whether it is soluble in xylene or
water) the whole slide should be
completely submerged in the respective
solvent.
1. standing up in a glass jar filled with
either pure xylene or warm water
(30-50°C)
2. time needed for the coverslip to swim
off may range from hours to days
3. gentle movement of the jar may speed
up the process
4. air-dry the slide after removal
Note: It is very important NOT to use any
force to push off the coverslip because this
might damage the section! Wait till it falls
off by itself! The necessary time depends
on the age of the sample and the dryness
of the mounting medium.
Fresh slides (only days old) can be decoverslipped much faster.
Treatment to remove RNases
MembraneSlides are shipped without any
pretreatment.
• To ensure RNase-free MembraneSlides
or glass slides, use dry heat at 180°C
for 4 hours to completely inactivate RNases.
• MembraneSlide NF (nuclease free) is
certified to be free of DNase, RNase and
human DNA.
Treatments to remove nucleases are therefore not necessary using these slides.
Suggested UV treatment
To overcome the hydrophobic nature of
the membrane we strongly recommend to
irradiate with UV light at 254 nm for 30
minutes (e.g. in a cell culture hood).
The membrane gets more hydrophilic,
therefore the sections (paraffin- and
cryosections) adhere better. Positive side
effects are sterilization and destruction
of potentially contaminating nucleic acids.
Poly-L-Lysine treatment
Additional coating of slides with Poly-L-Lysine (0.1% w/v, e.g. SIGMA, #P8920) may
help for poorly adhering materials (e.g.
brain sections) and should be done after
UV treatment.
Distribute a drop of the solution (100μl) all
over the membrane area (e.g. with a soft
hair brush or a pipet tip moved horizontally
along the surface.
Let air-dry at room temperature for 2-3
minutes. Avoid any injury of the membrane, as this might result in impairment
of Laser Capture Microdissection (LCM).
9
LCM Protocols - RNA Handling
Mounting samples onto slides
Frozen sections
Formalin Fixed Paraffin Embedded
(FFPE) sections
Sectioning
Sections are mounted onto MembraneSlides similarly as when using glass slides
by “melting“ the frozen section to the
warmer slide. Freezing media like OCT or
similar may be used but should be kept to
a minimum and must be removed before
laser cutting.
To our experience massive steel knives allow better section quality than the exchangeable razor blades in the microtome.
For optimal RNA protection take a precooled slide and touch the backside of the
slide with your finger (gloves!) to warm
only the region for placing the section.
Now transfer the section from the knife by
touching with the warmed area and dry
at -20°C in the cryostat for 2-3 minutes.
Longer drying can increase the adhesion of
weakly attaching tissue sections.
Sectioning
Sections are mounted onto MembraneSlides
the same way as routinely done using glass
slides. Floating the section on warm water
as well as hot plate techniques can be applied.
After mounting it is helpful to let the slides
dry overnight in a drying oven at 56°C.
The longer melting/drying step will strongly
improve the adhesion of the section to the
membrane.
To allow laser cutting and lifting a coverslip
and standard mounting medium must not
be applied.
Fixation
As first step the dehydration in ice-cold
70% ethanol for 2-3 minutes is always
recommended.
Removing the tissue freezing medium
If OCT or another tissue freezing medium
is used, it is important to remove it before
laser cutting because such media will
interfere with laser efficiency. Removing
this medium is done by dipping the slide
5-6 times into ice-cold RNase-free water. If
staining is done in aqueous solutions, the
supporting substance is removed “automatically” by the water containing steps.
10
Deparaffination
Paraffin will reduce the efficiency of the
laser, sometimes strongly inhibiting cutting
and lifting. If you are working with unstained sections it is therefore important to
remove the paraffin completely before laser
cutting and lifting.
If applying standard staining procedures
deparaffination is routinely included in any
protocol. 1 mm MembraneSlides can be
used like normal glass slides.
Minimal procedure
1. Xylene
2 minutes, 2 times
2. Ethanol 100% 1 minute
3. Ethanol 96% 1 minute
4. Ethanol 70% 1 minute
LCM Protocols - RNA Handling
Cytospins
Cytospins can be prepared on glass slides
or on MembraneSlides. After centrifugation
with a cytocentrifuge let the cells air-dry.
Then fix for 5 minutes in 100% methanol.
Allow the cytospins to dry at room temperature before staining.
Blood and tissue smear
Distribute a drop of (peripheral) blood
or material of a smear over the slide.
Be careful to avoid injuries in the membrane, which would lead to leakage
during fixation or washing steps and
therefore would impair the LMC process.
Let smears air-dry shortly and fix them
for 2 up to 5 minutes in 70% ethanol.
11
LCM Protocols - RNA Handling
Staining procedures
For isolation of high quality RNA use only freshly prepared and precooled staining
solutions and take notice of our tips on handling RNA (please see page 24).
Formalin Fixed Paraffin Embedded Cresyl Violet
(FFPE) sections
After deparaffination continue with the
staining procedure of your choice.
Most standard staining procedures can
be used for FFPE sections (for recommendations see Frozen sections).
Frozen sections
Most standard histological stainings (e.g.,
HE, Methyl Green, Cresyl Violet, Nuclear
Fast Red) are compatible with subsequent
RNA isolation.
Note: Using frozen sections endogenous
RNases may still be active after the short
fixation step. Therefore it is recommeded to
keep all incubation steps as short as possible.
Please use RNase-free water and solutions
for all steps. All required reagents should
be kept on ice.
At ZEISS Microscopy Labs we usually
perform the Cresyl Violet or Hematoxylin
staining. Skipping the Eosin staining of the
HE-procedure can help additionally against
RNA degradation or PCR inhibition.
12
This short staining procedure colors the
nuclei violet and the cytoplasm weak violet.
Mucin, mastcells, amyloid or developing
bone are stained red. It is recommended
for RNase-rich tissues since all solutions
contain high ethanol concentrations.
Procedure
1. after fixation (2 min, 70% ethanol)
dip slide into 1% Cresyl Violet Acetate
solution (*) for 30 sec
2. remove excess stain on absorbent
surface
3. dip into 70% ethanol
4. dip into 100% ethanol
5. air-dry shortly (1-2 min)
(*) Dissolve solid Cresyl Violet Acetate
(e.g. ALDRICH #86,098-0) at a concentration of 1% (w/v) in 50% EtOH
at room temperature with agitation/
stirring for several hours to overnight.
Filter the staining solution before use
to remove unsolubilized powder.
(Sometimes Lot to Lot variations in the
purchased Cresyl Violet powder can
lead to weaker staining results if the
dye content is below 75%).
LCM Protocols - RNA Handling
Hematoxylin/Eosin (HE)
Note: In most cases this Cresyl Violet
staining procedure will be sufficient for
cell identification. If an enhancement of
the staining is desired, a reinforcement
by two additional steps in 50% ethanol
(first before the staining in Cresyl Violet;
second after the staining in Cresyl Violet)
is possible. Additional intensification can
be obtained by increasing the working
temperature of all solutions to room
temperature.
The endogenous RNase acitivity varies
between different tissues (please see
page 23). Therefore, when the short
staining protocol is modified by additional
steps (50% ethanol) or by increasing
the working temperature we strongly
recommend a quality control of the RNA
(please see page 22).
Ambion offers the LCM Staining Kit (#1935)
which also contains a Cresyl Violet dye.
When using this kit we recommend to
omit the final xylene-step of the Ambion
instruction manual because xylene makes
the tissue very brittle and reduces the adhesion of the section to the PEN-membrane.
HE-staining is used routinely in most histological laboratories and does not interfere
with good RNA preparation if intrinsic
RNase activity is low. The nuclei are stained
blue, the cytoplasm pink/red.
Procedure
1. after fixation quickly dip slide 5-6 times
in RNase-free distilled water
2. stain 1-2 minutes in Mayer’s Hematoxylin solution (e.g. SIGMA, #MHS-32)
3. rinse 1 minute in DEPC-treated tap
water or blueing solution
(e.g. BBC Biochemical, #3900)
4. stain 10 seconds in Eosin Y
(e.g. SIGMA, #HT110-2-32)
5. perform a quick increasing ethanol
series (70%, 96%, 100%)
6. air-dry shortly
Storage
Stained slides can be used immediately or
stored at -80°C.
To avoid excess condensation of moisture
during thawing, the slides should be frozen
in a tightly sealed container (e.g. two slides
back to back in a 50 ml Falcon-tube).
For rethawing the container should not be
opened before it is completely warmed up
again to ambient temperature.
13
LCM Protocols - RNA Handling
Non-contact Laser Capture Microdissection (LCM) Procedures
Please, additionally have a look into the PALM MicroBeam User Manual.
Tips to improve morphological information
Embedding and glass covering of the specimen is inapplicable for LCM.
Thus, the rough open surface of the section/material often results in
impaired view of morphology.
Diffusor
Holders for PALM RoboMover and PALM
CapMover II are equipped with diffusors.
The opaque glass diffuses the incident microscope light, which smoothens
the harshness of contrast and, depending
on material and staining, even minute
details as nuclei and cell boundaries show
up. Even slight differences in color become
visible. For more details and handling, please
see Diffusor CM product information.
cap2
Diffusor
cap1
Tube collector 2x200 CMII - Order No.
415101-2000-410
14
Diffusor
CollectorSet SingleTube 200 RM- Order No.
415101-2000-951
LCM Protocols - RNA Handling
AdhesiveCap opaque
The white/opaque filling of AdhesiveCap
clearly improves visualization of morphological information of the samples due
to enhanced color balance and contrast,
which makes the view comparable to those
of coverslipped tissue sections.
Two different microfuge tube sizes with
these filled caps are available from ZEISS.
Liquid Cover Glass
The polymeric and low viscose Liquid Cover
Glass completely embeds the tissue and
smoothens the rough tissue surface, resulting
in enhanced morphology.
For more details and handling, please see
Liquid Cover Glass product information.
For more details and handling, please see
AdhesiveCap product information.
AdhesiveCap opaque - Order No. 415190-9201-000 (500 μl)
AdhesiveCap opaque - Order No. 415190-9181-000 (200 μl)
Liquid Cover Glass - Order No. 415190-9020-000
15
LCM Protocols - RNA Handling
Collection devices
AdhesiveCap
The intention of AdhesiveCap is to allow
LCM (Laser Capture Microdissection) without applying any capturing liquid into the
caps prior to LCM. This minimizes possible
RNase activities.
Beside the quick relocation of the lifted
samples in the cap due to instant immo-bilization there is no risk of evaporation and
crystal formation during extended specimen harvesting.
AdhesiveCap is produced with cleanroom
technology and can therefore be considered as RNase-free. Autoclaving is not
possible.
ZEISS recommends AdhesiveCap as a collection device for all RNA experiments.
For more details and handling, please see
also AdhesiveCap product information.
Other microfuge tubes
Other commercially available RNase-free plasticware can be used, too.
(e.g. ABgene #AB-0350; 0.5 ml tubes)
If there are no RNase-free tubes available
use the following procedure to remove
RNases from regular tubes.
Treatment of microfuge tubes
to remove RNases
add 0.1 ml DEPC to 100 ml of double
distilled water to get a 0.1% DEPC
solution (DEPC: e.g. ROTH #K028.1)
1. stir for 5-6 h at room temperature to
dissolve the DEPC
2. soak the reaction tubes into the DEPC
solution, take care that the tubes are
completely covered with liquid
(not blistered!) and incubate overnight
at room temperature
3. autoclave the tubes together with
the solution for 20 minutes at 121°C
to inactivate the DEPC
4. discard the liquid carefully and
thoroughly. Dry the tubes at 50°C - 80°C
5. use the tubes as usual
Note: DEPC is toxic and should be
used under a hood!
AdhesiveCap opaque - Order No. 415190-9201-000 (500 μl)
AdhesiveCap opaque - Order No. 415190-9181-000 (200 μl)
AdhesiveCap clear - Order No. 415190-9211-000 (500 μl)
AdhesiveCap clear - Order No. 415190-9191-000 (200 μl)
16
“Dry collection“ procedure
Collection procedures
Please have a look into the PALM MicroBeam User Manual.
“Dry“ collection (AdhesiveCap)
AdhesiveCap is the recommended collection device for all RNA experiments.
Capturing without liquid minimizes RNase
activity.
After LCM add a lysis buffer of your own
choice (e.g. QIAGEN: 350 μl RLT buffer)
and incubate “upside down“ for 30
minutes.
Note: Please do not use any water bath
for the upside down incubation.
Subsequently briefly centrifuge the lysate
and then apply the routine RNA extraction
procedure.
“Wet” collection
(other microfuge tubes)
Pipette 20 μl lysis buffer into the cap.
The lifted cells or cell areas will stick
onto the wet inner surface of the cap
and will not fall down after the lifting
procedure. Be aware that aqueous solutions will dry out after a while.
When using glass mounted samples and
AutoLPC filling the cap with liquid completely can increase the capturing efficiency.
Capture check – looking into the
cap to see the lifted samples
To control the efficiency of lifting it is
possible to have a look into the collection
device (e.g. microfuge cap) with the 5x,
10x, LD 20x, LD 40x and LD 63x objectives.
By using the software function “go to checkpoint” the slide is moved out of the light
path and the cap can be lowered further
towards the objectives for looking inside.
17
LCM Protocols - RNA Handling
Downstream Applications
RNA from frozen sections
To capture microdissected samples from
frozen sections ZEISS Microscopy Labs
recommend AdhesiveCap.
For RNA extraction a procedure of choice
can be used.
The RNeasy® Micro Kit (QIAGEN, #74004)
combined with AdhesiveCap (500 μl) in our
hands results in very good yield and quality
of RNA from various tissues.
For recommended modifications to the
original QIAGEN protocol please see page 19.
The final RNA solution (12 μl) may be stored
at -20°C or used directly for reverse transcription.
Quality control by direct analysis like the
Agilent Bioanalyzer (RNA 6000 Pico LabChip® Kit) is limited to concentrations
above 50 pg/μl and may only be possible
with large microdissected samples (about 2
mm2 of collected areas from tissue sections
of 5-10 μm thickness).
We normally use 5 to 10 μl of the final RNA
solution as template in a RT-reaction of 20 μl
(e.g., Transcriptor First Strand cDNA Synthesis
Kit, ROCHE, # 04 379 012 001).
18
LCM Protocols - RNA Handling
Applying components of the QIAGEN RNeasy® Micro Kit (Order No. 74004)
1.
Add 350 μl Buffer RLT containing ß-Mercaptoethanol to the tube with the LCM
elements in the AdhesiveCap, close the cap and incubate in an “upside down”
position for 30 min. Please do not use any water bath for the incubation.
Thorough lysis is essential for good RNA yield.
Note:
2.
ß-Mercaptoethanol (ß-ME) must be added to Buffer RLT before use.
Add 10 μl ß-ME per 1 ml Buffer RLT. Dispense in a fume hood and wear
appropriate protective clothing. Buffer RLT is stable at room temperature
for 1 month after addition of ß-ME.
Spin down the lysate in a microcentrifuge for 5 minutes.
(13400 rcf; e.g. Eppendorf 5415D: 12000 rpm)
Note:
Samples can now be stored for later use at -80°C or purified immediately
following the original protocol of the QIAGEN RNeasy® Micro Kit
(Handbook 04/2003).
3.
To continue with the isolation transfer the lysate to a RNase-free 1.5 ml
microcentrifuge tube.
4.
Now switch to step 5 of the QIAGEN protocol “Total RNA Isolation from
Microdissected Cryosections” (RNeasy® Micro Handbook 04/2003, pp 20).
5.
“Add 1 volume (350 μl) of 70% ethanol to the homogenized lysate, and mix
well by pipetting. Do not centrifuge. Continue immediately with step 6.”
Note:
All further steps (6-14) of the QIAGEN protocol remain unchanged
and should be performed step by step as listed there.
Please consider also the comments and tips of the QIAGEN RNeasy®
manual, especially the section: “Things to do before starting”.
19
LCM Protocols - RNA Handling
Downstream Applications
miRNA from frozen sections
Modifications for LCM samples
To capture microdissected samples from
frozen sections ZEISS Microscopy Labs
recommend AdhesiveCap (500 μl).
The special miRNeasy® Mini Kit (QIAGEN,
#217004) combined with AdhesiveCap in
our hands results in very good yield and
quality of total RNA including enrichment
of small RNAs.
Only minor adaptations have to be made
to the original QIAGEN procedure (see
miRNeasy® Mini Handbook 10/2007) when
applying AdhesiveCap.
1.
As first step add 350 μl of QIAzol Lysis
Reagent to the tube of the AdhesiveCap
(instead of the usual 700 μl - due to the
smaller tube size).
Close cap and invert the tube.
The lysis should be performed upside
down for 30 minutes at room temperature.
2.
After short vortexing spin down briefly in a
tabletop centrifuge and transfer the liquid
to a 1.5 ml reaction tube.
Add another 350 μl of QIAzol Lysis Reagent
and mix by pipetting.
3.
Add 140 μl Chloroform (CCl4) and close tube
securely. Shake vigorously or vortex for at
least 15 seconds.
Note: After step 3 switch directly to the
QIAGEN manual at step 4 (“Place tube
at room temperature for 2-3 min“).
All further steps are now performed
according to the normal QIAGEN
procedure (steps 4 - 13).
Quality control by direct analysis like the
Agilent Bioanalyzer (RNA 6000 Pico LabChip® Kit) is limited to concentrations
above 50 pg/μl and may only be possible
with large microdissected samples (some 2
mm2 of collected areas from tissue sections
of 5-10 μm thickness).
20
The RNA elution in step 13 should be done
with the minimal volume (30 μl) to avoid
unnecessary dilution of the RNA.
The final RNA solution may be stored at
-20°C or used directly for downstream
reactions.
LCM Protocols - RNA Handling
Downstream Applications
RNA from FFPE sections
For collecting microdissected samples ZEISS
Microscopy Labs recommend AdhesiveCap.
ZEISS Microscopy Labs apply the QIAGEN
RNeasy® FFPE Kit (#73504) with some LCMspecific modifications (please see page 22).
This procedure is very effective and allows
a high final concentration of RNA due to a
small elution volume (12 μl). Genomic DNA
contamination is minimized by a DNase I
digest on the purification column.
Deparaffination and staining is done according to standard procedures for slides
(please see pages 10, 12 and 13).
The incubation with Proteinase K in our protocol is prolonged significantly compared to the
QIAGEN RNeasy® FFPE protocol, because
all our tests with laser microdissected material from various tissues showed higher RNA
yields when applying longer digestion times.
Note: For formalin fixed samples a Proteinase K digestion step is essential.
The time necessary for optimal Proteinase K
digestion depends on many factors like
tissue type, fixation procedure or element
size of lifted material. An overnight digestion
(12-18 hours) is a good starting point for
optimization but shorter digestion times
may be tested as well. To our experience at
least 3 hours digestion should be applied
with any extraction procedure and material.
Quality control by direct analysis like the Agilent Bioanalyzer (RNA 6000 Pico LabChip®
Kit) is very limited and may only be possible
with quite large microdissected samples (often some 4 mm2 collected area from tissue
sections of 5-10 μm thickness).
We normally use 5 to 10 μl of the final
RNA solution in a RT-reaction of 20 μl
(e.g., Transcriptor First Strand cDNA
Synthesis Kit, ROCHE, # 04 379 012 001)
using random-oligomers (instead of oligodT) as primers for the cDNA synthesis.
Note: The use of random or gene-specific
primers is important. Reverse transcription
of formalin fixed RNA with standard oligodT-primers is inefficient and strongly 3-prime biased due to the numerous strand
breaks and modifications inflicted by the
formalin fixation and paraffin embedding
procedure.
21
LCM Protocols - RNA Handling
Applying components of the QIAGEN RNeasy® FFPE Kit (Order No. 73504)
1.
Add 150 μl Buffer PKD and 10 μl of Proteinase K to the tube, containing the LCM elements
in the AdhesiveCap and invert tube to get contact between liquid and adhesive surface.
2.
Use an incubator to digest the samples in an “upside down” position at 56°C overnight (or
for at least 3 hours), then vortex and heat at 80°C for precisely 15 min in a heating block.
Note: Please do not use any water bath for the upside down incubation.
3.
Incubate on ice for 3 min.
4.
Add 16 μl DNase Booster Buffer and 10 μl DNase I stock solution. Mix gently by inverting
the tube. Centrifuge briefly to collect residual liquid from the sides of the tube.
Note:
DNase I is supplied lyophilized and should be reconstituted as described in
“Preparing DNase I stock solution” (page 14; RNeasy FFPE handbook 09/2010).
DNase I is especially sensitive to physical denaturation. Mixing should only be
carried out by gently inverting the tube. Do not vortex!
5.
Incubate at room temperature for 15 min.
6.
Transfer the lysate to a new 1.5 ml microcentrifuge tube.
7.
Add 320 μl RBC to adjust binding conditions and mix the lysate thoroughly.
8.
Add 720 μl ethanol (100%) to the sample and mix well by pipetting. Do not centrifuge.
Proceed immediately to step 9.
9.
Transfer 700 μl of the sample to a RNeasy MinElute spin column placed in a 2 ml collection
tube. Close the lid gently and centrifuge for 15 sec at ≥8000 x g (≥10000 rpm).
Discard the flow-through. Reuse the collection tube in step 10.
10. Repeat step 9 until the entire sample has passed through the RNeasy MinElute spin column.
Reuse the collection tube in step 11.
11.
Add 500 μl Buffer RPE to the RNeasy MinElute spin column. Close the lid gently and
centrifuge for 15 sec at ≥8000 x g (≥10000 rpm) to wash the spin column membrane.
Discard the flow-through. Reuse the collection tube in step 12.
Note:
22
Buffer RPE is supplied as a concentrate. Ensure that ethanol is added to Buffer RPE
before use.
12.
Add 500 μl Buffer RPE to the RNeasy MinElute spin column. Close the lid gently and
centrifuge for 2 min at ≥8000 x g (≥10000 rpm) to wash the spin column.
After centrifugation carefully remove the spin column from the collection tube so that the
column does not contact the flow-through.
13.
Place the RNeasy MinElute spin column in a new 2 ml collection tube, and discard the old
collection tube with the flow-through. Open the lid of the spin column and centrifuge at
full speed for 5 min. Discard the collection tube with the flow-through.
It is important to dry the spin column membrane, since residual ethanol may interfere with
downstream reactions.
14.
Place the RNeasy MinElute spin column in a new 1.5 ml collection tube. Add 14-30 μl
RNase-free water directly to the spin column membrane. Close the lid gently and centrifuge for 1 min at full speed to elute the RNA. The dead volume of the RNeasy MinElute
spin column is 2 μl: elution with 14 μl of RNase-free water results in a 12 μl eluate.
15.
The RNA solution may be stored at -20°C or used directly for reverse transcription.
LCM Protocols - RNA Handling
miRNA from FFPE sections
In contrast to mRNA and rRNA miRNAs are
mostly well preserved in FFPE tissue and this
allows quite good yields from LCM samples.
Due to their small size the miRNAs are normally not bound efficiently by the QIAGEN
columns during the regular FFPE Kit procedure. Still the miRNA fraction can be strongly
enriched by simply changing one washing step
of the standard protocol.
To capture microdissected samples from FFPE
sections ZEISS Microscopy Labs recommend
AdhesiveCap.
Using other extraction methods
Apart from the QIAGEN Kits there are many
other possibilities and kits to extract RNA from
FFPE-material. Depending on the
material and the experience of the user even
simple procedures like homemade AGTCmethods or Trizol can be quite efficient. If the
original extraction protocol does not contain
any Proteinase K digestion step we recommend
to apply a simple procedure as listed below.
Proteinase K Procedure
1.
Add 20 μl digestion buffer containing
Proteinase K (150 mM NaCl, 100 mM Tris
pH 7.5, 0.5% Igepal, 0.5 μg/μl Proteinase K)
to the tube containing the LCM elements
in the AdhesiveCap.
2.
Use an incubator to digest the samples
in an “upside down” position at 55°C
over-night. Do not use any waterbath.
3.
Spin down the lysate in a microcentrifuge.
(13400 rcf; e.g. Eppendorf 5415D: 12000 rpm)
4.
Inactivate Proteinase K by heating to
90°C for 10 minutes.
5.
Add the appropriate lysis buffer and mix
by intense vortexing; if not proceeding
immediately, store the digested samples
at -20°C or -80°C.
6.
Continue with your preferred extraction
procedure.
Modifications for miRNA samples
1.
2.
3.
Collection and extraction is initially
done according to our protocol for
total RNA from FFPE (see page 22)
applying components of the QIAGEN
RNeasy® FFPE Kit (Order No. 73504).
Step 1 till step 7 are performed as usual.
At step 8 an increased volume of 1120 μl
ethanol (100%) is added to the tube
(instead of the normal 720 μl).
With this stronger dilution the binding
conditions change in favour of small RNAs.
Therefore miRNAs are no longer lost in the
flow-through.
All further steps of the routine protocol
(step 9 - 12) remain unchanged and can
be done as usual.
Note: Proteinase K digestion time should be
optimized for any tissue sample (at least
3 hours are recommended, but up to 18
hours may be more efficient).
23
LCM Protocols - RNA Handling
Downstream Applications
One sample for DNA and RNA
The QIAGEN AllPrep® DNA/RNA Kit
(#80234) is designed for simultaneous
purification of genomic DNA and total RNA
(including small RNAs) from FFPE-material.
DNA and RNA are released sequentially by
differential solubilization of the same precious FFPE sample. Pure DNA and RNA are
obtained from the entire sample.
ZEISS Microscopy Labs have successfully
tested this kit for its applicability for LCM
samples on several FFPE materials. Both
DNA and RNA can efficiently be purified
simultaneously from LCM samples when
some modifications to the original manual (AllPrep DNA/RNA FFPE Handbook
09/2010) are made. The first Proteinase K
digestion and lysis step before separating
the DNA and RNA fractions seems critical
especially for the RNA yield.
Mostly we have found a time of one hour
(instead of 15 minutes) to be a good compromise for both DNA and RNA yield but
this may vary depending on the individual
material. We strongly encourage performing pilot experiments with time courses
of the first digestion time between one to
three hours.
For more information please contact ZEISS
Microscopy Labs directly since an universal
protocol recommendation is presently not
available.
Procedure
Note: Proteinase K digestion time should
be optimized for any tissue sample.
At least 1 hour at 56°C is recommended in the first lysis step of the
QIAGEN AllPrep® DNA/RNA Kit but
longer times may be more efficient.
24
Quality control of RNA
Due to the normally very small sample size
from LCM a direct quality control of the
RNA requires high sensitivity technologies.
Gel electrophoresis or even NanoDrop
procedures are frequently not sensitive
enough.
The Agilent 2100 Bioanalyzer (RNA 6000
Pico LabChip® Kit) is able to analyze RNA
samples with concentrations down to 50
pg/μl and provides information about RNA
quality (degradation, purity) and quantity
(see also: www.chem.agilent.com).
A similar technology is available from
BioRad (Experion® System, see also: www.
bio-rad.com)
A prognosis of the expected amount of RNA
in FFPE tissue is very difficult since many
factors like species, cell/tissue-type, fixation, staining, fragmentation, extraction
procedure and others will influence the
outcome.
Anyway, RNA from FFPE material will
frequently not show clear profiles and only
rough estimations of the size distribution
and the RNA amount are possible.
LCM Protocols - RNA Handling
General remarks on RNA (distribution, content, RNase activity)
A typical mammalian cell contains 10-30 pg total RNA (mRNA, rRNA, tRNA). The majority of
RNA molecules are tRNAs and rRNAs. mRNA represents only 1-5% of the total cellular RNA.
Approximately 360 000 mRNA molecules are present in a single cell, corresponding to
approximately 12 000 different transcripts with a typical length of 2 kb. Some mRNAs
comprise as much as 3% of the mRNA pool whereas others account for less then 0.01%
(QIAGEN, Bench guide).
RNA distribution in a typical mammalian cell
Total RNA per cell
Total RNA in nucleus
DNA : RNA in nucleus
mRNA molecules
Typical mRNA size
~ 10-30 pg
80-85%
15-20%
1-5%
~ 14%
~ 2:1
5
2x10 - 1x10⁶
1900 nt
rRNA (28S, 18S, 5S)
tRNAs, snRNAs, low MW species
mRNAs
per cell
RNA content in various cells and tissues
Cell cultures (107 cells)
Mouse tissue (100 mg)
Quantitative hierarchy of RNase activity
in mouse tissues (AMBION, Inc.)
Mouse tissues
Pancreas
Spleen
Lung
Liver
Thymus
Kidney
Heart
Brain
Fold increase
relative to brain
181,000
10,600
5,300
64
16
8
2
1
NIH/3T3
HeLa
COS7
Brain
Heart
Intestine
Kidney
Liver
Lung
Spleen
Total RNA
(μg)
120
150
350
120
120
150
350
400
130
350
mRNA
(μg)
3
3
5
5
6
2
9
14
6
7
Also the RNase activities vary dramatically across
different tissues (Krosting J, Latham G, AMBION, Inc.).
A comparison of total RNase activities for 8 different
mouse tissues showed that total RNase activity spans
a 181,000-fold range from pancreas to brain, which
points out the importance of RNase control.
25
LCM Protocols - RNA Handling
ZEISS Microscopy Labs: Tips for working with RNA
For best RNA quality we use fresh frozen sections on MembraneSlides. Frozen sections should
not be stored for more than a few days at -80°C. After staining and drying freezing should be
performed in an air tight container. Any condensation of moisture on the section can lead to
reactivation of intrinsic RNase activities and therefore fast degradation of RNA.
A prognosis of the expected amount of RNA is difficult since many factors will influence the
outcome (see above). From mouse liver frozen sections we usually are able to retrieve
5-20 pg RNA per cell (calculated from extractions of 1000 cells and analysis with an Agilent
Bioanalyzer; Agilent Application Note 5988-EN on our website or at www.chem.agilent.com).
Archival tissues are mostly Formalin Fixed and Paraffin Embedded. RNA extraction from these
tissues is often not very effective because of the crosslinking properties of aldehydes. Other
methodologies for preservation of high molecular weight RNA in FFPE tissue are described by:
Vincek et al. 2005 (Diagn Mol Pathol, 14,3: 127-133) and
Olert et al. 2001 (Pathol Res Pract, 197: 823-826)
For more information see our website: www.zeiss.de/microdissection
Summarized recommendations:
• Keep attention to DOs and DON´Ts on handling RNA (page 6)
• Take AdhesiveCap as collection device for all RNA experiments (page 16)
• Choose a short staining procedure for tissues with high content of
endogenous RNases (e.g. Cresyl Violet) (page 12)
• RNeasy® Micro Kit (QIAGEN, #74004) results in good RNA yield
(quality and quantity) from frozen sections in our lab (page 18)
• RNeasy® FFPE Kit (QIAGEN, #73504) results in good RNA yield
(quality and quantity) from FFPE tissue in our lab (page 21)
26
LCM Protocols - RNA Handling
Brochures and Protocols
Live cells
Chromosomes
DNA
FISH
Immunofluorescence
Proteins
For questions, comments or information requests please contact:
ZEISS Microscopy Labs
Application Lab
[email protected]
+49 8990 9000 900
Download of protocols: www.zeiss.de/applab
27
For scientific questions please contact
[email protected]
+49 8990 9000 900
ore visit:
wwww.zeiss.de/applab
[email protected]
Carl Zeiss Microscopy GmbH
07745 Jena, Germany
BioSciences
+49 8990 9000 800
[email protected]
www.zeiss.de/microdissection
28
February 2012
LCM Protocols – RNA handling
LCM Protocols - RNA Handling