1
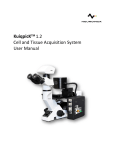
Application Guide
PALM Systems
Application Guide
This document is delivered only to persons who are trained and authorized by Carl Zeiss MicroImaging GmbH.
No part of this document may be reproduced or distributed in any form or by any means
without the prior written consent of Carl Zeiss MicroImaging GmbH.
The information in this document is subject to change without notice.
Carl Zeiss MicroImaging GmbH assumes no responsibility for any errors or unclear
formulations that may appear.
Third Edition August 2008
LMPC is a trademark of Carl Zeiss MicroImaging GmbH.
PALM is a registered trademark of Carl Zeiss MicroImaging GmbH.
Patent rights:
The instruments, instrument components or methods described in this manual are protected
by the following patents:
- Laser catapult technology (Laser Pressure Catapulting LPCpat)
Patents: US 5,998,129, EP 879408 B1 and others.
- Three-dimensional laser beam positioning system
Patents: US 5,689,109, EP 679325 B1 and others.
- Element List
Patent: US 6,930,764
- RoboMover: DE 102 54 229.5
- Additional patents pending.
Regulatory Notice:
PALM Systems are intended for research use only and are not approved
for medical applications in the United States and Canada.
Published by:
Carl Zeiss MicroImaging GmbH
Location Munich
Kistlerhofstr. 75
81379 München/ Germany
Phone: +49 (0) 89 90 9000-800
Fax: +49 (0) 89 90 9000-820
E-mail: [email protected]
Web: www.zeiss.de/microdissection
© Carl Zeiss MicroImaging GmbH, 2008. All rights reserved.
2
Application Guide
PALM Systems
3
1
Introduction
5
2
2.1
2.2
LMPC-Technology (Laser Microdissection and Pressure Catapulting)
The Principle of Laser Cutting
Lifting of the specimen
6
6
6
3
Modular System
7
4
4.1
Applications
Specimen features and preparation techniques
8
8
5
5.1
5.2
5.2.1
5.2.2
5.3
5.3.1
5.3.2
Preparation of specimen
Samples on glass slides
Samples on membrane slides
UV treatment
Poly-L-Lysine treatment
Mounting sections onto slides
Paraffin embedded sections
Frozen sections
9
9
10
10
10
10
10
10
6
Histological staining methods
11
7
7.1
7.2
7.3
7.4
7.5
7.6
Enhancement of the image quality by optimizing the microscope
Microscope
Objectives
The Lamp
Neutral Density Filters
Aperture Diaphragm
Camera-Settings
13
13
13
14
14
14
14
Application Guide
8
8.1
8.2
8.3
8.3.1
8.3.2
8.3.3
Tricks to improve the morphology sight of sections
Glass covered samples
LiquidCover Glass
Uncovered Samples
Diffusor
AdhesiveCaps opaque
Ethanol
15
15
15
15
16
16
16
9
9.1
9.2
9.2.1
9.2.2
9.3
9.4
Specimen isolation and collection
Cutting with the laser
Sample collection
Collection into liquid
Dry collection
Control by ‘CapCheck’ function
Collecting the sample extracts
17
17
17
17
17
18
18
10
Laser functions - an overview
19
11
11.1
11.1.1
11.1.2
11.2
11.2.1
11.2.2
11.2.3
11.2.4
11.3
11.3.1
11.3.2
11.3.3
11.3.4
Protocols
Working with DNA
Preparation of DNA from lifted samples
DNA extraction
Working with RNA
Some special tips for working with RNA
Treatment to remove RNases:
Preparation of RNA from frozen sections
Quality control of RNA
Special Preparations
Cytospins
Blood and tissue smear
Isolation of Live Cells
Chromosome Preparation
21
21
21
21
22
22
22
23
23
23
23
23
24
24
4
Application Guide
PALM Systems
1 Introduction
Understanding cellular mechanisms and intercellular communication requires pure samples
to study key molecules such as DNA, RNA and
proteins. The extraction of homogeneous
specimens derived from a morphologically
defined origin became one of the most
challenging tasks in modern life sciences.
Different approaches have been tested to
retrieve pure samples from various sources
but so far, all of them require mechanical
interaction with the specimen in one way
or the other. However, direct contact, as for
example un-avoidable with needle extraction
or application of adhesive transfer membranes,
always bears the danger of contamination
with neighboring or non-selected material.
Carl Zeiss has developed a non-contact LCMtechnology (Laser Capture Microdissection)
that made contamination-free sampling
possible. Clear defined specimen with
precision at the micrometer level opens up
new perspectives in scientific research.
5
With this Application Guide we support our
customers to find the optimal solution for their
special application. You will find tips and tricks
for preparing samples, find individual settings for
your PALM System and references to information
provided by Carl Zeiss, e.g. manuals, product
information sheets and protocols. There you
will find detailed information for your individual
needs and different downstream procedures.
Additionally we encourage you to contact
our PALM Laboratories with highly qualified
specialists. They will assist you in all aspects to
obtain the best results. Please ask for up to date
protocols, learn on your specific experimental
parameters (RentalLab), send us your samples
or come to our lab.
For questions, remarks or protocol requests
please contact:
PALM Laboratories
E-mail: [email protected]
Service Line: +49 (0) 89 90 9000-900
Application Guide
2 LMPC-Technology (Laser Microdissection and Pressure Catapulting)
The LMPC technology from Carl Zeiss is a
technical innovation of non-contact LCM
techniques (Laser Capture Microdissection).
It combines the cutting function with the
unique technique of lifting the isolated sample
contact-free in to a vessel.
2.1 The Principle of Laser Cutting
What gives LMPC its decisive edge is the ability
to focus light through an objective with a high
numerical aperture. Energy can be bundled to a
focal point of considerably less than 1 μm. This
allows microdissection and micromanipulation
down to the subcellular level. Using a 100x oil
immersion objective single nuclei, filaments,
chromosomes or even chromosomal parts can
precisely be isolated. So far, the smallest spot
size achieved was 600 nm, when chromosome
cutting was performed on a routine metaphase
spread.
2.2 Lifting of the specimen
The key function of the LMPC-technology is the
laser catapult. It was found, that the power of
a focused laser not only allows microdissection
but is sufficient to transport the selected specimen out of the object plane upwards along the
direction of the incident laser light. Thus, sample
recovery can be performed without any contamination of non-selected material. Since this process is extremely fast, no heat can be transferred
to the sample in this short period. Furthermore,
unwanted specimen within larger areas can selectively be eliminated by laser ablation to warrant homogeneity of the subsequently captured
samples. So a contamination of surrounding tissue can be avoided.
This technology is the breakthrough in modern
laser capture methods and allows the entire
non-contact sample preparation without risk of
contamination in a fast and elegant way.
Regardless what source of material is used it
offers pure specimen for analysis.
Numerous research work was done using either
direct lifting or the combination of microdissection and lifting.
An innovative approach is to isolate a single
live cell out of a heterogeneous cell culture.
The viability is not affected and the isolated cell
can be recultivated.
Principle of LMPC
6
Application Guide
PALM Systems
3 Modular System
The PALM Family of products is a collection of
state-of-the-art tools for precise, non-contact
laser based microdissection and micromani-pulation and consists of PALM MicroBeam, PALM
MicroTweezers and as a combination of both,
PALM CombiSystem. It can be supplemented
by different modules that can be adapted to the
individual needs:
PALM RoboStage II that can be equipped with
different target holders for slides, petri-dishes,
capillaries and even for work with serial sections.
For the positioning of different collecting vessels
Carl Zeiss offers:
- PALM CapMover for fast positioning of
collection vessels with highest precision.
- PALM RoboMover for work at higher
throughput for complex applications.
This unique robotic collection device enables
computer driven sampling of lifted
specimen from multiple spots into a variety
of collecting devices.
- The fluorescence attachment expands
the microscope to a fluorescence microscope.
- All functions can be controlled by the
PALM RoboSoftware to facilitate operation
and control of PALM Systems.
PALM MicroBeam
PALM RoboStage II
Before starting to work with your PALM System
you have to become familiar with the different
modules. To learn how to work with the system
please refer to the user and software manuals
provided.
PALM RoboSoftware
7
Application Guide
4 Applications
4.1 Specimen features and preparation
techniques
PALM MicroBeam with its contact-free
LMPC-technology offers a key tool for producing
pure, contaminant-free and hence clearly defined
specimen material and even live cells for analysis
or recultivation. Regardless what source of
material is used there are no limits, either in the
choice of specimens, preparation or staining
techniques.
Research activities in Pathology,
Cytogenetics, Oncology
Sources and preparation:
• Histological specimen from glass slides
or membrane coated slides
• Live cells or cell cultures from a culture dish
• Chromosomes and Cytospins
• Fluorescence specimens
• Cryo preserved or FFPE material
• Stained or unstained
Unlimited subsequent analyses:
•
•
•
•
Analyze DNA, RNA and proteins
Hybridize to Microarrays
Recultivate live cells
Select efficiently from
heterogeneous cell cultures
• Micromanipulate live human,
animal or plant cells
Wide-ranging research activities:
The wide range of source material means high
flexibility. With PALM MicroBeam you can:
• Retrieve whole tissue regions for
oncological studies
• Selectively target individual cells such as
neurons in tissue for cytological research
• Isolate individual particles, fetal cells, sperm
cells or chromosomes
• Identify and retrieve individual cells from
cytospins and smears
PALM Systems offer the key tool for solid scientific
results with highest flexibility for wide ranging research activities. They can be used in all disciplines
of life sciences and can provide purest analytical
material for applications like genetic fingerprinting.
New discoveries in life sciences with greater efficiency in daily practice – PALM Systems will open
up incredible new possibilities from pathology to
forensics, from genomic and proteomic analysis
to stem cell research.
8
Application Guide
PALM Systems
5 Preparation of specimen
Workflow
When working with low magnifying objectives,
including 20x, 40x and 63x long distance objectives, regular 1 mm thick glass slides can be
used. Due to the short working distance of the
63x (oil) and 100x (oil) magnifying objectives
0.17 mm thin cover glass slides have to be used.
5.1 Samples on Glass Slides
With PALM MicroBeam almost every kind of
biological material can be microdissected and
lifted directly from standard glass slides, with no
intermediate steps. Even archival pathological
sections can be used after removing the cover
slip and the mounting medium.
To facilitate easy lifting additional adhesive substances or “Superfrost + charged slides” should
only be applied when absolutely necessary for
the adhesion of special material (e.g. brain sections). For these applications higher laser energy
for lifting is needed.
5.2 Samples on MembraneSlides
MembraneSlides are glass slides covered with a
membrane on one side. The membrane is easily
cut together with the sample and acts like a
stabilizing backbone during lifting.
9
Therefore even large areas are lifted by a single
laser pulse without affecting the morphological
integrity. This feature is especially important for
isolation of single cells, chromosomes as well as
live cells or small organisms.
Carl Zeiss offers 1 mm and 0.17 mm MembraneSlides. The PEN-membrane (Polyethylene
naphthalate) is highly absorptive in the UV-A
range, which facilitates laser cutting. It can be
used for all routine applications.
The PET (Polyethylene terephtalate) covered
slides are less sensitive to the cutting laser,
that means a higher laser energy is required
for cutting. Thus, it is possible to perform laser
ablation of unwanted specimen with moderate
laser energy without immediate cutting the
membrane. After “cleaning” the surrounding
a higher laser energy is required to circumcise
and lift the selected specimen. We suggest to
use PET-membrane covered slides for weakly
responding fluorescence samples.
Ask also for our nuclease-free MembraneSlides
PEN NF. The FrameSlides PET are optimized for
immuno-histochemical staining that require
microwave treatment. Tissue samples, single
cells or chromosomes can be applied on a PETmembrane, which is attached to a metal frame.
Application Guide
In fluorescence applications even weak signals
can be detected due to low signal to noise ratio.
5.2.1 UV treatment
To overcome the hydrophobic nature of the
membrane it is advisable to irradiate with UV
light at 254 nm for 30 minutes. The membrane
gets more hydrophilic, therefore the sections
(paraffin and cyrosections) will obtain a better
adherence. Positive side effects are sterilization
and to some extent destruction of potentially
contaminating nucleic acids.
5.2.2 Poly-L-Lysine treatment
Additional coating with poly-L-Lysine (0.1% w/v)
will be only necessary for special materials and
should be performed by distributing a drop of
the solution on the membrane. Let it air dry at
room temperature for 30 minutes. Avoid any
leakage underneath the membrane, as this might
result in impairment of Laser Pressure Catapulting.
5.3 Mounting sections onto slides
Sections are mounted onto MembraneSlides the
same way as routinely done with glass slides.
For cutting and lifting a coverslip or standard
mounting medium must not be applied. Already
embedded and covered tissue sections can still
be used for laser micromanipulation, after uncovering and removing of the mounting material.
5.3.1 Paraffin embedded sections
Mount the sections onto the slide as routinely
done. Afterwards let dry at 37 °C up to 56 °C
overnight in a drying oven.
Deparaffinization
Paraffin will reduce the efficiency of laser cutting;
sometimes it will make it impossible to cut
and lift. If working with unstained sections it is
therefore very important not to forget removing
the paraffin before laser cutting and laser pressure
catapulting. If applying staining procedures
deparaffinization is routinely included in any
protocols.
Minimal Procedure:
- Xylene 2 times for 2 minutes
- Ethanol 100% 1 minute
- Ethanol 96% 1 minute
- Ethanol 70% 1 minute
- rinse with water
With the 1 mm MembraneSlides it is possible to extend the time of Xylene treatment up
to 2x15 minutes. Also acetone or isopropanol
can be applied.
ATTENTION: The thin (0.17 mm) MembraneSlides are not as resistant against organic
solvents and should be handled according to the
minimal Procedure (see above).
5.3.2 Frozen sections
Fixation
After mounting the sections there are many possibilities to fix the material. Prepare your sections
onto the slide as you do routinely. Let shortly air
dry. Dehydrate in 70% ice-cold ethanol for 2-3
minutes (acetone, methanol or other are possible
as well depending on the following applications).
Subsequently let air dry for some minutes. The
slides can now be used at once (even if they are still
somewhat wet), stained or deep-frozen at -80 °C.
Removing the freeze supporting substance
If OCT or another tissue freezing medium is
used it is important to get rid of the medium on
the slide before Laser Microdissection, because
these media will interfere with laser efficiency.
Removing of the medium is very easily done by
gently washing the slide for about 1 minute in
water. If the sections are stained, the supporting
substance is removed “automatically” in aqueous
staining solutions.Frozen sections should always
be allowed to dry for 5 up to 30 minutes at room
temperature before use.
10
Application Guide
PALM Systems
6 Histological staining methods
For constant image recognition and LMPC
results, one has to start with a standardized
procedure at the very beginning. The first
step is the thickness and quality of the cutting
at the microtome, which must be maintained
at high quality for a good physical sample
basis concerning shape and consistence.
All subsequent treatment of the sample,
e.g., the fixation process up to the staining
procedure is also subject of standardization.
Staining as the issue of “bringing color to
the sample” is a crucial step in visualizing
minute details of the sample to recognize
and extract. Therefore it is recommended to
follow a standard staining procedure, either
a protocol issued from Carl Zeiss MicroImaging
GmbH or an own, in-house procedure.
The reason for the need of a standardized
protocol is besides the possibility of insufficient
staining or overstaining the reproducibility
of the staining procedure to obtain constant
results.
To our experience almost any standard histological staining (like H&E, Methyl Green, etc.)
can be used. In the following you will find
some common staining methods that are
tested for LMPC.
Tissue stained with HE
• Hematoxylin/ Eosin (H&E, HE)
HE-staining is used routinely in most histological
laboratories and does not interfere with DNA or
RNA preparation. The nuclei are stained blue, the
cytoplasm pink/ red.
Procedure:
- directly from distilled water
- 1-2 minutes Mayer’s Hematoxylin solution
(e.g. SIGMA, #MHS-32)
- 1 minute rinsing in tap water or blueing solution
- 10 seconds up to 3 minutes Eosin Y
(e.g. SIGMA, #HT110-2-32)
- quick increasing ethanol series
- let air-dry at room temperature
• Cresyl Violet
Because of the easy and short protocol Carl Zeiss
recommends the Cresyl Violet staining for DNA,
although it was originally developed for RNA.
Procedure:
- dip slide for 30 seconds in 1% cresyl
violet acetate solution (*)
- remove excess stain on absorbent surface
- dip into 70% EtOH
- dip into 100% EtOH
- air dry shortly (1-2 minutes)
11
Application Guide
Slides can be used immediately or stored at
-80 °C before LMPC.
To avoid excess condensation of moisture
during thawing, the slides should be frozen
and rethawed in a tightly sealed container
(e.g., 50 ml Falcon-tube).
(*) Dissolve solid cresyl violet acetate
(e.g., Aldrich cat #86,098-0,or similar)
at a concentration of 1% (w/v)
in 50% EtOH at room temperature with
agitation/ stirring for several hours to overnight.
• Nuclear Fast Red
The nuclei are stained dark red,
the cytoplasm lighter red.
Procedure:
- directly from distilled water
- 5 to 10 minutes Nuclear Fast
Red solution (DAKO, #S1963)
- rinse in distilled water
- let air-dry at room temperature
• Methylene Blue
The nuclei are stained dark blue.
Not recommended for RNA extraction.
Procedure:
- directly from distilled water
- 5-10 minutes Methylene Blue
solution (0.05% in water; SIGMA, #31911-2)
- rinse in distilled water
- let air-dry at room temperature
• Toluidine Blue
The nuclei are stained dark blue,
cytoplasm lighter blue.
Procedure:
- directly from distilled water
- 30 seconds Toluidine Blue solution
(0.1% in water; SIGMA, #T-0394)
- rinse in distilled water
- quick increasing ethanol series
- let air-dry at room temperature
• Methyl Green
The nuclei are stained dark green,
the cytoplasm light green.
Procedure:
- directly from distilled water
- 5 minutes Methyl Green solution
(DAKO, #S1962)
- rinse in distilled water
- let air-dry at room temperature
12
Application Guide
PALM Systems
7 Enhancement of the image quality by optimizing the microscope
PALM Systems are equipped with an inverse Zeiss
microscope. This high quality microscope can be
used as a normal research microscope with the
facility to integrate an image processing software
(e.g. AxioVision).
For using the LMPC technology you have to consider to define the microscope settings accurately. Working with uncovered specimen which is
mandatory for microdissection and harvesting
of samples is a challenge for the optical system
to obtain an optimal image for identification of
details and small objects. There are various possibilities to enhance the image quality that should
be adjusted prior to working with the system.
7.1 Microscope
Our systems are assembled and preset by our
technical service. Nevertheless to tap the full
potential condenser, aperture diaphragm and
field diaphragm should be adapted due to the
Köhler rules before each operation.
For instructions in terms of Köhler rules read the
instruction manual of the microscope.
The long working distance enables the examination through vessels or the inspection in the cap
after lifting of the sample. Be aware that the
objectives have to be adjusted with the help of
the correction ring to the thickness of the used
slide (1 mm for standard slides; 0.17 mm for cover
glass slides and DuplexDishes).
If oil immersion objectives are used, the oil is
mandatory. The support for the specimen has
to be applicable for the low penetration depth
of the optical focus, therefore you must use
membranes as support or visualize through a
thin glass slide, e.g. a 0.17 mm cover glass slide.
Notice: Only use the objectives that are authorized by Carl Zeiss MicroImaging GmbH for laser
operations. Do not change or modify any objectives or other hardware or software components.
Carl Zeiss is not responsible for any damage
resulting from disobeying these points.
7.2 Objectives
To be used for microdissection the objectives
have to sufficiently transmit UV light to ensure
the cutting function of the system. For most
applications we recommend long distance LDPlan-Neofluar objectives. This objective group is
of highest quality and versatility and appropriate
for various staining methods, fluorescence,
bright-field, phase-contrast, DIC and others.
The objectives are monochromatic and chromatic
entirely corrected for the focus level. Another
benefit of this system is the high numerical
aperture.
13
Zeiss Objectives
Application Guide
7.3 The Lamp
7.5 Aperture Diaphragm
Most important to obtain comprehensive and
objective final results and indispensable for
correct identification with automatic image
processing is the color temperature of the
illumination light source. The color temperature
corresponds to the current through the lamp
coil, which in turn is represented by the voltage
read on the front display of the condenser arm
of the microscope. At approximately 10.3 V the
system indicates a color temperature of 3200 °K:
this should be considered the standard for image
visualization. It should become a habit to use
the system only at 10.3 V and to decrease the
light flux by application of neutral density filters
(optional, see 7.4) and camera shutter times only.
The aperture diaphragm in the illumination path
allows to control the depth of field and is therefore responsible for an excessive “crisp” image or
a flaw one, in both cases if set incorrectly.
However, the aperture diaphragm must never
be used as a diaphragm for attenuation of light,
because of the influences it exerts on the illumination behavior of the system. Therefore it is
a good start to keep the aperture diaphragm at
least 1/2 – 2/3 open (depending on the applied
objective) and set the light intensity coarsely by
applying neutral density filters.
7.4 Neutral Density Filters
The main feature of neutral density filters is an
attenuation of the light without change in the
light temperature and without any diffusion or
stray effects.
A good combination may include filters transmitting 3% (0,03) and 12% (0,12) in the inserts
in the condenser head. However, the combination of filters accords to your specific sample
types and is therefore to be evaluated separately.
7.6 Cameras
There are different camera ports available to
integrate several digital Zeiss AxioCam camera
out of the MR series or a ICc 1 camera (see user
manual for further informations).
Contact at: [email protected] for detailed
information.
14
Application Guide
PALM Systems
8 Tricks to improve the morphology sight of sections
Next after a correct set illumination path is to
prepare the sample itself. The sample is either
covered by a glass, LiquidCover Glass or
uncovered for LMPC.
8.1 Glass covered samples
8.2 LiquidCover Glass
The best image quality can be achieved with
embedded and glass covered samples. The light
path is exactly guided through the sample and the
image to eye or camera is a plain density image
representing the colors in their actual density
without excess stray. Glass covered samples can´t
be used for non-contact LCM. The only use of a
glass covered sample during the LMPC process
is to employ one sample for reference purpose
within the serial section feature.
As for LMPC specimen embedding and glass
covering cannot be applied, this can result in
a poorly visible morphology. LiquidCover Glass
completely embeds the tissue and smoothens
the rough tissue surface, resulting in enhanced
morphology. Additionally the tissue sections
are protected against environmental influences
e.g. moisture and associated RNAse activity.
Cutting and lifting will not be affected.
LiquidCover Glass
8.3 Uncovered Samples
This is the type of sample that is best for extraction
of tissue - the genuine application the MicroBeam
instruments are designed for. Unfortunately stray
and diffusion on uncovered samples distort the
light path. So colors may be distorted and details
may become very difficult to detect.
15
Application Guide
8.3.1 Diffusor
8.3.2 AdhesiveCap opaque
Adhesive Caps opaque
PALM Diffusor
A diffuse illumination improves the visualization
of the sample and can be performed with
the PALM Diffusor. The diffused light reduces
the contrast, so that interfering shades are
eliminated. For work with image processing
software usage of the Diffusor is recommended.
The collection devices for PALM RoboMover and
CapMover are equipped with diffusors, except
the collectors for culture dishes.
Alternative to the Diffusor, AdhesiveCap opaque
(200 or 500 μl) or AdhesiveStrip 8C opaque (200
μl) can be used due to the similar effect of the
opaque filling. These optimized caps are available
from Carl Zeiss MicroImaging (see 9.2.2).
8.3.3 Ethanol
For a fast monitoring of your section you can use
Ethanol to search for an interesting area on your
slide. Pipet about 5 μl of ethanol onto this area.
You may use 70% or 100% ethanol. When using
absolute ethanol a little destaining of the section
may happen, but the drying is much quicker.
The depiction of the details is improved
immediately after contact with ethanol.
Now it is possible to select the cells. After the
evaporation of ethanol LCM can be performed.
16
Application Guide
PALM Systems
9 Specimen isolation and collection
9.1 Cutting with the laser
9.2.1 Collection into liquid
Depending on the specimen the laser settings
have to be optimized for energy and focus as
well as the laser speed. The “factory defaults”
may serve as suitable starting points for your
experiments, or you can save your individual
settings, see your RoboSoftware Manual. For
cutting around the specimen the laser energy has
to be increased until a small cutting line is performed. With the same laser energy the cutting
line will be broader within the plain membrane
but thinner within the specimen.
Using standard caps or tubes or working with
the CapturePlate 96 enables you to choose a
filling medium according to the requirements
of the applied protocol (e.g. mineral oil or lysis
buffer or buffer medium).
9.2 Sample collection
Depending on the collection vessel you will have
a single cap, AdhesiveStrip 8C or CapturePlate
96 for collection. You will have to position
the capturing vessel motorized and software
controlled into the line of laser action. We
recommend our tailor-made consumables for
comfortable research. For details refer to the
product information.
Please also have a look into the PALM MicroBeam
user manual how to work with the collection
devices.
Filling of the collection vessel:
Pipette 3 to 15 μl of buffer (see 11.1.1) into the
cap. The isolated cells or cell areas will stick onto
the wet inner surface of the cap.
9.2.2 Dry collection
For liquid free sampling we recommend
AdhesiveCap or AdhesiveStrip 8C. The intention
is to allow LMPC without applying any capturing
liquid into the caps. They offer quick relocation
of the lifted samples in the cap due to instant immobilization. Danger of evaporation and crystal
formation during extended specimen harvesting
can be eliminated. Liquid free sampling is recommended especially for working with RNA.
AdhesiveCap opaque additionally offer an
enhanced specimen visualization on stained
sections.
If you work in a higher throughput mode it will
be advisable to use the optimized AdhesiveStrip
8C. It is developed for liquid-free sampling
without time consuming manual changing of the
caps. Up to 12 AdhesiveStrip 8C can be mounted
in one collector. More information on request.
If selected ablation of unwanted material is
carried out prior to the relevant LMPC procedure,
we suggest using a spare cap to avoid crosscontamination.
CapturePlate 96
17
Application Guide
Working with glass slides
LMPC from glass slides usually results in small
tissue fragments, which will tightly adhere to the
adhesive filling until lysis. The lifted fragments
remain visible in the cap until the extraction
procedure is performed.
time the lysate is spun down in a benchtop
centrifuge (5 minutes, 13400 rcf) and samples
can then be stored for later use.
For details refer to PALM handling protocols.
Working with MembraneSlides
LMPC from membrane-mounted tissue sections
usually results in morphologically preserved tissue within the cap.
Working with culture dishes
The cutting and lifting procedure is the same
for working with dishes. Basically you will use
dishes for isolation and manipulation of live cells.
Carl Zeiss MicroImaging has designed special
accessories and consumables for isolation and
recultivation of live cells, e.g. DuplexDish 35 and
50; MembraneRing 35 and 50 and the LiveCell
Collector for working in a totally enclosed
surrounding. Ask Carl Zeiss MicroImaging for
detailed information.
AdhesiveStrip 8C
9.3 Control by ‘CapCheck’ function
To control the efficiency of lifting it is possible
to look into the collection device (e.g. caps,
CapturePlate 96) with the 5x, 10x, LD20X, LD40x
and LD63x objectives. Controlled by the software
PALM RoboStage is moved automatically in the
‘CapCheck’ position and the isolated cells or
tissue areas can be focused inside the cap
MembraneSlides
9.4 Collecting the sample extracts
After microdissection and lifting, depending
on the desired volume, digestion/lysis is either
performed “upside down” in the cap or lysis
buffer is added to the tube and after closure
mixed by inversion. After the required incubation
LiveCell Collector in a DuplexDish 50
18
Application Guide
PALM Systems
10 Laser functions - an overview
Depending on the used tissue, preparation and downstream analysis, there are different possibilities to
perform non-contact LCM. (Refer to PALM RoboSoftware manual)
Cut
Cutting along the predefined line. The laser cuts
precisely along the predefined line effecting a
clear-cut gap between the selected and nonselected material. Thus pure sample preparation
is possible without risk of contamination.
JointCut
A cutting function where the marked line leaves
a small connecting bridge. The entire area can be
lifted later by a single laser pulse.
LPC
Laser Pressure Catapulting:
Only LPC dot-marked specimens are lifted.
The catapult point can be set manually, to
individually catapult samples out of tissues after
laser cutting.
This function is of special benefit for cytocentrifuged specimen and for isolated cells or single
particles like e.g. sperm cells.
LineAutoLPC
With this new laser function samples on
glass slides can be harvested along a defined
line. It can be used for structures that are
extended like arms of dendrites. LPC-points
can be set with defined intervals and are
adaptive to the line and freehand function.
19
Application Guide
RoboLPC
Cutting and lifting are proceeded automatically! Only possible with membrane-mounted
specimen. The marked line is closed leaving a
small connecting bridge from where the entire
area is immediately lifted with one single laser
pulse. The size of the connecting bridge can be
preselected in the Software.
CenterRoboLPC
Cutting of a geometric area with automated
setting of a lifting point in the center.
Close&Cut
The enhanced cut function will close any
incompletely drawn figure by connecting the end
point with the start point by a straight line.
AutoLPC
The tissue of the selected area is isolated by multiple LPC dots and only possible with specimen
mounted on glass slides. The cellular material is
captured in fragments. The distance of AutoLPCdots can be preselected in the software.
Close&Cut and AutoLPC
This function combines ‘Close&Cut’ with ‘AutoLPC’.
Prior to AutoLPC the selected area is separated
by cutting a closed line.
20
Application Guide
PALM Systems
11 Protocols
The following protocols are only standard procedures. For further questions and up to date protocols benefit
from our years of experience – from laser system related assistance to scientific support and laboratory work.
11.1 Working with DNA
11.1.1 Preparation of DNA from
lifted samples
For best results we at Carl Zeiss recommend
to use frozen sections that are lifted into
AdhesiveCaps.
For DNA-preparation from paraffin sections we
usually use a Proteinase K containing Catapult
Buffer. This step is mostly not necessary for
frozen sections. Then you can proceed directly to
normal DNA extraction procedures (see below).
Catapult Buffer: (20 mM Tris, 0.1 mM EDTA,
0.5% Igepal, 1% Proteinase K fresh from Stock)
Proteinase K digestion procedures
Digest for 2-18 hours at 55 °C followed by a
heating step at 90 °C for 10 min to inactivate
Proteinase K. At best use a thermal cycler
with a heating lid for the standard digestion.
Recommendable for AutoLPC and small samples:
Lift directly into 20 μl Catapult Buffer containing
Proteinase K. Digest upside down in the cap for
2-18 hours at 55 °C
followed by a heating step at 90 °C for 10 min
to inactivate Proteinase K.
If not proceeding immediately, store the samples
in the refrigerator at 4 °C.
Formula to prepare 10 ml:
• 0.05 M EDTA pH 8.0
20 μl
• 1 M Tris pH 8.0
200 μl
• Igepal CA-630 (SIGMA #I-3021)
50 μl
• (Proteinase K Stock: 20 mg/ml)
(100 μl)
fill up to 10 ml
• mol. biol. grade H2O
Proteinase K Solution 20 mg/ml
(Qiagen GmbH, Hilden, Germany; Catalog #19131)
Always prepare a fresh mixture of Catapult
Buffer and Proteinase K!
Notice: The time necessary for complete
digestion depends on the kind and on the
number of lifted cells.
11.1.2 DNA extraction
After the Proteinase K digest (or directly with
frozen tissue without fixation) any suitable
DNA extraction procedure can be performed
e.g., Qiagen QiaAmp DNA micro kit (Qiagen,
#56304), Charge Switch gDNA, Microtissue Kit
(#CS 11203), Invotrogen, Germany), Phenol/
Chloroform extraction etc.
Even use of the crude lysate directly in PCR may
be possible with small samples.
Do not forget to inactivate the proteinase K!
21
Application Guide
11.2 Working with RNA
11.2.2 Treatment to remove RNases:
11.2.1 Some special tips for working
with RNA
Slides:
MembraneSlides are shipped without any
pretreatment.
Working with RNA is more demanding than working with DNA, because of the chemical instability
of the RNA and the ubiquitous presence of RNases.
For best RNA quality we use frozen sections on
MembraneSlides and AdhesiveCaps as collection
device.
• It makes sense to designate a special area
for RNA work only.
• Clean benches with 100% ethanol or a special
cleaning solution e.g., RNase ZAP
(Ambion, #9780) or similar.
• Always wear gloves. After putting on gloves, do not
touch surfaces or equipment to avoid reintroduction
of RNases to decontaminated material.
• Use sterile, disposable plastic ware.
• Use filtered pipettes tips.
• Glassware should be baked at 180 °C for 4 hours.
(RNases can maintain activity even after prolonged
boiling or autoclaving!)
• Purchase reagents that are RNase-free.
• All solutions should be prepared with
DEPC-(diethylpyrocarbonate) treated H2O.
• Treat all used material with DEPC.
• For best results use either fresh samples or samples
that have been quickly frozen in liquid nitrogen or
at -80 °C. (This procedure minimizes degradation of
RNA by limiting the activity of endogenous RNases.)
All required reagents should be kept on ice.
• Store RNA, aliquoted in ethanol or RNA buffer,
at -80 °C. Most RNA is relatively stable at this
temperature. Store prepared slides also at -80 °C.
• RNA is not stable at elevated temperatures, there
fore avoid high temperatures (>65 °C) since these
affect the integrity of RNA.
• To ensure RNase-free MembraneSlides, heat
MembraneSlides at 180°C for 4 hours to
completely inactivate RNases.
• An alternative for decontamination of slides is the
treatment with RNase ZAP (AMBION, #9780).
First dip the slides for a few seconds into pure RNase
ZAP, followed by two separate washings in Diethyl
pyrocarbonate (DEPC)- treated distilled water and
drying at 37 °C for 30 minutes up to 2 hours.
• MembraneSlides NF (nuclease free) are certified to be
free of DNase, RNase and human DNA. Using these
slide treatments to remove nucleases is not necessary.
• Treatments of glass slides to remove RNases are
identic with the procedure for MembraneSlides.
Tubes:
In case you don’t like to work with tubes from
Zeiss use commercially available RNase free plasticware (e.g. ABgene #AB-0350; 0.5 ml tubes).
If only not RNase free tubes are available use
the following procedure to remove RNases:
Add 0.1 ml DEPC to 100 ml of double distilled
water to get a 0.1% DEPC solution
(DEPC: e.g. ROTH #K028.1)
1. Stir for 5-6 h at room temperature to
dissolve the DEPC
2. Soak the reaction tubes into the DEPC
solution, take care that the tubes are completely covered with liquid (not blistered!)
and incubate overnight at room temperature
3. Autoclave the tubes together with the solution
for 20 minutes at 121°C to inactivate the DEPC
4. Discard the liquid carefully and thoroughly.
Dry the tubes at 50°C-80°C.
5. Use the tubes as usual
Note: DEPC is toxic and should be used under a hood!!!
22
Application Guide
PALM Systems
11.2.3 Preparation of RNA from frozen
sections
23
11.3 Special Preparations
11.3.1 Cytospins
For capturing microdissected samples from
frozen sections we recommended AdhesiveCaps.
The RNeasy® Micro Kit (QIAGEN, #74004) in
our hands results in a good yield of RNA. But
in contrast to most other laser microdissection
companies you can go on straight forward
with RNA extraction by using your extraction
procedure of choice.
After LMPC adjust the sample volume to 350
μl with lysis buffer (QIAGEN, RLT buffer) and
incubate upside down for 30 minutes.
Vortex the digestion mix thoroughly. Then the
lysate is spun down in a bench top centrifuge (5
minutes, 13400 rcf); and samples can then be
stored for later use at -80°C.
NOTE: If using paraffin embedded (FFPE)
sections for lifting, please use a buffer containing
Proteinase K like mentioned in the DNA protocol
(see 11.1.1). For tips working with FFPE sections
ask for the special PALM RNA protocol.
Cytospins can be prepared on glass slides or
on membrane slides. After centrifugation with
a cytocentrifuge let the cells air-dry over night.
Then fix for 5 minutes in 100% methanol. Allow
the cytospins to dry at room temperature before
staining.
11.2.4 Quality control of RNA
11.3.2 Blood and tissue smear
It is difficult to estimate the amount of RNA that
is to be expected after extraction since many
factors like species, cell/ tissue-type, degradation,
fixation, staining, fragmentation, extraction
procedure and others will influence the outcome.
The most common method used for assessing
the integrity of total RNA is to run the RNA
sample on an agarose gel (refer to PALM Protocol,
RNA Handling).
Distribute a drop of (peripheral) blood or material of a swab smear over the slide. Let smears
shortly air-dry and fix them for 2 up to 5 minutes
in 70% ethanol.
Cytospin
Application Guide
11.3.3 Isolation of Live Cells
Live cells under PlasDIC view
LMPC allows non contact collection and
recultivation of isolated living specimen without
affection of cell viability. Facilitating consumables
like DuplexDish and MembraneRing and the accessories LiveCell Collector and collecting devices
enables the absolute contamination free manipulation.Ask for a detailed list of our Zeiss products
and protocols for working with live cells.
11.3.4 Chromosome Preparation
Chromosomes
Preparation of chromosomes is delicate and
demands know-how. Please ask for our PALM
protocol for chromosomes and metaphases.
For questions, remarks or protocol requests
please contact:
PALM Laboratories
E-mail: [email protected]
Service Line: +49 (0) 89 90 9000-900
24