1
INSTALLATION INSTRUCTIONS OVERVIEW
Your vehicle has an onboard computer that controls the engine and transmission. The
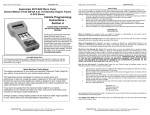
JET programmer reprograms your factory computer according to your specifications
with JET Performance Products Tuning.
To reprogram your vehicle’s computer, simply plug the programmer cable into the
vehicle’s diagnostic connector, located under the dash panel on the driver’s side. Set
the parking brake. Next, turn the ignition key to RUN but do not start the engine. It will
then identify your vehicle and ask a series of questions on its LCD screen.
When completed, turn the key to OFF and disconnect the cable from the diagnostic
connector. Now you’re “Engineered for Power”.
JET Performance Product’s tuning can be stored in only one vehicle. When you install
JET Performance Product’s tuning program into your vehicle, the programmer reads
and stores your vehicle’s factory programming. You can use the Programmer to restore
your stock programming if it should ever become necessary.
You may also reconnect your programmer at any time to modify the programming.
Simply reconnect the JET Performance programmer, answer the necessary questions,
and program your vehicle.
PROGRAMMING INSTRUCTIONS
1. Locate the Data Link Connector (DLC) under the driver’s side of the dash
panel.
2. Plug the Programmer cable into the DLC. Make sure the cable is plugged in
completely to ensure a good connection.
3. Set the parking brake to turn off the DRLs (DayLight Running Lamps)
IMPORTANT:
•
DO NOT LEAVE THE VEHICLE WHILE PROGRAMMING IS IN
PROGRESS.
•
MAKE SURE THE VEHICLE BATTERY IS FULLY CHARGED
BEFORE PROGRAMMING.
•
IF THE VEHICLE HAS BEEN PROGRAMMED USING ANOTHER
MANUFACTURERS PROGRAMMER, YOU MUST RETURN THE
VEHICLE TO STOCK PROGRAMMING BEFORE USING THE JET
PROGRAMMER.
•
DO NOT DISTURB OR UNPLUG THE CABLE UNTIL THE
PROGRAMMER INSTRUCTS YOU TO DO SO.
•
DO NOT OPERATE ELECTRICAL ACCESSORIES (RADIO,
WINDOWS, WIPERS, ETC.) WHILE PROGRAMMING.
1