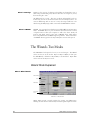
1
IPIX Wizard 2.0 Standard Version Software Manual Limited Warranty Interactive Pictures Corporation (the “Company”) warranty obligations are limited to the terms set forth below. Warranty Service will not be provided without dated proof of purchase. Please return the warranty registration card within 30 days of purchase. The Company makes no warranties regarding the digital camera enclosed with this product. You must look directly to the digital camera manufacturer for any warranties it may provide regarding the camera. The Company warrants all other Hardware components included herein against defects in materials and workmanship under normal use for a period of one (1) year following purchase. This warranty does not apply in case of misuse including but not limited to dropping, contamination by sand, or modifications to Hardware. In case of defect, the Company will at its option, repair or replace the defective product with a new or reconditioned product at no charge to you, provided you return the product during the warranty period with transportation charges prepaid, to the Company. For product returned for service, please attach your name, address, telephone number, and a copy of the bill of sale bearing the appropriate Company serial numbers as proof of date of original purchase, as well as a description of the problem for which service is requested. Prior to returning the product, you must obtain from the Company a Return Merchandise Authorization Number (RMA#). You are responsible for packaging the product to be returned, and should take care that the product is packaged in its original packaging. If the product is covered under the Limited Warranty, and if the product was properly shipped to the Company, we will pay the return shipping charges. The Company warrants to you that the Software will perform substantially in accordance with the Documentation for the one (1) year period following purchase. If the Software does not perform substantially in accordance with the Documentation, the entire and exclusive liability and remedy shall be limited to either, at the Company’s option, the replacement of the Software or the refund of the license fee you paid for the Software. EXCEPT AS PROVIDED SPECIFICALLY ABOVE, THE COMPANY MAKES NO OTHER WARRANTIES, INCLUDING, WITHOUT LIMITATION, THE IMPLIED WARRANTIES OF MERCHANTABILITY AND FITNESS FOR A PARTICULAR PURPOSE. Limitation of Liability IN NO EVENT WILL THE COMPANY, OR ITS SUPPLIERS, BE LIABLE TO YOU FOR ANY CONSEQUENTIAL, INCIDENTAL OR SPECIAL DAMAGES, INCLUDING LOST PROFITS OR LOST SAVINGS, OR LOST DATA. Some states or jurisdictions do not allow the exclusion or limitation of incidental, consequential or special damages, so the above limitations may not apply to you. Interactive Pictures Corporation 1009 Commerce Park Drive Oak Ridge, TN 37830 Phone: 423-482-3000 Customer Support: 888-909-4749 Email: [email protected] Website: http://www.ipix.com Notice of Copyright Copyright 1998 Interactive Pictures Corporation. All rights reserved. IPIX, IPIX Wizard, IPIX Builder, IPIX WebCam, IPIX I-Linker and Step Into the Picture are all registered trademarks of Interactive Pictures Corporation. IPIX is a registered trademark of Interactive Pictures Corp. IPIX are a means of viewing a totally immersive, unbounded image created from two fisheye photographs. Based on U.S. Patents 5,185,667 and 5,384,588 (others pending). IPIX images are revolutionizing the way we see the world. IPIX are distributed by Interactive Pictures Corp. of Oak Ridge, TN ([email protected], http://www.ipix.com, 423-482-3000, fax 423-482-5447). Contact Interactive Pictures Corporation to learn how you can take advantage of IPIX for CD-ROMs, Web pages, or Virtual Reality applications. Nikon is a registered trademark of Nikon Corporation, Sinagawa-ku, Tokyo 140-0015, Japan. This software is based in part on the work of the Independent JPEG Group. Portions of the imaging technology of this product are copyrighted by Accusoft Corporation. Other product and brand names may be trademarks or registered trademarks of their respective owners. Table of Contents 1 Product Overview IPIX Technology ............................1 The IPIX Wizard ............................2 .....................................................2 What’s new in Wizard 2.0 SV?................3 Technical Support ..........................4 2 IPIX Photography Taking the First Steps .....................5 Basic Photography Tips....................6 Taking Your Pictures............................7 3 Software Installation IPIX Wizard Installation ................11 On-line Documentation.......................17 Adobe Acrobat Reader........................18 4 Camera Calibration Camera Calibration and Profiles........19 The Calibration Screen Explained...........19 Starting the Calibration Process ............20 5 Wizard Functions Working with the Wizard ................23 The Wizard’s Two Modes ................24 Wizard Mode Explained.......................24 Expert Mode Explained .......................25 The Preferences Screen .....................27 Profiles ..........................................28 6 Building Images Wizard Walk-Through ...................29 Open Hemispheres............................29 IPIX Preview Types ...........................32 Multimedia Customization ...................34 Customizing Your IPIX Image ..............35 Selecting Camera Configuration ............38 Seaming the IPIX Image.....................39 Previewing the New IPIX Image .........39 Saving Your IPIX Image .....................40 IPIX Images and Keys ...................42 7 Web Pages Setting Up Your Web Site ..............45 IPIX File Location on the Server ............46 Sample Refreshing Page ............................46 Posting Java IPIX ..............................47 Posting Non-Java IPIX........................49 IPIX Images and Frames ....................50 MIME Type Introduction .................51 IPIX MIME Types on Web Servers..........51 8 Wizard Help Trouble-Shooting the Wizard ...........53 Viewing IPIX Images .........................53 Image Alignment..............................53 Tripod Cap Problems..........................55 General Error Messages......................56 Camera Problems .............................56 Frequently Asked Questions ............56 9 Glossary Commonly Used Terms..................61 1 Product Overview IPIX Technology A n IPIX image is an interactive, spherical image with a complete field of view, from earth to sky, floor to ceiling, horizon to horizon. Never before has a technology so thoroughly captured the way we see the world with our own eyes. An IPIX image is created from two opposing photographs captured by a fisheye lens. Interactive Pictures Corporation’s patented technology remaps the images, seaming them into an immersive whole. IPIX images can then be linked together, linked to traditional photographs and renderings, enhanced with audio or other file types, or incorporated into other applications. IPIX images can be used in a variety of ways. IPIX images naturally apply to virtual reality world creation, computer-based training, real estate, and marketing. IPIX Wizard 2.0 SV User Manual 1 Using the IPIX Wizard, the IPIX Builder, and other software products developed by Interactive Pictures, IPIX images can be: • Posted on a World Wide Web site for viewing by industry-standard web browsers, or with an embedded IPIX Java viewer. • Emailed for remote viewing by a local IPIX viewer, providing an easy and convenient way to share IPIX images for business applications, or just for fun. • Imported into Adobe Photoshop, using the IPIX Photoshop plugin, for enhancement and touch-up by those looking to create the highest quality IPIX images. • Embedded into a Microsoft PowerPoint presentation or other Microsoft Windows application using the IPIX ActiveX viewer, allowing for IPIX viewing in a wide range of off-the-shelf application programs. • Opened in MacroMedia Director and Authorware using the IPIX Xtra plugin, allowing for the creation of compelling, high quality professional presentations. • Viewed from any Microsoft Visual Basic, Visual C, or Visual C++ application program by using the IPIX Software Development Kit (SDK) package. No matter what your application needs may be, Interactive Pictures Corporation provides you with the solutions you need to “Step Inside The Picture.” For more information on these and other IPIX products, visit the Interactive Pictures Corporation’s website, http://www.ipix.com, or call toll free (888) 909-4749. The IPIX Wizard The Wizard creates interactive, spherical images quickly from a digital camera by joining, or “seaming,” two 180° by 180° opposing photographs, or “hemispheres.” The IPIX Wizard automatically remaps the images, seaming them into an immersive whole (sphere), capturing the entire environment, floor to ceiling, horizon to horizon, 360° by 360°. Through an easy-to-use interface, the IPIX Wizard allows you to: • Seam fisheye hemisphere images based created from fisheye images taken from any of three digital camera types, • Color match fisheye hemisphere images to adjust for different exposures, • Blend the seam to create a single image out of two halves, • Save the IPIX image in multiple sizes and resolutions, • Configure an initial IPIX image view, embed sound files for playback during viewing, and • Brand the IPIX image with your own logo through a custom tripod cap. 2 IPIX Wizard 2.0 SV User Manual What’s new in Wizard 2.0 SV? Multiple Save-As Option The Multiple Save-As option allows you to: • Save IPIX images as high resolution, low resolution and Java file formats for the cost of a single IPIX image key. • Experience the IPIX image solution without worrying about extra cost due to unexpected application needs. Auto Alignment The Auto Alignment tool aligns image hemispheres to create a nearly invisible seam by: • Optimizing camera configuration information during creation of each IPIX image. • Correcting minor variations in camera setup or placement. Thumbnail Selection Option The Thumbnail selection option has been updated to allow you to: • Select creation of IPIX image thumbnail as either a flat or rounded IPIX image. • Preview the IPIX image in different formats. Tripod Cap Hotspot Netscape/Active X Plugin support The IPIX Wizard has a new feature built into the Tripod Cap screen. This feature will place a link on the tripod cap that when selected, takes control of the web browsers to the specified hotspot. The new Netscape and Active-X Plugin support allows the IPIX Wizard to: • Create a promotional IPIX image. • Showcase products or services and transport potential customers to a specified website. IPIX Wizard 2.0 SV User Manual 3 Technical Support All IPIX hardware and software is backed by a one year warranty and includes toll-free first-level technical support during this period. Information on trouble-shooting common problems with the IPIX Wizard is included as a reference section in this manual. .If you experience any problems, you will have access to first-level technical support from Interactive Pictures Corporation’s world-wide-web site, http://www.ipix.com, or by calling toll-free (888) 909-IPIX. 4 IPIX Wizard 2.0 SV User Manual 2 IPIX Photography Taking the First Steps T hank you for your purchase of the IPIX Wizard 2.0 Standard Version. With the IPIX Wizard, you can create 360° x 360° immersive images in a matter of minutes. It is a solution that has proven valuable for real estate, entertainment, photojournalism, electronic publishing, and many other on-line and CD-ROM applications. Other so-called “immersive photography” solutions require up to 16 pictures to provide a narrow vertical field-of-view. With your IPIX technology, you can capture landscapes, interiors, and news events, without missing any detail. Before you Install Before installing the IPIX Wizard software, familiarize yourself with your camera and the fisheye lens. • Take a few test pictures with the camera, lens, and rotator, and download the images to your computer. The test images you take can be used to calibrate your camera and lens to work with the IPIX Wizard. • After you have downloaded these images, then install the IPIX Wizard. What is camera calibration? In prior versions of the IPIX Wizard software, Interactive Pictures Corporation included a Camera Configuration Diskette. This floppy diskette contained a special configuration file that was used to align your camera hardware to the Wizard software. Each Camera Configuration Diskette installed custom settings that were individually aligned with both camera and lens to provide the best output for IPIX photography. The IPIX Wizard Standard Version 2.0 does things differently. The IPIX Wizard calculates optimal camera lens settings based on test images that you provide. How often do I have to calibrate the camera? IPIX Wizard 2.0 User Manual You should only have to calibrate your camera once, provided the rotator and tripod mounting is the same. The Quick Calibration option takes approximately one to two minutes. Further information on camera calibration is included later in this manual. 5 Basic Photography Tips The Olympus D-340L with the Fisheye Lens Converter . Kodak DC200 with the Fisheye Lens Converter. Nikon Coolpix 900s with the Fisheye Lens Converter. The camera is mounted on the rotator. Introduction Your Camera and the Tripod To create the highest quality IPIX images, you must start with good digital pictures. Included in this section are general tips on taking pictures with your digital camera. Before taking any pictures, inspect the equipment. Check the camera lens and the fisheye lens for smudges and clean them if necessary. Refer to your camera and lens manuals for cleaning instructions. IPIX images are easier to create from hemispheres taken with a level tripod. Advanced features in the Wizard such as Reference Pan, Tilt, and Rotate, can compensate for IPIX images taken at any angle. When you set up your tripod, make sure the legs are fully extended, and the tripod does not wobble. Assembling the Camera, Tripod, and Rotator Step 1: Attach the IPIX rotator to the tripod. The rotator attaches to the tripod through the screw threads at the base of the rotator. When attaching the IPIX rotator to the tripod, hold the rotator by the stationary bottom portion.. The rotator may spin slightly while it is being screwed to the tripod. Turn the rotator clockwise until it is securely attached to the tripod. Once the rotator is attached, turn the rotator clockwise until it clicks softly in place. The rotator should have very little play in movement. 6 IPIX Wizard 2.0 SV User Manual Step 2: Attach the camera to the IPIX Rotator. Attach the camera body to the rotator assembly using the thumb screw. • Make sure the camera is snug along the back stop. The screw must enter the hole at the camera base at a 90° angle. If the camera is not positioned correctly on the rotator, the hole and camera screw threads may be damaged. • Tighten the thumb screw snugly, but only with your fingers. Tightening this screw with a wrench will damage the screw and possibly your camera. Olympus D340-L with the fisheye converter mounted on a rotator and a table-top tripod. • Make sure that the back of the camera and the back of the rotator are flush. If the camera and rotator are not aligned correctly, your IPIX images may not line up properly when building your IPIX images. If your camera is positioned correctly on the rotator, the fisheye lens will line up directly over the center of the tripod. Taking Your Pictures An IPIX image has two halves, or hemispheres, a front and a back, as illustrated below. You should always shoot consecutive image pairs without moving the tripod. You should capture front/back, front/back, front/back. Do not shoot front/front/front or back/back/back, for example. Shooting the halves out of order will make the production process more difficult. Composing the Image Composing an IPIX image involves two major decisions: determining the image’s point of view and choosing where the seam will fall. First, determine the point of view by deciding where to place the camera and tripod. IPIX images place the viewer in the middle of the picture, and can make objects appear farther away than they really are. IPIX Wizard 2.0 User Manual 7 • Don’t place the tripod exactly between two points of interest in the scene. Instead, position the tripod in the foreground of your scene. The second most important decision is choosing where the seam will fall. For example, if you are shooting a living room that features a complex and detailed dried flower arrangement, avoid placing the seam on this area. If you are shooting journalistic or action-packed subjects, such as a sporting event, avoid placing the seam in the areas where most of the action is taking place. • Determine the point of view of your shot and adjust the tripod to the appropriate height. For example, if an environment is usually viewed at eye level, adjust the tripod to that height. Preparing for the Shoot Because IPIX photography captures everything in a scene, remove unwanted items before shooting. Although IPIX images which include people or live subjects (like animals) are often more interesting, pay attention to motion, especially at the image seam. The fisheye lens captures over 180° of the area surrounding the camera. While this extra area allows more space for correction when creating an IPIX image, it also means that you must keep any part of your body out of the image area. • Before your take your pictures, set your camera to High Quality (for Olympus) or Fine (for Nikon) mode. • Disable the flash, and the set the camera to Fisheye mode, if applicable. The Nikon Coolpix 900s can be set to Fisheye Mode, but the Olympus D-340L does not have this feature. The Olympus must be manually set to disable the flash. Please refer to your digital camera’s user manual for instructions on disabling the flash. Taking the Picture Before you press the shutter button, make sure that the tripod is level and the rotator is firmly clicked into the proper position. Here, the camera is placed first facing right, and then when rotated, is facing in the opposite direction, to the left. • Set the self-timer on the digital camera. Setting the timer gives you a few seconds to make sure you are completely out of the picture and avoids camera movement when the picture is taken. When the Nikon Coolpix 900s is in Fisheye mode, the timer is disabled. 8 IPIX Wizard 2.0 User Manual • If you will be taking pictures without using the timer, press the shutter release by placing your index finger on the shutter button and your opposing thumb to the camera base. Gently press down with your finger and up with your thumb simultaneously. This action helps avoid applying downward pressure on the camera, rotator and tripod. • After taking one image, grasp the ridged grip near the top of the rotator. Gently turn the camera clockwise so that the rotator clicks into place 180° degrees from the first shot. DO NOT change any of the settings, bump the tripod between positions, or use the camera as a handle for rotating. • Gently press the shutter release to capture the second image of the pair. Take several pairs of the same area. Sometimes a surprise angle turns out to be the best. Taking Pictures without the Tripod IPIX images can be taken without a tripod or rotator. These images are subject to blurring from movement, and you may have problems aligning the two hemispheres. Every movement, however slight, is reflected in the pictures, and ultimately, in the quality of the IPIX images you create. To take a pair of digital photos while holding the camera by hand: • Mark a spot on the ground using a coin or other object and stand with it in front of your toes. • Hold the camera up to your face and look through the viewfinder. Make note of any objects on each side, at the border of the view. • Take a deep breath, hold it, and press the shutter release. Holding your breath helps keep the camera from moving. • Turn 180°, using your mark and the objects at each side as your guides, and shoot the opposite hemisphere. Can I use the IPIX Wizard with a film camera? Images captured from a film camera require special processing. After the film is developed, the negatives must be scanned into a computer with a special scanner. These pictures can be used to create IPIX images with the IPIX Builder software. The IPIX Wizard software is designed to work only with digital cameras. The fisheye lenses used with these cameras capture over 180°, and provides some seam overlap when creating IPIX images. Fisheye lenses for film cameras capture exactly 180°. IPIX images built from negatives must be precisely positioned and manually blended using the IPIX Builder and the Adobe Photoshop IPIX plugin. For more information on the IPIX Builder and the Adobe IPIX plugin, contact IPIX Sales at (888) 909-IPIX or visit the IPIX Online Store at http://www.ipixstore.com for more information. IPIX Wizard 2.0 User Manual 9 3 Software Installation IPIX Wizard Installation T his software installation procedure will install the IPIX Wizard 2.0 Standard Version and the IPIX Viewer with internet browser plugins. These software packages have the following functions: • The IPIX Wizard creates immersive IPIX images from hemispheres taken with your digital camera, rotator, and fisheye lens. • The IPIX Viewer is a stand-alone application for viewing IPIX images and the browser plugins for every copy of Netscape Navigator/Communicator or Microsoft Internet Explorer on your computer. Wizard Minimum Requirements To use this software with your IBM/PC-compatible computer, you will need: • Microsoft Windows 95/98, or Windows NT 4.0 or later • Quad-speed or faster CD-ROM drive • 70MB of free hard disk spaced • Pentium 133Mhz or faster processor (166Mhz or faster recommended) • 32MB RAM (64MB RAM recommended) • Video display capable of 800 x 600 pixels or higher with 256 colors (65,535 colors or higher recommended) What if I have a previous version of the IPIX Wizard? IPIX Wizard 2.0 SV User Manual If you have a prior version of the IPIX Wizard installed on your computer, it will not be replaced. This installation is designed to preserve any existing camera configuration files you may have been using. The New Wizard 2.0 SV installation will create a new folder named IPIX Wizard2 SV under C:\Programs Files\IPIX. The Wizard 2.0 SV files will be copied to this subdirectory if you choose the default destination. 11 Wizard Installation This procedure will install the IPIX Wizard and the IPIX Viewer software onto your computer. You can stop the installation process at any time by pressing the Cancel button. • Insert the IPIX Wizard CD-ROM into your CD-ROM drive. The Setup program should start automatically. If the program does not start, click on the Start button on the Windows Task Bar. Select Run. Type D:\setup (where D: is the letter of your CD-ROM drive) and press enter. Close all other Windows applications that are currently running. Running other applications while installing software can interfere with the setup process. • Click Next on the Welcome screen to continue with the installation. 12 IPIX Wizard 2.0 SV User Manual • Click the Agree button after reading the License Agreement screen. Pressing the Disagree button will cancel the installation. The Agreement contains important information about the software you are installing. When you click the Agree button, you are accepting all of the conditions stipulated in the License Agreement. • Click the Next button on the Choose Destination Location screen to install the IPIX Wizard software to the default location. installing the software to the default location. IPIX Wizard 2.0 SV User Manual We recommend 13 To change the Destination Folder, click on the Browse button. Locate the new folder where you wish to install the IPIX Wizard software. Click on the new folder name, and click the OK button. • On the Select Camera screen, shown below, chose the type of camera you will be using with the Wizard. You will have to choose at least one camera to continue with the installation. Click the Continue button. If you choose to install more than one camera, you will be prompted to chose a Default camera. On the Select a Default Camera screen, select the camera you wish to have as the default. The IPIX Wizard will use the settings for the default camera for building IPIX images. 14 IPIX Wizard 2.0 SV User Manual • After you press the Continue button, the installation program will copy files for the IPIX Wizard and the IPIX Viewer to your hard drive. If you installed an Olympus digital camera, a secondary installation program will install the camera’s TWAIN drivers. Follow the on-screen instructions for these installations. Once they are completed, you will be returned to the IPIX Wizard setup program. • Once the installation program is completed, the IPIX Wizard Readme file will be displayed. Click the Next button to continue the installation. IPIX Wizard 2.0 SV User Manual 15 • Click the Finish button to complete the installation. If you leave the check box marked, the Registration screen will start after you click the Finish button. • On the IPIX Wizard Registration screen you can either choose to register your software now or later. If you click the Register and Redeem Certificate button or the Register and Purchase Keys button, your web browser will be launched at the Interactive Pictures’ On-line store, http://www.ipixstore.com. If you do not wish to register at this time, click on the Register Later button. You must register your copy of the Wizard before you can purchase Keys at the IPIX On-line Store, at http://www.ipixstore.com. 16 IPIX Wizard 2.0 SV User Manual How do I open the Wizard? To start the IPIX Wizard software, select the IPIX Wizard icon from the Program Files\IPIX\IPIX Wizard 2SV\ menu on the Windows Start button. What if I need to reinstall the IPIX Viewer, but not the IPIX Wizard software? This information is included in case you need to re-install the IPIX Viewer separately. • Insert the IPIX Wizard CD into your CD-ROM drive. The IPIX Wizard installation program will start automatically. screen after it opens. Close the IPIX Wizard • Double-click on the My Computer icon on the Windows desktop. • Click once on the CD-ROM drive. • Click on the File menu, and select Explore from the menu. • In the new Explorer window, double-click on the IPIX Viewing Software.exe from the list of files. • Double-click on the file to start the installation process and follow the on-screen directions. What if I want to share my IPIX images with other people? If you wish to share your IPIX images with a friend or a client, you can copy the Viewer installation file to a floppy diskette. When you visit your friends, or your clients, you can install the IPIX Viewing software on their computer without having to wait for a download from the Interactive Pictures web page. On-line Documentation What electronic documentation is included with the Wizard? The IPIX Wizard includes a copy of this manual as a Portable Document Format (PDF), and in HTML. The PDF file requires Adobe Acrobat Reader to be installed to view and print the manual. The webpage version (HTML) of the manual can be viewed in your web browser. Where can I find the documents? Shortcuts to the Wizard 2SV Manual.pdf and the Wizard_2.htm appear in the Program Files\IPIX\Wizard 2SV menu. IPIX Wizard 2.0 SV User Manual 17 Adobe Acrobat Reader What if I want to read the electronic copy of the manual? To view the electronic copy of this manual, you will need to install Adobe Acrobat Reader onto your system. Acrobat Reader allows you to view electronic documentation saved as a Portable Document Format (PDF). The electronic manual is located at: C:\Program Files\IPIX\IPIX Wizard2SV\Docs\Wizard SV Manual.PDF. Adobe Acrobat Installation Procedure This installation procedure will install Adobe Acrobat Reader onto your computer. • Insert the IPIX Wizard CD into the CD-ROM drive. The IPIX Wizard installation program will automatically start. screen after it opens. Close the IPIX Wizard • Double-click on the My Computer icon on the Windows desktop. • Click once on the CD-ROM drive. • Click on the File menu, and select Explore from the menu. • In the new Explorer window, double-click on the Acrobat folder from the list of files. • Double-click on the file named AR32e301.exe to start the installation process and follow the directions on the screen. 18 IPIX Wizard 2.0 SV User Manual 4 Camera Calibration Camera Calibration and Profiles T o achieve the best results with your IPIX Wizard, you will need to calibrate your camera system. This process is simple to set up but may take time to run, as much as 2 hours depending on the speed of your computer. The Calibration process calculates the seam location from two images taken with the camera system you wish to calibrate. The Wizard has default configurations for each of the camera types that you have installed. When a camera is calibrated, the IPIX Wizard generates a new calibrated camera configuration file. This file appears in the Camera Configuration screen in the Wizard Mode, or in the middle left region of the Expert Mode screen. The chosen camera configuration is included whenever you save a Profile (see the Profiles section of this manual for more information). The Calibration Screen Explained Hemispheres used to calibrate your camera. Press the Browse button to select your hemisphere Select the type of calibration you wish to perform here. Select your camera type here. The Cancel button will stop the Calibration process without making any changes. IPIX Wizard 2.0 SV User Manual Press the Calibrate button to start the calibration process. 19 Starting the Calibration Process Camera Calibration can be accessed in one of two ways: from the Preferences screen, or when the Wizard prompts you to calibrate your camera. If you change your camera settings, you may be prompted to perform another calibration. How long does a camera calibration take? The amount of time it will take to calibrate your camera depends upon the processing power of your computer. The faster your processor and the more RAM you have installed, the quicker the calibration. The Quick Calibration can take as little as a few minutes. A Thorough Calibration can take more than an hour on some machines. How do I calibrate my camera? This procedure assumes that the Wizard is currently installed on your computer. If you have not installed your camera software and the IPIX Wizard, please do so before continuing with this procedure. 1. Assemble your camera, lens, rotator, and tripod (see instructions in Chapter 2, IPIX Photography). 2. For the calibration, snap two hemispheres (front and back). • These images should be taken indoors, in a well-lit room with plenty of detail at the seam. Avoid rooms with low or uneven lighting or with large areas of blank wall or ceiling. 3. Download the images from the camera to your computer. Your camera manual will have instructions for attaching your camera to your computer and for downloading the images. 4. Start the Wizard by selecting it from the list of installed applications in the Program menu. On the Open Hemispheres screen, click the Browse button to locate the images on your hard drive. It does not matter which hemisphere is selected first. 5. Select the type of calibration - Quick or Thorough. 20 IPIX Wizard 2.0 SV User Manual • Some cameras can be calibrated with the Quick process, which is approximately 25 times faster than the Thorough process. You may wish to try this first to see if it achieves satisfactory results. Otherwise, choose the Thorough option. 6. A default configuration name is provided for you. You may use the default name, or change it to another name of your choosing. The default name is usually the name of the camera, the word Calibrated, followed a unique number: Nikon Coolpix 900 Calibrated #1, for example. If you choose another name for the file, and that name is already in use, you will have to change the file name before proceeding. • After calibration, this name will appear in the list of camera configurations. Use this configuration whenever you build images using pictures from this camera. 7. Select the Calibrate button to start the process. The Calibration screen will display the approximate time remaining. 8. After the calibration process is complete you will be presented with the built IPIX image. If the results are satisfactory and the image is well-aligned, click the Accept button to save the settings. If the results are not acceptable, click the Reject button to return to the initial Calibration screen. How can I improve the calibration? If you have run the Quick version of the calibration, and the results were not acceptable, you may want to try the Thorough version. Although this process takes much longer, it is potentially more accurate. • Make sure that the images you have taken are suitable for calibration. IPIX Wizard 2.0 SV User Manual 21 • There should be no movement at the seam. If objects on the seam are moved between pictures, the calibration will be inaccurate. What do I do if my images don’t line up after I’ve calibrated my camera? When a seam is not lining up properly, you may see a black space in the middle of seam where the two hemispheres meet after you build the IPIX image. If you have trouble with the images aligning, try taking another pair of images and building a new IPIX image with these files. If you bumped or moved the tripod or camera when you were taking your pictures, it can cause problems when you use the Wizard to create your IPIX images. Please refer to the Trouble-Shooting section of this manual for complete information on how to correct this problem. How do I save my Wizard and camera settings? 22 Your calibrated camera file is saved automatically when you accept the results of the calibration. Since this new calibration is automatically selected for you, the Wizard will ask you if you wish to save a Profile when you exit. This Profile will preserve the settings that you selected while you were creating your IPIX images. Profiles can also be created or changed in Expert Mode. IPIX Wizard 2.0 SV User Manual 5 Wizard Functions Working with the Wizard T he IPIX Wizard simplifies the process of seaming two 180° x 180° images into an immersive photograph. The Wizard allows anyone to create an IPIX image in a few minutes, without prior knowledge of digital image retouching software like Adobe . Other Interactive Pictures Corporation products, such as the IPIX Builder, may be utilized to create and maintain complete control over the IPIX image creation process. How is an IPIX image formed? An IPIX image is created by taking two opposing photographs with a fisheye lens-equipped camera system and seaming the photographs together. The two opposing shots are referred to as hemispheres. The Wizard software joins the two hemispheres. When you open an IPIX image, it appears that you are inside the photograph and that you can look anywhere inside the picture, for an “immersive” experience. The seam in this previewed IPIX image is almost invisible. IPIX Wizard 2.0 SV User Manual 23 What is seaming? Seaming is the process of aligning and melding two hemispheres into a whole image and blending away the line where the two images are joined, thus removing the “seam.” An IPIX image has a seam. The seam is almost undetectable, but if you look closely, you can see the faint line where the two hemispheres meet. To create an IPIX image with no trace of a seam, the image would have to be edited using the IPIX plugin, which comes with the IPIX Builder software. What is TWAIN? TWAIN is an acronym for Technology (or Toolkit) Without an Interesting Name. A TWAIN driver is a piece of software that interacts with a scanner or digital camera to allow your computer to talk to the device. Nearly all scanners and digital cameras come with a TWAIN driver, which makes them compatible with any TWAIN-supporting software. More information on TWAIN drivers appears in the Open Hemispheres section of Chapter 6. The Wizard’s Two Modes The IPIX Wizard is designed to be easy to use and navigate. The Wizard can be used in one of two modes: Expert or Wizard. When you first open the IPIX Wizard, it defaults to Wizard Mode, as shown below. Expert Mode can be set from the Preferences screen. Wizard Mode Explained What is Wizard Mode? Wizard Map Work Area Navigation Area Illustration of Wizard Mode. Wizard Mode provides a simple interface for creating your IPIX images. Clicking the Next button automatically scrolls through all required screens. 24 IPIX Wizard 2.0 User Manual Parts of the Wizard Mode Screen Wizard Mode has three main work areas: Wizard Map, Navigation Area, and Work Area. • The Wizard Map, on the left side of the screen, provides quick access to any portion of the Wizard, without scrolling through every screen by clicking on the Next button. • The Navigation Area provides access to screen navigation, help, and exit functions. • The Work Area is where most of the Wizard functions are performed. Depending upon the screen you are in, the functions displayed in the Work Area will change. Expert Mode Explained What is Expert Mode? Expert Mode displays all Wizard settings in one screen. Instead of paging through the eight Wizard Mode screens, all of the functions are located in one place. Once you are familiar with the Wizard, the Expert Mode provides a fast alternative to generating your IPIX images. Parts of the Expert Mode Screen There are six work areas on the Expert Mode screen: Source, Tripod Cap, Media, Bio Information, Reference Pan/Tilt/Rotation, and Image Processing. Each of these sections responds to one of the areas in the Wizard Map portion of the Wizard Mode screen. These sections are briefly explained below. Detailed information appears in the Chapter 6. User Profile Music and Media files Hemisphere Source Bio Info IPIX file type Camera Config file Tripod Cap Reference PTR Image Processing • Source. Select the files to use to build your IPIX image. You can either create an IPIX image using a Single Hemisphere or Two Hemispheres. IPIX Wizard 2.0 User Manual 25 • Tripod Cap. If you wish to use a graphic file to cover the tripod in the IPIX image, select this file here. • Media. If you wish to include background music or narration for your IPIX image, specify those files here. • Bio Information. This optional information provides a reference source. This information is attached to the completed IPIX image file properties as text. This information does not alter the appearance of the IPIX image. • Reference Pan/Tilt/Rotation. The Reference PTR setting can be used to compensate for capturing images at any angle. If your pictures were not taken at a horizontal angle and you wish to correct the point of view, change the PTR value here. • Image Processing. These options are the core of the IPIX image building process. Image Processing provides control over seam blending, color balancing, image smoothing, and adjusting image alignment. How do I change to Expert Mode? Expert Mode can be selected from the IPIX Wizard Preferences screen by accessing the IPIX Wizard menu bar. To change to Expert Mode, select Preferences from the IPIX Wizard menu. Select Expert Mode from the Program Mode drop-down box, then click the OK button. When the Preferences screen closes, the Wizard will be displayed in Expert Mode. 26 IPIX Wizard 2.0 User Manual The Preferences Screen The Preferences screen allows you to change options for Program Mode, Notifications, Camera Calibration, and Image Thumbnails. To open the Preferences, select Preferences from the IPIX Wizard Menu, located under the IPIX Wizard menu bar, as shown. An explanation of the Preferences screen functions are described below. Notifications is used to toggle warning messages. Program Mode controls if the IPIX Wizard opens in Expert Mode or Wizard Mode. The Wizard will open in Wizard Mode by default. Calibration sets the default settings used when building an IPIX image. Use this area to select a configuration file for your camera, or to have the IPIX Wizard calibrate your camera. If you do not select a file, the Wizard will use the default file. IPIX Wizard 2.0 SV User Manual Image Thumbnails show small previews of your image files when this option is turned on. 27 Profiles The settings that are used to build an IPIX image from a profile can be saved to a file and reloaded at a later time. The profile drop-down box on the Expert Mode screen contains the default profile as well as the most recently used profiles. You may select one of these or click the Browse button to locate a previously saved Profile. Why would you want to create a profile? Profiles can be useful if more than one person uses the same machine, or if you have more than one camera. Each user’s settings can be saved and changed. What information does a Profile contain? A Profile contains the media types, image processing options (seam blending, color matching, image smoothing, image alignment adjustments), selected camera configuration, the type of IPIX that will be previewed, background MIDI and introductory sound files, reference pan/tilt/rotate settings, tripod cap settings (Tripod Cap file, URL link), and biographical information. Creating a New Profile Whenever you calibrate your camera, you will have the option to save the settings to a new Profile. A Profile allows you to create a custom group of settings. A Profile remembers every setting within the Wizard, except for the hemisphere selections. Every other setting in the Wizard will remain with a saved profile. If you modify any settings while you are using the Wizard, you will be prompted to save the changes in the Profile. If you choose not to save, the settings will not be retained. Changing the Profile To change the profile, open the Preferences screen and set the Wizard to Expert Mode. Select the new Profile from the upper right corner of the screen in the User Profile drop-down box. 28 IPIX Wizard 2.0 SV User Manual 6 Building Images Wizard Walk-Through begin building an IPIX image, select the IPIX Wizard icon from the ToWindows Programs menu to launch the program. If you wish to save any of your finished IPIX images, you will need to have Keys readily available. Refer to the Keys section of Chapter 6. Open Hemispheres The Open Hemispheres option is the first radial button on the Wizard Map. Use the Open Hemispheres screen to select the type of IPIX image you wish to create. The Input Source drop-down box allows you to create an IPIX image from either one or two hemispheres. Select the hemispheres by clicking on the Browse button and choosing your files. IPIX Wizard 2.0 User Manual 29 • Single Hemisphere. This option creates a 180° by 180° IPIX image from a single hemisphere file. An IPIX image created using this method contains only half of the sphere; you can look from earth to sky, but not in a full circle. By clicking on Mirror This Hemisphere option, you can create a mirrored image, where both halves of the IPIX image use the same file. • Two Hemispheres. This option allows you to create a fully immersive 360° by 360° IPIX. The Two Hemispheres input source is the default selection. Opening the Fisheye Hemisphere Files Hemisphere images can be loaded directly from disk storage (hard disk, floppy disk, CD-ROM, or other removable media) or directly from a digital camera or scanner using the TWAIN Acquire interface. The TWAIN interface will differ depending upon your camera type. Small previews, or “thumbnails,” of your hemispheres appear in the boxes after file selection. Thumbnail preview can be toggled on or off in the in Preferences. The Wizard default settings are the most commonly used parameters for building an IPIX image. In Wizard Mode, select the Next button after you have specified your IPIX hemispheres to view or to adjust the pre-selected values. Select the Finish button after viewing or adjusting the additional screens. The Finish button is not active until you have specified your source hemispheres. Browsing to Hemisphere Files 30 Click the Browse button under the front hemisphere window to select the desired file. Once you select the file, a thumbnail preview will appear in the Front screen window. Select the Browse command under the Back screen window to select the appropriate matching file. If you are creating a single hemisphere IPIX image, select one image. If you wish to create an IPIX image using two hemispheres of the same file, select the Mirror the Hemisphere check box. IPIX Wizard 2.0 SV User Manual The two hemispheres selected are specified as front and back so that an initial viewpoint may be established for the finished IPIX. If you wish to swap the front and back hemispheres, use the double arrow button between the thumbnails. Loading Hemispheres Directly from a Digital Camera The IPIX Wizard can capture images directly from the memory card in your digital camera, provided your camera includes a TWAIN driver. If your camera does not include a TWAIN driver, then you will need to download the images to your computer from the camera before running the Wizard. Please refer to your camera documentation for instructions. If no TWAIN driver is installed on your computer and you press the Acquire button, the Select Source Dialog box will appear, and will be blank, as shown below. If you click the Acquire button, and you have a TWAIN driver installed on your computer, the name of the driver will appear in the window, as illustrated below. In general, a TWAIN driver will allow you to select images to download. If you select more than two images to download, all images past the second will be ignored and you will be advised to cancel the download process. If you click on the the TWAIN driver and press the Select button, the camera’s TWAIN application will appear. No TWAIN installed. TWAIN installed. IPIX Wizard 2.0 SV User Manual 31 IPIX Preview Types You may preview three IPIX image types: High Resolution, Low Resolution, and Java. These options are shown in the Preview IPIX screen, the second radio button on the Wizard Map. File Types Explained The Preview IPIX file type options are as follows: • High Resolution. The High Resolution IPIX option saves each hemisphere in a 1K x 1K (1024 x 1024) pixel image. With a fully immersive two hemisphere IPIX image, the total High Resolution file size option results in a 2K x 1K IPIX image. • Low Resolution. The Low Resolution IPIX image option saves each hemisphere in a 512 x 512 pixel image. With a fully immersive two hemisphere IPIX image, the total Low Resolution file size option results in a 1k x 512 IPIX image. • Java. The Java IPIX option saves a 1.5K x 256 pixel image in a viewing format with a runtime downloadable IPIX Java viewer. Use the Java IPIX image format for viewing by browsers which do not have the IPIX plugin installed. All of these files types have a .IPX extension. Keys and Saving IPIX Images A Key is not required to run the IPIX Wizard build process, but IPIX Keys must be available to save an IPIX image. Selection of the Add Keys button on the Preview IPIX screen will install new IPIX Keys or verify the current IPIX key count. The Add Keys screen displays the following information: • Site ID Code is unique to each computer installed with the IPIX Wizard software. This code is required to purchase additional Keys. • IPIX Keys indicates the total number of remaining Key in your account. A “0” indicates that more Keys must be purchased to save new IPIX images. 32 IPIX Wizard 2.0 User Manual Additional Keys may be purchased online at the IPIX Online Store, at http://www.ipixstore.com, or by calling (800) 336-7113. You can also click on the Purchase Keys On-line button to automatically launch your browser to link to the IPIX On-line Store webpage. High Resolution and Low Resolution formats can be used with the standard IPIX Viewer or plugin. However, the Java IPIX image format can only be read on a webpage where the IPIX image is displayed. The Java IPIX image is displayed by using the Java class files of the IPIX Java Viewer. These files are available on the IPIX web site, http://www.ipix.com. The Viewer installs with the IPIX Wizard. IPIX Wizard 2.0 User Manual 33 Multimedia Customization Audio files can be linked to an IPIX image for enhanced viewing. Your computer must have sound capabilities to play, add, or edit sound files to your IPIX images. The IPIX Wizard uses MIDI files to play background music, and WAV or VOX files for audio introduction to your IPIX image. MIDI files are selected on the first dialog box by clicking on the Browse button. VOX or WAV files are selected in the lower dialog box by clicking the Browse button. Sound File Formats The IPIX Wizard utilizes three different sound file formats: • MIDI. Musical Instrument Digital Interface (MIDI) is a standard of the electronic music industry for controlling electronic musical devices. A MIDI representation of a sound includes values for the note’s pitch, length, and volume. Synthesizers and computers with MIDI-capable sound cards can create and modify MIDI files, which makes the file type very portable. For further information on MIDI, visit the Midiweb homepage, at http://www.midiweb.com. • WAV. This format stores sound in files developed jointly by Microsoft and IBM. Support for WAV files was built into Windows 95 making it the de facto standard for sound on PCs. WAV sound files end with a .WAV extension and can be played by nearly all Windows applications that support sound. The WAVE format is a large file size, and can increase the download time on the web. For further information on WAVE, visit the WAV.COM home page at http://www.wav.com. • VOX. This file format is commercially available through Interactive Pictures which offers a special service to create low-bandwidth audio files to include with IPIX images. VOX files are small in size and are downloaded quickly. 34 IPIX Wizard 2.0 SV User Manual Inserting Sound Files into Images To insert a MIDI file as background music, select the Browse button beside the dialog box, then select the desired MIDI file. In order for this file to play, it must be stored in the same directory as the IPIX image. An introduction sound file is an audio file in WAV or VOX format, usually a voice-over explanation of the content in the IPIX image. To insert an introduction file, select the Browse button beside the lower dialog box, then select the file. This sound file must be stored in the same directory as the IPIX image. Contact your Interactive Pictures Sales representative at (888) 909-IPIX in the United States to find out more about creating VOX files. Customizing Your IPIX Image The IPIX Wizard displays a multi-tab screen that allows you to customize the IPIX image when you select the Bio Information button. Each of these tabs is also displayed as a radio button on the Wizard Map. These options allow you to customize biographical information, add a tripod cap, change the reference pan/tilt/rotation settings, and customize image processing. Customizing Bio Info IPIX Wizard 2.0 User Manual The first tab, Bio Information, allows you to add authoring information to your image for later reference. You may name the IPIX image, identify the photographer, and create key words. This information is stored as text fields and will not affect the look of the finished product. Bio Information can also be selected by clicking on the fourth radio button. 35 Selecting and Creating a Tripod Cap Because an IPIX image captures an entire environment, part of the tripod will appear at the bottom of the image. You can insert a Tripod Cap, a logo, or other bit of visual data over the tripod . Two Tripod Caps are provided; you can insert a Tripod Cap of your choice or none at all. Tripod Caps can either be 250 x 250 pixels or 350 x 350 pixels. If you enter a link in the URL field, a hotspot is created over the tripod cap. When viewing this IPIX image in your browser, you can click on this hotspot and your browser will open the URL. This format should be referenced by using http:// and then the World Wide Web location of the page you wish to link to. The Tripod cap from the above screen as it appears in an IPIX image. Note that the green background area that appears in the original tripod file shown above has disappeared in the IPIX image preview. Creating a Custom Tripod Cap You can also create your own custom tripod cap. To create your own, use a graphics program like Microsoft Paint. Save your file as a bitmap (.bmp) or as a TIFF (.tif) file. • Draw a square in the drawing area of your graphics program. 36 IPIX Wizard 2.0 SV User Manual • Draw a circle in the middle of the square, then fill in the pixels outside the circle with solid green (RGB value 0,255,0). This will leave the area outside the circle transparent when the Tripod Cap is inserted into your IPIX image. • Inside the circle, add or create your own logo or bit of visual information. The default Tripod Cap is 350 x 350 pixels. Save your Tripod Cap, then use the Browse button to select the Tripod Cap file you have created. Customizing IPIX Reference PTR You have the option of changing the Reference Pan, Tilt, and Rotation (PTR) values. This is normally done only if the camera and tripod were arranged in an unusual way. Ref Pant/Tilt/Rot is the sixth radial button on the Wizard Map. If the tripod is standing upright and the hemispheres are captured as front and back, then Reference PTR should be horizontal. If the hemispheres are captured as top and bottom, in which the camera points up for the first image and then down for the second image, the Reference PTR should be vertical. User-defined Reference PTRs can be used for other camera orientations. Reference Pan ranges -360° to 360°, Reference Tilt ranges -180° to180°, and Reference Rotation ranges from -360° to 360°. IPIX Image Processing Options When an IPIX image is created, the two hemispheres seams are blended together. You may increase or decrease the number of pixels being blended as this may improve the final image quality. A color matching routine is also used to eliminate large color shifts between hemispheres. There is normally no reason to adjust the pre-selected values. Blend Seam and Color Balance Hemispheres improve the quality of the IPIX in almost every case. Omitting these steps will result in faster build time, but a possibly unsatisfactory image. If you find that the seam appears rough, try adjusting the Blend Seam setting lower or higher and rebuilding the IPIX image. IPIX Wizard 2.0 SV User Manual 37 Selecting Image Smoothing may give you a smoother image, but it may double the time it takes to create an IPIX image. Select Adjust Image Alignment if you would like the Wizard to calibrate the hemispheres before building the IPIX image. Adjust Image Alignment can help compensate for small movements in a camera system or when pressing the shutter release. Selecting Camera Configuration The IPIX Wizard supports several camera types by using Camera Configurations. Pre-defined Camera Configurations are available for other digital cameras. One camera may have multiple resolutions. The camera configurations are designed to work with the highest resolution each camera can produce. The camera must be set to the highest resolution when taking pictures for IPIX images. 38 IPIX Wizard 2.0 User Manual You can create new Camera Configuration files by using the Camera Calibration utility located in Wizard Preferences. These calibrations can be saved for later use. Click the Finish button to begin building the IPIX image. If you have not calibrated your camera and you click the Finish button, you will be prompted to calibrate. If you choose to calibrate, the Wizard will use the selected images during the camera calibration. If you selected any new images during the calibration, and then click the Cancel button, the images you selected will now be visible in the Open Hemispheres screen. Seaming the IPIX Image As the Build process is underway, the Building screen shows what image type is being built, and the estimated time remaining. During this process, the Wizard performs color corrections and blending, aligns, and remaps the images to the IPIX image format. When the build completes, you can view the IPIX image in the Preview window. If you do not wish to build the IPIX image at this time, click the Cancel button to stop the process. Previewing the New IPIX Image The Preview screen provides a full preview of your new IPIX image before it is saved. Within this screen, you can set the minimum and maximum zoom, change the initial viewpoint—the view that is seen when the IPIX is first opened—save your IPIX image and reset the image to the default. You may save the image in multiple formats by pressing the Save button. Changing Initial Viewpoint IPIX Wizard 2.0 User Manual To change the initial viewpoint, pan around the IPIX until you reach the view you prefer, then select the Set View button. At any time, you may return to this initial view by selecting the Go To Init View button, or by right-clicking with the mouse. 39 Setting Minimum and Maximum Views IPIX Viewers have default zoom limits that are determined by image resolution. The image may become degraded as you zoom in or too distant as you zoom out. Use the Set Zoom Min and Set Zoom Max buttons to control the zoom factor on the IPIX image. Zoom out to the point you wish to set as the minimum limit and select Set Zoom Min. Then, zoom in to the point you wish to set as the maximum limit and select Set Zoom Max. At any time, you can return to these limits by selecting Go To Zoom Min or Go To Zoom Max. You cannot set a minimum zoom greater than the maximum zoom and vice versa. Also, your initial viewpoint must be within the zoom limits. To reset the initial viewpoint and zoom limits to their default values, press Reset to Defaults. Once you are finished, you can end the program by selecting Exit or return to the settings screens by pressing the Back button. Saving Your IPIX Image To save your IPIX image, press the Save button. You will need to have Keys in order to save an IPIX image. The Save As screen allows you to save one IPIX image in multiple formats while only using one Key. The Save As screen is shown below. How do I save my IPIX image? 40 Before saving your image, make sure you have available Keys. Without Keys, you will not be able to save your IPIX images. If there are no remaining Keys in your account, you can purchase additional Keys 24 hours per day at the IPIX On-line Store, at ://www.ipixstore.com. IPIX Wizard 2.0 User Manual • First, browse to the location where you wish to save your file. • Type a name in the File Name box. This will automatically generate file names for all output types. • Check the boxes for the image type you wish to save: High Resolution, Low Resolution, or JAVA, and whether or not you wish to include any thumbnail selections. Even if you select more than one file type, you will use only one Key. Saving a thumbnail does not require or consume a Key. Once you have selected the file types, you can edit each file name individually. • Click the Save button to save and store your IPIX image. If you decide that you do not wish to save the image, click the Cancel button. Can the IPIX images have different names? IPIX Wizard 2.0 SV User Manual When you save your IPIX image to more than one format, you may assign each file a different name by entering a new name next to the corresponding file type text box. 41 IPIX Images and Keys What is an IPIX Key? An IPIX Key allows you to save IPIX images to multiple formats. Without Keys, an image can be created and previewed, but it cannot be saved. Without Keys, you will not be able save any of the images you have created. The Add Keys screen shows the number of IPIX Keys you have remaining in your account. When your IPIX Wizard has no remaining IPIX Keys, you be unable to create additional IPIX images. Plan ahead to order Keys. For Key purchase, visit the IPIX On-line Store 24 hours per day, which is available at http://www.ipixstore.com. Why does IPIX use Keys? An IPIX image is a digital photograph and is unlike anything else available on the web or CD-ROM. When you purchase a roll of film for your camera and take pictures, the film must then be developed and printed on quality paper at a cost to you. In a similar fashion, IPIX charges you for the use of Keys to save and distribute as an IPIX image that you can share with others. How do I order more Keys? To order additional IPIX Keys, you must supply your IPIX Wizard site code. The IPIX Wizard generates a 12-digit Site Code during installation. Each code is a unique identifier that ensures no one else may access Keys that you have ordered. Only Keys you purchase are valid on your computer. Pressing the Purchase Keys On-line button on the Add Keys screen will open your browser to the IPIX On-line Store (http://www.ipixstore.com) where you can purchase additional Keys at any time. Your browser should automatically open to the Buy Keys page. If it does not, then once you are at the IPIX On-line Store, select the option to “Buy IPIX Keys.” Enter your 42 IPIX Wizard 2.0 SV User Manual Site Code when prompted, and follow the instructions online. If you encounter any difficulties with the IPIX On-line Store, please contact IPIX Technical Support via email at [email protected], or by telephone at (888) 909-4749. If you have purchased IPIX Keys and were sent a certificate number, you can redeem that certificate on the IPIX On-line Store at any time by selecting “Redeem Certificate” from the IPIX On-line Store home page. IPIX On-line Store is available 24 hours per day, every day, for your convenience. Keys and other IPIX Products may be purchased from http://www.ipixstore.com. How do I locate the Site Code? Your Site Code appears on the Add Keys screen, and in the IPIX Wizard title bar. Before you order more Keys, make sure you provide the Site Code for the specific computer that will be running the IPIX Wizard and saving Keys. Keys ordered for a specific Site Code will not work with any other machine. To locate your site code: • Start the IPIX Wizard. The Site Code appears in the Wizard title bar. • Click the Add Keys button on the second screen of the Wizard Mode to display the Add Keys screen shown below. The Site Code is listed in the first line of the dialog box. IPIX Wizard 2.0 SV User Manual 43 • When you provide your Site Code you will be given a 30-digit Key code to activate your new Keys. • After receiving the 30-digit code, enter it in the Key Code portion of the screen, as shown above. Click the OK button. • You can cut and paste your Key Code directly into the Add Keys screen. Highlight the Key Code in your browser after the IPIX On-line Store provides it for you. Press CTRL-C. Click on any box in the Add Keys screen and press CTRL-V to paste the code into the code fields. 44 IPIX Wizard 2.0 SV User Manual 7 Web Pages Setting Up Your Web Site T o post your IPIX images to the World Wide Web for viewing, you must create a web page with special HTML code explained in this chapter. Much of the information in this section assumes you have a certain understanding of the Hypertext Markup Language (HTML). The IPIX plugin and Viewers Not everyone who visits your website will have the IPIX plugin installed for Netscape Navigator/Communicator or Internet Explorer. You may wish to provide a link to the IPIX home page where they can obtain the appropriate IPIX plugin. The best way to enable your customers to download IPIX viewing software is to create a link that sends them directly to the IPIX Web site download area: http://www.ipix.com/cgi-bin/download.cgi. Interactive Pictures Corporation has developed automated and semi-automated viewer downloading and installation setup. The degree of automation is dependent on customer browser type and operating software. We suggest that you borrow one of our IPIX logo images to use as a clickable graphic to the download page. The code samples below are provided as cut and paste samples. • With Clickable Text <A HREF="http://www.ipix.com/cgi-bin/download.cgi" > click here. </A> • With Clickable Image <A HREF="http://www.ipix.com/cgi-bin/download.cgi" > <IMG SRC="images/ipixlogo.gif" BORDER=0 ALIGN="MIDDLE"> </A> IPIX Wizard 2.0 SV User Manual 45 IPIX File Location on the Server We recommend placing all IPIX files in either: • The same directory/folder where the calling HTML files are located, or • A directory/folder named ipix (all lower case) located one level down from the directory/folder which contains the calling HTML files We recommend using relative paths, e.g. ipix/ipixfilename.ipx Absolute path names are supported, but relative paths are recommended. Performance is usually improved when relative paths are employed. Sample Refreshing Page The following HTML sample creates a self-refreshing page that refreshes the image every 30 seconds. This page was used on the IPIX Intranet to test some of our WebCam software. <HTML> <HEAD> <META HTTP-EQUIV="Content-Type" CONTENT="text/html; charset=iso-8859-1"> <TITLE>Web Cam Description </TITLE> </HEAD> <BODY> <CENTER><B><FONT SIZE=+1>Click 'Refresh' or 'Reload' for the most recent IPIX image.</FONT></B></CENTER> <P><B><FONT SIZE=+4>The IPIX Web Cam</FONT></B> <P><FONT SIZE=+1>Tune in here for up to the minute IPIX images. Powered by our new WebCam technology this page demonstrates the ultimate in surveillance solutions. Just a single digital camera equipped with a fish-eye lens gives you complete coverage of the target area. You will need to set your cache size to 0 in order to receive updated images.</FONT> <CENTER> <EMBED SRC ="ipixcam.ips" REFRESH=30 LOADALL=TRUE HEIGHT=360 WIDTH=480 PALETTE="foreground" BORDER=5></CENTER> </BODY> </HTML> 46 IPIX Wizard 2.0 SV User Manual Posting Java IPIX Java IPIX are designed for viewing with the IPIX Java Viewer and are posted in a slightly different fashion than other IPIX image types. They can be more convenient because it is unnecessary for your customer to download the IPIX plugin to view a Java IPIX image. They are, however, generated in a lower resolution to reduce file size and may not be acceptable in all cases. There are four elements that must be placed on the Web server to properly post a Java IPIX image: • the HTML file that links to the Java IPIX; • the IPIX Java Viewer itself, named IpixViewer.jar; • the Java class files; and • the Java IPIX image intended for viewing. The HTML file contains a Java applet section which contains a reference to both the IPIX Java Viewer and the Java IPIX to be viewed. The IPIX Java Viewer file, IpixViewer.jar, contains an archive of the Java applet. JAR files work with Microsoft Internet Explorer and Netscape Navigator 3.0 and higher. If someone viewing your page has a 3.x version of a browser, the JAR file will not be recognized, and instead, all of the class files will be loaded. This has the same effect as the JAR file, it takes a little bit longer to display the page. Java Minimum Requirements Java requirements differ from the IPIX Wizard minimum requirements. Java viewing is done through most customers’ web browsers. Please note the minimum requirements to view Java IPIX on the Internet:: • Pentium running Windows 95/98, or NT 4.0 or higher or • Macintosh Power PC running Mac OS 7.5.1 or higher • Internet Explorer 3.02 or Netscape 3.0 or higher Creating a Java web page Capitalization within the Java IPIX web page is very important. The Java IPIX Viewer is called from the class “IpixViewer.class,” where the I and V are capitalized. If you do not have the proper capitalization, your page will not work properly. When you create your page and post it to your internet site, you will need to upload the class files. A copy of these files are included with your IPIX Wizard. If you installed your IPIX software to the default location, then the Java Viewer files are located in the following directory: C:\Program Files\IPIX\IPIX Wizard 2SV\Java Viewer These files are also on the IPIX Wizard CD-ROM. IPIX Wizard 2.0 SV User Manual 47 Java web page sample The following is a cut and paste example of the Java applet tag contained in the HTML file: <applet code="IpixViewer.class" archive="IpixViewer.jar" align="baseline" width="320" height="240" name="IpixViewer"> <param name="Spin" value="on"> <Param name="URL" value="java.ipx"> </applet> NOTE: The width and height values may be changed but must maintain the same aspect ratio. The suggested limit on width and height is 400 by 300. Explanation of Terms: The following items are explanations of terms used in the above sample of HTML code. • APPLET tag is required to call the Java applet. • ARCHIVE indicates the name and location of the Java applet. The Java applet is named: IpixViewer.jar • WIDTH=320. This indicates the width of the applet in pixels. 320 is the suggested size. • HEIGHT=240. This indicates the height of the applet in pixels. 240 is the suggested height. • PARAM NAME="URL" This parameter indicates the name and location of the Java IPIX. Here the parameter is VALUE="java.ipx". This indicates that the Java IPIX is named java.ipx and is located in the same directory as the HTML file that is calling it. Note: Relative addresses are permitted. VALUE="java.ipx" • PARAM NAME="Spin" This parameter turns on and off the automatic spin feature of the Java IPIX. The VALUE may be set to ON or OFF. When the Spin parameter is not specified, it defaults to off. Note: Relative addresses are permitted. • VALUE="jipix/java.ipx" • PARAM NAME="Spin." This parameter turns on and off the automatic spin feature of the Java IPIX. The VALUE may be set to ON or OFF. When the Spin parameter is not specified, it defaults to OFF. Resizing your page 48 Sometimes when you resize a web page containing a Java IPIX image, there may be some problems with image display. When you resize the image, the browser automatically refreshes the web page to reformat it to the new display size. The IPIX image may display as a black screen. To correct this, hold down the Shift button on your keyboard and click the Refresh button on the browser. The IPIX image should display properly after the page reloads. IPIX Wizard 2.0 SV User Manual Posting Non-Java IPIX There are two ways to place IPIX files into HTML code for viewing: Controlled IPIX Image Size Controlled IPIX Image Size To specify the size of the IPIX image within the browser Full Screen To display full screen IPIX images When you want to control the IPIX image size within the browser window, employ the EMBED SRC tag. To set IPIX image size, include the HEIGHT and the WIDTH dimensions within the EMBED SRC tag. It is also essential to include the PALETTE attribute with the value “foreground” [PALETTE="foreground"]. Code Sample using a standard IPIX file: <EMBED SRC ="ipix/spacestation.ipx" HEIGHT=300 WIDTH=400 PALETTE="foreground" BORDER=0> Full Screen Image The simplest way to post an IPIX image for full screen viewing is to use the HREF Anchor tag. When this method is used, the IPIX will fill the browser window. The following HTML code samples can provide some guidance when you are building your own web pages. These examples are also included in the online help, where you can copy and paste the code directly into your HTML source code. To view an IPIX image of Westminster Abbey: • With Clickable Image to another web page: <A HREF “http://www.ipix.com/ipixx/l4344.ipx”> double-click here<IMG SRC="images/westabbey.gif" WIDTH=100 HEIGHT=86 BORDER=0> </A> • With Clickable Image to a relative address: <A HREF “ipix/sample.ipx”> double-click here<IMG SRC="images/westabbey.gif" WIDTH=100 HEIGHT=86 BORDER=0> </A> • Without Clickable Image: <A HREF ="http://www.ipix.com/ipix/sample.ipx"> double-click here </A> <IMG SRC="images/wabbey.gif" WIDTH=100 HEIGHT=86 BORDER=0> IPIX Wizard 2.0 SV User Manual 49 • Using FRAMES. The HTML code using a FRAME which contains an IPIX link: <FRAME SRC ="http://www.ipix.com/ipix/sample.ipx" name="IPIX“> IPIX Images and Frames Your frame names must be in all CAPS! This violates the NO CAPS rule but is a REQUIREMENT for this process to work. This process requires the IPIX I-Linker. Steps for controlling frames from an IPIX: • Create your frameset with all caps. • Open your IPIX image in the I-Linker. • Create a hotspot. • Set the hotspot Media Type to URL. • Set the hotspot File Name to the HTML file name, semicolon, target frame. • Example: ../info.html;FLAT • Save and test your changes. 50 IPIX Wizard 2.0 SV User Manual MIME Type Introduction What is MIME? MIME is an acronym for Multipurpose Internet Mail Extensions, a formatting specification for non-ASCII messages that can be sent over the Internet. Most email clients now support MIME, which enables them to send and receive graphics, audio, and video files via email. Web browsers that support MIME types can display or output non-HTML files. MIME Type IPIX files present a new file type to systems that have not run them before. Whenever a new file type is introduced, the operating system (Windows95/98, etc.) must be instructed how to handle it and what application is used to process it (this is a onetime operation). MIME types are used to help define the new file type and application software used to process it. This applies to both Web browsers and Web servers. IPIX MIME Types on Web Servers When IPIX files are used on webpages, the appropriate MIME type must be set up on the Web Server. These MIME types must be set up on the local computer as well. The MIME type is usually set up on the local computer when the IPIX browser plugin is installed. The Web server which contains IPIX files for downloading and/or viewing needs to be properly configured. It must send a message which designates the correct MIME type for processing an IPIX file. Configuring a MIME type for a Web server is usually not difficult. • The server maintains a file indicating the types of documents that correspond to various file extensions. The name of this file differs based upon the Web server. • When the server gets a request for a URL leading to a file which has one of these extensions, it first sends a single line to the browser which states the major and minor MIME types. The MIME types that should be added to the Web Server are: IPIX Wizard 2.0 SV User Manual MIME type/subtype Extension application/x-ipix file extension is ipx application/x-ipscript file extension is ips 51 When a Web server is not properly configured for the IPIX MIME type, users experience difficulties in downloading and viewing IPIX files. When the .IPX extension is detected but is not on the Web server MIME type list, a default application type and subtype will be employed. The browser will attempt to assign an application to open the IPIX file. Because no default application can open an IPIX file, the user will not be able to view the IPIX image on their browser. To review how to add MIME types to Apache Web Servers, visit the following page: • http://www.apache.org/docs/mod/mod_mime.html • http://www.apache.org/docs/mod/mod_mime.html#add type Typical file locations for MIME type on other Web servers: • IIS--Located in Registry Key: HKEY_LOCAL=MACHINE\SYSTEM\CurrentControlSet\Services\ InstInfo\ ==>Parameters\MimeMap • IIS non-HTTPD: c:\httpd\conf\mime.typ • HTTPD for Windows or UNIX: /usr/local/etc/httpd/conf/mime.types IPIX plugins and MIME types When an IPIX plugin is downloaded and installed, MIME types are automatically configured. Thus, when Netscape Navigator 3.0 and later or Microsoft Internet Explorer 3.02 and later are used with IPIX plugins, MIME type is not an issue. When an IPIX viewer is downloaded for use as a stand-alone application with a browser, the MIME type is not automatically configured and must be configured manually. 52 8 Wizard Help Trouble-Shooting the Wizard I nteractive Pictures’ goal is to consistently design and develop quality software products and to reduce or eliminate program errors. The IPIX Wizard 2.0 SV has been extensively tested on computers with a broad range of hardware configurations and operating systems. To assist you in running the Wizard, we have included the following Trouble-Shooting guide. Viewing IPIX Images How do I view my IPIX image? The IPIX Viewer is installed with your IPIX Wizard allows you to view any high or low resolution IPIX image. The Viewer will not open newer Java IPIX images. Older Java images, with the .IPX file extension, can be opened in the Viewer. Double-clicking on an IPIX image should open the IPIX Viewer software. The first time you open an IPIX image, Windows may prompt you to create a file association for the .IPX file extension. Select the IPIX Viewer from the list of installed Windows applications. Image Alignment What if my images don’t line up? When images do not line up properly, it usually indicates either a problem with camera calibration, or a problem with how the picture was originally taken. If you have run the Quick camera calibration, you may want to try running the Thorough version. Although this process takes much longer, it is potentially more accurate. • Make sure that the images you have taken are suitable for calibration. These images should be taken indoors and in a well-lit room with plenty of detail at the seam. Avoid rooms with low or uneven lighting or with large areas of blank walls or ceiling. • There should be no movement at the seam. If objects on the seam are moved between pictures, the calibration will be skewed. IPIX Wizard 2.0 User Manual 53 What do I do if my images don’t line up after I’ve calibrated my camera? There are several situations that may cause the seams to misalign. When a seam is aligned properly, you may see a black space where the two hemispheres meet after the IPIX image is built. Problems with the seam can be caused by: Incorrect picture quality. When you take pictures, make sure that the digital camera is set to take pictures at the highest available resolution. To change the camera resolution, please refer to your camera manual. If the images you have taken were not taken when the camera was set to Fine or Super High Quality mode, then this may cause problems with alignment. Movement of the tripod. It is possible the camera or the tripod was inadvertently moved during picture taking. If this happens, try taking another set of pictures and re-calibrating the camera. Equipment problems. Seam differences can be caused by incorrectly assembled equipment. Ensure the lens is snugly attached to your camera. The back of the rotator should be flush with the back of the camera. My images line up, but the hemispheres are not the same color. Before you preview the IPIX image, make sure the Color Balance Hemispheres option is selected on the Image Processing screen. This may help blend the colors. If the color difference is still noticeable, try to: • Create a back-up copy of the original JPG fisheye image you downloaded from the camera. • Open the image copy in a graphics editing program like Adobe Photoshop or Adobe PhotoDeluxe. • Adjust the color balance and save the image. • Open the Wizard and load the new hemisphere with it’s matching second hemisphere. On the Image Processing Options screen, make sure that Adjust Camera Alignment option is checked. Click the Finish button to build the new IPIX image. I’ve tried everything, but my images still don’t line up. In this case, take four images with your camera, lens, and rotator. Email the images to Interactive Pictures, at [email protected]. One of our Service Center Representatives will review with your images and build a calibration file. The IPIX Service Center requires four pictures taken with your camera and fisheye lens for camera configuration. • Set the camera to Super High Quality or Fine mode. Disable the camera’s flash. • Position the camera in the forward direction to take a picture. Try to avoid capturing moving objects at the edge of the field of view. Take care to not place the IPIX image seam on visually important regions of the image. • Set the Self-Timer, and wait for the camera to take the picture. • Rotate the camera to the opposite direction until it clicks into place and take another picture. When rotating the camera, be sure the tripod remains stationary. Take two sets of pictures, both front and back views. Always take pictures in pairs. Sequence picture taking so that the front picture is followed by the back picture. 54 IPIX Wizard 2.0 SV User Manual • Download the images to your hard drive by following the instructions in your camera's user guide. • Email the images as an attachment to [email protected]. An IPIX Service Center representative will review your images and develop a camera configuration disk suited to your camera and lens. • A Service Center Representative will email you the configuration file within 48 hours. Please allow extra time for weekends and holidays. • If you have installed IPIX Wizard in the default location, copy the camera configuration file to the C:\Program Files\IPIX\IPIX Wizard2 SV\cameras directory. My thumbnail preview doesn’t look right. The Wizard will function normally even if the thumbnails appear slightly off-color. You should not have any trouble viewing the IPIX images. This error is usually caused when Windows is set to use only 256 colors. Setting the Display control panel to more colors by increasing the color depth, if possible, should help this. Windows NT 4.0 will sometimes have color pallette problems with thumbnail images. This may be due to the way that Windows NT handles video. It is possible that the most up-to-date hardware video drivers may correct this problem. Tripod Cap Problems The tripod cap file I created isn’t working. If your Tripod Cap file loads improperly when you build an IPIX image, try this procedure: • Make a copy of an IPIX Tripod Cap file. • Open your tripod cap file, and the IPIX tripod cap file in a graphics program. • Copy and paste your image into the IPIX tripod cap file. Save the file as a new name, and try rebuilding the IPIX image with the new tripod cap file. My tripod cap looks fuzzy around the edges. The fuzzy appearance, “ghost edges,”around the edges of the Tripod Cap is caused by the JPEG compression the IPIX Wizard uses to build the IPIX images. When the Wizard compresses an image, it compresses the image so the file size is smaller. Because original fisheye image data is lost, tripod caps may appear to have a ghost edge or a fuzzy appearance. Before you make any changes to your tripod cap file, make a back-up copy. When you create your tripod cap file, try including a drop shadow with the image. The black in the drop shadow may help mask any ghost edges. IPIX Wizard 2.0 SV User Manual 55 General Error Messages Corrupted Key Database If you receive this error, DO NOT reinstall the IPIX Wizard software. Please contact IPIX Technical Support at (888) 909-4749 and they will help you resolve this problem. VOX File Error If you experience a problem with a VOX file, please contact your IPIX Representative, or contact Technical Support at (888) 909-4749. Camera Problems If you encounter any general problems with your camera, please refer to your cmera’s documentation. Frequently Asked Questions What is an IPIX image? An IPIX image is an interactive, spherical image offering users a complete field of view, from earth to sky, floor to ceiling, horizon to horizon. An IPIX image is a full-environment, 360° X 360° still photograph (or rendering), viewable on the Web or CD-ROM, with the capacity to perform a variety of multimedia functions, such as automatic navigation, zooming, playing background music, and linking to text, audio, standard photographs, URLs, video, and other IPIX images. Never before has a technology so thoroughly captured the way we see the world with our own eyes. With an IPIX image, you can experience places, events, or situations in a totally new way – when you Step Into The Picture. How can I use IPIX image? IPIX images can be used in a wide range of applications - almost any where you use your Digital Camera. Use IPIX images to capture immersive images for: • Real estate - for showcasing properties • Insurance - for documenting accidents or property damage • Journalism - for capturing locations or event • Education / Training - for exploration of places, events or products • Product Demonstration - for presenting product features and benefits 56 IPIX Wizard 2.0 SV User Manual • Publishing - for online Web journals/newsletters, CD-ROM titles or interactive magazines • Corporate - for training, presentations, events • Entertainment - for interactive games or online programming support • Vacations - for virtual scrapbooks and family histories How do you make an IPIX image? An IPIX image is created by capturing two opposing photographs with a fisheye lens. Our patented technology remaps the images, seaming them into an immersive whole. IPIX images can then be linked together, linked to traditional photographs and renderings, enhanced with audio or other file types, or incorporated into other development environments. Why do I need a Fisheye Lens? In the past, fisheye lenses were used for special effects photography so that an extremely wide field of view could be captured in a single shot. Technically speaking, the fisheye lens captures a 360° by 180° field of view in a single image. By taking two opposing fisheye lens images and seaming them together with IPIX software, a complete spherical image is created that can be viewed on any Windows or Macintosh computer. What is a Hemisphere? A hemisphere is a single image captured through a fisheye lens. Two hemisphere images, when digitally stitched together with IPIX software, allow you to view a scene in any direction. Does the IPIX Digital Camera include everything I need to create immersive images? Yes. The kit is an easy to use, all-in-one solution for capturing immersive images. The kit includes the Digital Camera for taking pictures, a high quality fisheye lens, a tripod with camera rotator plate for precise camera placement during image capture, IPIX Wizard software and IPIX Keys for creating distributable IPIX images, and a handy camera case. What are IPIX Keys? IPIX Keys allow you to save your IPIX images for distribution on the Web or CD-ROM. When capturing IPIX images, you can use the IPIX Wizard software included with the kit to preview your immersive IPIX images. Unlike traditional film that you must purchase and develop before seeing the picture, IPIX Keys let you preview the immersive images before saving and paying for them. When you are ready to distribute your IPIX image, you use the Save-As function to use one of your IPIX Keys. How can I get more IPIX Keys? There are several ways you can order Keys to save your IPIX images. These include calling IPIX directly at (423) 482-3000 or toll free at (888) 909-IPIX (4749). Additionally, you can order IPIX or redeem IPIX certificates by going to the Interactive Pictures’ On-line Store, located at http://www.ipixstore.com. IPIX Wizard 2.0 SV User Manual 57 Do I really need a Tripod to take IPIX pictures? A tripod is not absolutely necessary to take full 360° x 360° IPIX images since you can visually align your two hemisphere images. But for the highest quality IPIX images, use the tripod with the IPIX rotator and bracket to perfectly align the front and back hemispheres for seamless IPIX images. What are the Rotator and Bracket Used For? The rotator plate, mounted on the table top or full height tripod to support the Digital Camera, allows the camera to be rotated exactly 180°. This 180° movement ensures the two fisheye hemispheres, which will be fused into one image, will contain the correct amount of image data for a quality IPIX image. What are some tips for making successful IPIX Images? Ensure that exposure is maintained at the same level for each IPIX hemisphere image. Some Digital Cameras allow you to set the camera to a fixed exposure mode, ensuring consistency across IPIX hemisphere images. For Digital Cameras that do not support this type of exposure control, you will need to be sensitive to hemisphere exposure variations. For example, when photographing interiors, a bright window or even a lamp can skew the exposure. You can overcome this by selecting a slightly different angle of view or changing the location of the IPIX image seam. • Place the tripod on a firm surface and adjust to an even, eye-level setting. Although this is not critical for making a 360° x 360° view, the perspective will appear natural. • Use the rotator to turn the camera until you hear a click and feel the rotator catch into place. The subsequent opposing image can be accurately captured by rotating the camera another 180°. • Use the self-timer to trip the shutter. This will help prevent camera vibration and contribute to maximum sharpness. It will also help prevent your fingers and hands from appearing in the ultra-wide view of the fisheye lens! • Shoot a variety of perspectives for each scene. It helps to have choices when editing. Remember, you don’t need to use IPIX Keys in order to see how each 360° view is rendered. You can try all the views, then pick your favorite to finish off with an IPIX Key. • Look for content that invites a 360° exploration. Scenes with interesting content in the vertical direction as well as the horizontal direction will produce the most dynamic scene. • Build perspective by including objects that are very near the camera as well far away to help build perspective and depth. • Avoid placing the seam on visually important regions of the picture, or on moving elements, such as people or cars. On what computers can I build IPIX images? 58 The IPIX Wizard is available for Windows 95/98, Windows NT and Apple Macintosh PowerPC. The IPIX Builder software is currently available only for the Windows-platform. For more information, contact Interactive Pictures Corp. at 1-888-909-IPIX or by emailing IPIX Sales, at [email protected]. IPIX Wizard 2.0 SV User Manual Once I’ve created an IPIX image, how do I post it on my Web page? Step 1: Make sure your server system or Internet Service Provider has the necessary MIME type settings. For IPIX images to work with your server system, these MIME type settings are necessary: application/x-ipscript file extension=ips application/x-ipixfile file extension=ipx Step 2: Make sure all of your IPIX files—IPIX images (.ipx), IPScripts (.ips, created with the IPIX-TV Studio), and audio files (.midi, .vox, .wav; linked to the IPIX with the I-Linker) are located in one directory. Step 3: Embed the IPIX image onto your Web page. The code used to embed IPIX on a Web page varies depending on how you prefer the IPIX to appear. If you would like the IPIX image to open to full screen size, use the following code: <a href="yourimage.ipx">something clickable like text or a button</a> If you would like to control the opening size of the IPIX, use the following code varying the width and height values: <embed src="yourimage.ipx" border=0 width=320 height=240 palette="FOREGROUND"> Are there any Web browsers that IPIX images will not work with? IPIX images are viewable through all internet browsers via the free, downloadable IPIX plugin. The plugin download is made even more simple with an ActiveX download for Internet Explorer and a JIM download for Netscape. Interactive Pictures Corp. also offers a free, stand-alone viewer, available from the IPIX web site, http://www.ipix.com. How do I get the IPIX plugin for my web browser? Plugins and viewers are available for download from the IPIX web site, located at http://www.ipix.com. What instructions should I provide to my Web site visitors for retrieving the IPIX plugin? Downloading the IPIX viewer is a simple process. Go to the IPIX Website (http://www.ipix.com) and select the “IPIX plugin” button. Interactive Pictures has made the process easy by automatically determining which plugin you need. Follow the simple instructions to download and install the plugin or viewer selected. How do I make the IPIX picture move by itself? IPIX-TV Studio software, available from Interactive Pictures Corporation creates automation files called IPScripts. The IPScripts are capable of panning and zooming the IPIX image without viewer interaction, and control the playback of IPIX images. IPIX Wizard 2.0 SV User Manual 59 What is an IPScript? An IPScript is a file which can be used to control the presentation of IPIX images as well as control the launching of other media or a series of IPIX images. Create IPScripts using the IPIX-TV Studio software. How do I link one IPIX image to another? Link one IPIX image to another by using the IPIX I-Linker software. With the I-Linker, you can create hotspots within IPIX images which can point to other IPIX images, URLs, sound files, or IPScripts. What is a Java IPIX? A Java IPIX is a special format of an IPIX image which is compatible with the IPIX Java Viewer. The Java Viewer provides users of Internet Explorer 3 (and up) and Netscape 3 (and up) the ability to view IPIX images without an IPIX plugin. Do IPIX images come in different file sizes? Yes, IPIX images come in various file sizes. When built with the IPIX Wizard, IPIX images can be output in two different file sizes: Quick View, also known as Low Resolution (file size 30K-60K) and Standard, as known as High Resolution (file size 180K-280K). The varying file sizes are determined by a compression rate that you select inside the IPIX Wizard. The exact file size varies slightly image to image due to the difference in initial quality and quantity of image data. The IPIX Wizard also outputs Java IPIX images. 60 IPIX Wizard 2.0 SV User Manual 9 Glossary CODEC A CODEC, or compressor/decompressor, is any technology for compressing and decompressing data. CODECS can be implemented in software, hardware, or a combination of both. Hemisphere An 360° x 180° picture taken with a fish-eye lens, and forming one half of an IPIX image. IPIX Image A full-environment, 360° X 360° still photograph (or rendering), viewable on the Web or CD-ROM, with the capacity to perform a variety of multimedia functions, such as automatic navigation, zooming, playing background music, and linking to text, audio, standard photographs, URLs, video, and other IPIX images. Key A number obtained from Interactive Pictures Corporation that allows IPIX images to be saved in a specified format. MIDI Musical Instrument Digital Interface (MIDI) is a standard of the electronic music industry for controlling electronic musical devices. MIME Multipurpose Internet Mail Extensions. A formatting specification for non-ASCII messages so that they can be sent over the Internet. Many e-mail clients now support MIME, which enables them to send and receive graphics, audio, and video files via email. Web browsers that support MIME types can display or output non-HTML files. Seam The area in an IPIX image where two hemispheres meet. Seaming The process of joining two hemispheres into a whole, removing distortion, and blending the line where the two hemisphere meet. VOX Interactive Pictures offers a special service to create low-bandwidth audio files to include with IPIX images. WAVE The format for storing sound in files developed jointly by Microsoft and IBM. Support for WAV files was built into Windows 95 making it the de facto standard for sound on PCs. IPIX Wizard 2.0 User Manual 61 Index A Add Keys 32 Add Keys screen 43 Adjust Image Alignment 38 Assembling the Camera, Tripod, and Rotator 6 B Bio Info 35 Bio Information 26 Bio Information, 35 Blend Seam 37 Browsing to Hemisphere Files 30 Build 39 Build process 39 Building 29 Customizing 35 Bio Info 35 Multimedia 34 Preview 39 Saving IPIX images 32 Seaming 39 Building an IPIX Image 29 C Calibration 19 Calibration procedure 20 Calibration Process 20 Camera calibration Definition 19 Camera Calibration 19 Calibration process 20 Configuration Diskette 5 IPIX Wizard 2.0 User Manual 63 Definition 5 Frequency of 5 How long does it take? 20 Improving the calibration 21 Procedure 20 Quick 20 Quick 53 Quick Calibration 5 Thorough 20, 53 Camera Calibration Calibration Screen 19 Camera Problems 56 Cameras Multliple resolutions 38 Change to Expert Mode 26 Changing Initial Viewpoint 39 Changing the Profile 28 CODEC 61 Color Balance 37 Corrupted Key Database 56 Create a Profile 28 Creating a Custom Tripod Cap 36 Customization Options 35 Customizing IPIX Reference PTR 37 Customizing Your IPIX Image 35 E Equipment problems. 54 Error Messages 56 Expert Mode 25 Changing to 26 Definition of 25 Image Processing 26 64 IPIX Wizard 2.0 SV User Manual Media 26 Parts of the screen 25 Ref PTR 26 Source 25 Tripod Cap 26 F First Steps 5 Fisheye lens 6 Frequently Asked Questions 56 Functions Bio Information 26 Saving 41 Seaming 23 TWAIN 23 Zoom settings 40 G Glossary 61 Go To Zoom Max. 40 Go To Zoom Min 40 H Help Image Alignment 53 Trouble-shooting 53 Hemisphere 61 Hemispheres 29 - 30 Opening files 30 Browsing 30 Single 30 Single Hemisphere 29 Two 30 High Resolution IPIX 32 How do I order more Keys? 42 IPIX Wizard 2.0 SV User Manual 65 How do I view my IPIX image? 53 HTML Frames 50 MIME 51 Posting JAVA images 47 Refreshing page 46 Server location 46 I Image Alignment 53 Trouble-shooting 53 Image Alignment 38 Image Processing 26 Adjust Image Alignment 38 Blend Seam 37 Image Smoothing 38 Image Processing Options 37 Improve the calibration 21 Initial Viewpoint 39 Inserting Sound File 35 Inserting Sound Files into Images 35 Installation 5 Before you install 5 IPIX Wizard 12 Installation Procedure 11 IPIX File Location on the Serve 46 IPIX Image 61 IPIX images Definiation 1 Point of view 7 Seams 7 Uses of 2 IPIX Images and Frames 50 66 IPIX Wizard 2.0 SV User Manual IPIX Images and Keys 42 IPIX Online Store 33, 44 IPIX Plugin 45 IPIX Wizard 2, 11 Overview 2 IPIX Wizard Installation 11 J K Java IPIX 32 Key 61 Key Code 44 Key Load Dialog 32 Keys 42 How do I locate the Site Code? 43 How do I order more Keys? 42 indicates 32 IPIX Online Store 33 Saving Your IPIX Image 40 What is an IPIX Key? 42 Why does IPIX use Keys? 42 Keys 32 L License Agreement 13 Loading Hemispheres Directly from a Digital Camera 31 Low Resolution IPIX 32 M Media 26 MIDI 34, 61 MIME 51 - 52, 61 MIME Type 51 Definition 51 MIME Types on Web Servers 51 IPIX Wizard 2.0 SV User Manual 67 Minimum and Maximum Views 40 Movement of the tripod. 54 Multimedia Inserting sound files 35 Multimedia Customization 34 Multiple resolutions 38 O Open Hemispheres 29 Overview 1 IPIX Technology 1 Technical Support 4 P Photography Attaching the camera to the rotator 7 Composing the image Seams 7 Fisheye lens 6 No tripod 9 Taking pictures Composing 7 Taking the Picture 8 Tripod 6 Photography Tips 6 Introduction 6 Point of view 7 Posting Java IPIX 47 Posting Non-Java IPIX 49 Preferences Camera calibration 27 Image Thumbnails 27 Mode 27 Notifications 27 68 IPIX Wizard 2.0 SV User Manual Preferences Screen 27 Preview Min and Max views 40 Preview IPIX File types 32 High and low resolution 32 JAVA 32 Preview IPIX 32 Preview screen 39 Initial view 39 Maximum zoom 39 Minimum zoom 39 Previewing PIX Images 39 Previewing the New IPIX Image 39 Changing Initial Viewpoint 39 Setting Max and Min Zoom 39 Profile Changing 28 Information contained in 28 Profiles 28 Creation 28 Q R Quick Calibration 20 Reference Pan,Tilt,Rotation. 26 Reference PTR 37 Registration 16 S Save 41 Saving IPIX Images 32 Saving Your IPIX Image 40 Seam 39, 61 IPIX Wizard 2.0 SV User Manual 69 seaming 24 Seaming 61 Seams 7 Blend Seam 37 Definition 24 Example of 24 Select Camera 15 Set Zoom Max. 40 Set Zoom Min 40 Settings 22 Single Hemisphere 30 Site Code Definition 43 Location 43 Site ID Code 32 Sound file formats File types 34 Sound File Formats 34 File types 34 Source 25 Starting 5 IPIX Wizard Installation 11 Photography Tips 6 T Taking Pictures without the Tripod 9 Taking the Picture 8 Taking Your Pictures 7 Composing the image 7 Technical Support 4 Thorough Calibration 20 Thumbnails Previews 55 70 IPIX Wizard 2.0 SV User Manual Tripod 6 Taking pictures without one 9 Tripod Cap 26, 36, 55 Creating a new one 36 Tripod Cap problems 55 Trouble-shooting Images 22 Trouble-Shooting Camera 56 Error Messages 56 Hardware trouble 54 Image Alignement 53 Thumbnails 55 Tripod Cap 55 Tripod movement 54 Viewing IPIX images 53 Trouble-Shooting the Wizard 53 TWAIN 24, 31 TWAIN driver 31 Two Hemispheres 30 V Viewing IPIX Images 53 VOX 34, 61 VOX File Error 56 VOX. 34 W Warranty 2, 4 License Agreement 13 WAV 34, 61 WAVE 34, 61 Web File Location on Server 46 IPIX Wizard 2.0 SV User Manual 71 Frames 50 MIME Types 51 Posting Non-Java images 49 Web Pages 45 What if my images don’t line up? 53 Why does IPIX use Keys? 42 Wizard Camera Configuration 38 Customizing your image 35 Image Processing 37 Installation 11 Destination Folder 14 Registration 16 Select Camera 15 Minimum Requirements 11 Modes Wizard mode 24 Multimedia options 34 Preview 39 Profiles 22 Saving 40 Seaming the picture 38 Views and Zooms 39 Wizard Map 25 Wizard Mode Definition 24 Navigation 25 Wizard Map 25 Work Area 25 Wizard Mode Explained 24 Work Area 25 72 IPIX Wizard 2.0 SV User Manual Y Z Your Camera and the Tripod 6 Zoom Initial Viewpoint 39 SET MAX ZOOM 39 SET MIN ZOOM 39 Zoom factor 39 IPIX Wizard 2.0 SV User Manual 73