1
Time Display and Channel Display – These buttons enable their respective displays on the
video during playback.
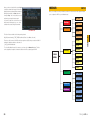
SCHEDULE
This is covered in Section 3.6 Schedule
NETWORK
Accessing the DVR from within a Local Area Network, over the Internet or via a Smartphone
along with setting up e-mail notifications and other online features will be covered in full in the
Remote Monitoring Guide included on the CD that came with your DVR or available for
download from www.Q-See.com.
DETECT
Please see Section 3.7 for instructions on using the features in this window.
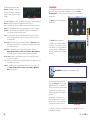
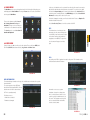
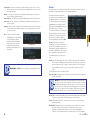
This window contains the settings that control the Graphical User Interface (GUI) as well as
how you view the DVR.
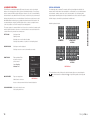
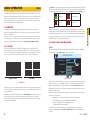
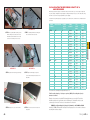
Enable Tour – Selecting this box will cause the screen to cycle through displaying channels
selected in the following fields.
Interval – This is the time – from 5 to 120 seconds – that the DVR will display each group of
channels before moving to the next group in the tour.
View – These are the number of groups available in each tour. Deselecting a number means
that this group of channels will be skipped during the tour.
Motion Tour Type – If a motion detection event occurs, and the Tour button is selected in the
Detect window (See Section 3.7) the DVR will switch a single-screen view tour or an
eight-screen view tour displaying the channels that were selected in that menu.
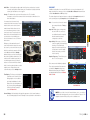
In Tour mode, you will see an icon in the
upper right corner of the display which allows
you to control the tour by right-clicking upon
it. Clicking upon the icon will cause the tour
to start or resume.
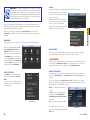
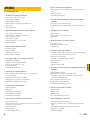
Transparency – You can choose to make
the menu screens more transparent
or opaque with 128 being the most
transparent and 255 being completely
opaque.
CHAPTER 4 MENUS
DISPLAY
Resolution – There are five pre-set options; 1366x768 (default), 1280x1024, 1280x720,
1024x768 and 800x600. The DVR will need to reboot in order for these changes to
take place.
Window switching mode
enabled
PICTURE 4-20
Window switching mode
stopped
PICTURE 4-22
DEFAULT
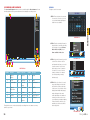
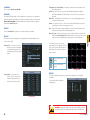
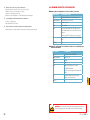
Channel Name – You can name each
channel - up to 25 characters. An
example is naming the channels
based on where they’re located.
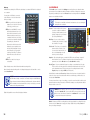
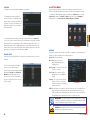
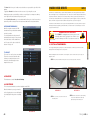
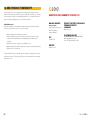
The options in this window will allow you to return various settings back to their default
configuration.
The settings that will be changed are
self-explanatory.
PICTURE 4-21
PICTURE 4-23
WARNING! Language, time display mode, video format, IP address, and user
account will not retain your settings after being reset back to default values!
40
41
Meijer.com