1
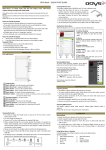
Table of Contents Disclaimer ................................................................................................2
Introduction .............................................................................................2
Package Content.......................................................................................2
Safety Instructions....................................................................................2
Support ....................................................................................................3
Getting Started .........................................................................................4
Parts and Controls................................................................................. 4
Power On and Off the Reader ............................................................... 5
Language Setting ................................................................................... 5
Charging the Reader.............................................................................. 5
Inserting Memory Card ......................................................................... 6
Starting from Home Menu .................................................................... 6
Entering Option Menu........................................................................... 7
Importing Content ....................................................................................8
Importing Content................................................................................. 8
Importing DRM Contents ...................................................................... 8
Installing Adobe Digital Editions (ADE) .................................................. 8
Importing and Transferring Content..........................................................9
Authorizing PC and Reader.................................................................... 9
Transferring DRM ebooks to Reader ..................................................... 9
Reading Books ........................................................................................10
Opening Book...................................................................................... 10
Turning book page............................................................................... 10
Adjusting Font Size .............................................................................. 10
Zooming In/Out................................................................................... 10
Using Option Menu in Reading............................................................ 11
Using Bookmark .................................................................................. 11
Go to Page........................................................................................... 12
Auto Flip.............................................................................................. 13
Book Information ................................................................................ 13
Rotate ................................................................................................. 13
Playing Audio File...................................................................................15
Viewing Pictures.....................................................................................16
File Explorer ...........................................................................................17
Settings ..................................................................................................18
Troubleshooting .....................................................................................19
Product Specifications ............................................................................20
Copyrights and Trademark Notice...........................................................21
Warranty Conditions ..............................................................................22
1
Disclaimer All the information, design and specifications contained in this manual were correct at the time of publication. However, as the product is under development and upgrading, the final device may have a slightly difference in appearance or modified functionality than presented in this manual. Introduction ODYS BooX is an ebook reader with full color display screen. ODYS BooX supports ebooks encrypted with Adobe DRM. Package Content 1.
2.
3.
4.
5.
Ebook Reader Earphones USB cable Quick Start Guide Warranty Card Safety Instructions Although this product is safe, please observe the following information and
warnings.
• Do not expose the device to direct sunlight, extreme heat or cold, damp or
dusty conditions. Malfunctions and damage and can occur as a result..
• Do not use the device in an extremely dry environment to avoid static
electricity.
• Do not shake the device or subject it to hard knocks. The device may be
damaged if it falls. Do not place any heavy objects on top of the device.
• Promptly load the device’s internal battery.
• Do not use the e-book reader while driving a vehicle.
• Never press two buttons simultaneously and handle the display carefully.
• Do not carry the e-book reader with other metal objects (coins or keys) in
your pocket.
• Clean the device only using a soft, dry cloth and do not use any volatile
substances, such as solvents, to avoid damaging the surface.
• Do not open the casing of the device under any circumstances, and do not
attempt to repair or modify the device.
2
• Never disconnect the USB cable from your e-book reader to the PC during a
data transfer or formatting. Correctly disconnect the device from the operating
system. Information loss and malfunctions can occur.
Hearing Safety
Listen at a moderate volume: Using headphones at a high volume can
impair your hearing. This product can produce sounds in decibel ranges
that may cause hearing loss for a normal person, even for exposure less
than a minute. The higher decibel ranges are offered for those that may
have already experienced some hearing loss. Sound can be deceiving.
over time your hearing ‘comfort level’ adapts to higher volumes of sound.
So after prolonged listening, what sounds ‘normal’ can actually be loud
and harmful to your hearing. To guard against this, set your volume to a
safe level before your hearing adapts and leave it there. To establish a
safe volume level: Set your volume control at a low setting. Slowly
increase the sound until you can hear it comfortably and clearly, without
distortion. Listen for reasonable periods of time: prolonged exposure to
sound, even at normally ‘safe’ levels, can also cause hearing loss. Be
sure to use your equipment reasonably and take appropriate breaks. Be
sure to observe the following guidelines when using your headphones.
Listen at reasonable volumes for reasonable periods of time. Be careful
not to adjust the volume as your hearing adapts. Do not turn up the
volume so high that you can’t hear what’s around you. You should use
caution or temporarily discontinue use in potentially hazardous situations.
Do not use headphones while operating a motorized vehicle, cycling,
skateboarding, etc.; it may create a traffic hazard and is illegal in many
areas.
Disposal
Do not dispose of a defective e-book reader in normal household waste
disposal containers (internal battery). Take the defective device to your
retailer or to an appropriate waste collection site. This will ensure that the
device is disposed of in an environmentally-friendly way.
Support URL: http://www.odys.de See our website for the latest information on this device, on other products by our company and on our company itself. Any firmware updates for this device are also made available on our website. If you have questions or problems, please read the FAQs on our website or contact our customer support service [email protected]. 3
Getting Started Parts and Controls Earphone jack 1 2 Micro USB jack – for data transfer and charging Micro SD cart slot – supports SD/SDHC card 3 Menu button – press to call out Option Menu 4 5 Zoom button – press to adjust font size or to zoom in/out 6 Music button – to enter into music playing menu 7 Return button – press once to return to previous menu, press and hold to return to Home menu 8 Directional buttons – to move cursor OK / Enter Button 9 10 Next pg button – press to turn to next page Previous pg button – press to turn to previous page 11 12 Power button – press and hold for 3 second to turn on/off 13 LED indicator 4
Power On and Off the Reader Press and hold the [Power] button for 3 seconds to turn on Reader. It may take a few moments for reader to turn on and loading the content. • If Reader does not turn on, charging is required. • To turn off Reader, press and hold [Power] button for 3 seconds. Power On and Off the Display • Shortly press the [Power] button to turn off the display. • Press the [Power] button again shortly turn the display on again. Language Setting • To access extra functions available, press [Menu] button to open the Options Menu. • Select [Settings] and press <OK>. • Select [Language] and press <OK> again. • Select your desired language and press <OK> to confirm. Charging the Reader • You need to charge the Reader prior to using it for the first time or when battery power is low. • You can charge the Reader via: • Connect to PC via supplied USB cable. • When charging through PC, you cannot operate the Reader. To operate the reader during charging, click the Safely Remove Hardware from your desktop with the Reader remains connection to PC. Upon Reader is safely removed, you can operate it while charging. • Please turn the Reader to standby mode to shorten the charging process. • It will take about 6 hours to fully charger the reader in standby mode (LCD off) • The battery status is displayed at the bottom left corner. The remaining battery playback time is displayed right next to the battery icon. 5
Inserting Memory Card The Reader supports Micro SD/SDHC card. To insert a Memory card: • Check that the Micro SD card is in the correct position with the contact pin facing upwards as illustrated below. You may damage the card and the reader if Micro SD card is not inserted in correct position. • Push the Micro SD card into the card slot until it clicks. • To remove Micro SD card, push the Micro SD card once again until it clicks. • We recommend using only Micro SD or SDHC cards up to 8GB capacity. • When a Micro SD card is inserted in or ejected from the reader, it may take few seconds for the reader to update the content. • Please avoid inserting or ejecting Micro SD card when other operation is running as this may cause the system hang. • Do Not remove the card if the content inside the card is being played. This will halt the operation of the reader and cause the reader to restart. • If the system is not responding, press and hold the <Power> button for 6 seconds to reset and turn it off. Starting from Home Menu When the Reader is turn on, you will enter into the Home Menu. 1. Continue Reading •
‐display the page of the last read book. Press <OK> button to •
open the last read page. •
2. Library •
‐display the list of books •
available. Library Move the cursor to desired book and press <OK> to •
•
open it. Battery Indicator 3. Battery Indicator •
‐displays current battery status •
Page Number 4. Page Number ‐displays current page number and total available pages. 5. Time & Date time and date, •
‐display current Time & Date you can set this from the •
[Settings]
•
6
Entering Option Menu To access extra functions available, press [Menu] button to call out the Option Menu as illustrated. Press the directional key to move cursor to desired item. Selected item will be highlighted in dark. Press <OK> to enter. To exit from Option menu, move cursor to and press <OK> to confirm. Alternatively, press the <Return> button to exit. To sort books by different categories: Title, Author, Category, Date, Format Jump to a specific page Read from previously added bookmarks Adjust brightness of the display screen Enter into File Explorer for advance file management Enter into Music Player Enter into Photo Viewer Enter into Settings Open your favorite book list. 7
Importing Content Importing Content • The Reader supports USB Mass Storage Device function. • To import contents (ebooks, video, audio, photo etc) into the reader, connect the reader to PC via the supplied USB cable. • Upon successful connection to PC, the reader will enter USB mode and all operation will be halted. • Go to [My Computer], double click on the reader’s disk to open. • Perform normal file management operation like other USB device. Importing DRM Contents The Reader supports Adobe DRM contents. Adobe Digital Editions (ADE) is required. To use purchased books with this device you must use Adobe Digital Editions. Please follow the instructions from the online store from which purchased. Installing Adobe Digital Editions (ADE) • Make sure your computer is connected to internet • You can download the installer from http://www.adobe.com/products/digitaleditions/#fp . • Double click on the [digitaleditions_172] file to open the installer. • For first time user, you will need to get a free adobe ID from adobe website. Click on the [get an Adobe ID online] link as illustrated: • Enter your email address and complete the online form as per instructed. 8
Importing and Transferring Content Authorizing PC and Reader • Upon registration, return to the ADE window. Enter the username and password to activate your Adobe account. • After activation, connect the Reader to PC. ADE will detect the Reader and you are prompted to authorize device. • After authorization, you will be able to find the Reader recognized in ADE as below. Contents inside the Reader will be displayed on the right hand windows. • • You can now start downloading or buying ebooks from online Ebook stores supporting Adobe DRM. • Purchased or downloaded ebooks will be stored in [My Digital Editions] in [My Documents]. Transferring DRM ebooks to Reader • From ADE menu, click on [All Items] on the left hand column • Items in [My Digital Editions] will be listed down in right window. • Select the desired item(s) to be transferred. • Drag and drop the selected item(s) into the Reader’s Drive located on the last row of the left side column as illustrated below. 9
Reading Books Opening Book • Books transferred to Reader will be listed in Home Menu. • Reader supports ebooks in epub, pdf, txt format. • Use the <Directional> buttons to move the cursor to select book and press <OK> to open. Turning book page • On reading page, press <Next Page> or <Directional‐Right> button to turn to next page. To turn to previous page, press <Previous Page> or <Directional‐Left> button. Adjusting Font Size • In reading page, press <Zoom> button to call out the size menu. • There a 5 font sizes available: Normal, Medium, Large, XLarge, XXLarge. • Move the cursor to the desired font size then press <OK> to confirm. Zooming In/Out • You will need to use zooming function to enlarge images available in the ebook (epud & pdf file) • From the size menu, select [Elarge] • Zoom menu will appear. • Move the cursor to the desired zoom level and press <OK>. • In zoom mode, use <Directional> buttons to pan across the zoomed page. • Page turning is disabled in zoom mode. • Press <Return> to exit zoom mode and return to original size and resume normal book reading functions. 10
Using Option Menu in Reading In Reading page, press <Menu> button to call out the Option Menu. Options available: 1. Add / Delete Bookmark 2. Bookmarks 3. Go to Page 4. Music 5. Auto flip 6. Book Information 7. Rotate 8. Display Settings 9. Add to Favorite 10. Decode Settings Using Bookmark Adding Bookmark When reading, turn to the desired page that you would like to bookmark. Press <Menu> button, move the cursor to [Add Bookmark] and then <OK>. Deleting Bookmark • Turn to the bookmarked page that needs to be deleted. Press <Menu> and move the cursor to <Delete Bookmark>. Press <OK> to confirm. • Alternatively, you can delete bookmark from the Bookmark List. • In the Bookmark list, press <Menu> and select [Delete] to delete selected bookmark. Depending on the e‐book format you are using, some settings may not be usable with some of your e‐books. 11
Read from Bookmarks in Home Menu • From Home Menu, press <Menu> and select [Bookmarks] to enter Into Bookmark List. Upper window displays a quick preview of the selected book. Lower window displays the list of books with bookmarks. Press <OK> on the desired book to view the available bookmark list. • In the Bookmark List, move the cursor to the desired bookmark, press <OK> to open. • To delete bookmark from the Bookmark List, press <Menu> to call out [Option Menu] and select [Delete] to confirm. Read from Bookmarks in Current Book • In reading page, press <Menu> and select [Bookmarks] to enter into Bookmark List. • In Bookmark List, move the cursor to the desired page and press <OK> to open. • To delete bookmark from the Bookmark List, Press <Menu> to call out the Option Menu and select [Delete] to confirm. Go to Page You can jump to pages using the [Go to Page] option. In the Option Menu, select [Go to Page]. In Go to Page menu, move the cursor by the <Directional‐Left/Right> button. Input page number by <Directional –Up/Down> button. Move the cursor to [Apply] then <OK> to apply settings. 12
Auto Flip You can set the Reader to [Auto Flip] mode. The auto flip duration available are: 5s, 10s, 20s, 30s, 40s, 50s, 1 min. Book Information You can check the information of the current book from the [Book Information] option. This will show: Title, Author, Publisher, File Type, Date added, File size, Publisher and Expiration. Depends on the source of ebook that you download/purchase, some of the information may not be available. Rotate To use the device in landscape view, just rotate it 90° clockwise. [Rotate] option allows you to rotate the display orientation 90o in clock wise direction to landscape orientation manually. To return to original orientation, press <Menu> and enter <Rotate> once again. In landscape view, the button layout is as below: Up
Last page
Next page
Down
In landscape view, the Option Menu is divided into 2 pages. To access options in the second page, move the cursor to [More>] icon at the top right corner of the Option Menu and then enter by pressing <OK>. The automatic rotation is only available while reading e‐
books. 13
To return to previous page, move the cursor to [< Back] and then enter by pressing <OK>. Add to Favourite • You can add books to your Favourite List. Move the cursor to [Add to Favourite] to add current book into Favourite List. • To view books in Favourite List, from Home Menu, press <Menu> button and select [Favourite]. Decode Settings To change the text language and decoding settings. Background Music Playback in Book page ODYS BooX supports background music playing when reading books or viewing photos. To control music playback in book page, press Music button < > and a mini music player control bar will appear at the bottom of the page. Press the music control buttons to control music playback as described below. To return to book page, press <Return> button. 14
Playing Audio File Music Player • From Home Menu, press <Menu> to call out Option Menu. • Move the cursor to [Music] and press <OK> to confirm. • In the Music player, press <OK> to play/pause music playing • Press <> (Directional Right) to play next song, press and hold to Fast Forward • Press <> (Directional Left) to play previous song, Press and hold to Fast Rewind • Press <> (Directional Up) to increase volume • Press <> (Directional Down) to decrease volume • To return to file selection, press <Return> button. Using Option Menu in Music Player Press <Menu> to call out Option Menu. EQ settings – move the cursor to [EQ Settings] , press [Left] or [Right] button to select desired EQ mode. Play Mode ‐ move the cursor to [Play Mode] , press [Left] or [Right] button to select desired Play mode To view all stored audio files To sort audio files by genre To sort audio files by album To sort audio files by artist 15
Viewing Pictures • From Home Menu, press <Menu> to call out Option Menu. • Move the cursor to [Photo] and press <OK> to confirm. Upper window displays a quick preview of the selected photo Lower window displays the file list in the reader. • Use the <Directional> buttons to navigate through the photo list. • Press <OK> on the selected photo to view a full screen display. • In full screen mode, press <Directional Left/Right> to view previous and next picture. • Press < > to start the slide show. Press again to stop. • To return to file selection, press <Return> button.. Using Option Menu in Photo mode Press <Menu> to call out Option Menu. Start the photo slideshow Show detailed information’s about the current photo. Switch to Thumbnail preview. Use the arrow keys to select a photo. Select to rotate the current photo 16
File Explorer Enter into File Explorer for advance file management Select INT to open the internal memory or select Micro SD to open the Micro SD card content. Press <OK> to confirm. The following file formats are accessible: OGG, APE, WMA, WAV, MP3, FLAC, AAC, WMV, 3GP, ASF, AVI, FLV, MOV, MP4, MPG, RMVB, VOB, GIF, BMP, JPG Use the arrow keys to navigate. Press <OK> to open the file or folder. The playback functions of the listed file formats are the same as in music mode. Only the selected file will be played. To have a continuous playback please use the music or photo mode directly. Using Option Menu Press <Menu> to call out Option Menu. Delete the selected file 17
Settings • From Home Menu, press <Menu> to call out Option Menu. • Move the cursor to [Settings] and press <OK> to confirm. Time & Date Sets the displayed time and date of the Reader. Press <Directional Left/Right> buttons to move the cursor. Press <Directional Up/Down> buttons to input value. Select [Apply] and press <OK> to confirm. Device Standby To enable / disable auto standby mode. Press <Directional Up/Down> buttons to move the cursor. Press <OK> to confirm. Format Memory To format internal memory and memory card. All data will be lost. Please backup your data before performing this. Select the memory you which to format and confirm with <OK>. Press <OK> again to start formatting the selected memory. Select [cancel] and press ok to abort. About Product Displays product information of the Reader. Power Management Displays real time battery status of the Reader. Restore Factory Defaults To restore the Reader’s settings to defaults. User manual This user manual 18
Troubleshooting Symptoms Cause and solution Without power Whether the battery is enough. Please confirm whether turn on the player. Is the main switch turned on? Without sound Please confirm the volume is not in the status inside earphone. of Zero and the connection of earphone is ok. Please confirm the earphone is clean The broken MP3 will produce noise with different grades even cannot play music. Please confirm the complete files. Try another pair of headphones. The character on the display screen is in abnormal shape. Please confirm the language that you selected is correct. Cannot download Whether the installation of driver is OK music normally. Check whether damaged the connection of USB and the connection is OK. Check whether there’s any empty memory space. Be sure that button lock is deactivated. No USB connection Check cable/plug connection to the PC, is established to Windows system configuration and USB driver. Restart PC, remove and reconnect the USB the PC. cable, reinstall drivers If the malfunction continues, contact customer services. The device has Press the power button until the device turns stopped working. off. The player shuts off after a short time or cannot be turned on. However, the USB connection works. Fully charge the battery (3 – 4 hours) If the player has not been used for an extended period of time, then the first two battery charging cycles should last 8 hours each. 19
Product Specifications Display 7 inch TFT‐LCD Display, 800x480 pixels 2
Brightness: 200cd/m Storage memory Built in memory: 4GB supports Micro SD/SDHC Media File Format supported Ebook: epub, pdf, txt Audio: mp3, wma, wav, ogg, aac Photo: jpg, bmp, gif Connectivity Data transfer: USB 2.0 High Speed Audio: 3.5mm audio jack Power: USB jack Miscellaneous Clock Real time battery indication Battery life Reading – up to 8 hours Music – up to 40 hours (with backlight off) Charging Power: DC 5.0V, 1.2A Duration: 6 hours max Minimum system requirement (USB Mass Storage) Windows 2K, ME, XP, Vista, Win 7, Mac OS 10x Physical properties Dimension: 187.4 x 128.5 x 11.8 mm (approx) Weight: 280g (approx) **Design and specifications are subject to change without prior notice 20
Copyrights and Trademark Notice Copyright laws prohibit copying the data of this product or the contents of this manual (illustrations, related documents, etc.) in whole or in part without the permission of the copyright holder. Additionally, use of the data of this product or the contents of this manual is not allowed without Axdias permission except for personal use. Microsoft, Windows, Windows Vista and Windows Media are trademarks or registered trademarks of Microsoft Corporation in the United States and / or other countries. Macintosh and Mac OS are trademarks of Apple Inc., registered in the U.S. and other countries. Adobe, the Adobe logo, Reader and PDF are either registered trademarks or trademarks of Adobe Systems Incorporated in the United States and/or other countries. MPEG Layer‐3 audio coding technology and patents licensed from Fraunhofer IIS and Thomson. ODYS BooX contains Adobe® Reader® Mobile software under license from Adobe Systems Incorporated, Copyright © 1995‐2009 Adobe Systems Incorporated. All rights reserved. Adobe and Reader are trademarks of Adobe Systems Incorporated. Contains Reader® Mobile technology by Adobe Systems Incorporated 21
Warranty Conditions The following conditions comprise the requirements and scope of our warranty
conditions and do not affect our legal and contractual warranty obligations.
We offer a warranty on our products in accordance with the
following conditions:
1. AXDIA products are covered by a 24 month warranty. We will resolve
damages or defects on AXDIA products free of charge within 12 months of
the purchase date under the following warranty conditions. For any damage
or defect determined later than 12 months after the purchase date, proof of a
manufacturing fault must be submitted for repair under warranty.
The warranty does not cover batteries and other parts, which are considered
consumables, parts that break easily such as glass or plastic or defects
based on normal wear and tear. There is no warranty obligation in the event
of marginal differences compared to the target appearance and workmanship
provided these have a negligible effect on the product's fitness for use, in the
event of damage caused by chemical or electrochemical effects, by water or
generally from abnormal conditions.
2. The warranty will be performed in such a way that we shall decide whether to
repair the defective parts or to replace them with working parts free of charge.
AXDIA reserves the right to exchange the product for a replacement product
of equal value if the product that is sent in cannot be repaired within a
reasonable time or at reasonable cost. The product can also be exchanged
for a different model of the same value. Requests cannot be made for repairs
to be carried out on site. Parts that have been replaced or exchanged
become our property.
3. The warranty claim does not apply if repairs or other work is carried out by
unauthorized persons or if our products are equipped with additional parts or
accessories that are not approved for our products.
4. Warranties that have been activated do not cause the warranty period to be
extended, nor do they trigger a new warranty period. The warranty period for
any replacement parts installed ends with the warranty period for the entire
product.
5. Any other or further claims are excluded, especially those for replacement
due to damage caused outside of the product, provided there is no obligatory
legal liability. We therefore accept no liability for accidental, indirect or other
consequential damage of any kind, which leads to usage restrictions, data
loss, loss of earnings or interruption to business.
Asserting a warranty claim
1. To make use of the warranty service, you must contact the AXDIA Service
Center by e-mail, fax or phone (see below for contact details). You can also
use the service form on our website or on the back of the warranty conditions.
2. AXDIA Service Center will try to diagnose and solve your problem. If it is
determined that a warranty claim exists, you will be given an RMA number
(Return Material Authorization) and you will be asked to send the product to
AXDIA.
22
IMPORTANT: AXDIA will only accept parcels that have an
RMA number.
Please observe the following when sending the product:
1. Send the product suitably packaged with carriage and insurance paid. Do not
enclose any accessories with the products (no cables, CD's, memory cards,
manuals, etc.), unless the AXDIA Service Centre specifies otherwise.
2. Mark the RMA number on the outside of the package in such a way that it is
visible and clearly legible.
3. You must enclose a copy of the sales slip as proof of purchase.
4. Once AXDIA has received the product, it will meet its warranty obligations in
accordance with the warranty conditions and will return the product to the
sender with carriage and insurance paid.
Service outside of warranty
AXDIA can refuse any service claim made that is not covered by the
warranty. If AXDIA agrees to provide a service outside the warranty, the
customer will be invoiced for all repair and transport costs.
AXDIA will not accept any packages that have not first been approved by
AXDIA by means of an RMA (Return Material Authorization).
23