1
2. From the top tool bar, click “Go” and select “Applications”.
3. When Finder window opens, navigate to “Utilities Folder”.
4. Double click “Disk Utility” to open.
5. Select your Studio drive(s) from the list on the left. The top entry represents the FireWire device and the entry
underneath it represents the volume associated with that device. Click on the top device which will say
something like “XXXGB Glyph Technologies”.
6. Click the “Erase” tab on the right side of the screen.
7. Choose the desired volume format from the drop-down list. Glyph recommends the default “Mac OS
Extended (Journaled)”.
8. Click in the “Name” field and type the desired name for the drive. This name will identify the drive on the
desktop.
9. Click the “Install Mac OS 9 Disk Driver” button if you would like your drive to be compatible with OS 9.
10. Click the “Erase” button to erase your drive. Your new drive should automatically mount on the desktop as
a Glyph volume.
Mac OS 9 Formatting Instructions
Since Glyph drives come pre-formatted for Macintosh you don’t need to format them on installation. If you
decide to reformat or partition your drive at a later date, you can use the Erase Disk command in the Mac
OS 9 operating system. This command will erase all the data on a volume and create a new file system. Erase
disk will not allow you to re-partition a FireWire drive or create a different volume structure than what was
previously there.
Caution: This procedure will destroy any data currently on the drive. Before formatting a drive, save any important
data it contains.
1. Select the volume by clicking on it once in the Finder.
2. Go to the Special menu and select Erase Disk... The Erase Disk dialog box opens to verify your decision to
erase the disk.
3. In the Name field, enter the new name for the disk or leave the name as it is.
4. In the Format drop-down menu, choose an Extended volume and click “Erase”.
Setting up the Studio with Windows
Installing the Hardware
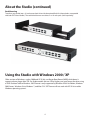
1. Position the Studio by placing the unit on a flat, level surface, or install the unit into a rack with the GPT
Rack Kit. Caution: Speakers are magnetic devices; they can harm your data if they’re too close to your hard
drives or tapes.
2. Connect the power cable. Make sure that the power is off on all of your computer equipment and the
Studio. Connect the power cable to the back of the Studio. Plug the three-prong plug into an
appropriate power receptacle, preferably with surge and spike protection.
6