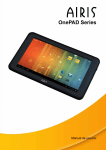
Download EZTrac Manual
Transcript
ACDI
EZTrac Series User & Technical Manual
EZTrac Online Card System
User’s Manual & Service Guide
“Choose ACDI for all document control needs”
ACDI
EZTrac Series User & Technical Manual
ACDI
EZTrac Series User & Technical Manual
INTRODUCTION ............................................................................................. 4
OVERVIEW ....................................................................................................... 4
FEATURES ........................................................................................................ 5
MEMBRANE SWITCH/OVERLAY ....................................................................... 5
MAGNETIC OR BARCODE SWIPE CARD ............................................................ 5
TCPIP NETWORK INTERFACE .......................................................................... 5
CENTRALIZED SOFTWARE CONTROL ............................................................... 5
UNPACKING THE ONLINE CONTROL SYSTEM .................................... 6
EZTrac Online Account Controller.................................................................... 6
Nport Network Device Server ........................................................................... 6
Operation and Setup Manual (This Manual)...................................................... 6
24 VAC Power Supply ...................................................................................... 6
Sign Kit............................................................. Error! Bookmark not defined.
H20-Interface Harness Pack (Copier Specific) .................................................. 6
H64-EXM Copier Interface Extension............................................................... 6
NPORT NETWORK SETUP ........................................................................... 7
SEARCH FOR DEVICES ...................................................................................... 8
CONFIGURE SERIAL ......................................................................................... 9
CONFIGURE OPERATING MODE...................................................................... 10
CONFIGURE NETWORK................................................................................... 12
EZTRAC SETUP............................................................................................. 13
PHYSICAL MOUNTING .................................................................................... 13
POWER-UP...................................................................................................... 13
SELECTING THE COPIER ................................................................................. 13
Changing the Copier Type .................................................................... 13
SETTING THE PRICE PER COPY ....................................................................... 14
IDENTIFYING THE FIRMWARE VERSION ......................................................... 14
Show EZTrac Firmware Version........................................................... 14
PROGRAMMING THE EZTRAC CONTROLLER ................................... 15
ENABLING HIDDEN PINS MODE ..................................................................... 15
Turning the Hidden Pins Mode ON or OFF .......................................... 15
DELAY SETTINGS ........................................................................................... 15
Disable Delay ........................................................................................ 15
Blind Time ............................................................................................ 16
Swipe Card Time Out............................................................................ 16
Internal Pin Time Out............................................................................ 16
ADJUSTING THE WELCOME SCREENS ............................................................. 17
Edit Text on the Display........................................................................ 17
Edit Time Each Screen is Displayed ..................................................... 18
Introduction
3
ACDI
EZTrac Series User & Technical Manual
Introduction
Overview
This document describes the operation and service of the EZTrac Series
copy/print controller. The EZTrac Series is the advanced generation of online
copy/print control, combining innovation and engineering to meet the demand
and provide the flexibility needed in an ever-changing market.
This EZTrac Series has up to 8 separate Price Lines to allow the option to
charge for B & W, color, and premium paper size copies.
The EZTrac and EX2000 Network series of products are equipped with a
TCP/IP network connection. This network connection interfaces to several
network account and print management software solutions. Connectivity allows
the unit to be field programmable for software updates enabling expanded
functionality and compatibility.
The EZTrac family of products is sold in a variety of configurations:
-
-
EZTrac – swipe card reader and keypad work as an online
swipe keypad for account control.
Onepad – keypad controller works as an online keypad for
account control.
EX2000-RV – bill acceptor, swipe card reader, and keypad
revalue online account balances.
EX2000-NB – coin changer, bill acceptor, and keypad work as
a standalone cash copier controller, online account controller,
and revalue station.
EX2000-NSWB – coin changer, bill acceptor, swipe card
reader, and keypad work as a standalone cash copier
controller, online swipe account controller, and revalue
station.
The EZTrac family of products can be configured to accept numerical keypad
data entry, ABA, and AAMVA magnetic card standards, as well as all two
dimensional barcode standards. This allows the EZTrac family to be
compatible with existing and future campus id, library, and staff access cards.
Overview
4
ACDI
EZTrac Series User & Technical Manual
Features
Membrane Switch/Overlay
The EZTrac features a membrane switch keypad built into the graphic overlay.
This keypad provides access to all menus and options as well as a means for
user input for internal and online user accounts. The LCD is a 2 line, 16character display with a backlight allowing for multiple lines of text and
instructions to be displayed.
Magnetic or Barcode Swipe Card
The EZTrac online controllers can be equipped with several different ID card
reading mechanisms. The EZTrac is designed with Campus cards in mind and
provides instant compatibility with the already existing card system. The
EZTrac reads most bar code symbologies, both visible and infrared bar code
data and/or up to three tracks of MagStripe data, all in a single swipe in either
direction. The swipe data is sent over the network allowing the data format and
card compatibility to be programmed & configured on the network server.
TCPIP Network Interface
Powered by the Nport Network module, the EZTrac Series has the flexibility to
integrate with several online account and print management solutions. Via the
ACDI Bootloader program, the EZTrac software can be updated for expanded
functionality and device control compatibility.
Centralized Software Control
The EZTrac Series of devices, work as a copier/print controller and user
terminal. This setup allows several features to be configured and/or modified
from within the server software. By allowing configuration and customization
via network software, the EZTrac remains flexible to meet the needs of the
customer. The centralized configuration eliminates the need to visit each device
when needing to make a change to the system. Software changes can add
increased functionality without the need for added hardware cost.
Overview
5
ACDI
EZTrac Series User & Technical Manual
Unpacking the Online Control System
The following equipment is included in the EZTrac shipment:
EZTrac Online Account Controller
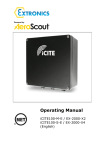
This EZTrac online account controller is a compact copier control
terminal measuring only 8” x 5” x 2 ½.” A rugged-integrated numeric
keypad, backlit high visibility lcd display, integrated swipe support,
and an advanced copier interface come together to make this product
easy to use, yet highly flexible.
Nport Network Device Server
This Nport network device server enables the EZtrac to connect with
the outside world. The Nport provides an easy to setup and reliable
connection to a large variety of network software solutions. The Nport
allows you to leverage the investment already made in your computer
network.
Operation and Setup Manual (This Manual)
This guide will walk you through the installation and setup process for
your EZTrac online control system.
24 VAC Power Supply
This Power Supply converts the standard 110 VAC from a wall outlet
and drops it down to 24 VAC for power to the EZTrac online account
controller.
H20-Interface Harness Pack (Copier Specific)
This copier specific interface creates a control connection between the
EZTrac online account controller and the copier or mfp. Contingent on
the copier/mfp under control the EZTrac H20-Interface can enable
color, b&w, and premium paper size signals.
H64-EXM Copier Interface Extension
This harness provides a connection from the EZTrac to the H20 copier
interface harness.
Unpacking
6
ACDI
EZTrac Series User & Technical Manual
NPORT Network Setup
The EZTrac Online Card System connects to the network via an Nport device
server. A basic knowledge of TCP/IP networks is helpful to ensure proper
configuration.
• Install the software from the CD that comes with the MOXA NPort
device.
• Run the NPort Administrator program.
• Connect the power cord and network cable to the NPort.
Nport Network Setup
7
ACDI
EZTrac Series User & Technical Manual
Search for Devices
1) Search for the NPort on the network by clicking on the Search button.
The search should display all NPorts connected to the network.
If the NPort is not listed in the search results:
• Verify both the power and network cable are properly connected.
• Make sure both the Ready and the Link light on the NPort are
green.
• Make sure the computer is on the same network as Nport devices.
• If the computer has a firewall, it may have to be turned off until
configuration is complete.
2) Select the NPort and press the configure button. The configuration
window will open.
Nport Network Setup
8
ACDI
EZTrac Series User & Technical Manual
Configure Serial
1) Click on the Serial tab.
2) Checkmark Modify, highlight the NPort, and click on Settings.
3) The options for the serial settings should be:
Baud Rate
19200
Flow Control
None
Parity
None
FIFO
Enable
Data Bits
8
Interface RS-232
Stop Bits
1
4) Click on OK to save the settings.
Nport Network Setup
9
ACDI
EZTrac Series User & Technical Manual
Configure Operating Mode
1) Click on the Operating Mode tab.
2) Checkmark Modify, highlight the NPort, and click on Settings.
Nport Network Setup
10
ACDI
EZTrac Series User & Technical Manual
3) The options for the Operating Mode should be:
Operating Mode: TCP Client Mode
Connect Mode
Any Character
Destination Host 1
###. ###. ###. ### Port 10117
(Replace ###. ###. ###. ### with the IP address of the Network Server)
Force Tx Timeout
10
TCP Alive Check Timeout
7
Inactivity Timeout
0
4) Click on OK to save the changes.
Nport Network Setup
11
ACDI
EZTrac Series User & Technical Manual
Configure Network
1) Click on the Network tab.
2) Modify the IP address of the NPort by selecting the modify box.
An IP address can be manually assigned for the Nport. Make sure that
the IP address selected is on the same network as the server you will be
connecting the EZTrac to or that network has access to the network
3) Click the OK button to save the changes. NPort will update
configuration.
Connect the ACDI machine to the NPort box using the serial cable
provided.
Nport Network Setup
12
ACDI
EZTrac Series User & Technical Manual
EZTrac Setup
Physical Mounting
The ACDI Vending System will mount easily to any of the appropriate stands
designed and offered by ACDI, or it can mount to the wall or cabinet.
Power-up
When powering on the EZTrac Series, the display will read
“Initializing Online X.XXX”
All Swipe or Keypad enabled control devices will display the following on their
LCD Display:
“Enter Account”
***Please refer to “ADJUSTING WELCOME SCREENS” for information on
adding additional text screens and the amount of time each screen is displayed.
Selecting the Copier
The EZTrac has several settings for Copier Type. The EZTrac interfaces with
virtually all copiers and printers. Select the copier mode that most likely
matches the make and model of copier the device will be connected to.
Changing the Copier Type
1.
2.
3.
4.
5.
6.
7.
8.
9.
10.
11.
12.
Press Exit, then Eject, then Enter.
Enter Supervisor Pin default 73784230.
Press FWD until display reads “Service Mode.”
Press ENTER to select “Service Mode.”
Press FWD until display reads “Setup Menu.”
Press ENTER to select the Setup Menu.
Press FWD until display reads “Select Copier.”
Press ENTER, display will read “Copier Default” (Or, current copier type).
Press ENTER and a flashing cursor will appear.
Press FWD or BACK to change the copier type.
Once display shows the preferred Copier Type, press ENTER to save it.
Press EXIT 2 times followed by EJECT to exit the Service Mode.
Setup
13
ACDI
EZTrac Series User & Technical Manual
Setting the Price per Copy
The cash price per copy can be adjusted by following the steps below:
1. Press Exit, then Eject, then Enter.
2. Enter Supervisor Pin default 73784230.
3. Press FWD until display reads “Service Mode.”
4. Press ENTER to select “Service Mode.”
5. Press FWD until display reads “Price Menu.”
6. Press ENTER, the display will read “Edit Prices Cash Customers.”
7. Press ENTER, the display will read “Cash Customers Price 1 $X.XX.”
8. Press ENTER to Edit Price 1 (cursor will appear on the display)
9. Using the keypad, enter the new price per copy and press ENTER
10. Press FWD to edit Price Line 2 and follow steps 6-8
EZTrac Price Menu
Price Label (Example)
Price 1
$0.10
B&W
Price 2
$0.50
Color
Price 3
$0.20
B&W Premium Paper
Price 4
$0.20
B&W Duplex
Price 5
$0.40
B&W Premium Paper Duplex
Price 6
$0.60
Color Premium Paper
Price 7
$1.00
Color Duplex
Price 8
$1.20
Color Premium Paper Duplex
Identifying the Firmware Version
The EZTrac has the ability for on-site upgrades. To know whether the machine
requires an upgrade, you can check to see which Version is currently loaded on
the EZTrac by following the instructions below.
Show EZTrac Firmware Version
1.
2.
3.
4.
5.
6.
7.
8.
9.
Press Exit, then Eject, then Enter.
Enter Supervisor Pin default 73784230.
Press FWD until display reads “Service Mode.”
Press ENTER to select “Service Mode.”
Press FWD until display reads “Setup Menu.”
Press ENTER to select Setup Menu.
Press FWD until display reads “Other Settings.”
Press ENTER, display will read “Coin-Op X.XX” (current version #).
Press EXIT two times followed by EJECT to exit the Service Mode.
Setup
14
Programming the EZTrac Controller
Enabling Hidden Pins Mode
The EZTrac online account controller has the ability to hide the pin #’s
displayed. This added security feature allows for discrete entering of access
pins in public venues.
Turning the Hidden Pins Mode ON or OFF
1.
2.
3.
4.
5.
6.
7.
8.
9.
10.
Press Exit, then Eject, then Enter.
Enter Supervisor Pin default 73784230.
Press FWD until display reads “Service Mode.”
Press ENTER to select “Service Mode.”
Press FWD until display reads “Setup Menu.”
Press ENTER, display will read “Cash Settings.”
Press FWD until display reads “Other Settings.”
Press FWD until display reads “Hidden Pins Mode Enabled.”
Press ENTER to toggle between Enabled and Disabled.
Press EXIT three times followed by EJECT to exit the Service Mode.
Delay Settings
Disable Delay
This setting determines how long the EZTrac online account controller waits
before disabling the copier.
Useful when last vend or partial pages are an issue.
1. Press Exit, then Eject, then Enter.
2. Enter Supervisor Pin default 73784230.
3. Press FWD until display reads “Service Mode.”
4. Press ENTER to select “Service Mode.”
5. Press FWD until display reads “Setup Menu.”
6. Press ENTER, display will read “Cash Settings.”
7. Press FWD until display reads “Delay Menu.”
8. Press ENTER, display will read “Disable Delay 25 mSec.”
9. Press ENTER to edit Disable Delay and a flashing cursor will appear.
10. Press FWD to increase the delay or press BACK to decrease the delay.
11. Press ENTER to save the new delay.
12. Press EXIT, display will read “Delay Menu.”
13. Press EXIT two times followed by EJECT to exit the Service Mode.
ACDI
EZTrac Series User & Technical Manual
Blind Time
This setting determines how long the EZTrac online account controller waits
before accepting another copy charge pulse.
Useful when more than one charge is made per copy, this setting can correct the
problem. By extending the Blind Time, the EZTrac online account controller
can ignore additional pulses.
1. Follow steps 1 thru 7 from “Disable Delay” above.
2. Press FWD until display reads “Blind time 50 mSec.”
3. Press ENTER to edit Blind Time and a flashing cursor will appear.
4. Press FWD to increase or press BACK to decrease Blind Time.
5. Press ENTER to save the new Blind Time.
6. Press EXIT, display will read “Delay Menu.”
7. Press EXIT two times followed by EJECT to exit the Service Mode.
Swipe Card Time Out
This setting determines how long a swipe card account will remain enabled
before disabling it due to inactivity.
1. Follow steps 1 thru7 from “Disable Delay” above.
2. Press FWD until display reads “Card Time Out 00:06:00.”
3. Press ENTER to edit Card Time Out and a flashing cursor will appear.
4. Press FWD to increase or press BACK to decrease Card Time Out.
5. Press ENTER to save the new Card Time Out.
6. Press EXIT, display will read “Delay Menu.”
7. Press EXIT two times followed by EJECT to exit the Service Mode.
Internal Pin Time Out
This setting determines the amount of time the EZTrac online account controller
displays a balance of “$0.00” before returning to the Idle Menu.
1. Follow steps 1 thru 6 from “Disable Delay” above.
2. Press ENTER, display will read “Disable Delay.”
3. Press FWD until display reads “Pin Time Out 00:05:00.”
4. Press ENTER to edit Pin Time Out and a flashing cursor will appear.
5. Press FWD to increase or press BACK to decrease Pin Time Out.
6. Press ENTER to save the new Pin Time Out.
7. Press EXIT, display will read “Delay Menu.”
8. Press EXIT two times followed by EJECT to exit the Service Mode.
EZTrac Online Account System Programming
16
ACDI
EZTrac Series User & Technical Manual
Adjusting the Welcome Screens
Edit Text on the Display
Adjust the text displayed on Screens 1 through 12 by following the steps below:
1.
2.
3.
4.
5.
6.
7.
8.
9.
10.
11.
12.
13.
14.
15.
16.
17.
18.
19.
20.
21.
22.
23.
24.
25.
26.
Press Exit, then Eject, then Enter.
Enter Supervisor Pin default 73784230.
Press FWD until display reads “Service Mode.”
Press ENTER to select “Service Mode.”
Press FWD until display reads “Setup Menu.”
Press ENTER, the screen will display “Cash Settings.”
Press FWD until display reads “Edit Welcome Screens.”
Press ENTER, the screen will display “Edit Screen 1.”
Press FWD until display reads “Edit Screen 2.”
or the number of screen desired to be edited.
Press ENTER, the screen will read “Edit Text.”
Press ENTER, the screen will display “Color $0.50.”
Press ENTER, the screen will display a line under the first character on
the screen “Color $0.50.”
Pressing FWD, the character currently underlined will change to the
next valid character “Dolor $0.50.”
Pressing BACK, the character currently underlined will change to the
prior valid character “Color $0.50.”
Pressing 6 will switch the underlined cursor to the right.
Pressing 4 will switch the underlined cursor to the left.
Pressing 8 will move the underlined cursor down.
Pressing 2 will move the underlined cursor up.
Pressing 0 will delete the underlined character.
Pressing 5 will clear the text from the entire screen.
Pressing FWD and BACK to edit the character.
Pressing 7 and 9 to edit the character from lower case to upper case.
Press ENTER to disable editing.
Press EXIT, the screen will display “Edit Text.”
Press EXIT, the screen will display “Edit Screen 2.”
Press FWD to edit other screens and follow steps 9-22.
Note: Welcome Screens 1 thru 8 are automatically set to price lines 1 thru 8 respectively.
Therefore, all but the lower right 7 characters are editable.
EZTrac Online Account System Programming
17
ACDI
EZTrac Series User & Technical Manual
Edit Time Each Screen is Displayed
Adjust the time that each welcome screen is displayed by following the steps
below:
1.
2.
3.
4.
5.
6.
7.
8.
9.
10.
11.
12.
13.
14.
15.
16.
17.
18.
Press Exit, then Eject, then Enter.
Enter Supervisor Pin default 73784230.
Press FWD until display reads “Service Mode.”
Press ENTER to select “Service Mode.”
Press FWD until display reads “Setup Menu.”
Press ENTER, then screen will display “Cash Settings.”
Press FWD until display reads “Edit Welcome Screens.”
Press ENTER, then screen will display “Edit Screen 1.”
Press ENTER, then screen will read “Edit Text.”
Press FWD until the display reads “Edit Time.”
Press ENTER, then screen will display “Time 2” (Default is 2 sec).
Press ENTER, the cursor will blink.
Pressing FWD will increase the value.
Pressing BACK will decrease the value.
Press ENTER to lock in value.
Press EXIT, then screen will display “Edit Time.”
Press EXIT, then screen will display “Edit Screen 1.”
Press FWD to edit Welcome Screen 2 and follow steps 8-16.
EZTrac Online Account System Programming
18
ACDI
EZTrac Series User & Technical Manual
Configuration Notes
Network Settings
IP Address:
Netmask:
Gateway:
IP Configuration:
DNS 1:
DNS 2:
Operating Mode Settings
Operating Mode: TCP Client Mode
Connect Mode: Any Character
Destination Host 1:
Destination 1Port: 10117
Force Tx Timeout: 10
TCP Alive Check Timeout : 7
Inactivity Timeout: 0
Delay Menu Settings
Disable Delay:
Blind Time:
EZTrac Online Account System Programming
19
ACDI
EZTrac Series User & Technical Manual
ACDI
7428 Lindsey Rd.
Little Rock, AR 72206
1 (800) 990 – 2234
www.acd-inc.com


