1
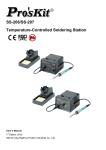
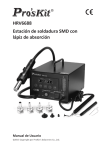
SS-206/SS-207 Temperature-Controlled Soldering Station User’s Manual st , 1 Edition 2012 ©2012 Copy Right by Prokit’s Industries Co., Ltd. Thank you for purchasing the SS-206/SS-207 Temperature-Controlled Soldering Station. Please read this manual before operating the SS-206/SS-207 the manual in a safe, easily accessible place for future reference. Features • Comply with CE, ESD safe certification. • Temperature range 200 - 480ºC (392-896℉) • Soldering iron handles are insulated and ergonomic-designed for ease and comfort. • CPU Control, ceramic heater offer stable power and fast thermal recovery • Celsius or Fahrenheit temperature unit selection • Control IC modular design for easy and quickly repair. • Stackable to conserve bench space Packing List Please check the contents of the Soldering station package and confirm that all the items listed below are included. Soldering Station………..…………1 Iron Stand(with cleaning sponge)….………………..1 Soldering Iron………………………1 User’s Manual……………….……………………………1 Power Cord…………………………1 Precautions In this instruction manual, "caution" are defined as follows. CAUTION: Misuse may potentially cause injury to the user or physical damage to the objects involved. For your own safety, be sure to comply with these precautions. When the power is on, the tip temperature is between 200°C/392°F and 480°C/ 896°F. Since mishandling may lead to burns or fire, be sure to comply with the following precautions. Do not touch the metallic parts near the tip. Do not use the product near flammable items. Advise other people in the work area that the unit can reach a very high temperature and should be considered potentially dangerous. Turn the power off while taking breaks and when finished using the unit. Before replacing parts or storing the unit, turn the power off and allow the unit to cool to room temperature. To prevent damage to the unit and ensure a safe working environment, be sure to comply with the following precautions. Do not use the unit for applications other than soldering. Do not rap the soldering iron otherwise subject the iron to severe shocks. Do not modify the unit. Use only genuine replacement parts. Do not wet the unit or use the unit when your hands are wet. The soldering process will produce smoke, so make sure the area is well ventilated. While using the unit, don't do anything which may cause bodily harm or physical damage. 1 Names of Parts SS-207 Temperature display Heater lamp ℃/ ℉ Switch Power switch Soldering iron receptacle Soldering iron Calibrator Temperature control knob Heater lamp SS-206 Soldering iron receptacle Power switch Soldering iron Temperature control knob Calibrator Soldering iron stand Cleaning sponge 2 Specification Model No. Display Voltage(V) Power consumption Output voltage Heater Temperature range Station size (mm) Standard Plug Fuse Replacement heater Replacement handpiece Individual packing SS-206B Model No. Display Voltage(V) Power consumption Output voltage Heater Temperature range Station size (mm) Standard Plug Fuse Replacement heater Replacement handpiece Individual packing Replacement Tips: SS-207B SS-206E SS-206H SS-206E7 Analog AC 110V/220V Switch AC 127V/240V Switch 60W 24VAC Ceramic heater 200℃-480℃(392℉-896℉) 115x95x130 B type E type H type E type 250V / 2A 9SS-900-HT 5SS-200-IRON Color Box SS-207E SS-207H SS-207E7 Digital AC 110V/220V Switch AC 127V/240V Switch 60W 24VAC Ceramic heater 200℃-480℃(392℉-896℉) 115x95x130 B type E type H type E type 250V / 2A 9SS-900-HT 5SS-200-IRON Color Box Setting up & operating the Soldering Station 3 Warning: Before use, please make sure the AC voltage, and turn the AC 110/220V switch to the correct position. CAUTION: the sponge is compressed. It will swell when moistened with water. A. Iron Holder Before using the unit, dampen the sponge with the water and squeeze it dry. CAUTION: Be sure to turn off the power switch before connecting or disconnecting the soldering iron. Failure to do so may damage the P.W.B. B. Connections 1. Connect the soldering iron cord into the receptacle. 2. Place the soldering iron on the iron holder. 3. Plug the power cord into the power supply. Be sure to ground the unit. SS-206 SS-207 C. Set the Temperature 1. Turn the power switch on. 2. Set the temperature control knob to the desired temperature. 3. The heater lamp blinks on and off when the tip temperature reaches the set temperature. The unit is now ready to perform soldering work. 4. Lock the knob. (Only for SS-206 Model as shown) .Set the control knob to desired temperature. .Tighten the screw of inside control knob by Phillips screwdriver. .Release screw anticlockwise before reset temperature. For user convenience, and soldering efficiency, two stations can be stacked securely. CAUTION: The soldering iron must be placed on the iron holder when not in use. Tip maintenance and use Tip temperature High soldering temperature can degrade the tip. Use the lowest possible soldering temperature. The excellent thermal recovery characteristics ensure efficient and effective soldering even at low temperatures. This also protects the soldered items from thermal damage. Cleaning 4 Clean the tip regularly with a cleaning sponge, as oxides and carbides from the solder and flux can form impurities on the tip. These impurities can result in defective joints or reduce the tip's heat conductivity. When using the soldering iron continuously, be sure to loosen the tip and remove all oxides at least once a week. This helps prevent seizure and reduction of the tip temperature. When not in use Never leave the soldering iron sitting at high temperature for long periods of time, at the tip's solder plating will become covered with oxide, which can greatly reduce the tip's heat conductivity. After use Wipe the tip clean and coat the tip with fresh solder. This helps prevent tip to oxidation. Maintenance Inspect and clean the tip 1. Set the temperature to 250°C (482°F) 2. When the temperature stabilizes, clean the tip with the cleaning sponge and check the condition of the tip. 3. If there is black oxide on the solder-plated position of the tip, apply new solder (containing flux) and wipe the tip on the cleaning sponge. Repeat until the oxide is completely removed, and coated with new solder. 4. If the tip is deformed or heavily eroded, replace it with a new one. CAUTION: Never file the tip to remove oxide. Calibrating the iron temperature The soldering iron should be recalibrated after changing the iron, or replacing the heating element or tip. 1. Connect the cord assembly plug to the receptacle on the station. 2. Set the temperature control the knob to 400°C (750°F). 3. Turn the power switch to 'ON' wait until the temperature stabilizes, Remove the CAL pot plug. 4. When the temperature stabilizes, use a straight-edge(-) screwdriver or small plus(+) screwdriver to adjust the screw (marked CAL at the station) until the tip thermometer indicates a temperature of 400°C(750°F). Turn the screw clockwise to increase the temperature and counterclockwise to reduce the temperature. Replace the CAL pot plug. Tips The tip temperature will vary according to the shape of the tip. The preferred method of adjustment uses a tip thermometer. (See calibrating the iron temperature.) 5 Troubleshooting Guide Warning: Disconnect the power plug before servicing. Failure to do so may result in electric shock. If the power cord is damaged, it must be replaced by the manufacturer, its service agent or similarly qualified person in order to avoid personal injury or damage to the unit. Problem1. The heater lamp does not light up. Problem 2. The heater lamp lights up, but the tip does not heat up. Problem 3. The tip heats up intermittently. Problem 4. Solder will not wet the tip. Problem 5. The tip temperature is too low. Check 1. If the power cord and/or connecting plug disconnected? *Connect it. Check 2. If the fuse blew and eliminate the cause, replace the fuse. A. Is the inside of the iron short-circuited? B. Is the grounding spring touching the heating element? C. Is the heating element lead twisted and short-circuited? Check 3. Is the soldering iron cord broken? *Refer to checking for breakage in the cord assembly. Check 4. Is the Heating element broken? *Refer to checking for breakage in the heating element. Refer to Check 3 Check 5. Is the tip temperature too high? *Set an appropriate temperature. Check 6. Is the tip clean? *Refer to Tip maintenance and Use. Check 7. Is the tip coated with oxide? *Refer to inspect and clean the tip. Check 8. Is the iron calibrated correctly? *Recalibrate. Problem 6. The tip can not be pulled off. Check 9. Is the tip seized? Is the tip swollen because of deterioration? *Replace the tip and the heating element. Problem 7. The tip doesn't hold the desired temperature. Check 8 Checking for breakage of the heating element and cord assembly Disconnect the plug and measure the resistance value between the connecting plug pins as follows. If the values of 'a' and 'b' are outside the above value, replace the heating element (sensor) and/or cord assembly .Refer to Procedures 1 and 2 If the value of C' is over the above value, remove the oxidization film by lightly rubbing with sand-paper or steel wool the points as shown. a. Between pins 1 & 5 (Heating Element) 11-16Ω b. Between pins 2 & 4 (Sensor) 0.5Ω-1. 5Ω c. Between pin 3 & Tip Under 2Ω 6 Heating Element Broken Disassembling the Unit 1. Turn the nut 1 counterclockwise and remove the tip enclosure 2 , the tip 3 . 2. Turn the nipple 4 counterclockwise and remove it from the iron. 3. Pull both the heating element 6 and the cord assembly 11 out of the handle 12. (Toward the tip of the iron.) 4. Pull the grounding spring 5 out of the D-sleeve. Measure when the heating element is at room temperature. 1. Resistance value of heating element (resistance between the 2 red lines) 11-16Ω 2. Resistance value of sensor (resistance between white line and blue line) 0.5Ω-1. 5Ω If the resistance value is not normal, replace the heating element. Two ways of checking negative pole and positive pole of the sensor: 1. Touch the two sides of sensor with a magnet, the side that emits antimagnetic is the positive side. The side does not have any magnetism is the negative side. 2. Heats up the heating element by hot water or fire, check the electric potential between 2 leads of sensor by multimeter in mV measurement, if the meter display positive mV sign, the red test lead side should be the positive side of sensor. Replace the Heating Element. (1) De-solder the damaged heating element leads and remove it. (2) Replace a new one and solders to PC board properly. 7 Solders the positive blue lead of sensor to the PC board which link to the blue lead of wire. Solders the negative red lead of sensor to the PC board which link to the white lead of wire (3) Solders the two lead of heater to the other side of PC board, bend the leads at right triangle when soldering to prevent short-circuit After heating element replaced: 1. Measure the resistance value between pins 2 & 1 or pins 3 & 1 or pin 3 & 2. If it is not ∞, the heating element or sensor touching the housing ground, it must be eliminated; otherwise will damage the PCB 2. Measure the resistance value between all leads' to confirm that the leads are not twisted and that the grounding spring is properly connected. Soldering iron cord damaged Testing the soldering iron cord Heating element lead diagram Check the resistance between the pin of the plug and the wire on the terminal. Pin 1: Red Pin 2: Blue Pin 3: yellow Pin 4: White Pin 5: Red The value should be <2Ω. If it is more than 2Ω or ∞, the soldering iron need to be replaced. Fuse replacement When fuse is blown, replace with the same type of fuse. (refer to below picture) 1. Unplug the power cord from the power receptacle. 2. The fuse holder is located under the AC power receptacle, use the slotted (–) screwdriver to loosen the fuse holder 3. Replace the fuse with new one 4. Put the fuse holder back in place 8 ©2011 Prokit’s Industries Co., LTD. All rights reserved 2011001(C) 19