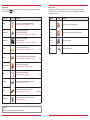
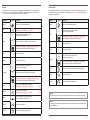
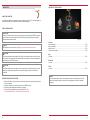
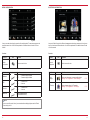
1
PRIME/ESSENTIAL DEVICE USER MANUAL EN Device user manual for ZENEC media system We are delighted that you have chosen a product from ZENEC. The more familiar you make yourself with the functions of the ZENEC system the more confident you will be in operating it. Please read this operating manual before you start your new ZENEC system. In this device user manual you will find important instructions and information for the safe operation of the ZENEC system, and to help you make the most of its technical advantages. About this manual This device user manual gives a description of all the equipment or model variants of the ZENEC systems. In addition, optional equipment or features of the vehicle are described that may not be included as standard in your vehicle. These are not identified for each and every individual case. Therefore equipment or features will be described that may not be in your ZENEC system or vehicle. More information can be obtained from your authorized ZENEC dealer. For more information please visit the official homepage, or contact an authorized ZENEC dealer (zenec.com - dealers). All the information in this manual corresponds to the state at the time of going to press, and applies only to ZENEC systems in original condition. On account of possible updates to device software, the illustrations and features shown in this operating manual may be different from your ZENEC system. Differences in the information, illustrations or features cannot form a basis for any claims. ZENEC wishes you a good and safe journey! If you sell your vehicle with the ZENEC system still fitted, please ensure that this operating manual stays with the vehicle, and that any personal data like a phonebook stored in the device is deleted. Resetting: Settings → Device Configuration → Help → Factory Setting BEFORE FIRST USE ✓ The safety instructions of the vehicle manufacturer, and the instructions given in this operating manual are all generally applicable. ✓ Please pay attention to the safety instructions on the ZENEC system. ✓ Before starting your journey make yourself familiar with the operation of the ZENEC system. ✓ Please use only suitable media for audio modes. ✓ If the ZENEC system has been disconnected from the power supply before use, it will be necessary to carry out a Sat-Fix before using the navigation system. Sat-Fix: Special User Manual → Navigation 2 3 SAFETY INSTRUCTIONS CAUTION If the driver of the vehicle is distracted, this may lead to an accident or injury. Operating the ZENEC system can distract attention from the general traffic situation! Equally, connecting, changing or inserting data media can distract the driver from the general traffic situation. CAUTION Devices, like mobile phones or removable storage devices, that are not fixed or are inadequately secured can be thrown through the interior of the vehicle by a sudden driving maneuver or an accident, thereby causing injury to vehicle occupants. CAUTION When the housing of a CD/DVD player is opened injuries may be caused by invisible laser radiation. Modifications of the ZENEC system may only be carried out by specialists authorized by ZENEC! CAUTION CAUTION A volume level that is set too high can damage the hearing. This is also true when the volume level is very high just for a short time. Changing or connecting an audio source can lead to sudden fluctuations in the volume level. CAUTION The connection and charging leads of external mobile devices can get in the way of the driver. Please run these so that the driver's freedom of movement is not hindered. CAUTION Route recommendations and displayed traffic signs on the ZENEC system may differ from the real situation. Traffic signs and traffic regulations have precedence over route recommendations and indications of the ZENEC systems. Speed data displayed in the navigation system corresponds to the permitted speed limit. Please adjust your speed and driving behavior to the prevailing visibility, weather, road, and traffic conditions. Always choose loudspeaker settings such that acoustic signals coming from outside can always be heard in the vehicle (e.g. signal horns or sirens). CAUTION Incorrect installation or commissioning of the ZENEC system may cause damage to the ZENEC system or to the vehicle electronics. Only let qualified specialists authorized by ZENEC install the device. CAUTION This ZENEC system is intended solely for operation at an on-board voltage of 12 V DC. Operating the ZENEC system at any other voltage can cause damage to the ZENEC system or to the vehicle electrical system. CAUTION Taking apart or modifying the ZENEC system can result in damage to the device or the vehicle. Opening the device or modification by a person not authorized by ZENEC will render warranty claims null and void. In the event of a malfunction or defect please contact an authorized ZENEC dealer. Unauthorized repairs will render warranty claims null and void. 4 5 CONTENTS MAIN MENU INTRODUCTION BEFORE FIRST USE...................................................................................................................... S. 03 SAFETY INSTRUCTIONS .............................................................................................................. S. 04 MAIN MENU.....................................................................................................................................S. 07 MAIN FUNCTIONS ......................................................................................................................... S. 07 ADDITIONAL FUNCTIONS ............................................................................................................ S. 07 GLOBAL CONTROLS..................................................................................................................... S. 09 SEARCH & INPUT ...........................................................................................................................S. 10 ENTERTAINMENT ABOUT THIS CHAPTER .................................................................................................................S. 11 CONTENTS OF THIS CHAPTER ...................................................................................................S. 11 RADIO ..............................................................................................................................................S. 13 MEDIA AUDIO ................................................................................................................................ S. 23 MEDIA VIDEO................................................................................................................................. S. 38 EXTERNAL CONNECTIONS ..........................................................................................................S. 42 REAR SIDE ENTERTAINMENT .................................................................................................... S. 46 HANDS-FREE SYSTEM ABOUT THIS CHAPTER ................................................................................................................ S. 49 CONTENTS OF THIS CHAPTER .................................................................................................. S. 50 CONNECTION ................................................................................................................................ S. 53 PHONEBOOK ................................................................................................................................. S. 55 NAVIGATION ABOUT THIS CHAPTER ................................................................................................................ S. 58 CONTENTS OF THIS CHAPTER .................................................................................................. S. 59 SETTINGS ABOUT THIS CHAPTER ................................................................................................................ S. 64 CONTENTS OF THIS CHAPTER .................................................................................................. S. 65 RADIO CONFIGURATION ..............................................................................................................S. 67 MEDIA CONFIGURATION ............................................................................................................. S. 68 BLUETOOTH CONFIGURATION................................................................................................... S. 69 TFT CONFIGURATION ...................................................................................................................S. 74 AUDIO CONFIGURATION ..............................................................................................................S. 75 VEHICLE CONFIGURATION* DEVICE CONFIGURATION ........................................................................................................... S. 85 GENERAL ABBREVIATIONS ........................................................................................................................... S. 90 INDEX ............................................................................................................................................. S. 92 STATUTORY RIGHTS AND WARRANTY ..................................................................................... S. 95 Fig. 1/01 MAIN FUNCTIONS Function Icon Slide Operation Navigate in the main menu by sliding to the left or right ADDITIONAL FUNCTIONS Function Icon Operation Move Press and hold to move an icon to the desired position Quick access For quick access you can drag icons that you want into the header (max. 4 icons). Recycle bin By touching and holding, you can move main menu icons that you no longer require or use into the recycle bin. Conversely, you can retrieve icons from the recycle bin by dragging them up into the header. NOTE *Please pay attention to the Device Quick Start Guide to learn more about the vehicle integration. 6 7 Main sources Global controls When you are in a source overview, return to the main menu by touching the main icon you require, or by pressing the HOME button. This list describes global controls and their functions that you will find in different sources of the ZENEC system. The function will always be the same: only the displayed content changes, depending on the source. Function Icon Operation Function Tuner Touch to select radio playback (FM/AM/DAB+) Device User Manual → Entertainment → Radio S. 13 Media Audio Touch to select audio playback (DVD/USB/SD/A2DP/Apple) Device User Manual → Entertainment → Media Audio S. 23 Media Video Touch to select video playback (DVD/USB/SD/Apple) Device User Manual → Entertainment → Media Video S. 38 Input Touch to select external sources Device User Manual → Entertainment → Input S. 42 M-Zone Touch to select playback of rear seat entertainment Device User Manual → Entertainment → M-Zone S. 46 Communication Touch to select Bluetooth mode Device User Manual → Hands-free System S. 49 Navi Touch to select navigation mode Device User Manual → Navigation S. 58 Settings Touch to access the system parameter settings Device User Manual → Settings S. 64 CAR Touch to select the vehicle-specific settings Device Quick Start Guide → CAR Recycle bin For icons that are not needed in the main menu See additional functions Icon Operation List Touch to display a list in the form of text Tile Touch to display a list in the form of tiles (images) Search Touch to start a search Back Touch to go back one level (separately) S. 7 NOTE Inactive icons that are grayed out cannot be selected. 8 9 ENTERTAINMENT SEARCH & INPUT ABOUT THIS CHAPTER This chapter describes how to operate and use the audio and video sources. In addition, optional equipment or features of the vehicle are described that may not be included as standard in your vehicle. These are not identified for each and every individual case. Therefore equipment or features will be described that may not be in your ZENEC system or vehicle. More information can be obtained from your authorized ZENEC dealer. SAFETY INSTRUCTIONS CAUTION Fig. 1/02 In each of the sources you have the option to make selections using a search function page we show you how to use the search mask. Function Icon . On this Operation Only operate the audio playback or radio while driving when the traffic situation allows. CAUTION Security Touch to show or hide the input on the display If the driver of the vehicle is distracted, this may lead to an accident or injury. Operating the ZENEC system can distract attention from the general traffic situation! Equally, connecting, changing or inserting data media can distract the driver from the general traffic situation. Select Touch to display the current selection (the number of hits will be shown in brackets) Always choose loudspeaker settings such that acoustic signals coming from outside can always be heard in the vehicle (e.g. signal horns or sirens). Delete Touch to delete one character Hold down to delete the complete input Back Touch to end the search or input CAUTION Upper/Lower Touch to write a character in upper or lower case Double touch to write all the following characters in upper or lower case. Touch to change the keypad layouts Keypad QWERTY QWERTZ ABC GREEK HEBREW CYRILLIC Keypad assignments like PC keyboard with Y Keypad assignments like PC keyboard with Z Alphabetic keypad assignments Geek keypad assignments Hebrew keypad assignments Cyrillic keypad assignments NOTE The functions Security and Upper/Lower are only enabled in the password function. 10 CAUTION According to the law, the operation of the video playback while driving is not permitted. For this reason, the picture switches off as soon as the vehicle moves. CAUTION Changing or connecting an audio source can lead to sudden fluctuations in the volume level. This should be borne in mind before changing or connecting an audio source. CAUTION The connection and charging leads of external mobile devices can get in the way of the driver. Please run these so that the driver's freedom of movement is not hindered. CAUTION A volume level that is set too high can damage the hearing. This is also true when the volume level is very high just for a short time. NOTE A compatibility overview of useful devices together with memory sizes and formats can be found at www.zenec.com. 11 BEFORE FIRST USE RADIO ✓ The safety instructions of the vehicle manufacturer, and the instructions given in this operating manual are all generally applicable. ✓ Please pay attention to the safety instructions on the ZENEC system. ✓ For the reception of digital radio stations a suitable antenna system must be installed in the vehicle. If you have questions please contact your authorized ZENEC dealer. Overview Sources Fig. 2/02 Overview Radio bands .....................................................................................................................................S. 14 Fig. 2/01 Icon Function Radio (FM/AM/DAB+) Device User Manual → Entertainment → Radio Audio playback (CD/Harddisc/A2DP/Apple interface/Gracenote) Device User Manual → Entertainment → Media Audio Video playback (DVD/Harddisc) Device User Manual → Entertainment → Media Video 12 S. 13 S. 23 S. 38 Analoge Radio Radio operation FM .........................................................................................................................S. 15 Station list FM ..................................................................................................................................S. 16 Manual frequency search FM ..........................................................................................................S. 17 Radio operation AM .........................................................................................................................S. 18 Manual frequency search AM ..........................................................................................................S. 19 Digital Radio Radio operation DAB ...................................................................................................................... S. 20 Station list DAB ................................................................................................................................S. 21 Manual frequency search DAB ........................................................................................................S. 21 Storing stations Storing stations (DAB/FM/AM) ....................................................................................................... S. 22 Setup Device User Manual → Settings → Radio Configuration .............................................................. S. 67 External connections (Smartlink/Camera/AV-IN) Device User Manual → Entertainment → Input S. 42 Rear seat entertainment Device User Manual → Entertainment → M-Zone S. 46 13 Radio bands Radio operation FM The ZENEC system enables you to receive radio stations via FM, AM or DAB+. The reception of the individual radio bands is dependent on the position of the antenna in your vehicle. Thus not all vehicles from the factory come with antennas designed for digital radio reception. If your vehicle antenna is not DAB capable, contact your ZENEC dealer for a retrofit. Icon Function Reception of analog radio stations using FM Entertainment → Radio → FM S. 15 Reception of analog radio stations using AM Entertainment → Radio → AM S. 18 Fig. 2/03 Function Reception of digital radio stations using digital audio broadcasting Entertainment → Radio → DAB+ Store radio stations (FM/AM/DAB) Entertainment → Radio → Store Station S. 20 Icon Operation Touch to jump back one station in the folder Station back Device Quick Start Guide → Multifunction Steering Wheel (only if supported by vehicle and ZENEC system) S. 22 Touch to jump forward one station in the folder Station forward Device Quick Start Guide → Multifunction Steering Wheel (only if supported by vehicle and ZENEC system) Scroll Touch and hold to move the slider up or down Band Touch to access the the desired radio band (DAB/FM/AM) Info Touch to access station information Folder Touch to access station lists (lists all receivable radio stations in the surrounding area) Preset Touch to access stored radio stations (18 presets across all bands) Entertainment → Radio → Store Station S. 22 Touch to access the radio frequency scale TA 14 TA Touch to switch on or off the automatic changeover to stations with traffic announcements 15 Manual station search FM Station list FM Fig. 2/04 Fig. 2/05 This view gives you a list of receivable stations in the region you are driving through. The list is by station identification, and not in alphabetical order. Function Station back / Station forward Icon Operation The functions Station back/Station forward in the previous view (Fig. 2/03) refer to the radio stations available here. Touch and hold to move the slider up or down. Scroll Radio band Station name Actual station 16 Touch and hold your finger on the list to move the list up or down. Indicates the frequency band (FM/DAB) Function Icon Operation Station back Touch to jump back one station Station Forward Touch to jump forward one station Frequency Back Touch to jump back 50 KHz Frequency Forward Touch to jump forward 50 KHz Manual Search Hold down and move until the desired frequency is reached. If the station name is transmitted via RDS, this will appear in the list. If no station name is available then its frequency will be displayed. This station is currently playing. 17 Manual station search AM Radio operation AM Fig. 2/06 Function Icon Fig. 2/07 Operation Function Icon Operation Station back Touch to jump back one station Device Quick Start Guide → Multifunction Steering Wheel (only if supported by vehicle and ZENEC system) Station Forward Touch to jump forward one station Touch to jump forward one station in the Frequency Back Touch to jump back 9 kHz Device Quick Start Guide → Multifunction Steering Wheel (only if supported by vehicle and ZENEC system) Frequency Forward Touch to jump forward 9 kHz Band Touch to access the the desired radio band (DAB/FM/AM) Manual Search Info Touch to access station information Preset Touch to access stored radio stations (18 presets across all bands) Entertainment → Radio → Store Station Scale Touch to access the radio frequency scale Touch to jump back one station in the folder Station back folder Station forward TA 18 TA Hold down and move until the desired frequency is reached. S. 22 Touch to switch on or off the automatic changeover to stations with traffic announcements 19 Station list DAB Radio operation DAB Fig. 2/08 Function Icon Fig. 2/09 Operation Touch to jump back one station in the This view gives you a list of receivable stations in the region you are driving through. The list is by station identification, and not in alphabetical order. folder Station back Device Quick Start Guide → Multifunction Steering Wheel (only if supported by vehicle and ZENEC system) Touch to jump forward one station in the Function Station back Station forward folder Station forward Icon Operation The functions Station back /Station forward in the previous view (Fig 2/0x) refer to the radio stations available here. Device Quick Start Guide → Multifunction Steering Wheel (only if supported by vehicle and ZENEC system) Band Touch to access the the desired radio band (DAB/FM/AM) Info Touch to access station information Folder Touch to access station lists (lists all receivable radio stations in the surrounding area) Preset Touch to access stored radio stations (18 presets across all bands) Entertainment → Radio → Store Station Scale Touch to access the radio frequency scale TA 20 Touch and hold to move the slider up or down Touch and hold to move the slider up or down Scroll TA Scroll S. 22 Touch and hold your finger on the list to move the list up or down Folder Indicates the receivable channel (e.g. 8 D) in which the assigned stations are respectively located. Radio band Indicates the frequency band (DAB/FM/AM) Station Name Station name that ist displayed Actual station This station is currently playing Touch to switch on or off the automatic changeover to stations with traffic announcements 21 Search/Store radio stations MEDIA AUDIO CONTENTS OF THIS CHAPTER Fig. 2/10 There are various ways for you to store a radio station. Storing depends on the radio band. Fig. 2/11 Function Icon Operation This station is currently playing. Overview Music sources ................................................................................................................................. S. 25 Station back Touch to skip to previous preset Display Footer .............................................................................................................................................. S. 26 Middle .............................................................................................................................................. S. 26 Station forward Touch to skip to next preset DVD Playback ...........................................................................................................................................S. 27 Touch and hold to store the station at the desired store Hard disk Playback .......................................................................................................................................... S. 28 Station Stores Store register 99.90 MHz Once the station is stored the icon of the radio band and the frequency or station name appear Touch to go to another store register (3 registers each with 6 stores) iPod Playback .......................................................................................................................................... S. 30 BT Music Playback .......................................................................................................................................... S. 29 Gracenote Operation ........................................................................................................................................ S. 32 MLT-Playback.................................................................................................................................. S. 33 Mood ............................................................................................................................................... S. 34 Settings Device User Manual → Settings → Media Configuration ............................................................. S. 68 22 23 Music sources Function SCREEN Footer Icon Operation Hard disk Touch to access hard disk playback (USB/SD) Entertainment → Media Audio → Hard Disk S. 28 DVD Touch to access the DVD playback (CD/DVD) Entertainment → Media Audio → DVD S. 27 iPod Touch to access the playback with Apple devices Entertainment → Media Audio → iPod S. 30 BT Music Touch to access the BT Music playback (A2DP) Entertainment → Media Audio → BT Music S. 29 Gracenote Overview of Gracenote functions Entertainment → Media Audio → Gracenote S. 32-37 Fig. 2/12 Function Operation Source Touch to go to the available sources. MLT Touch to generate a playlist Entertainment → Media Audio → Gracenote NOTE A wide range of data media can be connected to the ZENEC system. The latest compatibility overview of useful devices together with memory sizes and formats of the media supported can be found at www.zenec.com. Icon S. 32 Touch to skip to the previous track Back Device Quick Start Guide → Multifunction Steering Wheel (only if supported by vehicle and ZENEC system) Play Touch to play a track Pause Touch to pause at a track Touch to skip to the next track Forward Device Quick Start Guide → Multifunction Steering Wheel (only if supported by vehicle and ZENEC system) Mood Touch to go to Gracenote mood selection Entertainment → Media Audio → Gracenote Playlist Touch to display the folder and list S. 32 NOTE The listed Gracenote functions MLT and Mood are not available in all sources. 24 25 Middle DVD Audio If a CD or DVD with music files is inserted into the ZENEC system, you can play back using this music source. The requirements of CD or DVD ROMs, and file formats can be found at www.zenec.com for a particular product under device compatibility. Function Source Icon Operation Touch to go to the available sources Touch to skip back to the previous track Hold down to skip backwards Back Swipe to the right to skip back to the previous track Fig. 2/13 Function Icon Cover If a cover is stored on the music media, or via Gracenote, it can be displayed. This function is not supported for CD/DVD and BT Audio playback. Artist Information about the artist Touch to search for artists is only possible with Gracenote enabled. Track Information about the track Touch to search for tracks is only possible with Gracenote enabled. Album Information about the album Touch to search for albums is only possible with Gracenote enabled. Genre Information about the genre (only possible with Gracenote enabled) Shuffle Touch to turn on the random play feature within the folder that is playing Repeat Touch to automatically repeat a track Jump Touch or slide to skip within a track 26 Device Quick Start Guide → Multifunction Steering Wheel (only if supported by vehicle and ZENEC system) Operation Play Touch to play a track Pause Touch to pause a track Touch to skip forward to the next track Hold down to skip forwards Forward Swipe to the left to skip forwards to the next track Device Quick Start Guide → Multifunction Steering Wheel (only if supported by vehicle and ZENEC system) Playlist Touch to display the folder list Entertainment → Media Audio → Playlist Skip Touch or slide to skip within a track Shuffle Touch for random play Repeat Touch to automatically repeat a track S. 31 27 Hard disk BT Music (A2DP) If a USB stick or SD card with music files is plugged into the ZENEC system, you can play back using this music source. The requirements of USB, SD cards, and file formats can be found at www.zenec.com for a particular product under device compatibility. If a compatible mobile device is paired via Bluetooth®, you can play back using this music source. The requirements of mobile end devices can be found at www.zenec.com for a particular product under device compatibility. Function Icon Operation Function Source Touch to go to the available sources Source MLT Touch to generate a playlist Entertainment → Media Audio → Gracenote Back Device Quick Start Guide → Multifunction Steering Wheel (only if supported by vehicle and ZENEC system) Swipe to the right to skip back to the previous track Play Touch to play a track Pause Touch to pause a track Play Touch to play a track Pause Touch to pause a track Touch to skip forward to the next track Hold down to skip forwards Forward Device Quick Start Guide → Multifunction Steering Wheel (only if supported by vehicle and ZENEC system) Touch to skip forward to the next track Hold down to skip forwards Device Touch to change between the connected mobile devices* Shuffle Touch for random play Repeat Touch to automatically repeat a track Swipe to the left to skip forwards to the next track Device Quick Start Guide → Multifunction Steering Wheel (only if supported by vehicle and ZENEC system) Mood Touch to go to Gracenote mood selection Entertainment → Media Audio → Gracenote S. 32 Playlist Touch to display the folder list Entertainment → Media Audio → Playlist S. 31 Skip Touch to go to the available sources Back Device Quick Start Guide → Multifunction Steering Wheel (only if supported by vehicle and ZENEC system) Forward Operation Touch to skip back to the previous track Hold down to skip backwards S. 32 Touch to skip back to the previous track Hold down to skip backwards Icon Touch to skip direct to the desired position Slide to reach the desired position NOTE *The changeover applies only for music playback, and has no effect on the hands-free system. NOTE Shuffle Touch for random play Repeat Touch to automatically repeat a track 28 The listed functions depend on the paired mobile phone, installed software versions and the degree of compatibility. 29 iPod Playlists If a compatible Apple device is connected, you can play back using this music source. The supported Apple devices can be found at www.zenec.com for a particular product under device compatibility. There are various playlists. In general we distinguish between the standard and the Gracenote playlists. Function Icon Function Operation Icon Operation Folder Touch to go to the next higher level Touch to skip back to the previous track Hold down to skip backwards Folder Touch to go to the highest folder level Hold to go to the hard disk overview (root) Swipe to the right to skip back to the previous track Playlist Listing of iPod device playlists (only available with iPod playback) Device Quick Start Guide → Multifunction Steering Wheel (only if supported by vehicle and ZENEC system) Song Listing by song Play Touch to play a track Artist Listing by artist Pause Touch to pause a track Album Listing by album Genre Listing by genre Mood Sorting by mood Podcast Listing of iPod podcast directory (only available with iPod playback) Source Back Touch to go to the available sources Touch to skip forward to the next track Hold down to skip forwards Forward Swipe to the left to skip forwards to the next track Device Quick Start Guide → Multifunction Steering Wheel (only if supported by vehicle and ZENEC system) Playlist Touch to display the folder list Entertainment → Media Audio → Playlist Skip Touch to skip direct to the desired position Slide to reach the desired position Shuffle Touch for random play Repeat Touch to automatically repeat a track Scroll through the list: S. 31 Scroll Touch and hold to move the slider up or down Tap and hold your finger on the list to move the list up or down. Further functions in tile view (only possible with artist and album for Gracenote) Function Icon Operation Touch the desired cover to make a selection Tile Touch to play the selection (only for album) Touch to cancel the selection (only for album) 30 31 MLT Playlist GRACENOTE The Gracenote functions can be used for playback via USB or SD card. When a music source is connected, Gracenote synchronizes with the source. This process can take some minutes, depending on the size of the music source connected. An update for the Gracenote database can be downloaded from www.zenec.com → Support → Software-updates under the particular ZENEC system. Function Icon Operation MLT This function generates a playlist based on the song currently playing Audio → Gracenote → Playlist S. 33 Title Touch to list the available titles A > Z Artist Touch to list the available artists A > Z Album Touch to list the available albums A > Z Genre Touch to list the available genres A > Z Mood Sorting by mood Audio → Gracenote → Mood MLT playlist Touch to access the temporary MLT playlist Audio → Gracenote → MLT Playlist Fig. 2/14 This function gives you the option of managing playlists created by the MLT feature. After being saved the MLT playlist will be filled with the names of the artists. Function S. 34-37 S. 33 Icon Operation Folder Touch to go to the next higher level Temporary By pressing Save Touch the temporary MLT playlist to save it Portions of the content is copyright © Gracenote or its providers a temporary playlist is created* Hold down to delete an MLT playlist Delete Hold down to delete an MLT playlist song Scroll through the list: Scroll Touch and hold to move the slider up or down Tap and hold your finger on the list to move the list up or down NOTE *This list will be deleted as soon as the ZENEC system is switched off. To retain this playlist permanently, it must be saved. NOTE The deletion of playlists and songs is only possible in the saved MLT playlists. Folders, songs and directories that already exist, or temporary MLT playlists cannot be edited. 32 33 Mood Function Icon Peaceful Peaceful Easygoing Fig. 2/15 This function gives you the option of playing music from your collection according to your actual mood. Gracenote sorts your music collection into 25 different main categories, each with 4 subcategories, along four main axes (Positive, Dark, Calm, Energetic). In this way you have the choice of categorizing your music playback between 100 different mood styles. Function Icon Mood art Mood title Lively ( 53 ) Carefree Pop Happy/Soulful Party/Fun Soulful /Easygoing Lively Exuberant/Festive Lusty/Jaunty Playful/Swingin Showy/Rousing Excited Excited Euphoric Energy Happy Excitement Loud Celebratory Upbeat Pop Groove Beside colour-coded classification, the Mood art shows the mood for a Mood Playlist. Tender Tender Awakening/Stately Light Groovy Refined/Mannered Romantic/Lyrical Mood title shows the total number of tracks for the chosen mood. Romantic Romantic Dramatic/Romantic Heartfelt Passion Lush/Romantic Sweet/Sincere Empowering 34 Charming/Easygoing Cheerful/Playful Friendly Hopeful/Breezy Upbeat Touch one of the main tile to open the sub-categories. Touch one of the sub-categories to start the playback of the playlist. Peaceful Delicate/Tranquil Pastoral/Serene Quiet/Introspective Reverent/Healing Operation The total number of tracks which match to this mood are displayed inside the tile. Tile Upbeat Easygoing Operation Empowering Dramatic Emotion Idealistic/Stirring Powerful/Heroic Strong/Stable 35 Mood Function Icon Operation Function Icon Operation Cool Casual Groove Cool Confidence Dark Groovy Wary/Defiant Stirring Stirring Focused Sparkling Invigorating/Joyous Jubiliant/Soulful Triumphant / Rousing Cool Rowdy Rowdy Confident/Tough Driving Dark Groove Ramshackle/Rollicking Wild/Rowdy Yearning Sentimental Sophisticated Sensual Fiery Yearning Bittersweet Pop Energetic Dreamy Energetic Yearning Sensitive/Exploring Urgent Urgent Dark Pop Dark Pop Intensity Dark Urgent Energetic Anxious Defiant Defiant Attitude/Defiant Hard Dark Excitement Hard Positive Excitement Heavy Brooding Dreamy Pulse Intimate Sensual Groove Soft Soulful Somber Somber Creepy/Ominous Dark Cosmic Enigmatic/Mysterious Solem/Spiritual Dark Sparkling Lyrical Energetic Abstract Groove Fiery Groove Passionate Rhythm Gritty Sentimental Cool Melancholy Gentle Bittersweet Lyrical Sentimental Tender/Sincere Sophisticated Dark Playful Intimate Bittersweet Smokey/Romantic Suave/Sultry Sensual Fiery Energizing Energizing Abstract Beat Arousing Groove Edgy/Sexy Heavy Beat Serious Melancholy Melancholy Light Melancholy Mysterious/Dreamy Sad/Soulful Wistful/Folorn Brooding Aggressive 36 Gritty Serious Brooding Aggressive Depressed/Lonely Gritty/Soulful Sober/Determined Strumming Yearning Hypnotic Rhythm Melodramatic Serious/Cerebral Thrilling Alienated/Brooding Dreamy Brooding Energetic Melancholy Evocative/Intriguing Aggressive Power Chaotic/Intense Dark Hard Beat Heavy Triumphant 37 MEDIA VIDEO Video sources CONTENTS OF THIS CHAPTER Function Icon Operation CD/DVD Touch to access the DVD playback Entertainment → Media Video → DVD S. 40 Hard disk Touch to access hard disk playback (USB/SD) Entertainment → Media Video → Hard Disk S. 41 NOTE A wide range of data media can be connected to the ZENEC system. The latest compatibility overview of useful devices together with memory sizes and formats of the media supported can be found at www.zenec.com. Fig. 2/16 Overview Video sources ................................................................................................................................. S. 39 CAUTION Playing video files while driving is not permitted by the law. For this reason the screen switches off when the vehicle moves, with only the sound remaining on. DVD Playback .......................................................................................................................................... S. 40 Hard disk Playback ...........................................................................................................................................S. 41 Settings Device User Manual → Setup → Media Setup ............................................................................. S. 68 38 39 DVD Hard disk Fig. 2/17 Function Icon Fig. 2/18 Operation Function Skip Touch to skip direct to the desired position Slide to reach the desired position Skip Touch to skip direct to the desired position Slide to reach the desired position Source Touch to go to the available sources Source Touch to go to the available sources Eject Touch to eject the DVD Back Touch to skip back to the previous section Back Touch to skip back to the previous section Play Touch to play a film Play Touch to play a film Pause Touch to pause at a track Pause Touch to pause at a track Forward Touch to skip forward to the next section Forward Touch to skip forward to the next section Playlist Touch to display the folder and list Info Touch to get film information DVD Menu Touch to display the DVD menu Further functions in the DVD menu Function Navigation Confirm 40 Icon ▲ ◄► ▼ OK Operation Icon Operation Further functions in the playlist Function Icon Navigation ▲ ◄► ▼ Confirm OK Operation Touch the appropriate arrows to navigate in the video menu Touch to confirm a selection in the video menu Touch the appropriate arrows to navigate in the video menu Touch to confirm a selection in the video menu 41 EXTERNAL CONNECTIONS INPUT Sources CONTENTS OF THIS CHAPTER Function Icon Operation A/V-IN Touch to access the external audio/video Entertainment → Input → A/V-IN S. 44 Camera Touch to access the camera source Entertainment → Input → Camera S. 45 SMARTLINK Touch to access the SMARTLINK source Entertainment → Input → SMARTLINK S. 44 NOTE If no system is connected to a particular source the screen will remain black. Fig. 2/19 Overview INPUT Sources ............................................................................................................................... S. 43 A/V-IN Overview ......................................................................................................................................... S. 44 SMARTLINK Overview ......................................................................................................................................... S. 44 Camera Overview ......................................................................................................................................... S. 45 Settings Device User Manual → Setup → Media Setup ............................................................................. S. 85 42 43 A/V-IN Camera This combined audio/video input can be used to connect a wide range of external devices. For example, you can use the ZENEC system to listen music via the AUX connection. NOTE This source is a purely passive input: control of the end device from the ZENEC system is not possible. SMARTLINK Via the Smartlink connection it is possible to connect mobile phones and multimedia devices to the ZENEC system using a special ZENEC accessory, and control them. In combination with HDMI, Miracast Smartlink interfaces, or a DVB-T tuner separately available from ZENEC, compatible end devices can be connected and controlled. NOTE Further information may be obtained at www.zenec.com, or from an authorized ZENEC dealer. Fig. 2/20 This combined audio/video input can be used to connect a camera, optionally also with sound. If your ZENEC system has a CAM or ALT button, the connected camera can be switched on directly from these buttons. Function NOTE For further information about the control and operation of compatible end devices, please refer to the relevant user manual for the end device included separately. Icon Operation Settings Touch to adjust the lines Presentation Touch to show or hide the lines Line fields Display the line fields (1 – 3) with the arrows to change levels. Back Touch to exit the settings menu Together ►◄ Touch to narrow the current field Apart ◄► Touch to widen the current field Up ▼ Touch to bring the current field nearer Down ▲ Touch to push the current field away Basic setting Touch to set the lines to the basic setting NOTE To carry out calibration of the assist lines, reverse parallel to the parking space stripes and centrally to the start of the parking space (see fig. 2/20). 44 45 REAR SEAT ENTERTAINMENT M-Zone sources CONTENTS OF THIS CHAPTER If rear seat monitors are connected to the ZENEC system, they can be controlled using the sources locally available, independently of the ZENEC system. Function Fig. 2/21 Overview M-Zone sources ...............................................................................................................................S. 47 Icon Operation CD/DVD Touch to access the DVD playback Entertainment → M-Zone → DVD S. 48 A/V-IN Touch to access the external audio/video Entertainment → M-Zone → A/V-IN S. 48 Front Audio Touch to access the front audio playback Entertainment → M-Zone → Front Audio S. 48 Smartlink Touch to access the SMARTLINK control Entertainment → M-Zone → SMARTLINK S. 48 M-Zone Off Touch to switch off the M-Zone DVD Overview ......................................................................................................................................... S. 48 A/V In Overview ......................................................................................................................................... S. 48 Front Audio Overview ......................................................................................................................................... S. 48 NOTE The A/V-IN and Smartlink sources can only be used synchronously in the M-Zone and the ZENEC system. SMARTLINK Overview ......................................................................................................................................... S. 48 46 47 HANDS-FREE SYSTEM DVD If additional monitors for the rear seat are connected to the ZENEC system, DVD playback independent of the actual playback on the rear monitors is possible using this function. A/V-IN If additional monitors for the rear seat are connected to the ZENEC system, this combined audio/ video input can be used to connect a wide range of external devices, and played independently of the actual playback at the rear. NOTE Control is solely via the connected end device. ABOUT THIS CHAPTER This chapter describes how to operate and use the hands-free system. In addition, all the equipment variants and functions of the ZENEC system are described, as well as optional equipment of the vehicle manufacturer that may not be included as standard in your vehicle. This section does not refer separately to such issues. Differences from this information, features or functions cannot be used for any claims. SAFETY INSTRUCTIONS CAUTION Front Audio With this function the actual audio playback at the rear can be played. SMARTLINK Via the Smartlink connection it is possible to connect mobile phones and multimedia devices to the ZENEC system using a special ZENEC accessory, and control them. In combination with HDMI, and Miracast Smartlink interfaces, separately available from ZENEC, compatible end devices can be connected and controlled. NOTE If the driver is distracted, this may cause an accident or injury. Operating the ZENEC system can distract attention from the general traffic situation! Equally, connecting, changing or inserting data media can distract the driver. CAUTION Using the mobile phone with the hand while driving is not permitted. Only enter data or make changes via the ZENEC system when the traffic situation allows. CAUTION While driving always stow your mobile phone so that it cannot be thrown through the vehicle if there is a sudden driving maneuver or an accident. Further information may be obtained at www.zenec.com, or from an authorized ZENEC dealer. CAUTION NOTE For further information about the control and operation, please refer to the user manual that is included with the Smartlink interfaces. Network coverage depends on a number of factors – such as the network provider, or the geographical position of the vehicle. Tunnels, underpasses, parking garages, or street canyons in cities may lead to interruption of the connection. Thermal glazing or metallic stickers on the windows of the vehicle may also disrupt the connection. NOTE It is only possible to use the functions in this chapter with a paired mobile phone enabled by the ZENEC system. A compatibility list of pairable mobile phones can be found at www.zenec.com. NOTE Making phone calls and using mobile communication products both at home and abroad may lead to high costs, depending on the network provider and the contract. This is not indicated by the ZENEC system. No claims against ZENEC can be based on these factors. 48 49 SCREEN BEFORE USING FOR THE FIRST TIME ✓ Always follow all the safety instructions of the vehicle manufacturer, and the instructions given in this user manual. ✓ Please pay attention to the safety instructions on the ZENEC system. ✓ Pairing and synchronizing a suitable mobile phone with the ZENEC system Compatibility→ www.zenec.com CONTENTS OF THIS CHAPTER Fig. 3/02 This view will familiarize you with the most important icons and functions. If no mobile phone is found by the hands-free system, or if no mobile phone is paired, you will be automatically directed to the device manager. Header Fig. 3/01 Overview About this chapter ........................................................................................................................... S. 49 Safety instructions .......................................................................................................................... S. 49 Before first use ................................................................................................................................ S. 50 Contents of this chapter .................................................................................................................. S. 50 Screen Header..............................................................................................................................................S. 51 Footer ...............................................................................................................................................S. 52 Connection Accepting/ending incoming calls .................................................................................................... S. 53 Call setup using numeric pad ......................................................................................................... S. 53 Call setup using phonebook ........................................................................................................... S. 54 Conference call ............................................................................................................................... S. 54 Phonebook Contacts .......................................................................................................................................... S. 55 Favorites.......................................................................................................................................... S. 56 Call logs ...........................................................................................................................................S. 57 Icon Meaning Mobile phone currently connected TEXT Name of the current network provider (appears only if there is a call in progress) Battery capacity of the mobile phone currently connected Signal strength of the mobile network currently connected Appears if roaming is charged by the network provider (for example abroad) Settings Setup → BT Configuration → Device Manager ..............................................................................S. 70 Setup → BT Configuration → BT Setup ..........................................................................................S. 73 50 51 Footer Function CONNECTION Icon Accepting/ending incoming calls Operation Via the ZENEC system Select Mobile phone Touch to change the connected mobile phone. A maximum of three mobile phones can be paired, of which two are connected, and one is active. Settings → BT Configuration → Device Manager S. 70 Numeric pad Touch to enable the numeric pad Hands-free System → Control Panel → Numeric Pad Phonebook Touch to access the phonebook of the currently paired mobile phone Hands-free System → Phonebook S. 55 S. 53 Function Icon Operation Accept Touch the green handset to accept the call Reject Touch the red handset to reject the incoming call End Touch the red handset to end the call About the multifunction steering wheel Function Icon Operation Touch to access the stored favorites Hands-free System → Favorites S. 56 Call logs Touch to access the call logs Hands-free System → Call Logs S. 57 Call Touch to pass the call from the hands-free system to the mobile phone or vice versa Call setup using numeric pad Numeric pad Touch to show the numeric pad Necessary in case asked to enter a further number during the call (telephone call center etc.) Key in the desired phone number in full using the numeric pad. To set up the connection, touch . The display now changes to the call connection view. Back Touch to go back to the previous level Favorites NOTE To be able to use the phonebook or call lists without any problems, make sure that during the pairing process you confirm data access enable to the mobile phone. It is recommended to permanently confirm this on your mobile phone. 52 Accept Device Quick Start Guide → Multifunction Steering Wheel (only if supported by vehicle and ZENEC system) End Device Quick Start Guide → Multifunction Steering Wheel (only if supported by vehicle and ZENEC system) In the footer touch the Function numeric pad. Icon Operation Numeric pad Input field for entering numbers Special characters Touch to enter a Star Hold down to enter a Plus Special characters Touch to enter a hash symbol Correction Touch to delete the last digit Repeated touching to delete more digits Continue to hold down to delete the entire line entry 53 Call setup using phonebook In the footer touch the PHONEBOOK Contacts phonebook. From the phonebook list select a call partner and set up a connection by touching . After touching a contact you will be directed to the contact details view. Hands-free System → Phonebook → Contacts S. 55 NOTE Depending on the mobile phone and phonebook entries, the first synchronization can take up to 35 min. Fig. 3/03 Conference call A conference call enables you to accept a second call partner. This give the possibility of talking to the first or the second partner, during which time the other partner is muted. After successful synchronization of the mobile phone with the hands-free system, you will have access to the phonebook and the call logs. The simultaneous hook-up of all partners is not possible. Function NOTE This function depends on the network provider and the mobile phone setting! Function Icon Touch to let an incoming partner join* Change If more than one call partner is connected, you can change between the two partners by repeated touching. Operation Search Touch to open the search window Slider Touch and hold, move up or down to search in the phonebook; the current letter of the alphabet will be indicated in the slider. Operation Join Icon Touch to go to the contact list. Contacts NOTE Up to 1000 contacts per paired mobile phone can be synchronized; it makes no difference whether the contacts are stored in the phonebook or on the SIM card. Entry for mobile phone number *This icon appears only when a further external partner calls your mobile phone. Contact Type Entry for private number Entry for business number Entry not identified Call / Accept 54 Touch the green handset to setup the call 55 Favorites Call lists Fig. 3/04 Here you have the facility to store and retrieve up to 8 phone numbers as favorites. You can select any of the phone numbers in the phonebook and save them as favorites; exceptions are are emails and addresses. Fig. 3/05 If a compatible mobile phone is coupled, the call lists from the mobile phone will be synchronized with the hands-free system (this process can take some minutes, depending on the number of contacts). Once synchronization has been successfully completed you will be able to access: Function NOTE Icon Operation All favorites are visible to every user as they are saved on the device. Function Stored Favorite Icon Name / Number Touch to see all calls Missed Touch to see the missed calls only Operation Touch to set up a connection with a stored favorite Touch to add a new favorite Free Favorite All Select desired number from phonebook and confirm with Function Operation Incoming Entries with this icon refer to incoming calls Contacted Entries with this icon refer to outgoing calls Missed Entries with this icon refer to calls that you did not take Touch to remove a favorite Delete Icon Touch the favorite you want to delete NOTE A change of data on the mobile phone will not automatically be applied in the Favorites. Should you want to change data such as phone numbers then you must also transfer it to the Favorites. 56 57 NAVIGATION CONTENTS OF THIS CHAPTER ABOUT THIS CHAPTER This chapter describes how to operate and use the navigation function. This is only a quick guide; full details can be found in the Navigation User manual, available separately. SAFETY INSTRUCTIONS CAUTION If the driver is distracted, this may cause an accident or injury. Operating the ZENEC system can distract attention from the general traffic situation! Equally, connecting, changing or inserting data media can distract the driver. NOTE Map updates can be carried out by visiting https://zenec.naviextras.com/shop/portal. CAUTION Route recommendations and displayed traffic signs of the navigation system may differ from the real situation. Traffic signs and traffic regulations have precedence over route recommendations and indications of the ZENEC systems. CAUTION Speed data displayed in the navigation system corresponds to the permitted speed limit. Please adjust your speed and driving behavior to the prevailing visibility, weather, road, and traffic conditions. Fig. 4/01 Overview About this chapter............................................................................................................................ S. 58 Safety instructions .......................................................................................................................... S. 58 Before first use ................................................................................................................................ S. 58 Contents of this chapter................................................................................................................... S. 59 Map Overview .........................................................................................................................................S. 61 New Route Overview ........................................................................................................................................ S. 62 Traffic Overview ........................................................................................................................................ S. 63 NOTE BEFORE USING FOR THE FIRST TIME ✓ Always follow all the safety instructions of the vehicle manufacturer, and the instructions given in this user manual. ✓ Please pay attention to the safety instructions on the ZENEC system. ✓ SD card with appropriate map material must be inserted. ✓ Commissioning of navigation system completed (Sat-Fix, etc.) This user manual explains only the most important functions of the navigation system. Full details of the navigation functions can be found in the Navigation User manual, available separately. Device Installation Manual → Commissioning (www.zenec.com) 58 59 Map Overview Fig. 4/02 Function Map Icon Operation Touch to go to the map view Fig. 4/03 In the map view you are given diverse information depending on the navigation status. Here we explain only the basic functions that are available to you, including those when the route guidance is disabled. To see a detailed explanation of all map functions there is a separate user manual on navigation. Function Icon Operation New Route Touch to go to the destination input Traffic report Touch to see the traffic report summary Traffic Touch to go to the traffic report summary Compass Touch to go to the geo data view View of map orientation (direction of travel/North) List Touch to go to the control menu Position Current position of vehicle on the map NOTE For a full description see the Navigation User Manual included separately. 60 61 New Route Traffic Fig. 4/05 Fig. 4/04 In this view we explain an input option for navigating to a destination. All the options and functions are given in more detail in the Navigation User Manual, available separately. Function Icon This view presents you with information on road sections that are affected by traffic events. All the options and functions are given in more detail in the Navigation User Manual, available separately. Operation Function List Touch to go to the control menu (see Fig. 4/03) No Report No traffic announcements received (see Fig. 4/03 upper right corner) New Route Touch to go to the address input Report not relevant Touch to view received traffic announcements that are not on the active route (see Fig. 4/03 upper right corner) Report relevant Touch to view received traffic announcements that are on the active route (the approximate delay caused by the event is also displayed) Touch to enter a full address Input Icon Operation Touch to enter a POI address Touch to navigate to a stored address NOTE The broadcast of traffic announcements depends on different factors. Using the TMC function requires a radio stations, which broadcasts TMC signals. 62 63 SETTINGS CONTENTS OF THIS CHAPTER ABOUT THIS CHAPTER This chapter describes all the parameter and setting functions of the ZENEC system. Please note that settings or changed parameters can have a direct influence on the everyday use of the ZENEC system. In addition, all the equipment variants and functions of the ZENEC system are described, as well as optional equipment of the vehicle manufacturer that may not be included as standard in your vehicle. This section does not refer separately to such issues. Differences from this information, features or functions cannot be used for any claims. SAFETY INSTRUCTIONS CAUTION If the driver is distracted, this may cause an accident or injury. Operating the ZENEC system can distract attention from the general traffic situation! Equally, connecting, changing or inserting data media can distract the driver. NOTE All updates and bugfixes besides map material for navigation can be downloaded free of charge from www.zenec.com. CAUTION If you are using a password to protect your ZENEC system, ensure that this password is kept safe for future access. There is a charge for unlocking the ZENEC system, which can only be done by ZENEC Service. BEFORE USING FOR THE FIRST TIME ✓ Always follow all the safety instructions of the vehicle manufacturer, and the instructions given in this user manual. ✓ Please pay attention to the safety instructions. Fig. 5/01 Overview About this chapter ........................................................................................................................... S. 64 Safety instructions .......................................................................................................................... S. 64 Before first use ................................................................................................................................ S. 64 Contents of this chapter .................................................................................................................. S. 65 Setting sources ............................................................................................................................... S. 66 Radio configuration Overview ..........................................................................................................................................S. 67 Media configuration Overview ......................................................................................................................................... S. 68 Bluetooth configuration Overview ......................................................................................................................................... S. 69 Device Manager ...............................................................................................................................S. 70 BT settings .......................................................................................................................................S. 73 TFT configuration Overview ..........................................................................................................................................S. 74 Sound configuration Overview ..........................................................................................................................................S. 75 Loudspeaker system ........................................................................................................................S. 76 Audio settings ..................................................................................................................................S. 79 Profile .............................................................................................................................................. S. 84 Vehicle configuration Device Quick Start Guide ..................................................................................see separate document Device configuration Overview ......................................................................................................................................... S. 85 Version info ..................................................................................................................................... S. 86 Diverse .............................................................................................................................................S. 87 Inputs............................................................................................................................................... S. 88 Help ................................................................................................................................................. S. 89 64 65 Setting sources RADIO CONFIGURATION Fig. 5/03 Fig. 5/02 Function Icon Here you can make the settings for operation of the radio. To make the settings press the appropriate wrench icon. You will find an explanation of the abbreviations at the end of this user manual. Operation Tuner Touch to access radio settings Device User Manual → Settings → Radio Media Touch to access sound and image settings User Manual → Settings → Media Bluetooth Touch to access hands-free system settings Device User Manual → Settings → Bluetooth TFT Touch to access display settings Device User Manual → Settings → TFT Audio Touch to access sound settings Device User Manual → Settings → Sound Vehicle Touch to access vehicle settings Device Quick Start Guide → CAR Devices Touch to access device settings Device User Manual → Settings → Devices S. 67 Overview Function S. 68 Tuner configuration Operation Touch to access this view S. 69-73 Function 66 Icon S. 74 Icon Operation AF ON/OFF REG ON/OFF S. 75-84 S. 85 67 MEDIA CONFIGURATION BLUETOOTH CONFIGURATION Fig. 5/04 Fig. 5/05 Here you can make the settings for operation of the audio playback. To make the settings press the appropriate wrench icon. You will find an explanation of the abbreviations at the end of this user manual. Here you will find all the options for Bluetooth management and settings. A description is also given on how to pair and remove Bluetooth devices. You will find an explanation of the abbreviations at the end of this user manual. Overview Overview Function Icon Media configuration Function Icon Operation Function Touch to access this view Bluetooth configuration Operation Function Database ON OFF = Gracenote support enabled = Gracenote support disabled ID3 GN ALL = Gracenote sort = User sort Cover Art GN ALL = Gracenote sort = User sort Media Icon Button assignment MEDIA (Auto/USB/SD/DVD/iPod) Icon Operation Touch to access this view Icon Operation Device Manager Touch to pair, disconnect, or manage mobile devices Settings → BT Configuration → Devive Manager S. 70 BT Settings Touch to change settings for BT operation Settings → BT Configuration → BT Settings S. 73 NOTE If none or not all the music titles of your external media are displayed, please set the ID3 and Cover settings to ALL. 68 69 Pairing Device Manager Fig. 5/06 The pairing process requires the BT function on the end device to be enabled. Please also take note of the instructions of the device manufacturer on the pairing of devices. Fig. 5/07 Via the ZENEC system Function Function Icon Device Manager Function Icon Operation Touch to search for a new Bluetooth device (not possible if two devices are connected) Pair Touch to reconnect a paired Bluetooth device Disconnect Touch to disconnect a paired Bluetooth device Search Code Standard Code*: 1 2 3 4 NOTE *For mobile devices that do not support the SSP standard. Via the mobile device Function Search Touch to delete a Bluetooth device from the list (requires the device to be disconnected) Delete Meaning This icon indicates that the paired Bluetooth device supports HSP/HFP, and can be used via the hands-free system. Hands-free System S. 49 This icon indicates that the paired Bluetooth device supports A2DP, and can be used via the audio player. Settings → BT Configuration → BT Settings S. 73 70 Operation Touch the magnifying glass to initiate a search for BT devices. From the list select the desired mobile device that you want to synchronize with the ZENEC system. After selecting follow the instruction of the ZENEC system. Touch to access this view Search Icon Icon Operation Icon Operation Make sure that the ZENEC system is in Device Manager view otherwise the ZENEC system will not be visible to others. Follow the instructions of the device manufacturer on pairing. Auto Connect Once a mobile device has been connected with the ZENEC system, it will be automatically paired when the ZENEC system is started. On being briefly disconnected the ZENEC system will attempt to establish a new connection. NOTE On pairing for the first time, be sure to permanently enable the connection confirmation on your mobile device, otherwise malfunctions may occur during the Auto Connect process. 71 Device names BT SETTINGS Fig. 5/08 Change the name of the mobile device displayed in your ZENEC system (e.g. "Mobile phone John Smith") Function Icon Operation 1. Touch the name to be changed from the list. Device name Edit 2. Touch EDIT to open the keypad. Edit the name as you wish, and then save. This name is only changed in the ZENEC system: in the mobile phone the existing name is not changed. Fig. 5/09 Here you can make the settings for Bluetooth operation. To make the settings press the appropriate wrench icon. Overview Function Icon Operation Touch to access this view BT Settings Microphone NOTE The original device name of the mobile device is not changed. The name you enter here is only displayed in the ZENEC system. Function Icon Operation Internal = inside device External = only if installed Microphone Sort Function Icon Operation 1: by first name 2: by surname Name Device name Function Nickname 72 Icon Operation Here you can rename the ZENEC system. The name you enter here is displayed on the mobile devices. 73 TFT CONFIGURATION AUDIO CONFIGURATION Fig. 5/10 Here you can make the settings for the display. To make the settings press the appropriate wrench icon. Overview Function Icon TFT Configuration Function Touch to access this view Icon Operation Touch to select the brightness control: Navi = Brightness setting Day/Night is controlled by the navigation system. Car = Brightness setting Day/Night is controlled by the vehicle. TFT Settings TS Calibration Operation OK Touch to recalibrate the TFT (follow the instructions on the screen). TS Brightness Day -10 < > +10 TS Brightness Night -10 < > +10 Fig. 5/11 In this menu you can make all the settings to do with audio output. Please remember that all the settings you make here will have a direct influence on the sound in your vehicle. Overview Function Icon Audio configuration Function Operation Touch to access this view Icon Operation Loudspeaker system Touch to make general audio settings Settings Audio Configuration Loudspeakers S. 76 Audio setting Touch to make audio DSP settings Settings Audio Configuration/Audio Settings S. 79 Presets Touch one of the presets to apply this profile Settings Audio Configuration Profile S. 84 NOTE Using the DISP button you can set the display brightness to three levels ( 100% → 50% → 0% ). 74 75 LOUDSPEAKER SYSTEM Volume Fig. 5/12 Function Icon Loudspeaker system Function Volume Fig. 5/13 In this menu you can adjust the normal volume of the sources. Operation Function Touch to access this view Icon Operation Touch to set initial and normal volume levels Loudspeaker System Volume Touch to make general loudspeaker system settings Loudspeaker System Loudspeaker Setup S. 78 Navi mixer Touch to set the navigation voice outputs Loudspeaker System Navi-Mixer S. 78 76 Operation Initial Volume Setting = manually adjusted volume Last = last volume set before switching off Adjust Initial Volume This setting can only be made if the upper setting is at SET. 0< >+40 TA volume Setting = manually adjusted volume Last = last volume set Adjust TA Volume This setting can only be made if the upper setting is at SET. 0< >+40 S. 77 Loudspeaker setup Icon Navigation Volume -9< >+3 Tuner -9< >+3 CD/DVD -9< >+3 USB/iPod -9< >+3 A/V In -9< >+3 Camera Mic. -9< >+3 77 AUDIO SETTINGS Loudspeaker setup Fig. 5/14 In this menu you can make the settings for the loudspeaker system. Please note that the settings you make here will have an affect on the sound. You can reset them at any time using the preset profile. Function Icon Operation Fig. 5/15 Here you have the option of adjusting the sound profile optimally to your vehicle. The setting options described in this section for parametric equalizing, crossover setting, and time delay correction have great influence on the sound in your vehicle. To achieve an improvement in the acoustic playback by using the correct settings presumes a certain amount of background knowledge. If you do not have background knowledge about digital signal processors, gain settings, time delay differences, and Q-factors, you should perhaps avoid making settings yourself. Instead make use of the vehicle presets to quickly and easily find a suitable standard setting for your vehicle. Sound system 4.2 = 4 channel speaker system (+ 2 subwoofer) 5.1 = 5-channel speaker system (+ 1 subwoofer) OE Sound system On = Sound system installed by the vehicle manufacturer (DSP functions are partly disabled) Off = ZENEC DSP functions fully enabled Function Subwoofer filter 12 dB filter 24 dB filter Equalizer Touch to set the 11-BAND equalizer Audio Settings → Equalizer S. 80 X-Over Touch to make settings for the crossover Audio Settings → X-Over S. 81 Fader/ Balance Touch to set fader or balance Audio Settings → Fader/Balance S. 82 Time Delay Correction Touch to make the time delay correction for individual speakers Audio Settings → Time Delay Correction S. 83 Navi-Mixer (no picture) In this menu you can make the sound setting of the navigation output. Please note that other settings can be made in Setup in the navigation system . Navigation User Manual → Settings Function Icon Operation Mute ON OFF = Voice output mutes media playback = Volume of media playback reduced Audio output Driver Front = only at driver's speaker = only at speakers front left and right 78 Icon Operation 79 Equalizer X-Over Fig. 5/16 In this menu you can make the settings for the playback frequency response. Function Icon Operation Shape factor Q Touch to set the quality of the filter for the chosen band (1= wide, 5 = narrow) Frequency Touch to set a filter frequency for the selected band (each band adjustable in 7 steps) Gain -14 < > +2 Touch to select the desired BAND Band 1 <>5 In this menu you can make the settings for the crossover frequency of individual channel groups. Function Icon Operation Loudspeaker Group Selection of speaker group you want to set Front + Rear/Subwoofer/Center (5.1 setting only) HPF Touch to set the high pass filter Off (FLAT)/63 Hz/80 Hz/100 Hz/125 Hz LPF Touch to set the low pass filter Off (FLAT)/63 Hz/80 Hz/100 Hz/125 Hz Gain Touch to set the GAIN of the selected loudspeaker group -6 < > 6 Touch and hold to change the setting of the selected band NOTE The sound setting options are explained in a user manual included separately. Device Quick Start Guide → Basic Operation → Sound Setting 80 Fig. 5/17 Phase SUBWOOFER ONLY 0/180° ON/OFF SUBWOOFER ONLY ON = speaker as per setting OFF = mute 81 Balance/Fader Time Delay Correction Fig. 5/18 In this menu you can make the settings for the balance between the speakers in the vehicle. Fig. 5/19 In this menu you can set the time delay correction for the loudspeakers in your vehicle. Function Icon Operation Function Icon Operation Left/Right 6L > < 0 > < 6R Unit Selection of desired unit ms = time cm = distance Front/Rear 6F > < 0 > < 6H Speaker Touch to select the desired speaker (FL/FR/HL/HR/SUBW/CNTR) Touch at the desired position Delay ms = 0.0 < > 8.9 cm = 0 < > 305 Crosshair ,0.1 ms steps ,ca. 3 cm steps The distance between the ears and the speaker system installed in the vehicle varies considerably due to the complex arrangement of the individual speakers. This menu gives you the option to delay the audio signal at each of the speakers so that you have a central auditory sensation. 82 83 DEVICE CONFIGURATION PROFILES Presets The six preset profiles offers you a quick and easy way of tuning the sound to your vehicle. Function Profiles Profile Operation Touch to select one of the profiles User/Flat/Subcompact/Compact/Sedan/Station Wagon/Van SUV/Convertible Description User If you alter the values of the sound settings the system switches to the profile User. Fig. 5/20 Overvi Flat This centers all the settings back to a neutral position. Subcompact Use this setting, if you drive a subcompact car. Compact Use this setting, if you drive a compact car. Function Function Convertible Use this setting, if you drive a vehicle with an open roof. Operation Touch to access this view General Icon Operation Version info Touch to access current system information Setup General Version S. 86 Diverse Touch to make basic settings Setup General Diverse S. 87 Input Touch to access image settings of external sources (camera/AV-IN…) Setup General Input S. 88 Help Touch to make system settings Setup General Help S. 89 Sedan Use this setting, if you drive a vehicle with a notchback. Station Wagon Use this setting, if you drive a vehicle with an open trunk in the passenger compartment. Icon VAN/SUV Use this setting, if you drive a vehicle with three rows of seats (VAN) or a large interior (SUV). 84 85 Version info Diverse Fig. 5/21 Function Icon Operation Fig. 5/22 In this menu you can set the menu language, button assignments, and make other settings for the ZENEC system. Function Icon Touch to access this view General Function Icon Operation Function Version Info 86 Operation Touch to access this view General Displays the current system information Touch to access detailed information Icon Operation ALT Button Touch to define the source assignment of the ALT button (CAM/Quick EQ/SmartLink/AV-IN/USB/iPod/DVD) Button Sounds Off Off = acoustic acknowledgment disabled = acoustic acknowledgment enabled Ant. Power Off On = antenna phantom power disabled = antenna phantom power enabled OSD Language Touch to change the menu language 87 INPUT HELP Fig. 5/23 In this menu you can adjust the image settings of the connected video sources (e.g. camera). Function Icon General Function Brightness Contrast Saturation Hue Icon Fig. 5/24 In this menu you can perform various actions from password protection to factory setting. Operation Function Icon Touch to access this view General Operation Function Icon Operation -10 to +10 Factory setting OK Touch and confirm to reset the ZENEC system to the same state as when it was shipped. Save on USB OK Touch and confirm to save your profile settings in the ZENEC system on external data media (USB). (FAT32 formatting) Load from USB OK Touch and confirm to load your saved profile settings from external data media (USB) into the ZENEC system. Software Update OK Touch and confirm to carry out a software update. www.zenec.com → Support → Software-updates Touch to access this view -10 to +10 -10 to +10 -10 to +10 Password Prot. Password Operation Off On = password protection disabled = password protection enabled Touch and confirm to store a password*. NOTE *Please take note of the instructions in the Device Quick Start Guide on the subject of anti-theft protection. 88 89 GENERAL ABBREVIATIONS Abbreviation Description A/V-IN Input option for audio/video signal sources (serial input) A2DP Manufacturer-independent Bluetooth® technology allowing audio signals to be transmitted (Advanced Audio Distribution Profile) AC-Control Visual status information about the air conditioner Mood Playlist generated based on the mood you want to create (100 mood styles) M-Zone Interface for a rear seat infotainment system (Rear seat entertainment) OPS Visual and acoustic parking system POIs are geo-objects that have significance in the navigation system. For example: places to eat, places to stay, filling stations, cash machines, and parking blocks AM Transmission standard for terrestrial reception of medium wave analog radio (MW) P.O.I. AUX Input option for any audio signal source (Auxiliary Input) REG Regional station CAN/Stalk Specific communications adapter for connection to a CAN bus using an IF interface RFK Rear-view camera CAN-Bus The CAN bus (Controller Area Network) is a serial bus system for the communication of control units in a vehicle SSP Secure Simple Pairing (for Bluetooth devices) DAB / DAB+ Transmission standard for terrestrial reception of digital radio (Digital Audio Broadcasting) TMC/TMC Pro DSP The digital signal processor is used for the processing of digital signals (e.g. audio or video signals) Reception of messages about disruptions to traffic in digital form. Modern navigation systems can process TMC to generate detour routes around traffic tie-ups and obstructions (dynamic route guidance). USB DVB-T Transmission standard for terrestrial reception of digital video (Digital Video Broadcasting) A USB connection is a serial bus system for connecting a device to other devices (Universal Serial Bus). XVID XVID is the most popular container format. Over 90% of present-day AVI files are encoded with Xvid. DVD Digital Video Disc EQ Equalizer FAT32 Formatting format for digital media (File allocation table 32-bit) FM Transmission standard for terrestrial reception of very high frequency analog radio (UKW) GPS Global navigation satellite system for position fixing (Global Positioning System) GSM Global mobile radio network standard for fully digital mobile radio networks (Global System for Mobile Communications) ID3-Tag ID3 tags mean meta data, which could be included together with the MP3 format. MFL Multifunction steering wheel microSD Compact flash memory MLT "More Like This" is a Gracenote function 90 91 INDEX A A/V In ......................................................... p. 44 Alternative frequency (AF) ......................... p. 67 Audio playback ........................................... p. 23 CD/DVD .................................................. p. 27 Hard disk (USB/SD) ................................ p. 28 BT music (A2DP) .................................... p. 29 iPod ......................................................... p. 30 B Bluetooth ................................................... p. 69 Pairing device ..........................................p. 70 Connecting device ...................................p. 70 Auto connect ............................................p. 71 C CD audio ................................................... p. 27 D DVD DVD audio ............................................... p. 27 DVD video................................................ p. 38 E Settings ...................................................... p. 64 Ensemble ....................................................p. 21 External connections .................................p. 42 F Hands-free system .................................... p. 49 Accepting/ending calls ........................... p. 53 Call setup ........................................ from p. 53 Phonebook ............................................. p. 55 Conference call ...................................... p. 54 Favorites ................................................. p. 56 Call lists .................................................. p. 57 G Gracenote ................................................. p. 32 MLT playlists ........................................... p. 33 Mood ................................................ from p. 34 H Main menu ................................................ p. 08 Notes ................................................. from p. 05 K Configuration Configuration tuner.................................. p. 67 Configuration media ................................ p. 68 Configuration Bluetooth .................. from p. 69 Configuration TFT ....................................p. 74 Configuration sound ........................ from p. 75 Configuration devices...................... from p. 85 Camera ...................................................... p. 45 Camera line fields ..................................... p. 45 Map ............................................................p. 61 Sound settings ..................... Quick Start Guide S Station list FM ............................................................p. 16 DAB ..........................................................p. 21 Station store ............................................... p. 22 Station search FM ............................................................p. 17 AM ...........................................................p. 19 DAB ..........................................................p. 21 Search function (general) ...........................p. 10 SMARTLINK ............................................. p. 44 Security code ............................................. p. 89 L Volume ...................................................... p. 77 Mute ..................................... Quick Start Guide T TV tuner (DVB-T tuner) .............................. p. 44 Telephone book ......................................... p. 55 Telephone conference .............................. p. 54 M M-Zone (RSE) ............................................ p. 46 DVD ........................................................ p. 48 A/V IN ..................................................... p. 48 Front audio .............................................. p. 48 SMARTLINK ........................................... p. 48 N Navigation ................................................. p. 58 Map ..........................................................p. 61 New route ............................................... p. 62 Traffic ...................................................... p. 63 Navi mixer ............................................... p. 78 P Preset (save) .............................................. p. 22 Trash ..........................................................p. 07 Playlists ......................................................p. 31 U USB USB audio................................................ p. 28 USB video .................................................p. 41 V Traffic announcements (TA) .......................p. 15 Traffic reports ............................................. p. 63 Video playback ........................................... p. 38 DVD ........................................................ p. 40 Harddisk (USB/SD) ..................................p. 41 W Factory setting ........................................... p. 90 R Radio ...........................................................p. 13 Radio band FM .........................................p. 15 Radio band AM .........................................p. 18 Radio band DAB ...................................... p. 20 Rear-view camera ..................................... p. 45 I Input ............................................................p. 42 92 93 Gracenote ® -End User License Agreement STATUTORY RIGHTS AND WARRANTY This application or device contains software from Gracenote, Inc. of Emeryville, California (“Gracenote”). The software from Gracenote (the “Gracenote Software”) enables this application to perform disc and/or file identification and obtain music-related information, including name, artist, track, and title information (“Gracenote Data”) from online servers or embedded databases (collectively, “Gracenote Servers”) and to perform other functions. You may use Gracenote Data only by means of the intended End-User functions of this application or device. Dear customer, You agree that you will use Gracenote Data, the Gracenote Software, and Gracenote Servers for your own personal non-commercial use only. You agree not to assign, copy, transfer or transmit the Gracenote Software or any Gracenote Data to any third party. YOU AGREE NOT TO USE OR EXPLOIT GRACENOTE DATA, THE GRACENOTE SOFTWARE, OR GRACENOTE SERVERS, EXCEPT AS EXPRESSLY PERMITTED HEREIN. You agree that your non-exclusive license to use the Gracenote Data, the Gracenote Software, and Gracenote Servers will terminate if you violate these restrictions. If your license terminates, you agree to cease any and all use of the Gracenote Data, the Gracenote Software, and Gracenote Servers. Gracenote reserves all rights in Gracenote Data, the Gracenote Software, and the Gracenote Servers, including all ownership rights. Under no circumstances will Gracenote become liable for any payment to you for any information that you provide. You agree that Gracenote, Inc. may enforce its rights under this Agreement against you directly in its own name. The Gracenote service uses a unique identifier to track queries for statistical purposes. The purpose of a randomly assigned numeric identifier is to allow the Gracenote service to count queries without knowing anything about who you are. For more information, see the web page for the Gracenote Privacy Policy for the Gracenote service. The Gracenote Software and each item of Gracenote Data are licensed to you “AS IS.” Gracenote makes no representations or warranties, express or implied, regarding the accuracy of any Gracenote Data from in the Gracenote Servers. Gracenote reserves the right to delete data from the Gracenote Servers or to change data categories for any cause that Gracenote deems sufficient. No warranty is made that the Gracenote Software or Gracenote Servers are error-free or that functioning of Gracenote Software or Gracenote Servers will be uninterrupted. Gracenote is not obligated to provide you with new enhanced or additional data types or categories that Gracenote may provide in the future and is free to discontinue its services at any time. Please read the warranty specifications below carefully. Should your ZENEC product require warranty service, please return it to the retailer from whom it was purchased or the distributor of your country. Do not send any product to ZENEC directly. This ZENEC product is protected against defective materials and/or improper workmanship by a factory warranty, for the period of two years from date of purchase at retail, to the original buyer. For warranty work to be carried out, an RMA number must be generated, which requires a valid product serial number and the original sales slip. Guarantee Restrictions This warranty does not cover any damage due to: 1. Unauthorized or unapproved installation, incorrect audio or mains connection(s). 2. Defects caused by exposure of product to humidity, water and organic fluids, prolonged exposure to sun rays or excessive dirt or dust. 3. Mechanical defects caused by accidents, fall or impact. 4. Unauthorized repair attempts and modifications of product not explicitly authorized by the manufacturer. This warranty is limited to the repair or the replacement of the defective product at the manufacturer‘s option and does not include any other form of damage, whether incidental, consequential or otherwise. The warranty does not cover any transport costs or damages caused by transport or shipment of the product. Any additional or further claims and requirements for compensation of auxiliary components that have been damaged in sequence, directly or indirectly, are strictly excluded. GRACENOTE DISCLAIMS ALL WARRANTIES EXPRESS OR IMPLIED, INCLUDING, BUT NOT LIMITED TO, IMPLIED WARRANTIES OF MERCHANTABILITY, FITNESS FOR A PARTICULAR PURPOSE, TITLE, AND NON-INFRINGEMENT. GRACENOTE DOES NOT WARRANT THE RESULTS THAT WILL BE OBTAINED BY YOUR USE OF THE GRACENOTE SOFTWARE OR ANY GRACENOTE SERVER. IN NO CASE WILL GRACENOTE BE LIABLE FOR ANY CONSEQUENTIAL OR INCIDENTAL DAMAGES OR FOR ANY LOST PROFITS OR LOST REVENUES. © Gracenote, Inc. 2009 94 95 © Copyright 2015 RevA / copy deadline: Q3-2015 English