Download Isuzu 3-3126 3-1125 Thermohygrograph short user manual I
Transcript
BSRIA Instrument Solutions
SHORT OPERATIONS MANUAL
Old Bracknell Lane West,
Bracknell,
Berkshire,
RG12 7AH
Tel: +44 (0) 1344 459314
Fax: +44 (0) 1344 465556
E mail : [email protected]
Manufacturer :
ISUZU / TERWIN / J. S HOLDINGS / CASELLA
Model :
3-3126, 3-1125 & T9420
Page 1 of 2
1. INTRODUCTION
The Thermo-Hygrograph is a precision instrument designed to record simultaneously, using a rotating chart, changes in
ambient temperature / relative Humidity. Temperature readings are recorded on the upper half of the chart while Relative
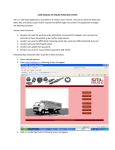
humidity is recorded on the lower half. A Schematic diagram of the Thermo-hygrograph is shown below.
2. UN-PACKING & PACKING THE THERMO-HYGROGRAPH
Remove the Thermo-hygrographs Perspex’s cover by depressing the cover release
button. Gently unclip the lower pen arm (Relative Humidity) from the pen clip and push
the pen clip to the bottom. Next undo the tie rap holding the upper (temperature) pen arm
in place during transit. Now remove the pen covers from both pens, while taking care not
to put any undue strain on the arms. Retain the pen covers and tie-rap for the return trip.
The instrument is fitted as standard with a 7 day chart, for fitting other charts see later.
Now push, from its base, the pen arm “lifter” towards the chart drum so that it and the
humidity pen arm clip can not interfere with the pen arm. Both pens should now sit on the
chart.
The Thermo-hygrograph will take approximately 1 to 2 hours to acclimatise to its new location.
To repack the instrument conduct the above in reverse using the pens caps & tie-rap supplied. For the Relative
humidity arm it is recommended that the pen arm clip is positioned such that any tension is taken off the Relative
Humidity “Hairs”.
Whilst every effort has been made to ensure the accuracy of the information given in this short manual, no liability is given or implied for any error or
omission contained herein. Due to our policy of progressive improvement, BSRIA Instrument Solutions reserve the right to change products and/or
services without notice.
Date :- 25 November 2008
Isuzu 3-3126 3-1125 Thermohygrograph short user manual I (2).doc
BSRIA Instrument Solutions
Page 2 of 2
THERMO-HYGROGRAPH SHORT OPERATIONS MANUAL
3. CHOOSING THE LOCATION FOR YOUR THERMO-HYGROGRAPH
For best results the Thermo-Hygrograph should be sited at a location such that it accurately records the ambient
conditions and is not affected by any external temperature / humidity sources.
Avoid placing the thermo-hygrograph in or near the following locations:- . Bright sunlight, Air conditioning inlets &
outlets, radiators, computers / monitors or other office equipment that may give off heat, damp corners, fans, sinks and
any draughts in general.
The ambient temperature & Relative Humidity are measured using a bi metallic strip and specially treated “hairs”,
respectively,. These “sensors” are located within the cage at the end of the instrument.
4. TURNING ON & SELECTING THE CHART SPEED
First site the Thermo-hygrograph in a suitable monitoring location. Ensure the chart fitted to the instrument is of the
correct period type. For more information on changing charts see later.
Depending on the model of Thermo-hygrograph turn “ON” the instrument either by flicking the switch located just at
the end of the instrument under the “CAGE”, OR by simply depressing the correct chart period “button”. For those
models with the “cage switch” you will additionally be required to select the correct chart period otherwise the
period will default to 1 day (24hours).
To symbolise that the instrument has started, an LED will flash. For Model 3-3126 ensure the LED corresponding
to the correct chart speed fitted flashes.
Finally, gently rotate the drum in a ANTICLOCKWISE direction until the pen tips on the chart are aligned to the correct
time / day.
Refit the instruments Perspex cover.
5. CHANGING THE CHART, PENS & BATTERIES
CHARTS:- The thermo-hygrograph should only be used with charts
& pens supplied by BSRIA Instrument Solutions or the manufacturer.
The use of other charts may affect the performance of the
instrument. Extra charts are available from Instrument Solutions.
Undo the drum fixing nut located on the top of the drum spindle. For
models 3-3126 this fixing nut is “keyed” and therefore will require the
“key” being aligned correctly with the drum spindle. Remove the
drum & used chart by lifting it off the drum spindle.
Next, loosen from the top the chart clip holding the chart in place.
Remove the “used” chart and refit the drum with a new chart.
Model 3-3126 Only. Drum Fixing nut “key”
Secure the chart with the chart clip.
IMPORTANT:- Ensure that the chart is tight / level around the drum and that its lower edge sits on the bottom “drum
flange”. Failure to follow this will mean that the time period will be wrong and the temperature & Relative humidity traces
will be incorrect, respectively. It is also recommended that the chart be changed before the pens trace over the chart clip
otherwise a delay of several hours may result.
Now refit the drum over the drum spindle. Refit the drum fixing nut. For those models with a “screw” drum fixing nut (as
apposed to a “keyed” drum fixing nut) ensure the fixing nut is only “finger tight. Over tightening the screw fixing nut
may stop the drum/chart from rotating. Ensure the drum when refitted engages fully with the drum drive cog wheel.
BATTERIES:- The instrument has been fitted with batteries to ensure that it will operate in excess of 12 months (7 day)
operation. 2 x 1.5V C sized batteries are located under the base plate of the instrument.
PENS:- After several months of use, or in extreme “dry” conditions, the pens may dry out. The pens can be temporally
“reactivated” by a single drop of methylated spirit to its tip. If the problem of “drying out” continues contact BSRIA
Instrument Solutions for replacements.
6. ADJUSTMENTS
Prior to its dispatch the Thermo-hygrograph has been extensively tested / calibrated against reference measurement
standards to ensure it accurately records temperature & relative humidity. It is not recommended that the user adjusts
the instrument as this may affect its performance. Ensure the Thermo-hygrograph has had 1to 2 hours to acclimatise.
Whilst every effort has been made to ensure the accuracy of the information given in this short manual, no liability is given or implied for any error or
omission contained herein. Due to our policy of progressive improvement, BSRIA Instrument Solutions reserve the right to change products and/or
services without notice.
Date :- 25 November 2008
Isuzu 3-3126 3-1125 Thermohygrograph short user manual I (2).doc


